Hello there everyone and happy Monday! It’s Wei Wei here. Today I’ll be sharing how to make double side light up card.
There’s a video of the process at the end of this post if you want to watch that instead of reading.
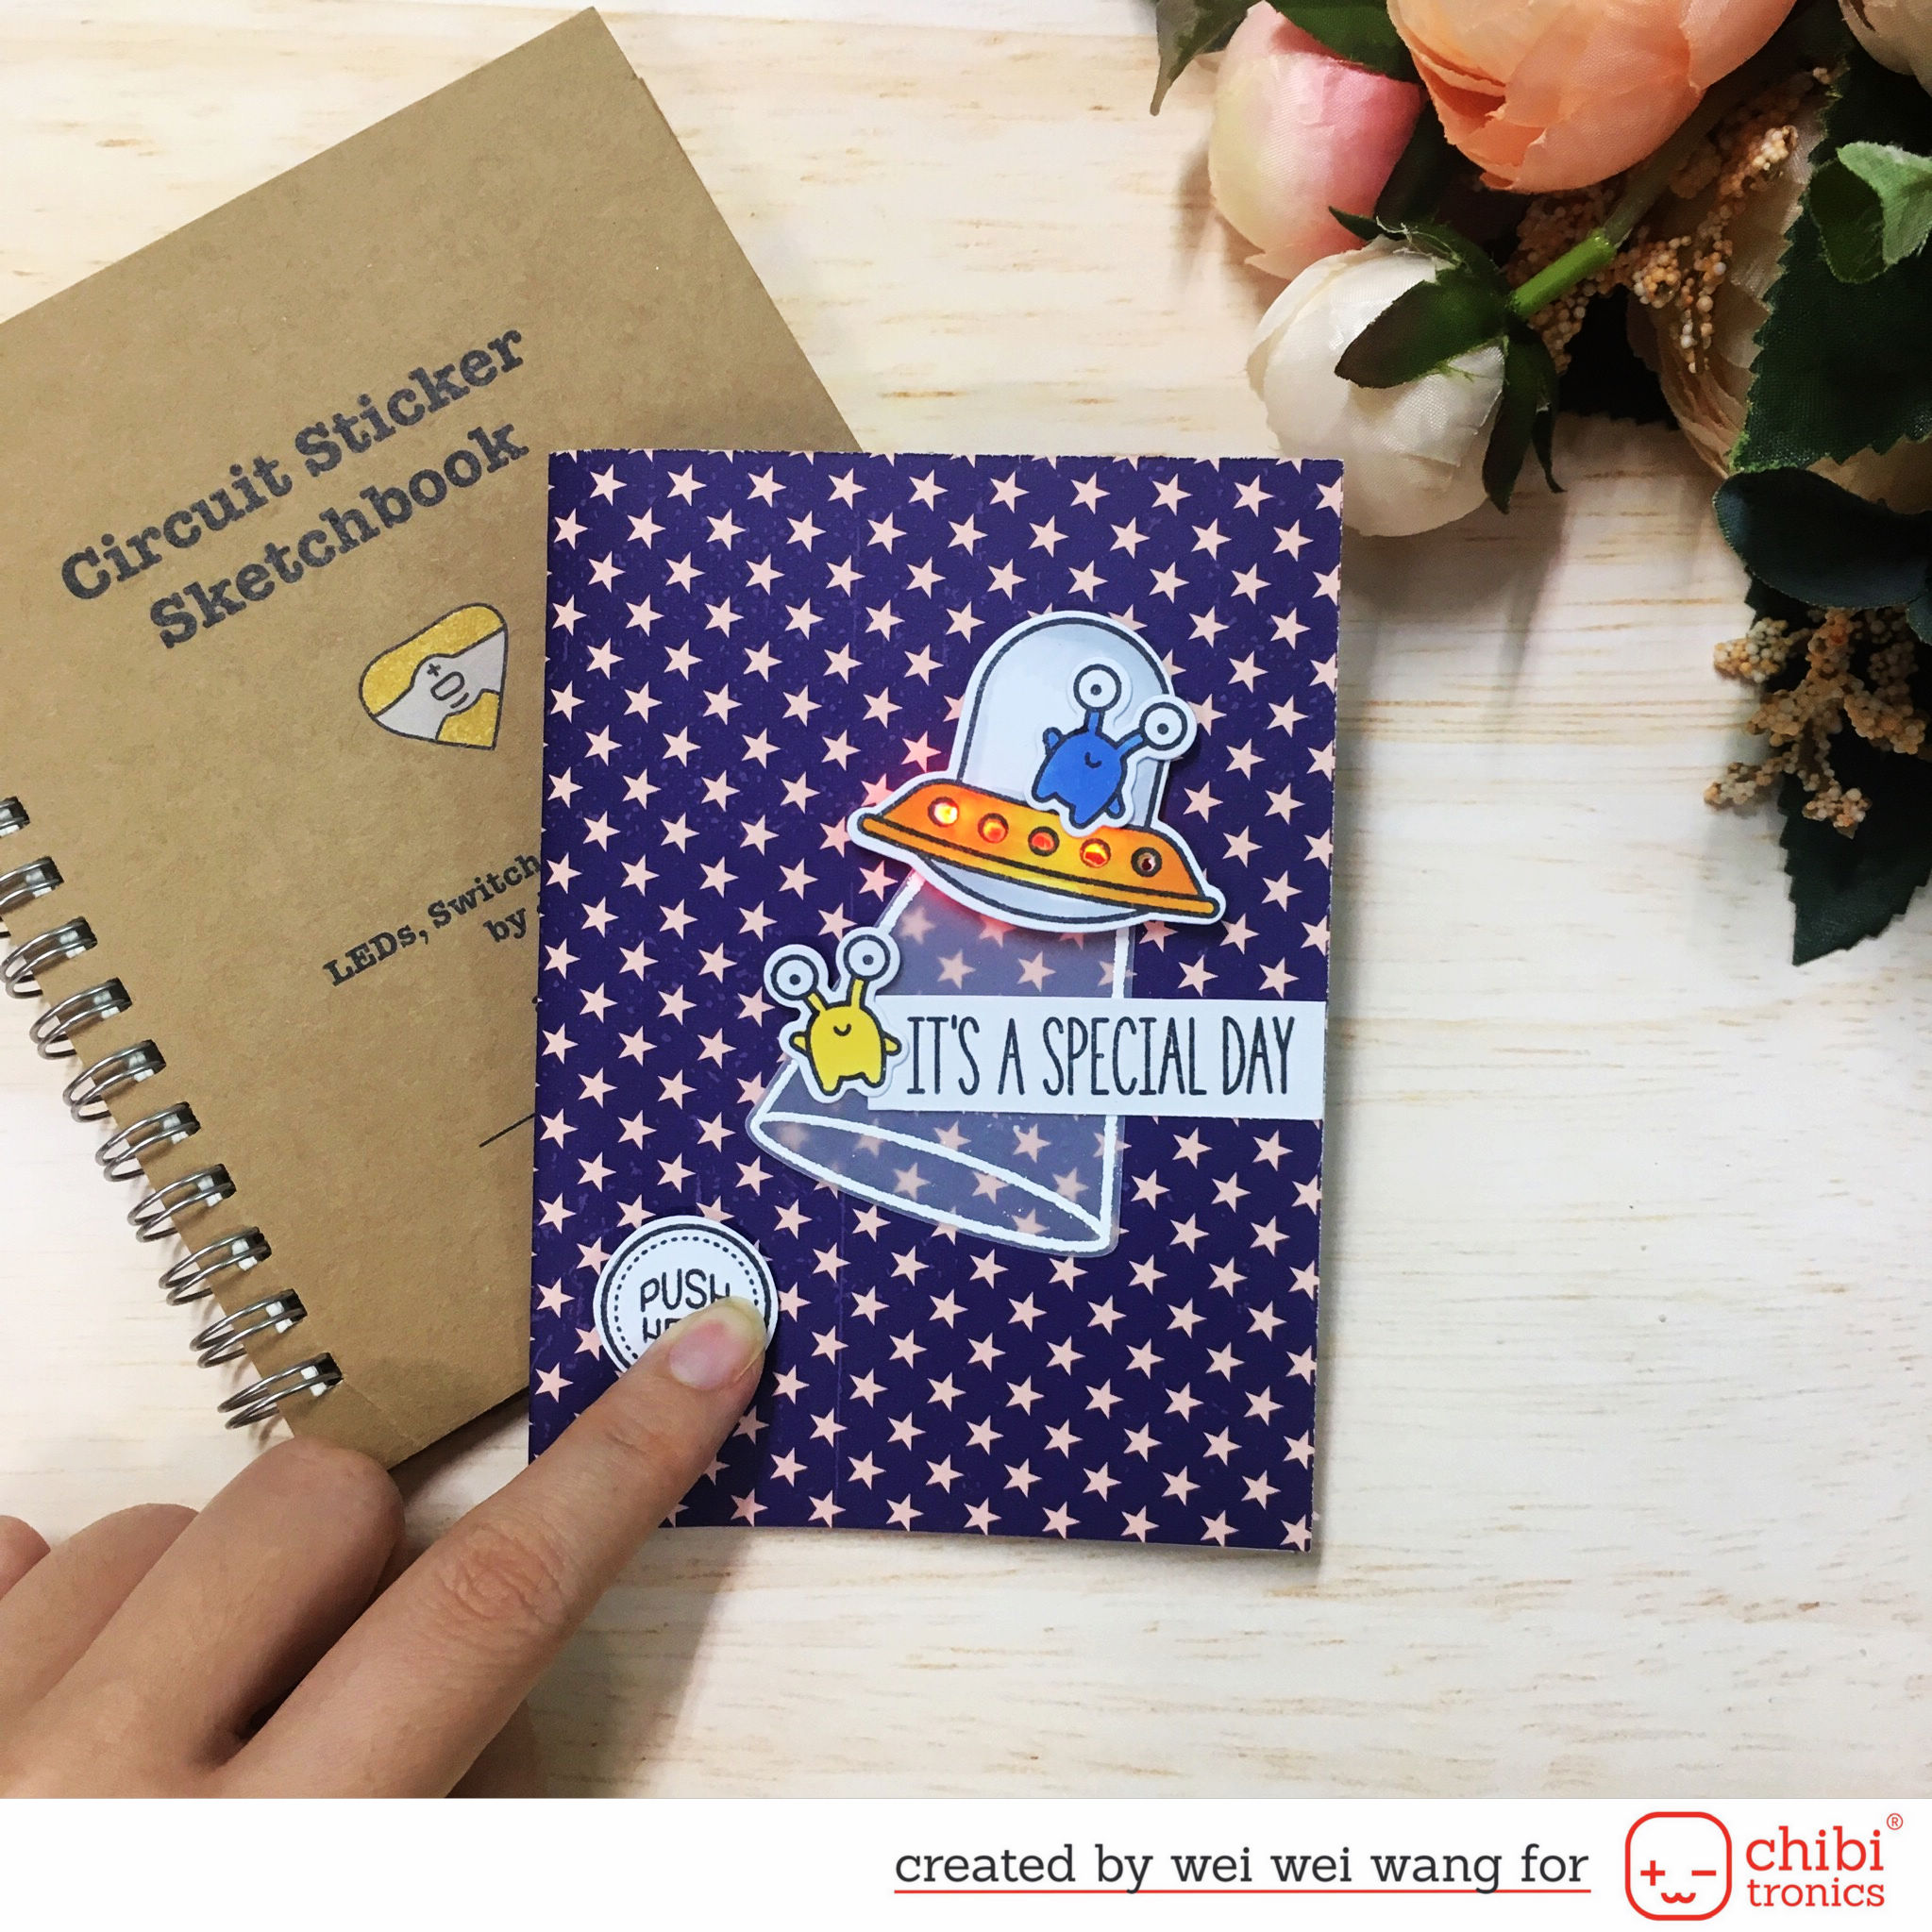
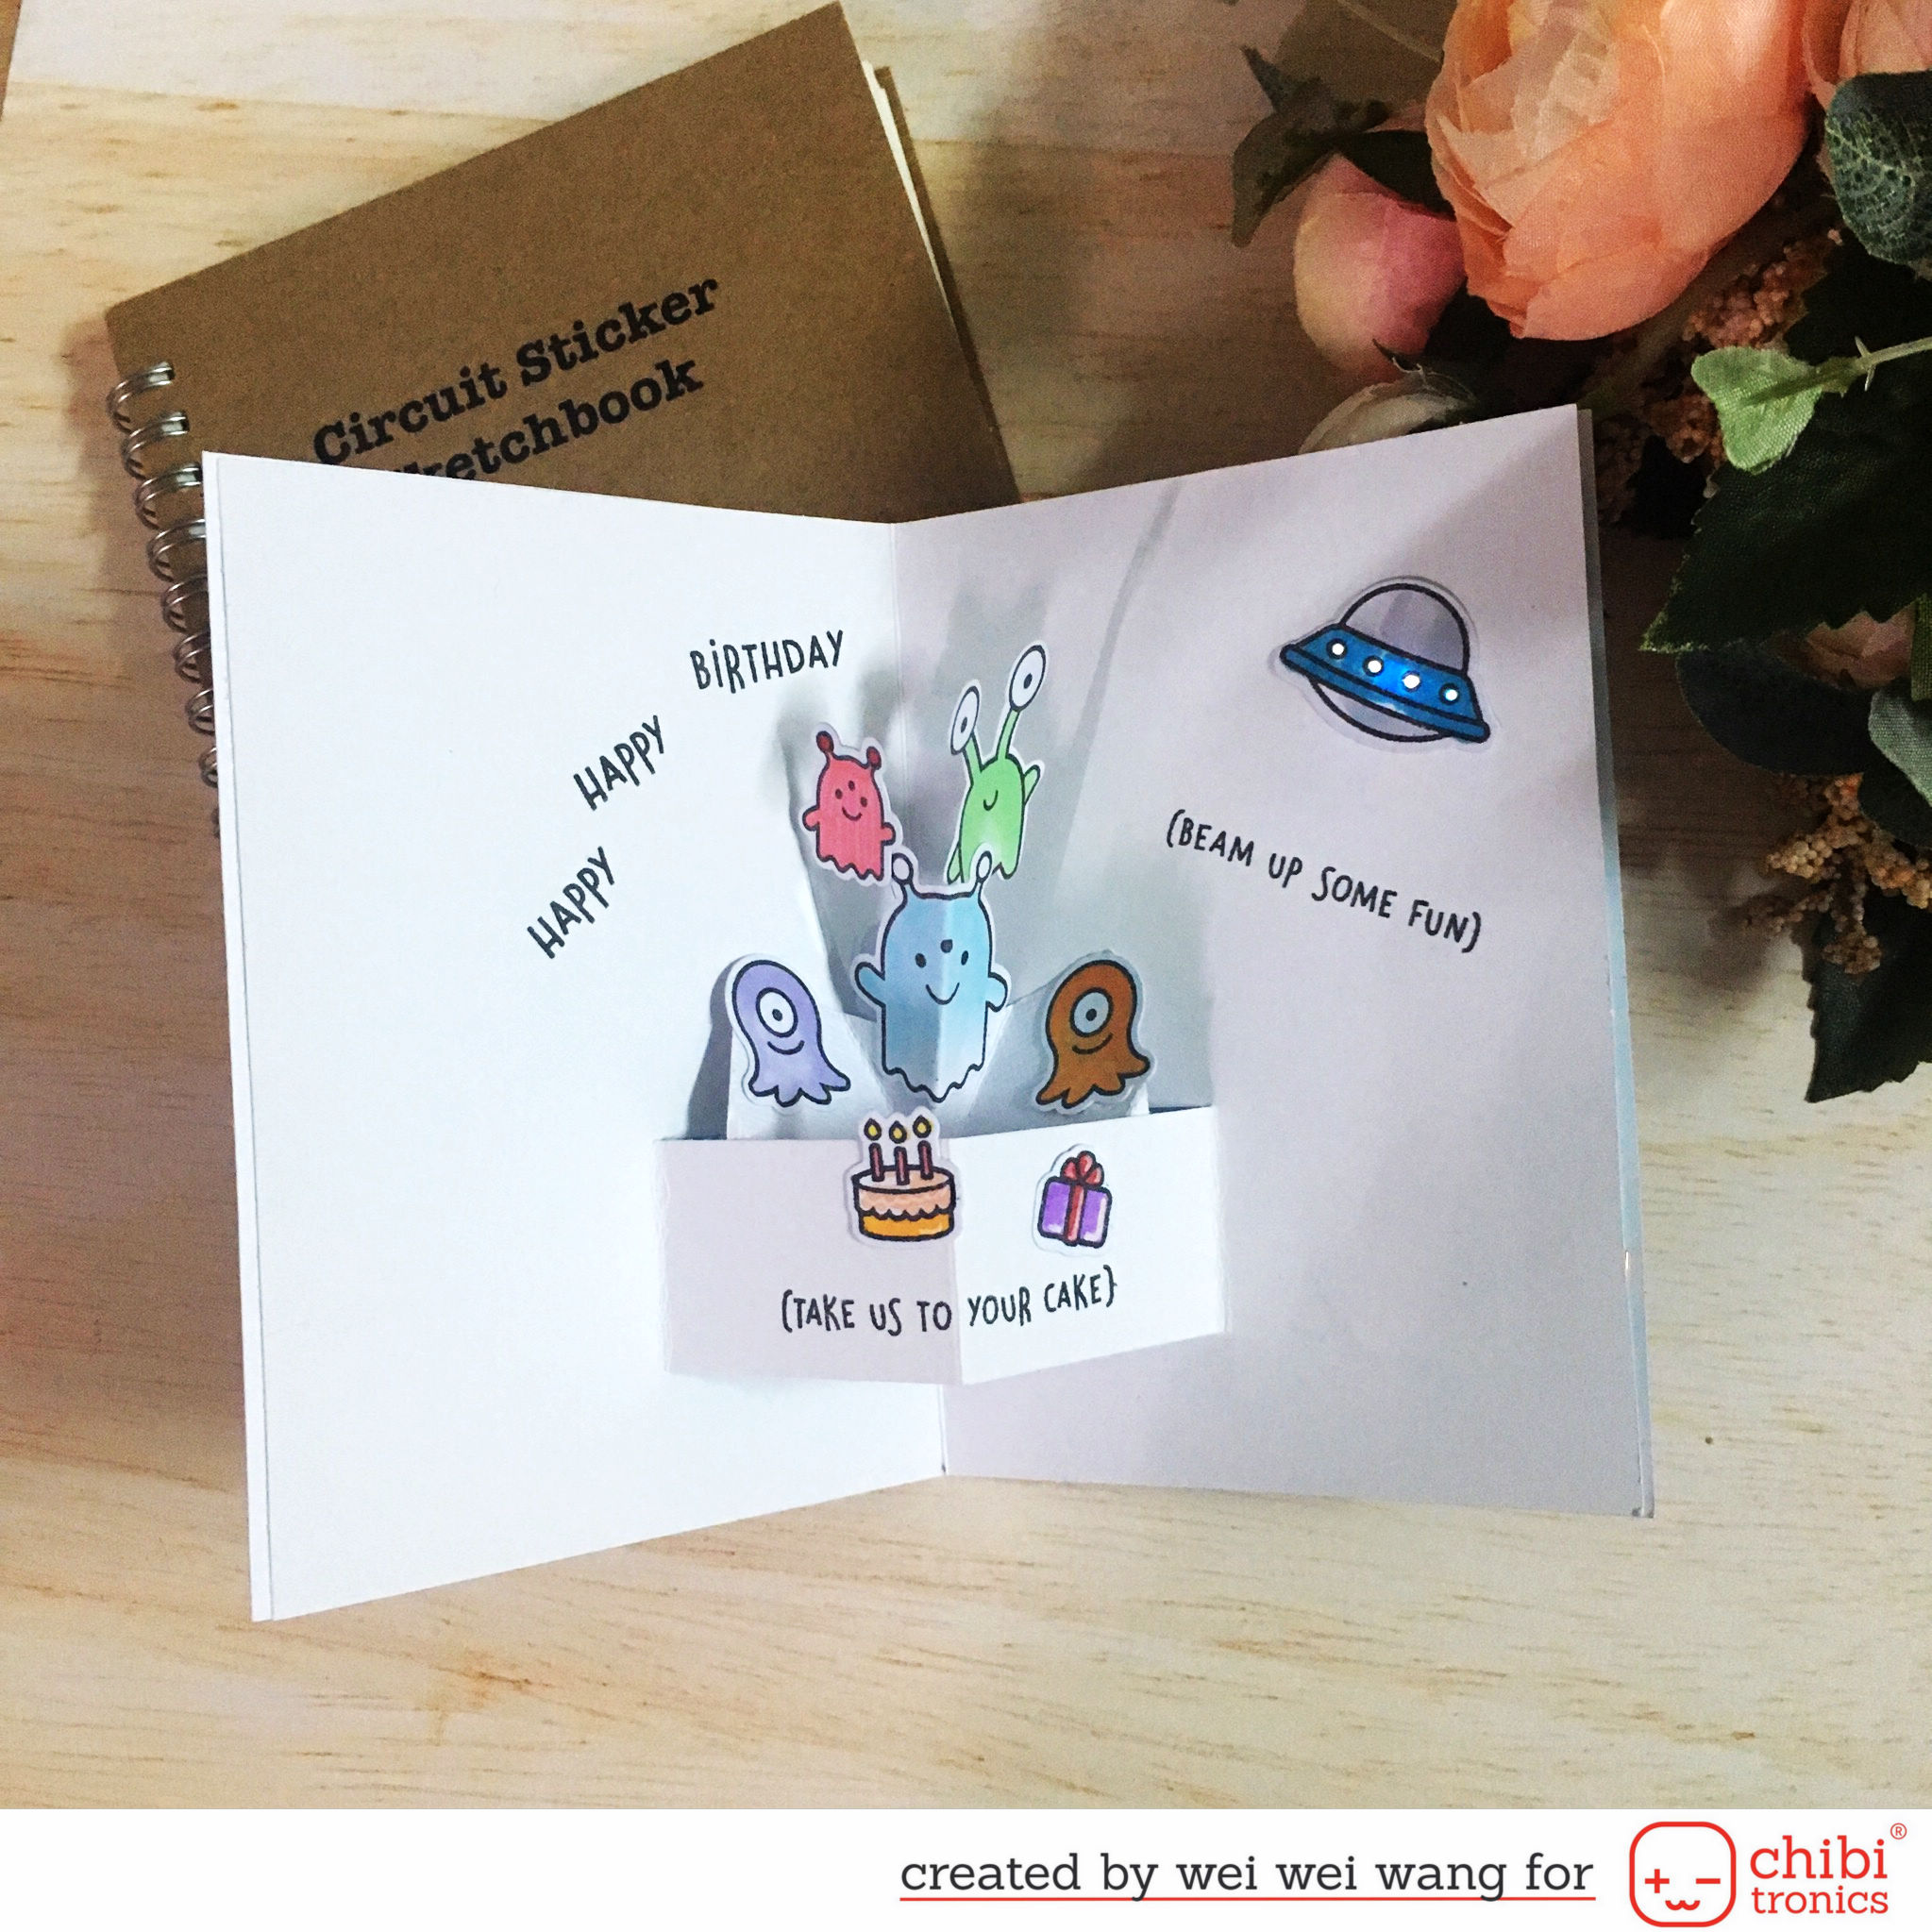
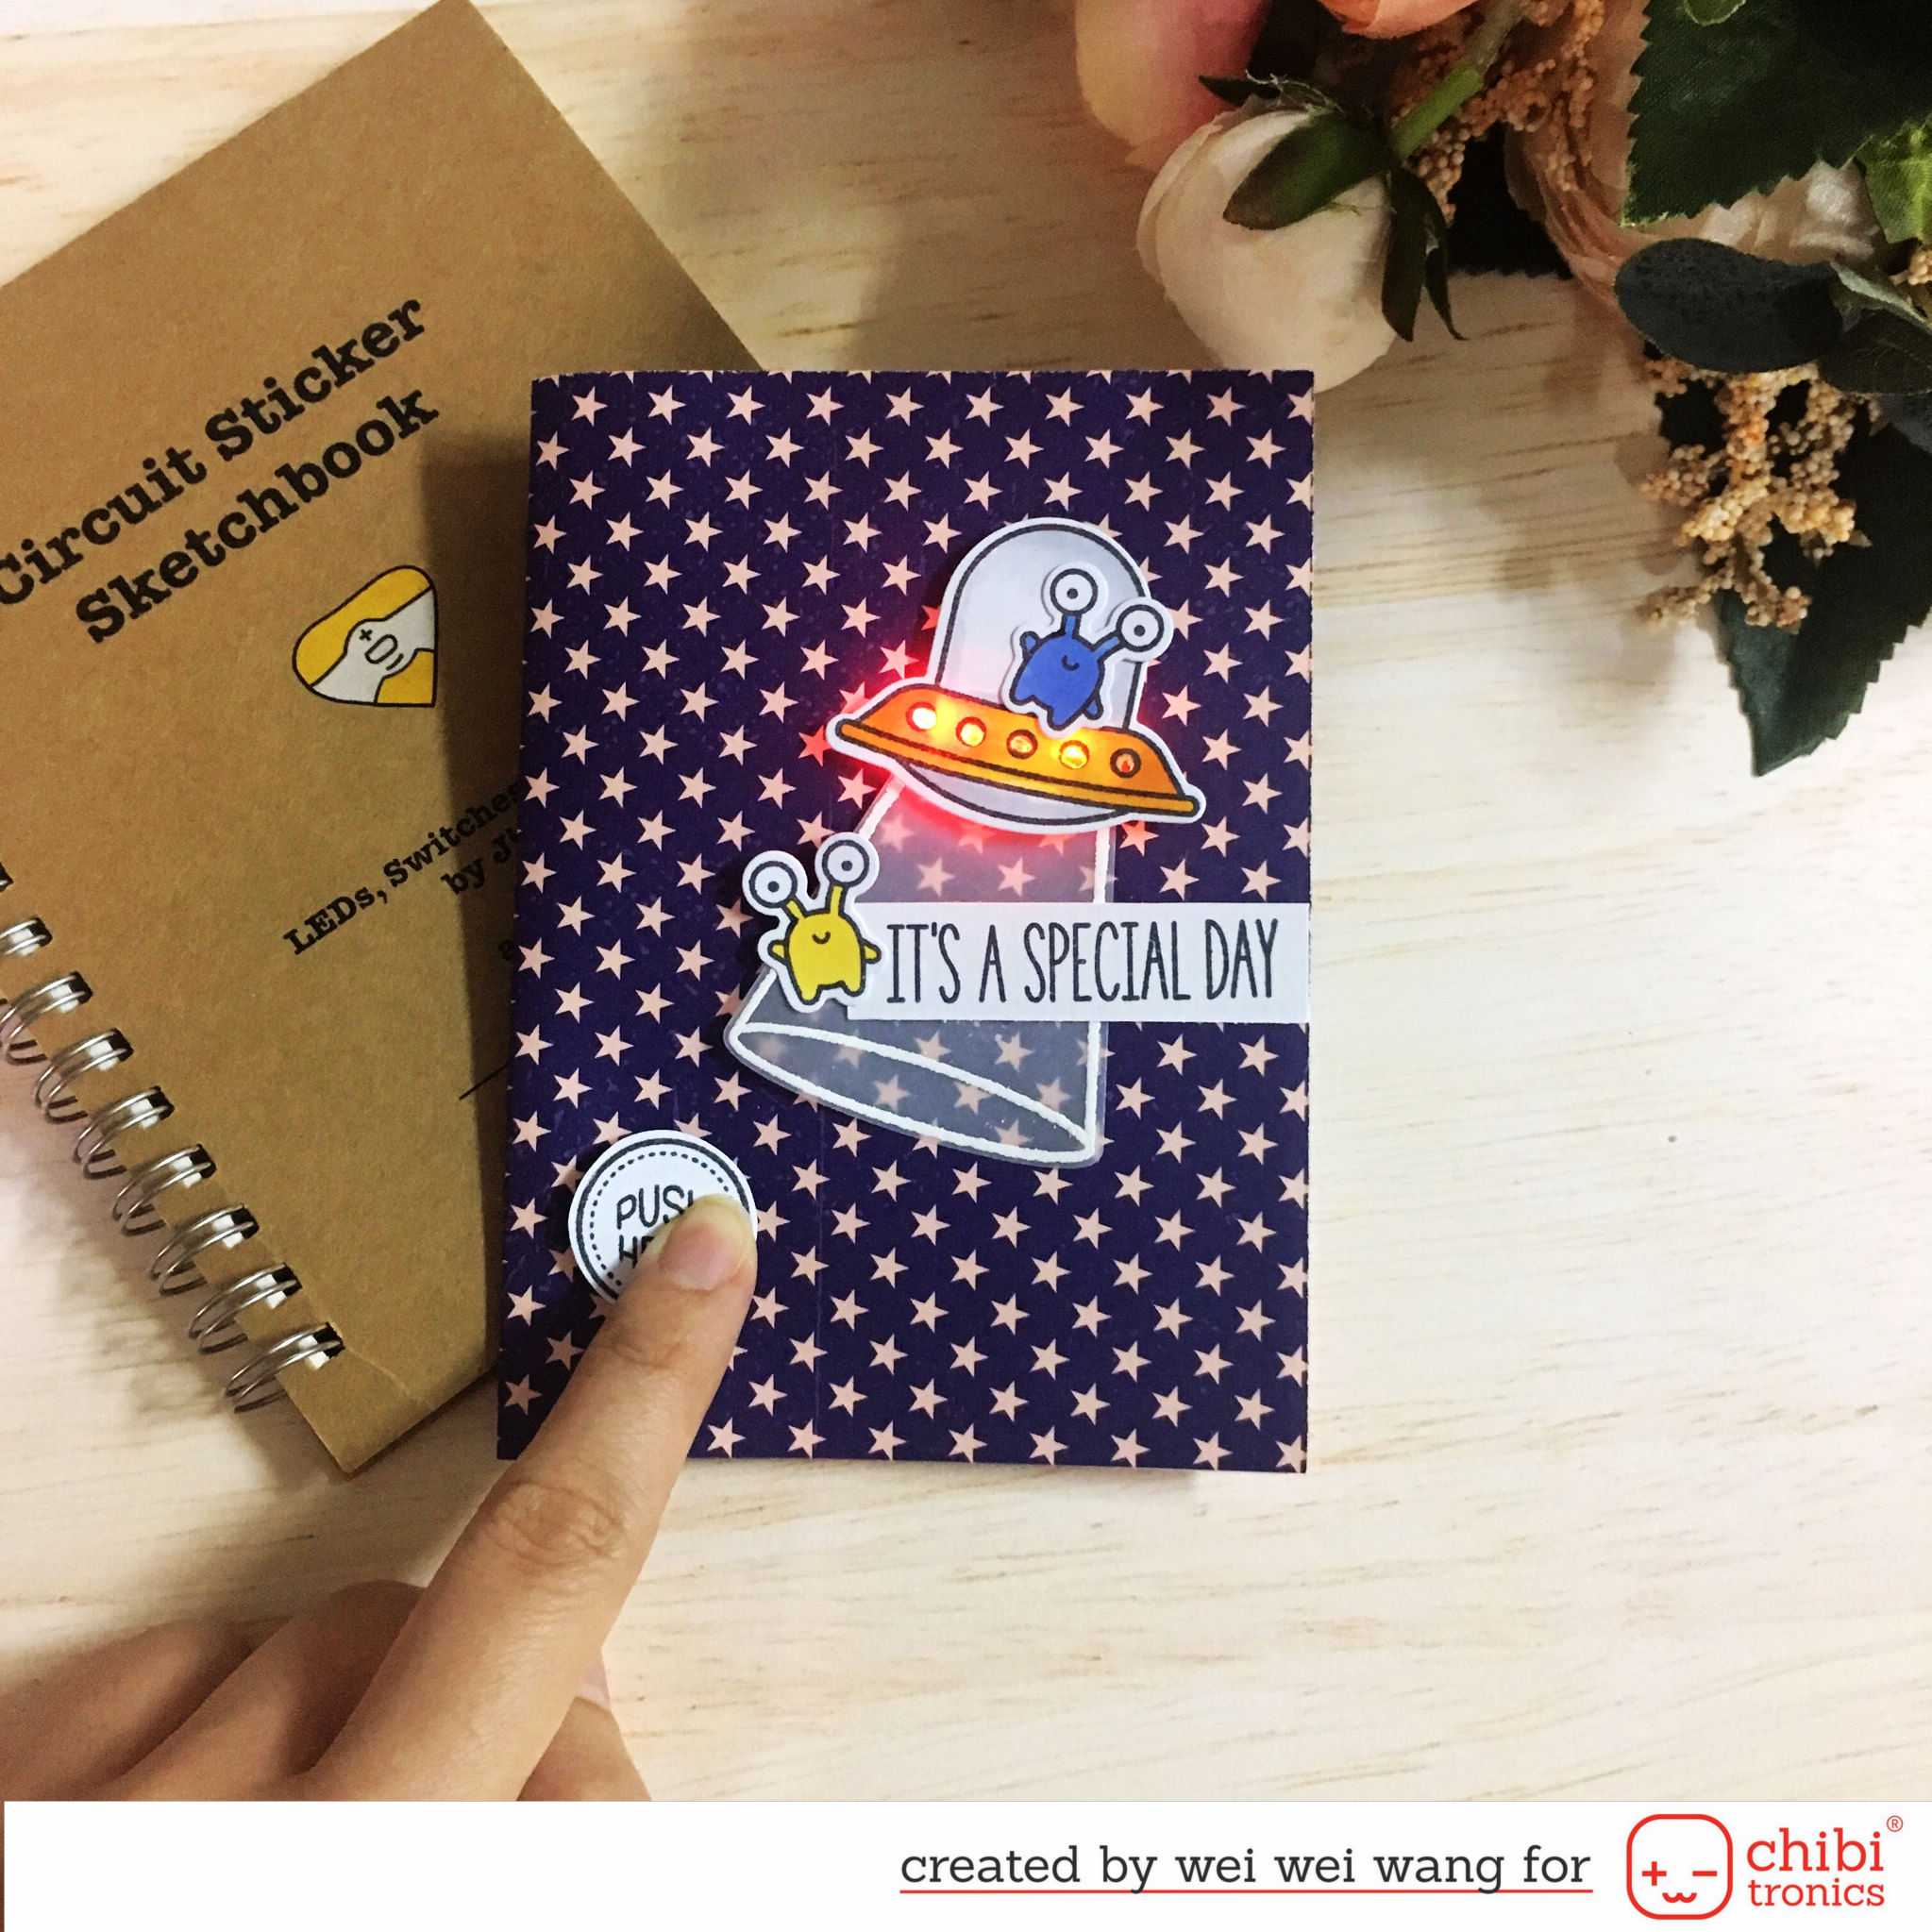
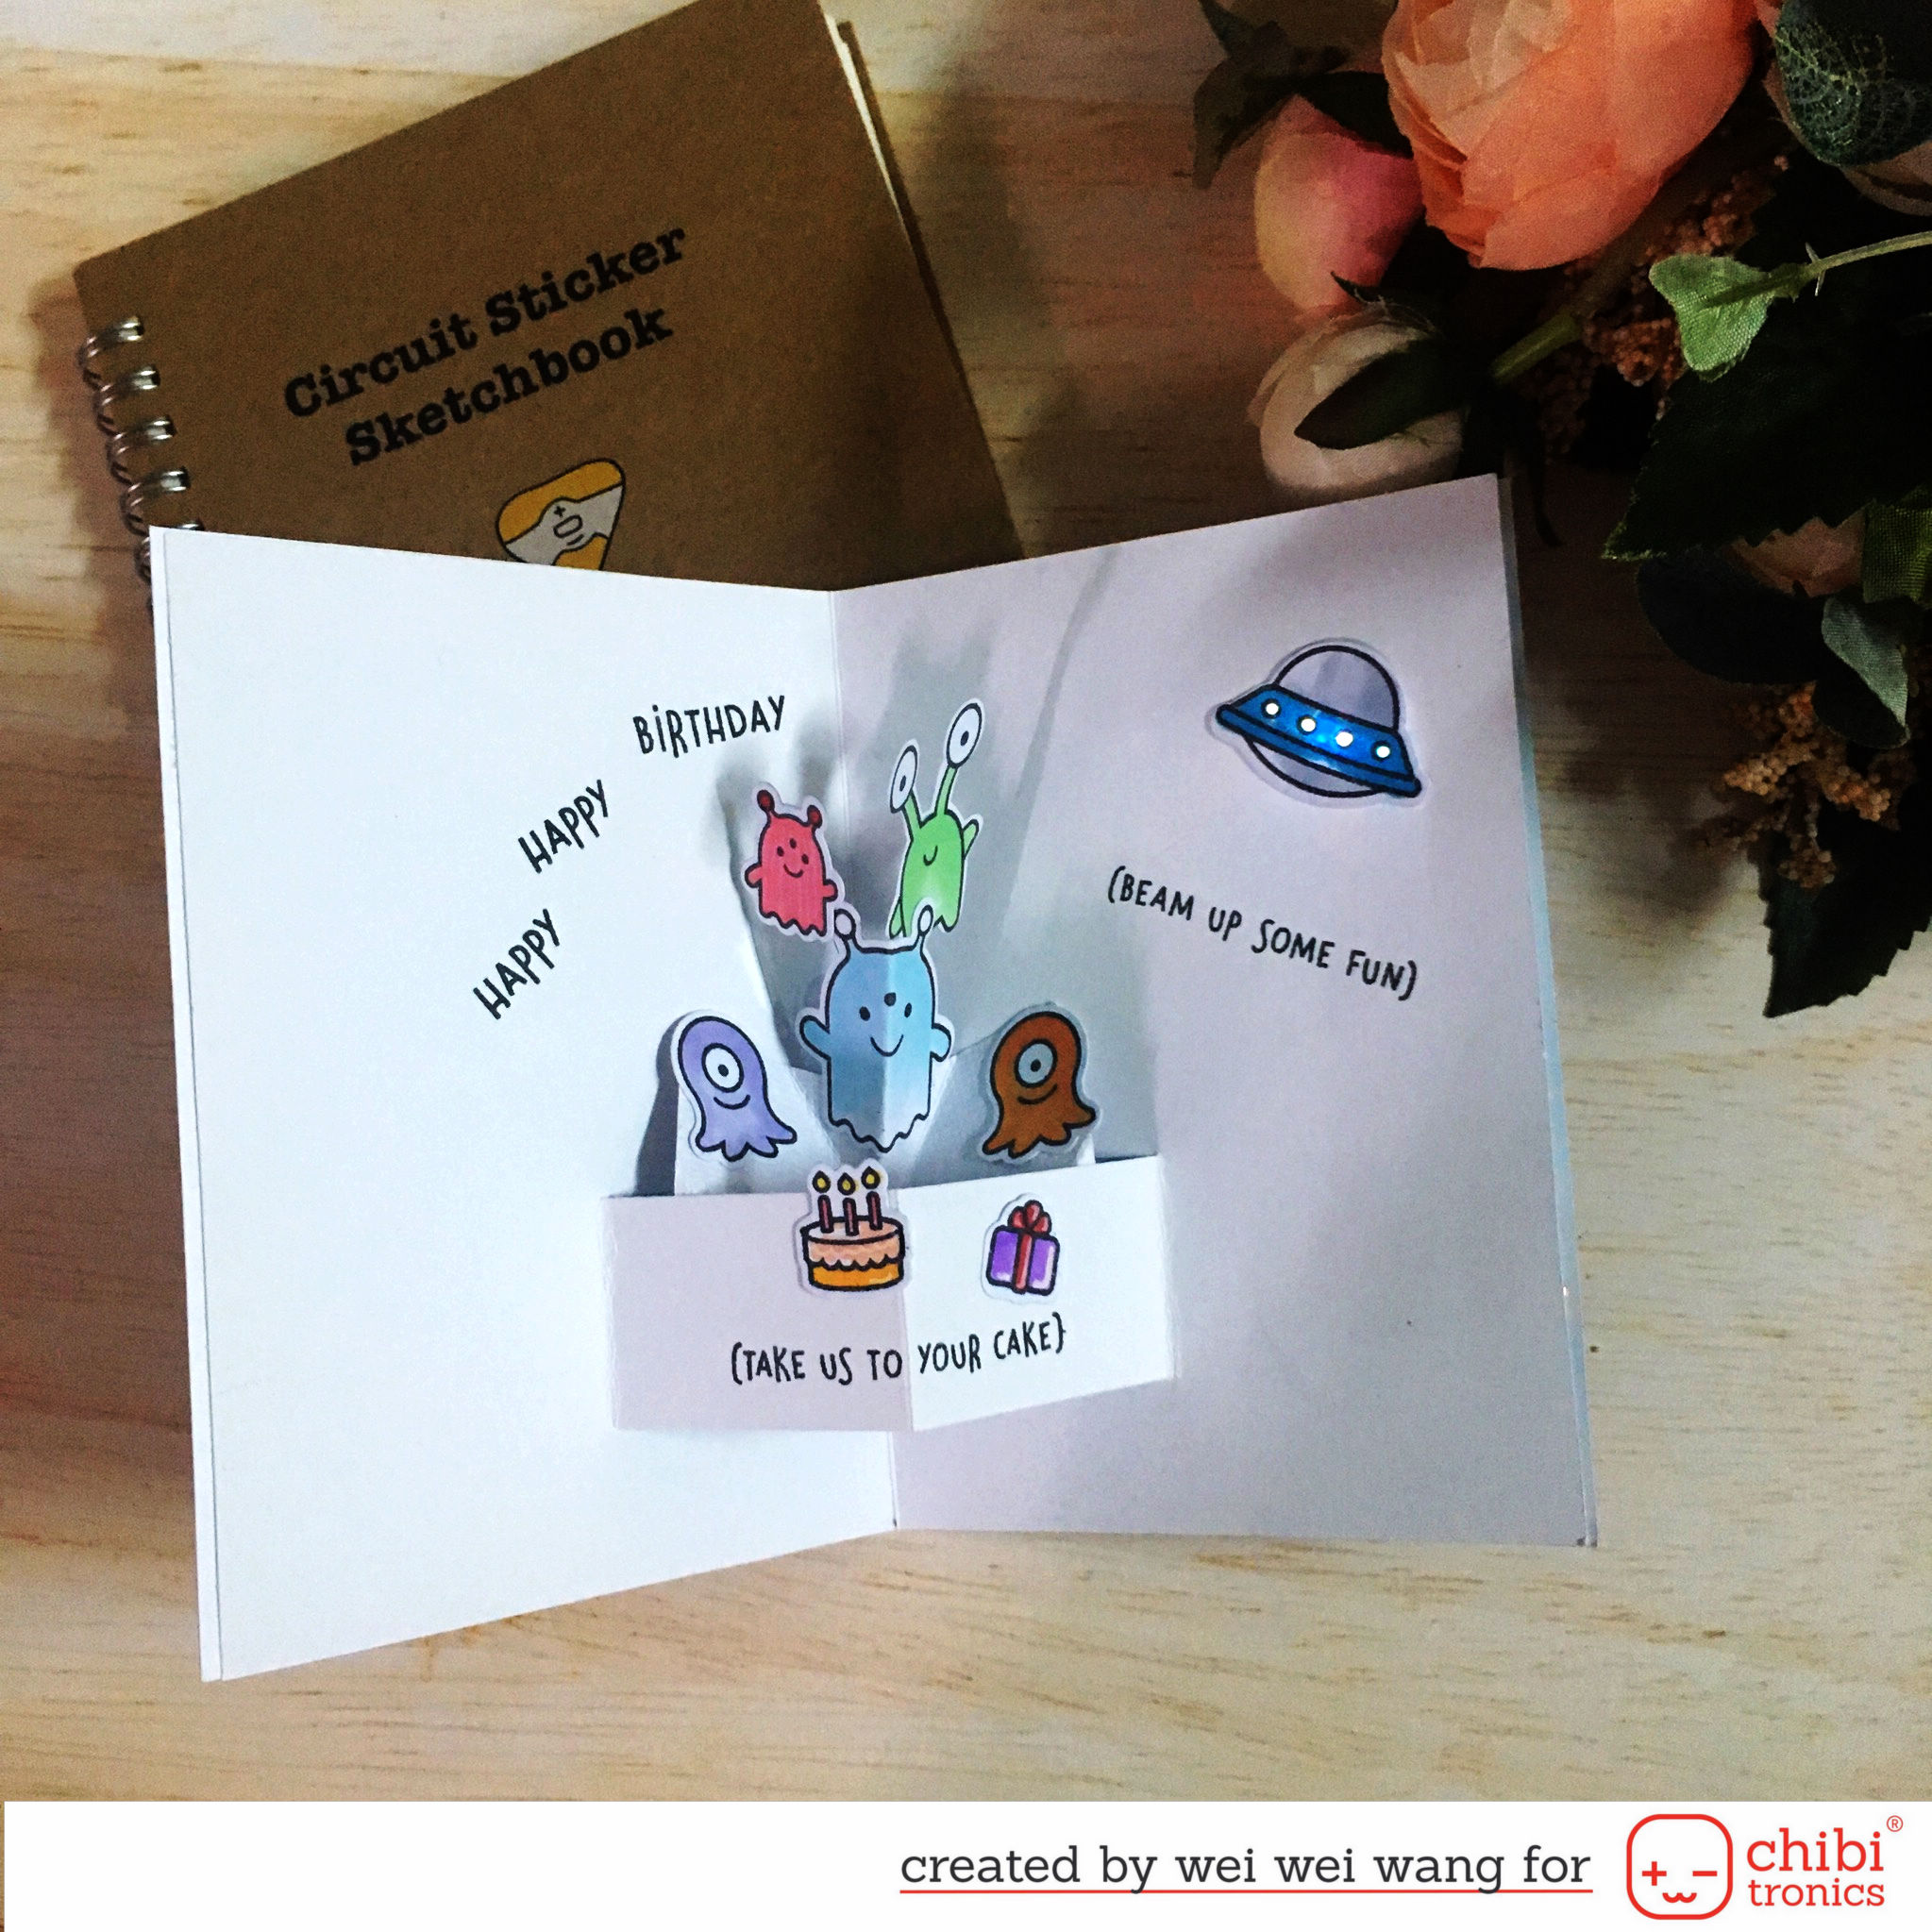
In the front of the card, when I press the button, the UFO lights up! And then, while open the card, there are birthday party held inside and the UFO also lights up!
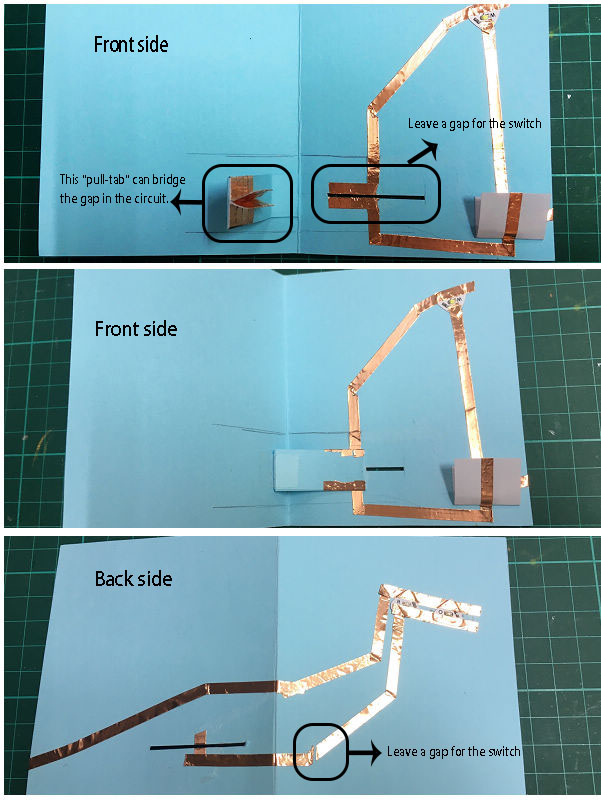
The photo above, I show you the circuit I used in my card.
In the front side, the switch is the same as I used before, I cut a sheet paper which function just like “pull-tab”. The mechanics attached underneath the “pull-tab” is the thing that two squares folded in half, butting up against each other and wrapped with copper tape. When the card is closed, the “pull-tab” can not bridge the gap in the circuit. On the contrary, when the card is opened, the “pull-tab” can bridge the gap in the circuit to turn the lights on.
In the back side, I made a simple circuit, but left a little gap for the switch. How to make LEDs light up? I added a conductive fabric tape patch to the back side of the pattern paper, and I also adhered a “press here” button. In this way, the LEDs light up when I press the button.
Very fun card! The stamps are adorable, and the addition of the lights makes the card so special!