
Create your own Winter Wonderland by making a paper craft set of icicles that light up with a simple paper circuit and learn how to play with shadows. Make small sections of ice or a very long strand of icicles that can hang from a window’s edge, top of a doorway, or even attach to the bottom of a picture frame to bring the essence of snow even to the warmest of spaces!
Materials
- 5 Blue LED Circuit stickers
- 3 strands of 12” Copper Tape
- Sheet of 5-3/8″x 12″ Tyvek paper (Look at your local paper or stationary store for a sheet, otherwise printer paper will work)
- (1) 3V Coin Battery
- A ruler
- Scotch tape
- 1 small Binder clip
- Pencil
- Scissors
- (Optional) Double-sided scotch tape
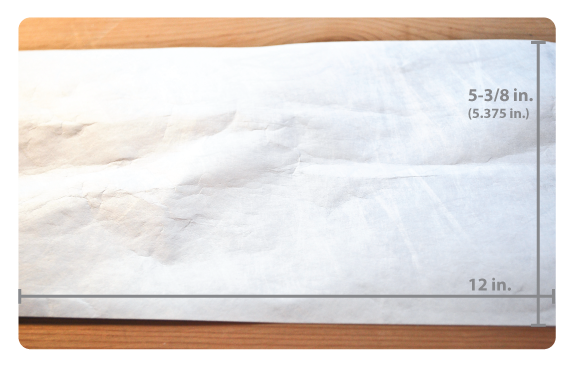
Step 1. Find a piece of paper that is at least 10″ long and over 5″ tall. For the sheet of paper Tyvek, often used for house construction and as a soft mailing envelope, is a great transparent material for a soft glow from the circuit stickers, but can hold it’s shape when you fold it. Tyvek also has a nice translucent, fabric-like texture to it that looks great with the LED’s soft glow.

Step 2. Turn your piece of paper around so it’s the long side up. Depending on how wide the paper is, determine the measurements of the middle of the bottom edge using your ruler to place your coin battery and make a mark on each side of it. Measure the length of each side of the coin battery to the right and left side of the paper. Repeat the previous step on the top edge of the paper, then draw a line from each mark to the top of the page. You are creating a path to lay your copper tape, circuit stickers, and where you will tape your 3D icicles over the LEDs.
Step 3. You can freehand or use your ruler to sketch icicles as one unanimous unit to cover both sides of the 3D icicles that will be attached in the center path. You can make the icicle tips, pointing away from the center path and toward the edges of the paper, all the way, but be careful to not draw the lines of the icicles too close to the lines of the path in the center.
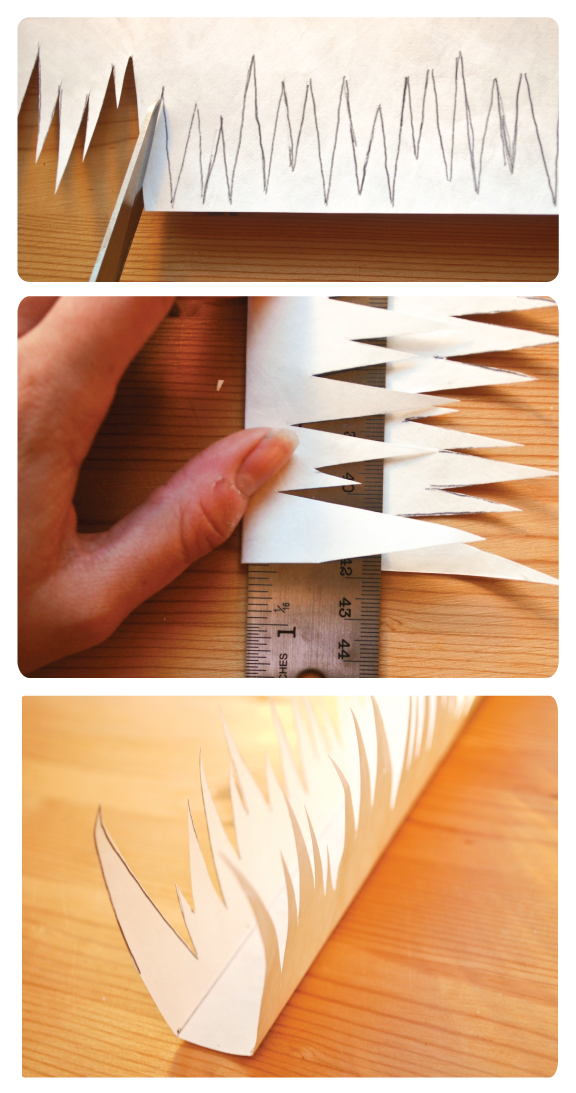
Step 4. Using the ruler, place it on the line of the path and carefully peel the tips of the icicles up and fold over. Rub your finger or a bone folder over the edge to make a sharp crease.
Repeat on the other side of the path until both sides of the icicles are pointed up at a 90 degree angle.

Step 5. Make a paper battery holder. Pick up the template and learn how to at this tutorial. Please note, once you make the paper battery holder, make sure each piece of copper tape is over 13 inches long. The reason for this is you lose a little tape on the tabs inside the holder touching the actual battery and you will be left with at least 12.5 inches of copper tape left.
Step 6. Label each piece of copper tape with a (+) for positive and (-) for negative to keep track of how you will place your circuit stickers down.
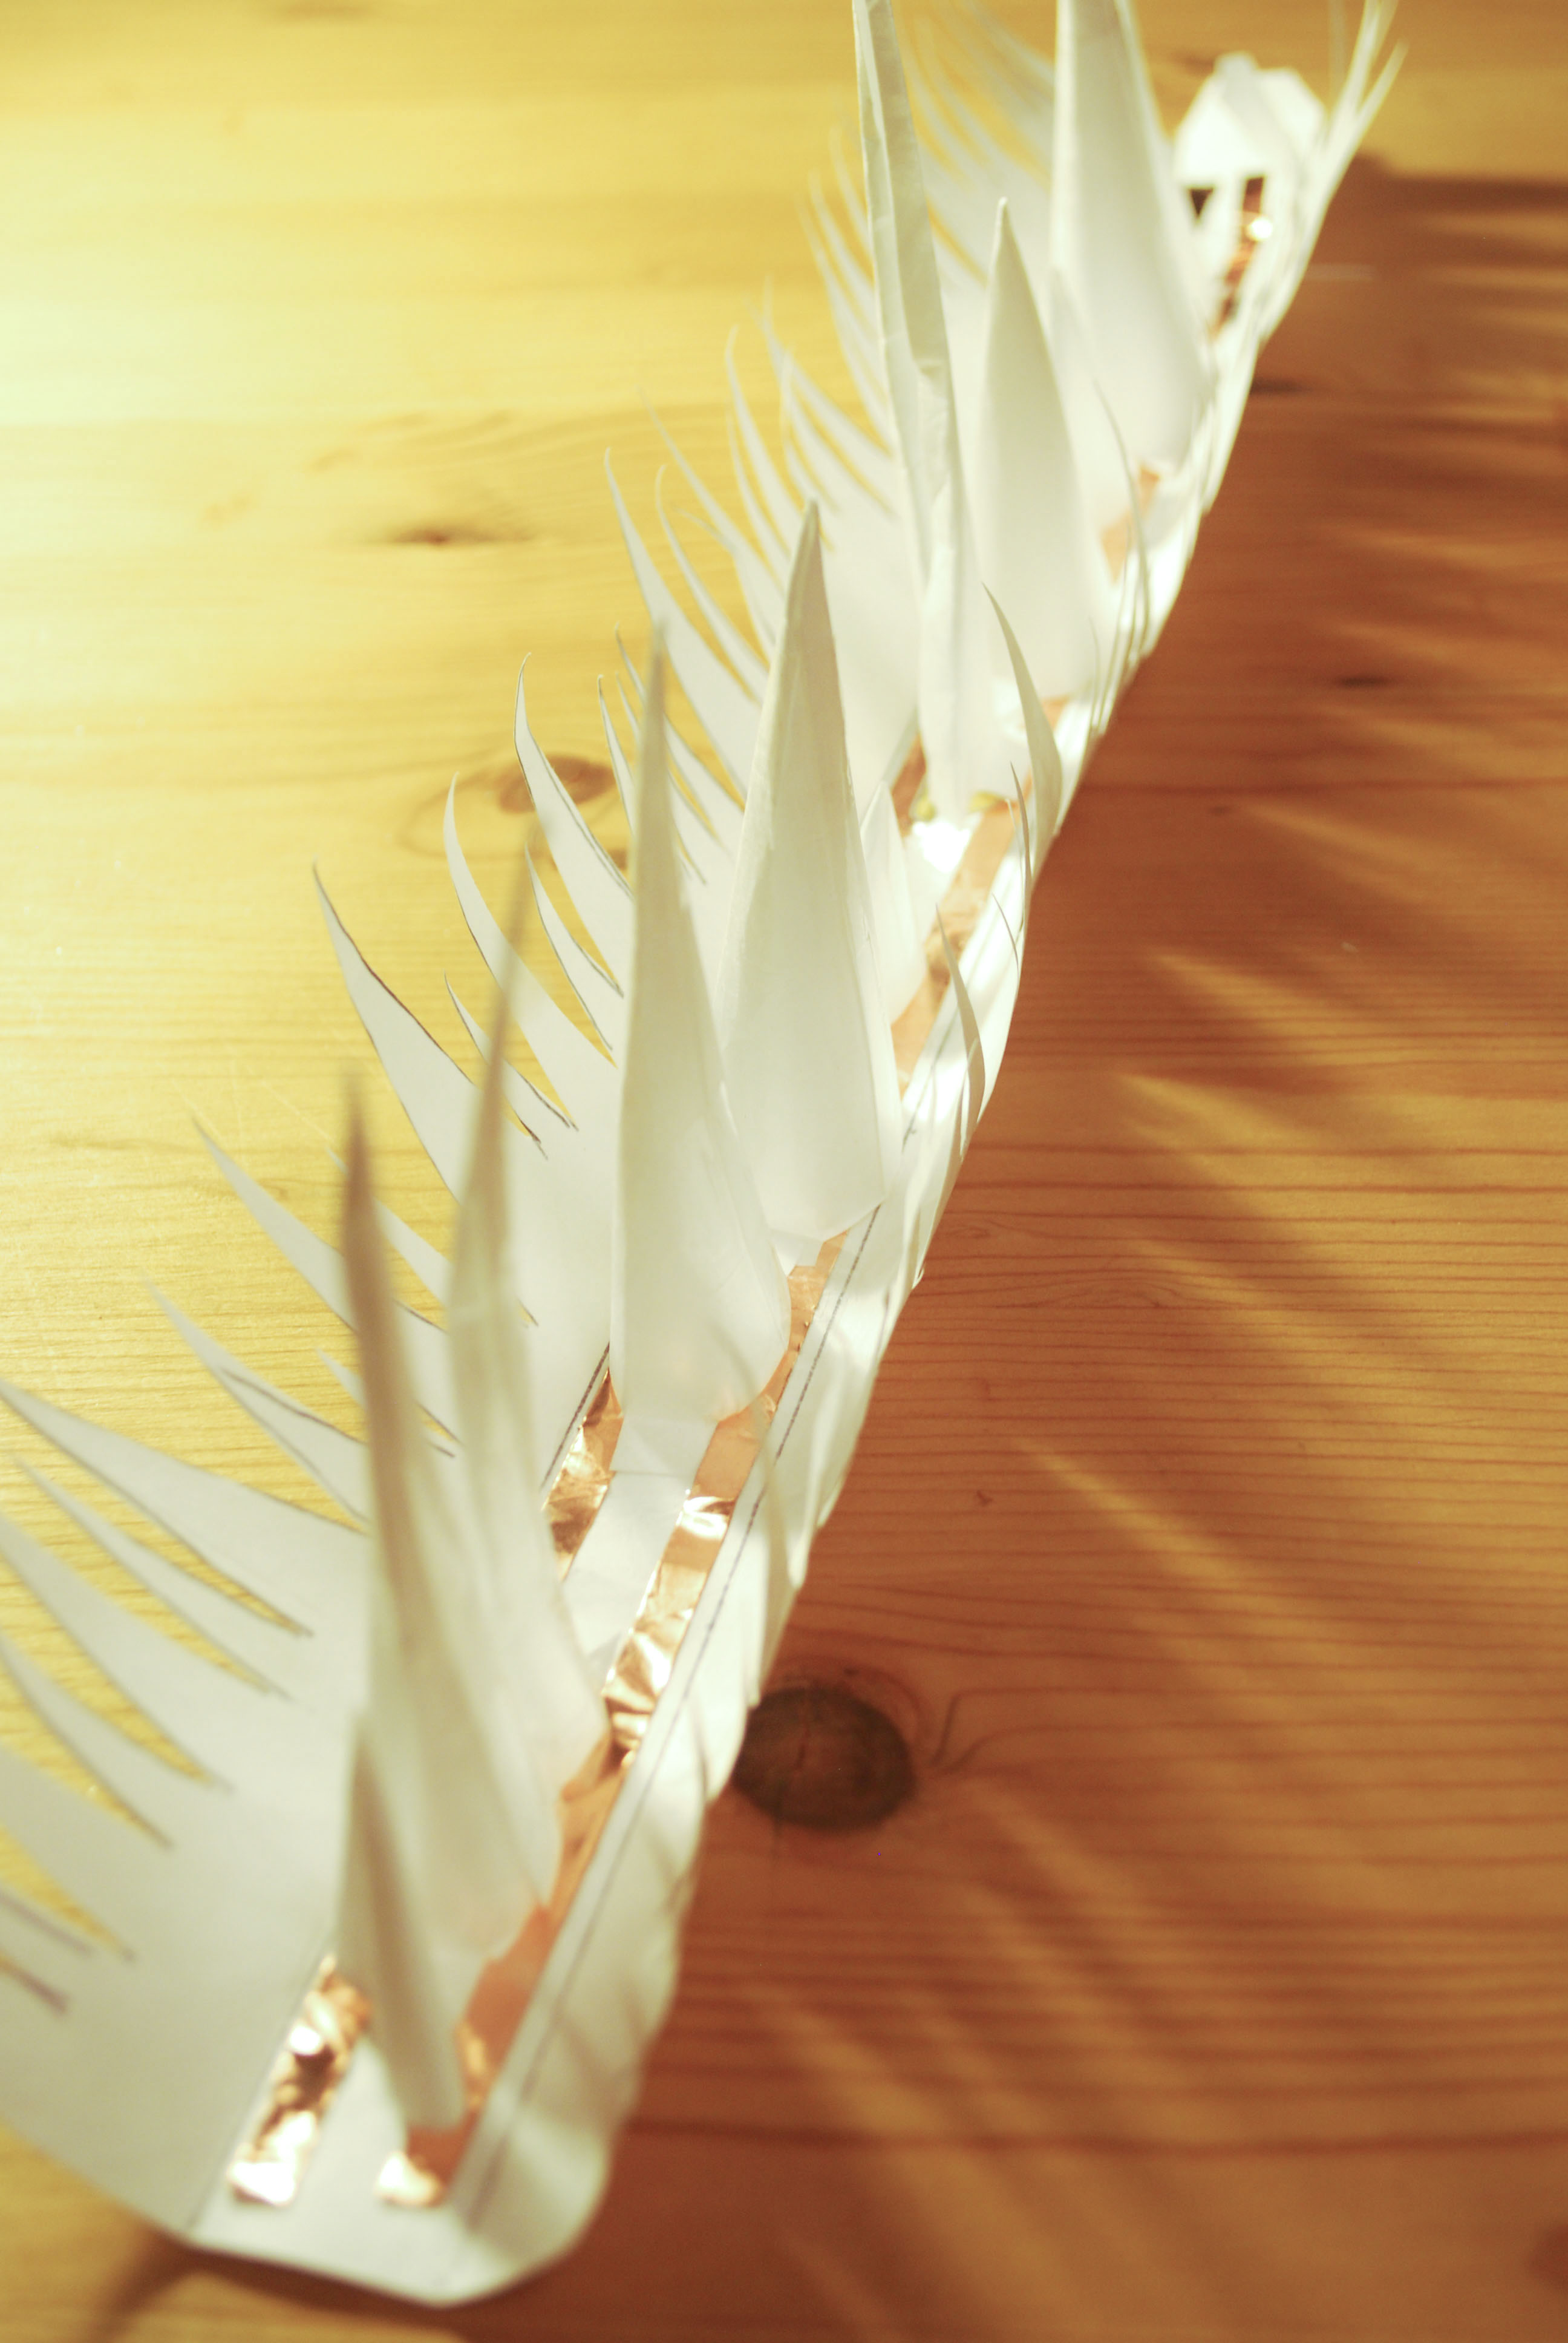
Step 7. Secure the paper battery holder first with a piece of rolled scotch tape underneath on the very bottom edge of the center path before laying down the long pieces of copper tape down. Once you are happy with the battery holder’s placement, lay the long pieces of copper tape down on the path along the icicle folds.
Step 8. Slip a coin battery in the battery holder and place your circuit stickers down according to which copper tape is (+) and (-).

Step 9. Making 3D icicles! Use a compass or a bowl to trace large circles from the Tyvek paper and cut them into thirds. Experiment with really long, thin slices or short slices to get different shaped icicles.
Step 10. Roll up the slices into a cone with as little overlapping of the edges so you do not get make dark shadows inside the icicle when it lights up. Tape the edges with a small piece of scotch tape.
Step 11. Snip small tabs about 2 cm long. Fold and crease the tabs from the inside out. Then place the 3D icicles directly over each circuit sticker and tape the tabs down with scotch tape.
Should look like this!
Step 12. You may want to trim the 2D sheet of icicles you made earlier to better show the 3D icicles inside. You can completely omit a 2D icicle by cutting it off and creating a small “window.”
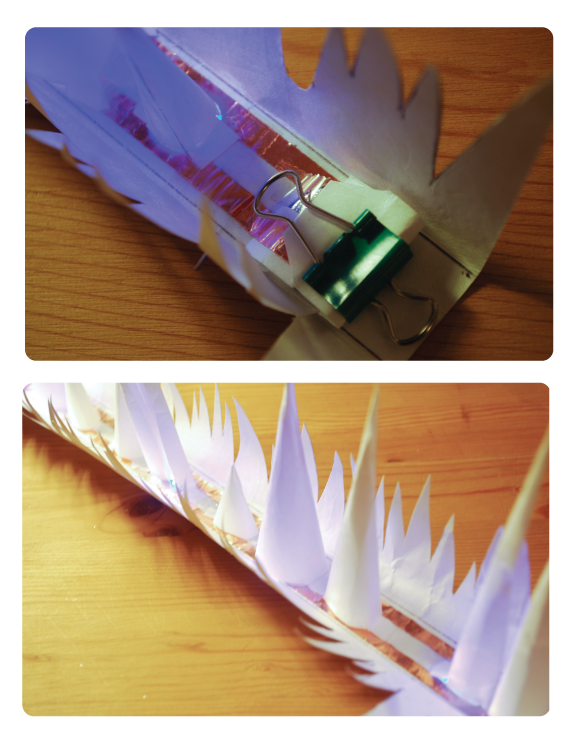
Step 13. Use a small binder clip to clamp the battery inside the paper battery holder and fully secure a connection to complete the circuit. It also helps prevent it from sliding out.

Try hanging them with doubled-side tape and turn off the lights to see your winter creation. Or even flip it to make a Frozen Forest!

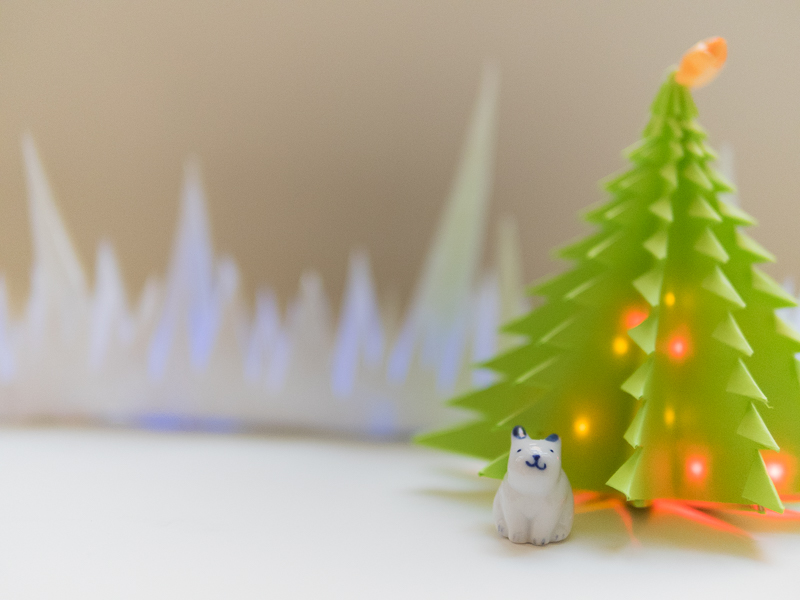
Add a light-up tree to your Frozen Forest!