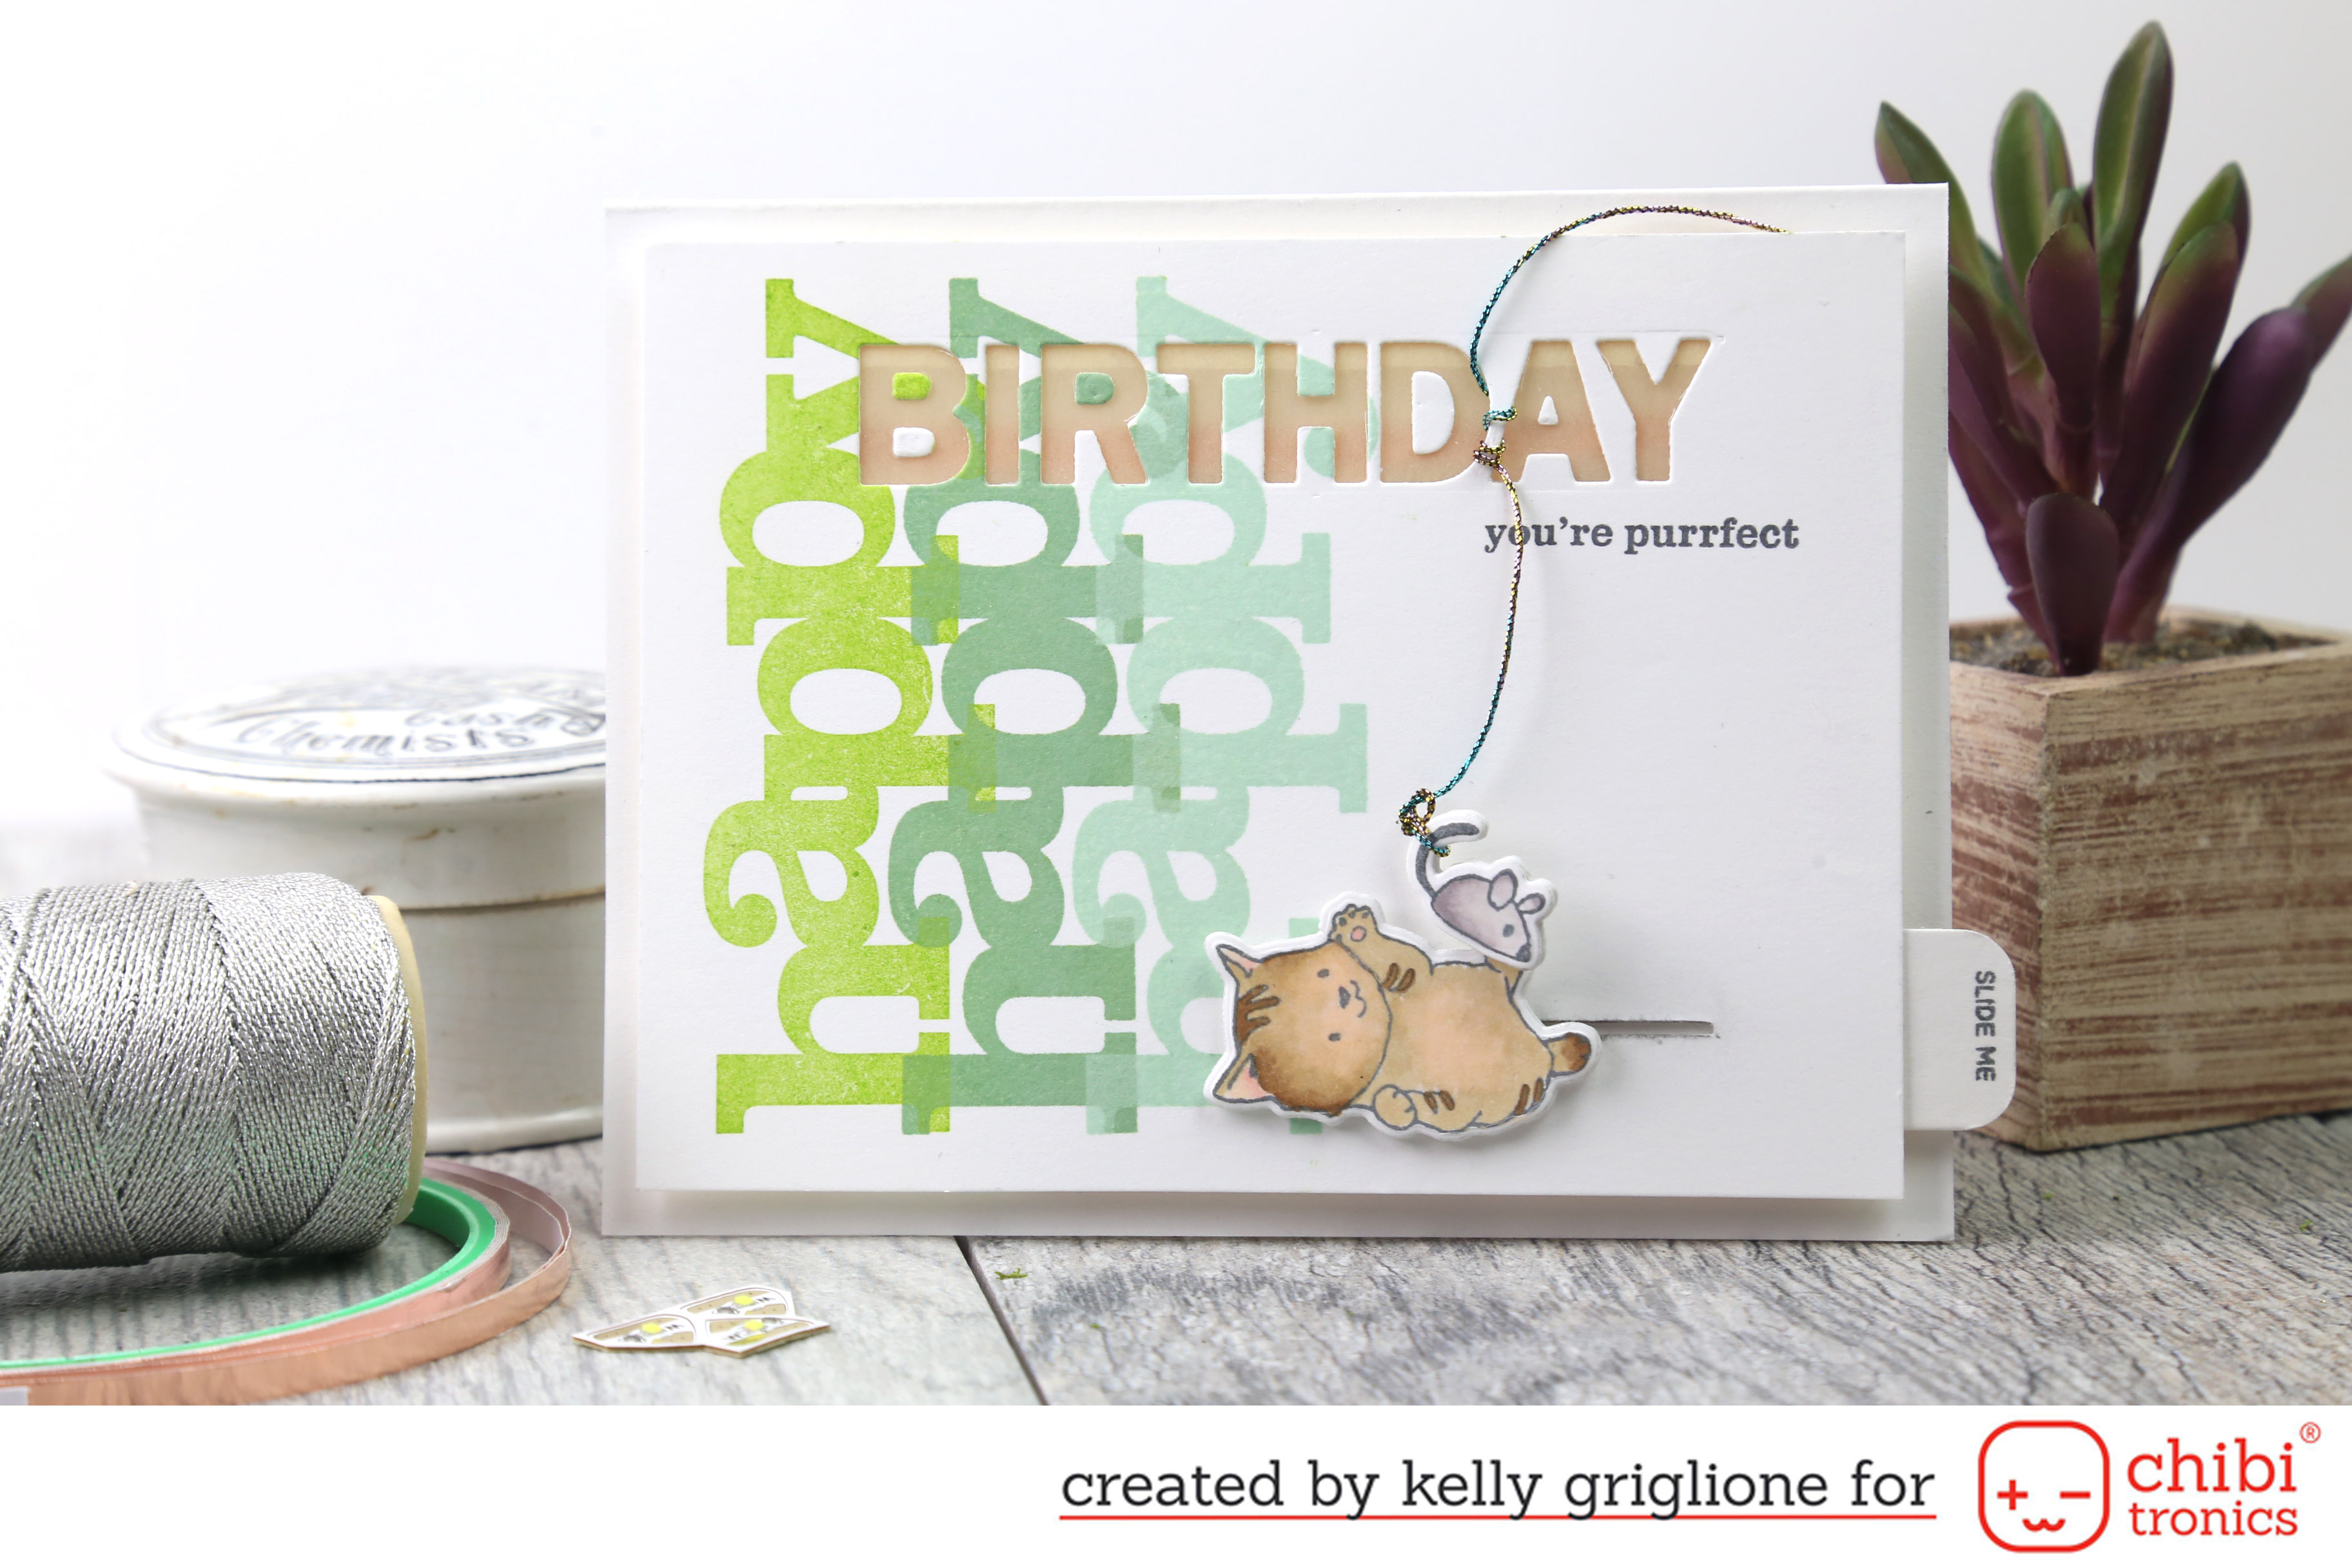
 Hi Friends! This is Kelly from Notable Nest here to share a cute card featuring a little kitty playing with his mouse toy. While he’s sliding across the floor, swatting at the mouse hanging from the sentiment …
 … he lights up the birthday greetings! If you’re interested in how this guy is able to create such magic, I have a little tutorial below.
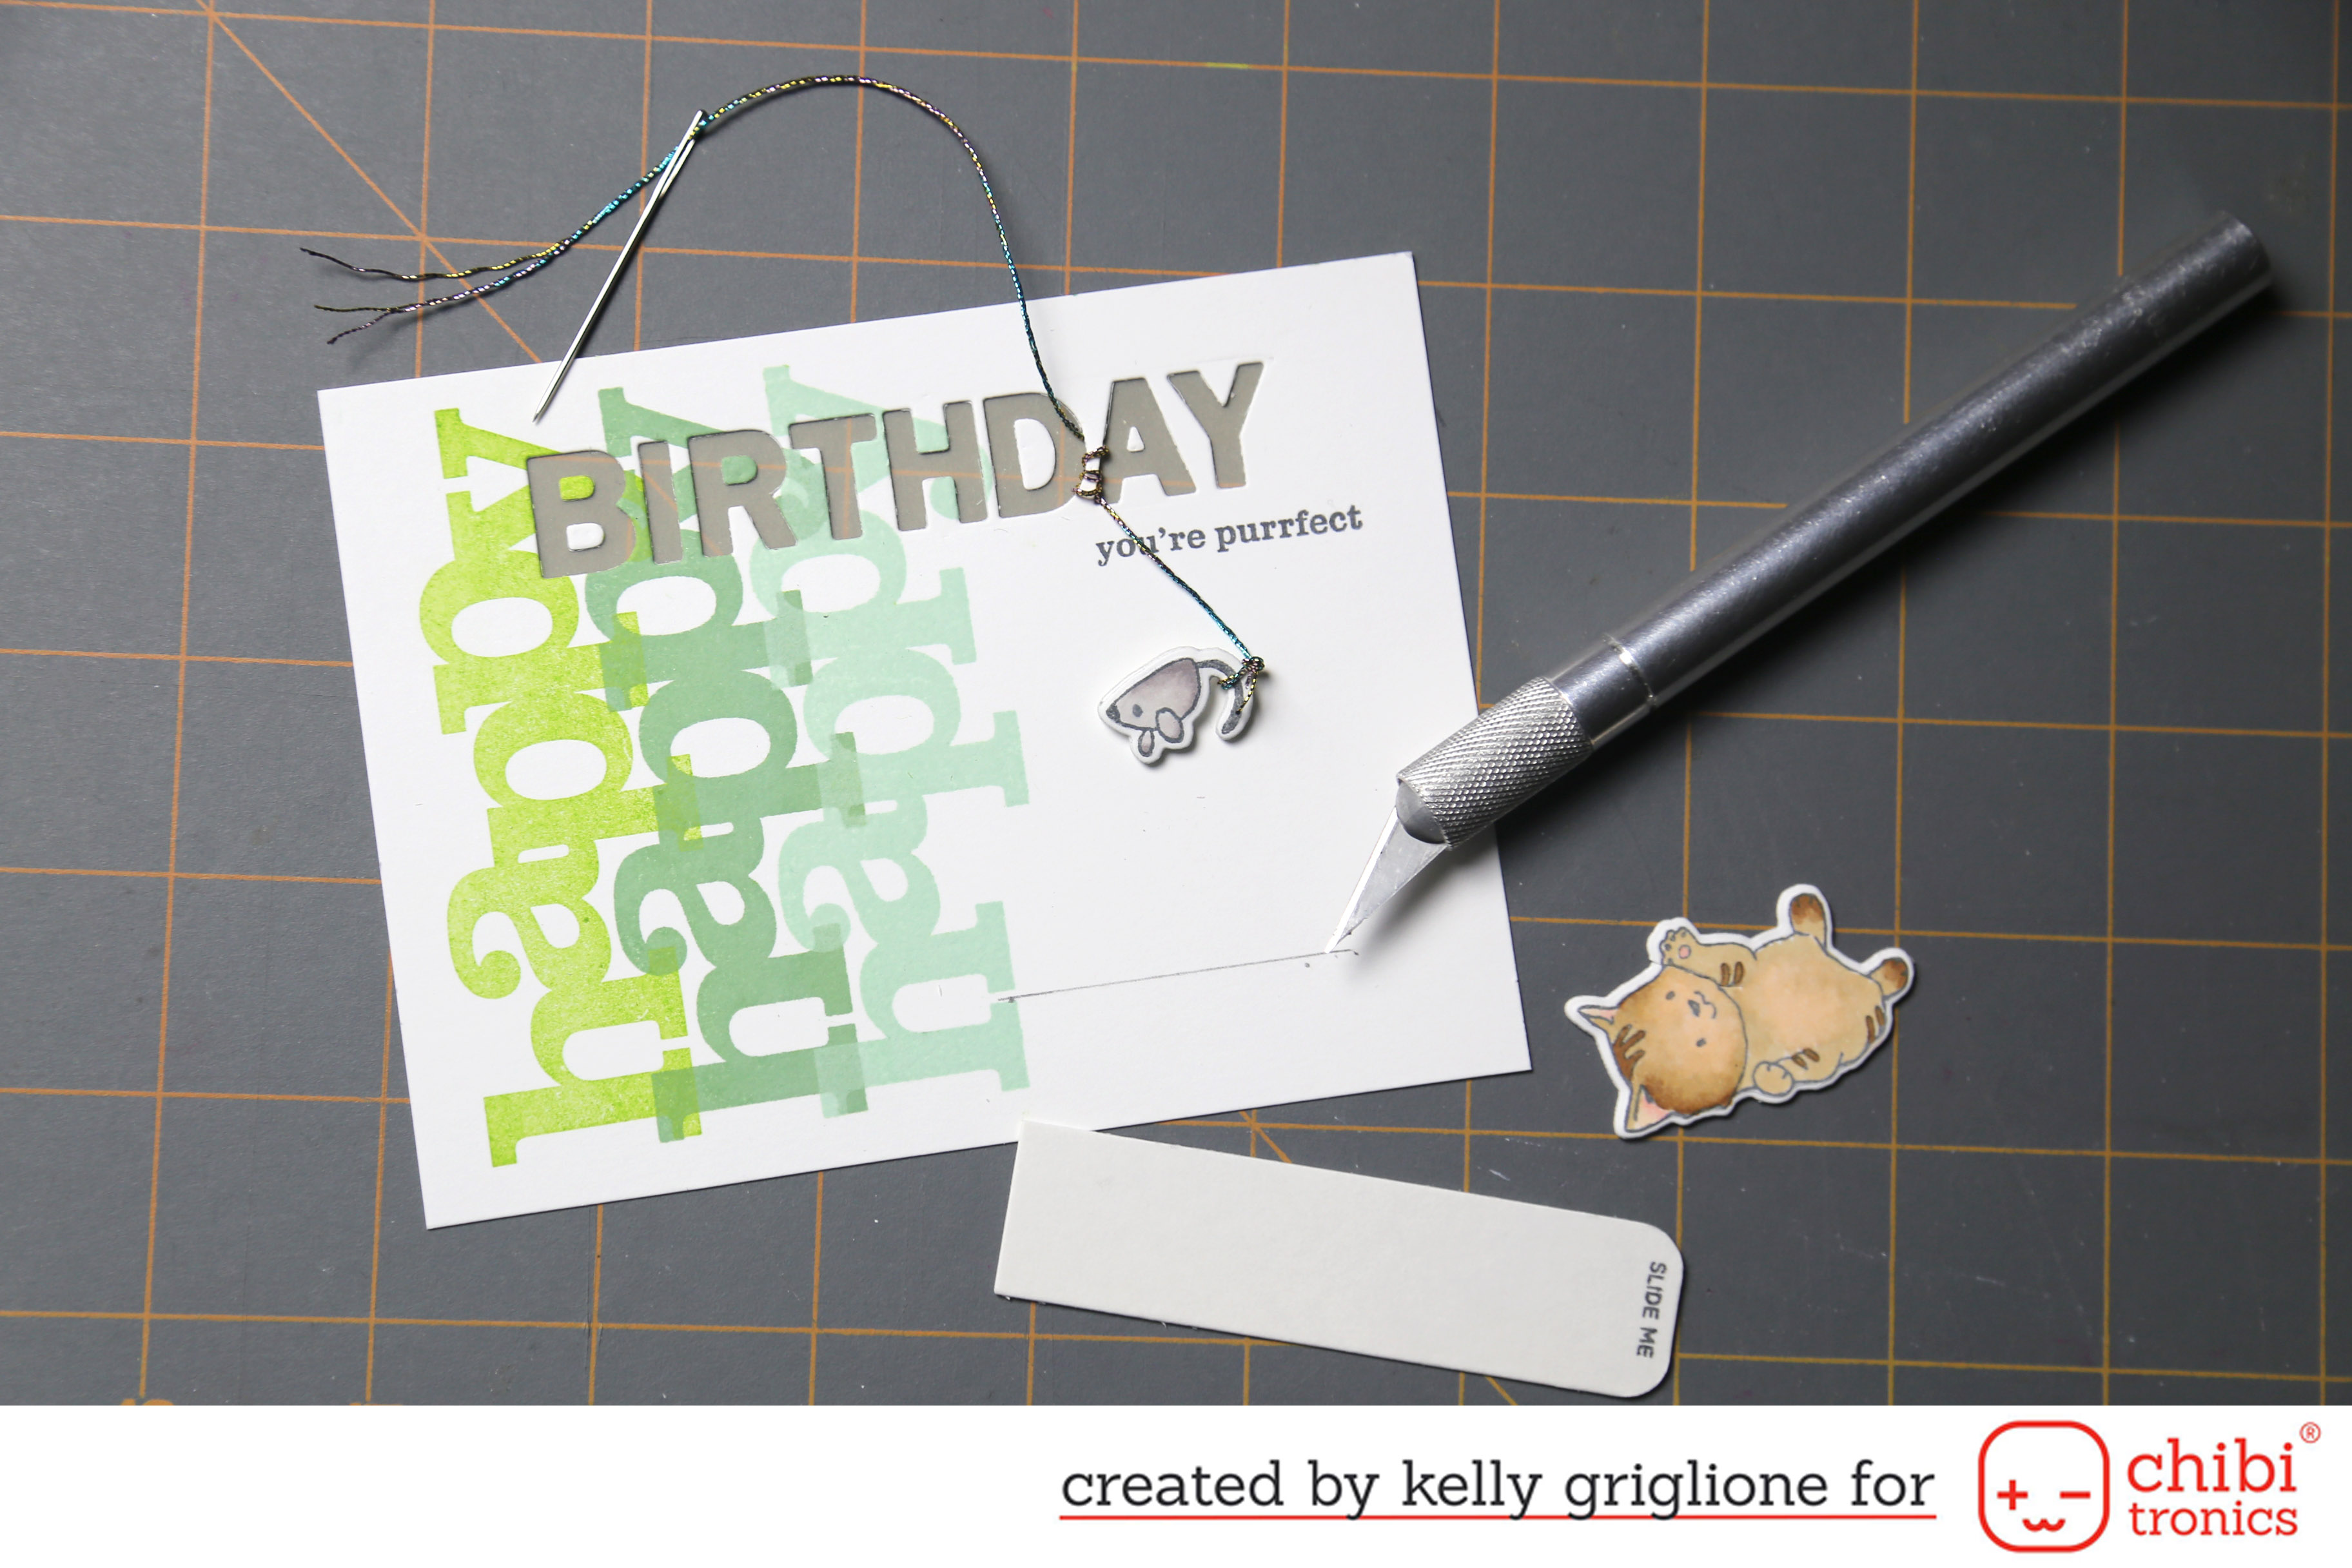 After stamping and die cutting the panel of my card with Winnie & Walter products (listed below), and cutting the slider out of a thin chipboard (my husband’s comic book backing boards) I penciled a line on the card base where I wanted my slider to go.
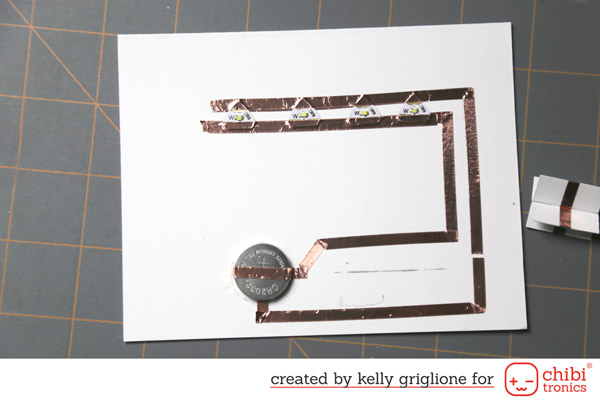
 I cut the slit with an exacto knife and made the rest of the mechanics related to the slider. The piece with the copper tape wrapped around it is the slider that Eiko invented – two squares folded in half, butting up against each other and wrapped with copper tape. This will be attached underneath the slider, and will bridge the gap in our circuit to turn the lights on (further explained below). The other two squares folded in half to the right of the kitty will be attached on top of the slider, be threaded through the slit in our panel, and then attached to kitty.
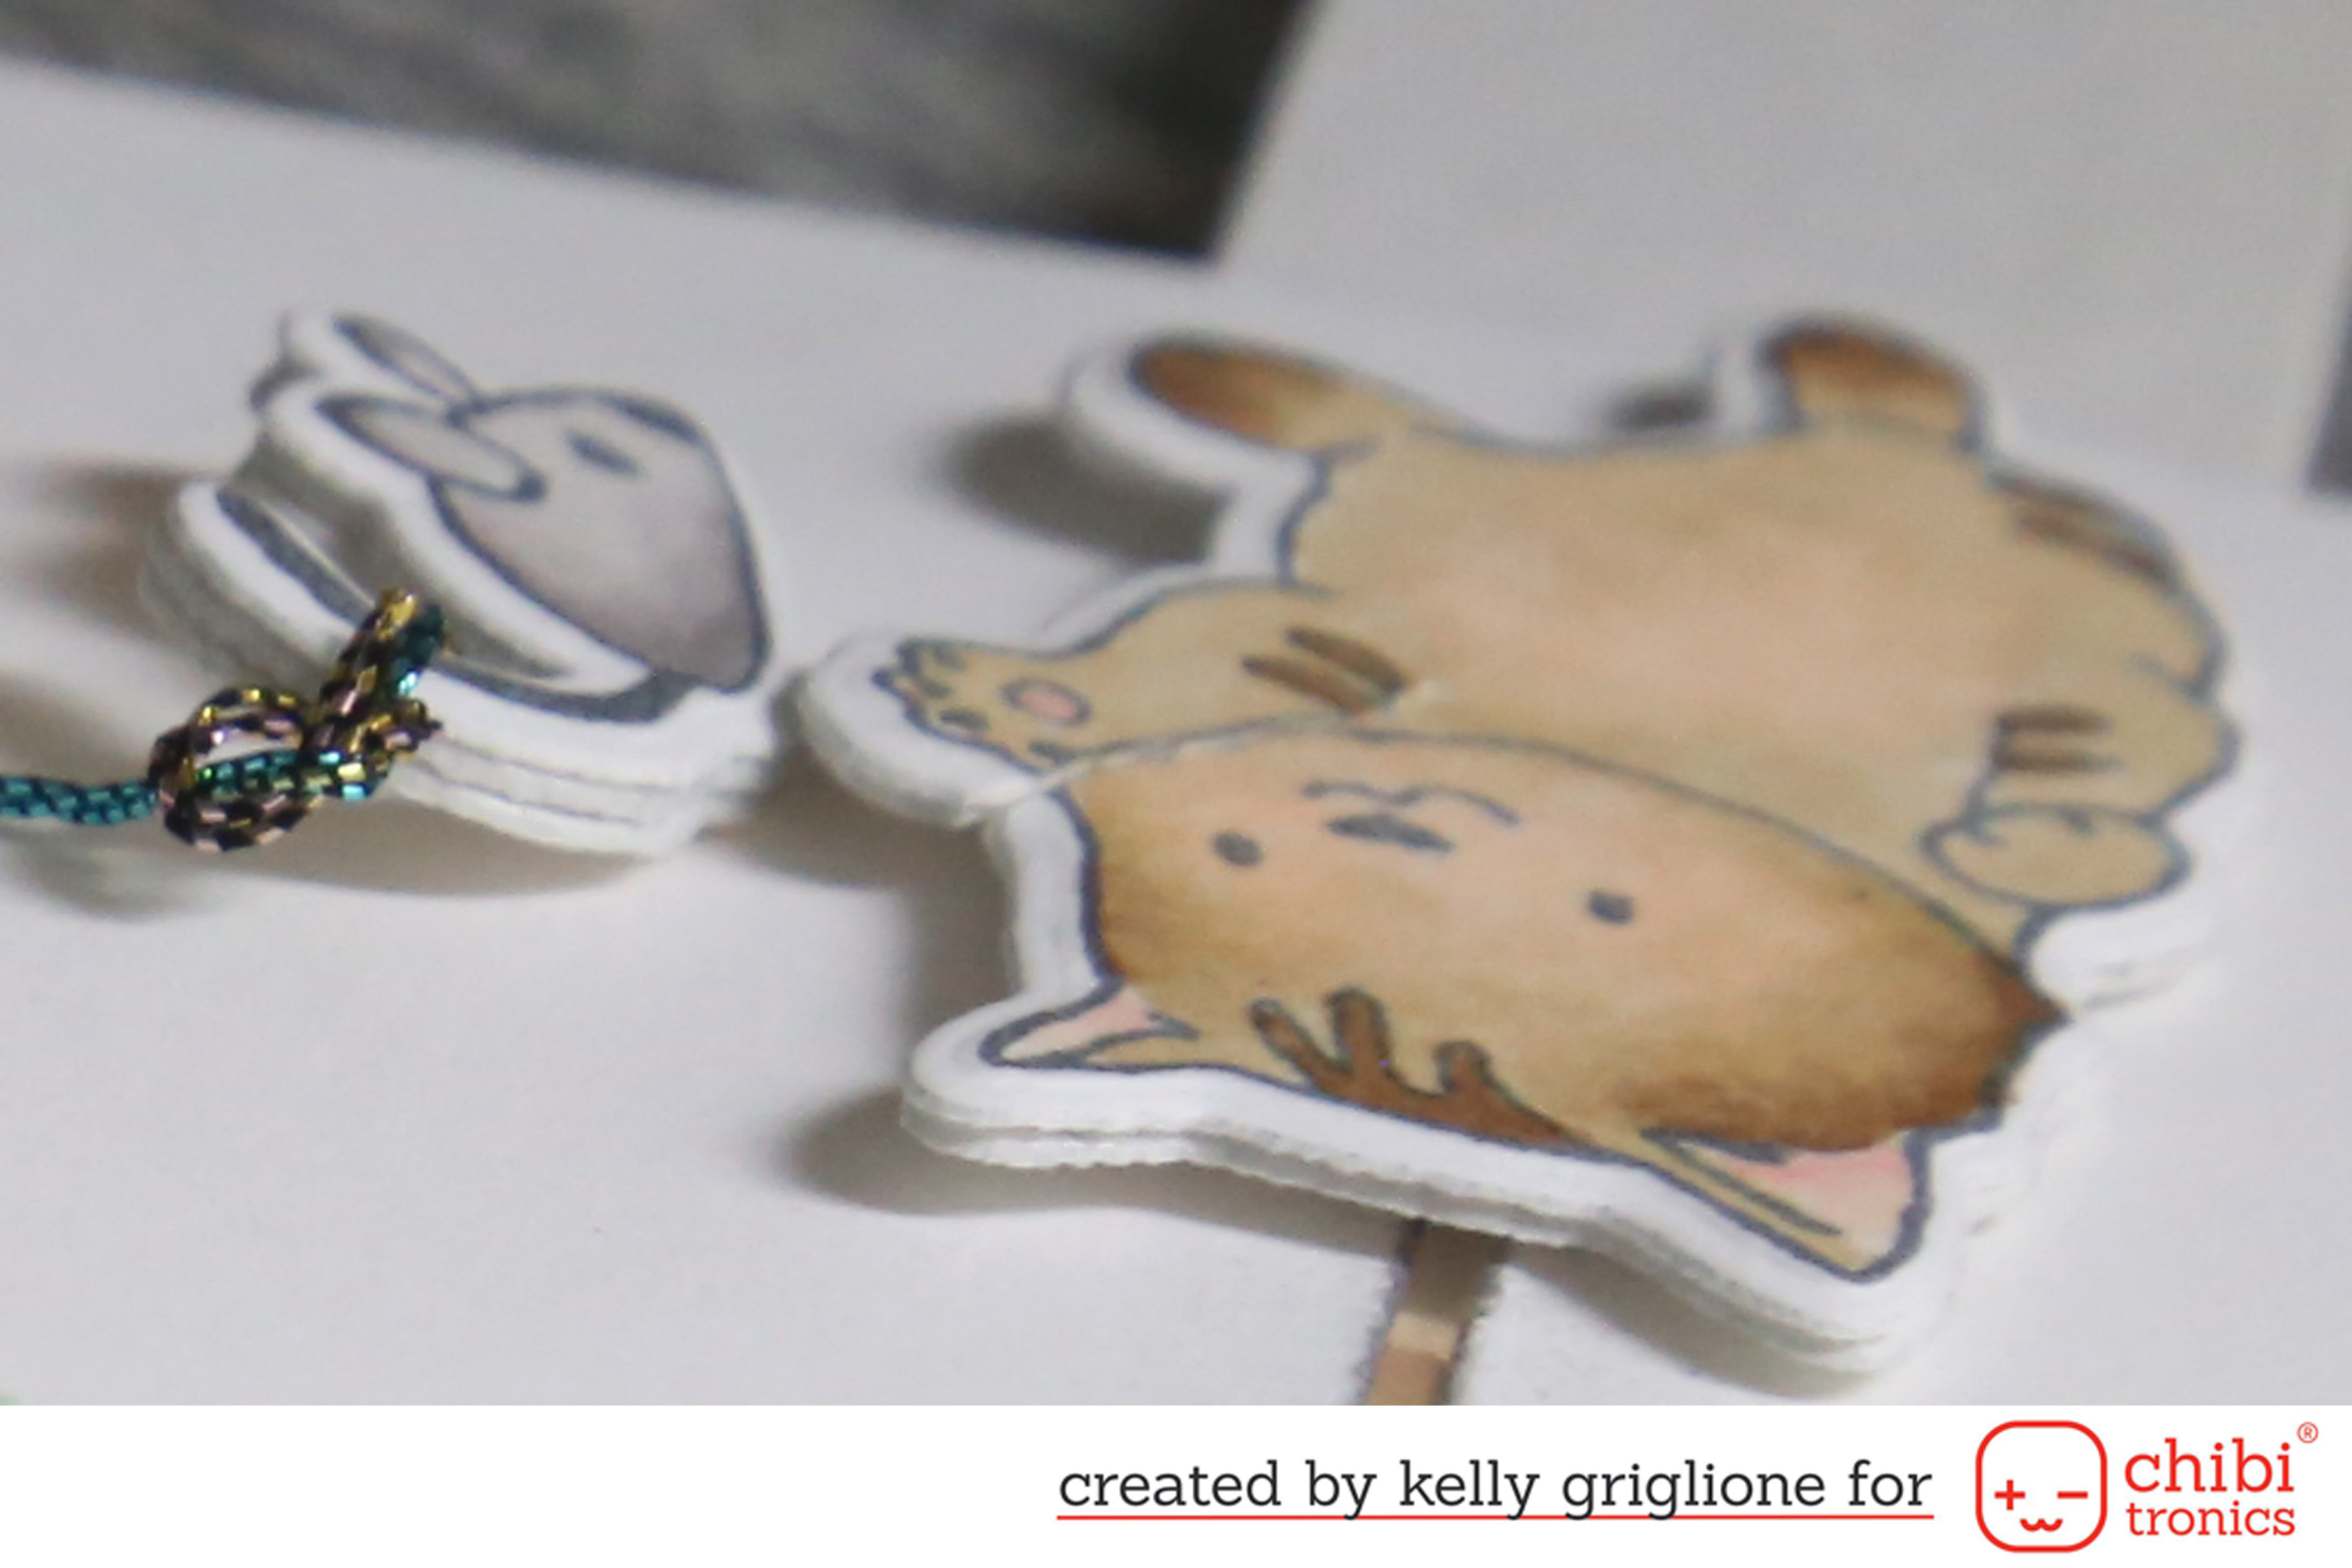 Here’s a close look at kitty and her mouse toy. For both critters I have added another layer or two of the thin chipboard. The curly tail makes a wonderful place to tie the string onto. I’ve also cut kitty’s paw (the one by the mouse) so you can slightly bend the paw forward to aid with the mouse attack.
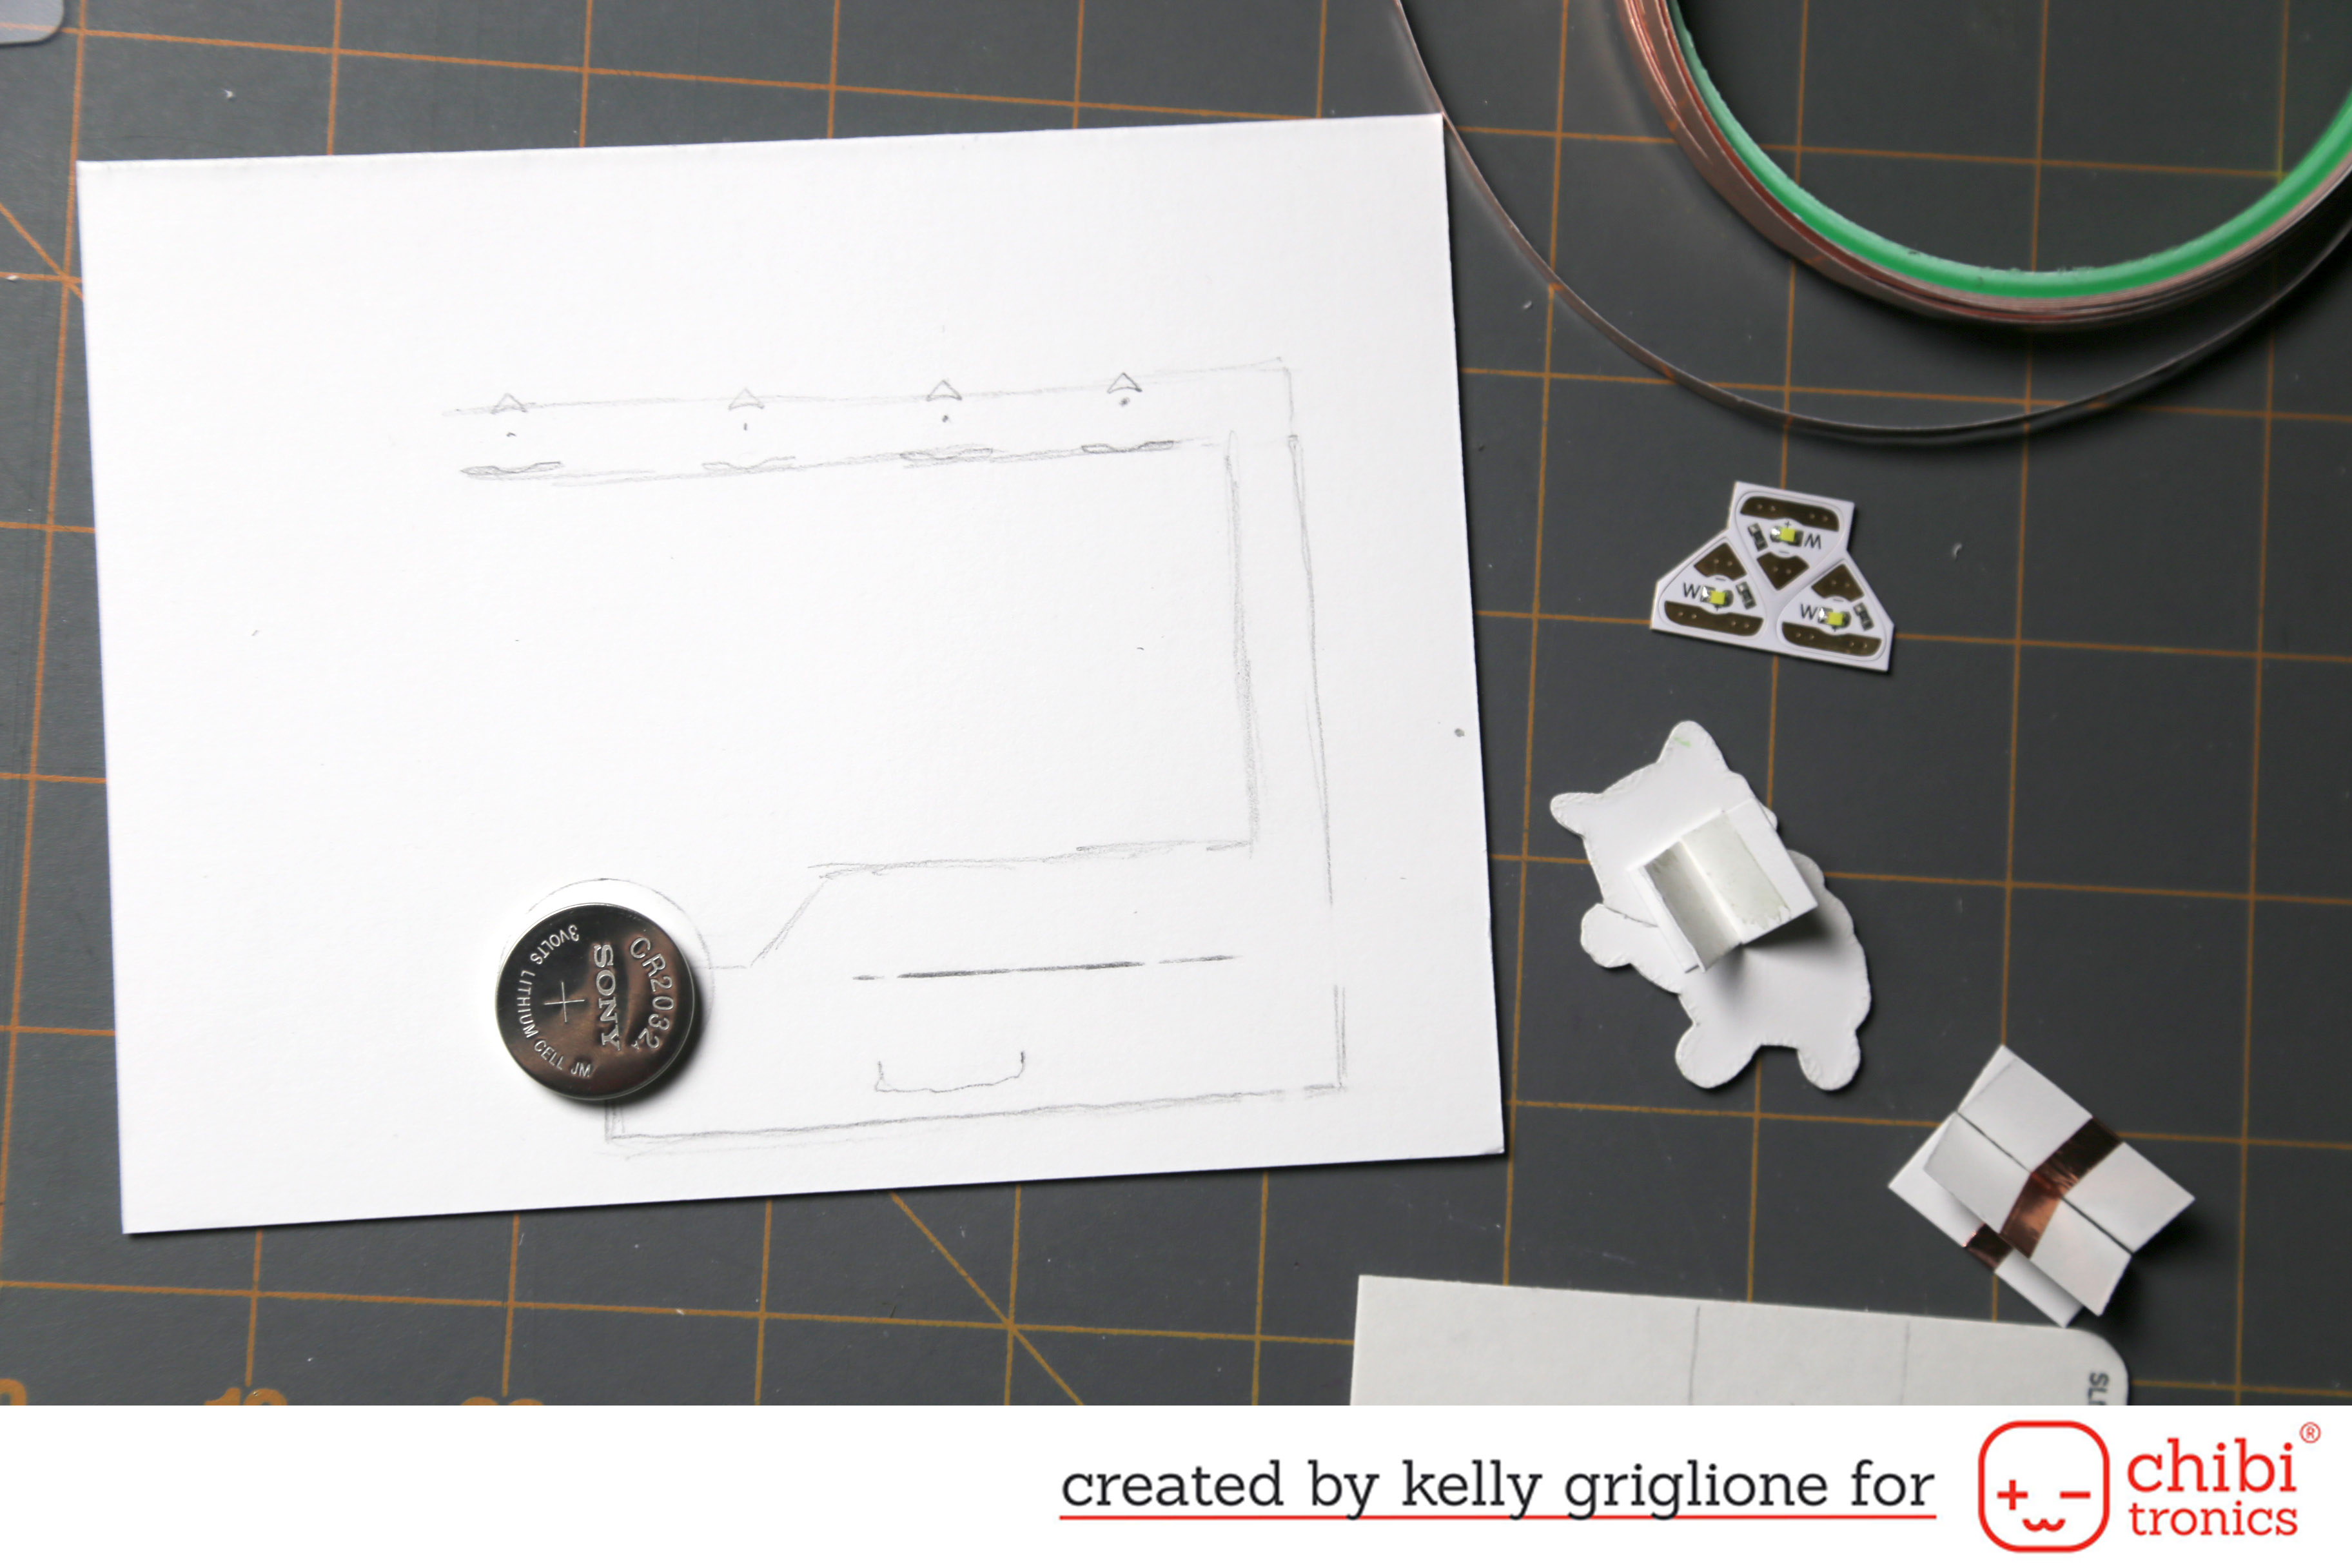 Next, I draw out where I want to place my lights by holding the panel on top of the card base and marking the locations with a pencil. Then I use the stencil to draw the actual LEDs, where the battery will sit, and where I’ll stick the copper tape. I’ve also turned kitty over so you can see the two folded squares attached to him, which will be threaded through the slit and attached to the slider.
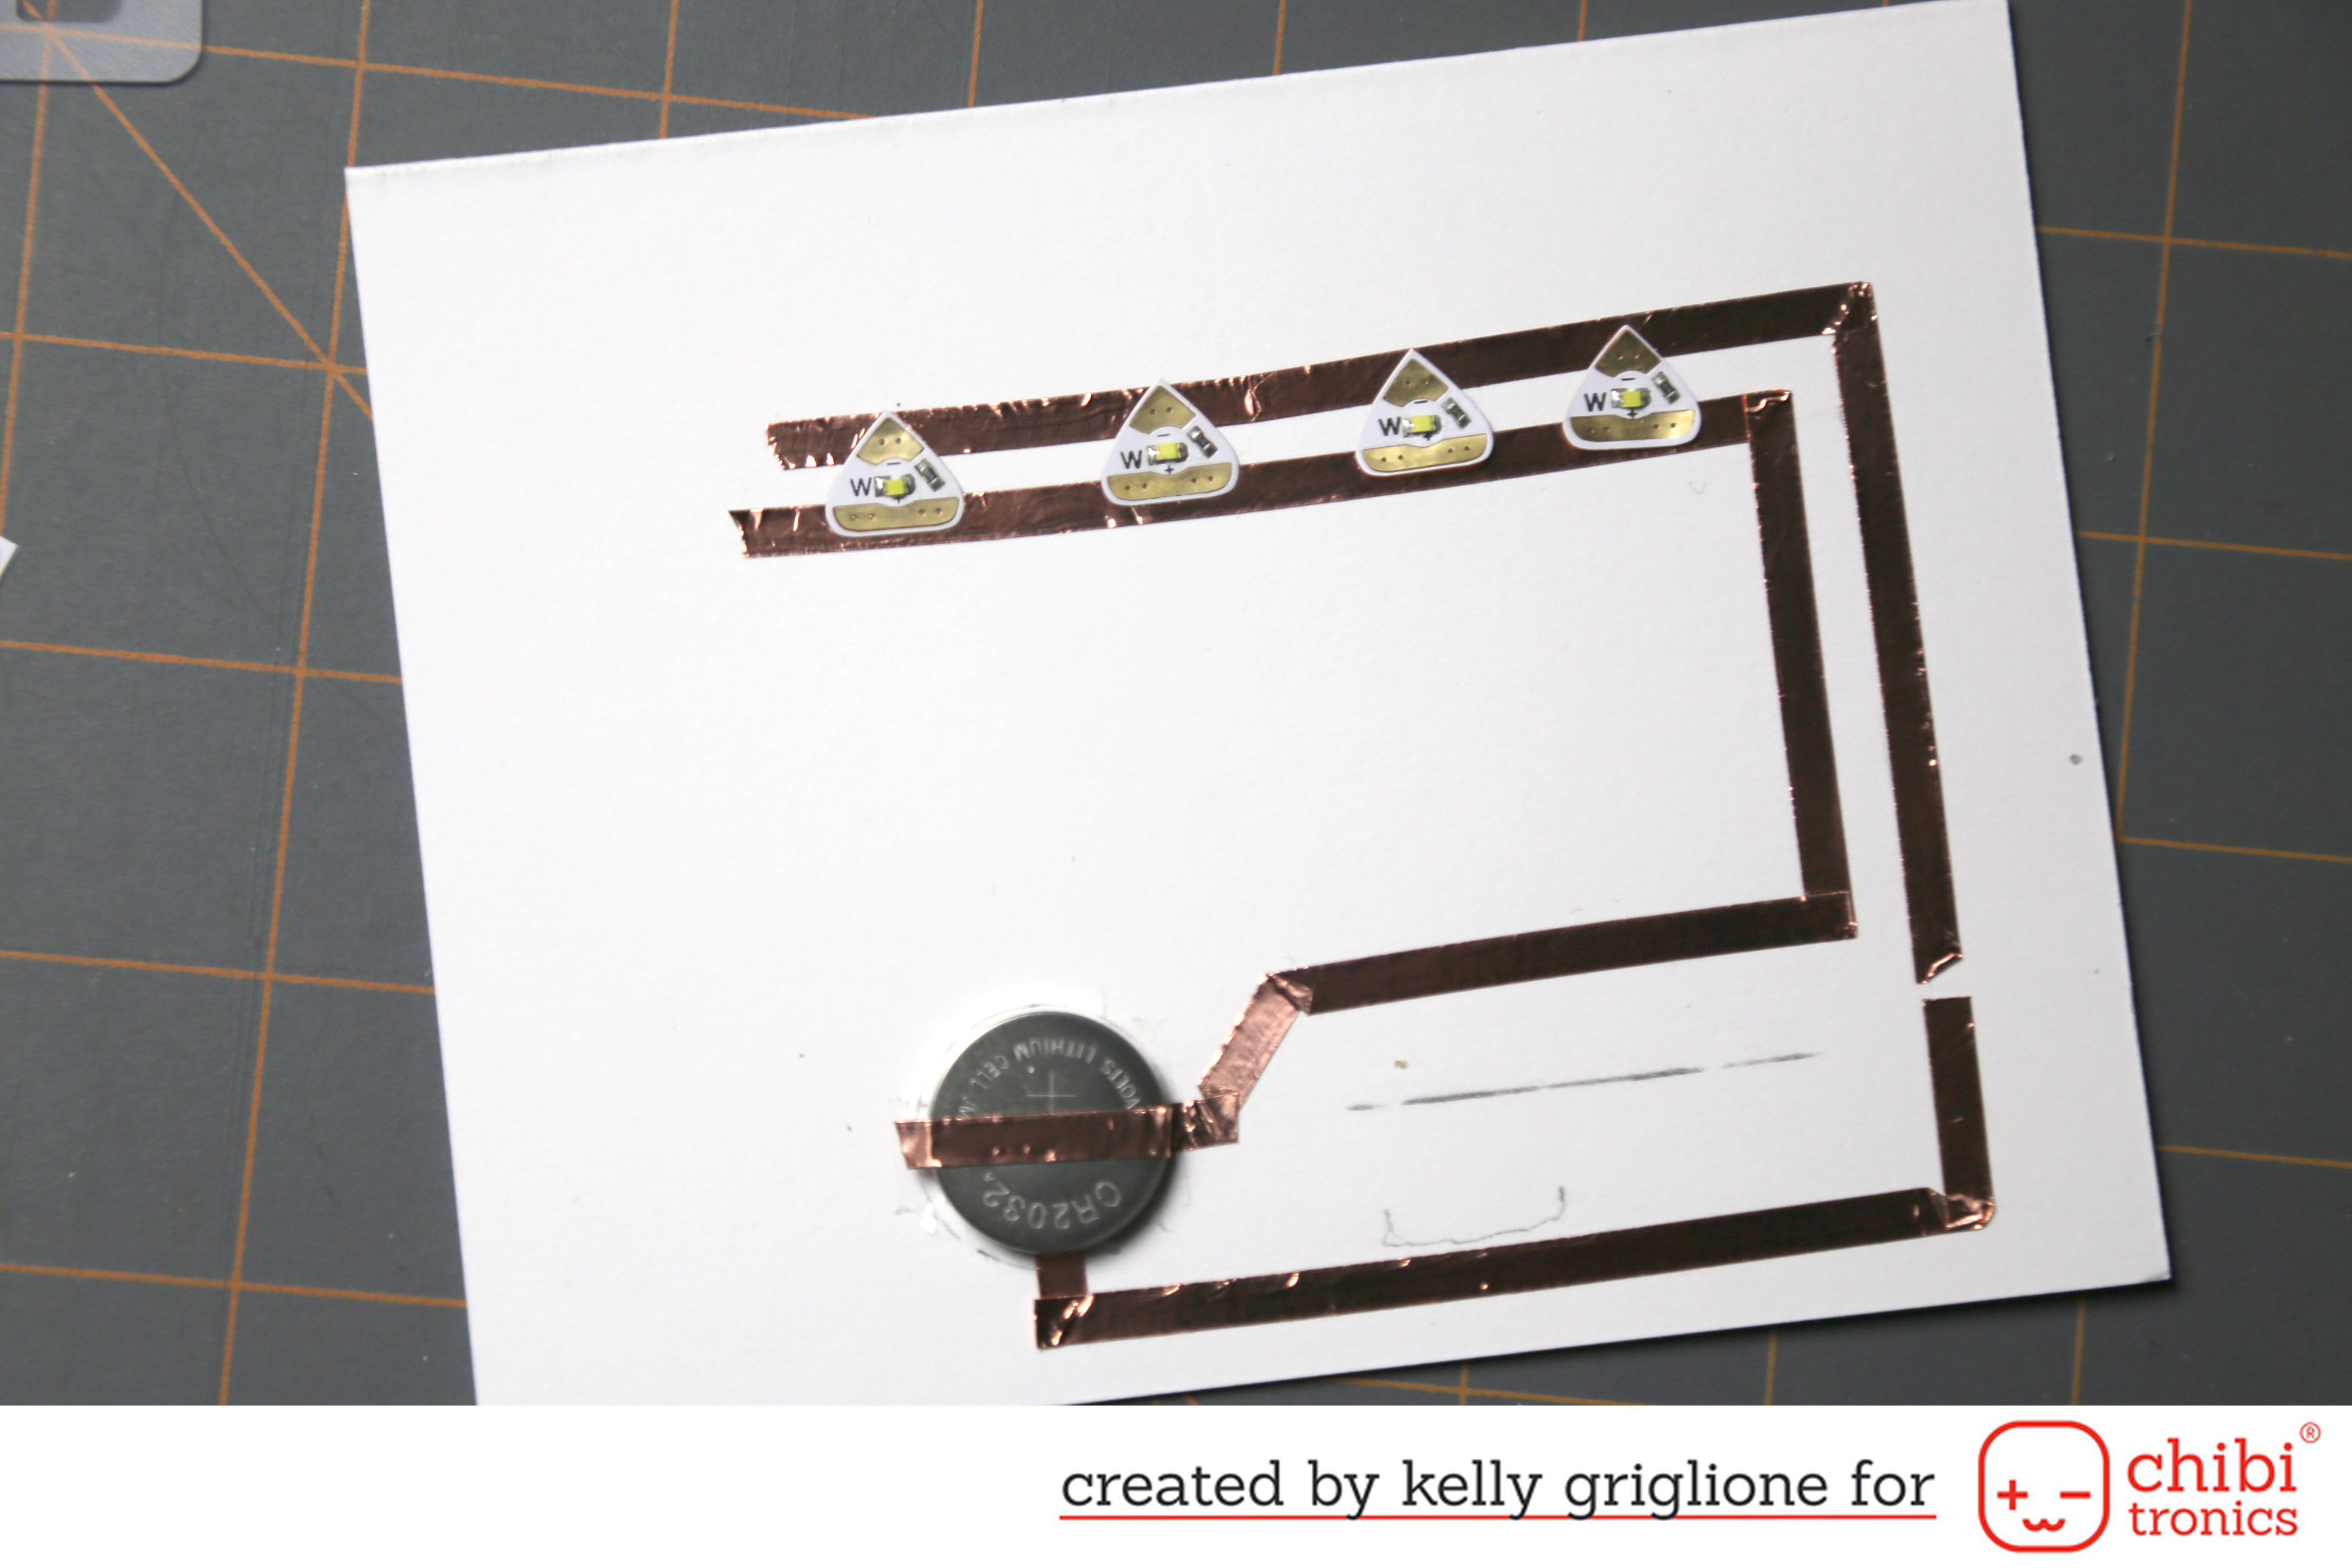 Now it’s time to add the copper tape (including a gap on the right side which the slider will bridge to turn on the light), battery (adhered down to the card base), and LEDs.
 The best tip I’ve picked up all year is another one from Eiko that Jessica Frost-Ballas mentioned during the Chibitronics class at Creativation: always run copper tape OVER YOUR LED CONTACT POINTS on both the pointy and the wide ends of each LED. You can see this in the photo above. This ensures that the LED has the proper contact with the circut. We had 51 participants in the Chibitronics class, and as you might imagine several participants had trouble getting their LEDs to light right away. The very first thing I would do before anything else would be to add copper tape on top of the LED contact points. Most of the time that fixed the problem! This is especially important if you are reusing a LED, or had already stuck it down once before. If the adhesive on the LED doesn’t attach to the copper tape well the lights will never work and you’ll frustrate yourself trying to figure out where the problem is.
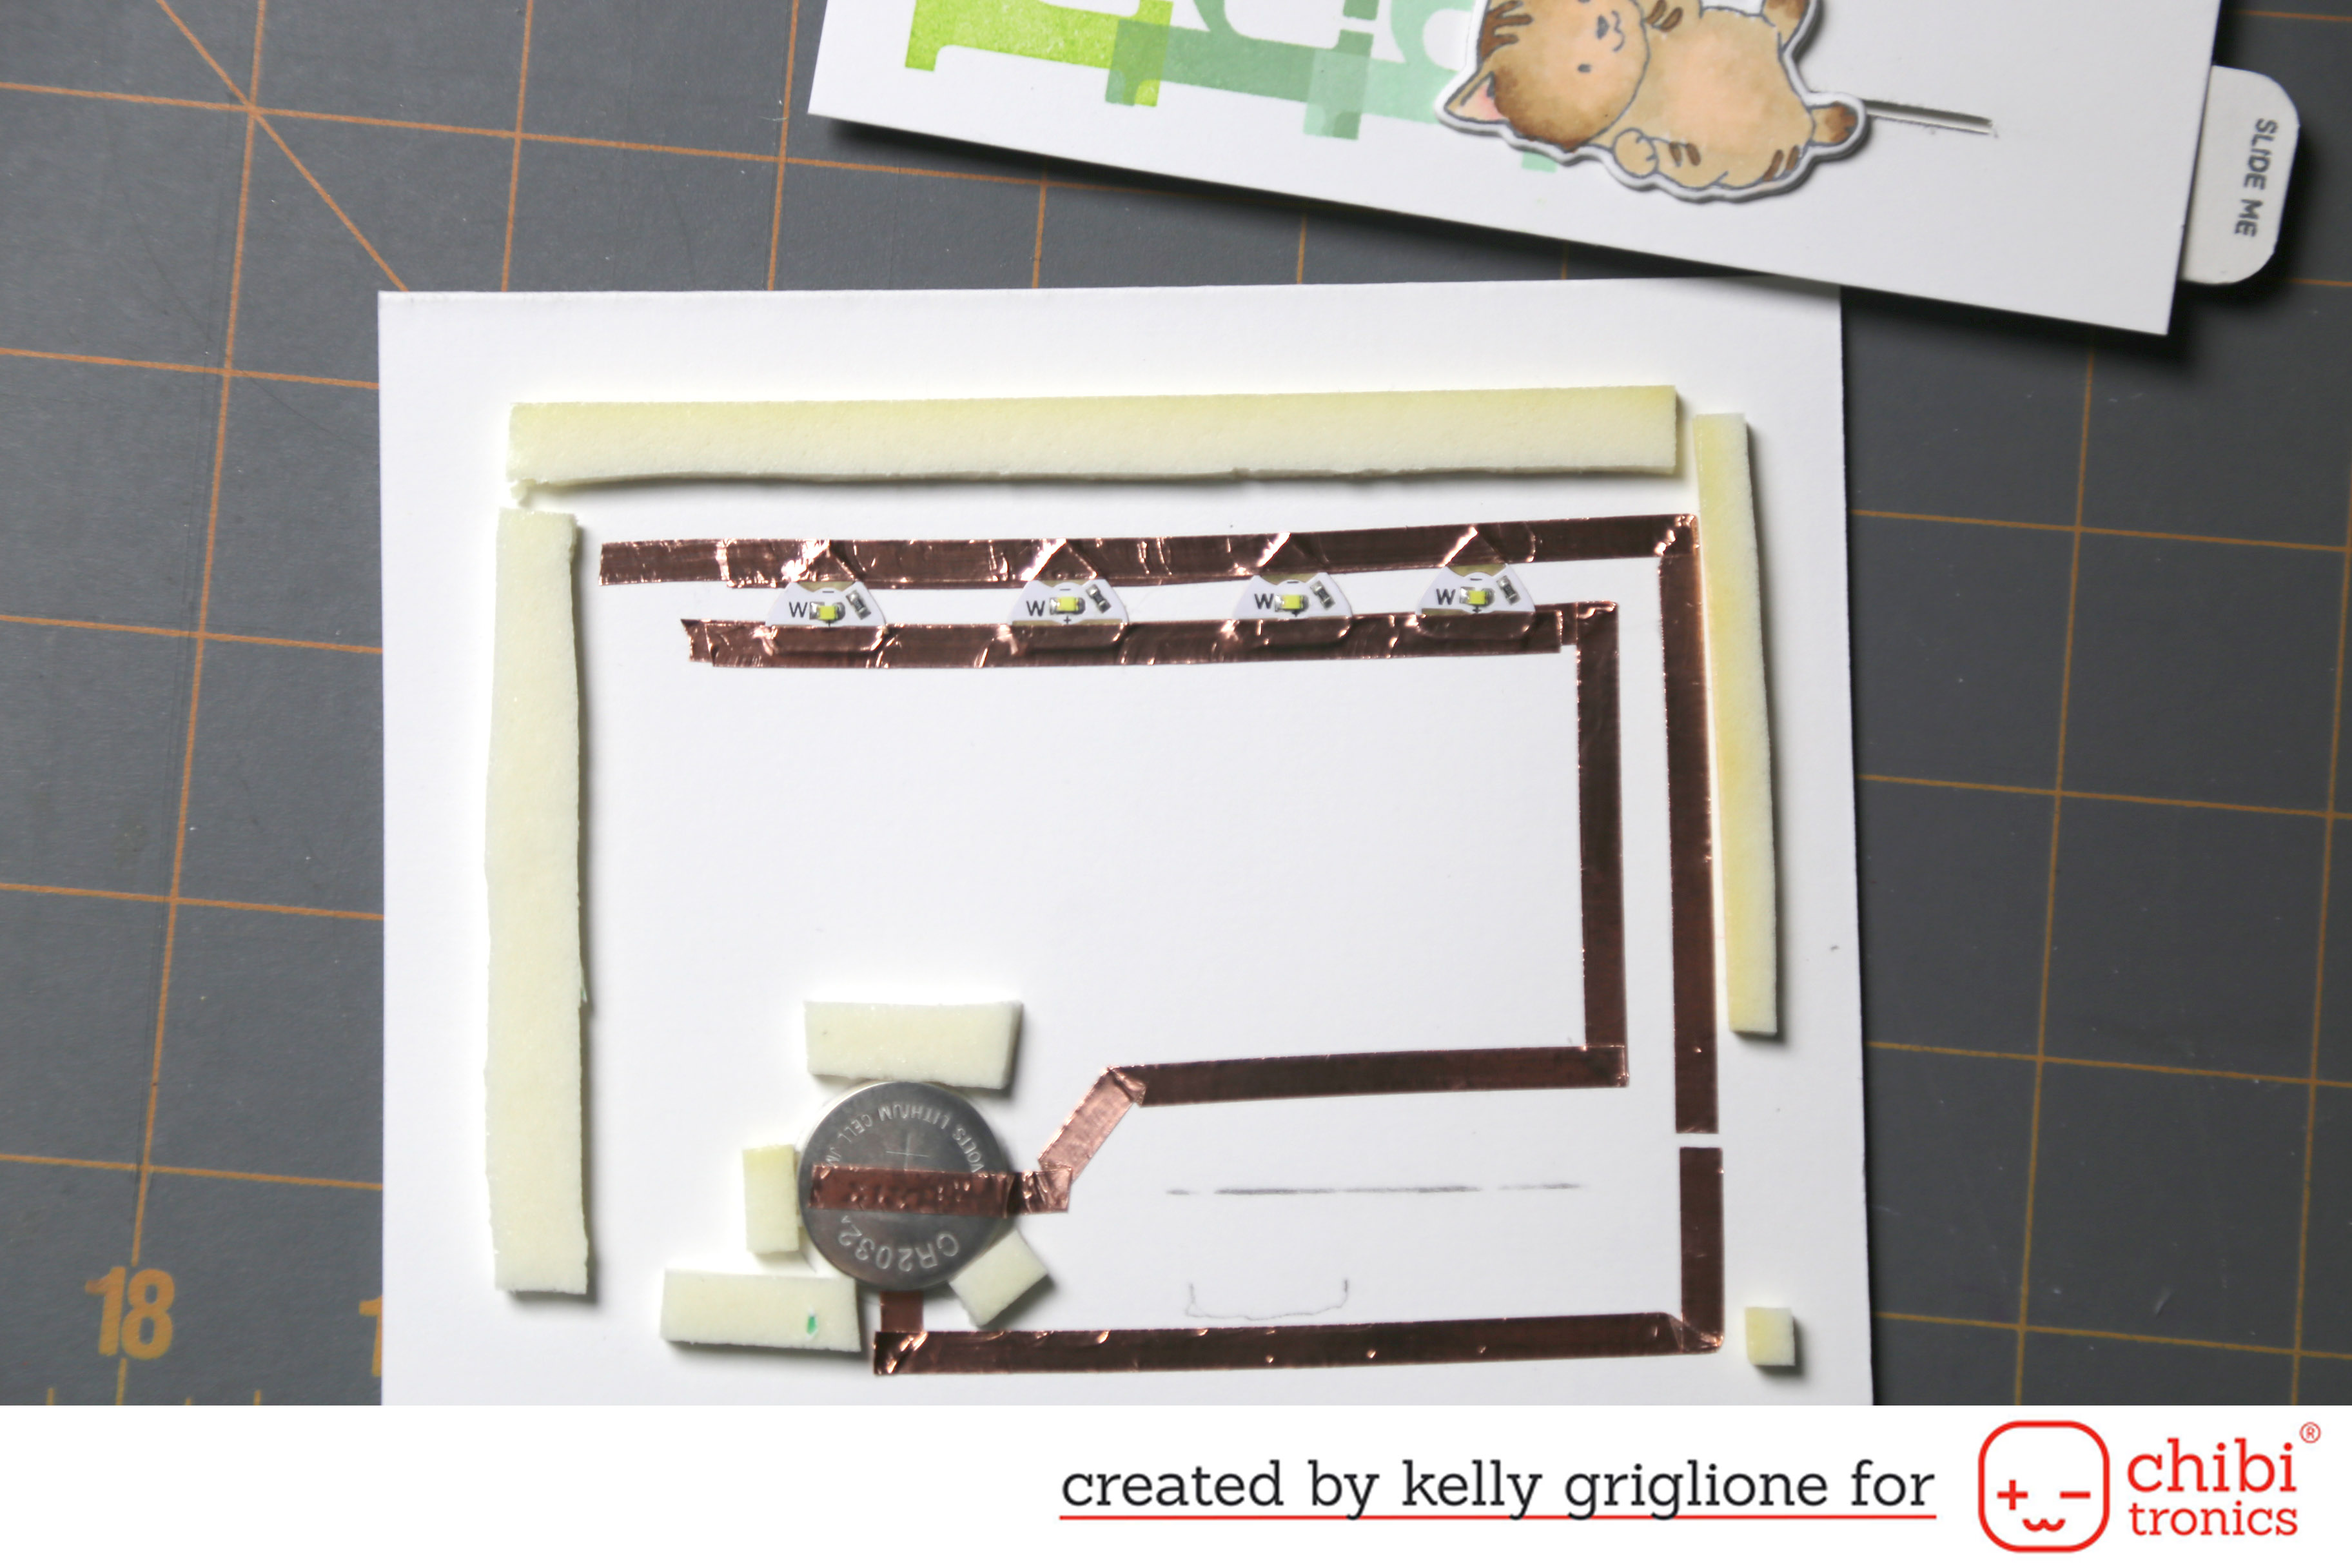 I add foam tape, taking care to add some all around the battery so it has additional support when the card is standing on display. I’ve left a gap in the foam tape on the right side to allow for the slider.
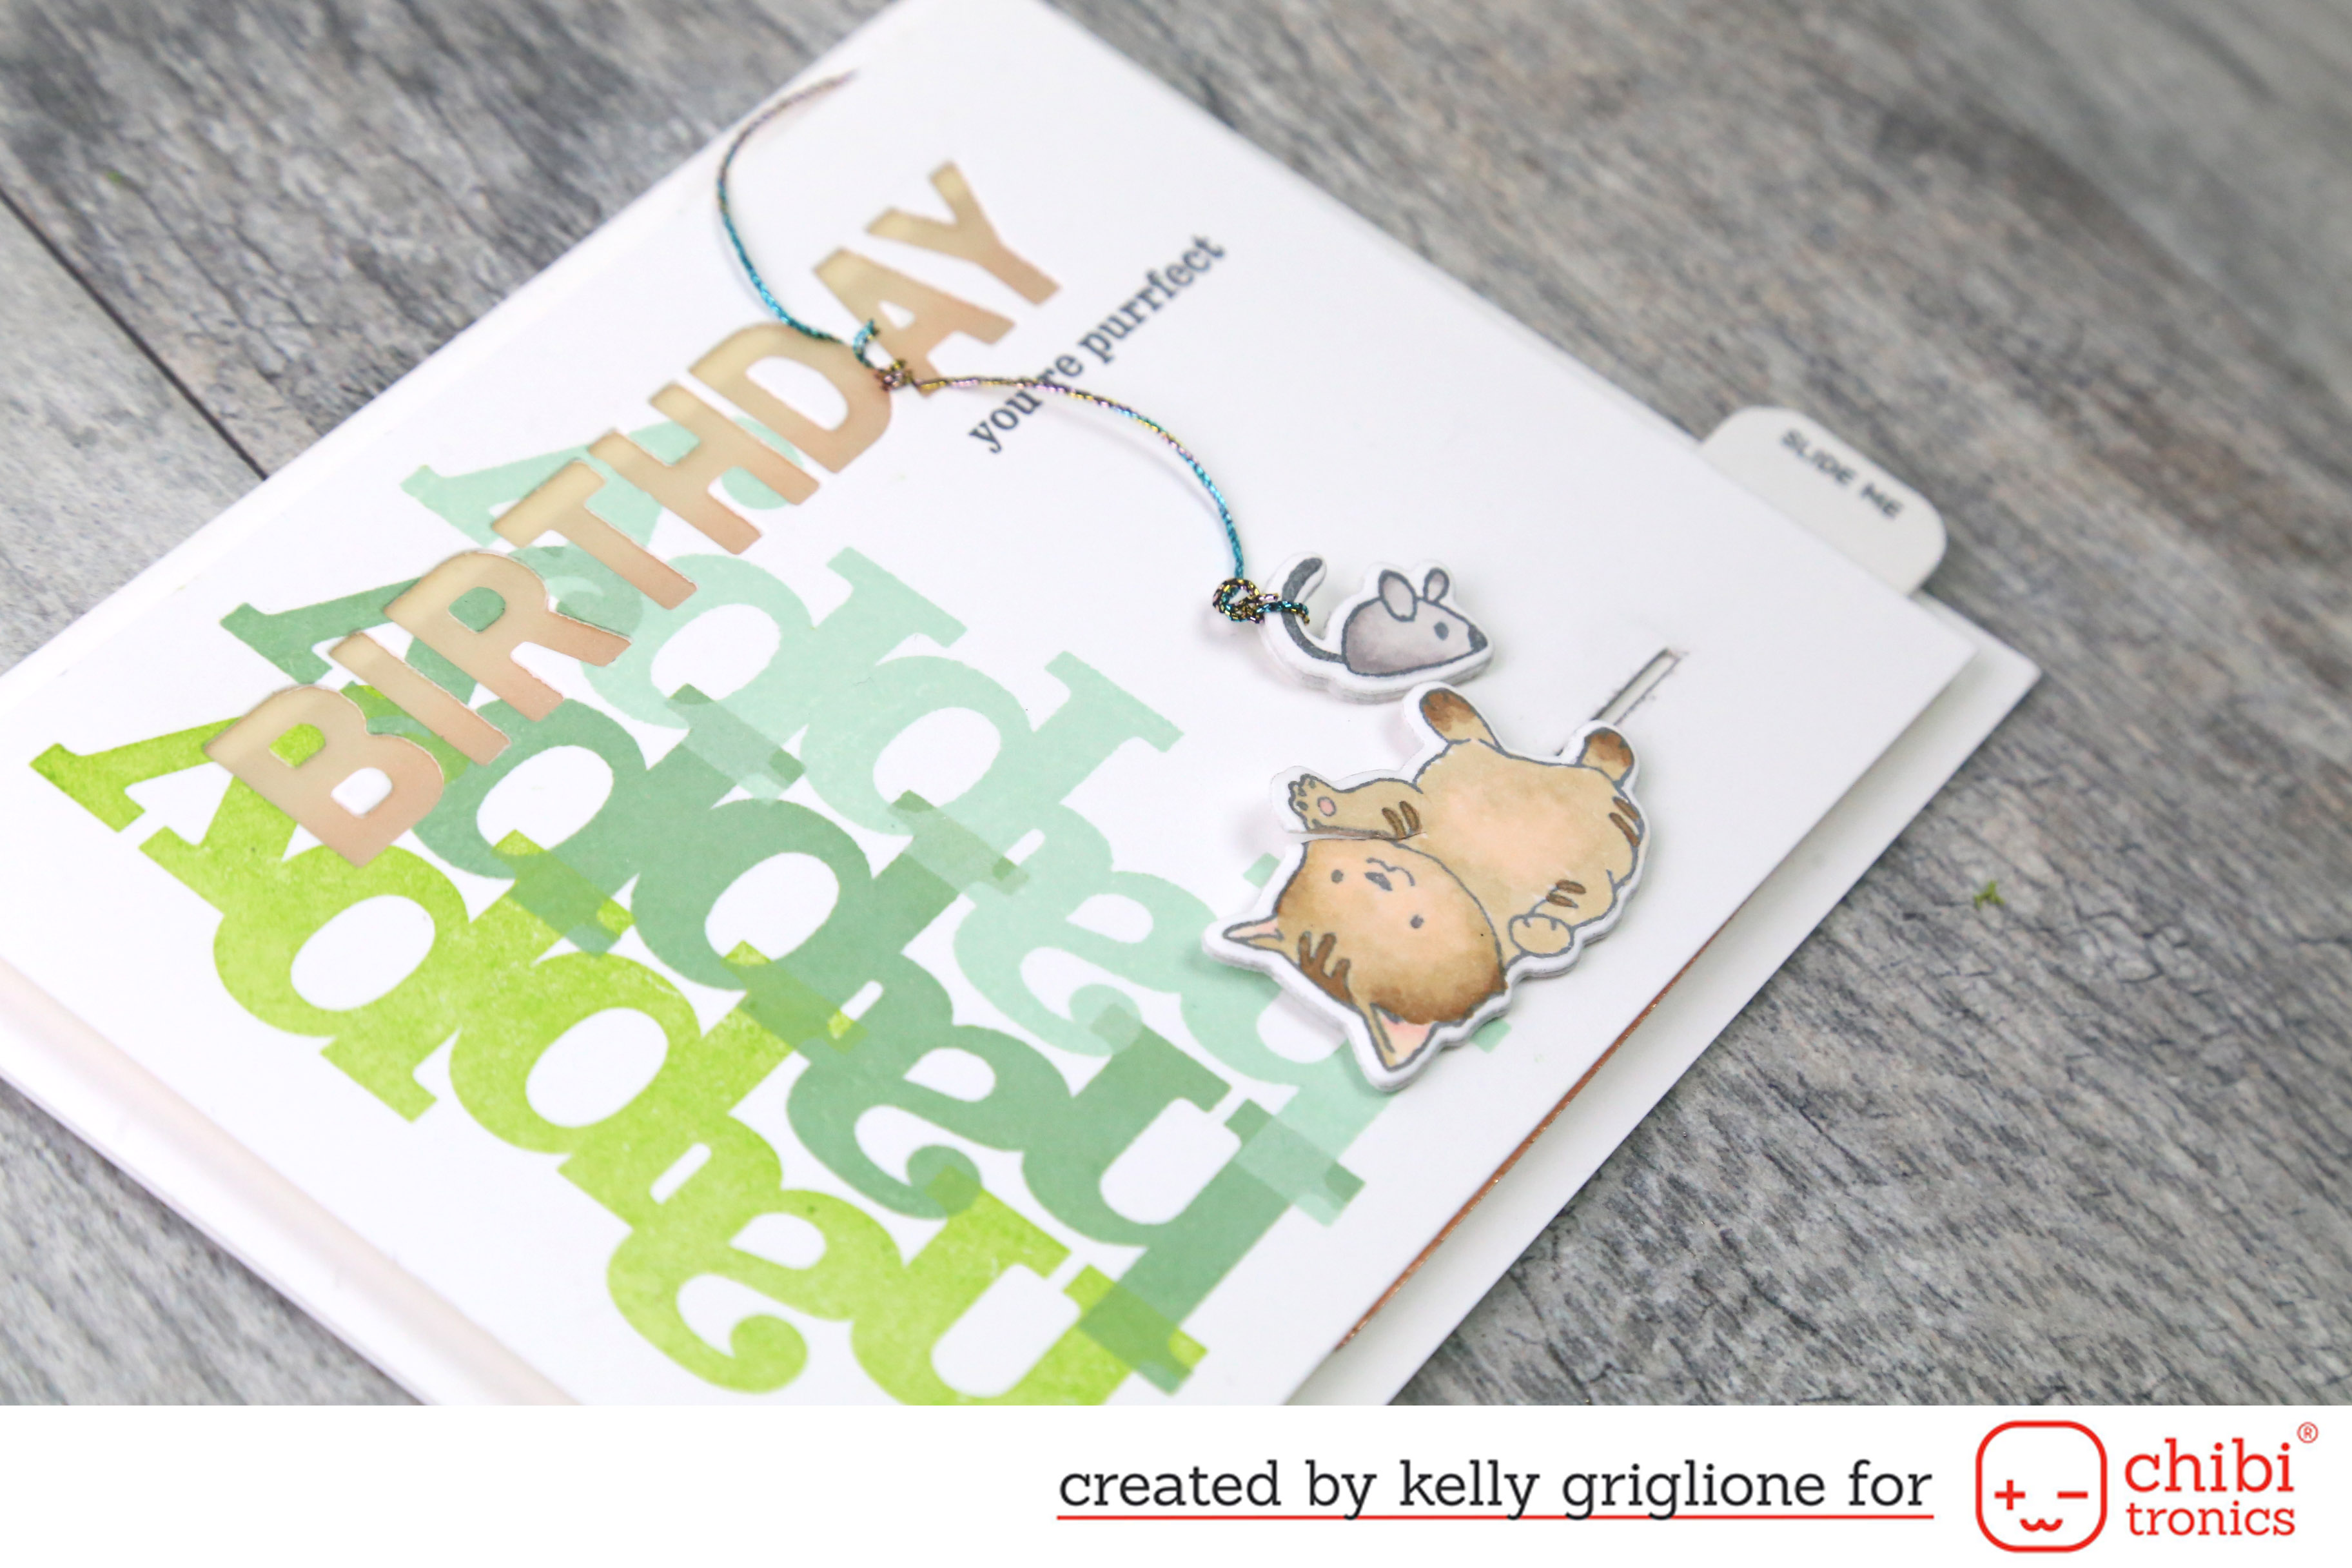 Finally, I add the panel to the top of the card base. I really like the different interactive elements going on here … the mouse dangling from the sentiment, the kitty sliding back and forth, the mouse moving when the kitty slides past it, and of course the lights that turn on.
 This photo shows kitty’s paw bent forward a little. I also wanted to point out the cute secondary sentiment “you’re purrfect” under the lit birthday sentiment (also part of the Purrfect with Evelin T Designs set).
It really never gets old when you see the lights go on and off the first couple times! Just like magic!
Thanks so much for looking!
-Kelly
Supplies used:
In a Word: Happy (Winnie & Walter)
Purrfect with Evelin T Designs (Winnie & Walter)
In a Word: Birthday Tiles Cutaways (Winnie & Walter)
Interactively Yours (Heffy Doodle)
So beautifully done!
Kelly, you are so very creative! I love everything about your card. Someone will be very lucky to receive this! Thanks for sharing.