
Hi Everyone! This is Tiffany and I’m here on the Chibitronics blog today. I have a pretty simple interactive card featuring a Christmas fairy and candle that lights up. The stamp set I am using today is from SSS Magical Wishes stamp set and it is the perfect stamp set to use with Chibitronics LED lights.
To make my card I stamp my images onto my white card stock and color it in using copic markers. Then I mark where each of my light source is and mark it into my card base. That is where I will place each of my white LED stickers and last mark where I will place my battery.
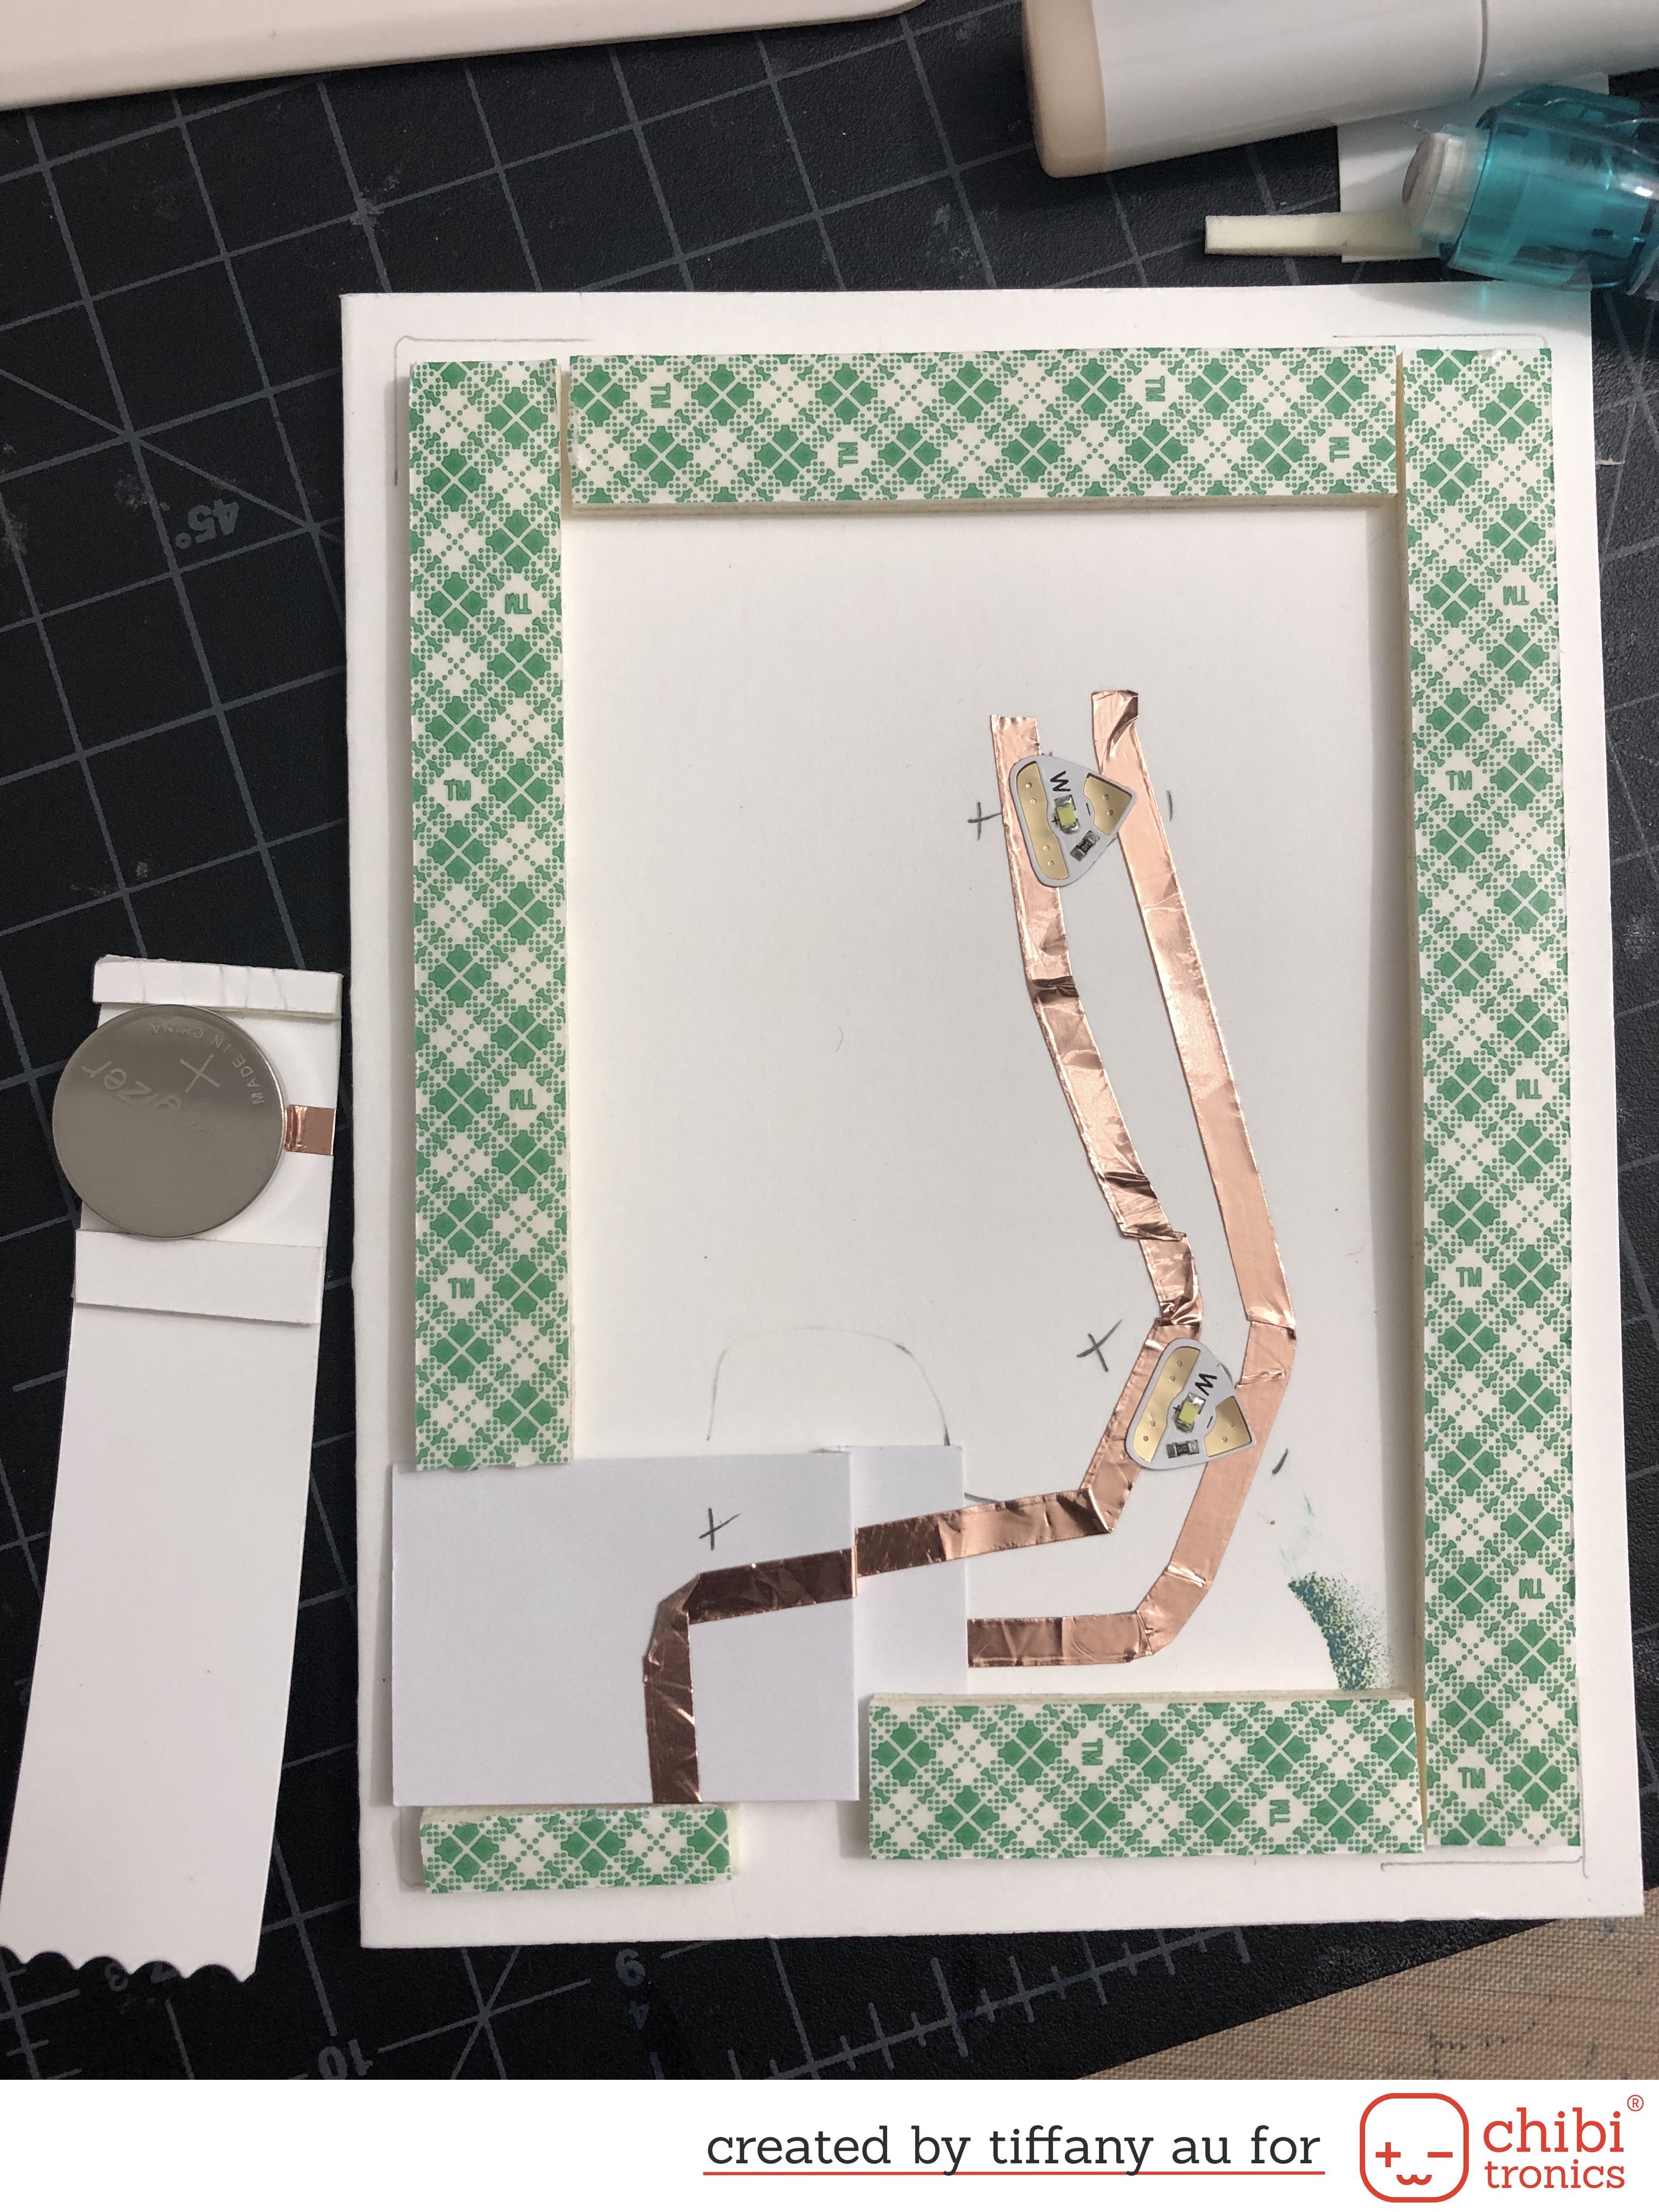
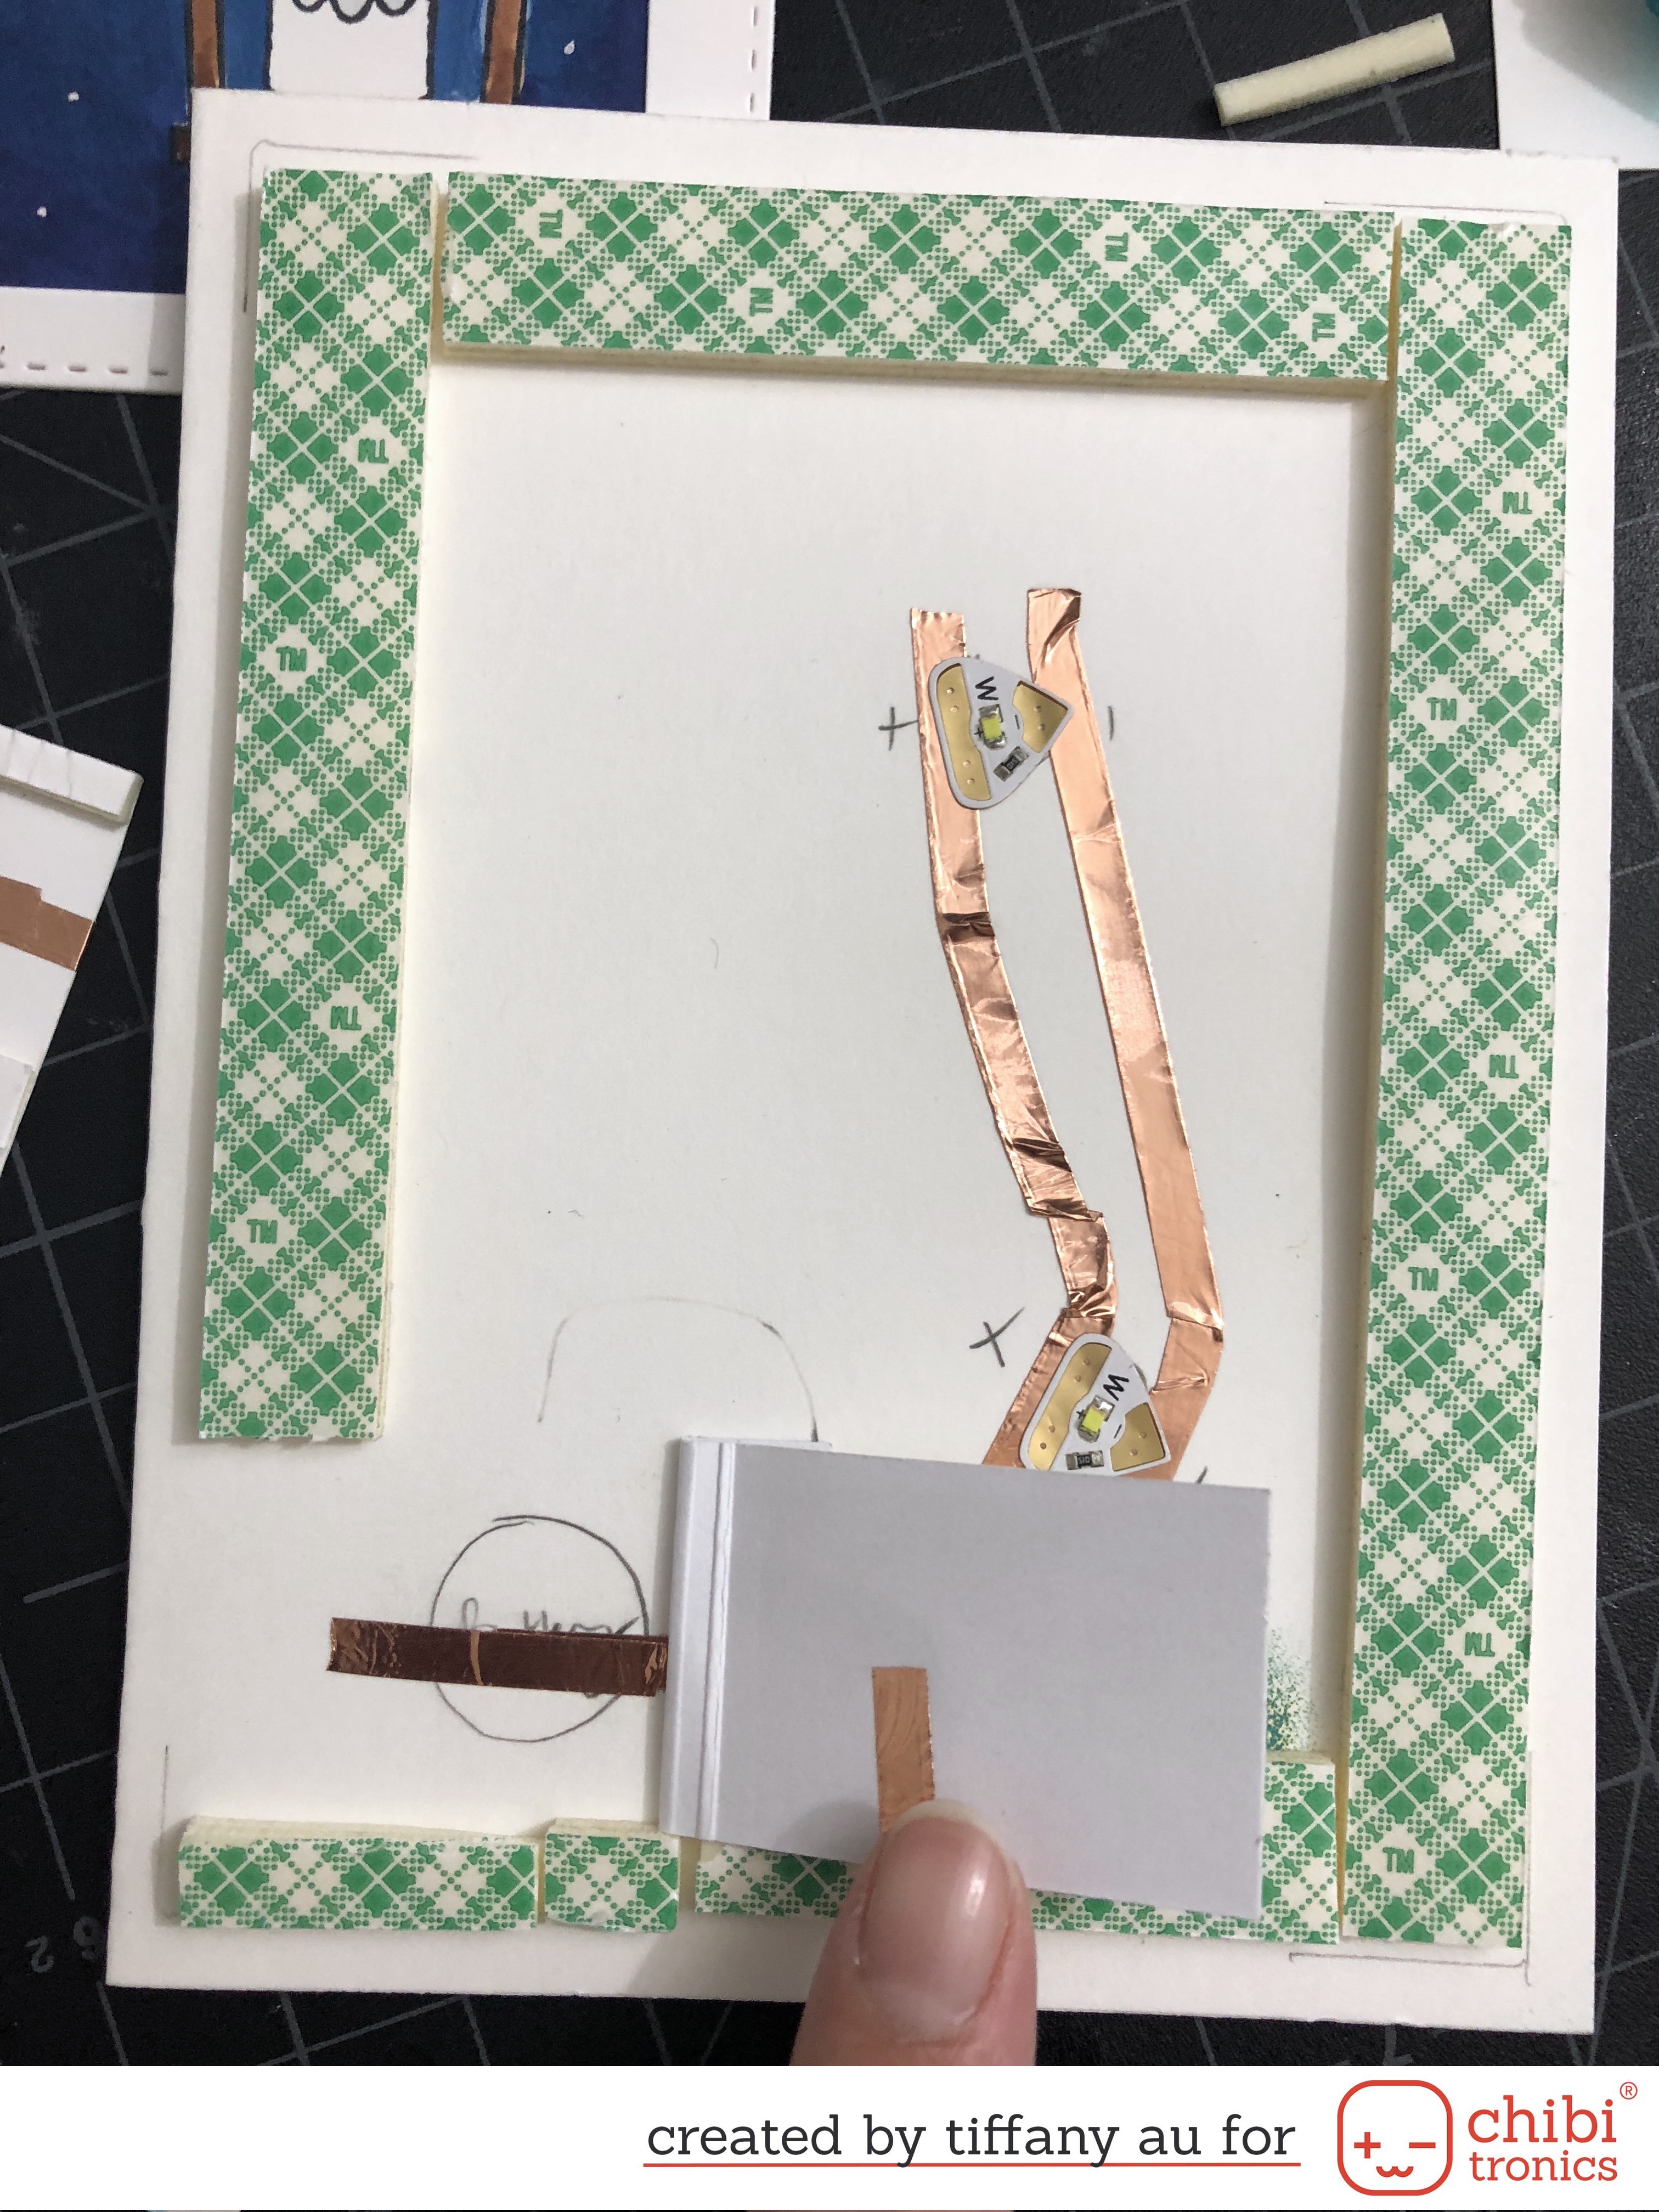
To create my circuit I first connect the negative end of my LED stickers to the bottom of my battery holding area and then tape down a piece of card stock down on one side. Next, connect the positive side of my circuit to my battery by taping down the copper tape over my battery holding area and under it. I then placed down double layers of 3M foam tape around my card base. To create my battery slider, I took a piece of card stock trim down to 3/4″ width and placed a piece of foam tape on either end of my battery .Then wrap a piece of copper tape around the middle thus allowing the copper tape touch the negative circuit. The battery slider is use to replace dead batteries.
I finish off my card by taping down my front panel and adding a tiny little red tag to my lantern.
I hope you enjoy my tutorial and here is a list of the supplies I used:
- Chibitronics Starter Kit
- Chibitronics White LED Stickers
- Chibitronics Copper Tape
- 3V Coin Battery
- Simon Says Stamp – Magical Wishes
- Copic Markers
- 3M Foam Tape
Such a pretty card and the fairy is so sweet! Love the lights shining out! xxx
This is an adorable card !
Loving the lights against the dark night sky! Very effective!!
How sweet and
love the lighting.
Cute fairy.
Carla from Utah
Wow! What a breathless card!!! Love so much the dark night sky!!!