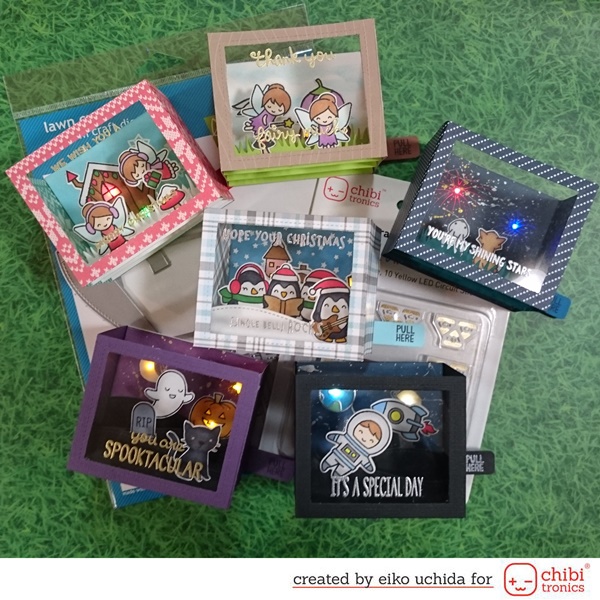
Hi, crafty friends!
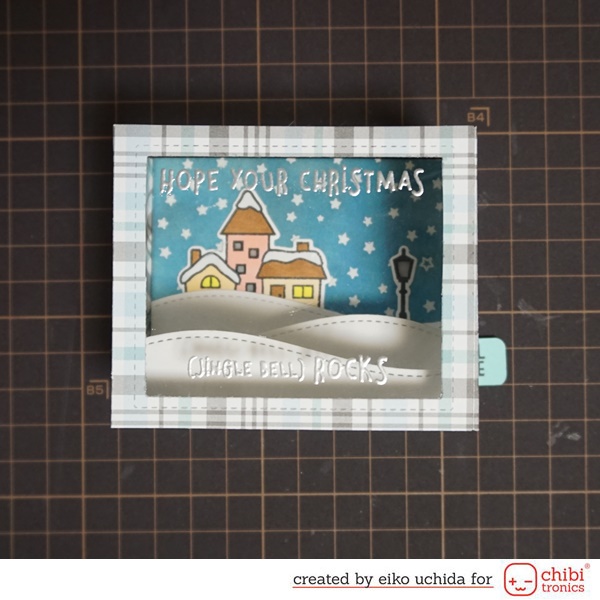
This is Eiko and I make light up shadow box card using Lawn Fawn stamps and dies.
When you pull the pull tab, the windows glow.
I will make the parts referring to the picture below.
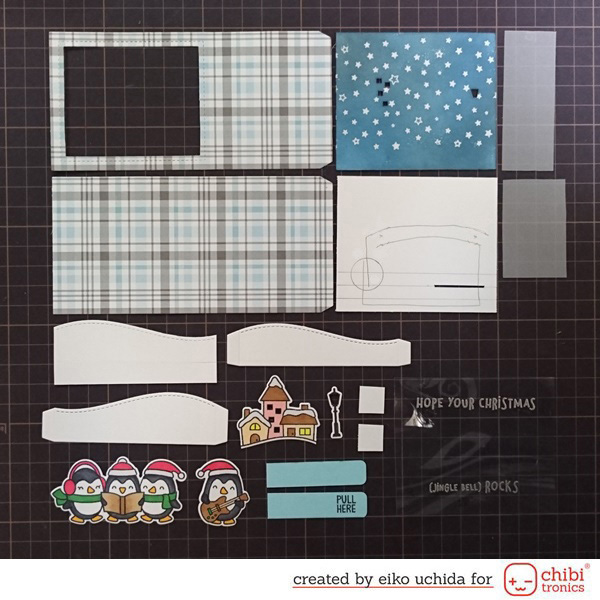
- Die cut a pattern paper with shadow box die.
- Cut the white cardstock for background.
- Stamp the starry backdrops with Versamark and heat embossing using clear embossing powder, and then coloring with salty ocean and black soot Distress Oxide ink.
- Cut the white cardstock for the circuit.
- Cut the white vellum paper for the windows.
- Die cut a white cardstock with hillside border dies.
- Stamp the penguin, house and lantern using Tsukineko Memento Tuxedo Black and color with copics.
- Cut out the windows with a craft knife.
- Pull tab parts (two 0.5 x 2 inch)
- Switch parts (two 0.5 x 0.5 inch)
- Cut the heat resistant acetate sheet and stamp the sentiment with Versamark, heat embossing with silver embossing powder.
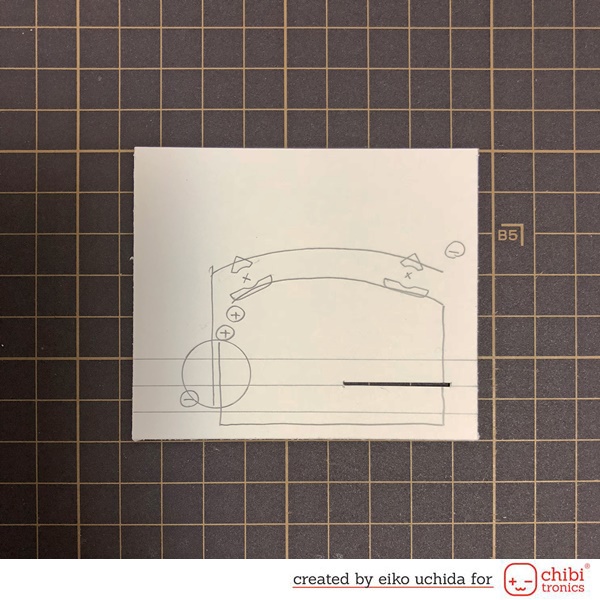
- Place the cover panel on the card base mark the position of the lights.
- Draw three lines for the slit.
- Draw a line every 1/4 inch from the bottom.
- From 1/4 inch from the right end, draw a 1 inch long line and cut out the 1/32 x 1 inch slit.
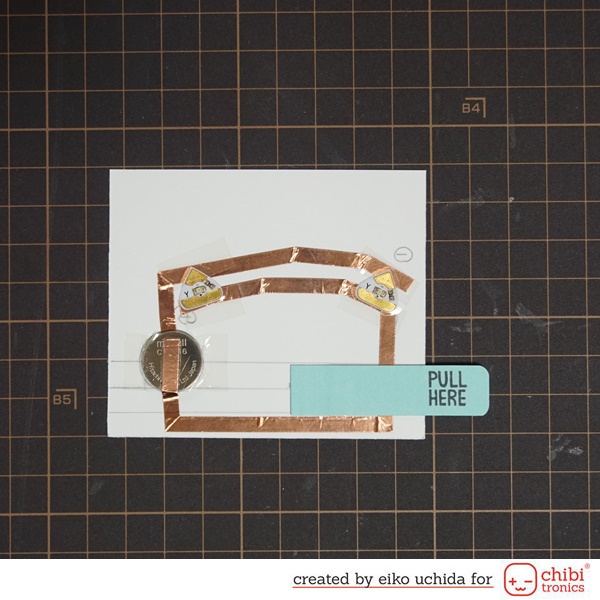
- Mark the position of the battery and Chibitronics and draw the circuit with a pencil.
- Adhere a double-sided tape at the position of the battery.
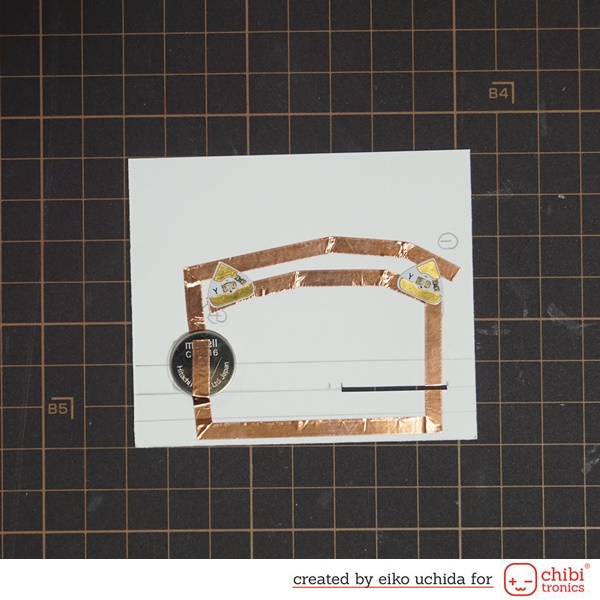
- Adhere the copper tape on the drawing path.
- In the position of the battery, adhere the copper tape on the double-sided tape.
- Place the battery on the copper tape with the positive side up.
- Adhere the positive side copper tape on the battery.
- Adhere the yellow Chibitronics on the mark.
Make the switch part.
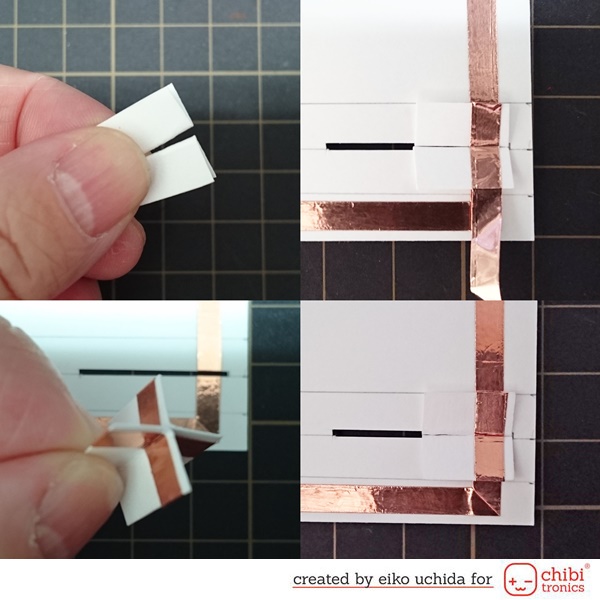
- Fold square parts in half.
- Insert the switch part into the slit.
- Adhere the copper tape to the same position as the copper tape attached to the circuit paper.
- Pull out the switch part from the slit and adhere the copper tape around the switch part.
- Insert the switch part into the slit again.
Apply a double-sided tape on the switch part and adhere the pull tab part on the switch part.
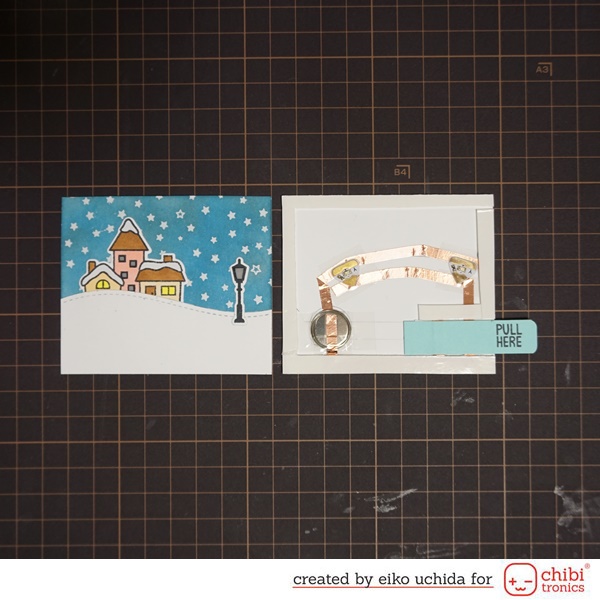
- Adhere the parts on the cover panel.
- Adhere the vellum paper on the back of the windows.
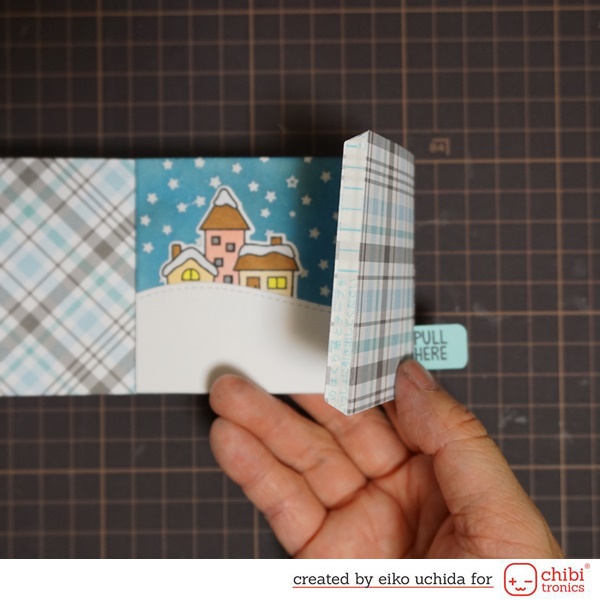
- Adhere a thin foam tape around the card base.
- Adhere the cover panel on the card base.
- Adhere the acetate sheet on the shadow box.
- Make a slit for the pull tab on the shadow box part.
- Apply the double-sided tape on the back of the card base.
- Through a pull tab on the slit, adhere the card base to the shadow box.
- Adhere the hillside border parts on the shadow box.
- Adhere the tabs with double-sided tape.

Adhere the penguin parts on the hillside border parts.
I finished it!
Be sure to check out the whole video tutorial for more details.
And please see my blog for detailed tutorial.
>>>How to make light up shadow box card.
Thank you for stopping by.
Eiko Uchida
~Supplies list~
- Chibitronics Red, Yellow, and Blue LED Sticker Pack
- 3V coin cell battery (CR1616)
- 5mm wide Copper tape
- Lawn Fawn shadow box card
- Lawn Fawn here we go a-waddling
- Lawn Fawn here we go a-waddling lawn cuts
- Lawn Fawn winter village
- Lawn Fawn winter village lawn cuts
- Lawn Fawn starry backdrops
- Lawn Fawn push here
- Distress Oxide Salty Ocean
- Distress Oxide Black Soot
How to make light up shadow box card.
These are adorable! xxx
Thanks for this very helpful post ! Shadow boxes are so cool!
Loving your wonderful creation!!!!!!