Hi everyone, it’s Nicorin, Yukiko I.
Spring has come, many birds are singing. Air is filled with happiness. In Japan, many schools start their new grade in April. So it’s the beginning season for many peoples like September in the US.
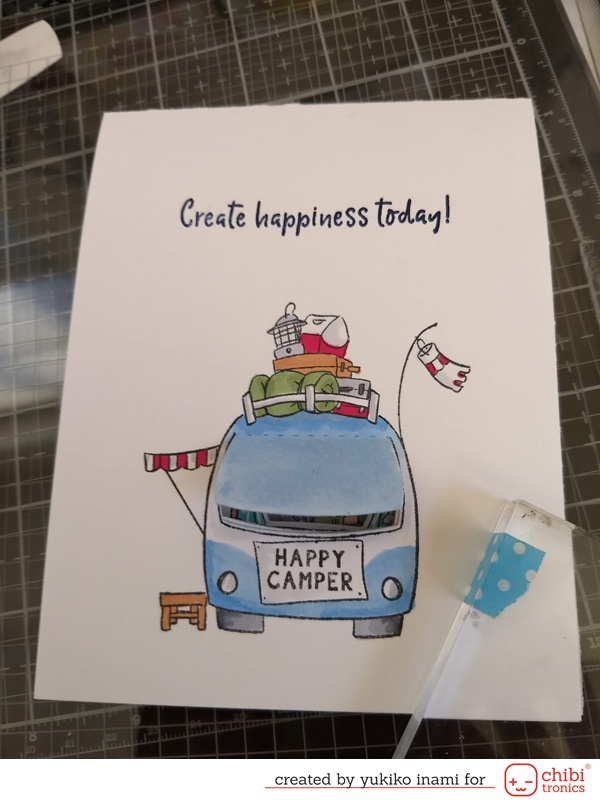
I chose the light up peek a boo card for my April project.
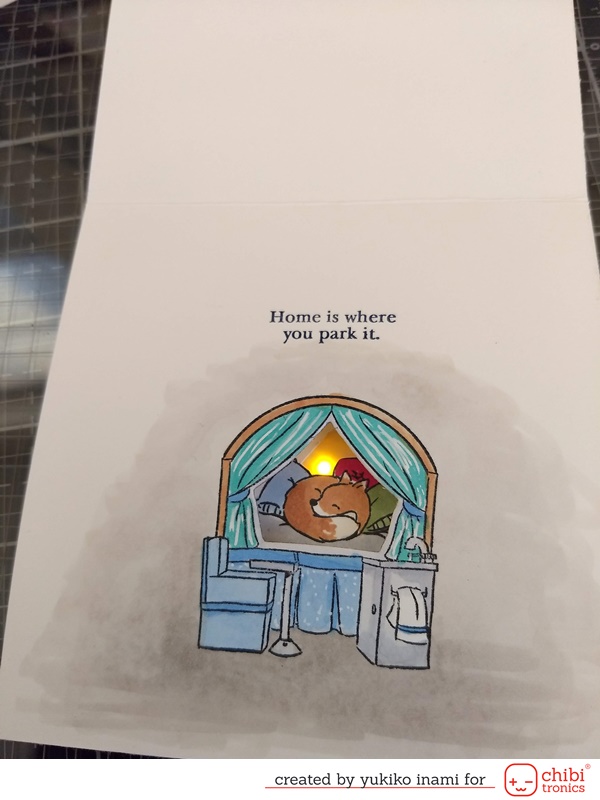
Peek the inside of the camping car! You can see the cozy room first and then when you open the card…. Oh my! You find an adorable sleeping little fox!

How to Make
・Coin cell battery 3V
・Foam tape
・Double-sided tape
・Copic Markers or other coloring tools what you like
Step by Step
1. Make parts as showing the below photo.
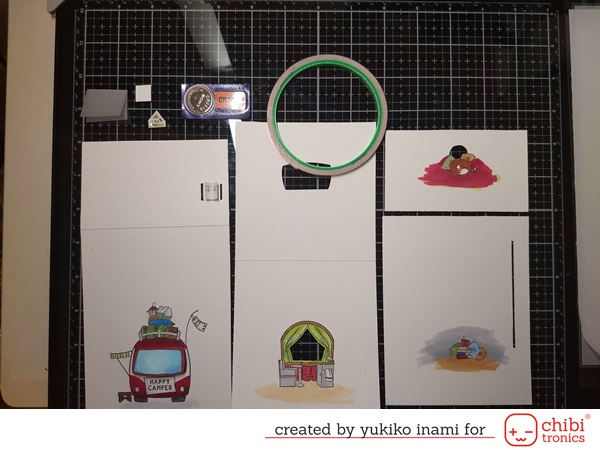
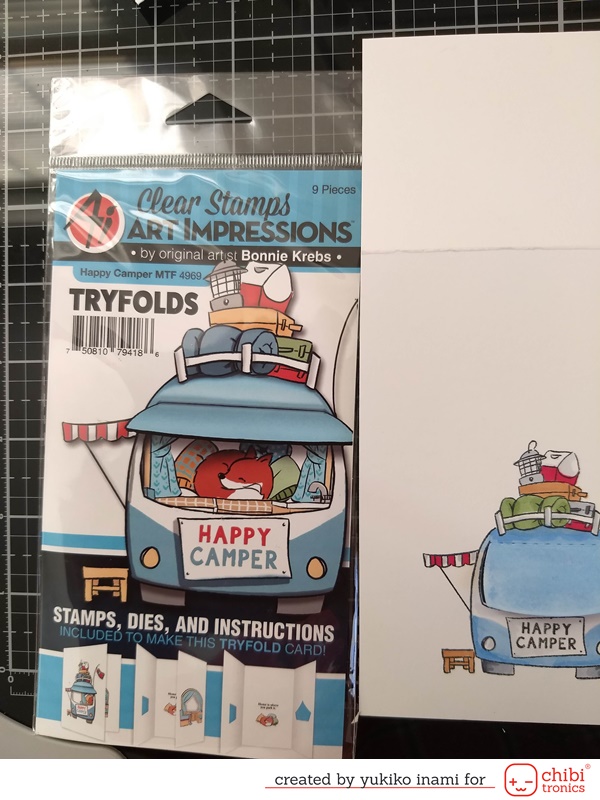
・Cover panel, 4 1/4 x 8 1/4 inches, score at 2 3/4 inches. Stamp the Camping car and cut with window die.
・Inner panel: 4 1/4 x 8 3/4 inches, score at 4 1/4, 8 ½ and fold. Die cut with the window die at the same place as the Cover panel. Stamp the room image inside the camping car another side, please refer to photo@ Decide the stamping place with the marking the window place.
・Sliding parts cover, 4 1/4 x 2 3/4 inches Stamp the Fox and make a hole for light up
・Back panel, 4 1/4 x 5 1/2 inches
・Card base, 4 1/4 x 5 1/2 inches
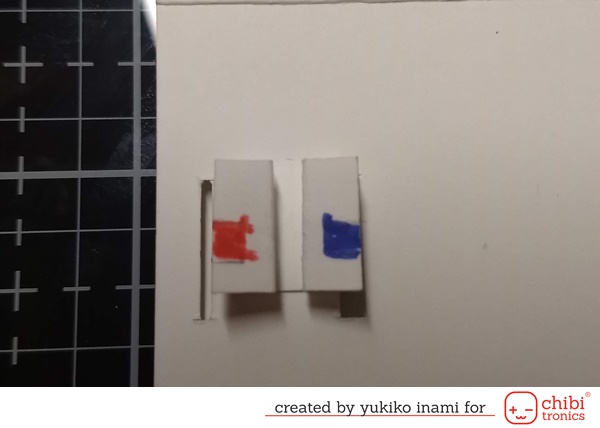
・Switch parts: 1 1/2 x 1/2 inches Score 1/4, 1/2, 1, 1 1/4 Fold to mountain, valley, valley, mountain

・white vellum for the window of light
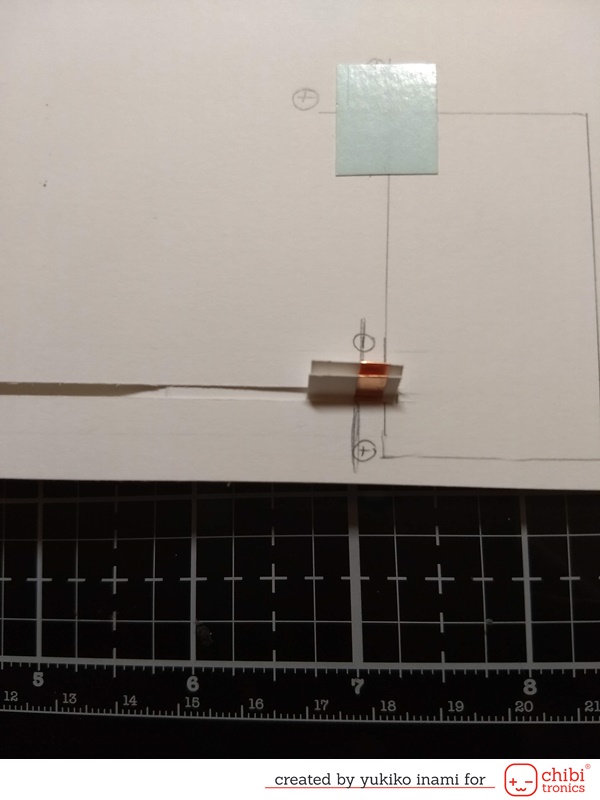
2. Drawing the circuit and cut some slits

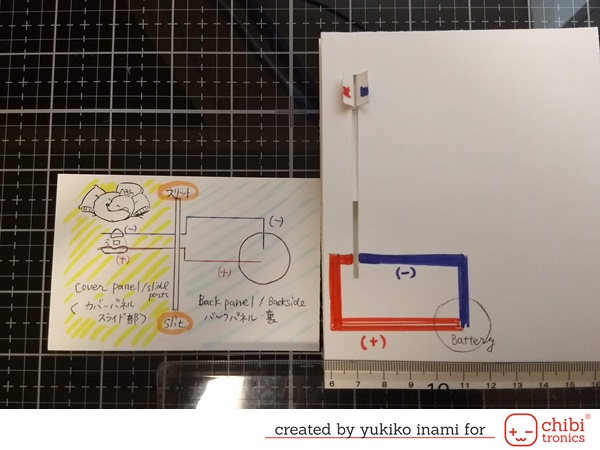
・Cover Panel:
Draw the vertical lines at 1/4, 1/2, 3/4 inch from the right end of the inside of the cover panel.
Mark 3/4 and 1 1/4 inch from the scoreline. You can see the 1/2 inches square.
Cut two slits on the outside edges of the square.
Mark the position of the LED sticker.
Draw a circuit connecting the LED and slit. The LED positive edge is connected to the outer slit and the LED negative edge is connected to the inner slit.
・Back Panel:
Draw the vertical lines at 1/4, 1/2, 3/4 inch from the left end of the back panel’s backside.
Mark 3/4 and 3 3/4 inch from the top of the card.
Cut out 1/16 inch (about 1.6mm) width slit 3 inch long.
Open the cover panel, this is the switch on position. Mark the position of the connecting site the cover panel and the back panel.
Draw a circuit on the back panel connecting the slit to the Battey. Confirm that the positive path goes through the outer slit and the negative path go through the inner slit.
Mark the place of the battery.
Set the double-sided tape on the place of the battery.
3. Assemble the panels (refer to the movie 3’05”-5’35”)
・Stick the cover panel on the inside panel fitting the place of the window.
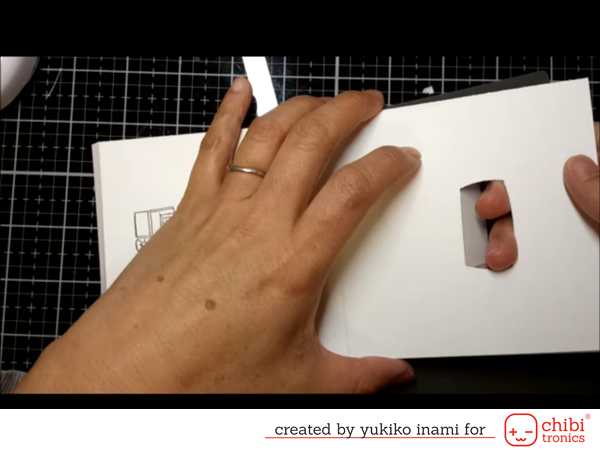
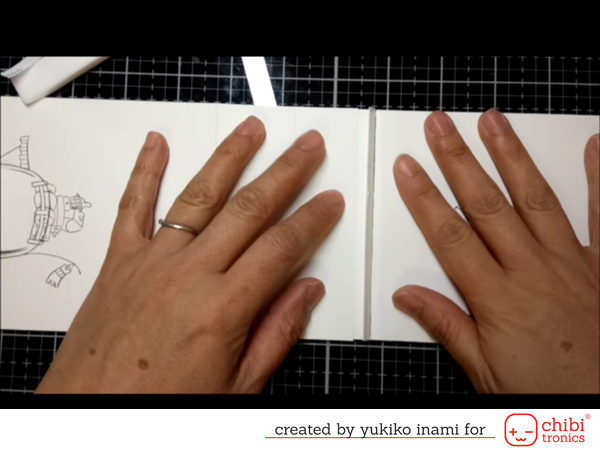
・Put the double-sided tape on the tab for sticking of the inner panel’s bottom edge.
・Peel off the backing sheet of double-sided tape and set the inner panel and the back panel on the table, then fit the edges of the two panels and stick on. (refer to the movie 3’57”-4’45”)
・Put the switch parts in the slit and stick on the backside of the cover panel.
You can find the just good point as showing. On the position opening the cover panel, peel of the backing sheet of the switch part and stick it to the cover sheet.

Sometimes, the slit cutting or the paper thickness and the folding the paper make a little off position. But you can adjust the little gap in this way. Of course, you don’t need this way, if you can draw perfectly and make flawless beautiful slits. I am an easier person so sometimes make a little out of position.

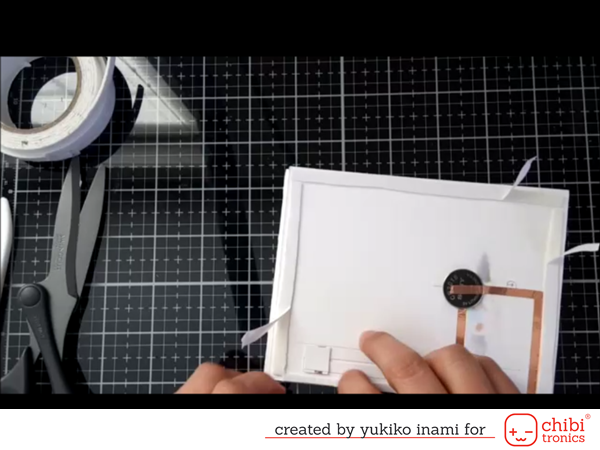
4. Making the circuit (refer at around 6’29”-10’30” of the movie
Stick the copper tape on the drown path. Then put the LED stickers on the mark.
・Cover panel
Stick the copper tape starting from LED sticker to slit, through the slit and switch part.
Make sure the path on the switch part is completely separated half and half, the right side is for the positive path and the left side is for the negative path.
It is a really important point of this switch in this card. If you connect the left side and the right side, the LED can’t light up because it’s a short circuit.
Set the LED sticker on the mark.


・Back panel
Peel off the release paper on the Battery place stick the negative path copper tape start from backside go through the slit and negative side of the battery.
Place the battery on the copper tape with the positive side up.
Stick the copper tape on positive path copper tape from the backside go through the slit and the positive side of the battery.
After you confirm that the lights work well when the slit switch slide in the place, reinforce the connection of LED stickers and copper tape path with sticking the short copper tape on each edge of LED stickers.

5. Coloring; you can do this whenever you like. It is just a fun process. Please enjoy your relaxation and healing time!
You did it!
We provided the peek a boo card for the advanced class in Creativation. It is a little hard to make totally strict beautiful work. But no problem, a little gap can be a charm. Take it easy! You can enjoy making this interactive card.
And if you feel it’s too hard to see it’s a system, I recommend that you make a peek a boo card without light introducing the making movie by Jennifer Mcguire first.
Today’s TIPS:About the switch separated left and right
By the way, this system of the switch was made by Eiko. I’d like to tell you what is great this switch. If you like it, it’s my pleasure.
You need the paths for both the positive and the negative on the switch to light up LED on the moving panel. Eiko made the light up ballon card with a switch having double parallel paths.
And she had evolved it to the more sophisticated one showing the cute peek a boo card. The switch is separated left and right. The left side of the switch is for the positive path and the right side is for the negative path. Wow! I can’t resist shouting!
I’ draw a schema. Please check it with the circuit.
First, the right half of the schema (sky blue diagonal pattern area) is the back panel.
The positive path start from the battery goes to slit drawing in red. The negative path start from the battery negative side goes to slit drawing blue.
Next, the left half of the schema (yellow diagonal pattern area) is the slide part of the cover panel. When the switch part slide in the position of connecting both circuits on the cover panel and the back panel, the circuit is completed and turn on the light!
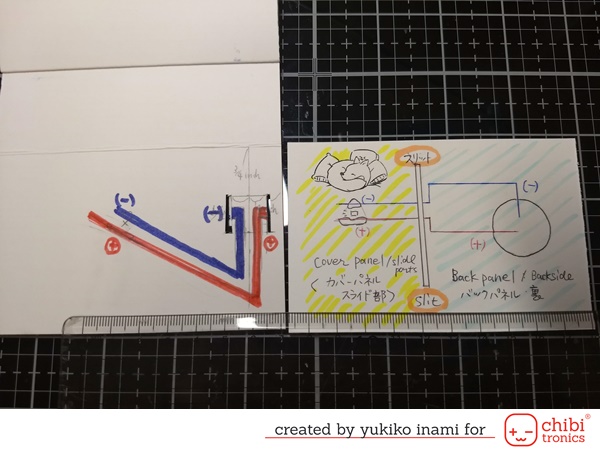
And when you make the path connecting the light and left as like a usual switch, what does happen?
It is the short circuit so LED will not work. The electron is lazy so that if there is a short circuit, doesn’t go LED. I’ll show you the movie showing what will happen in the short circuit.
Is this exposition for nerds? But you can realize what it the short circuit, please check it out!
Is it cool? This separated switch on the sliding panel is wonderful more than meets the eye. I hope you try it and it makes you ooh and ahh!
Thank you for stopping by! Have a sweet spring day!
Nicorin / Yukiko I.
This is so amazing!!!!!! And now….I need to buy these stamps! LOL
This is just adorable! Love the Art Impressions stamps you used! The light makes the card so fun!