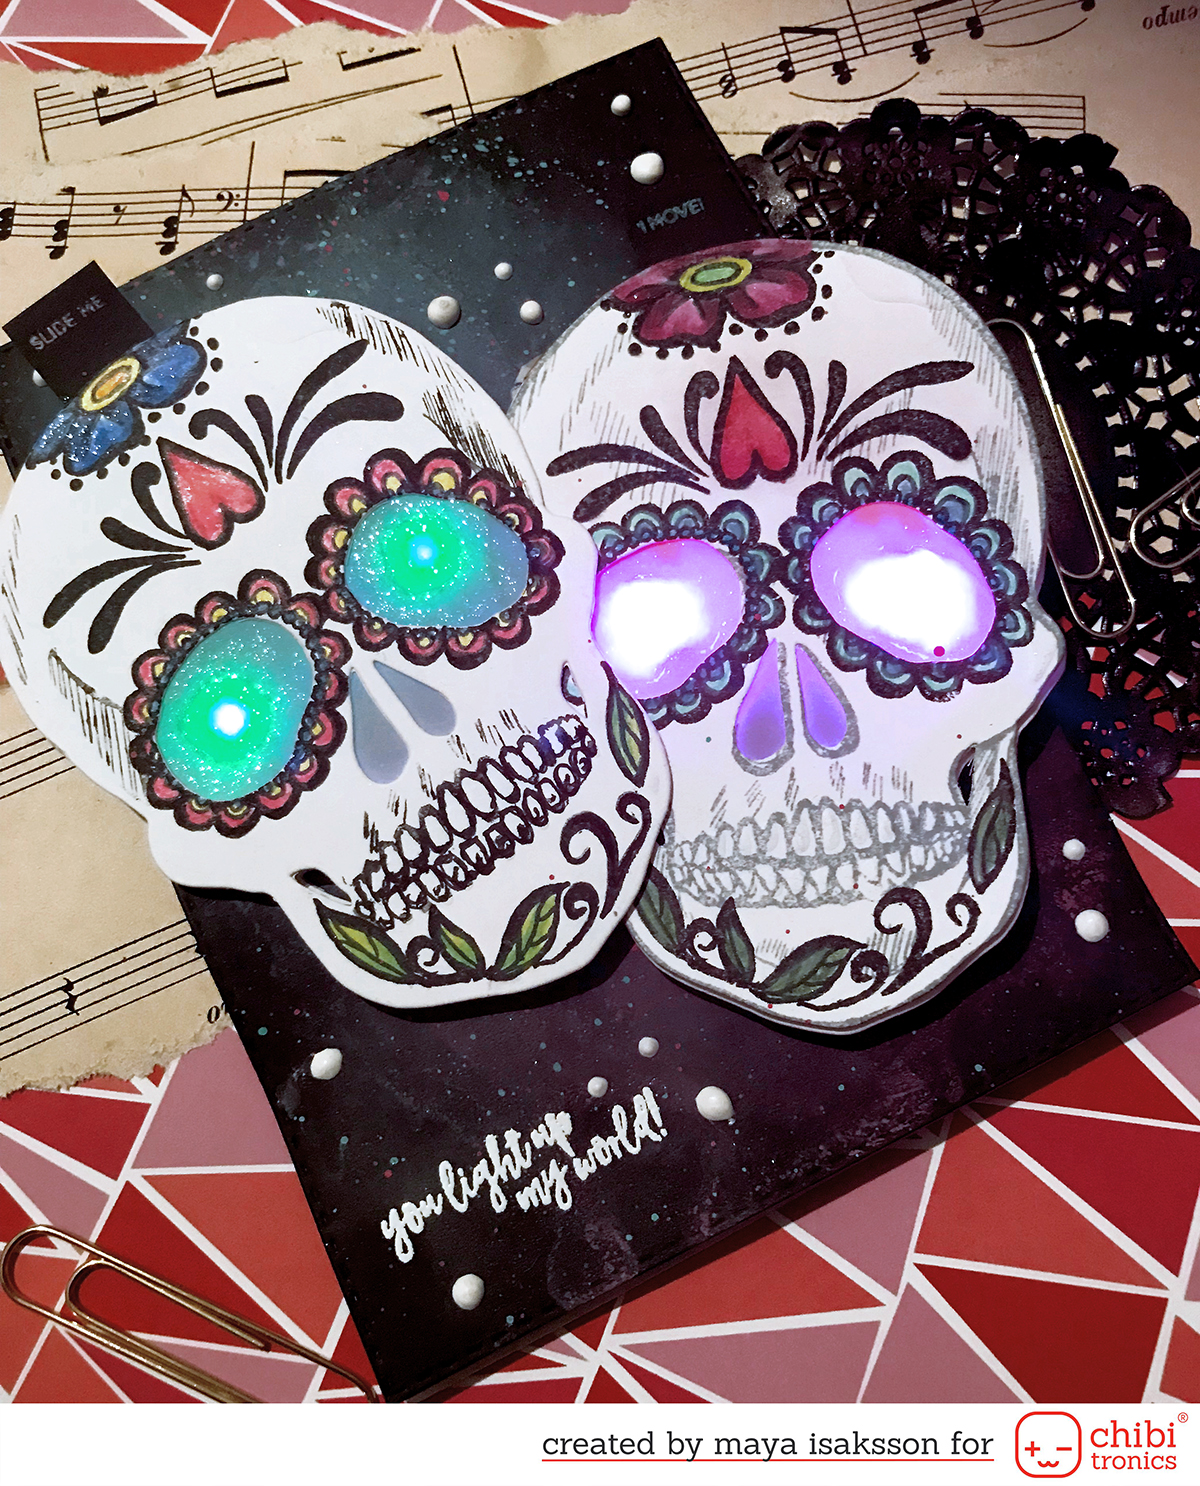
I love experimenting and trying to come up with new ways of doing things. These sugar skulls was an idea that I got and needed to try to make. The idea is that the skulls are attached on sliders and the sliders are also the switch. So you can move the heads up and down making them light up or turn off the light that way. I also added an effect sticker with heartbeat effect because let’s face it, effect stickers are super fun!
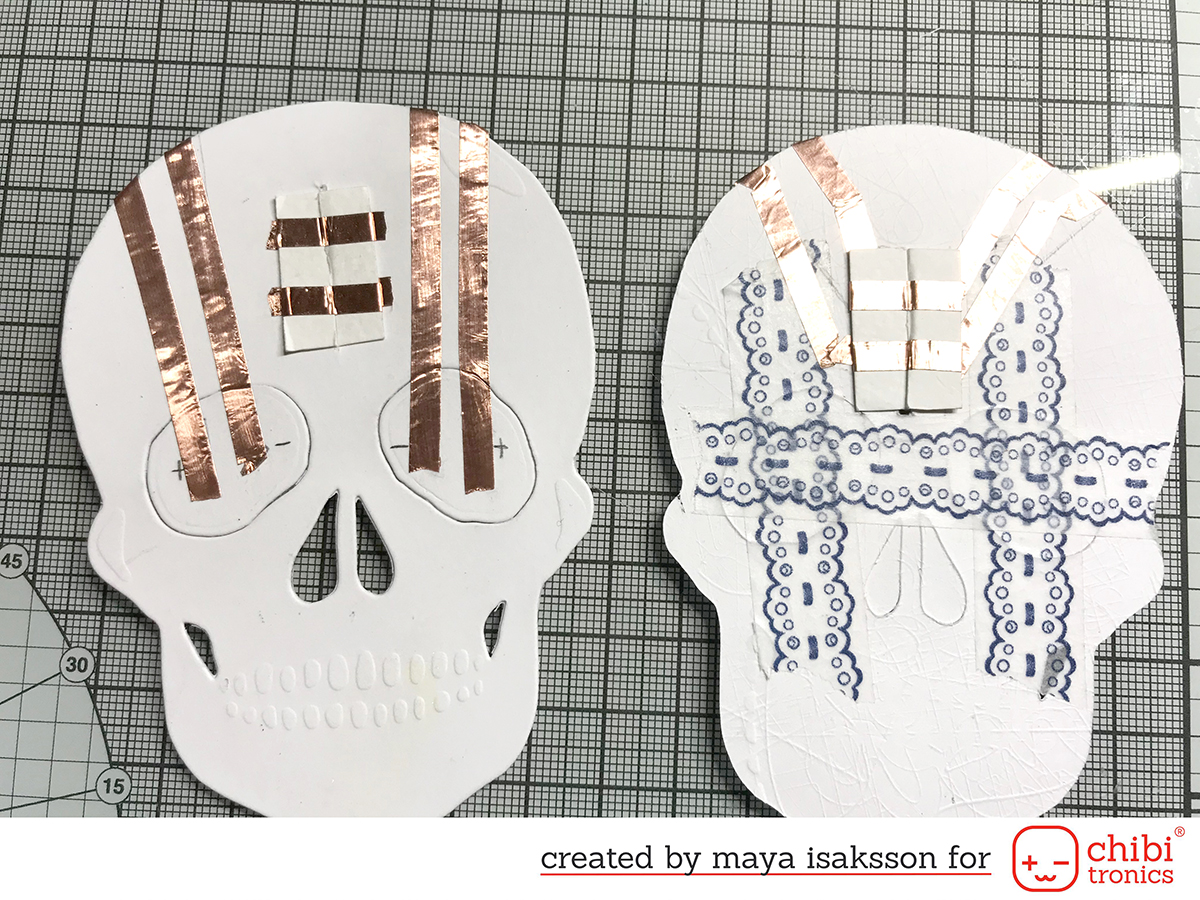 First step was making the actual skulls. I colored two skulls and diecut them out, and then I made two extra for making the circuit and attaching the LEDs to. I taped the eye holes back in place so I could put the LEDs there. That’s what the washi tape on the backside is for. To connect the skull with the inside of the card I made the X-shaped switches that I learned from my team mate Eiko. I thought it would work well to both connect the circuit to the one inside the card and also allow the skulls to slide back and forth. It will make more sense when you see the other steps, so don’t worry if it’s a bit confusing.
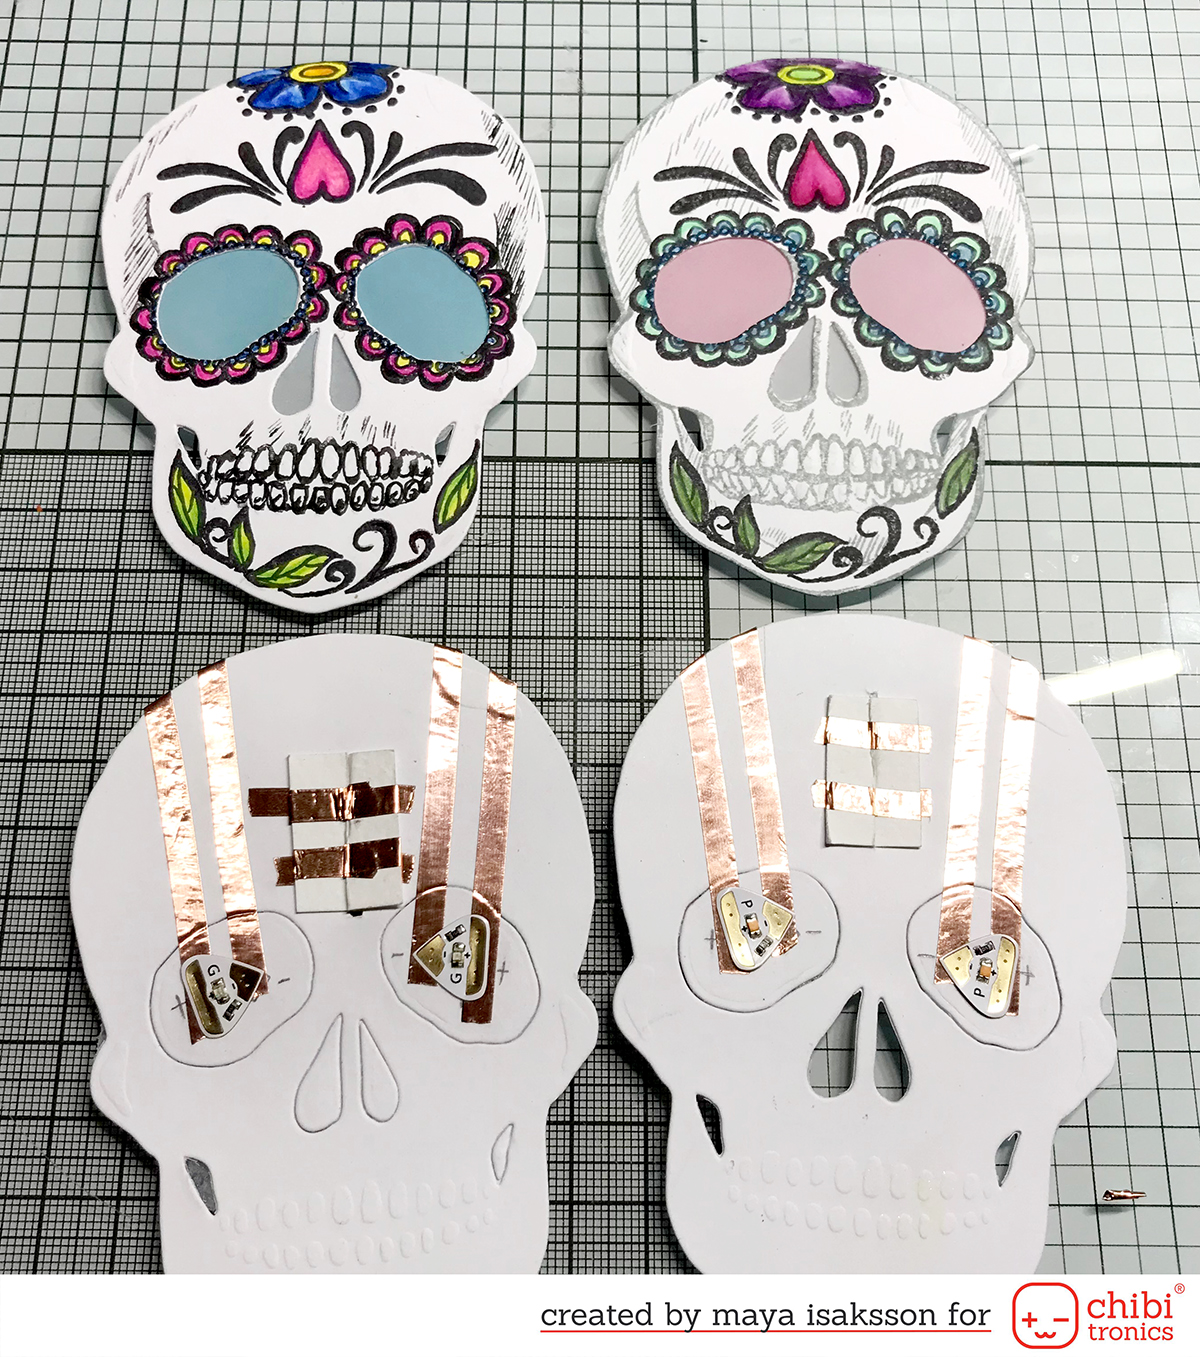
For the colored skulls I added vellum to the eyes to let the light through but so you can’t see the LEDs. I colored the backs of them using inks and also added glitter to them later so they sparkle a lot. To make the skulls a bit more colorful I used purple and green LEDs for them.
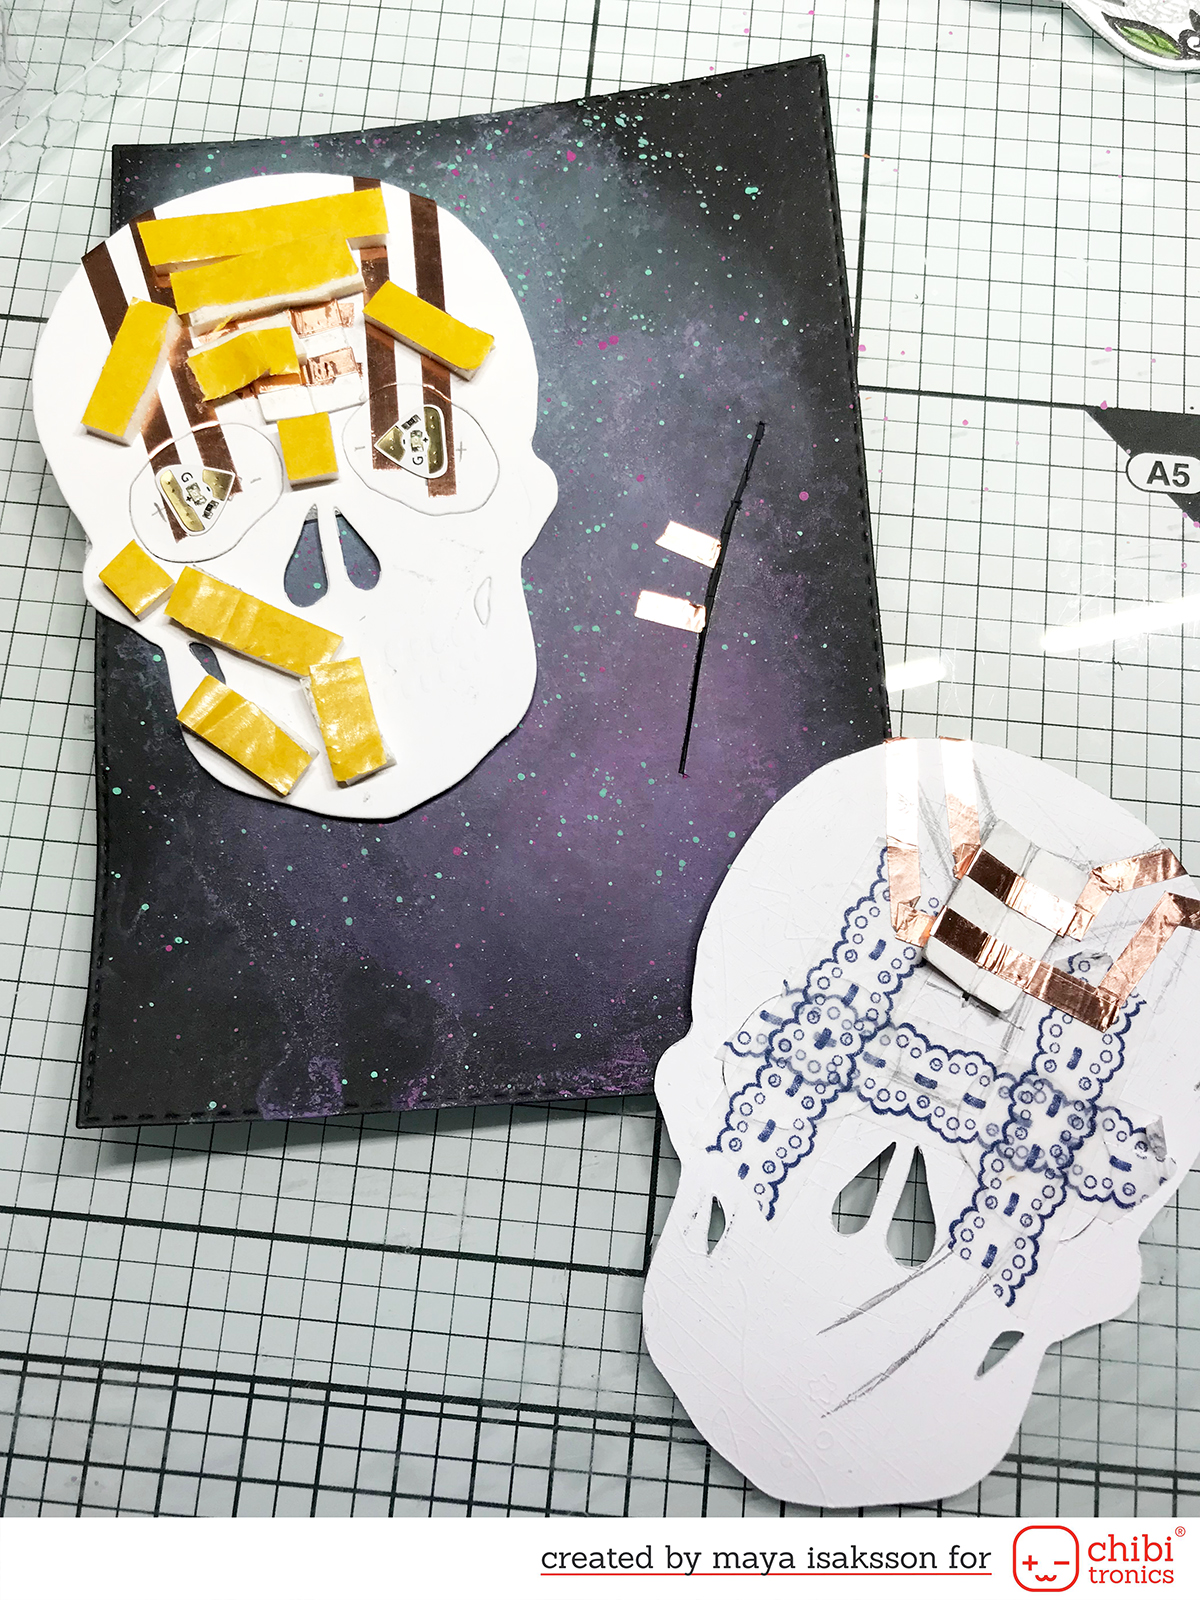
I cut two slits in the card front for where the skulls should slide. To make sure everything worked I waited to stick the front of the skulls down. As you might be able to see on the picture you can put in the tabs in the slit so they end up on the backside and keeping the skull secure while allowing to slide up and down.

Here’s the backside with the skulls attached. I added a foam tape to stop the skull, it was sliding a bit to far down too look good. After putting the skulls in the right position for having them light up, I marked the positive and negative pole with a pencil to know where to put my copper tape.
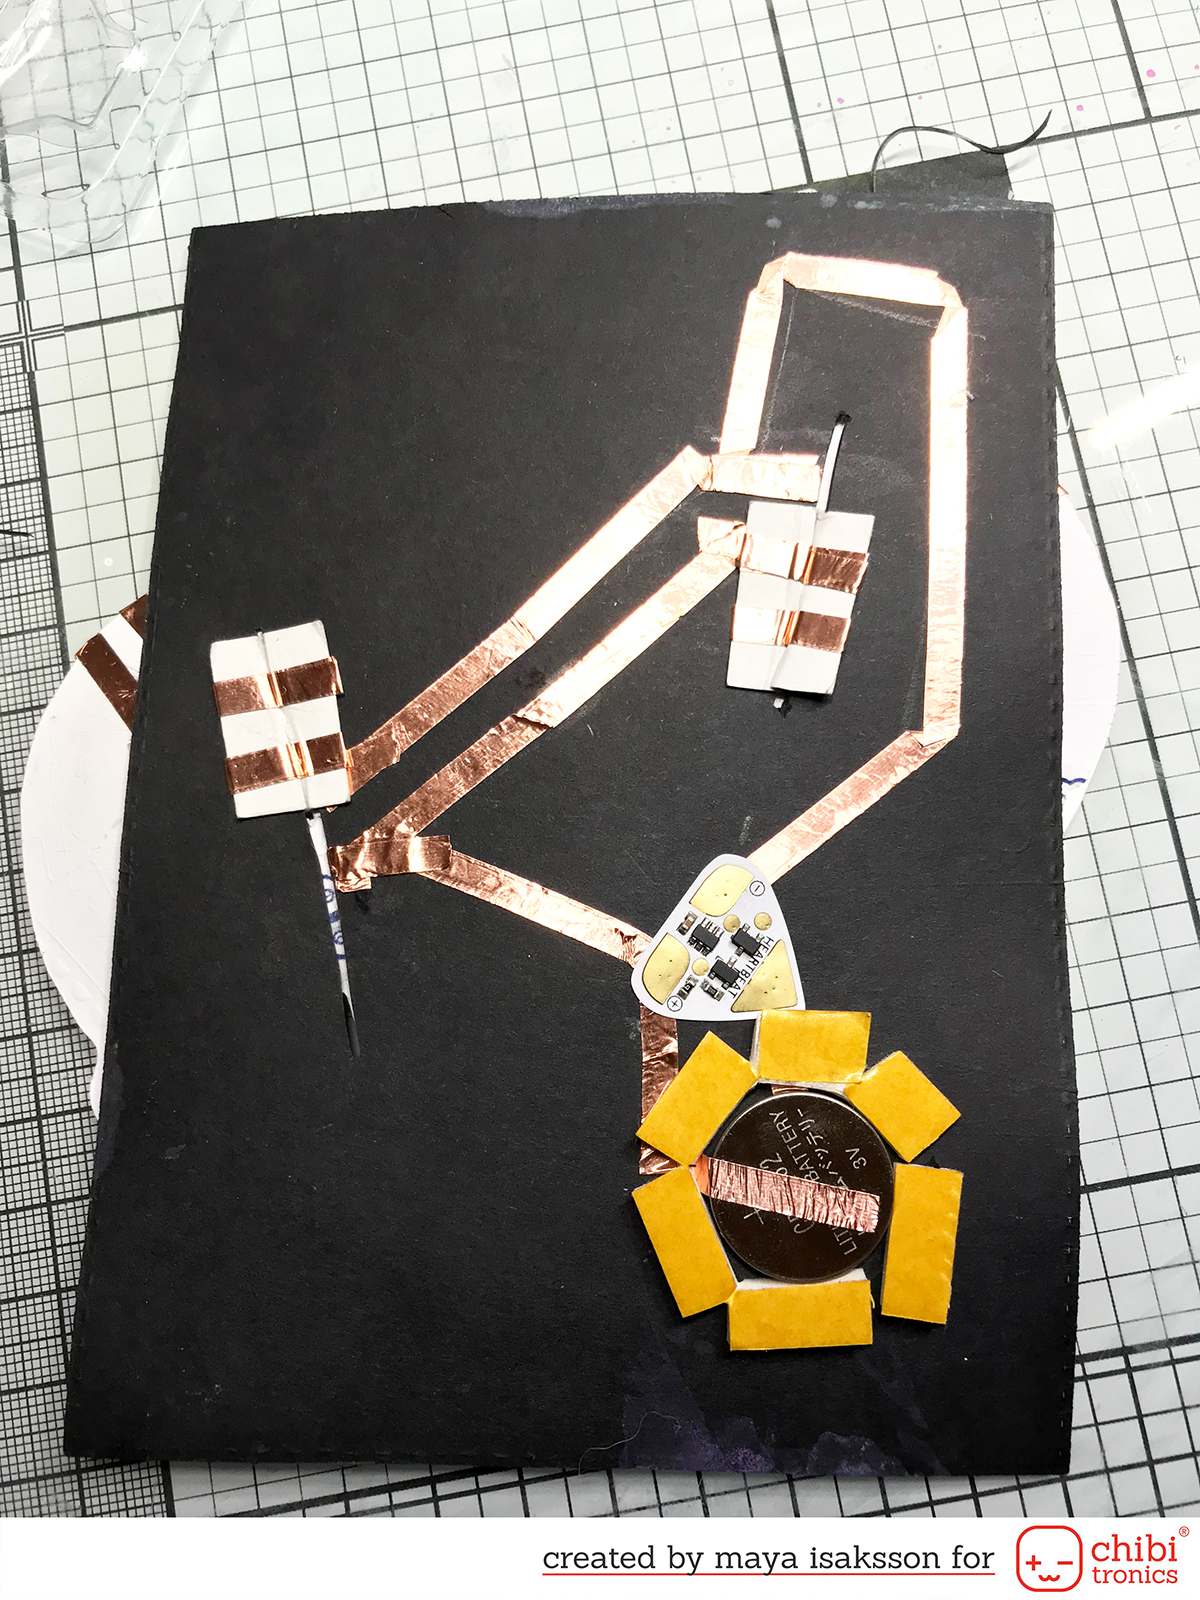
Here is the circuit after adding battery, effect sticker and copper tape. When the skulls slide into the correct position the tape connects and the skulls light up. I added the whole panel to a card base using foam tape and put an extra piece of foam on the back of the sliders, but without removing the protective paper on the back of the tape. This made the connection better so the tape connected better.
There are some ways to improve my design I must admit. The slider doesn’t always connect perfectly so you have to wiggle the skulls a bit to get them to work. If I did this card again I would probably make two separate circuits, one in each skull using two batteries. It would save a lot of fiddling with getting the tape to connect and and trying to plan all sides of the skull and card. But it’s really a learning experience and I always tend to over complicate things the first time I do something. But that’s what’s so much fun! There are so many ways to do something and exploring them is really exciting!
I hope that you got some inspiration to try to experiment with new ways to make your cards light up. If you want to make a card like mine then you will need the following supplies from Chibitronics. The stamps are by Crafters Companion and sentiments from Heffy Doodle stamps.
Supplies: Circuit Stickers Effects Add-On, Pink, Orange, Green MegaPack (30 stickers), Copper Tape,Chibi Stencil
So cool! xxx
Wow ❤️
It’s a wonderful work!
Wow !! Very impressive creation !!