
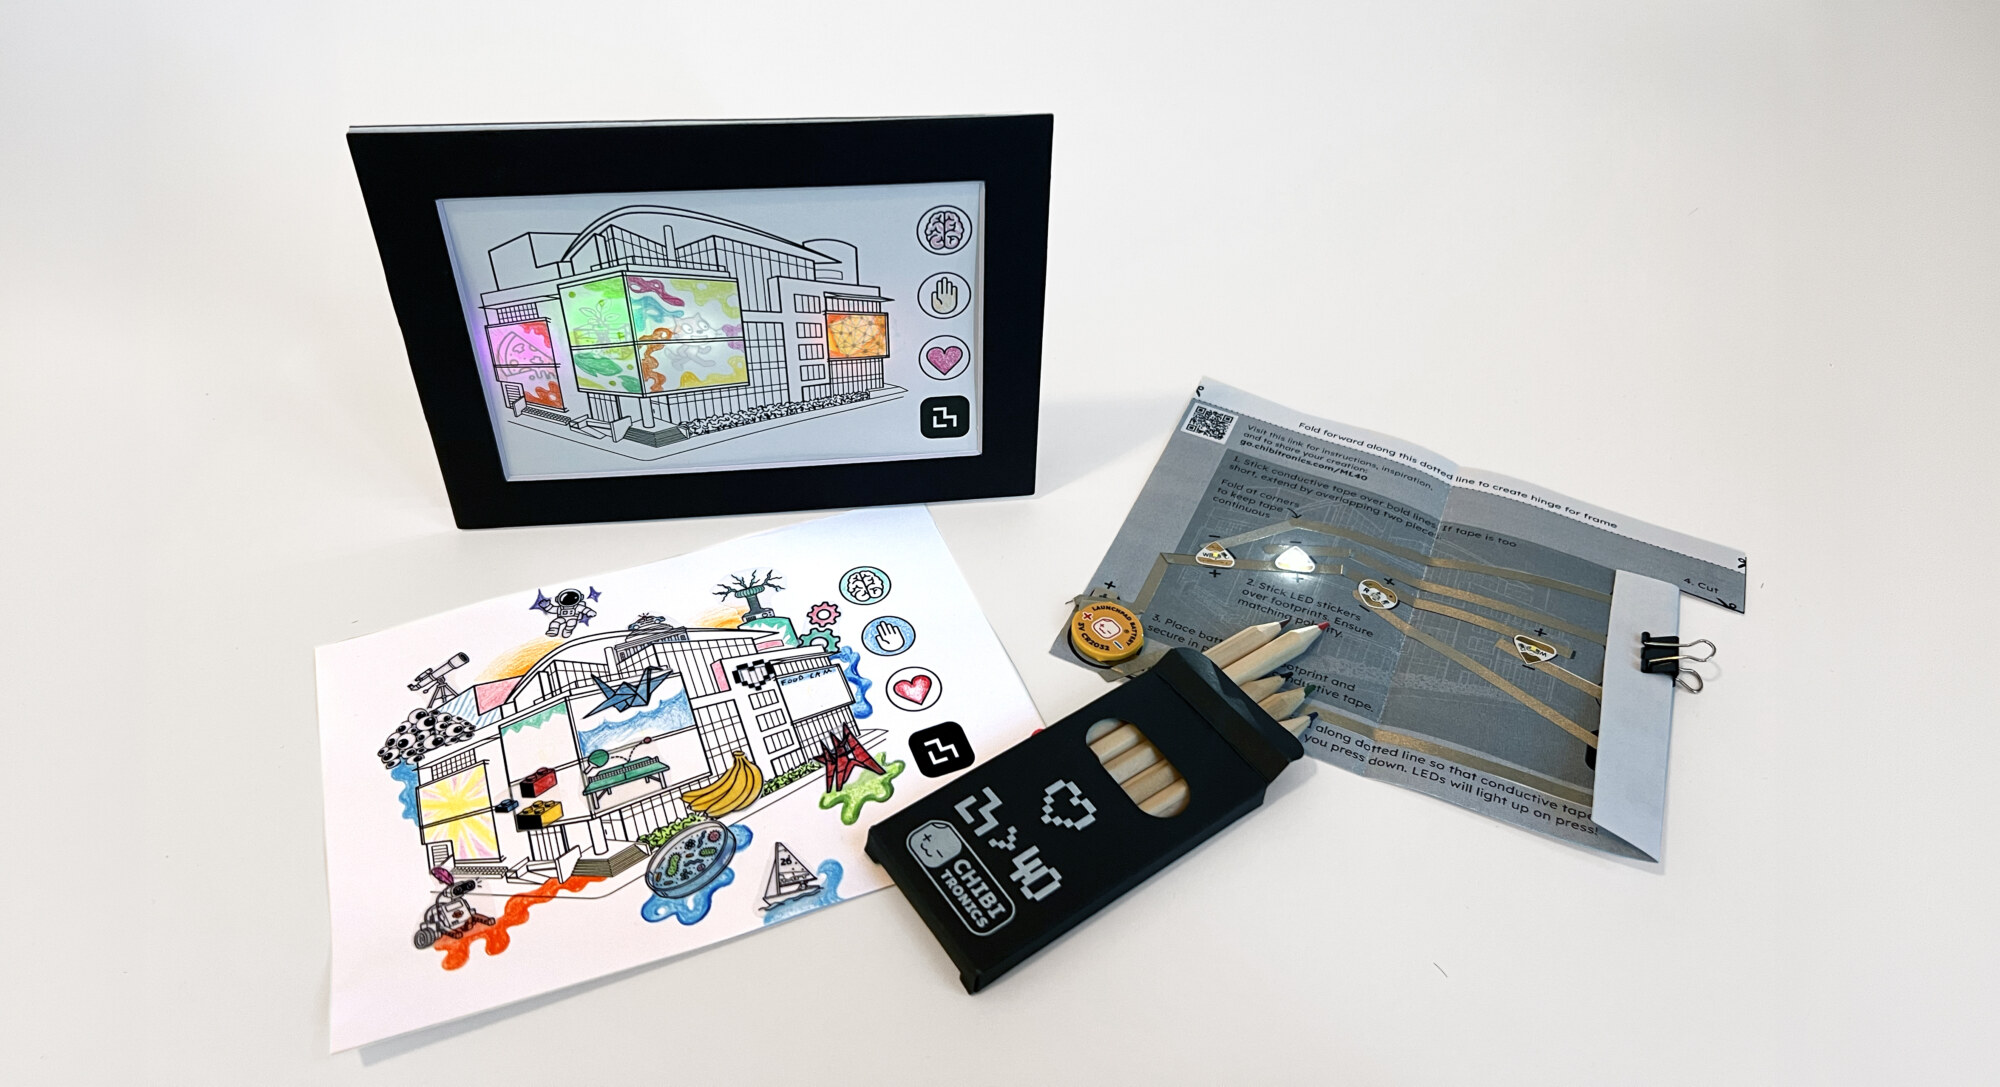
A project by Mark F.
Mark F.Community project
Celebrate 40 years of imagination, invention, and discovery at the MIT Media Lab. Color, collage, and illuminate your own version of the Lab with Chibitronics.
01 / PROJECT GALLERY
Explore the kit examples and community creations. Take a closer look, then share your version.
Mark F.Community project
Chibitronics · ML40ML40 kit example
Chibitronics · ML40ML40 kit example
02 / KIT TUTORIAL
A paper circuit, four lights, and your version of the Media Lab.
Have scissors and glue ready, too.
Make safely: keep batteries secured and away from young children and pets. Never connect the battery’s positive and negative sides directly with tape. Follow the Chibitronics safety guidelines.
STEP 01 / 08
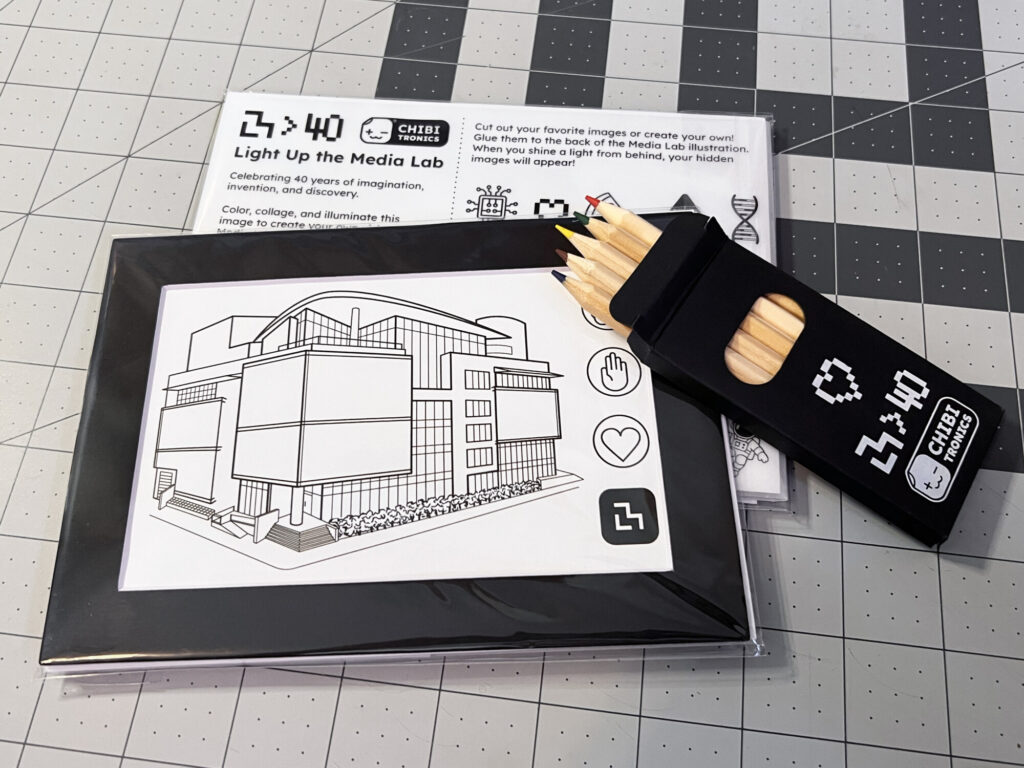
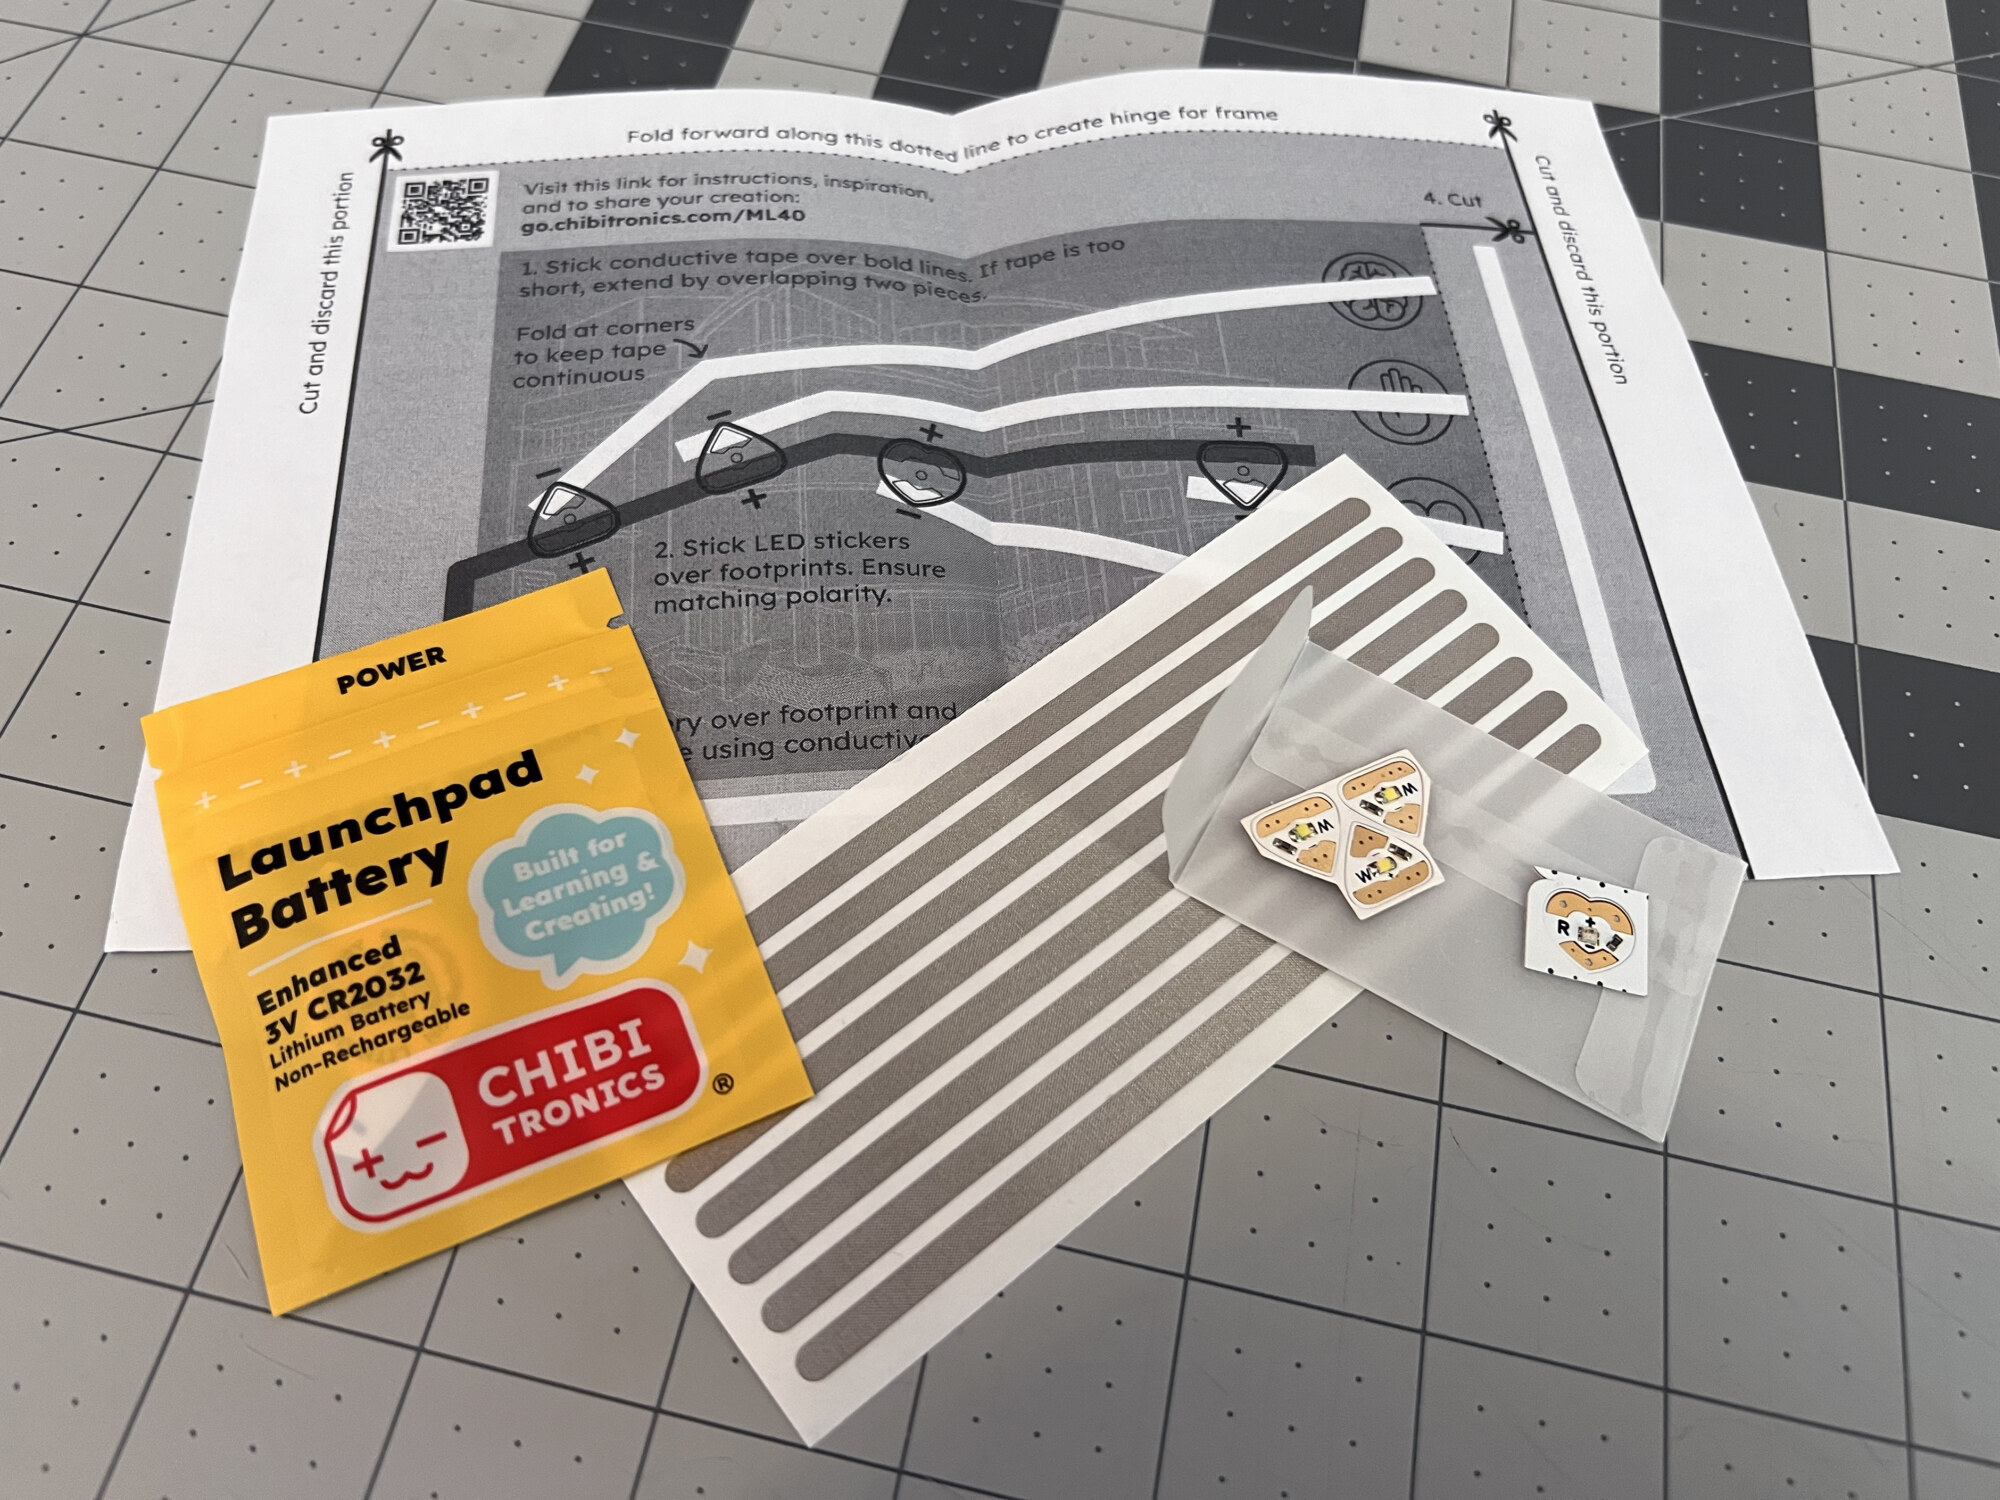
Gather your Launchpad battery, four LED stickers, conductive fabric tape, and the printed circuit template. Make the cuts and folds marked on the template, then follow its numbered directions.
Keep the top hinge and the switch flap attached. You will use both as you finish the picture.
STEP 02 / 08
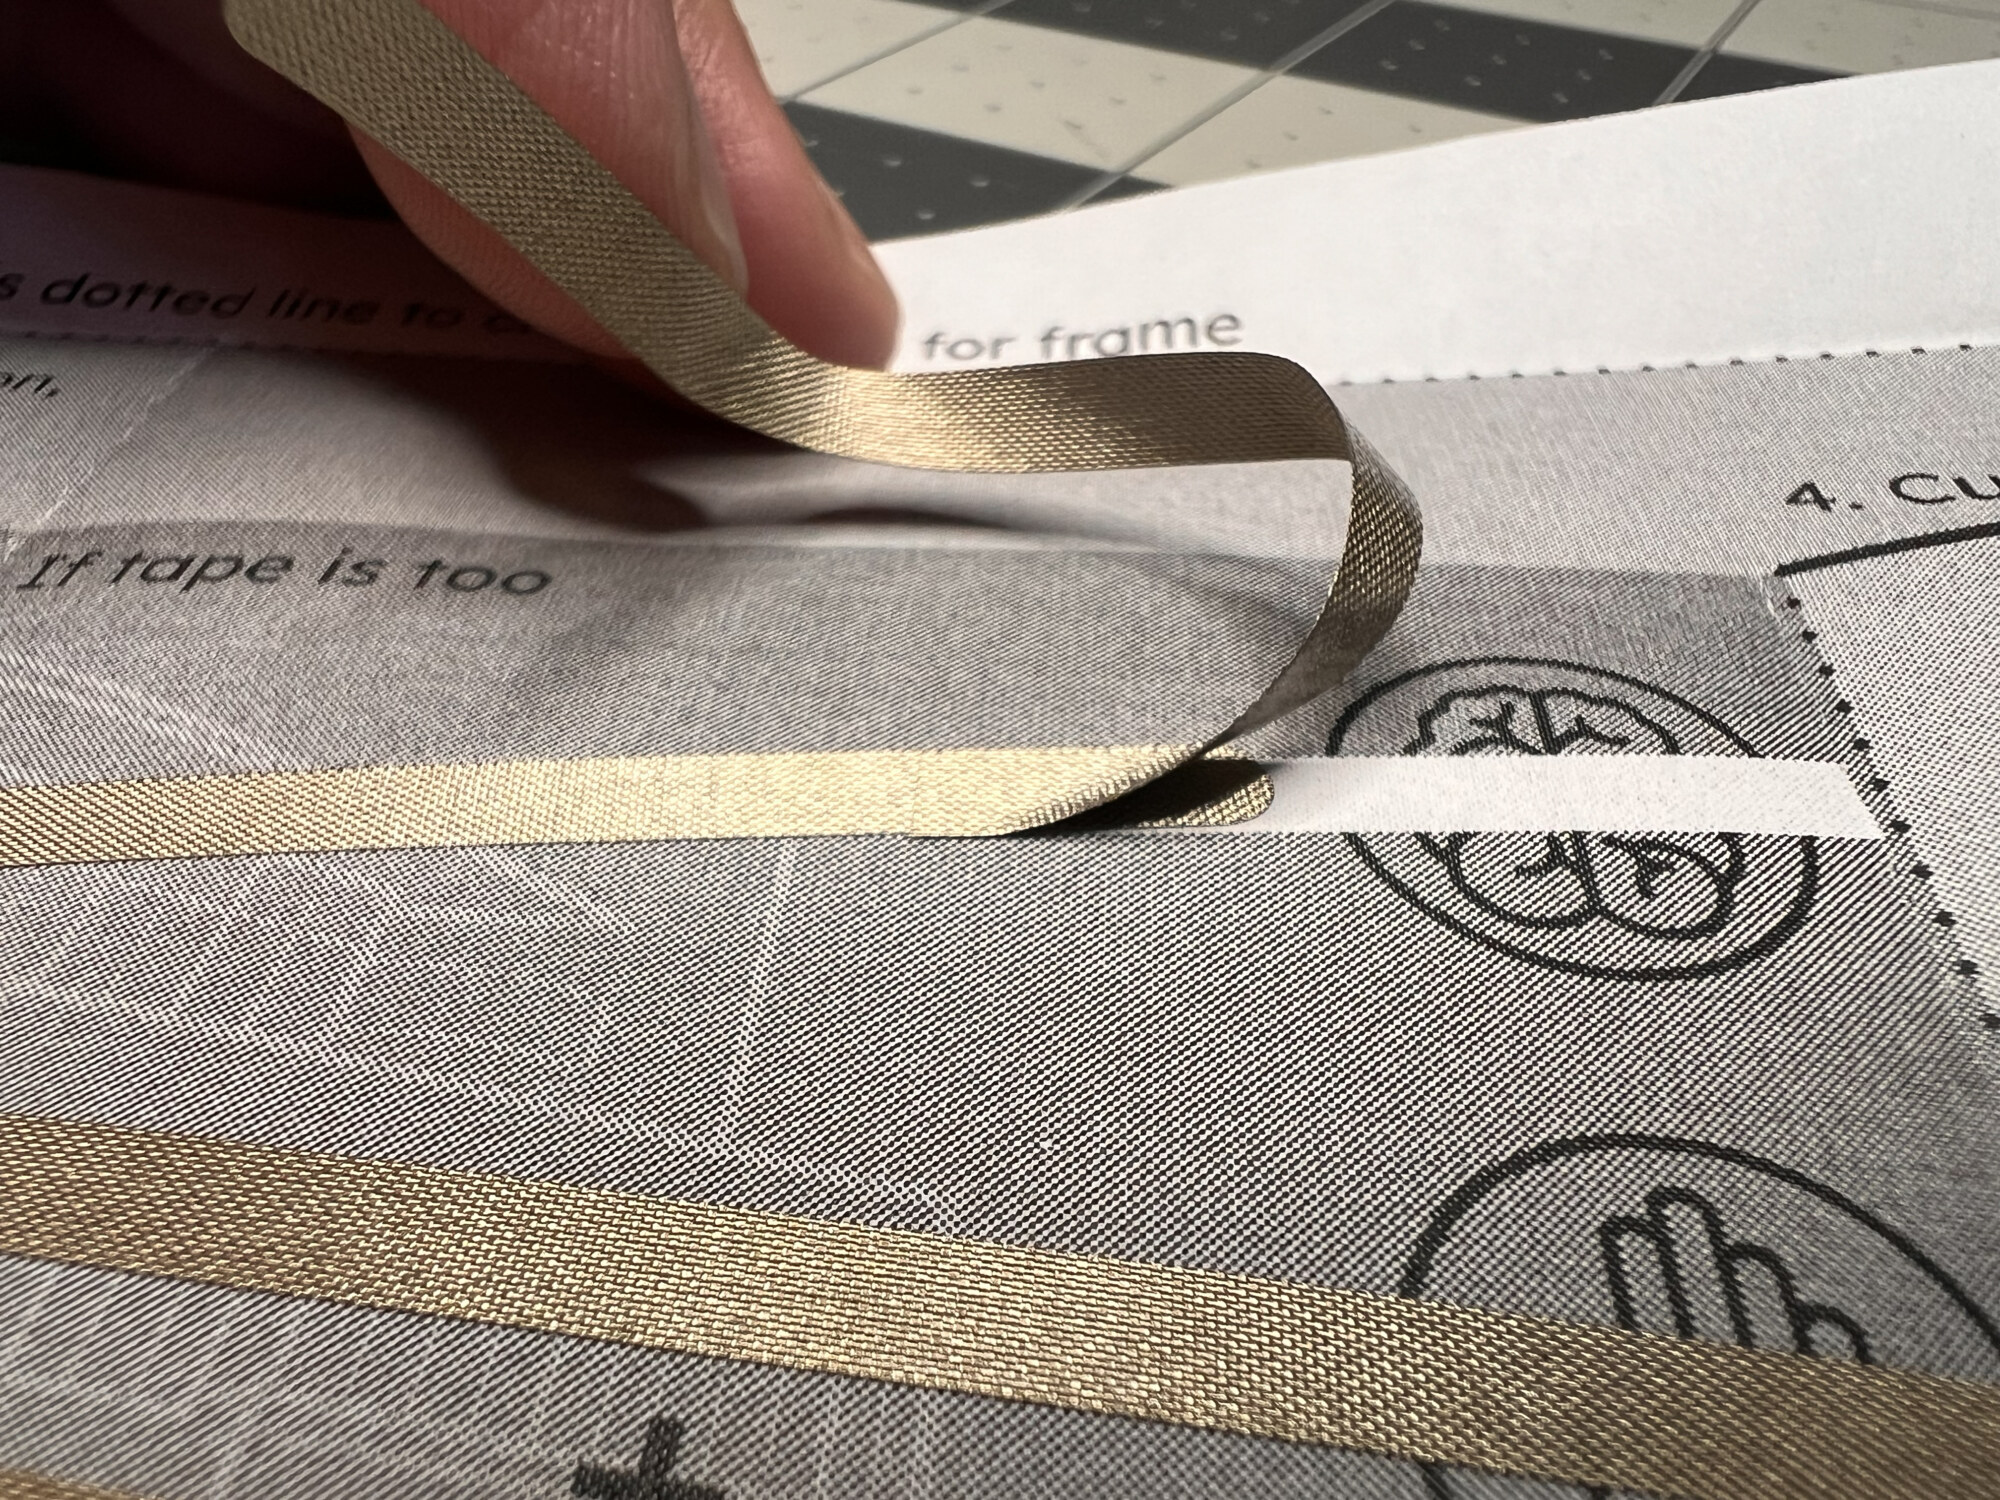
Stick conductive fabric tape along the bold traces. Fold the tape around corners to keep each path continuous. If one strip is too short, overlap it with the next piece and smooth the join down firmly.
Save your leftover tape. Small pieces are useful for reinforcing the LED and battery connections.
STEP 03 / 08
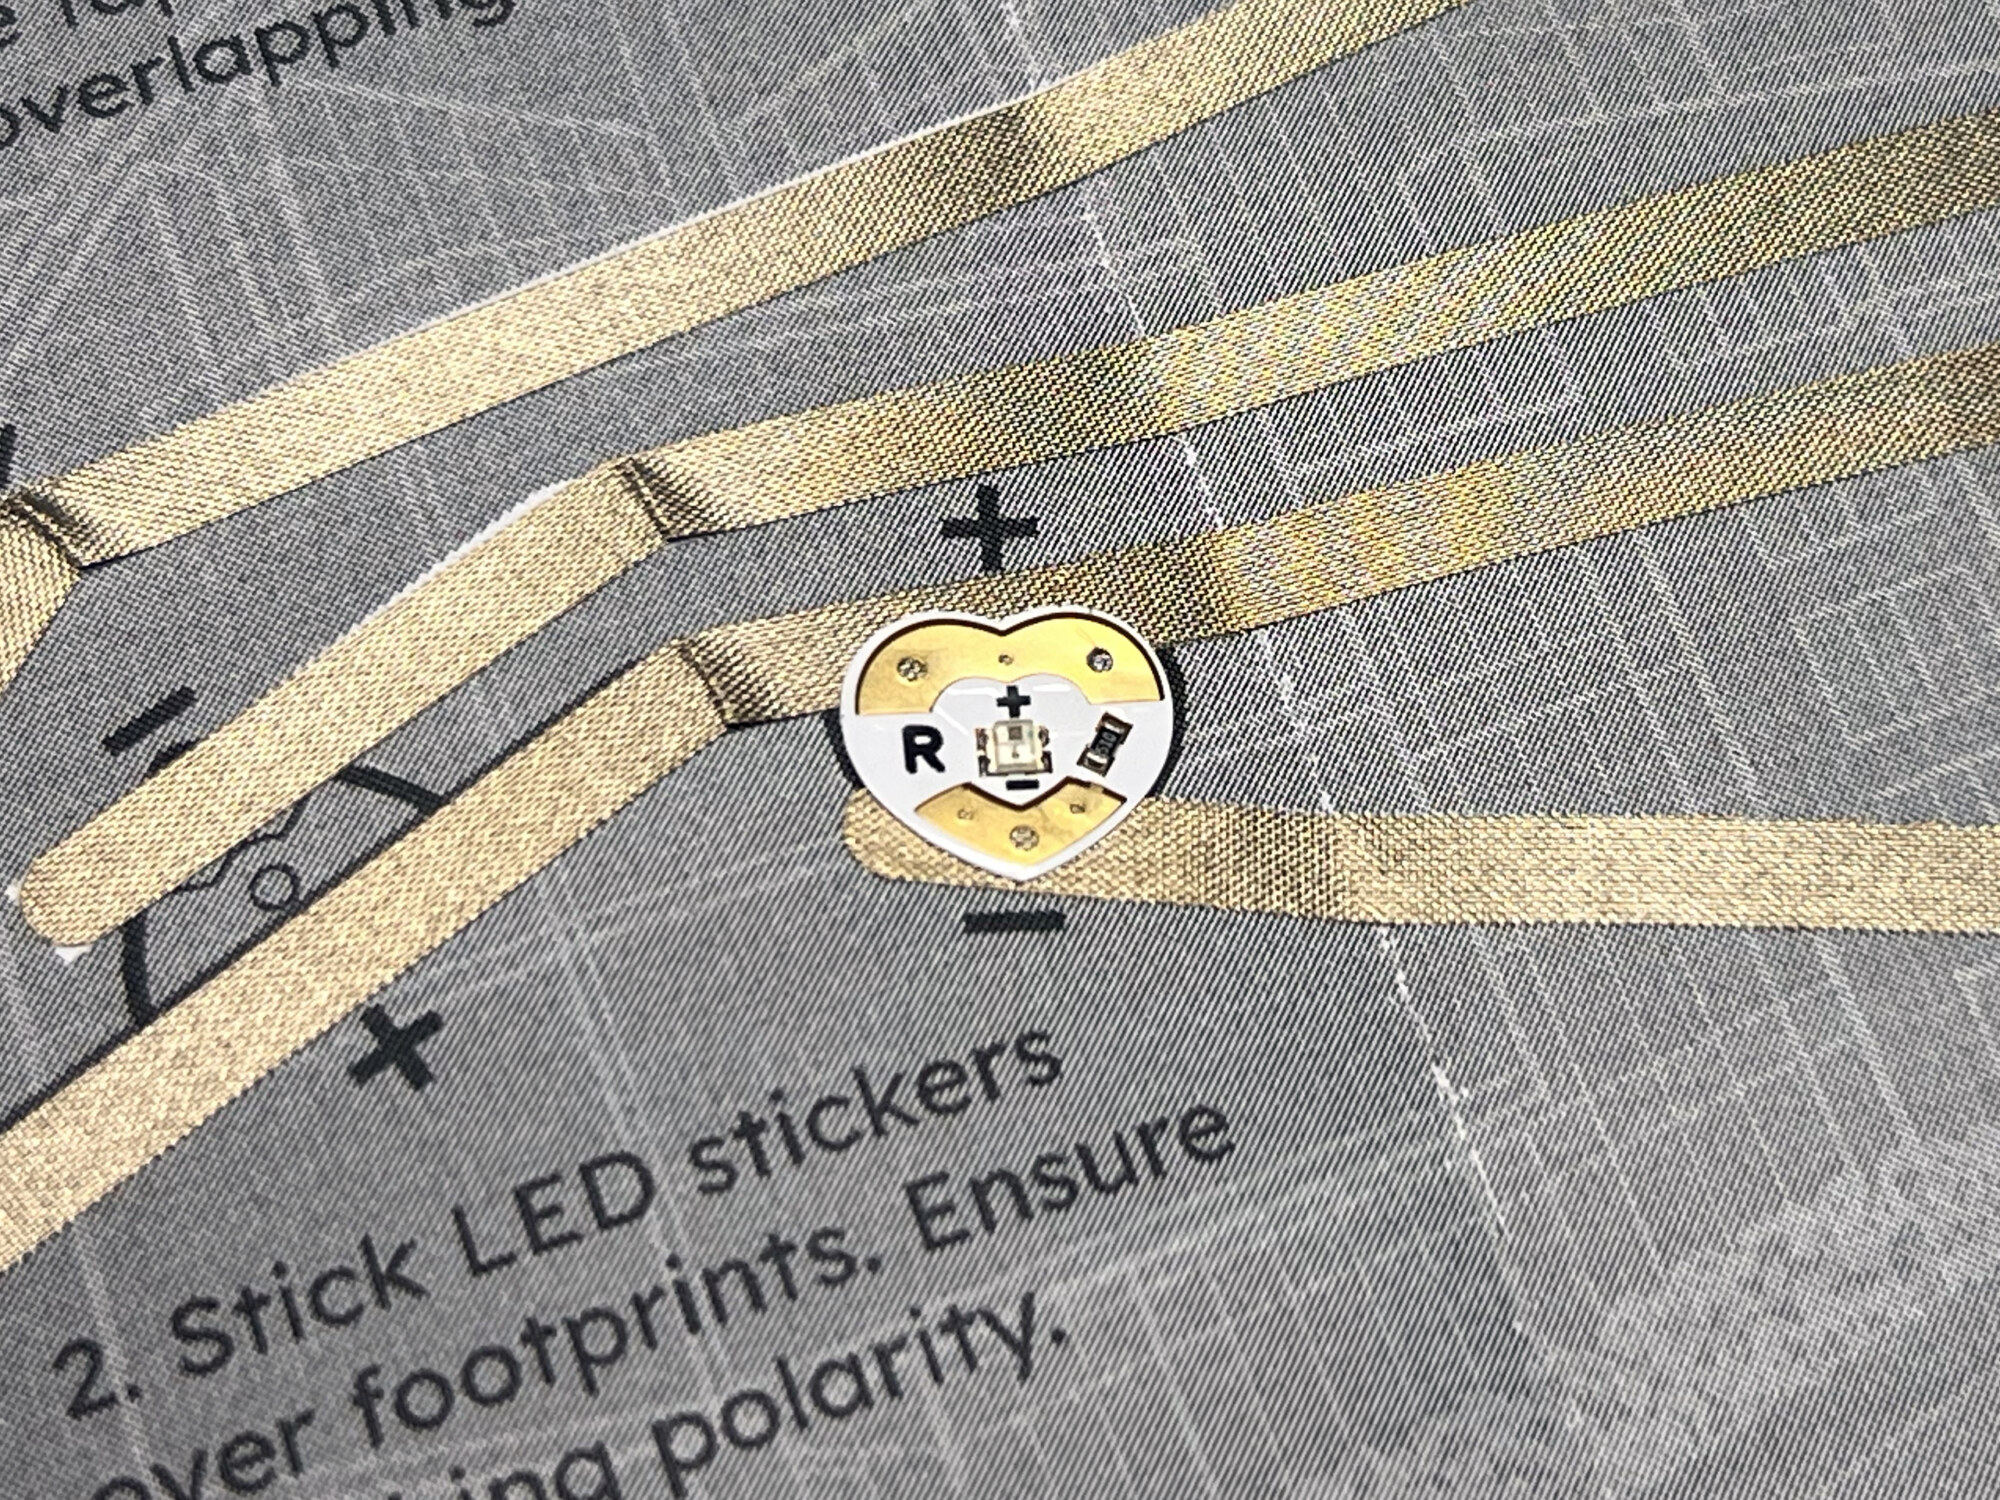
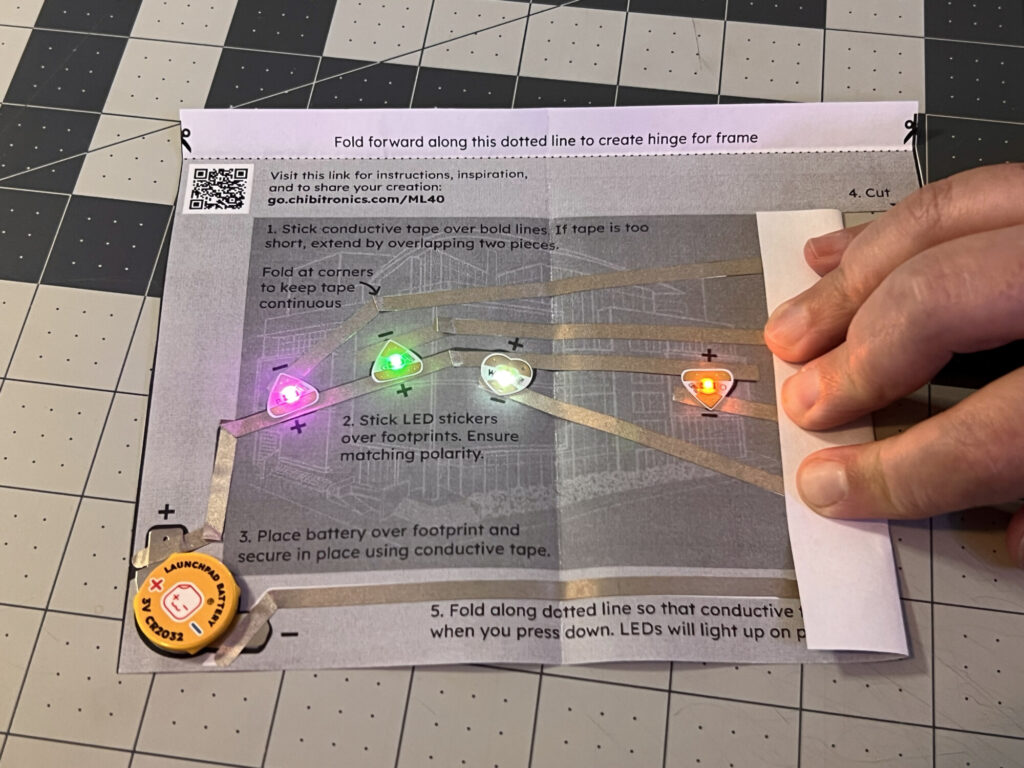
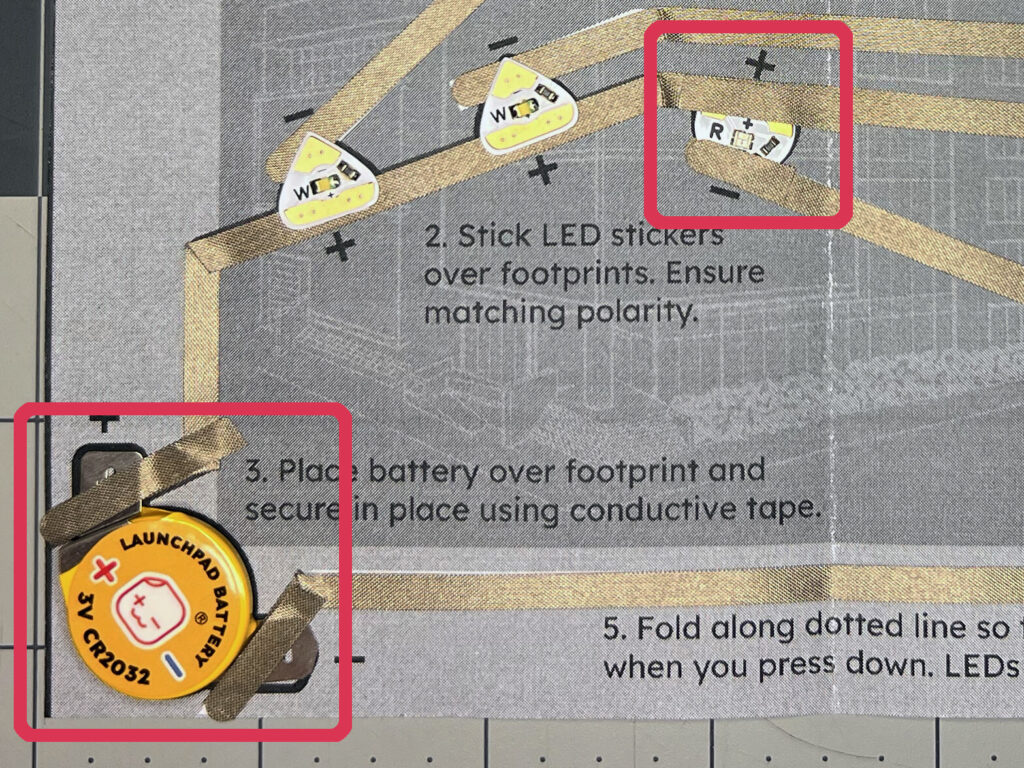
Place each LED on its footprint, matching the positive (+) and negative (−) contacts to the template. The wider positive side connects to a positive trace; the narrower end connects to a negative trace. Secure the Launchpad battery on its footprint with conductive tape.
Press each contact firmly. Use leftover tape to reinforce the connections without joining the positive and negative paths.
STEP 04 / 08
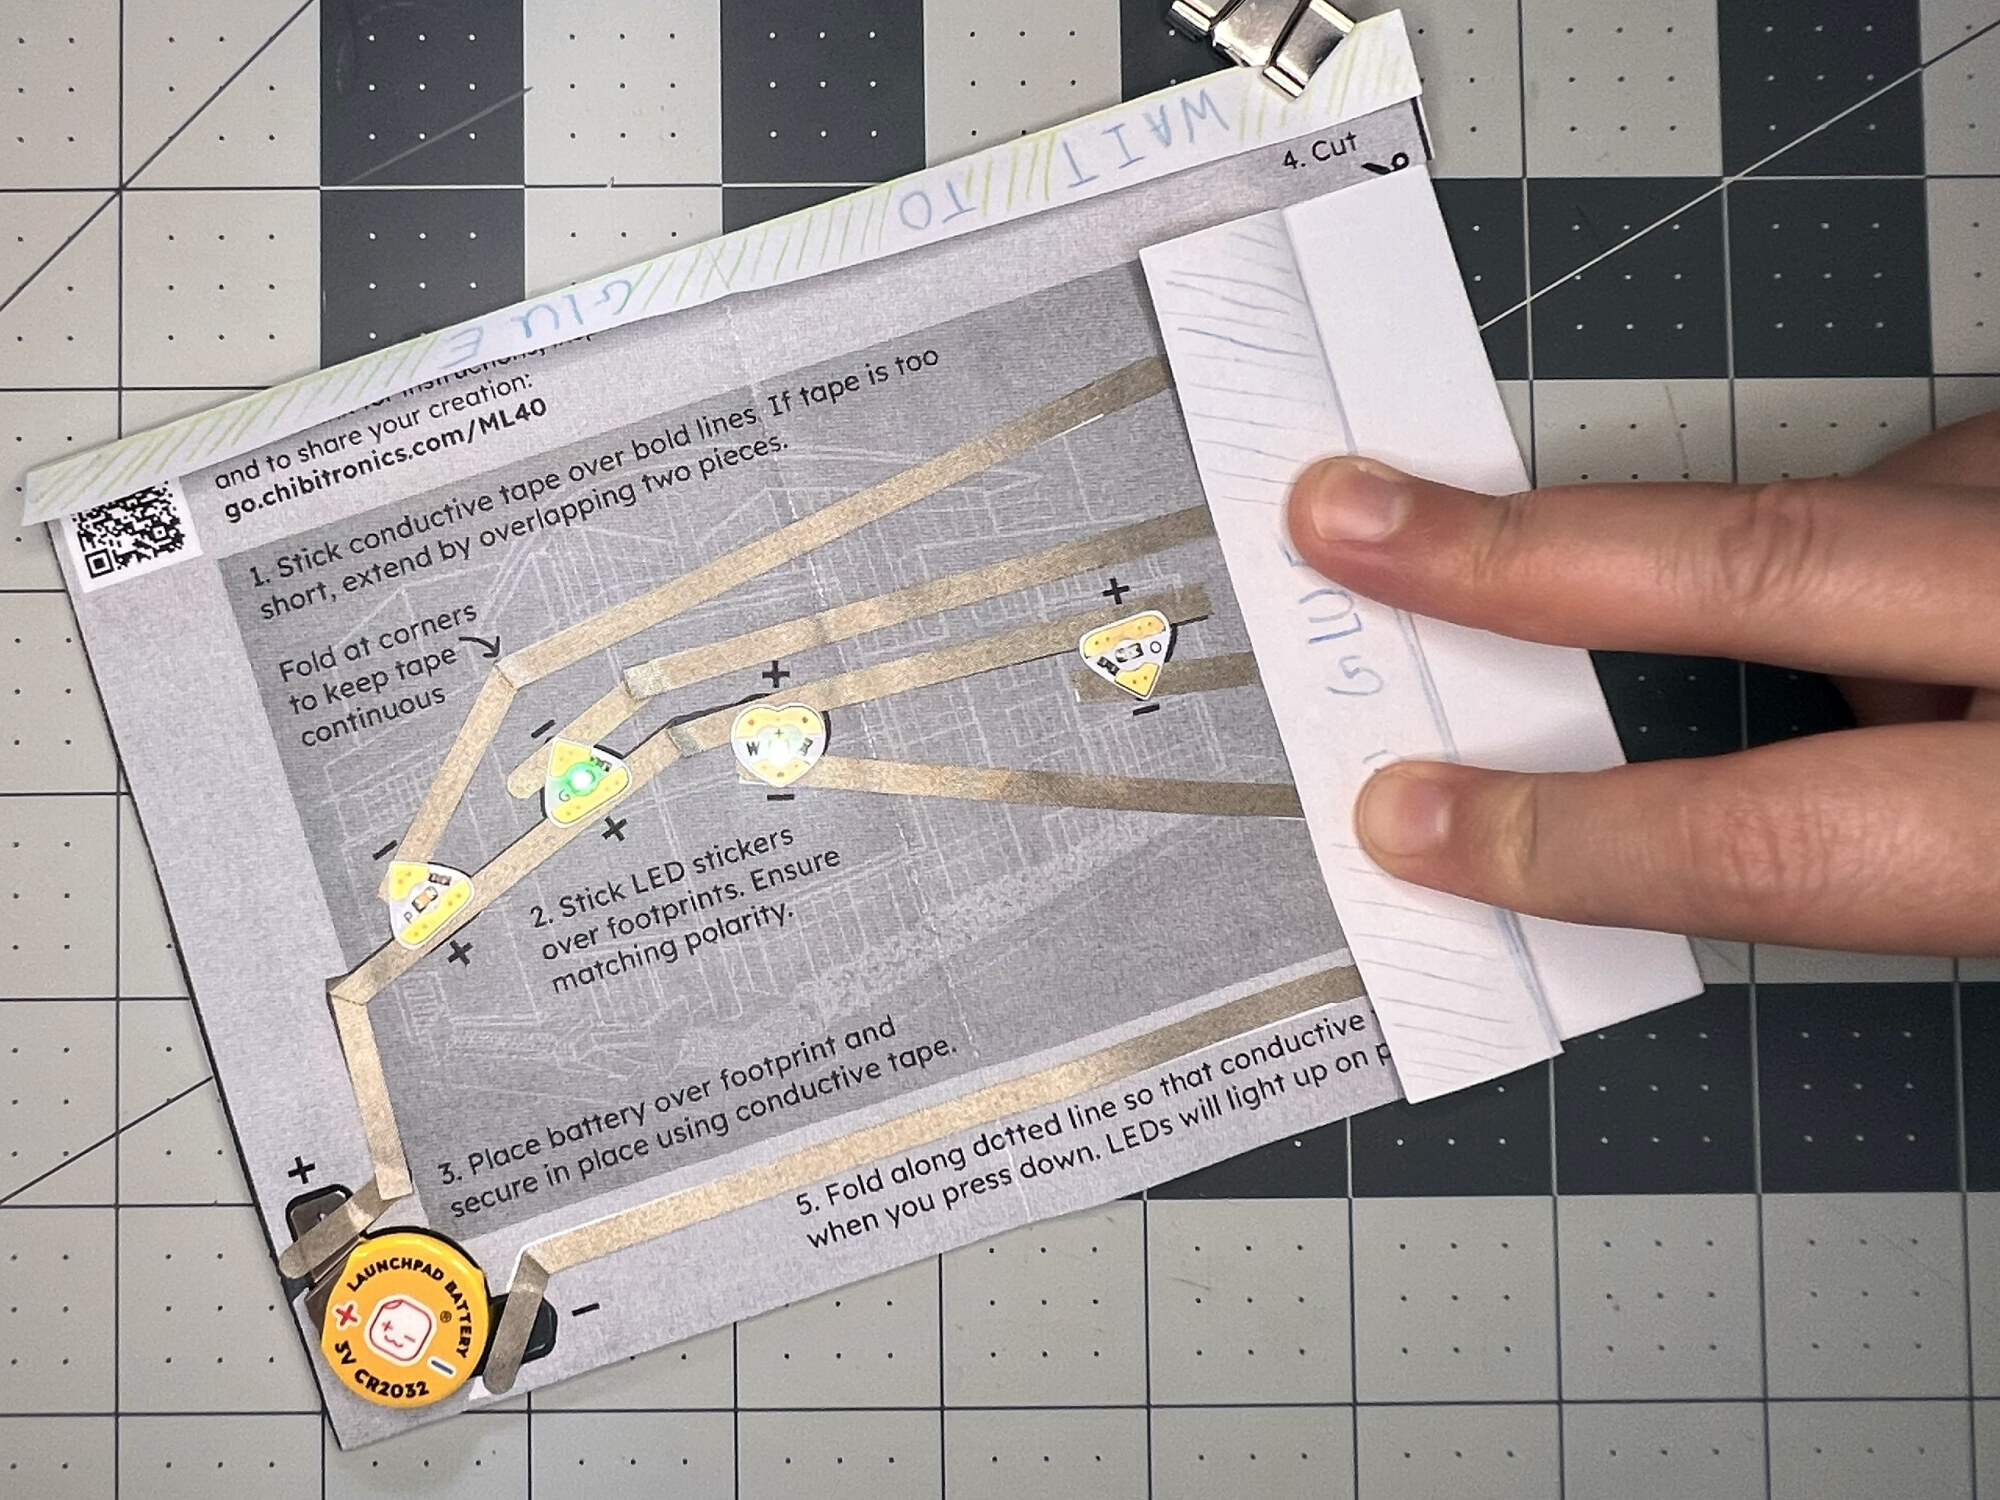
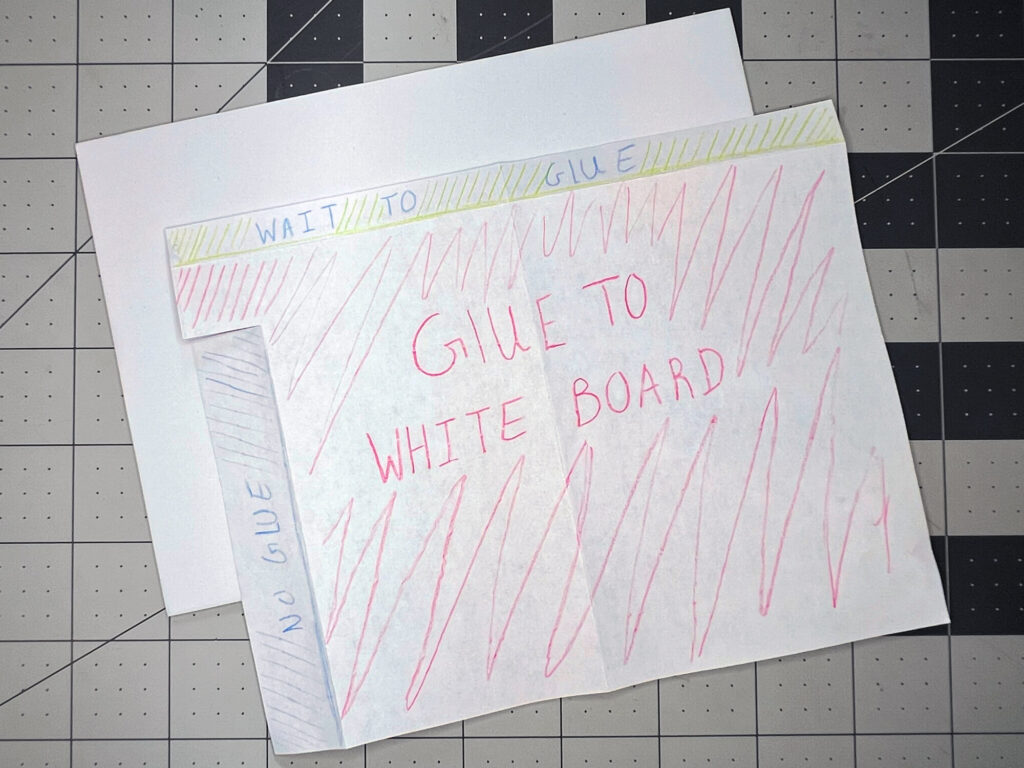
Fold the switch flap over and run your fingers from top to bottom. Different lights should turn on as you move. Once the circuit works, glue the back of its main panel to the white backing board so it stays still while you align the artwork.
Leave the switch flap and the top frame-hinge flap free of glue.
STEP 05 / 08
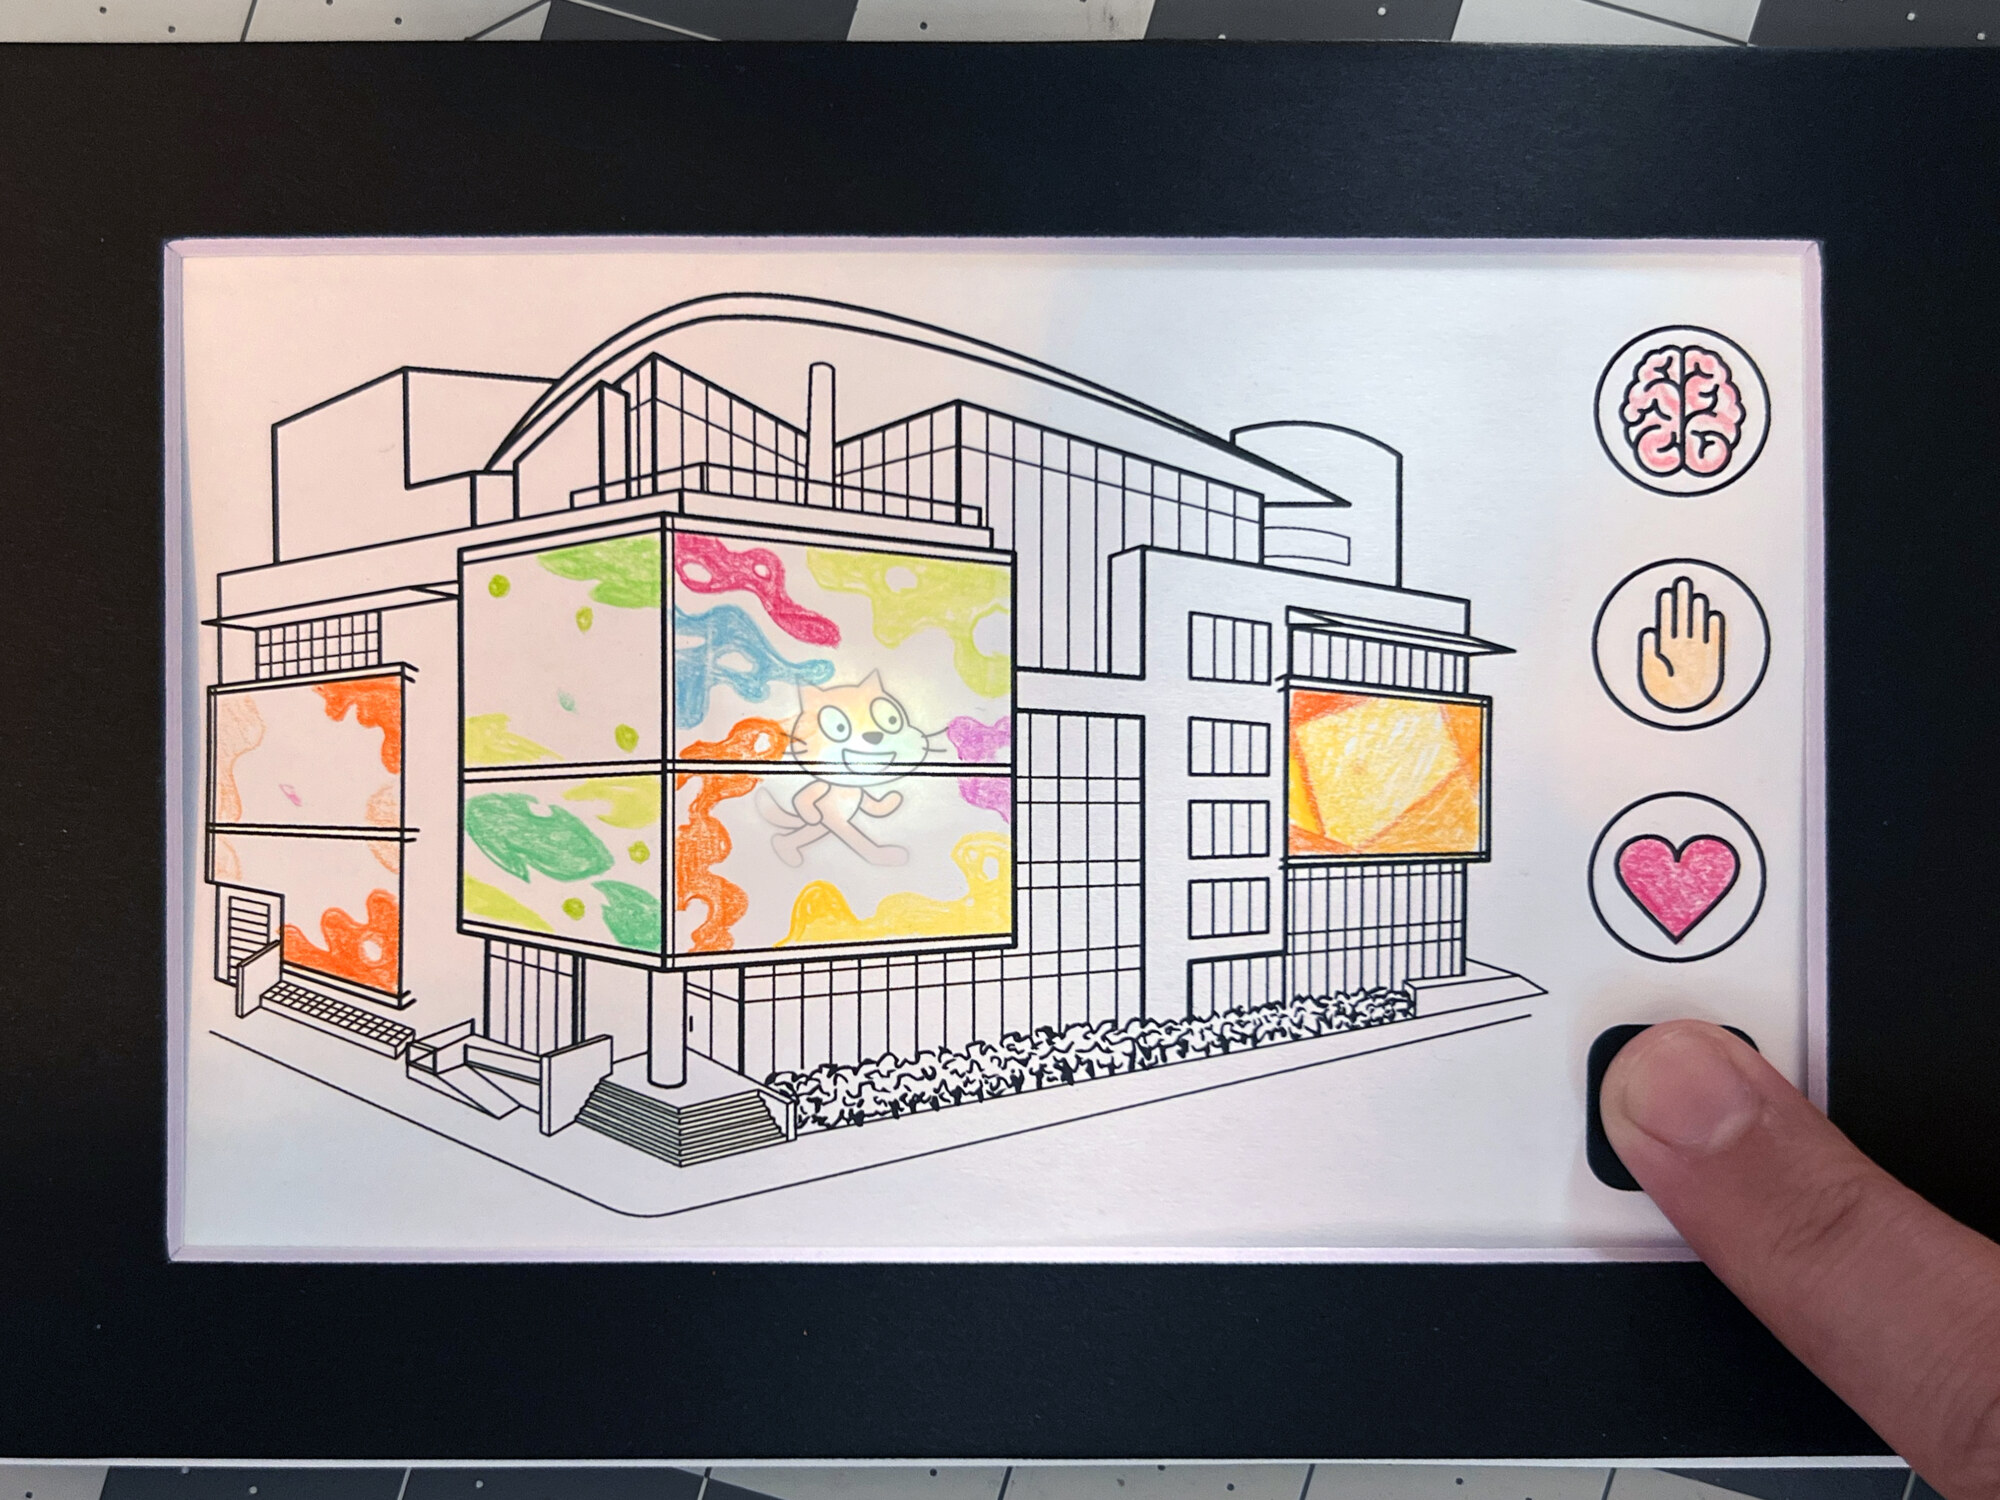
Place the Media Lab drawing over the circuit with the switch flap folded. Press the mind, hand, heart, and Media Lab icons to find the lights. Light the artwork from behind and make a small pencil mark above each LED. Hold the drawing up to the light to transfer those marks to the back.
Use these marks to position secret images that will appear when each LED lights up.
STEP 06 / 08
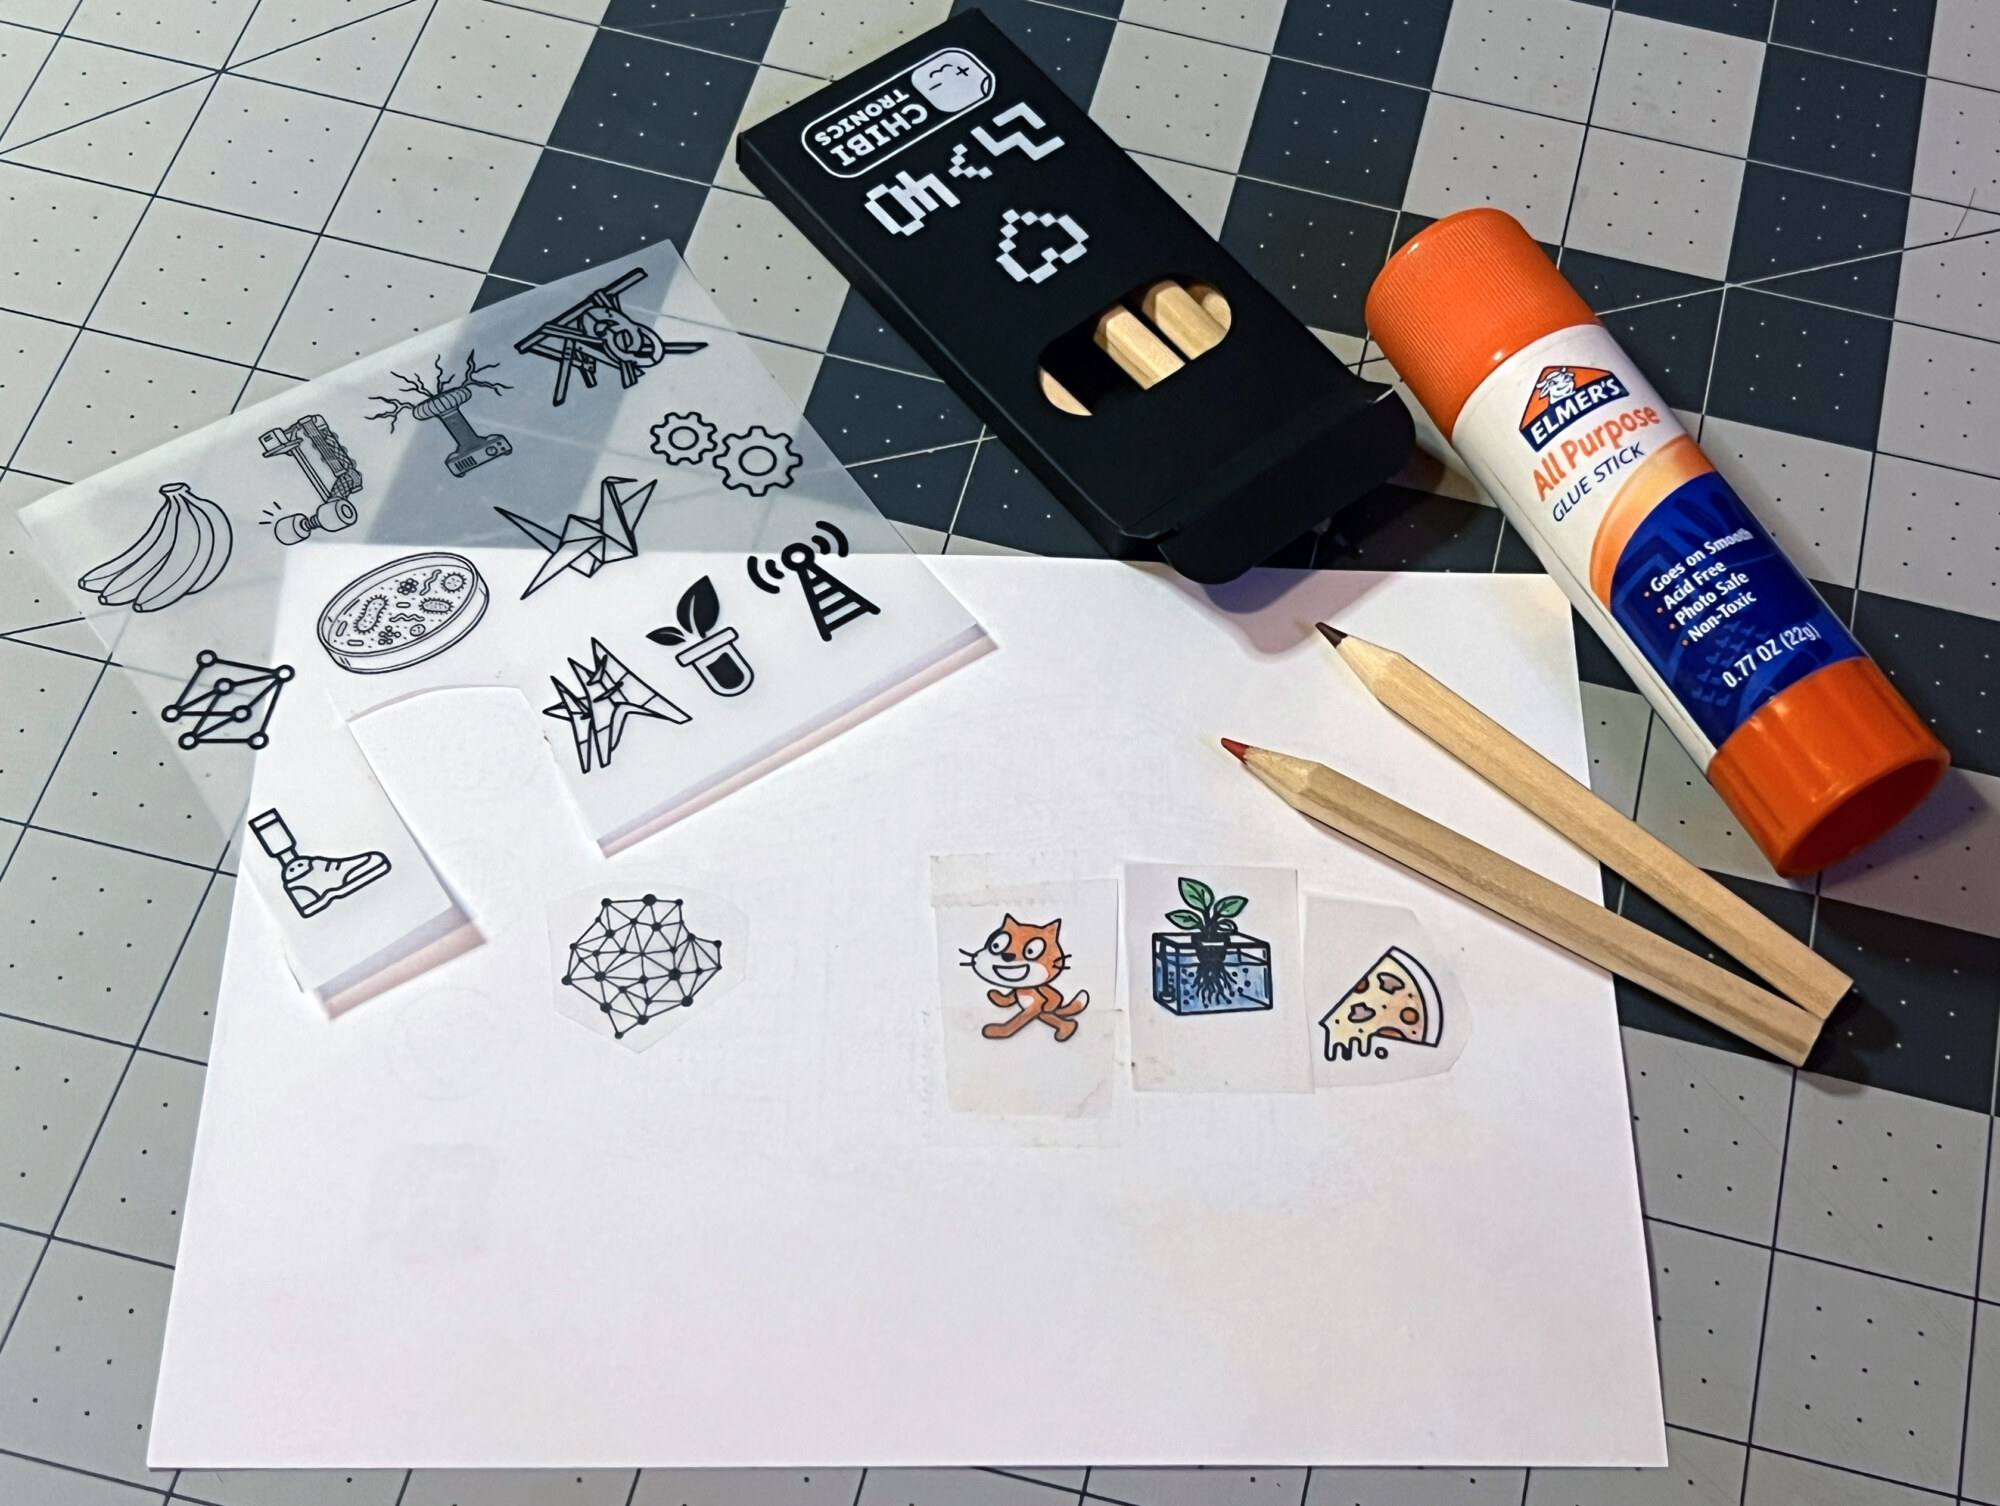
Draw directly on the paper, or color and cut out the supplied translucent images. Glue your hidden images to the back of the Media Lab drawing, lining them up with the pencil marks. Add color, collage, and your own ideas to both sides.
Check where the frame will cover the drawing before placing your favorite details.
STEP 07 / 08
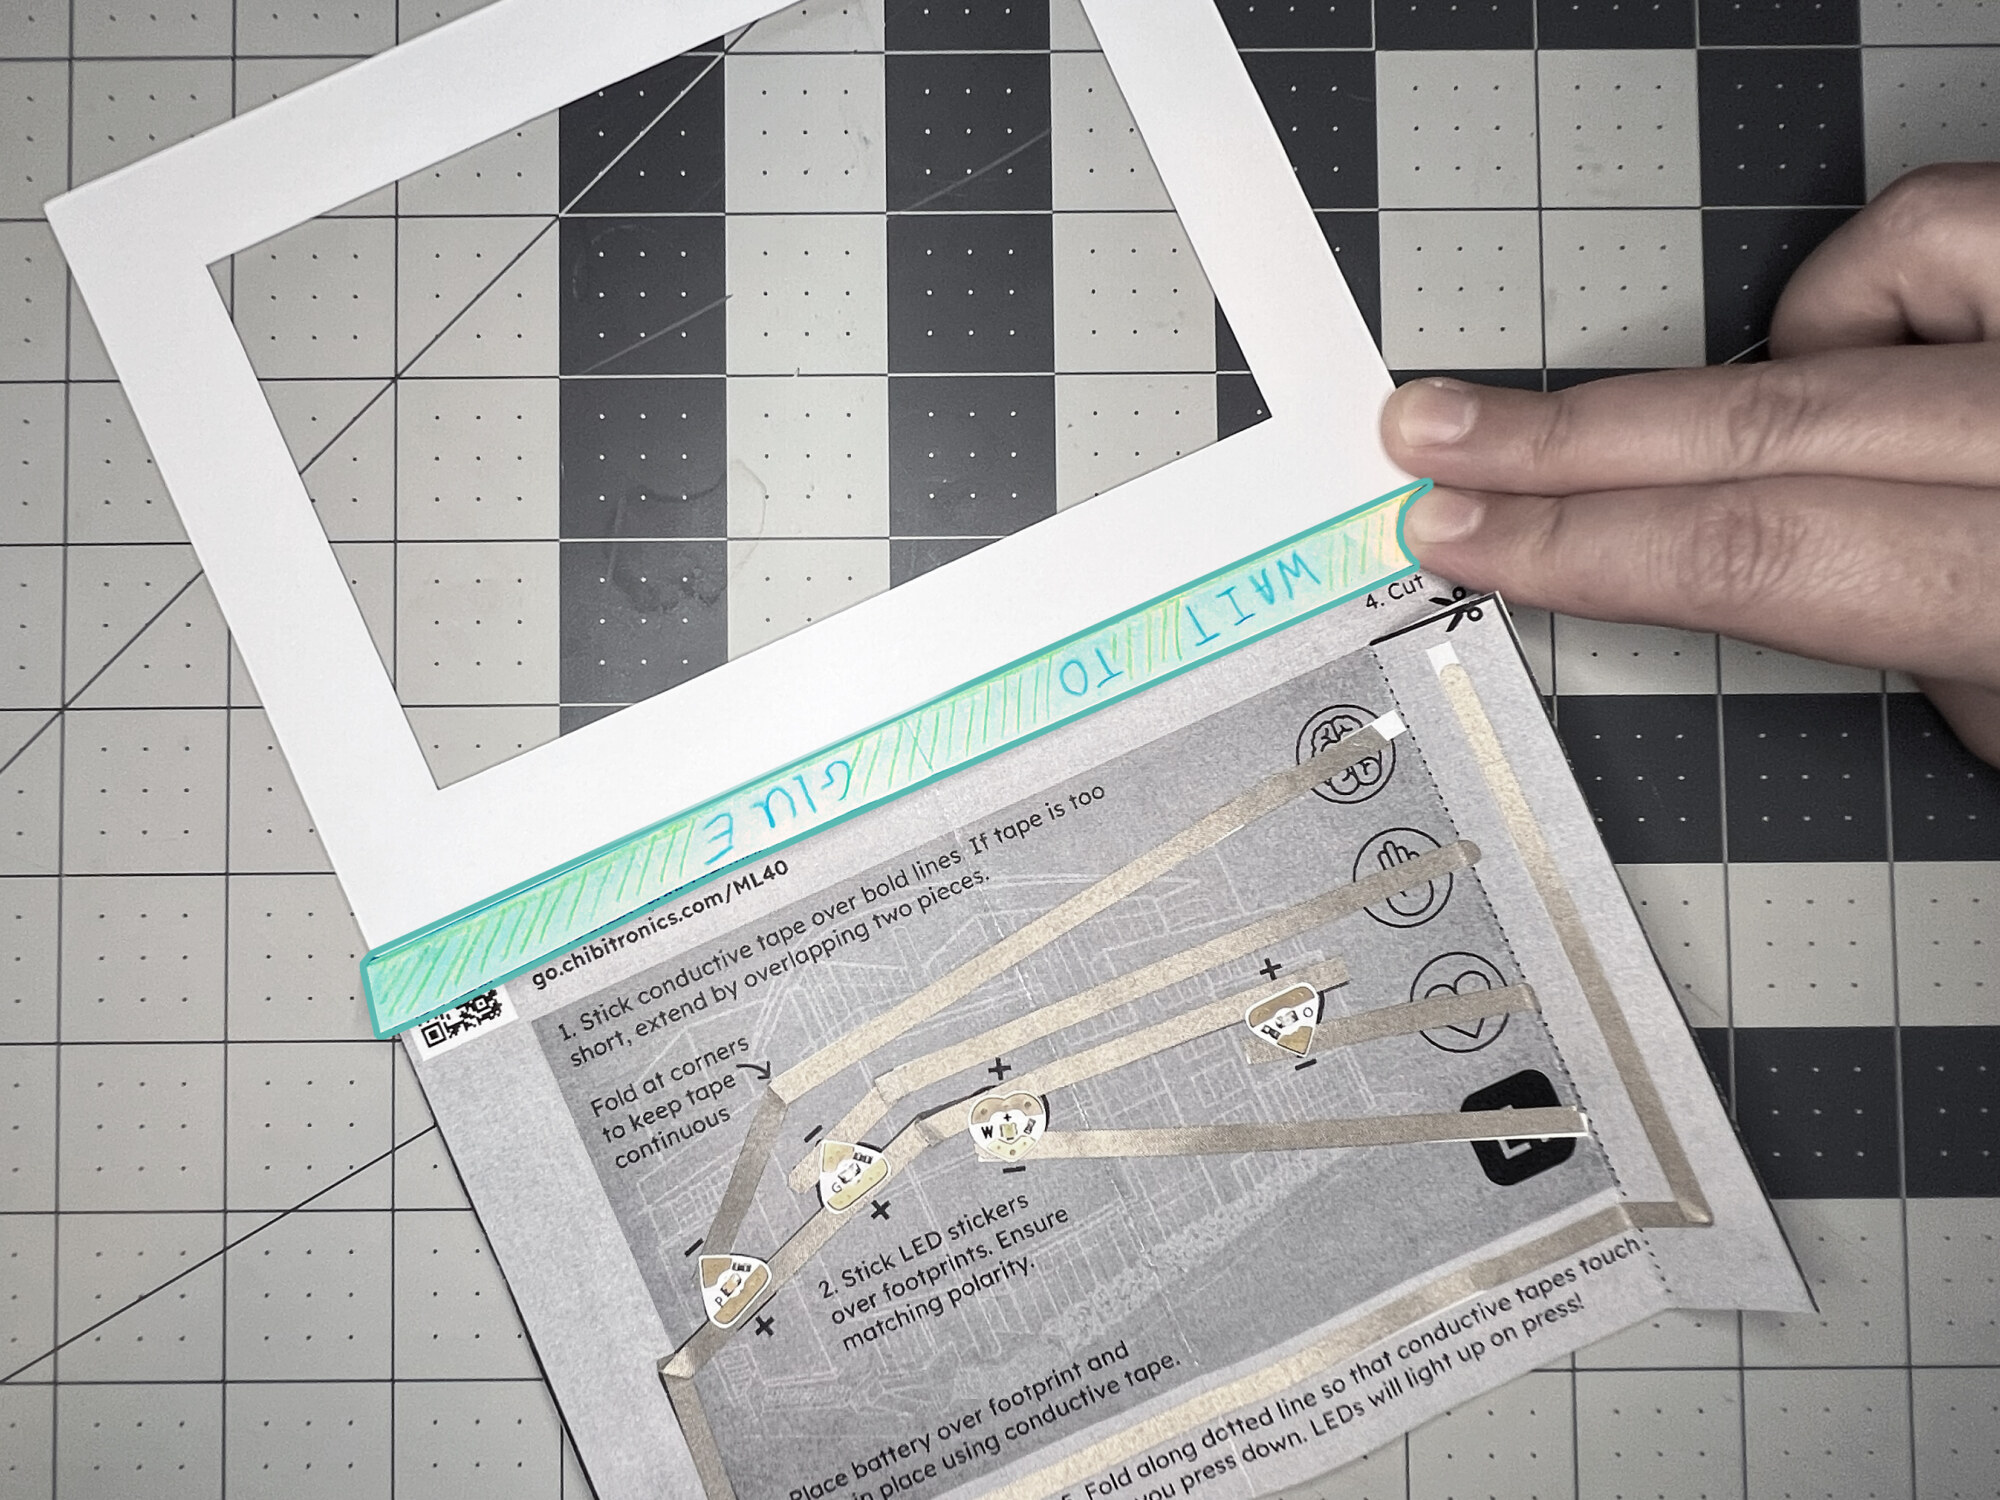
Fold the top tab so the printed hinge instructions face down. Apply glue to the opposite side, then attach the white side of the black frame to that flap. Reinforce the hinge with tape if needed. Once your artwork is finished, glue the Media Lab illustration around the edges of the frame.
Before the glue sets, check that the picture is aligned and you can still press the switches to light the artwork.
STEP 08 / 08
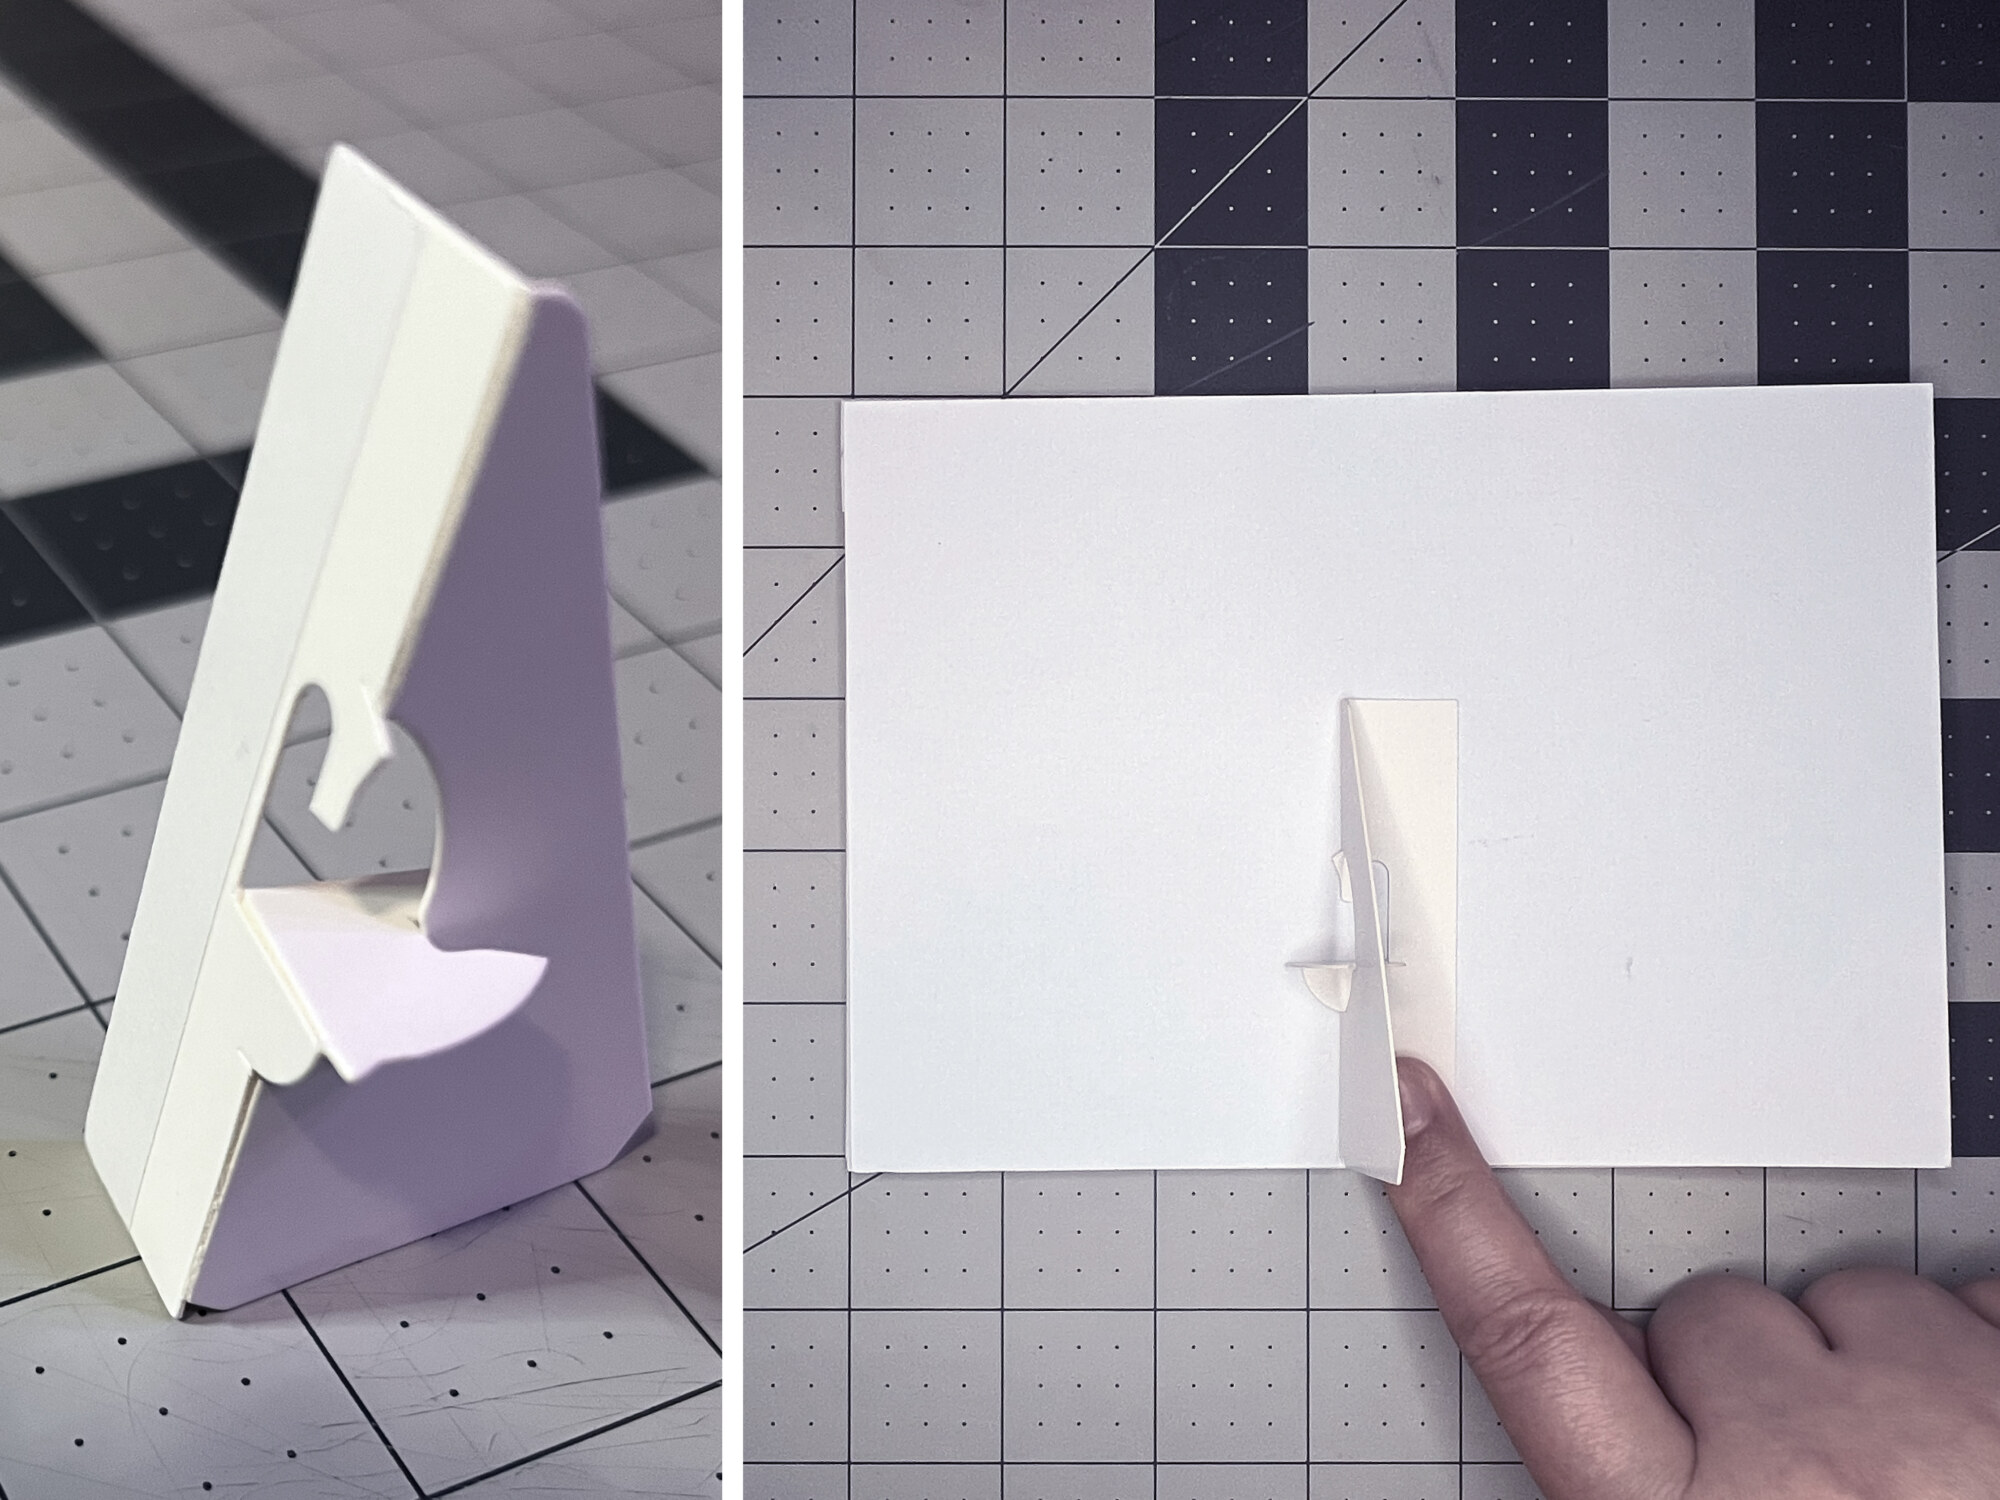
Peel the backing from the adhesive picture stand. Position it on the back of the white board with the triangular point facing up, then press it into place. Stand up your picture, try each light, and keep adding to your artwork.
Finished? Share a photo in the gallery so others can see what you made.
A little stuck? Let’s troubleshoot together
04 / CIRCUIT SKETCHER
Explore the Media Lab artwork and four-light circuit in Circuit Sketcher. Make it your own, experiment with the circuit, and keep creating.
Open the Media Lab design Opens Circuit Sketcher · Log in to edit and save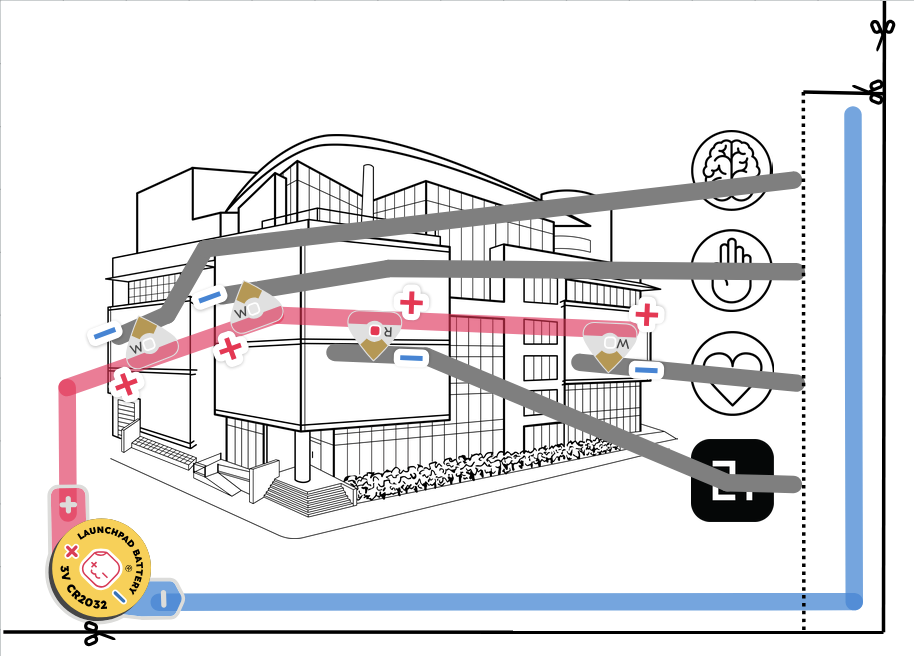
05 / CONTACT
Need a hand with your circuit, or have an idea you'd like to explore? Email us at sketcher@chibitronics.com