Good morning! This week we’re excited to collaborate with Sweet Stamp Shop and both design teams will be sharing inspiration all week long! And what’s a collaboration without a giveaway? 😉 One lucky commenter on our blog will win a Chibitronics starter kit so make sure to leave a comment each day for the most chances to win!
Today Tiffany Au and Kelly Griglione are sharing projects using Sweet Stamp Shop and Chibitronics! And don’t forget to head to the Sweet Stamp Shop blog to see what their designers have created!
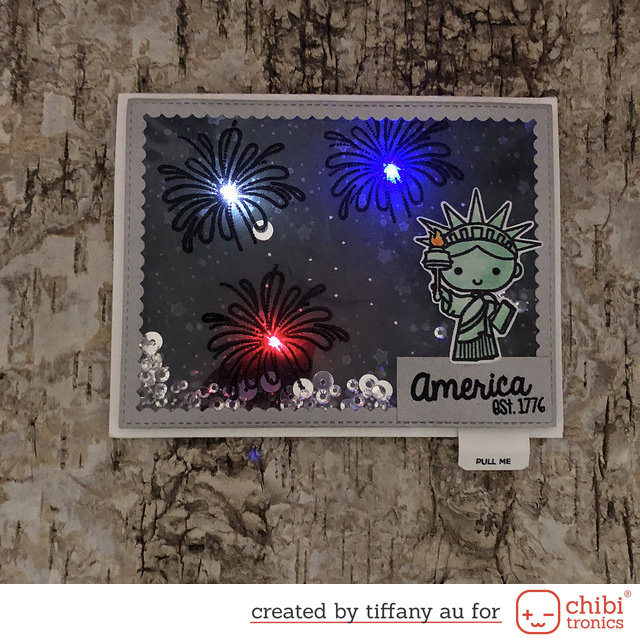 Hi Everyone! It’s collaboration week between Chibitronics and Sweet Stamp Shop and I’m very excited to show you my card featuring the ‘Blinking’ effect sticker from Chibitronics. This effect stickers makes the fireworks from the Lady Liberty stamp sets look like real fireworks (match made in heaven). My card also features a surprise element when you open it. The card will switch the lights from the front of the card to the inside.
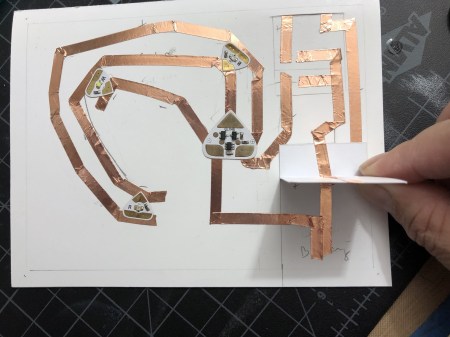
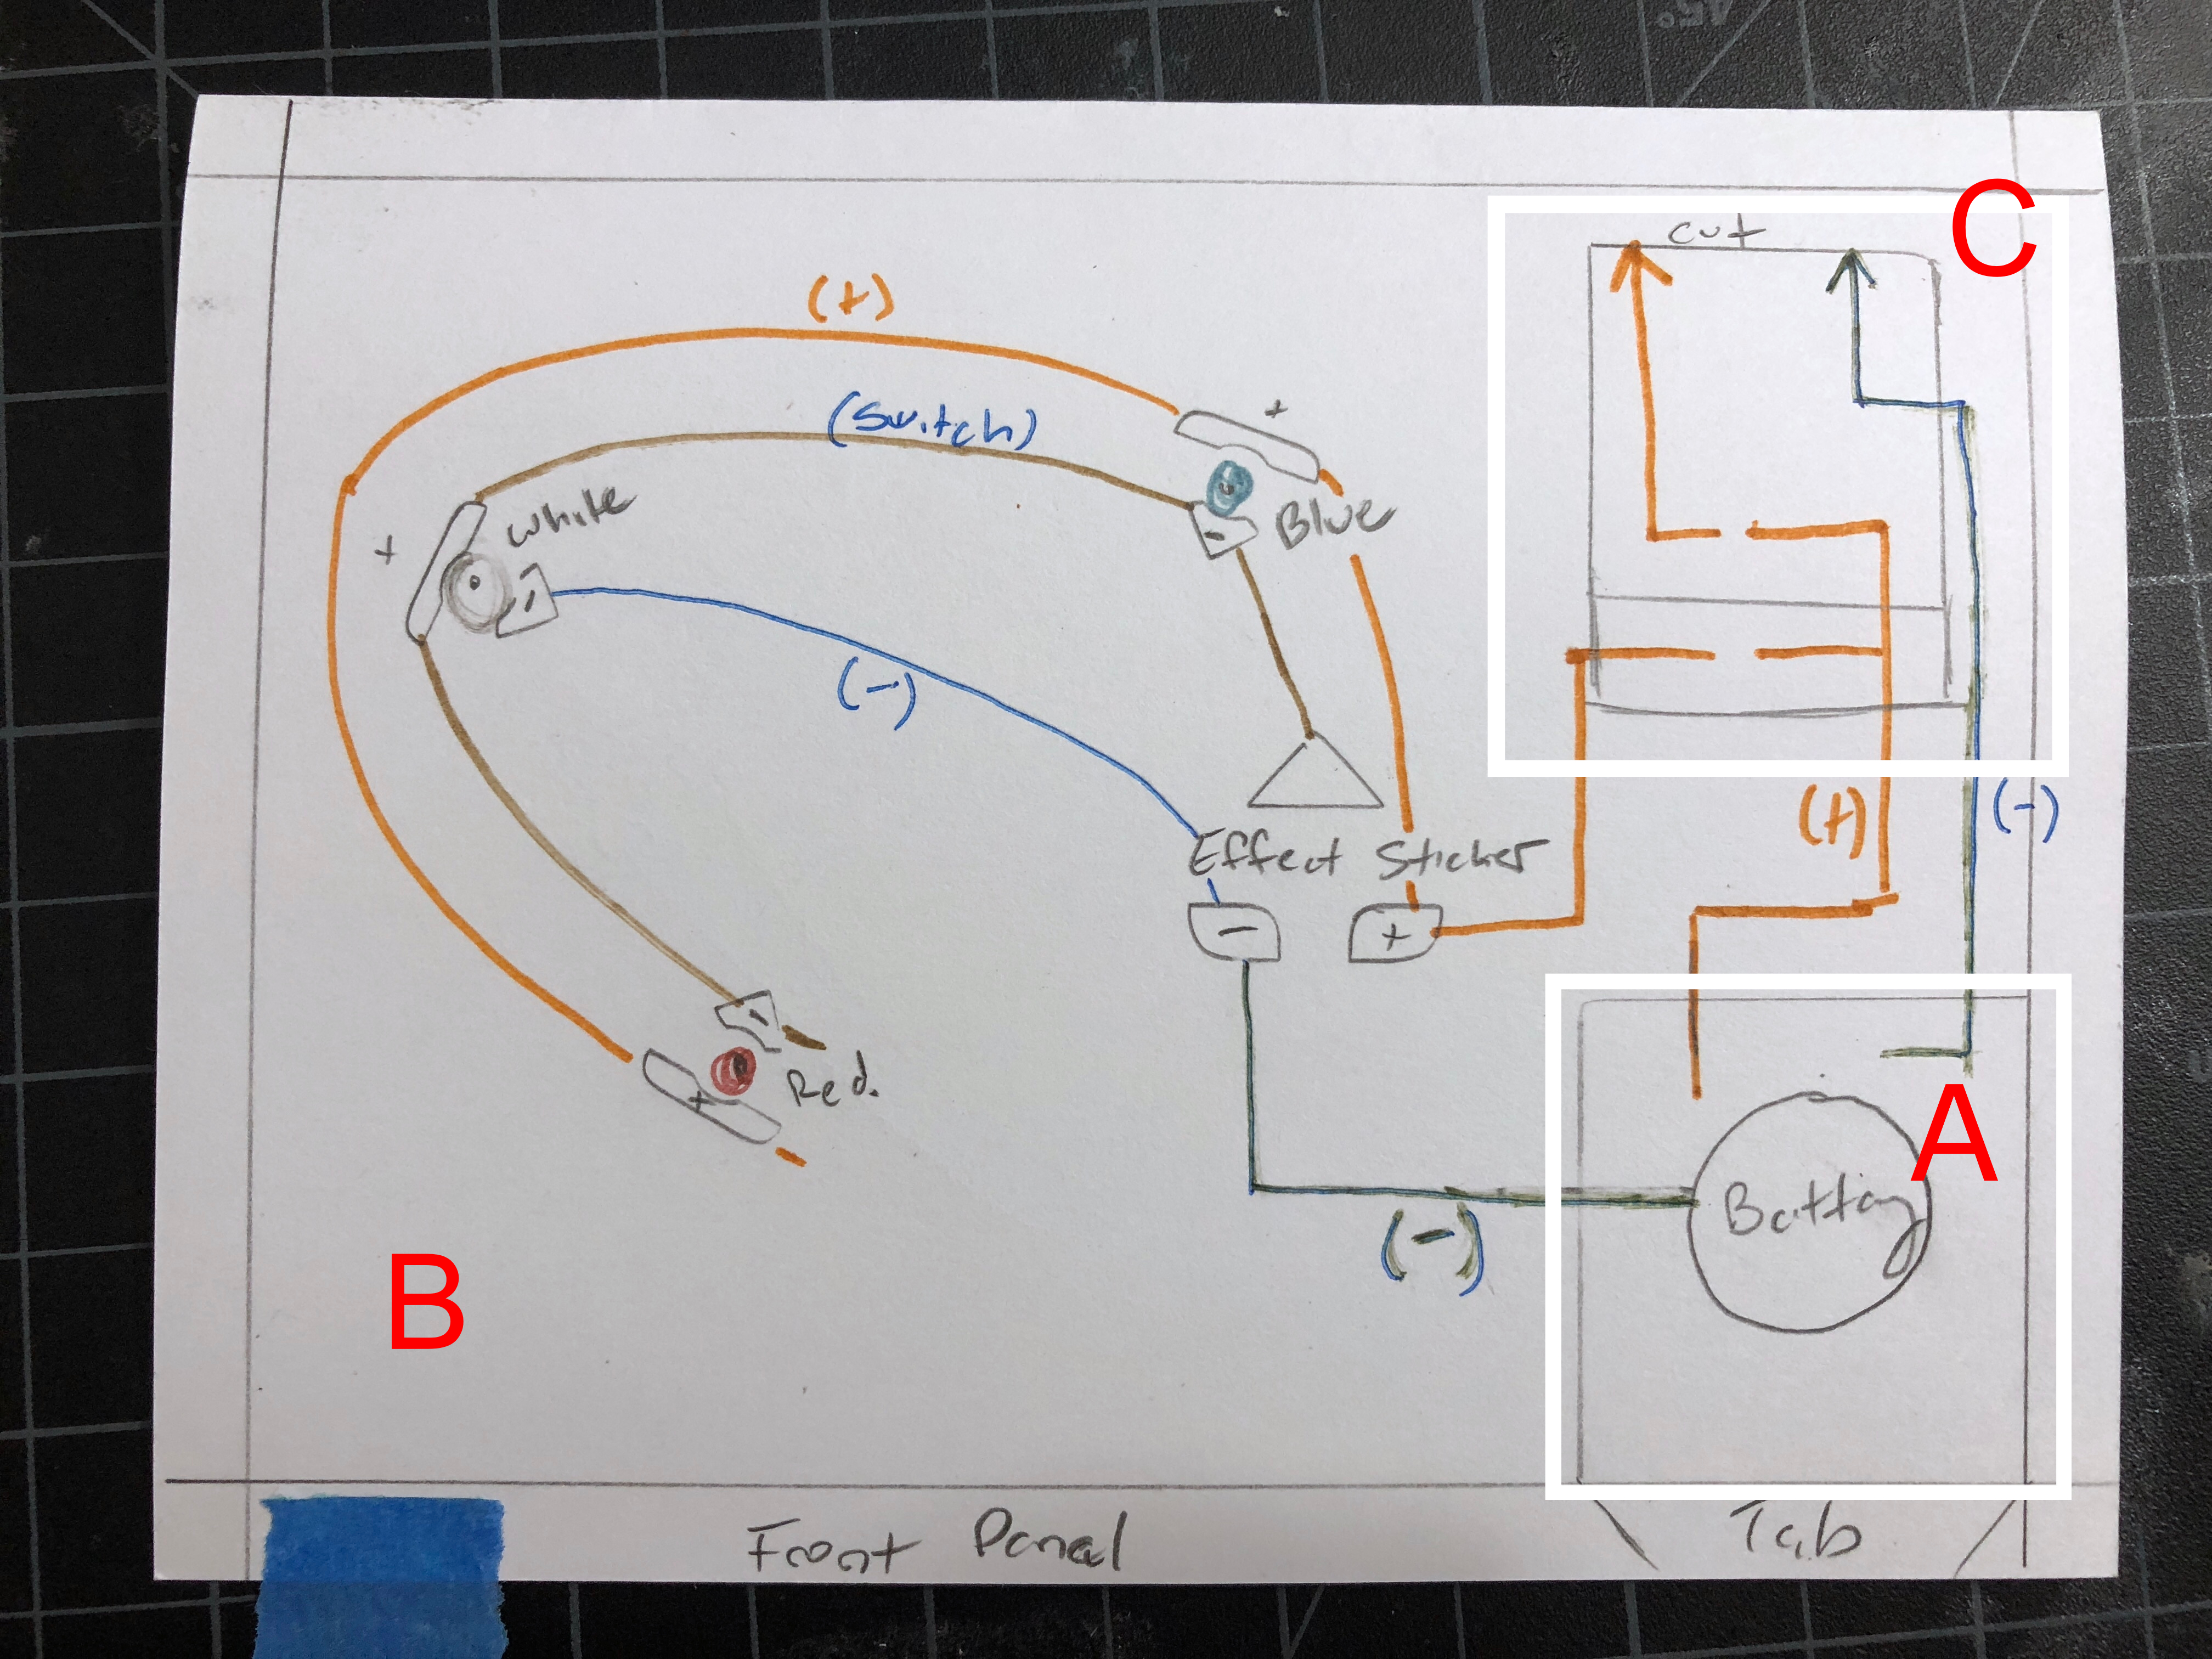
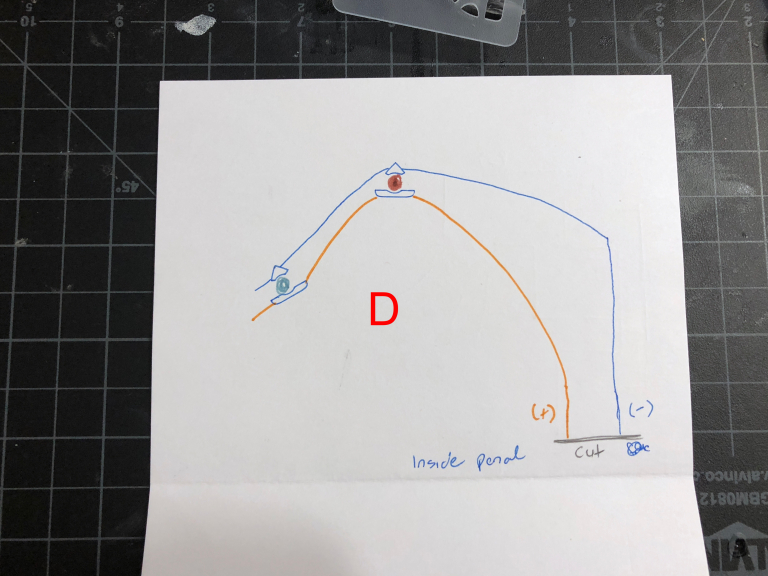
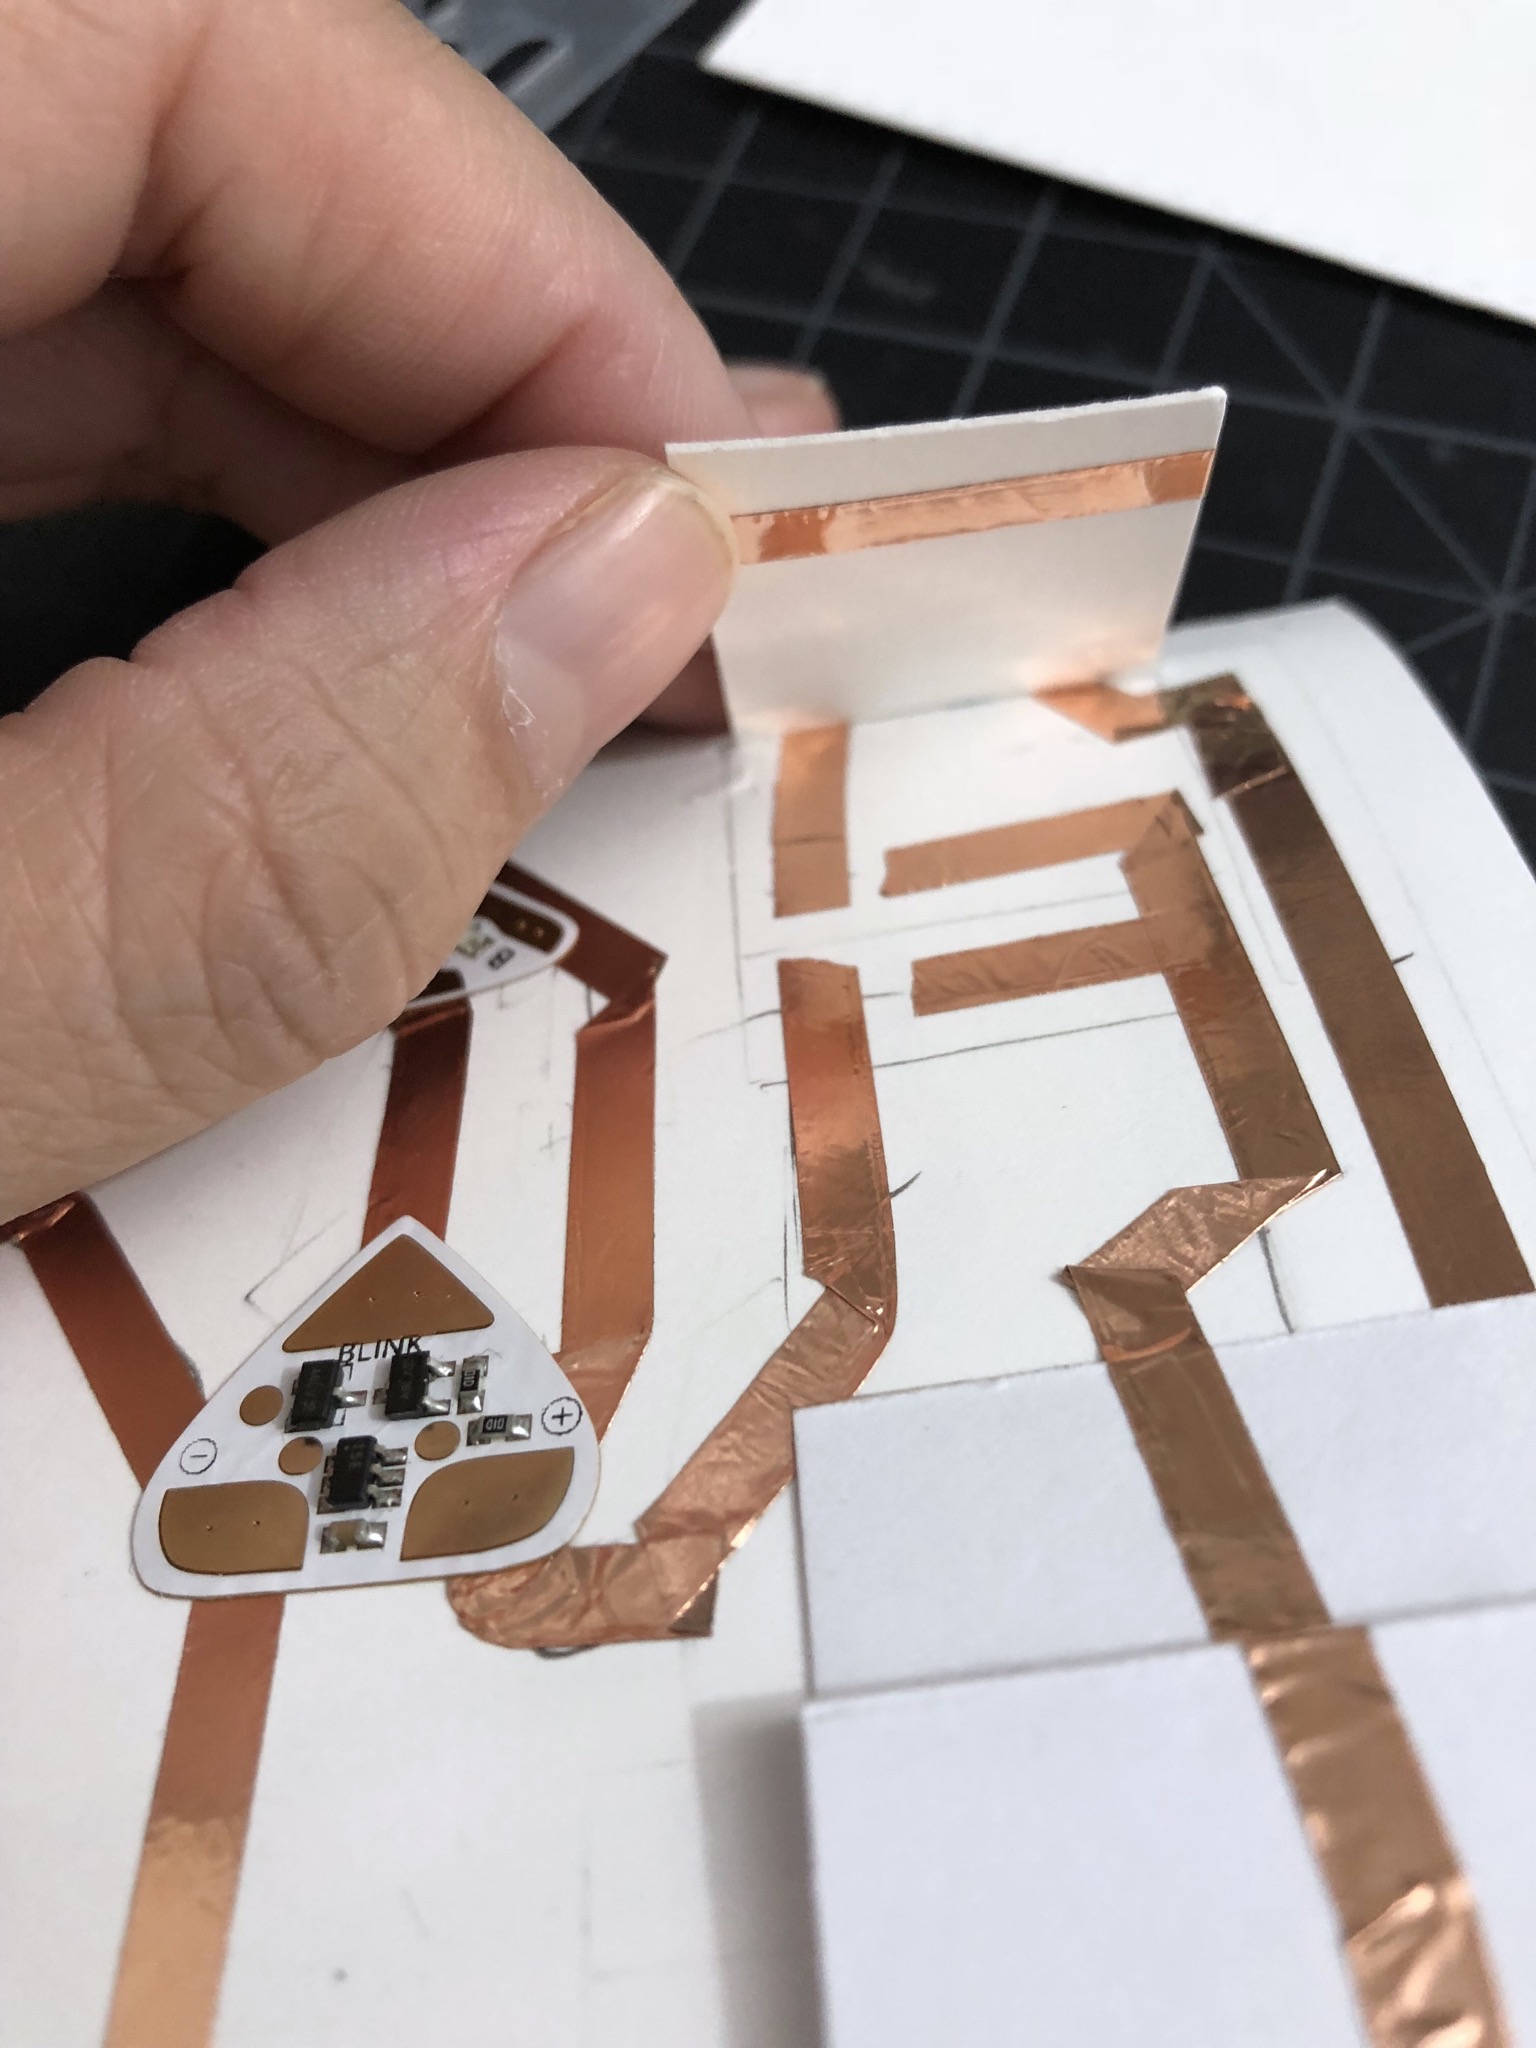
The LED circuit is broken down into 4 parts: (A) the battery and the start of the positive and negative circuit; (B) the LED circuit for the front of the card with the addition of the Blink effect sticker; (C) this is what I am calling the toggle area; and last (D) the inside panel of the card.
To setup the path of the copper tapes and the LED stickers I first draw in where the positive and negative path will be placed starting with the battery section. The positive copper tape will go directly to section C and split into 2 path with a tiny break in between. The path closer to the battery will lead to the Blinking sticker (section B) and then right into the color LED lights. The path above it will lead to a cut in the card and it gets threading into the slit to the inside (section D).
The negative copper tape will have two different start points. One will lead to the slit in section C and then to the inside of the card (section D) while the other copper tape will lead directly into the Blinking sticker and then to the color led lights in the front panel (section B).
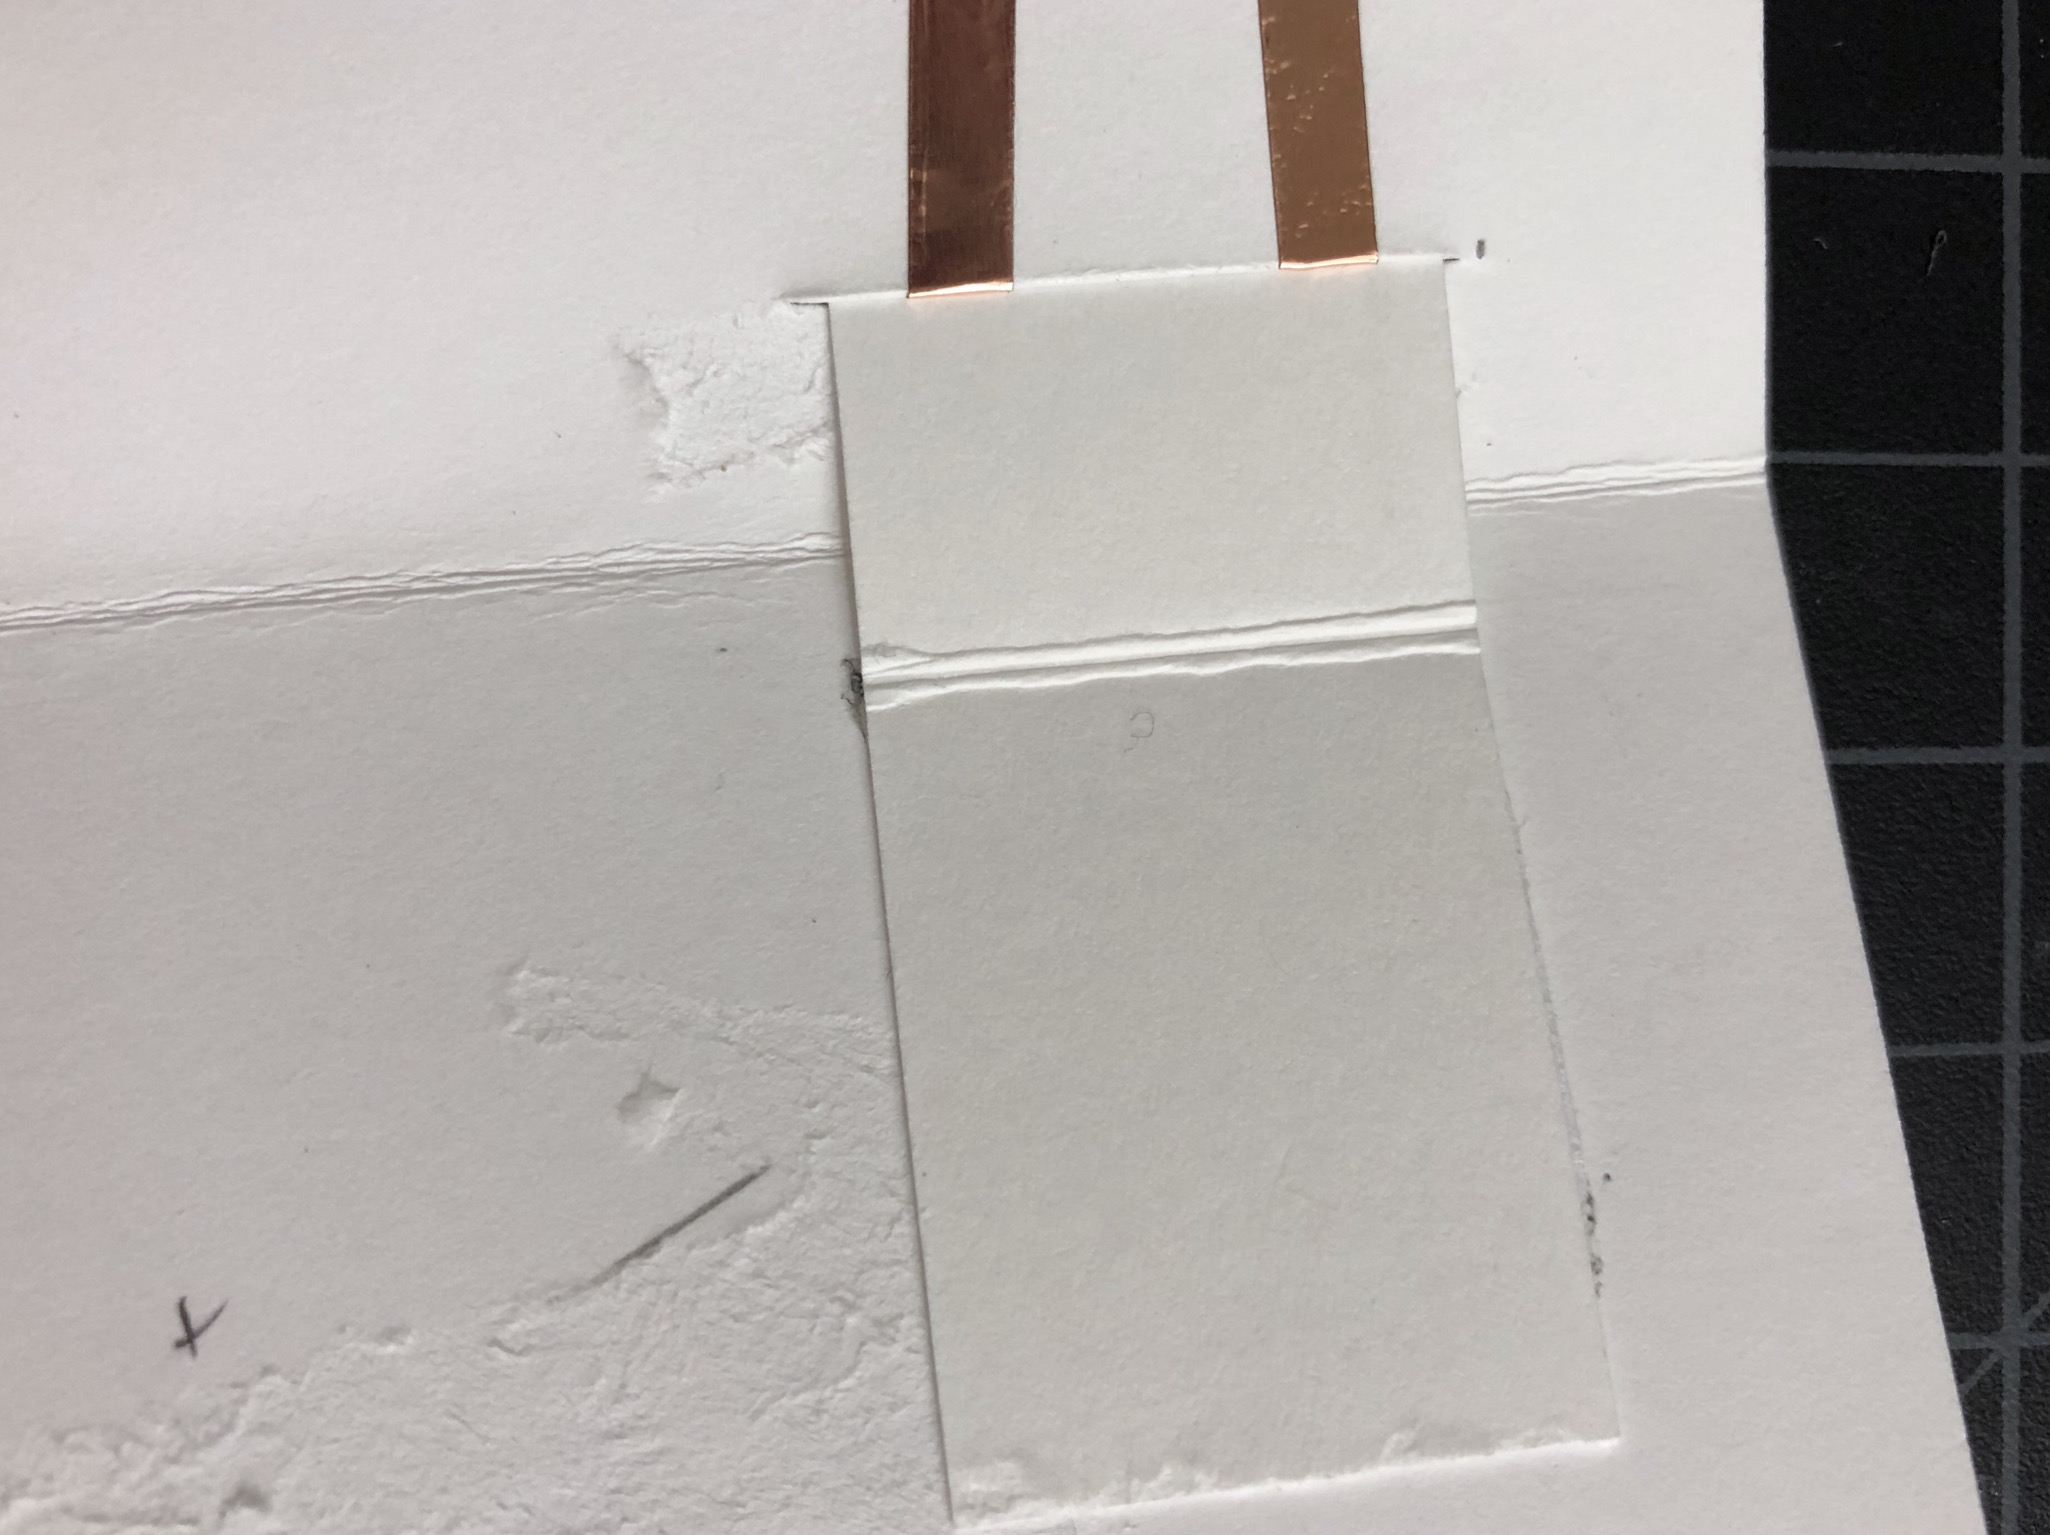
To create my toggle in section C I first cut a strip of card stock and crease it in half. One half will be glue down to the inside of my card (make sure its slightly removed from the middle card crease) and I tuck the other end into the slit so it will show in section C. I then placed a small piece of copper tape on the toggle strip. This will move over each break when you open and close the card.
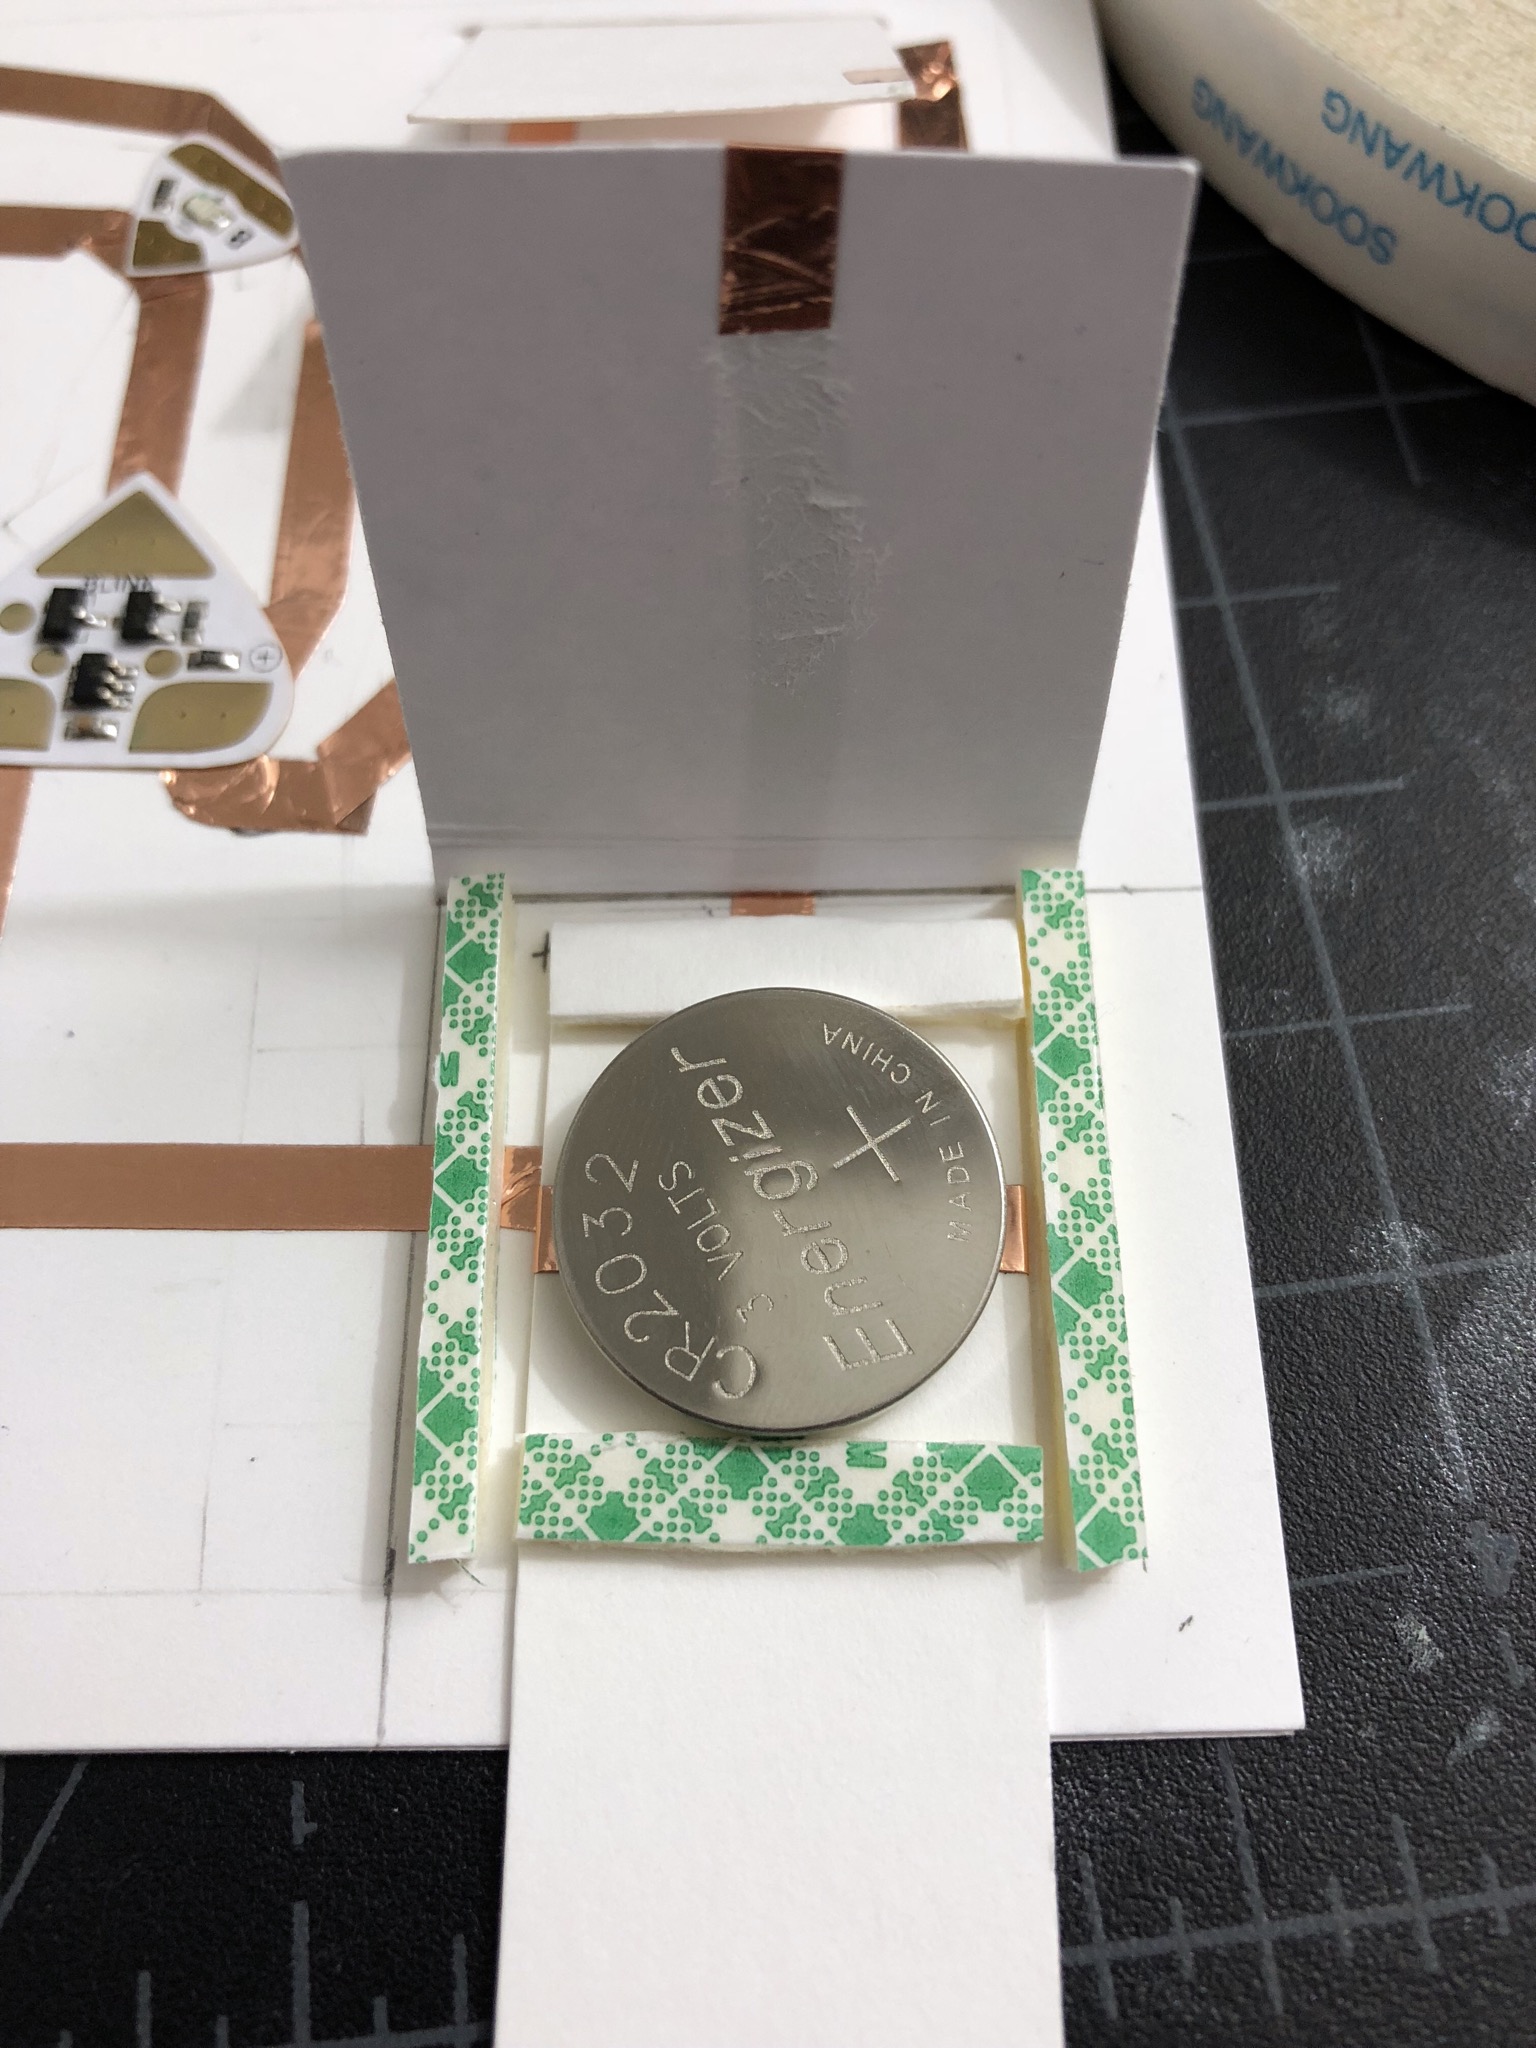


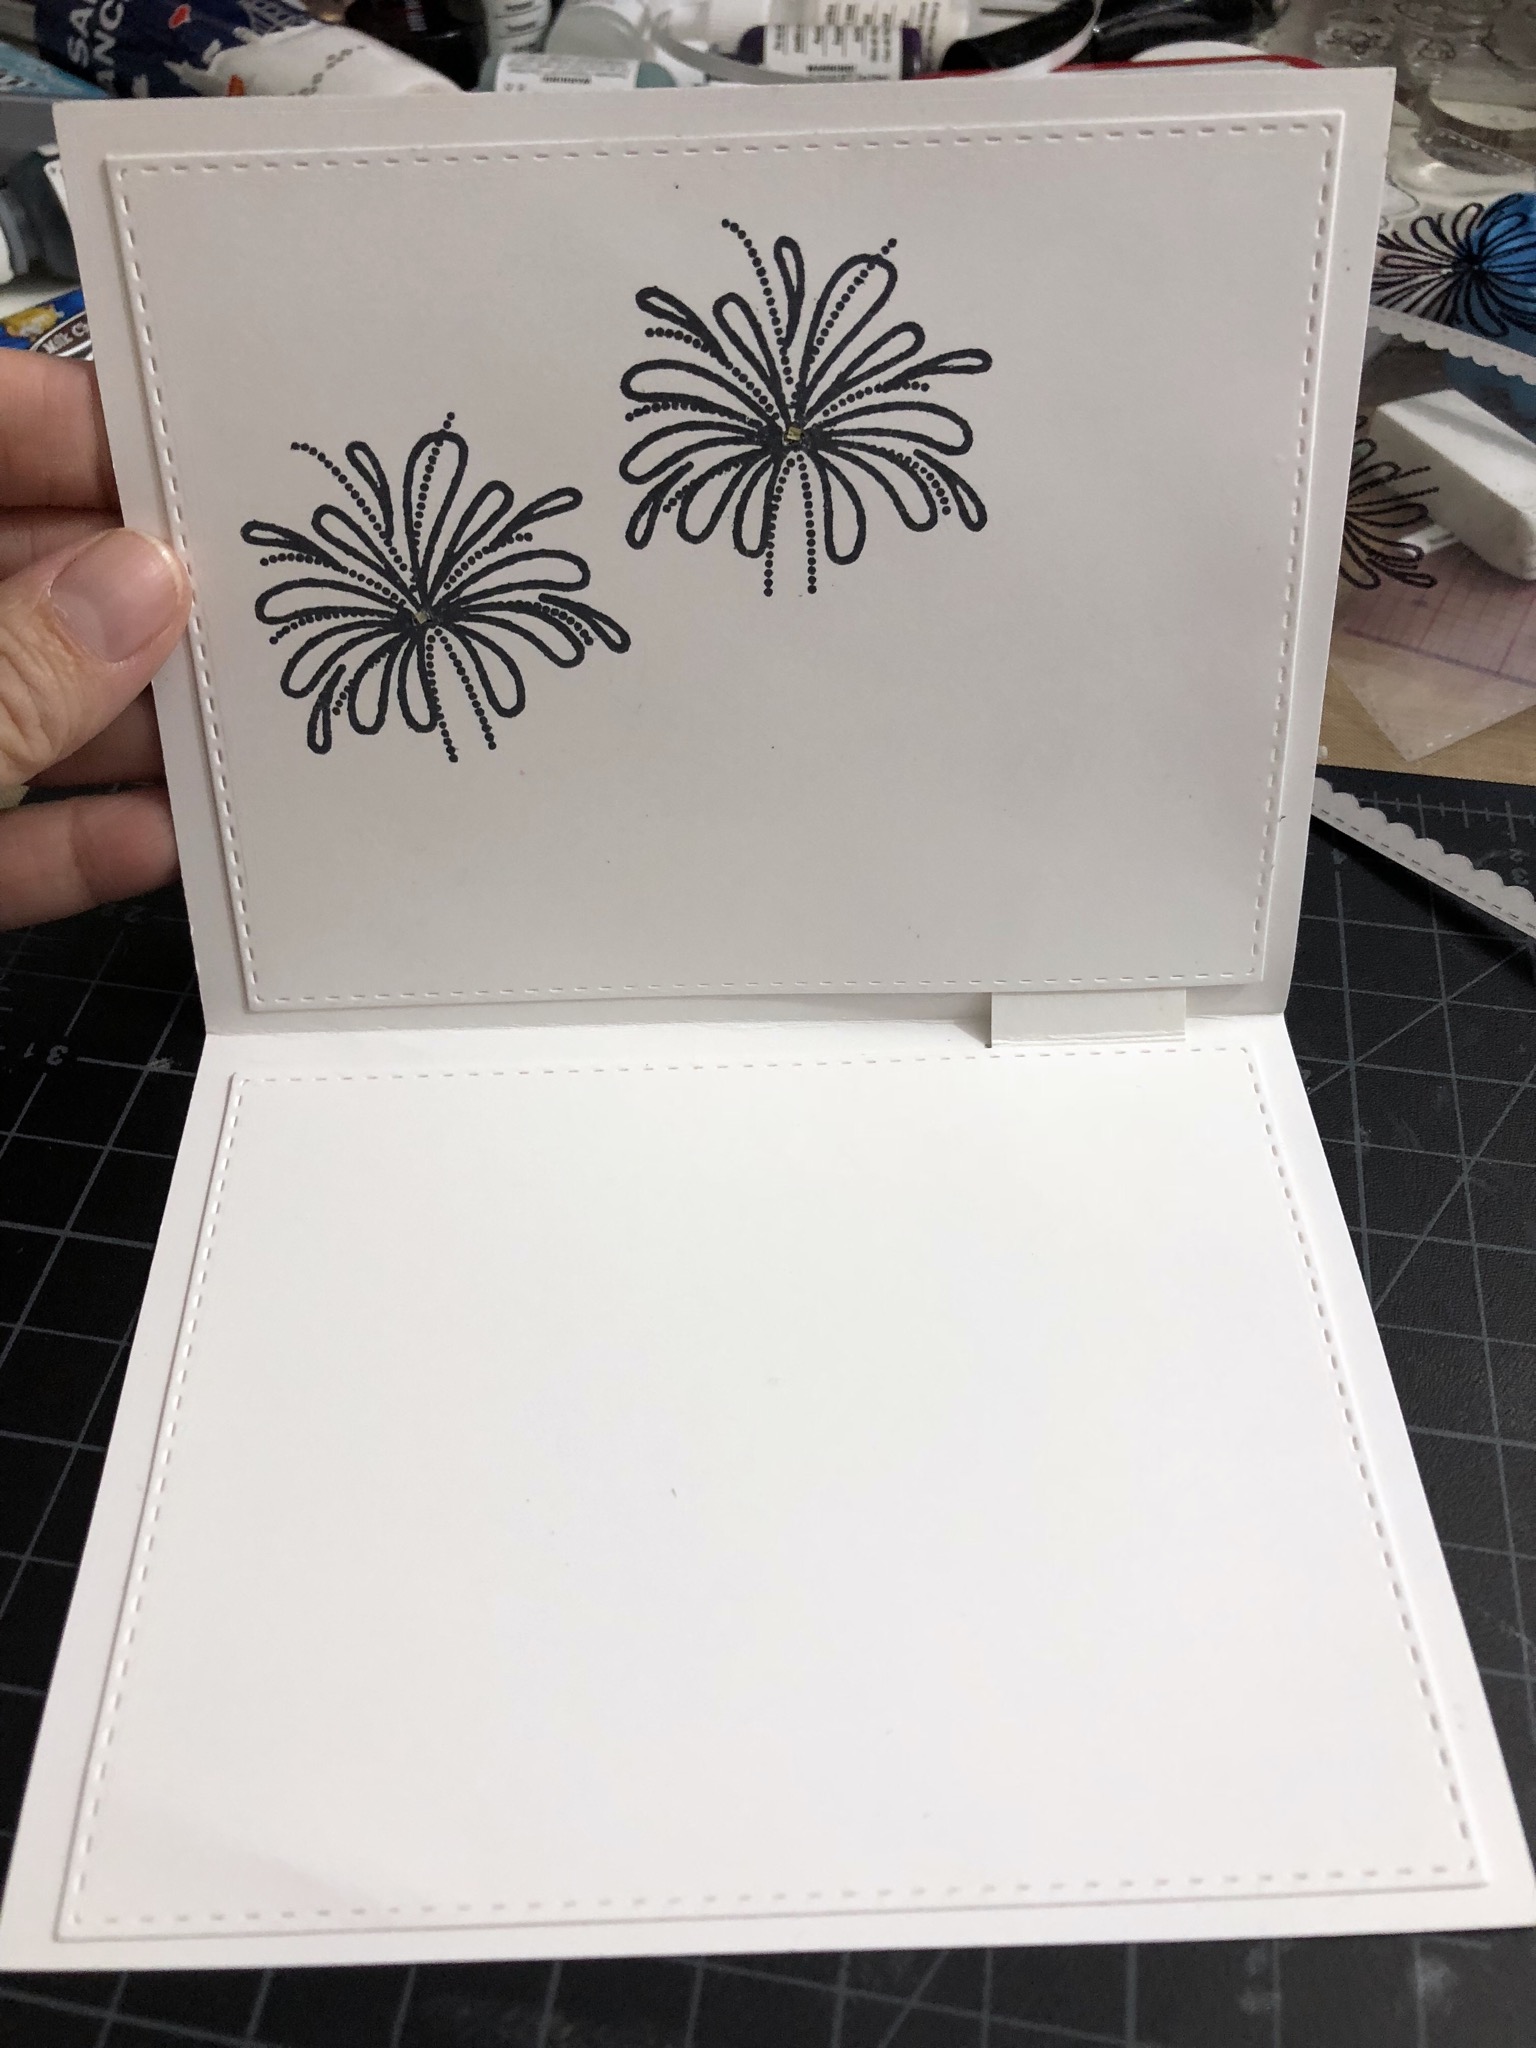 To finish off my card I create a slider tap for my battery with a piece of copper tape wrapped around it. Glue down my starry background panel onto the front of my card (making sure to align the the pre-cut holes over the light stickers and do NOT place any glue over the toggle strip). Place my silver frame over my acetate sheet with the firework image. Tape that down over my card base using double layers of foam tape. Add my lady liberty and sentiment over the battery. For the inside of my card, I placed my white stitched rectangle panel over the inside LED stickers.
I hope you enjoy this tutorial!
Supplies List:
Chibitronics RYB LED Light Stickers
Chibitronics Effect Stickers
Chibitronics White LED Stickers
Copper Tape
Energizer 2032BP-4 3 Volt Lithium Coin Battery – Retail Packaging (Pack of 4)
Sweet Stamp Shop – Lady Liberty
Sweet Stamp Shop – Starry Night
Judikins Embossable Window Plastic Sheets, 4.25-Inch x 5.5-Inch, Clear, 20-Pack
3M Scotch 1/2-Inch by 36-Yard Double-Sided Foam Tape
Scor-Pal Scor Tape, 1-Inch by 27-Yard
Neenah Exact Index, 110 lb, 8.5 x 11 Inches, 250 Sheets, White, 94 Bright
-Tiffany
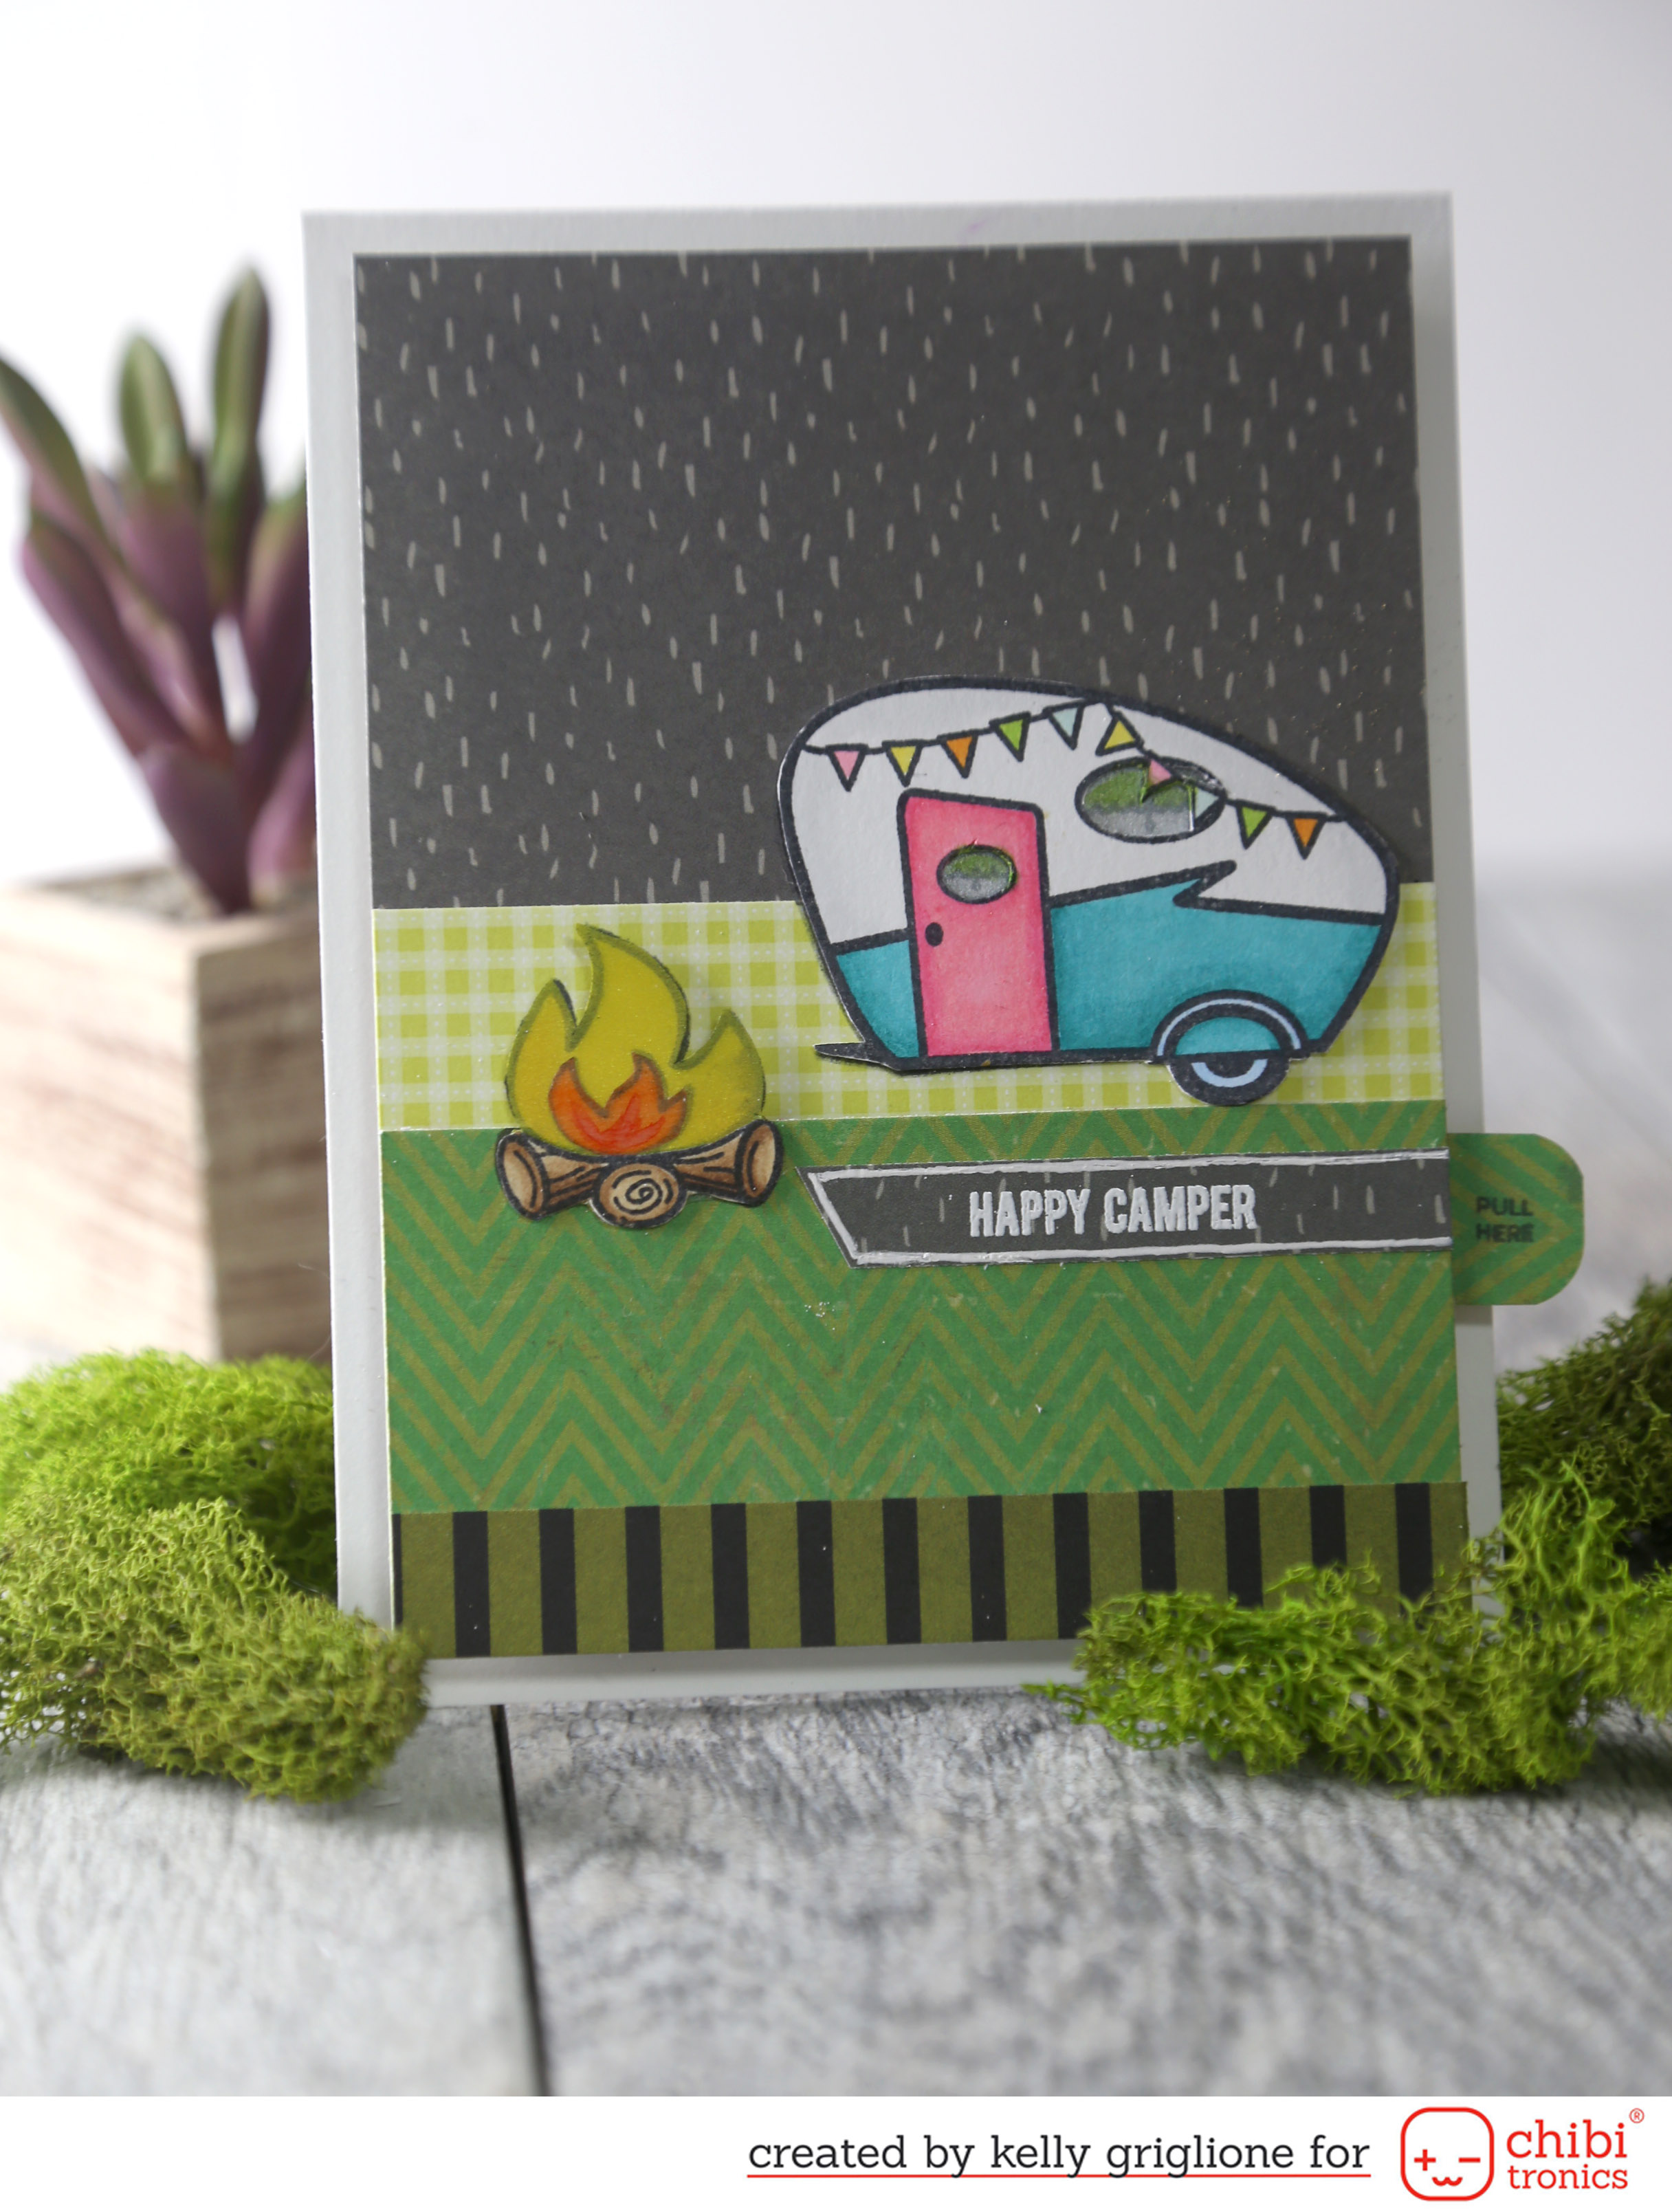 Hi everyone! What an amazing project by Tiffany! This is Kelly Griglione from Notable Nest with a more basic project to share. I was so excited to use the adorable Campout stamp set from Sweet Stamp Shop. Not only is it cute, but it’s perfect to use with Chibitronics! Fire, lanterns, fireflies…I had so many lighted objects to choose from! But before I show you the lighted card, let’s take a look at how it’s made …
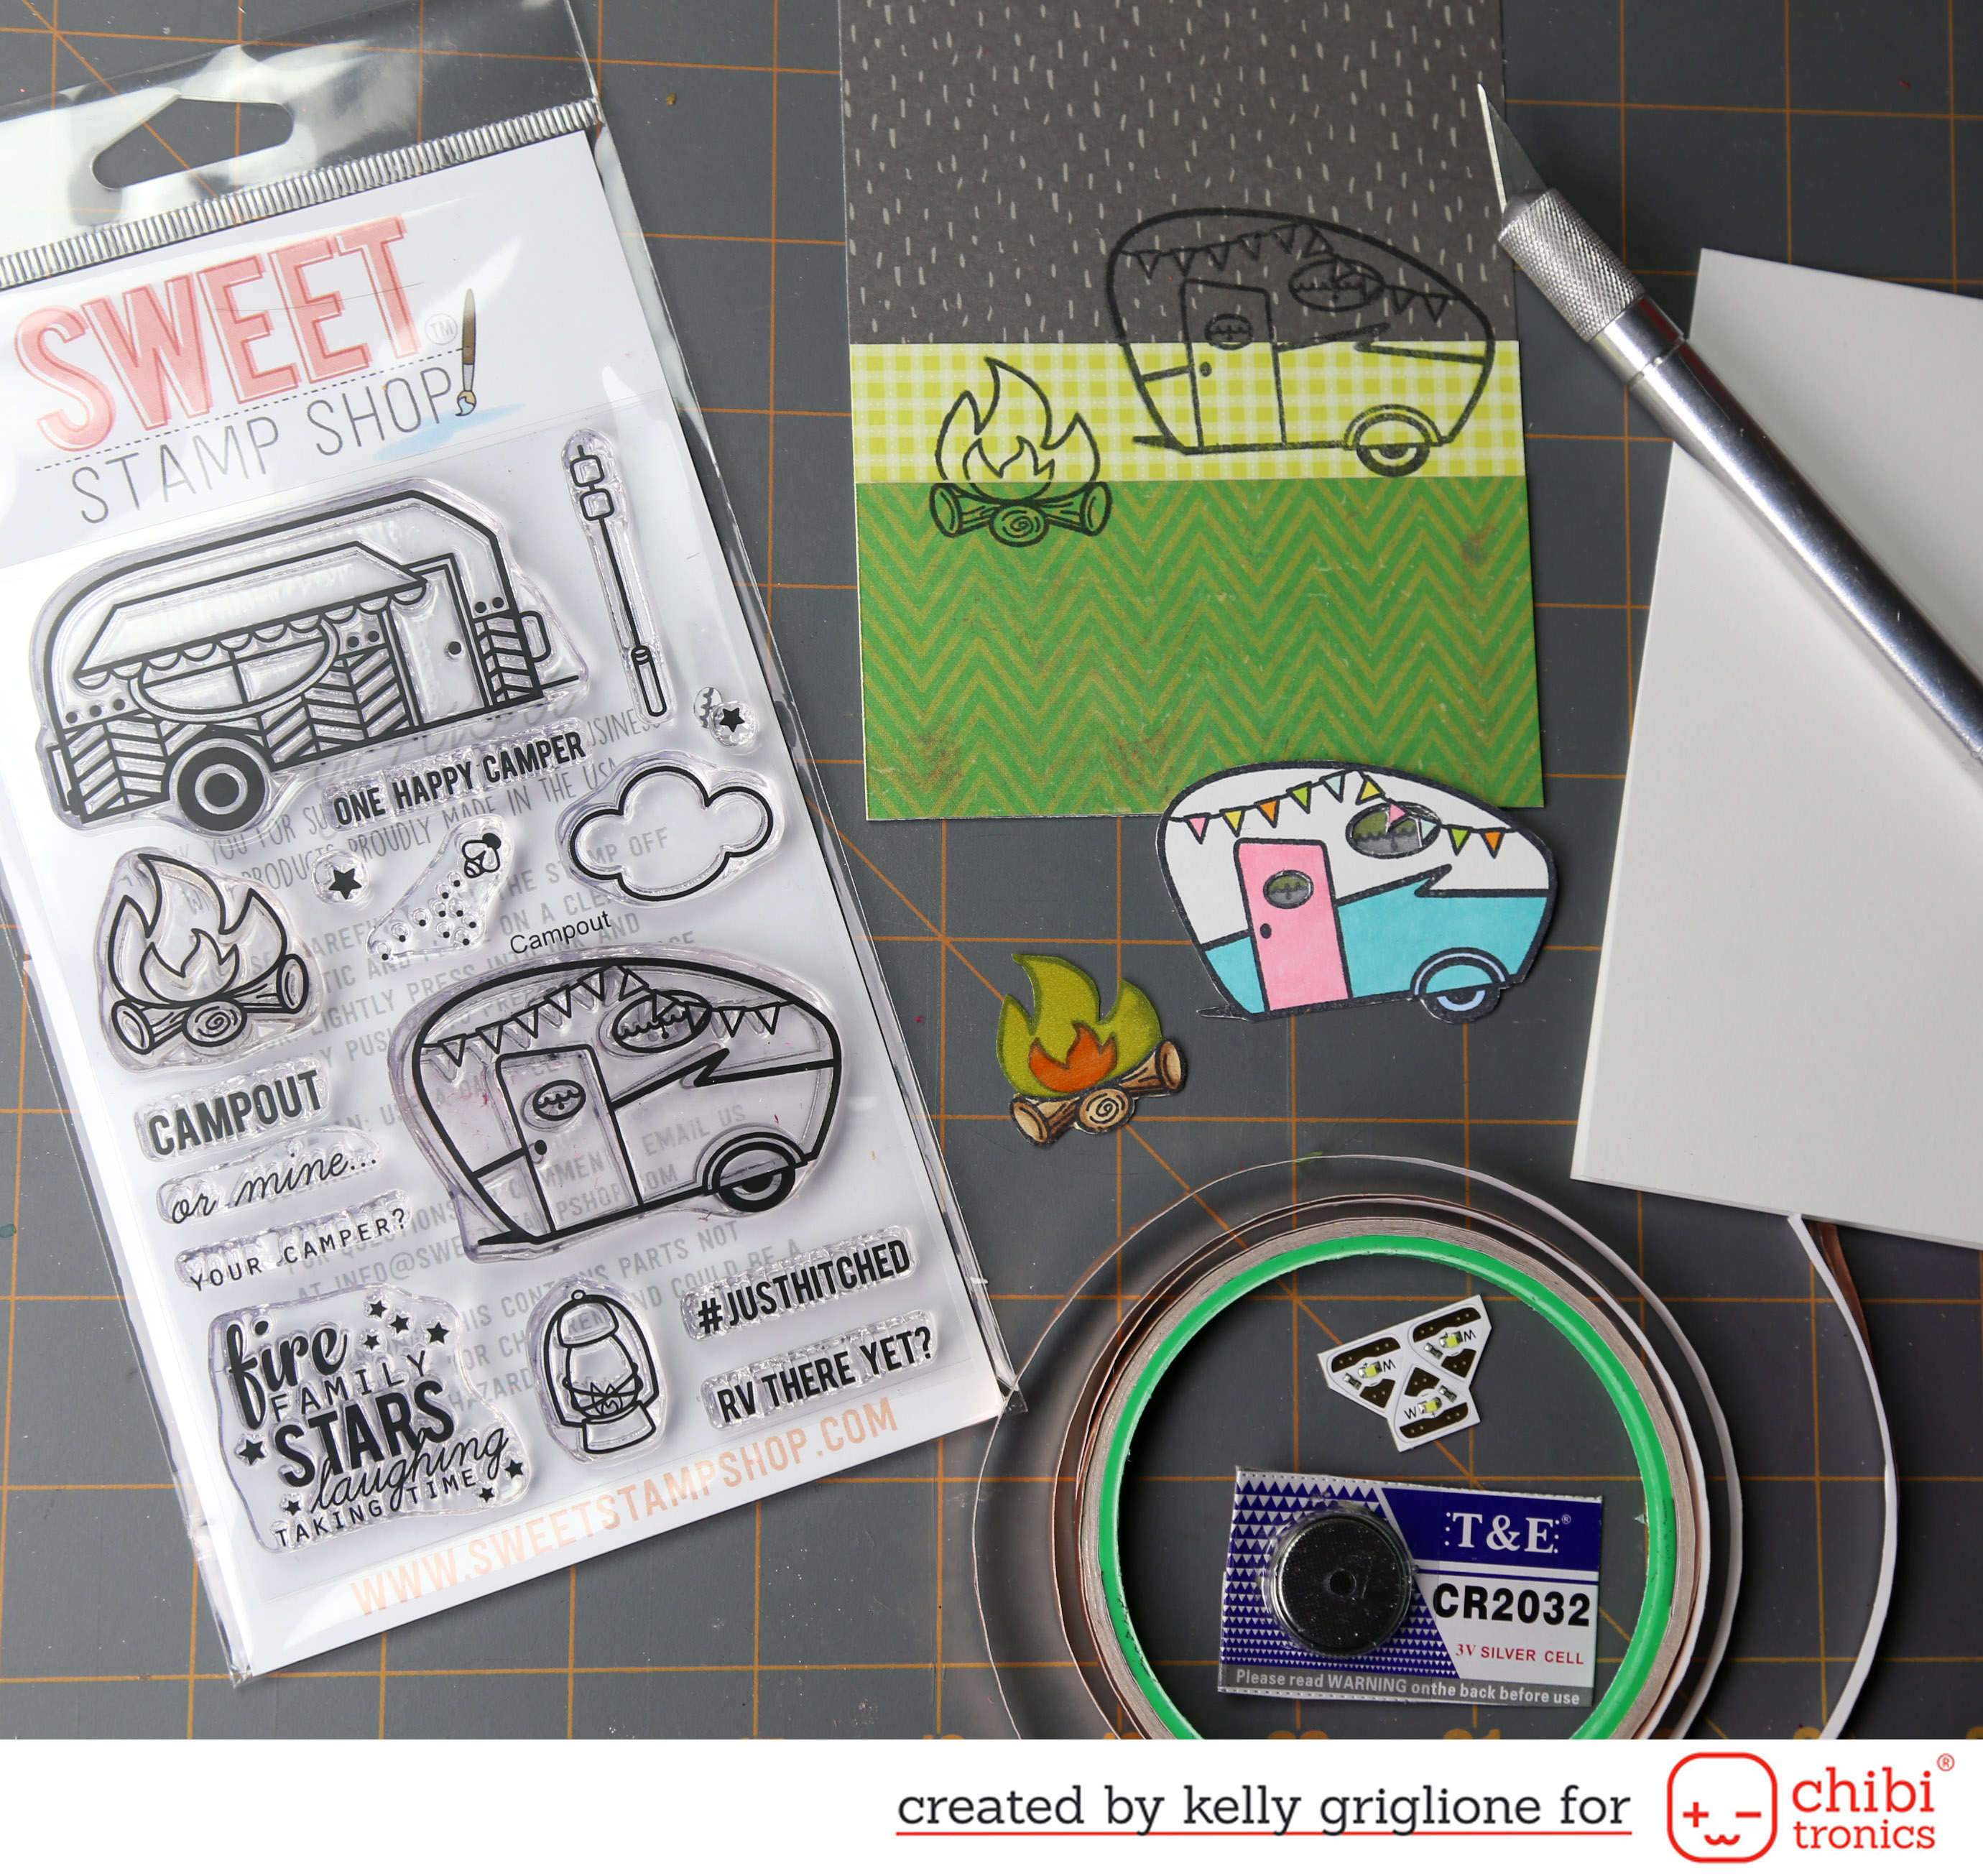 I’m using the Campout stamp set, the Chibitronics starter kit (copper tape and white lights), CR2032 battery, and an exacto knife to cut out the windows of the camper. Once I have the camper and fire stamped, colored and cut out, I stamp a duplicate camper and fire on my card panel so I know exactly where to cut out so my lights will show through nicely.
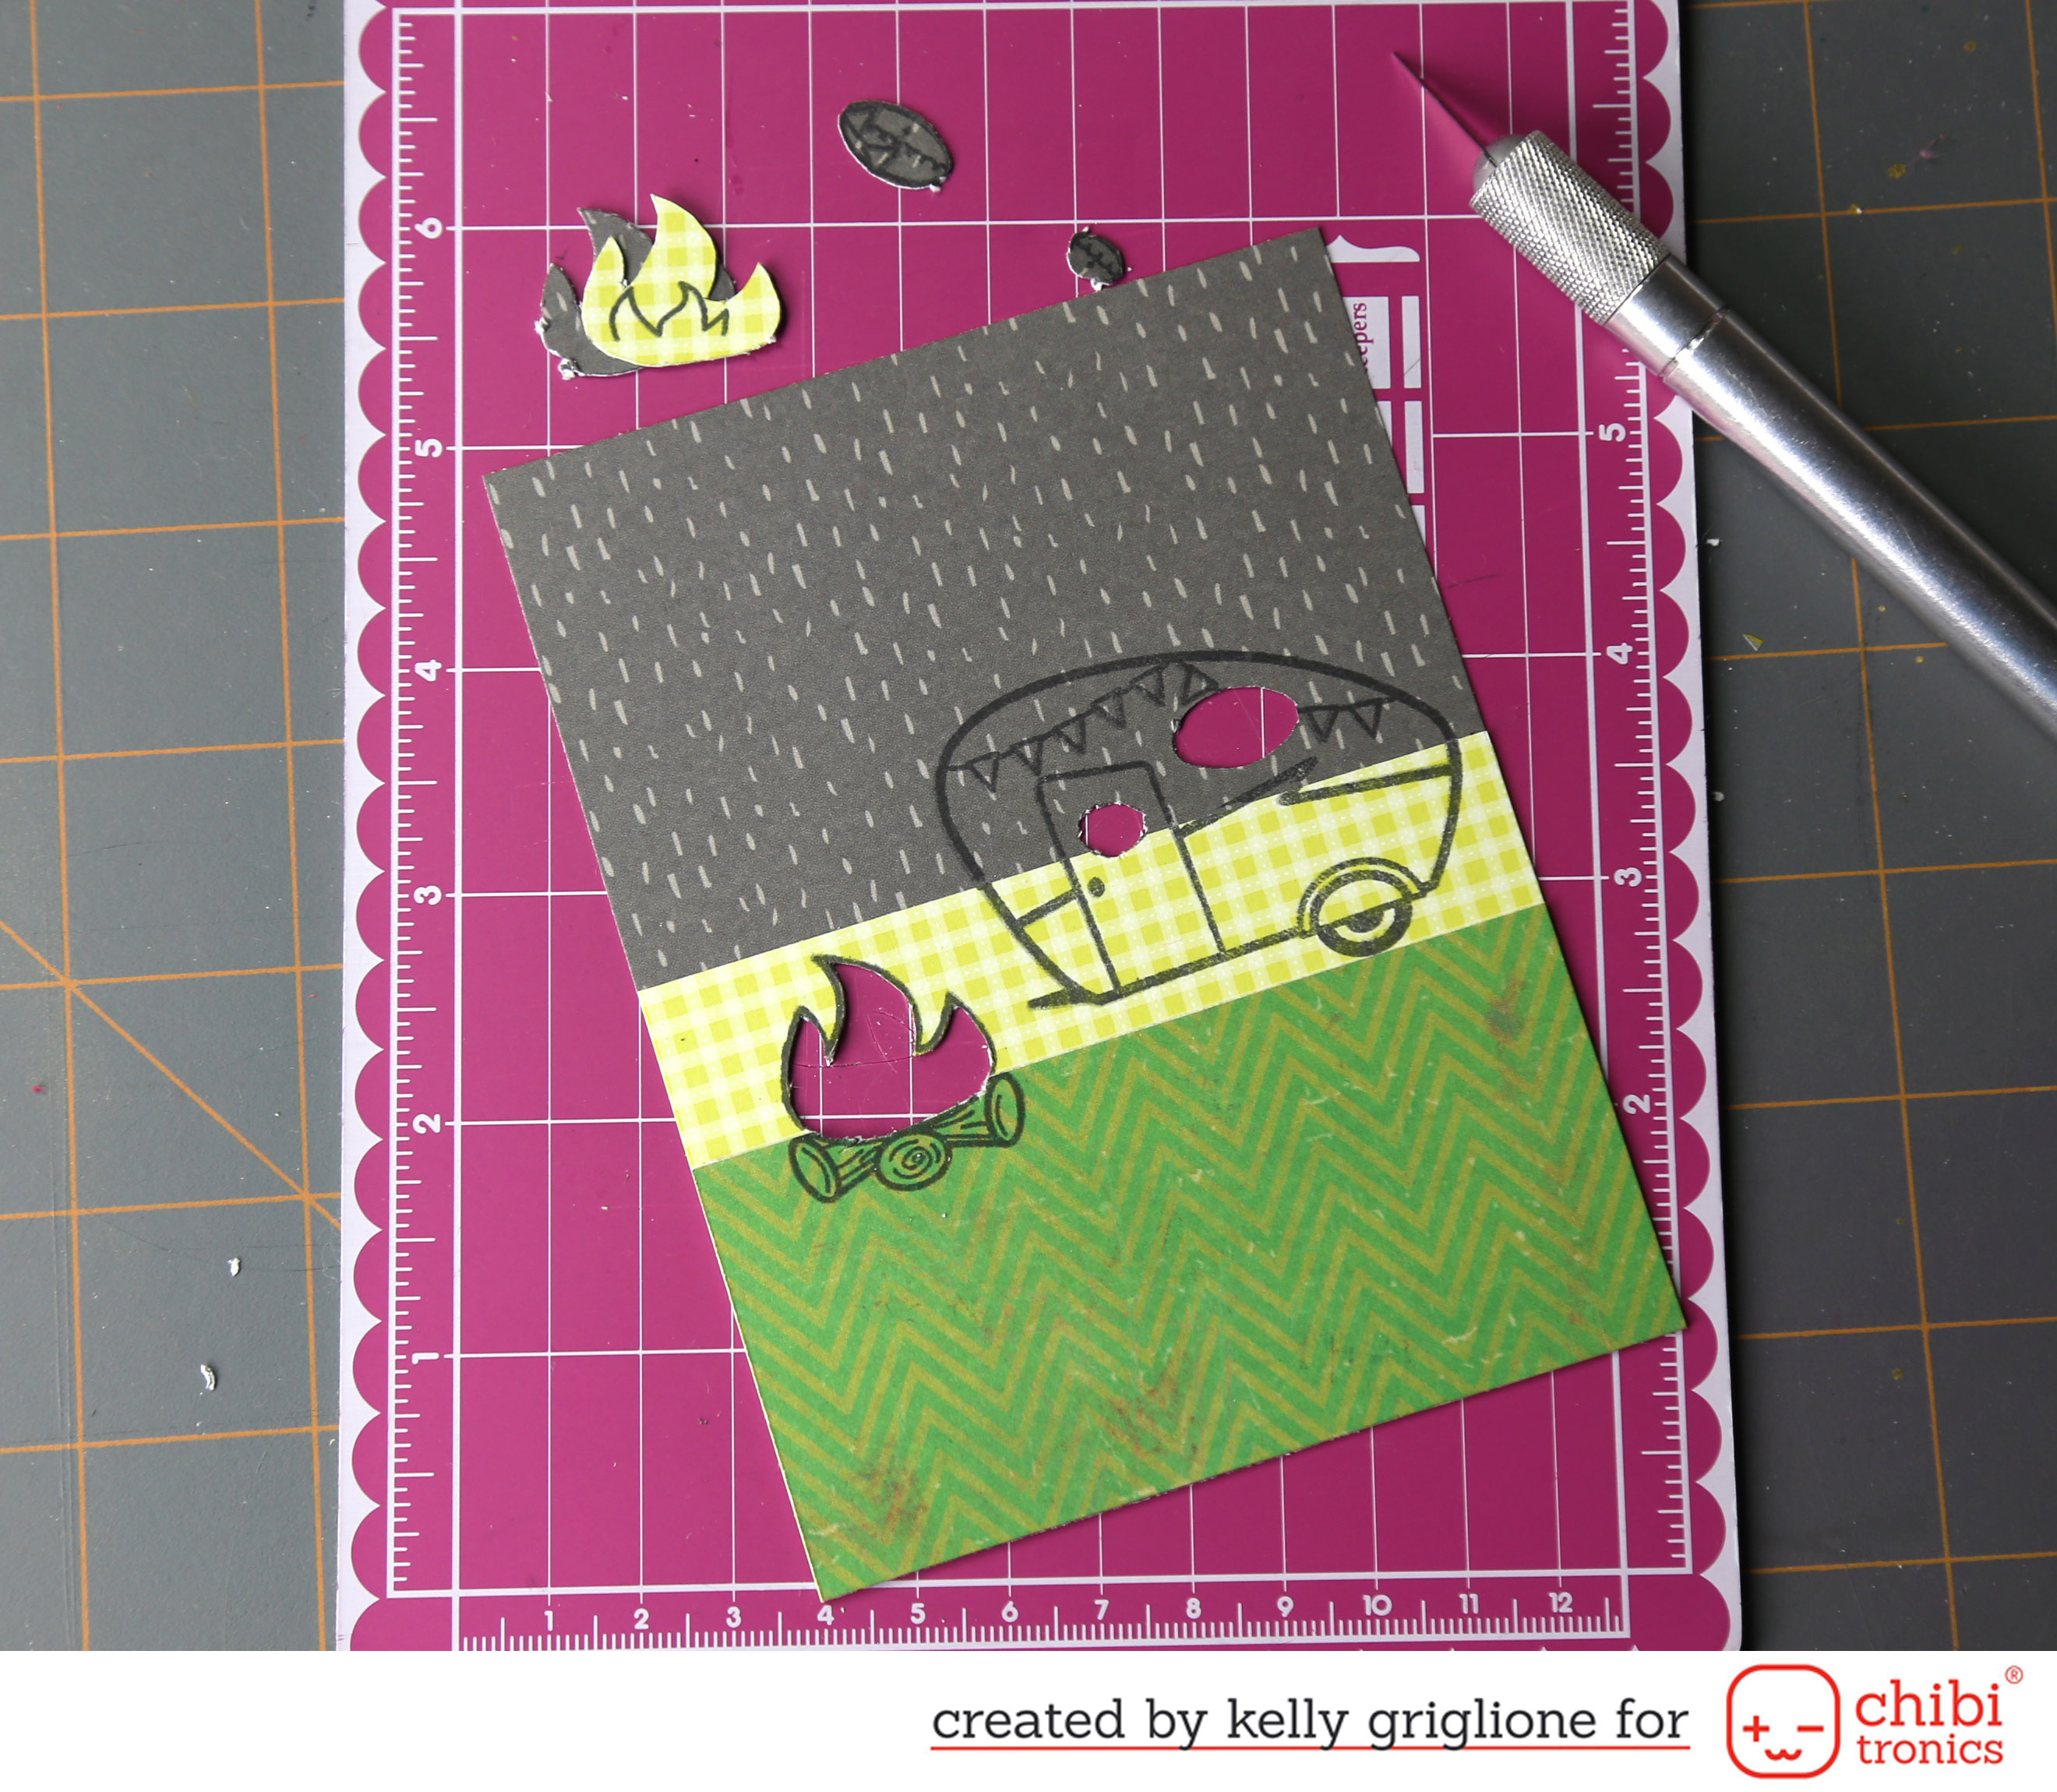 Now that the fire and windows are removed from my card panel, I will use this to trace through on my card base so I know exactly where to position the lights …
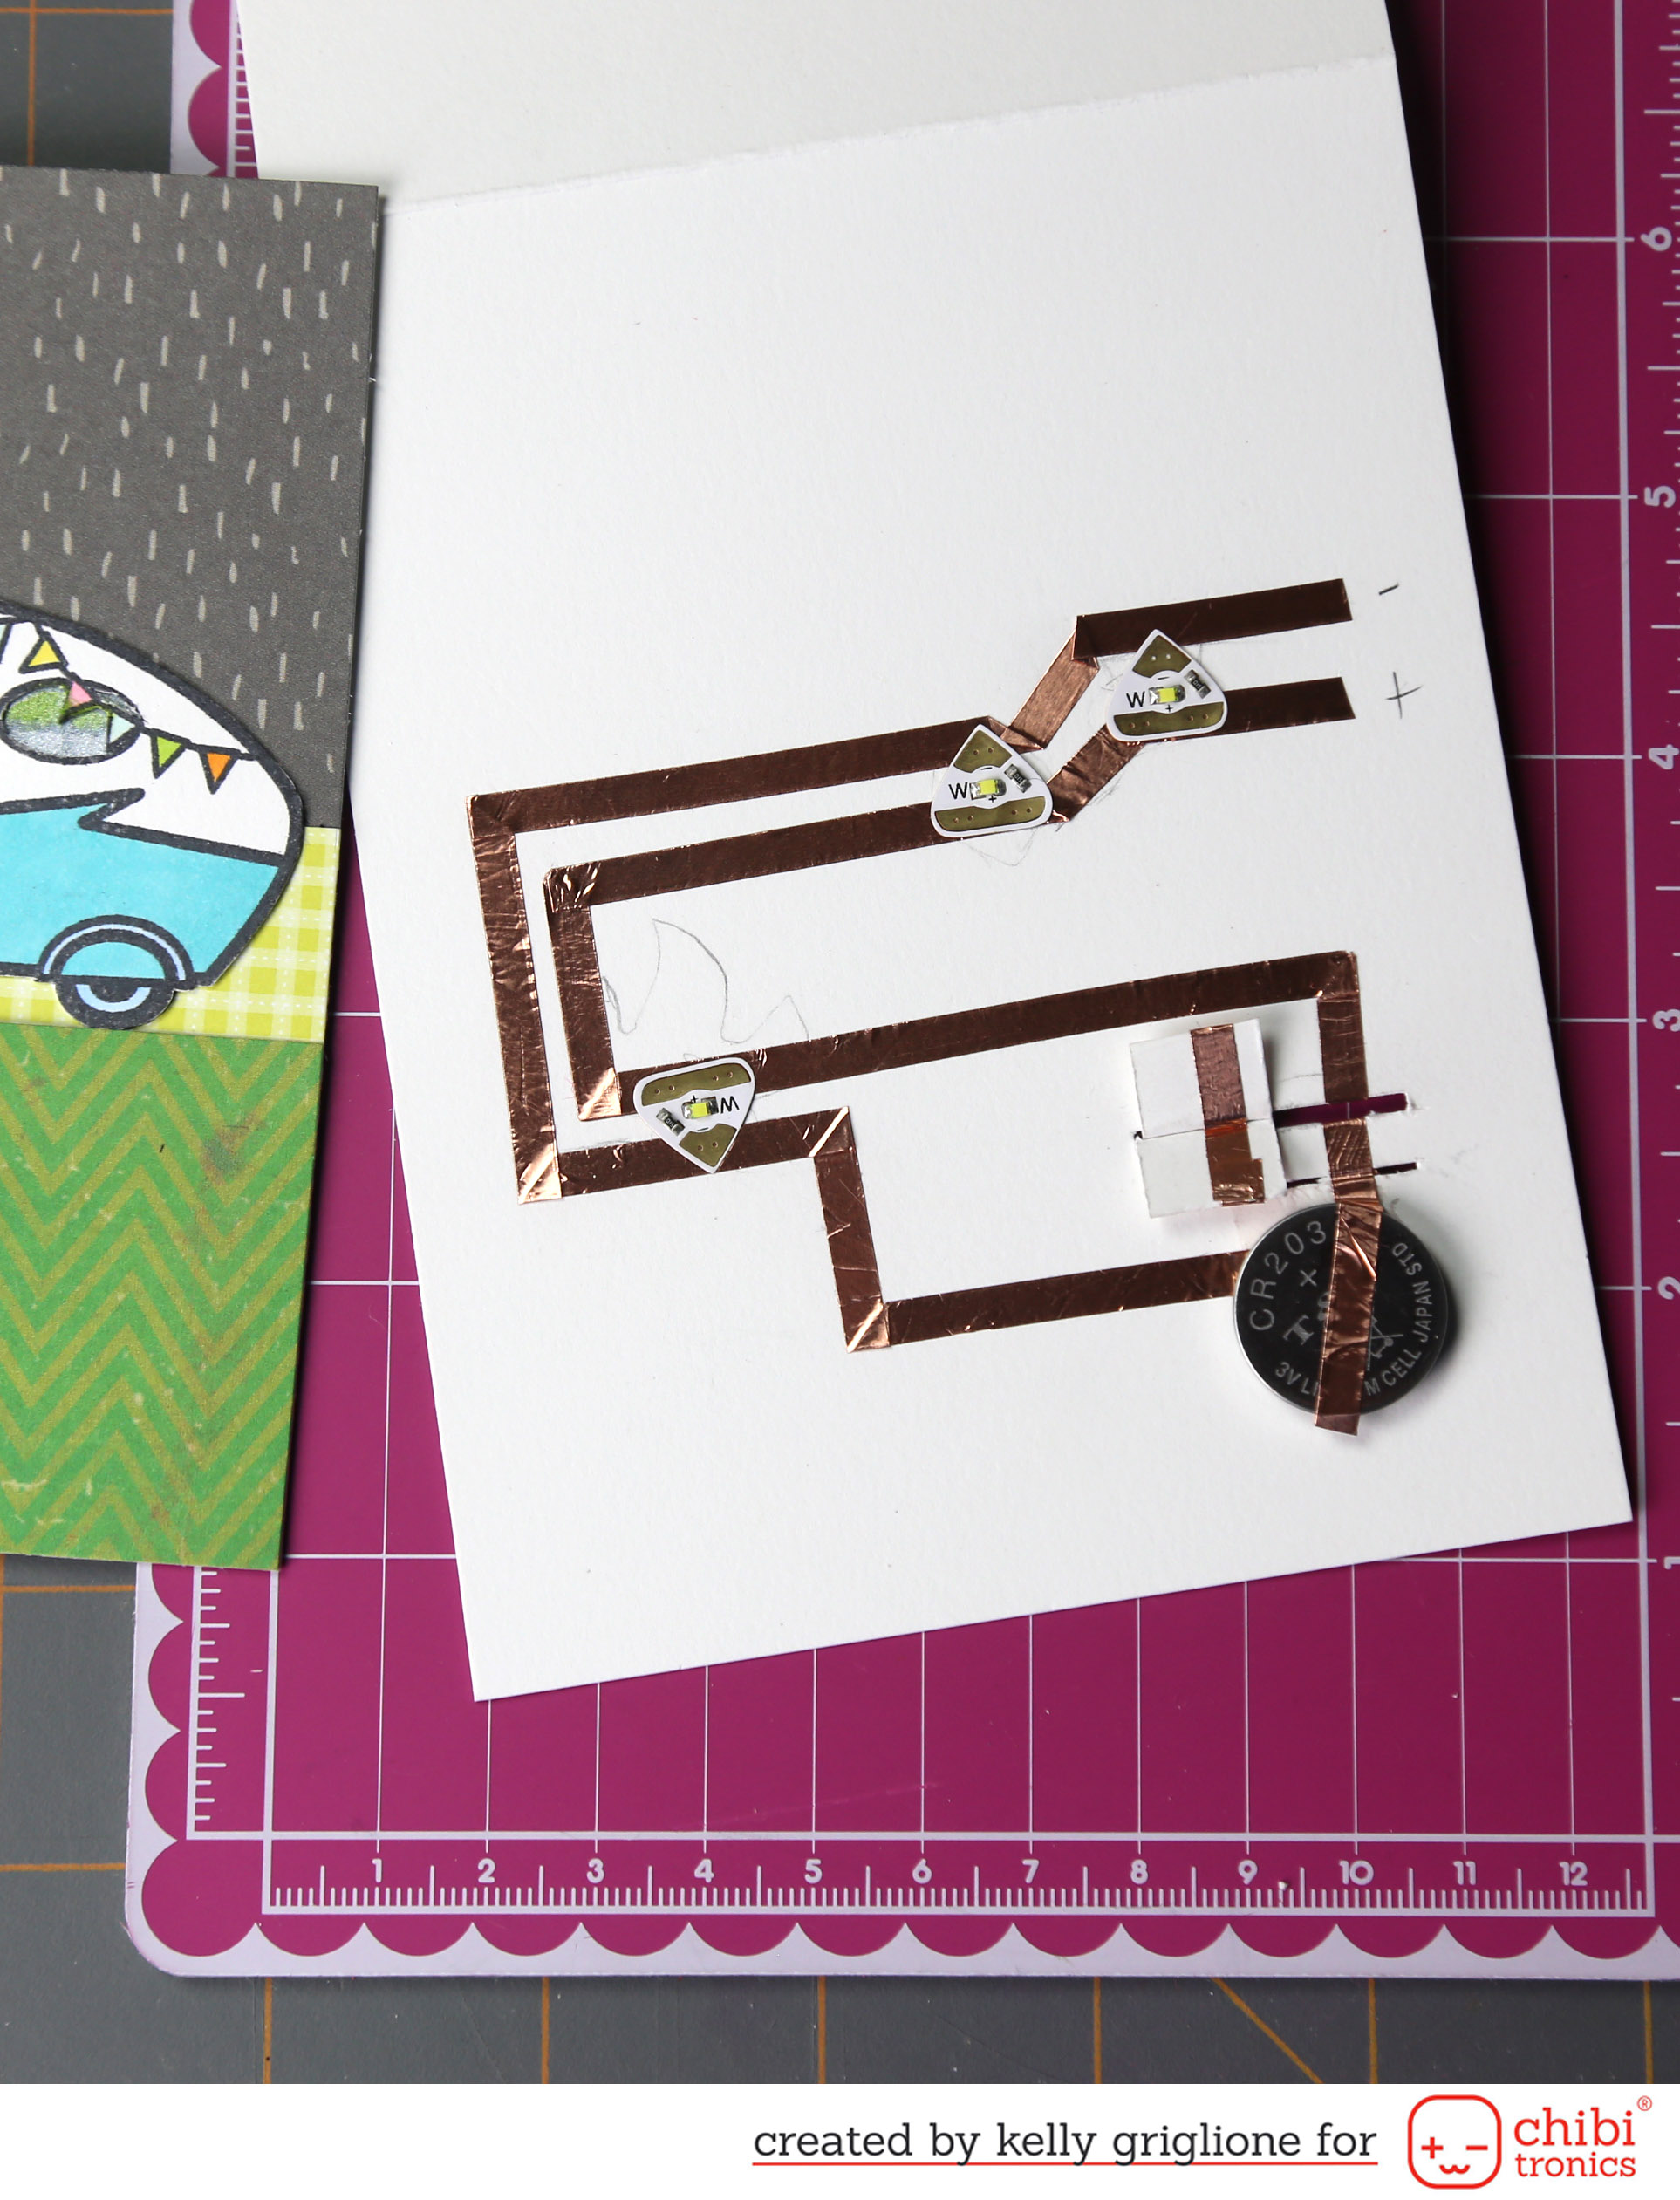 Here you can see the pencil marks for the fire, and how I placed the light in the lower center, by where the logs would be. The design for this circuit uses a switch, which is just above the circular battery. Once the switch slides to the right (by pulling a tab that I will add later), the copper tape on the switch will bridge the gap and allow the electricity to pass through to light up the lights. Brilliant! This design was shown to me by the very talented Eiko Uchida, and she has a wonderfully detailed tutorial on constructing it in yesterday’s post.
So are you ready to see it lit up?
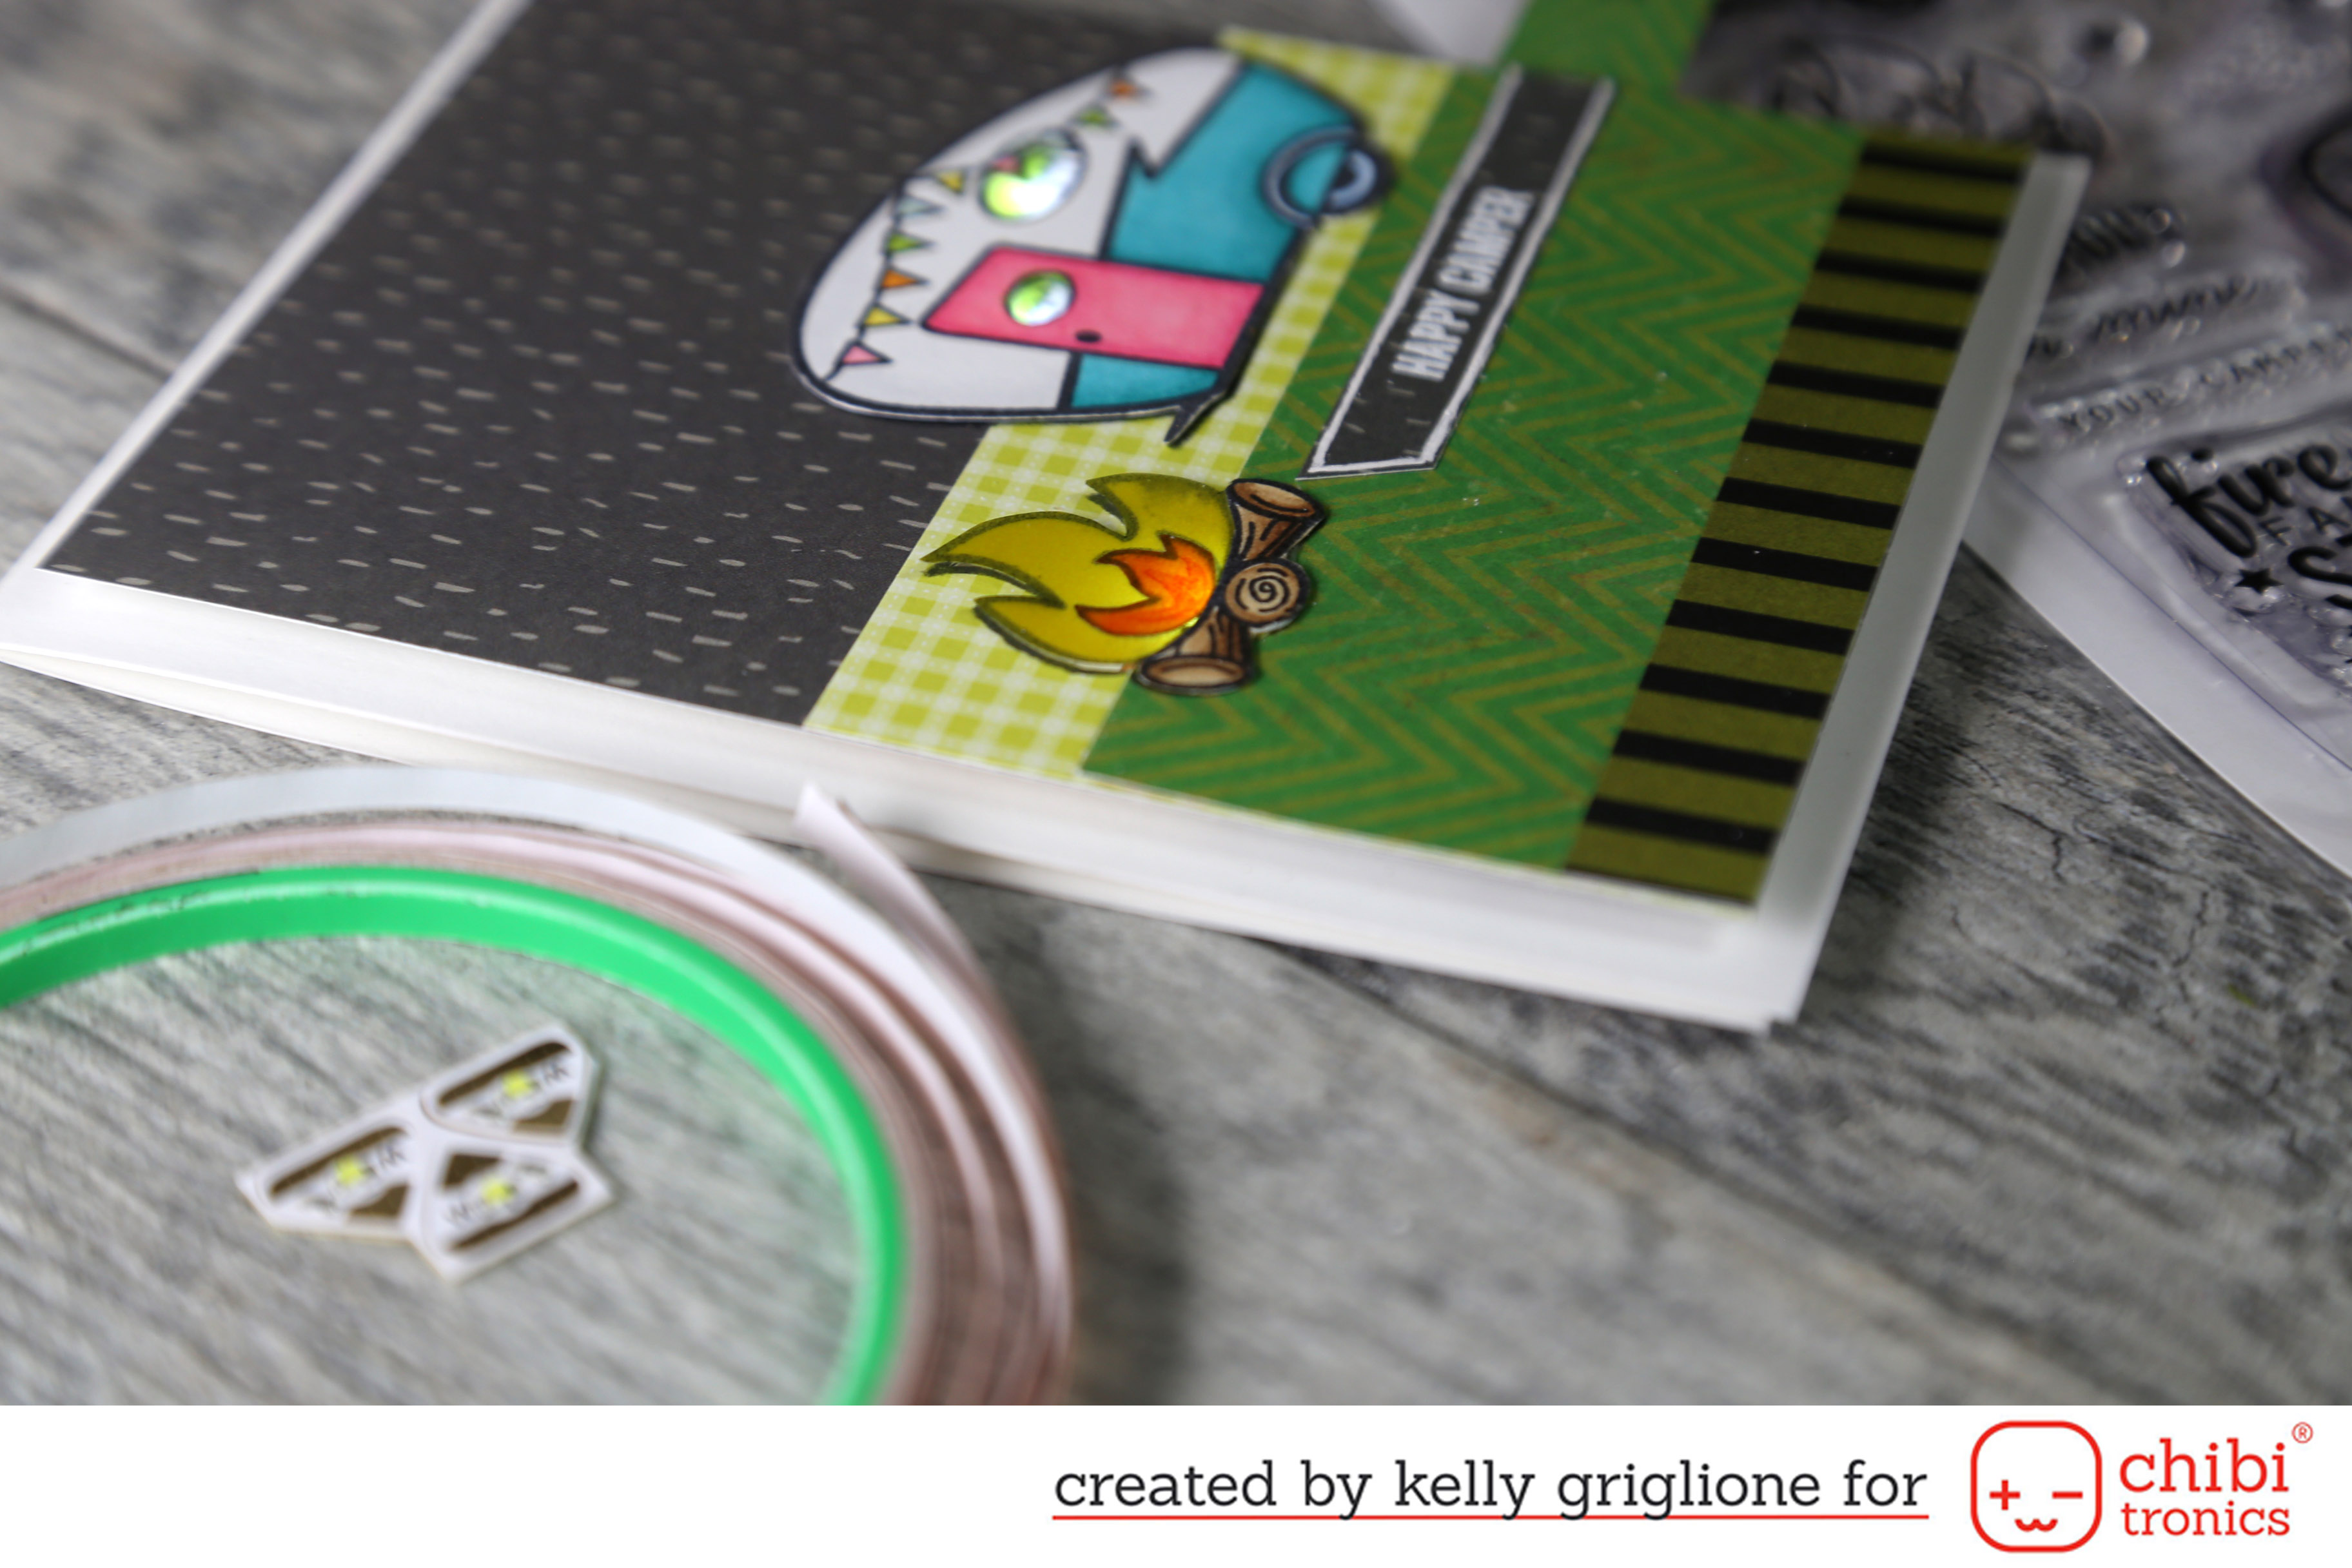 Here’s a little peek, showing the fire’s yellow and orange vellum glowing from the light underneath.
 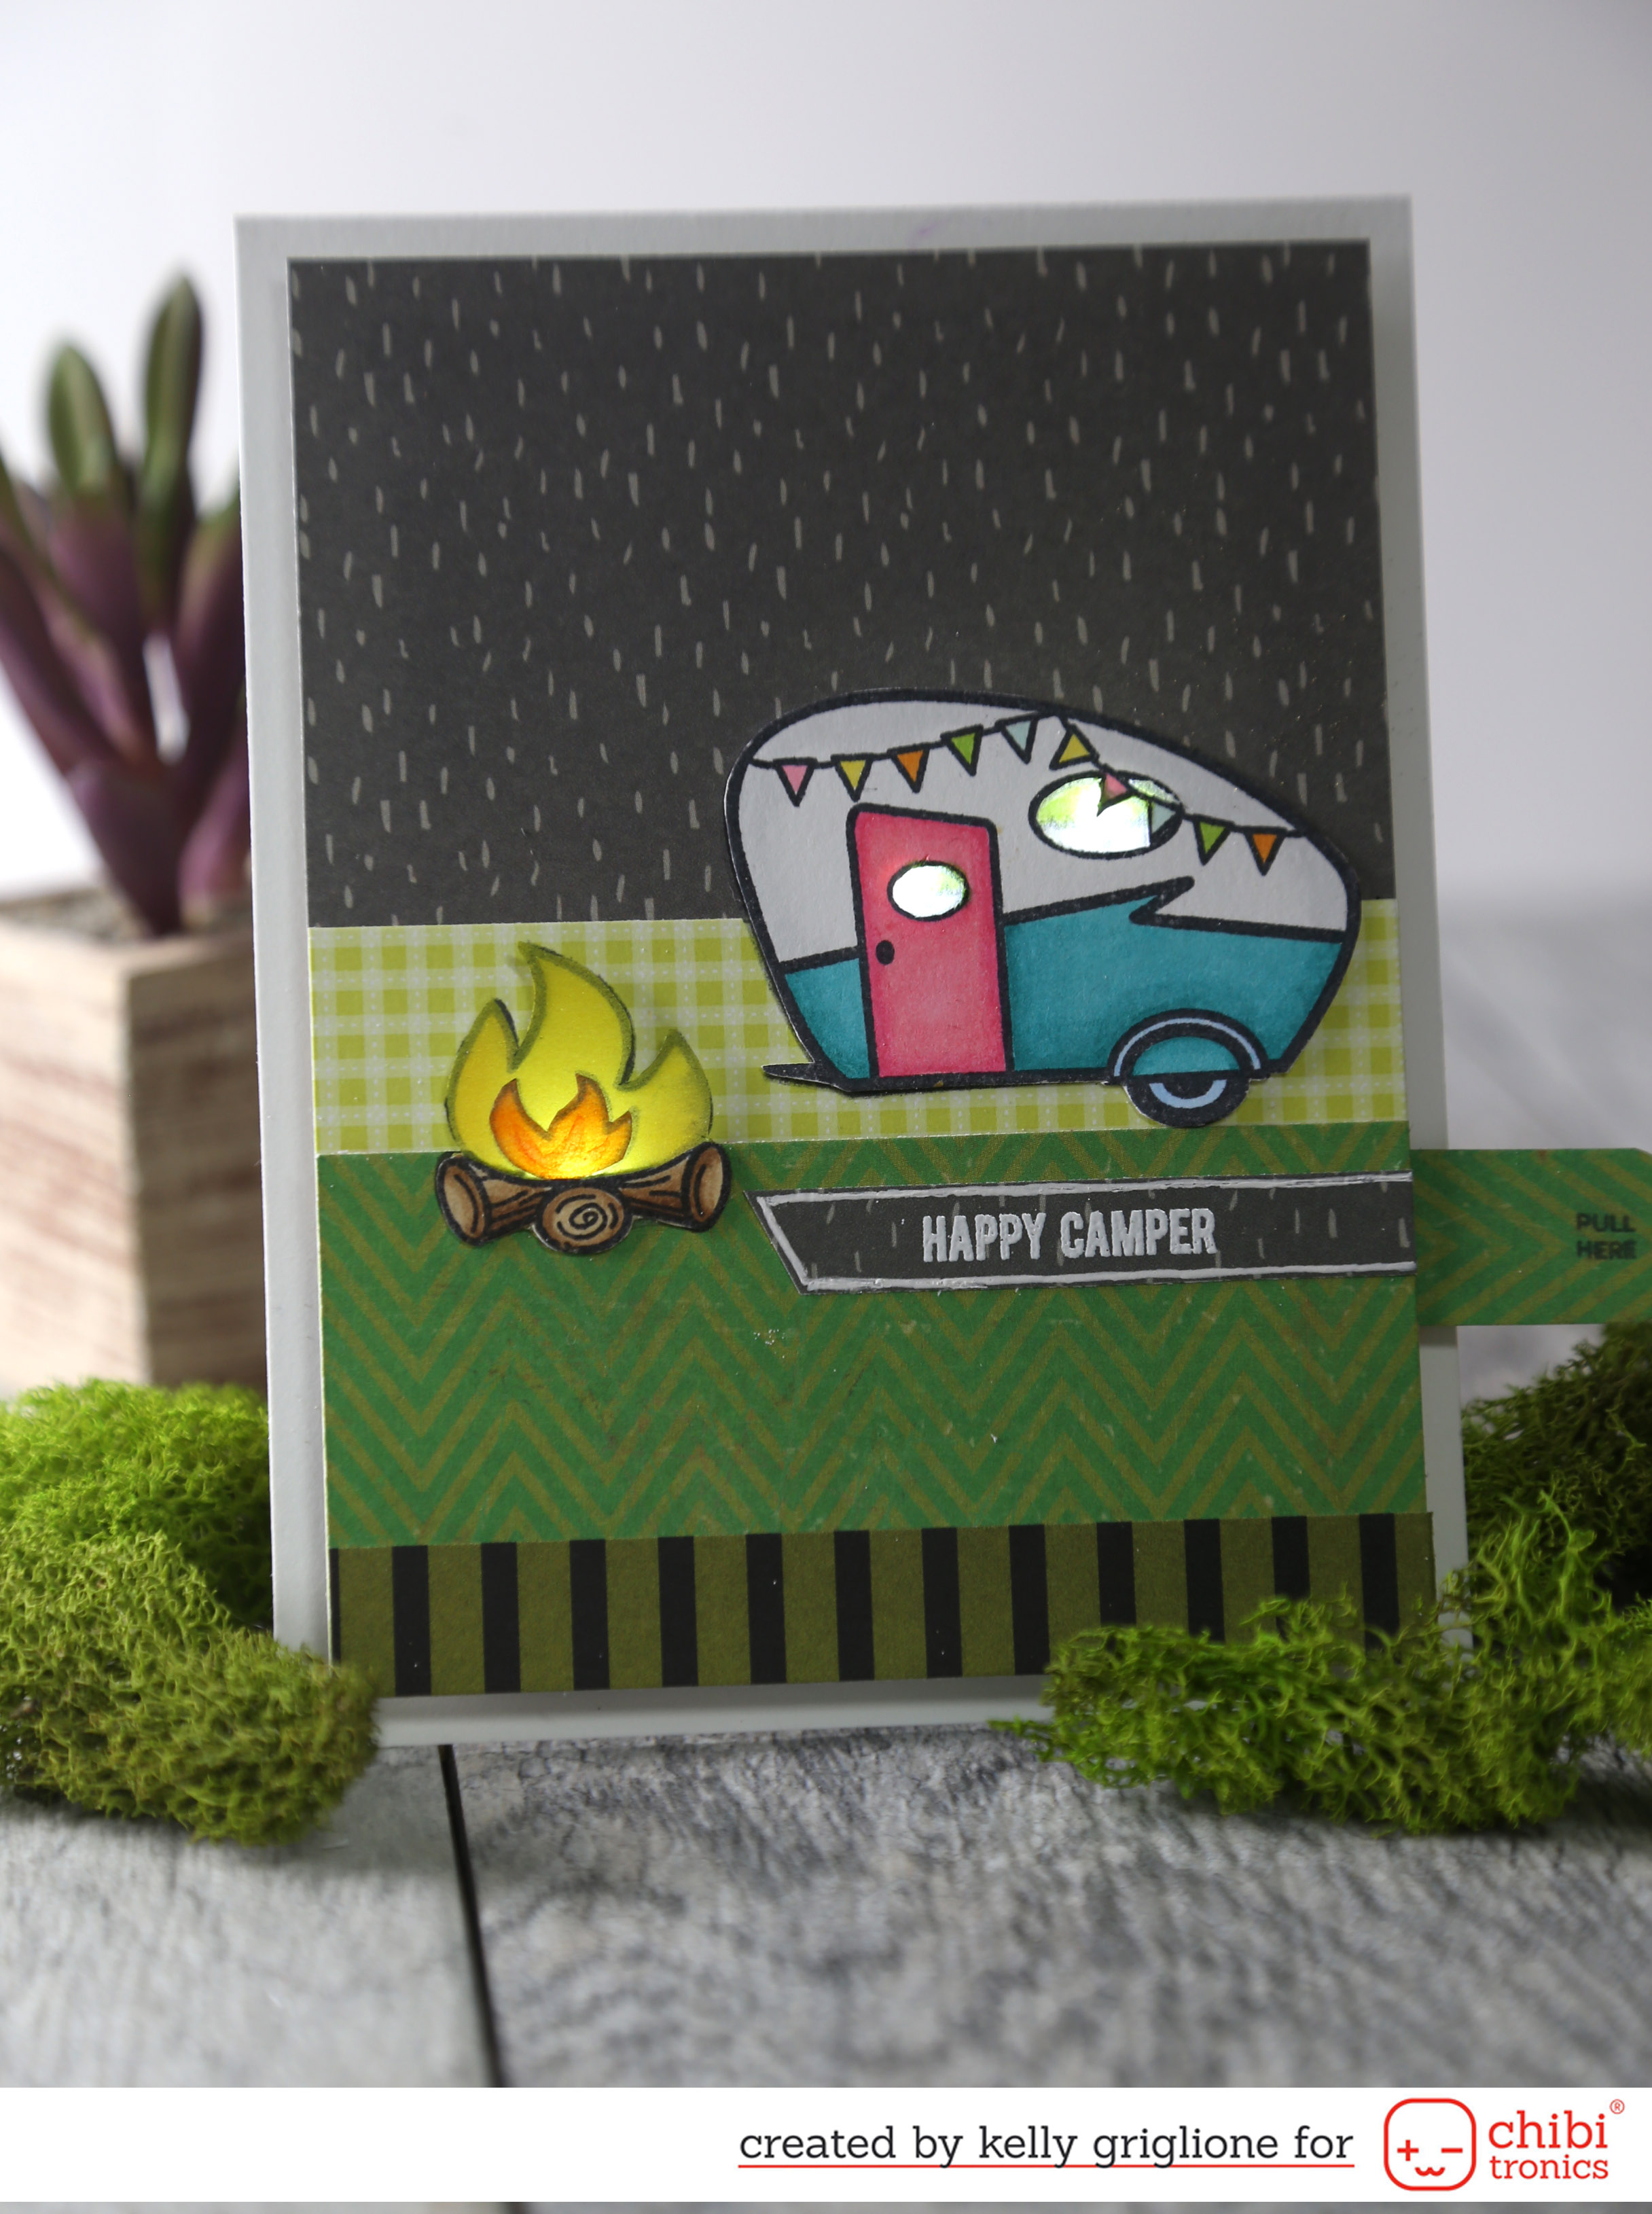 And here’s the full view! The fire’s on, and Mom is inside the camper getting dinner ready. How about it … are you ready to plan a summer camping trip for next year?!
-Kelly
Thanks so much for visiting and be sure to come back tomorrow for inspiration!

What a Super Outstanding Creative job!!
Oh these are so fun!
Great idea with the
lights inside the card
also. I love the camper
with the fire all lit up.
Carla from Utah
Two gorgeous cards! Love the bright fireworks and the fire all lit up is so cute! xxx
The toggle area on the first design is so clever. I had to stare at the images for a while before I worked out exactly how it was done, but I think it looks a bit more daunting than it actually is! Both projects are very inspiring! 😀
Wow! Great collaboration!!!
Both these projects are absolutely cute!!!
I’m totally in love for Tiffany ‘s idea! Fireworks are stunning!!!!
Super cute.
oh my good golly gosh! So adorable! and I am loving these fun interactive elements. I definitely need to try that switch mechanism! <3
I love both of these!
Wow ❤️❤️❤️❤️❤️
Perfect cards to use the Chibitronics kit !
Beautiful cards!
I love how the lights turn on inside the camper! It really makes the card come alive!
Perfect cards from both designers!!! Just love the interactiveness elements that Chibitronics adds.