Hi, crafty friends!
This is Eiko. I make light up slider pop up card using Chibitronics Tim Holtz and Heffy Doodle dies.

When you pull up a panel to make the front section stand up, the Christmas candle slowly fade in and out.
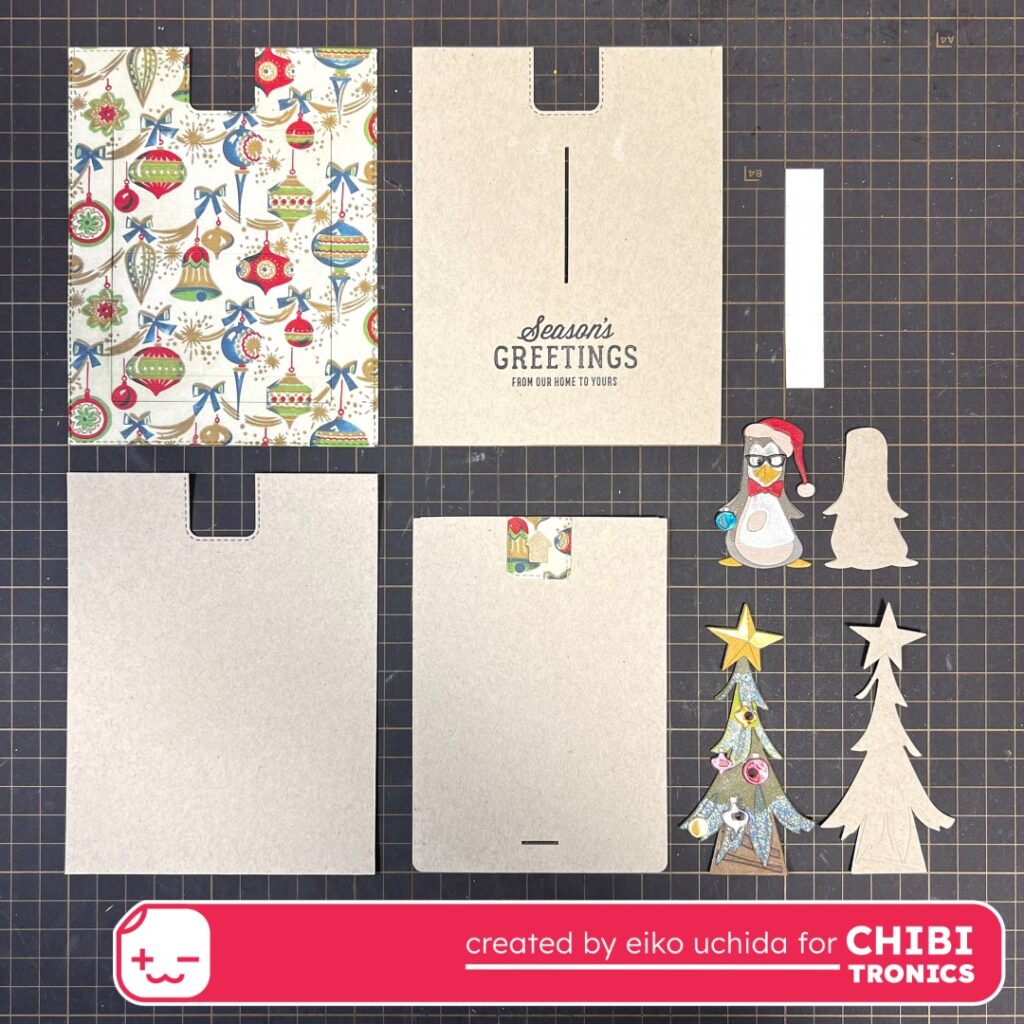
I will make the parts referring to the picture below.
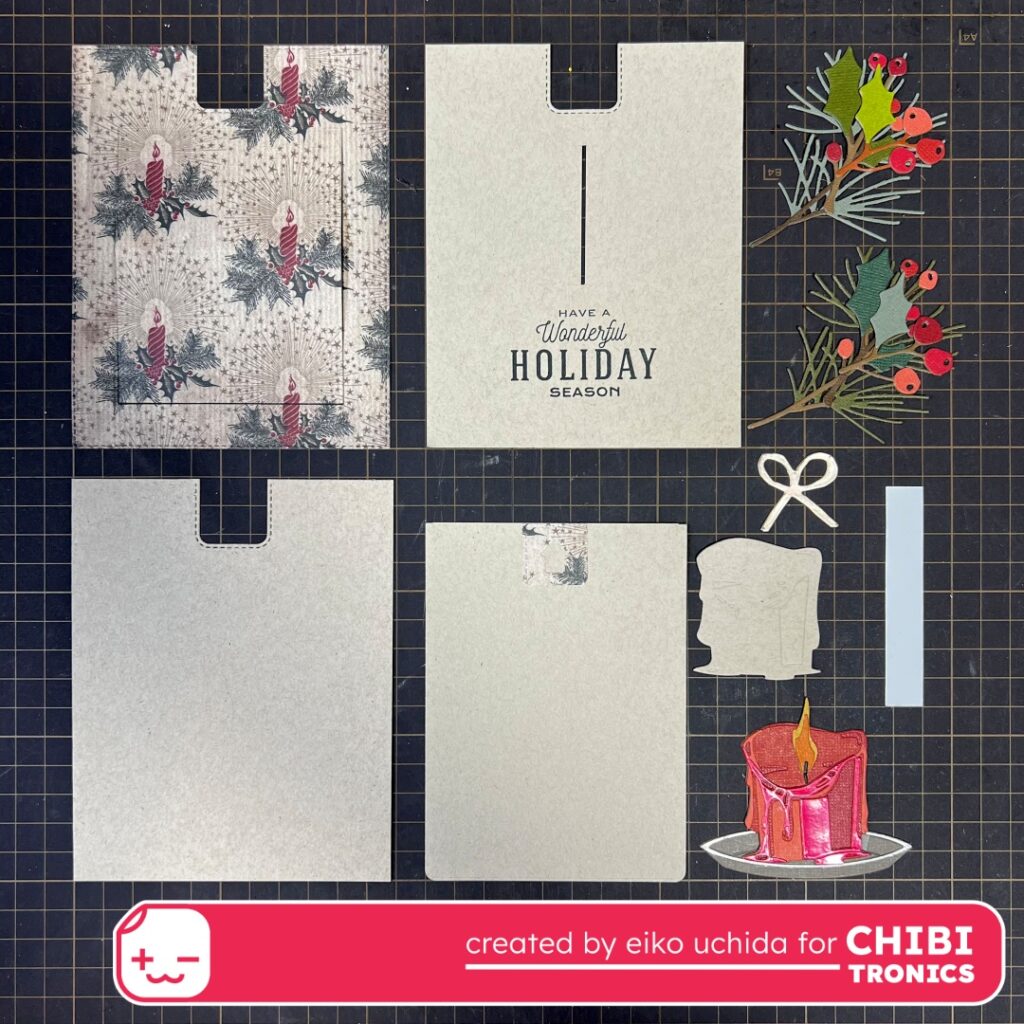
- Die cut candle pattern paper with slider pop up die and notch die.
- Die cut 4 1/4 x 5 1/2 inches kraft cardstock with notch die and make a 1 7/8 inches long slit from 1/2 inch above the center of the notch. Then stamp the sentiment with black ink.
- Die cut 4 1/4 x 5 1/2 inches kraft cardstock with notch die.
- Die cut kraft cardstock with pull panel die.
- Die cut color cardstock with pine sprigs, holly and berries dies.
- Die cut color cardstock with candle die.
- Die cut kraft cardstock with candle base die.
- Die cut gold foil paper with bow die.
- Switch parts (1/2 x 3 inches white cardstock)
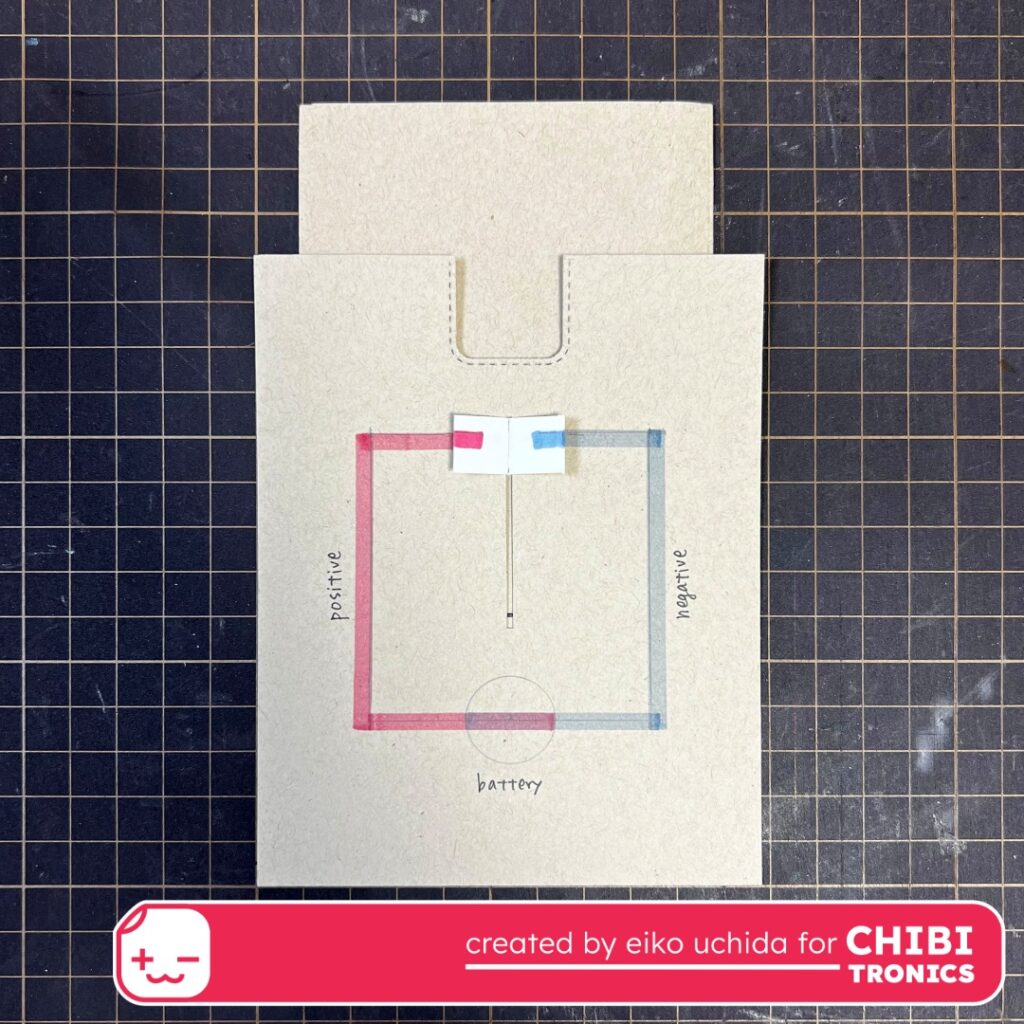
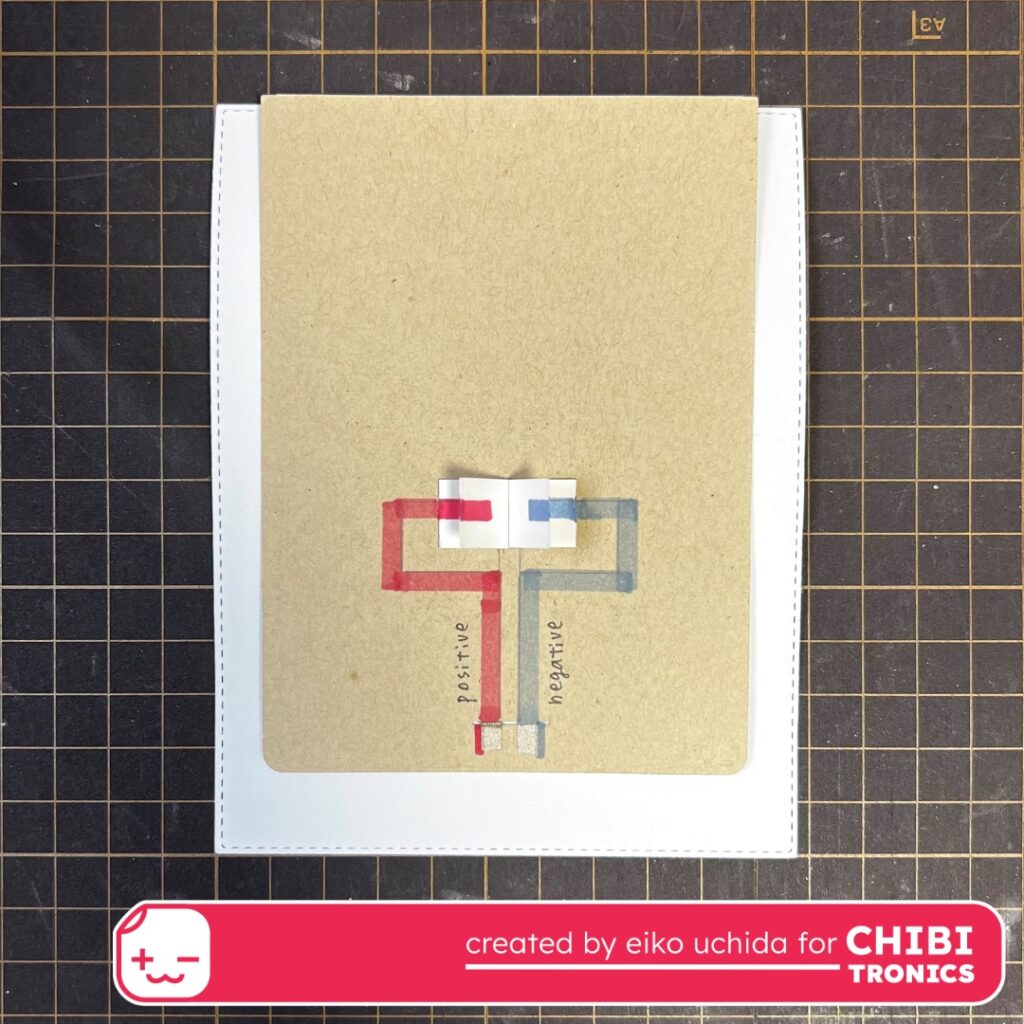
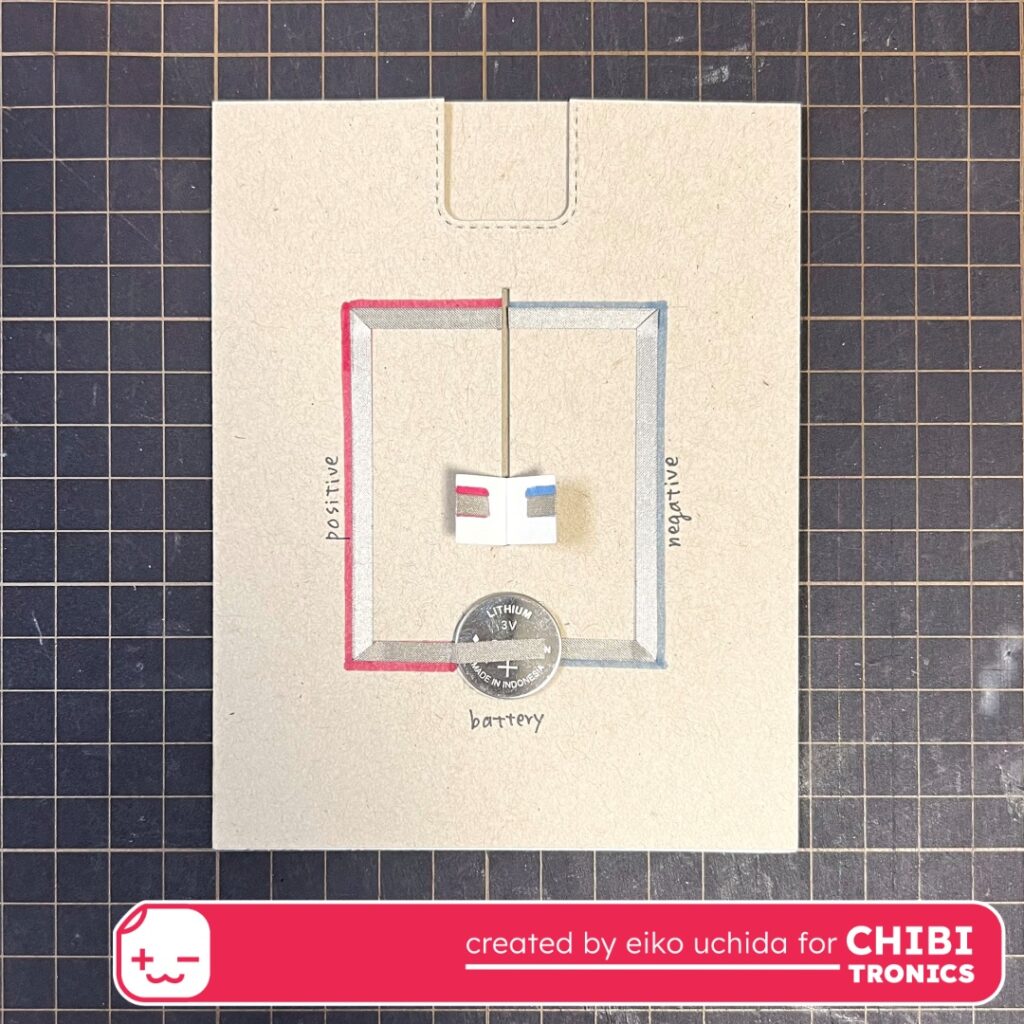
Make the circuit (cover panel)
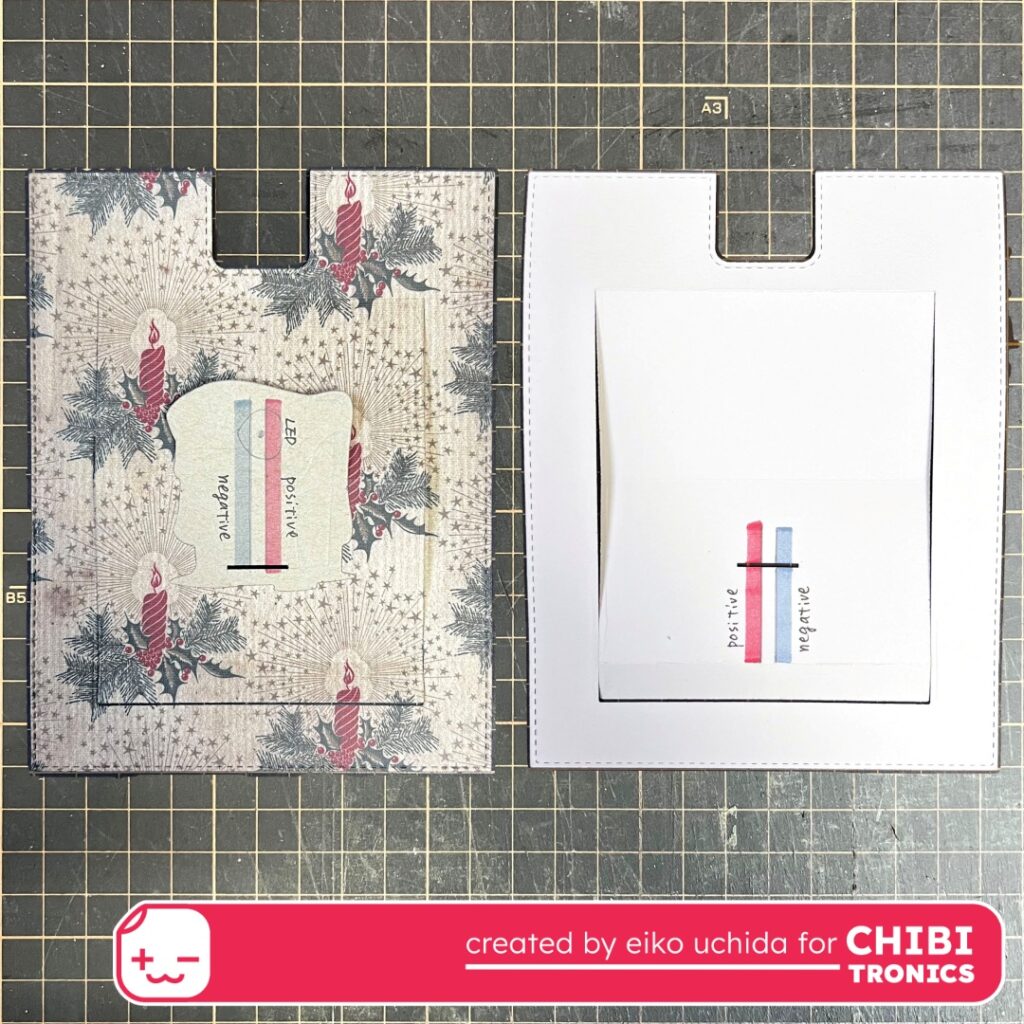
- Put the candle base on the center of the cover panel.
- Mark the position of the anmating LED.
- Make a slit at the bottom of the candle part.
- Draw the circuit with a pencil.
- I colored the positive side red and the negative side blue.
- The left is the front and the right is the back of the cover panel.
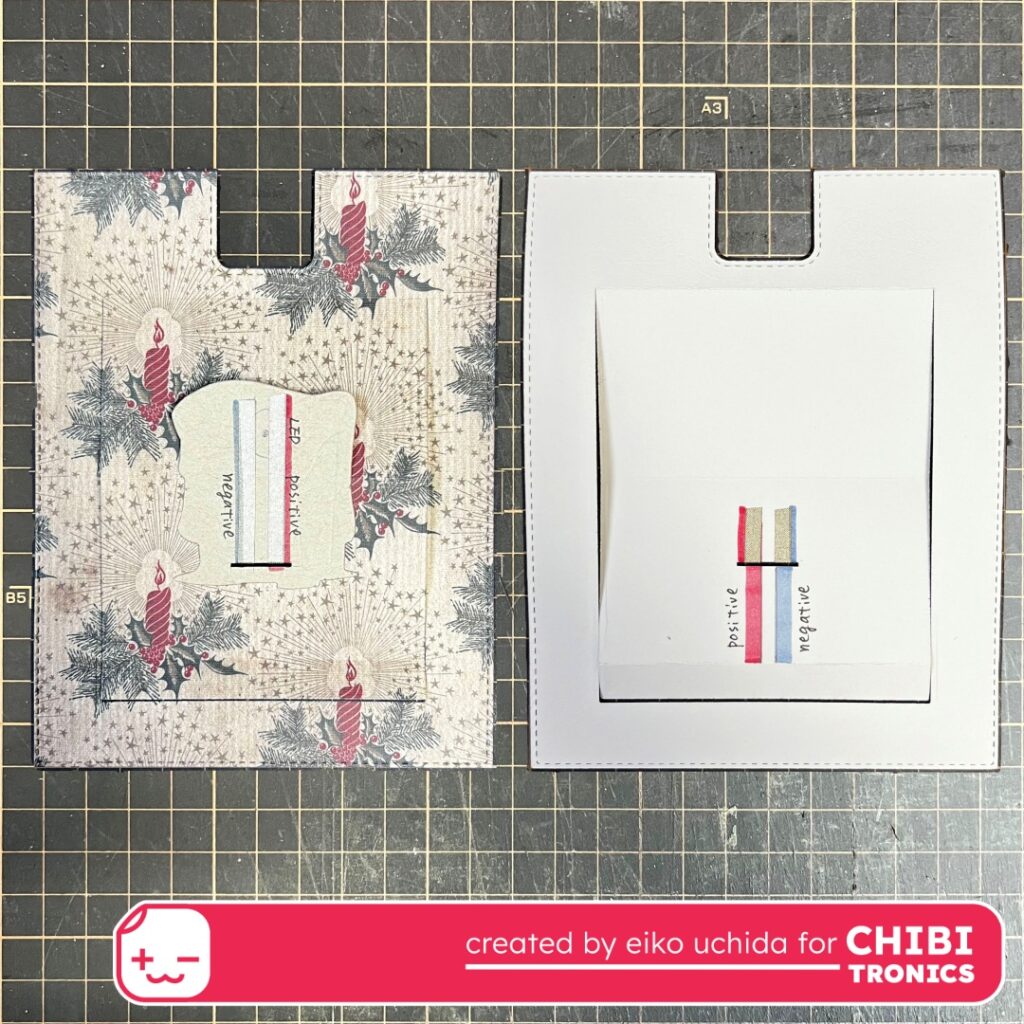
Make the switch part
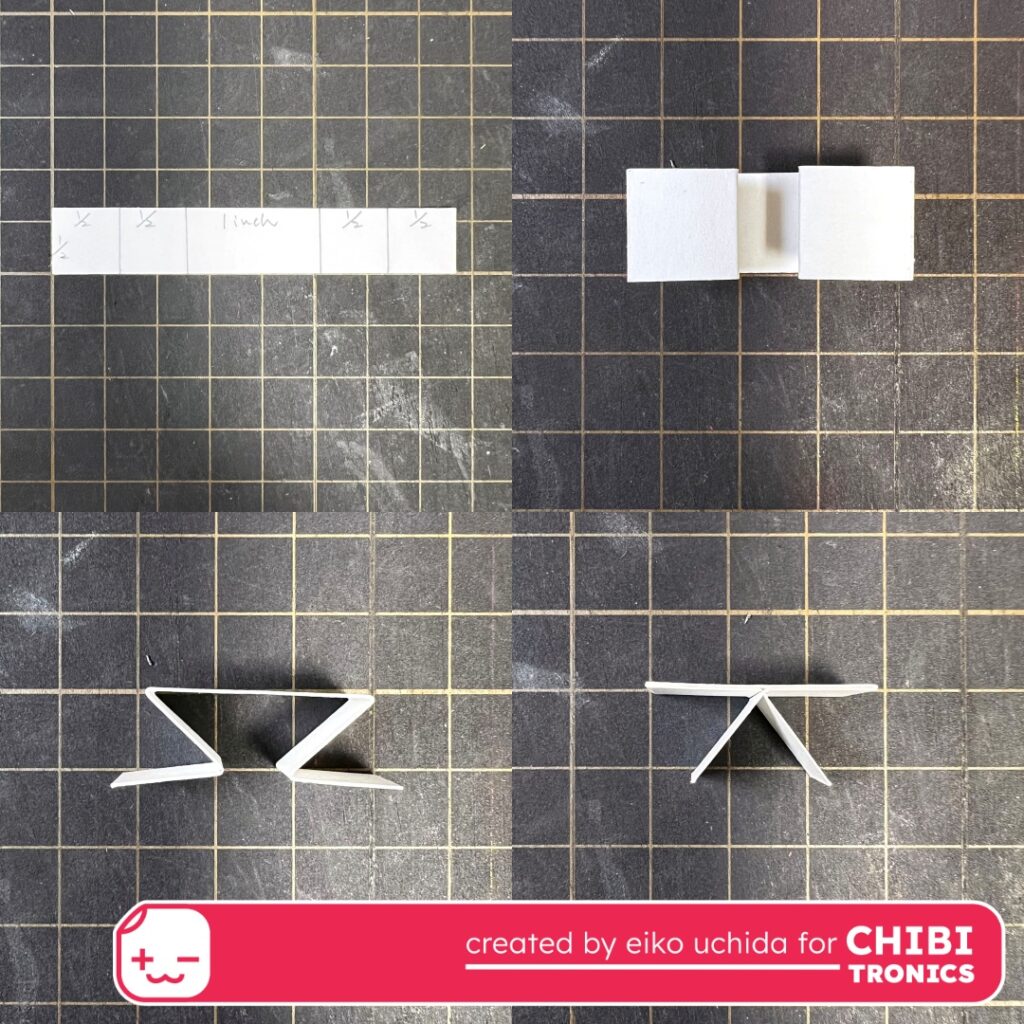
Fold the 1/2 x 3 inch switch part as shown.
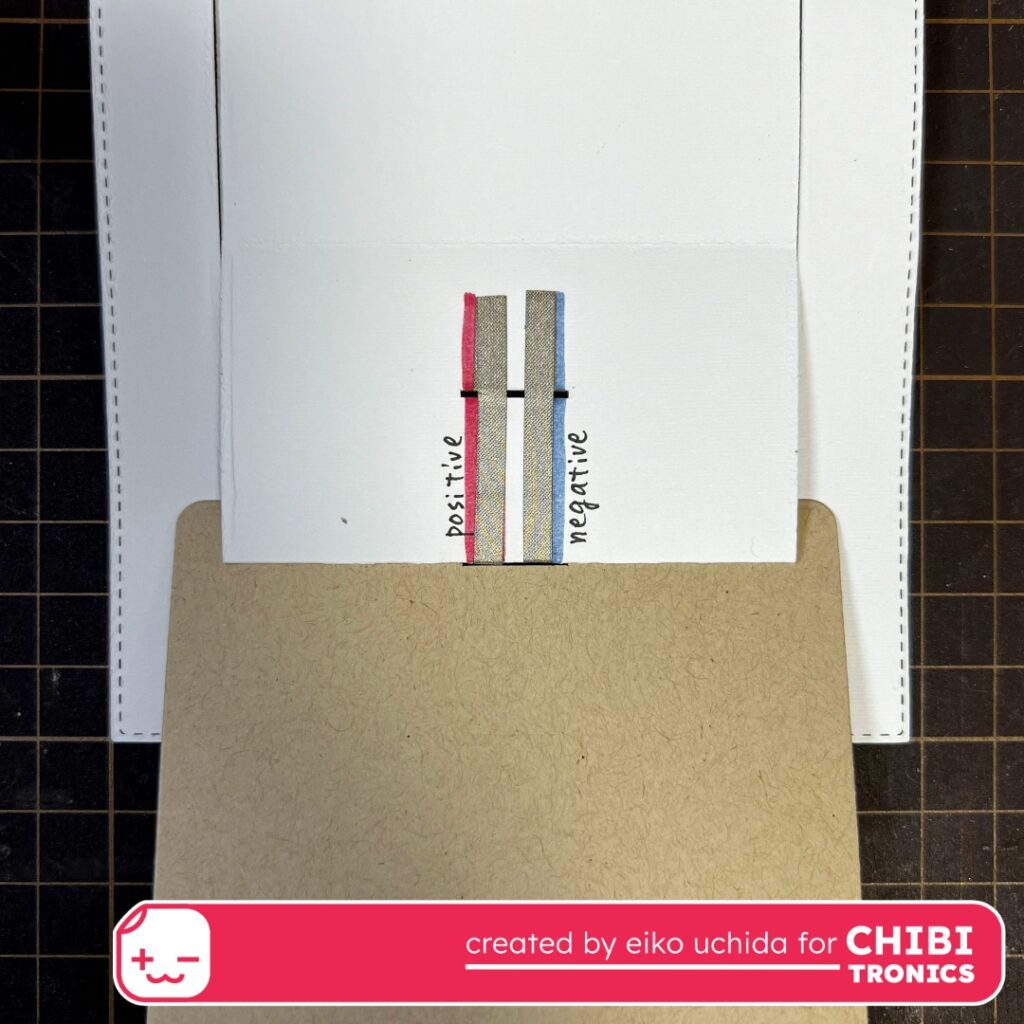
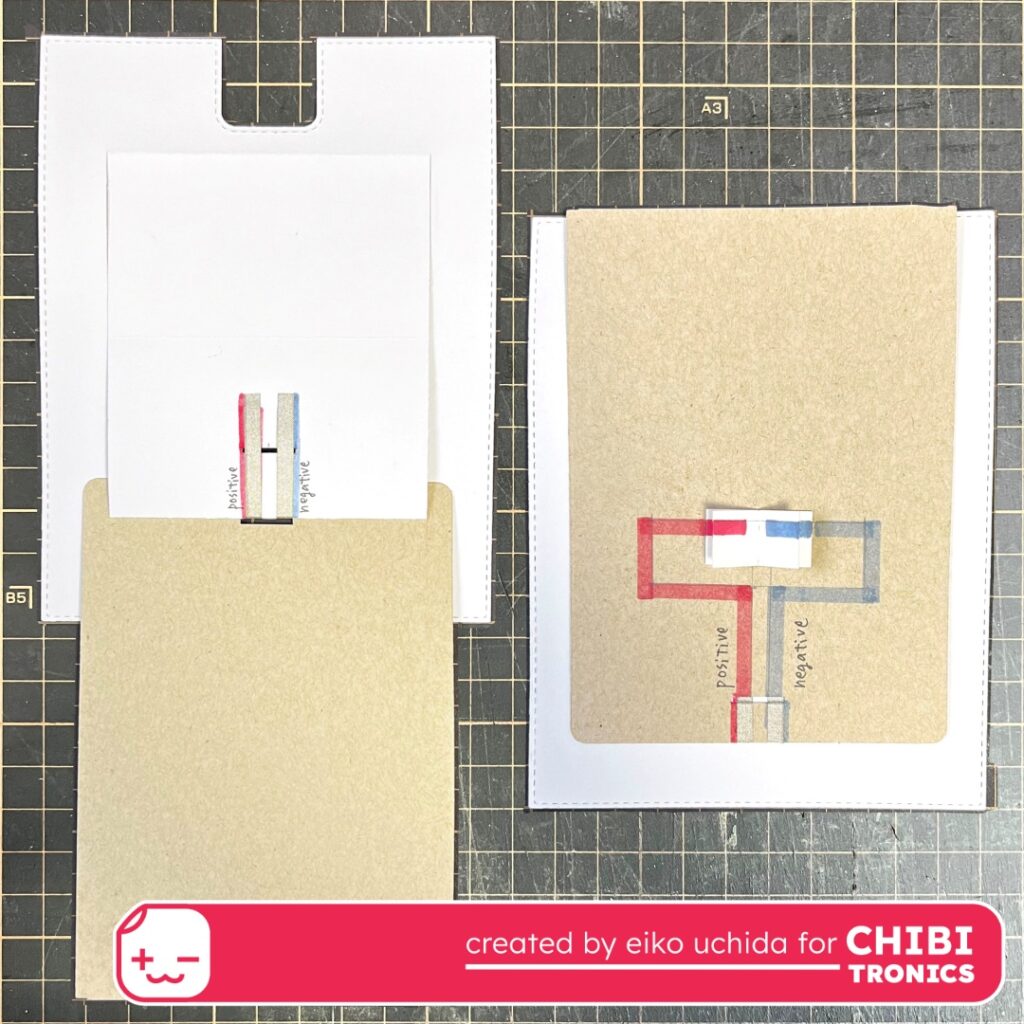
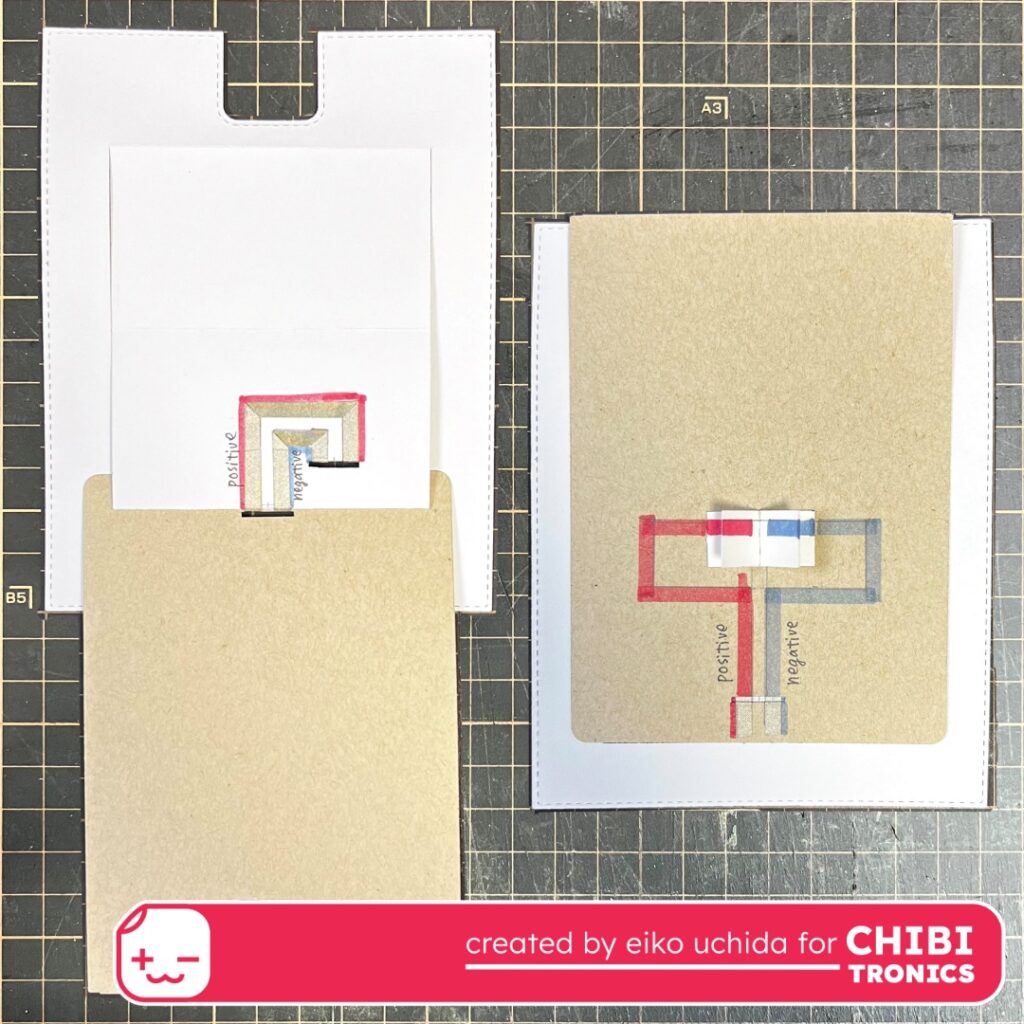
Make the circuit (pull panel)
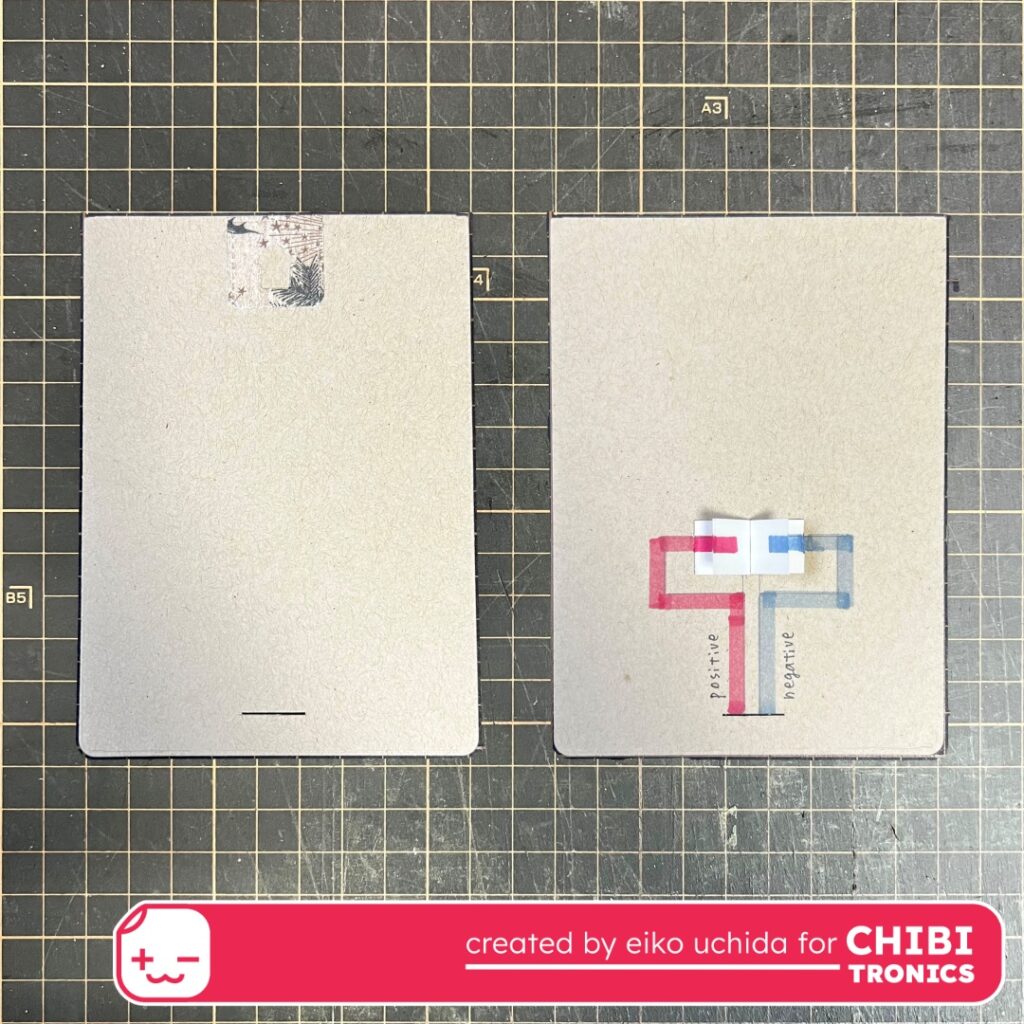
- Make a slit 3/8 inch from the bottom of the pull panel.
- Put the switch part 2 3/4 inches from the top of the back of the pull panel.
- Draw the circuit from the slit to the switch part with a pencil.
- I colored the positive side red and the negative side blue.
- The left is the front and the right is the back of the pull panel.
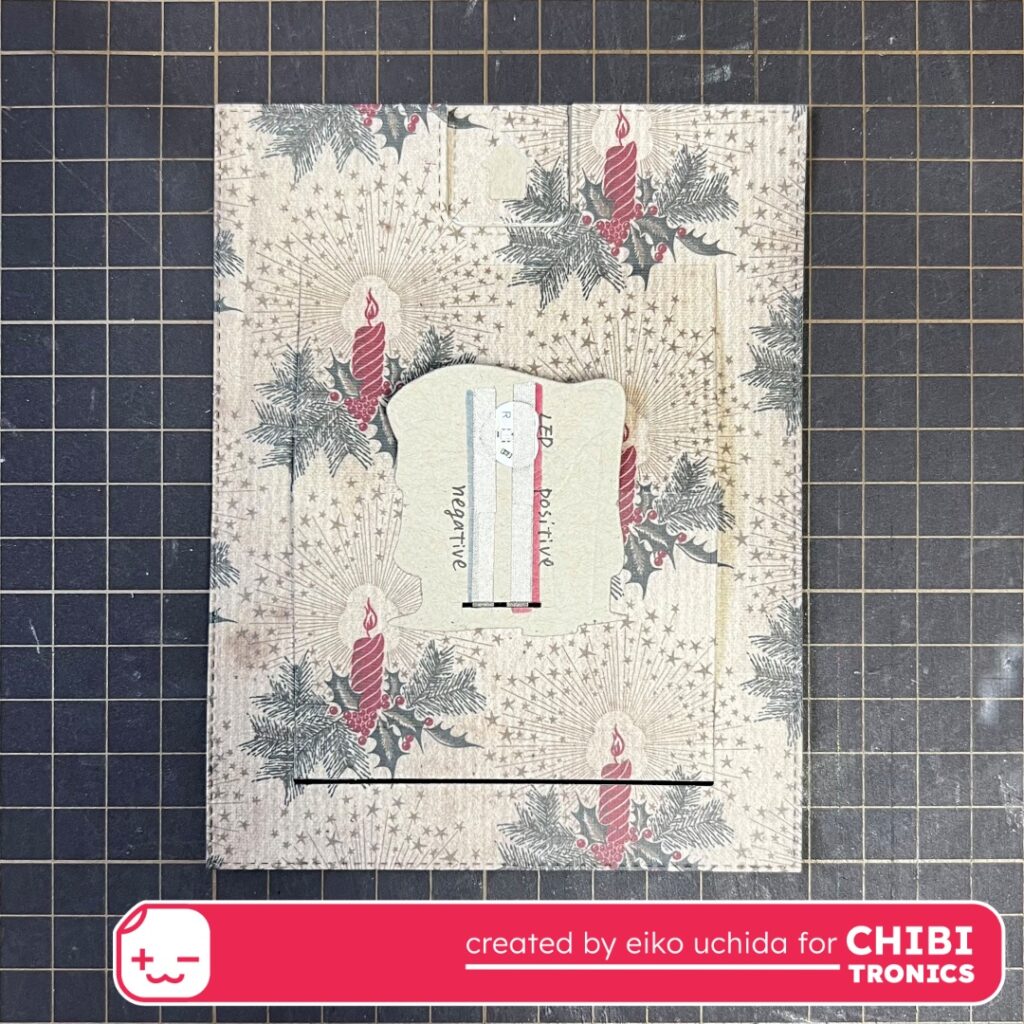
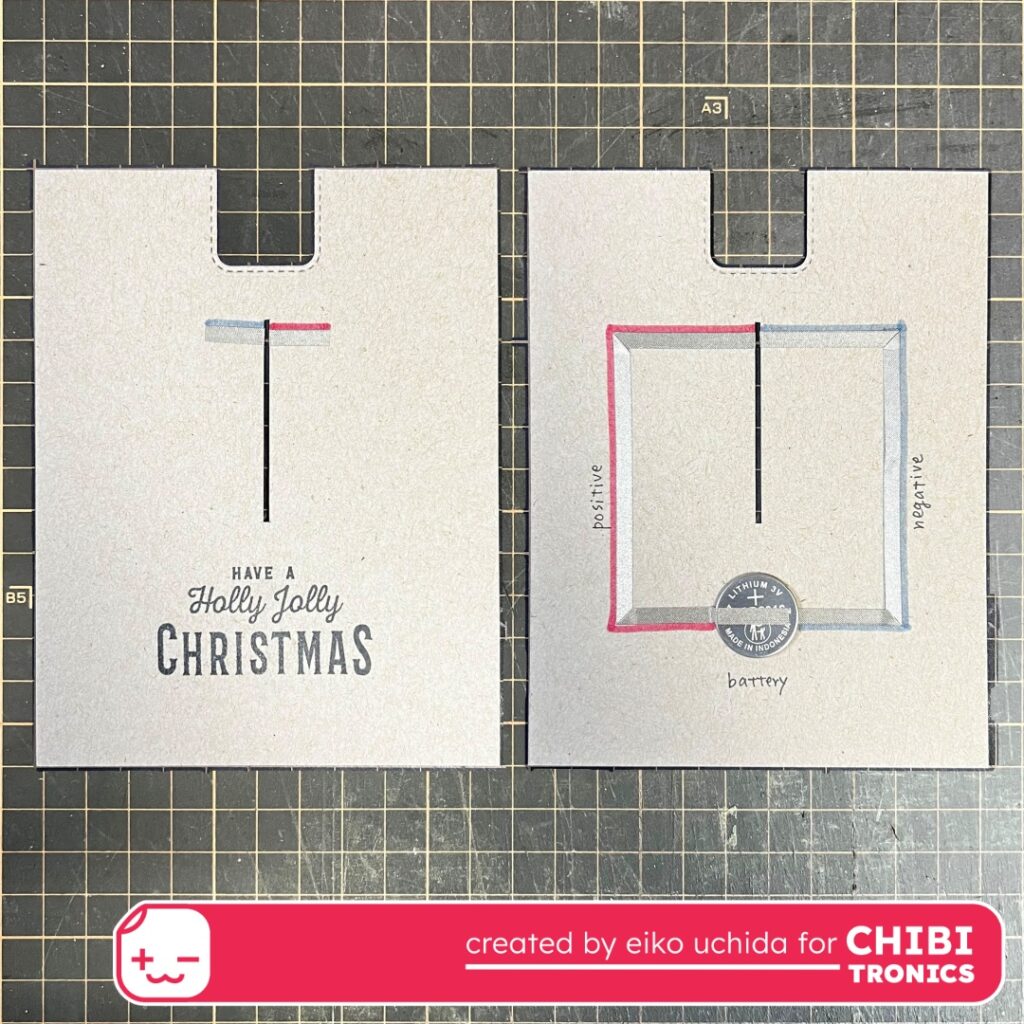
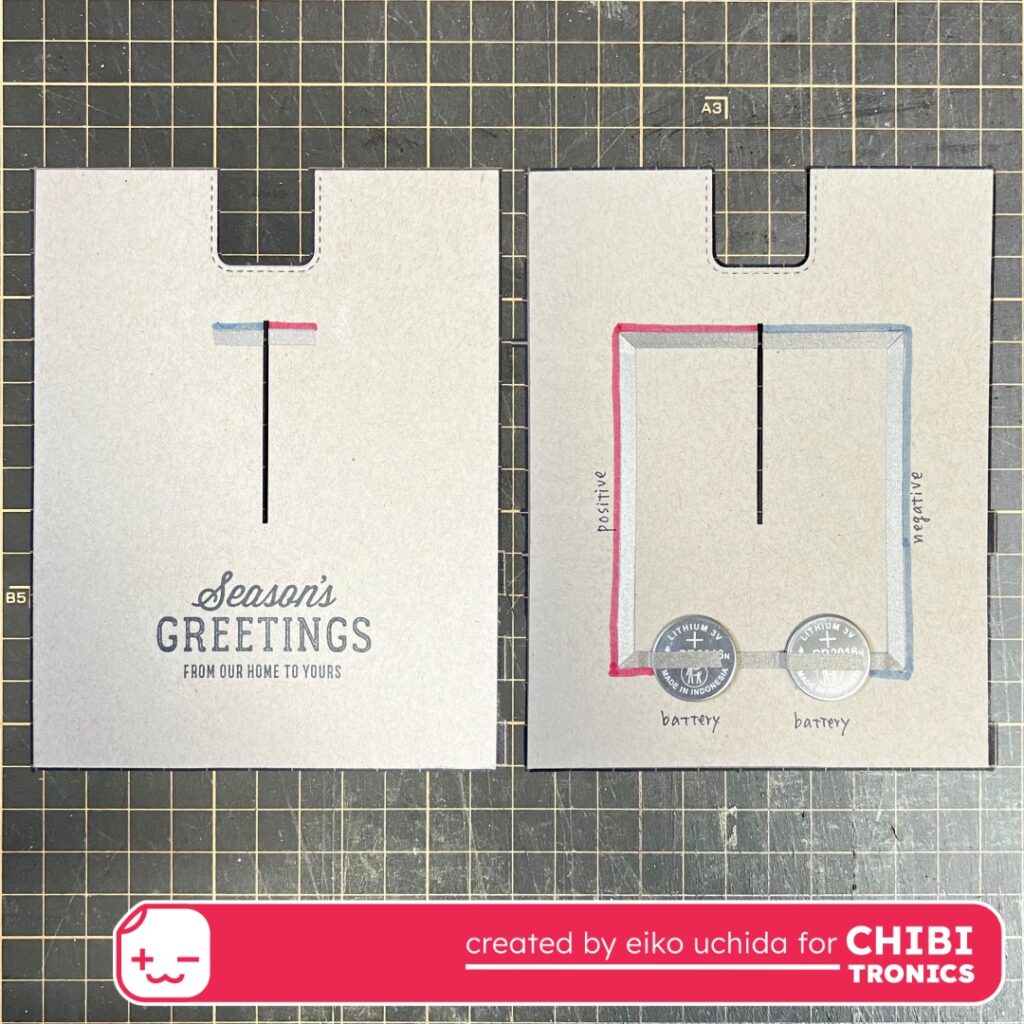
Make the circuit (card base)
- Insert the switch part of the pull panel into the slit of the card base from the front and align it with the top edge of the slit.
- Mark the position of the circuit.
- Mark the position of the battery.
- Draw the circuit with a pencil.
- I colored the positive side red and the negative side blue.
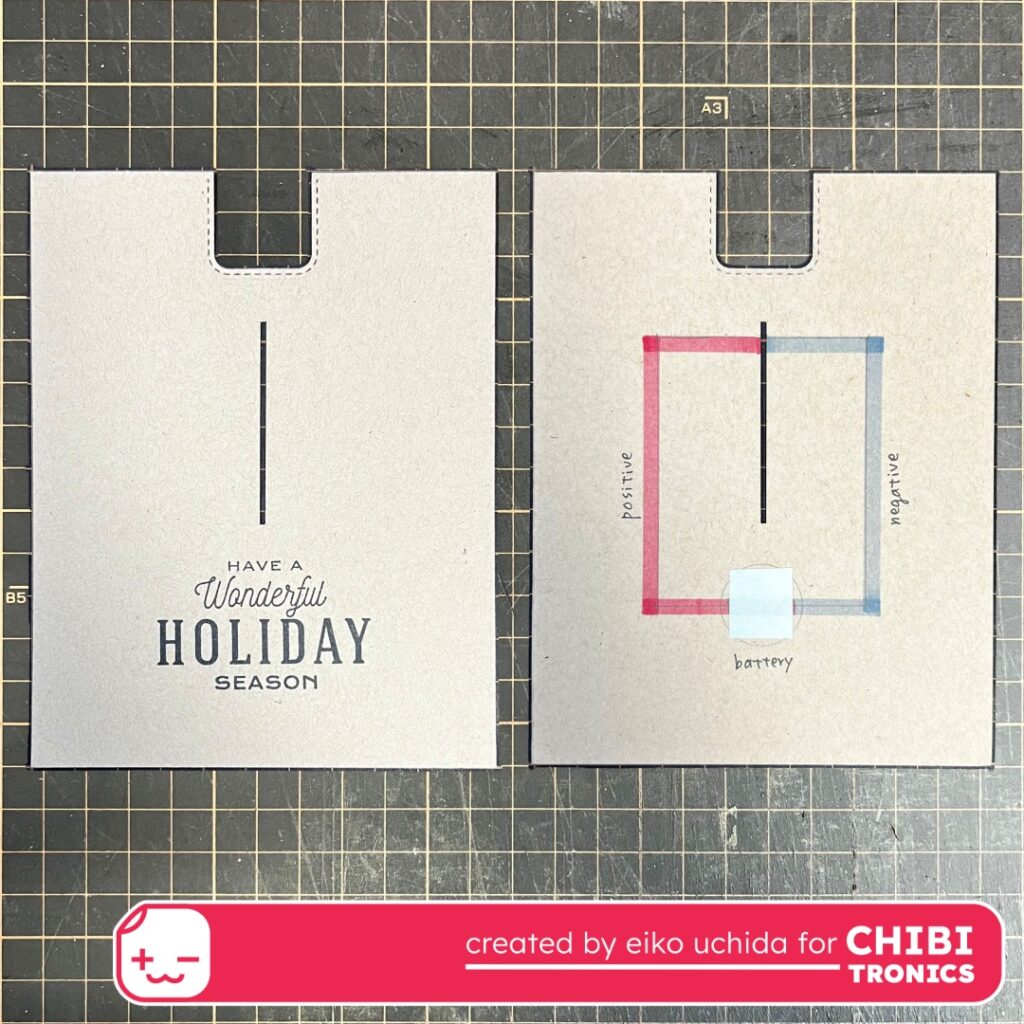
- Apply the double-sided tape on the battery place.
- The left is the front and the right is the back of the card base.
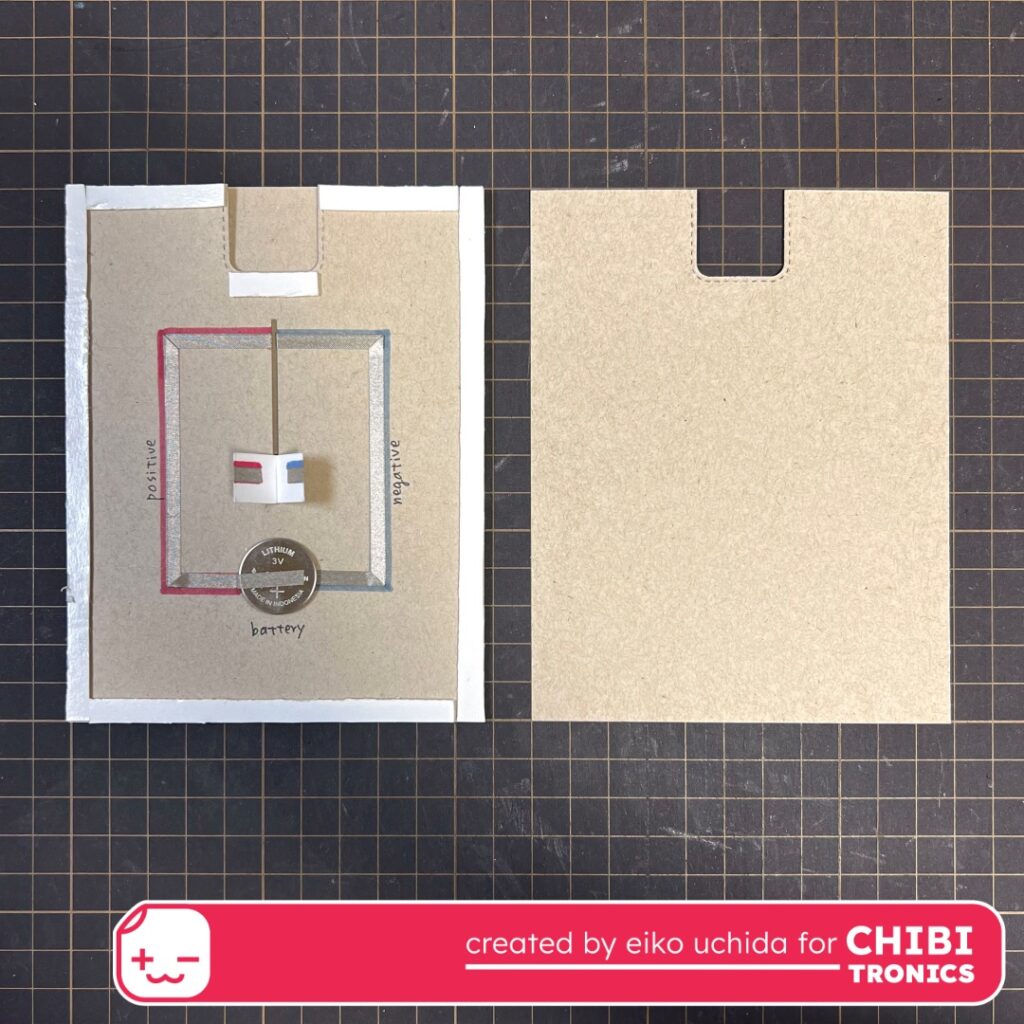
- Stick the conductive fabric tape on the pre-drawn path.
- After sticking it up to the slit, pass the fabric tape through the slit and stick it on the back side.
- The left is the front and the right is the back of the cover panel.
Attach the bottom edge of the pull panel to the cover panel.
- Stick the red fade animating LED sticker on the mark.
- Stick the short fabric tape on the LED sticker to reinforce.
- Stick the conductive fabric tape on the pre-drawn path.
- After sticking it up to the slit, pass the fabric tape through the slit and stick it on the back side.
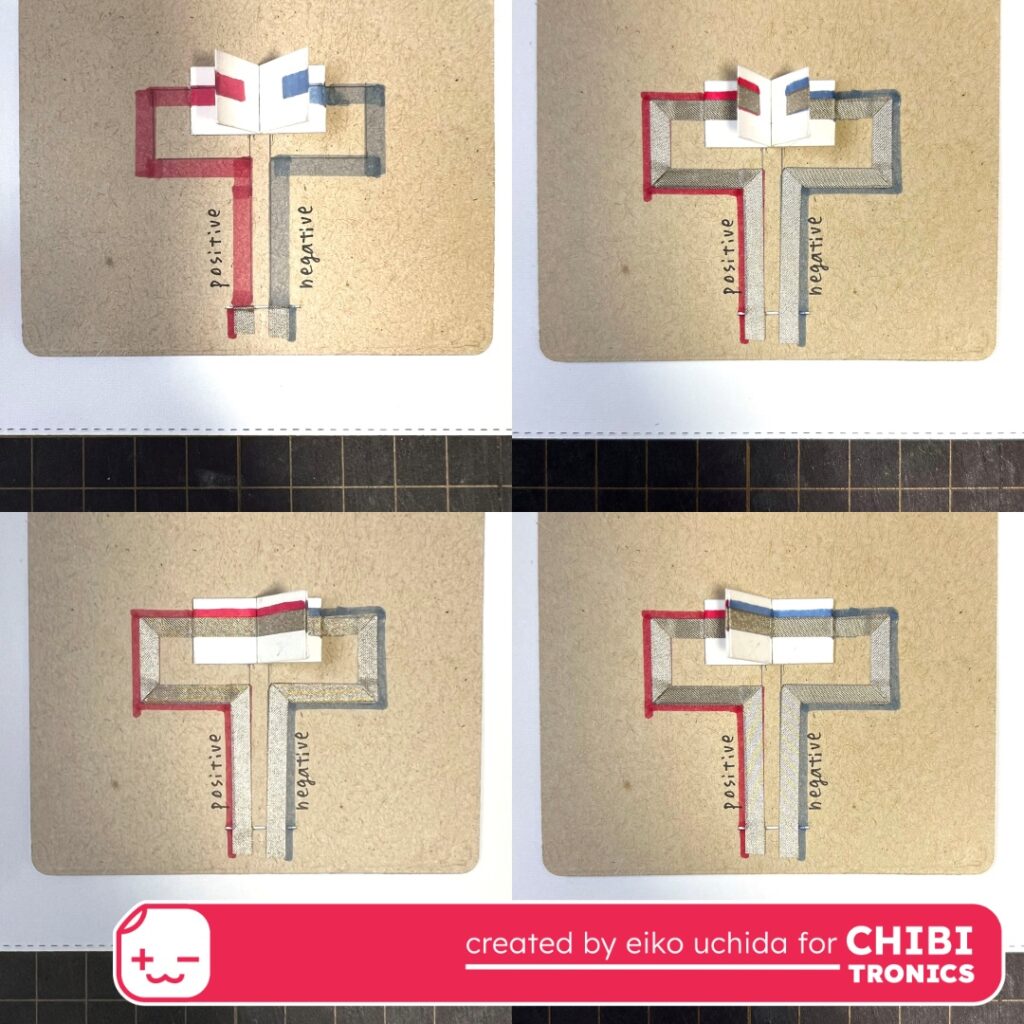
- Stick the conductive fabric tape on the pre-drawn path.
- Stick the fabric tape to the switch parts as shown in the photo.

- Stick the conductive fabric tape on the pre-drawn path.
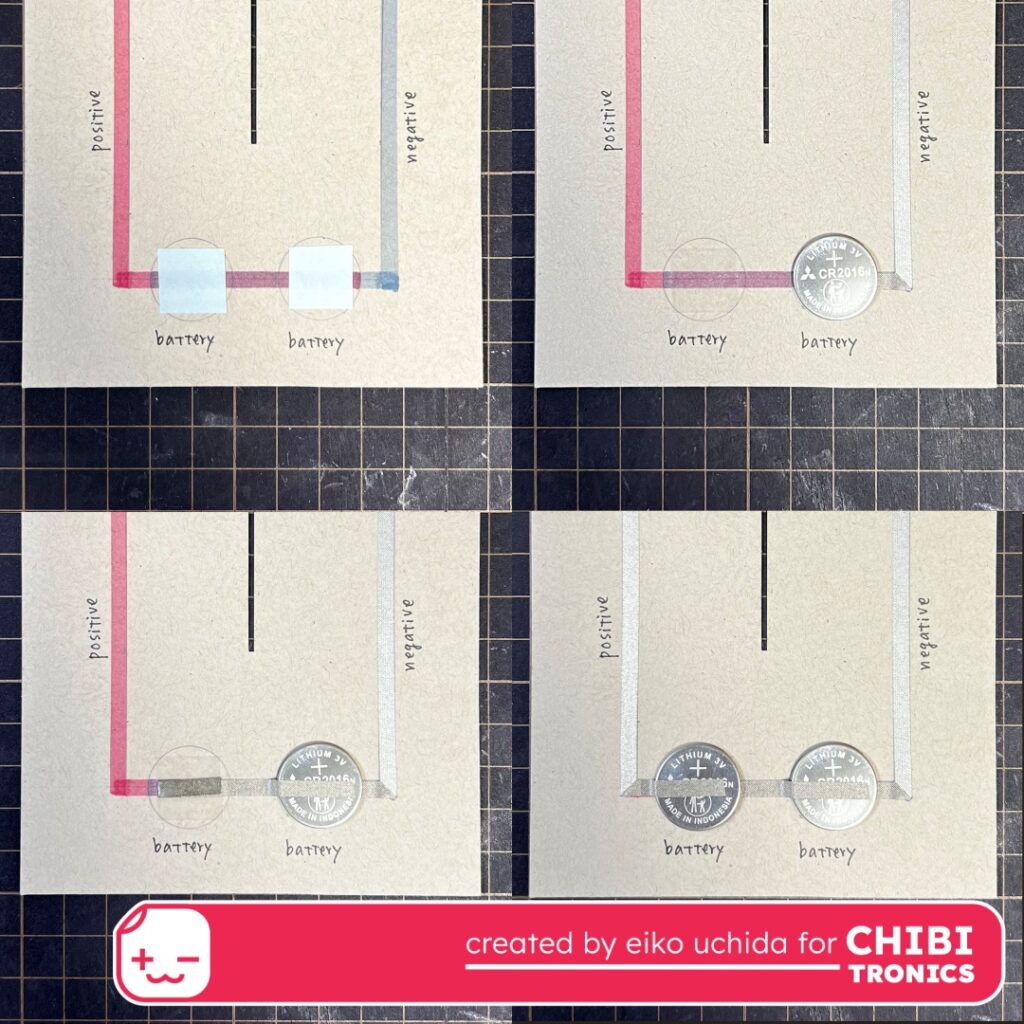
- At the battery place, peel off the release paper, stick the negative side fabric tape, fold it back and cut it.
- Place the battery on the fabric tape with positive side facing up.
- Stick the positive side fabric tape.
- At the battery place, stick the positive side fabric tape on the battery.
- The left is the front and the right is the back of the card base.
Assemble the card
Insert the switch part into the slit and attach the cover panel to the card base.
Stick the foam tape around the entire edge of the circuit card base.
- Attach the cover panel to the kraft card base.
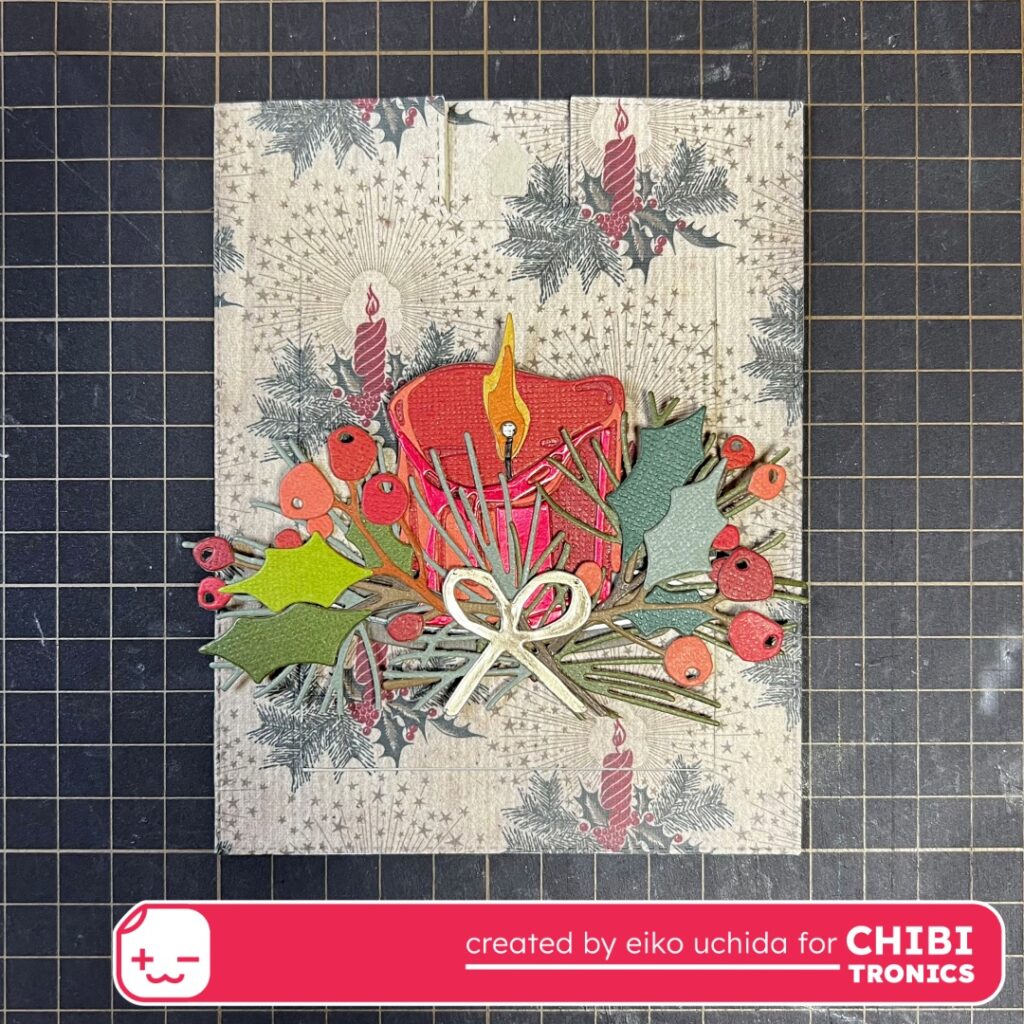
- Put the die cutting parts on the cover panel.

I finished it!
When you pull up a panel to make the front section stand up, the Christmas candle slowly fade in and out.

Be sure to check out the whole video tutorial for more details.
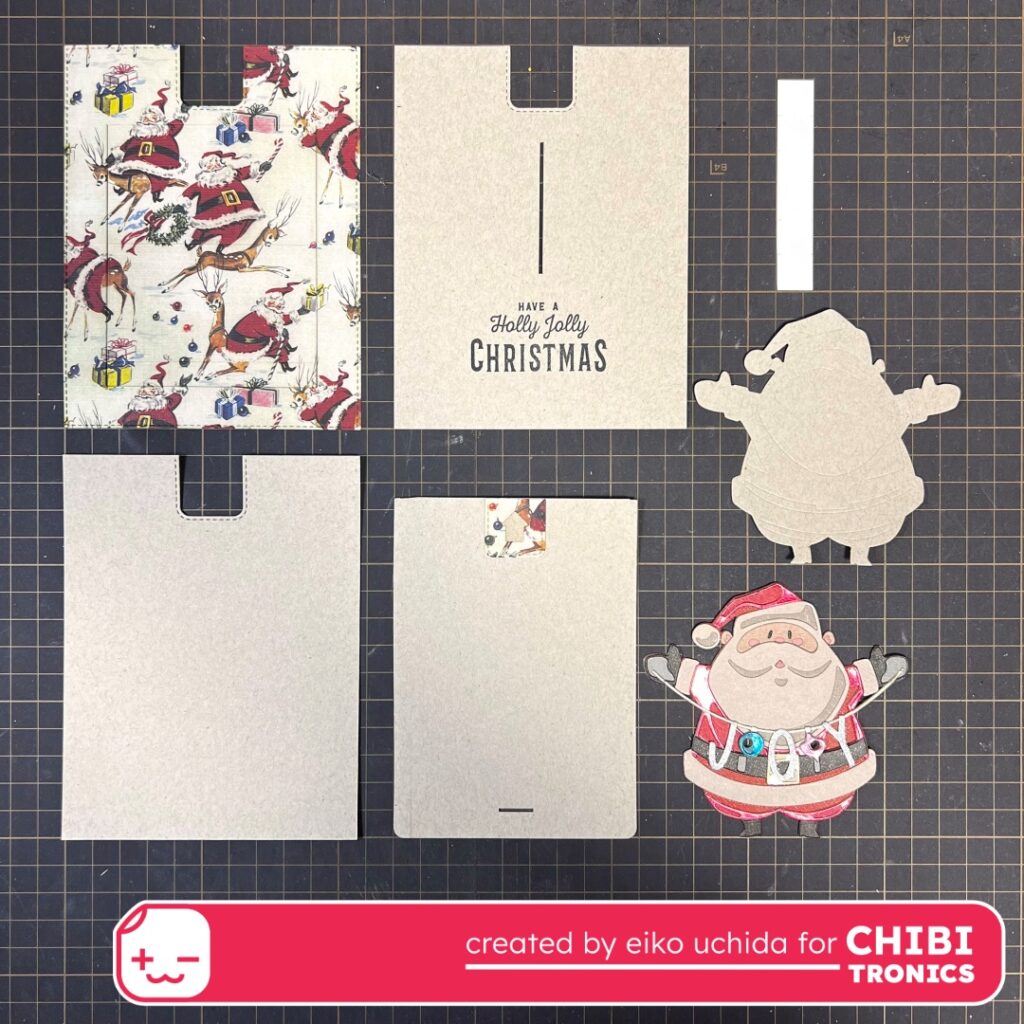
I made two more types of cards with the same structure.

When you pull up a panel to make the front section stand up, the ornaments fade and blink.
Here are the materials for Santa card.
And here are the circuit.

Here are the materials and circuit for the Christmas tree card.
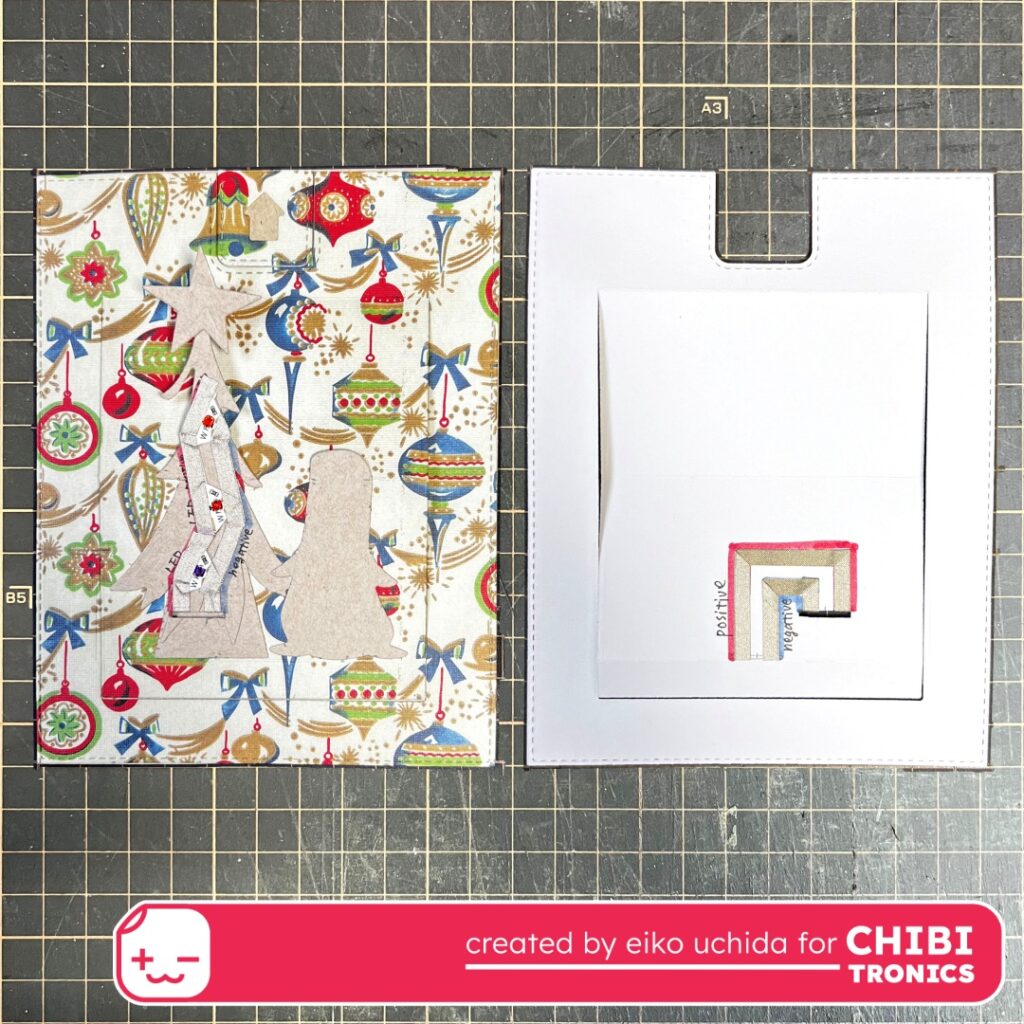
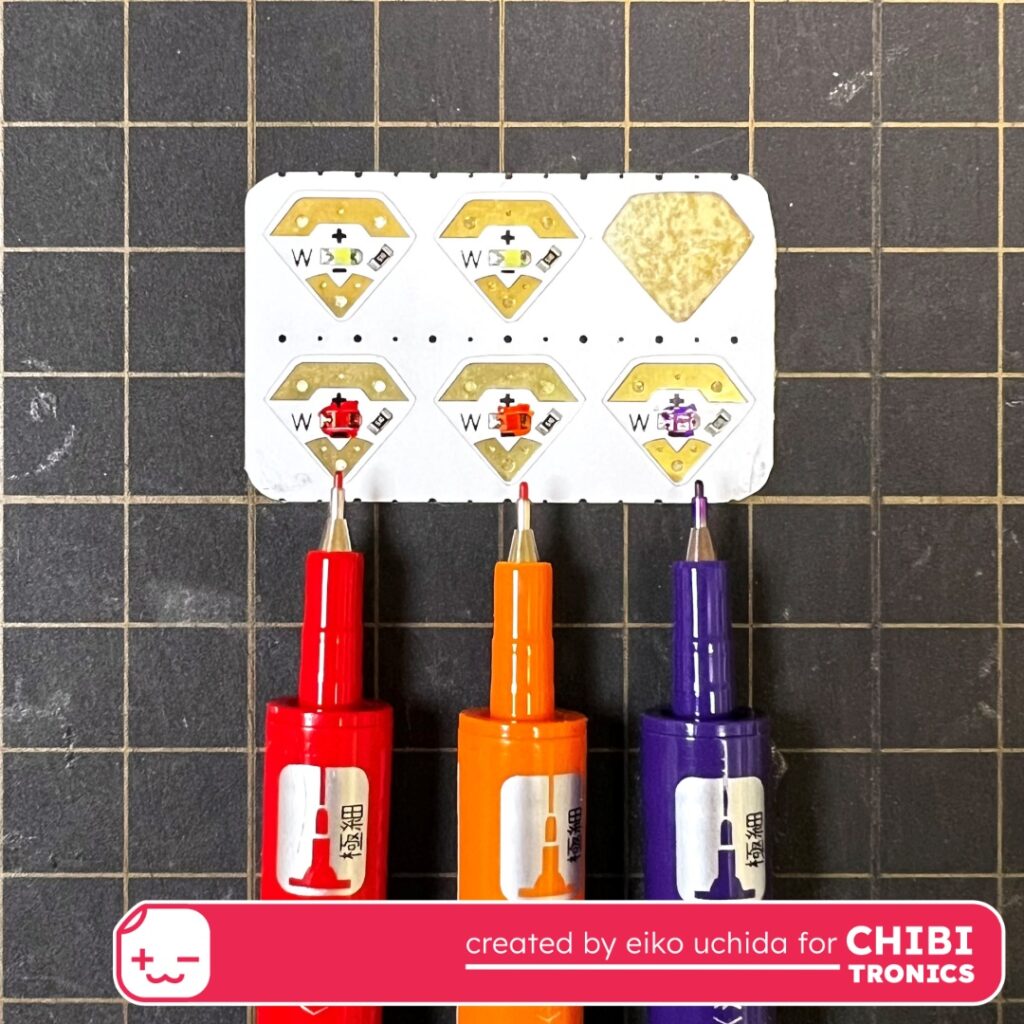
I colored the LED on this card with permanent markers.
Then, I connected two batteries in series.
Thank you for stopping by!
Eiko Uchida
~Supplies List~
- Chibitronics animating LED red fade
- 3V coin cell battery (CR2016)
- Conductive fabric tape
- Tim Holtz candle shop colorize dies
- Tim Holtz big tidings dies
- Tim Holtz festive gatherings dies
- Tim Holtz santa greetings colorize dies (Santa card)
- Tim Holtz trim a tree colorize dies (Santa card and Christmas tree card)
- Tim Holtz walter dies (Christmas tree card)
- Tim Holtz festive overlay stamps
- Heffy Doodle slider pop up dies
- Heffy Doodle slimline pull tab dies
- Tim Holtz kraft stock classic
- Tim Holtz metallic jewels kraft stock
- Tim Holtz metallic confections kraft stock
- Tim Holtz worn wallpaper scraps
- Neenah Cardstock Environment 80lb smooth desert storm paper
- White cardstock