Make Your Circuit POP!
The following project, which combines two of our favorite things (paper circuits and pop-ups) was created by Design Team member Emily Brooks, whom you can find on Instagram at @funfettigator.
Are you a big fan of the small screen?
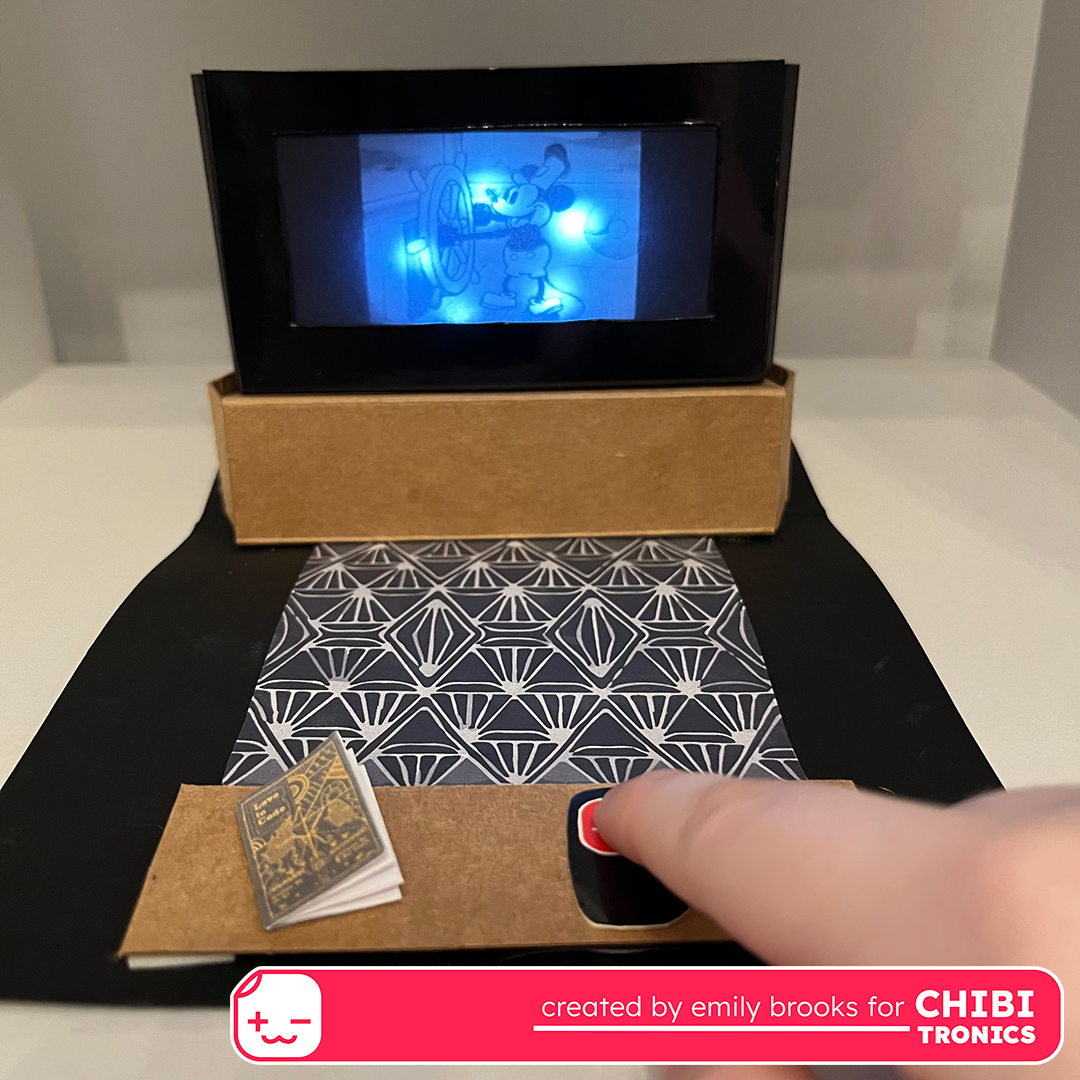
Learn how to make this easy light-up pop-up living room scene and use your “remote” to switch on your TV.
There are many ways to customize your scene, so get creative with it!
Supplies:
- White Circuit Sticker LEDs
- Conductive Fabric Tape
- CR 2032 Battery
- Assorted Cardstock
- I used a 12″ X 12″ sheet of black cardstock (cut in half) to make the base layer for my card.
- I used another sheet of black cardstock to make my TV Front, Back, and Sides.
- I used a piece of glossy black cardstock to add an optional, decorative frame to my TV Front
- I suggest using a heavy brown cardstock or light-weight chipboard for the TV Stand and the Table.
- Foam Battery Holder Ring or Foam Tape
- 2 pieces of Vellum
- Ruler
- Bone folder or embossing tool
- Double-sided Tape
- Scissors or craft knife
- OPTIONAL:
- printer
- Cricuit/Silhouette Machine
Instructions:
Step 1: Prepare Your Pieces
Create the pieces for your project using my suggested dimensions. Downloadable templates may be found below.
For this design, I used Adobe Illustrator to draw my rectangles, but you can use a ruler for this design just as easily.
The TV will be made of three main parts: a front, a back, and two sides. Optionally, if you’d like to make the front of your TV look more realistic, you can apply a secondary front (made with glossy black cardstock) to your TV.
Create Your TV Parts (Black cardstock)
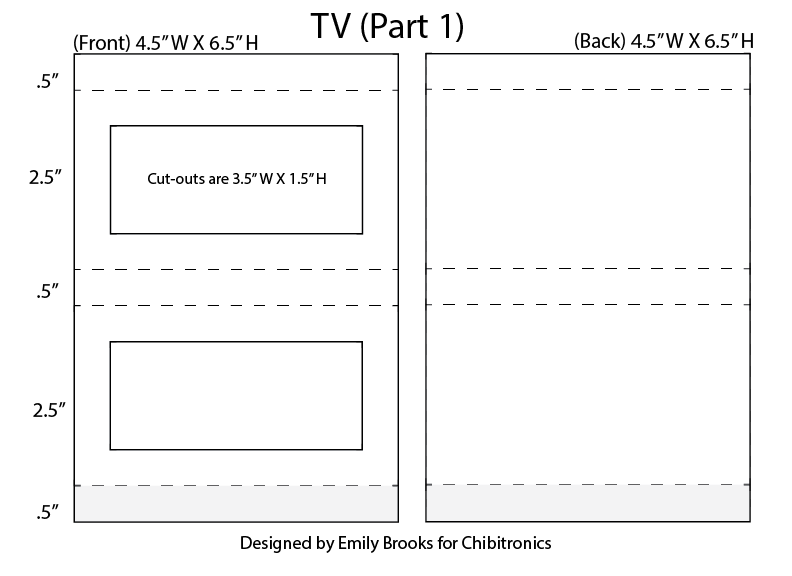
Front:
W: 4.5″
H: 0.5″, 2.5″, 0.5″, 2.5″, 0.5″ = total of 6.5″
Cut-outs: 3.5″ W x 1.5″ H with 0.5″ border
Back:
W: 4.5″
H: 0.5″, 2.5″, 0.5″, 2.5″, 0.5″ = total of 6.5″
Sides (x2):
W: 0.5″, 0.5″, 0.5″, 0.5″ = total of 2″
H: 2.5″
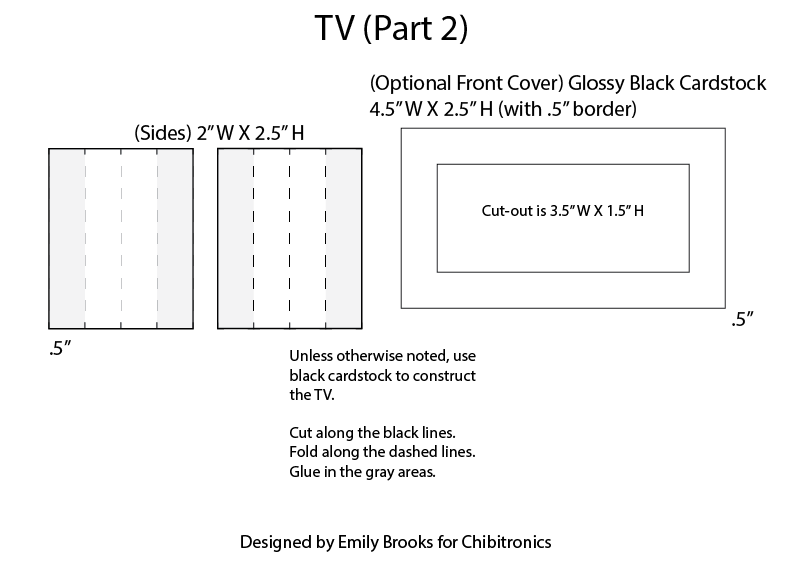
OPTIONAL:
Decorative Front (Black glossy cardstock)
W: 4.5″
H: 2.5″
Cut-out: 3.5″ W x 1.5″ H with 0.5″ border
TV Stand (cardstock of your choice)
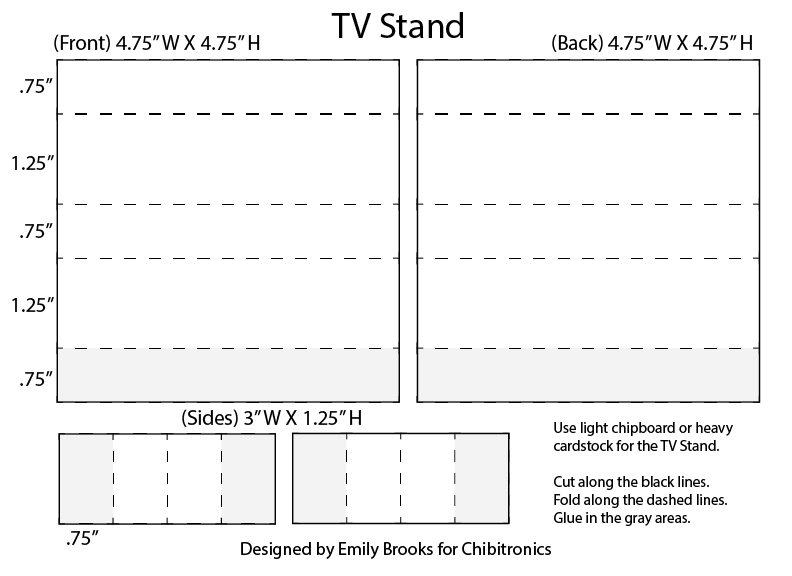
Front and Back:
W: 4.75″
H: 0.75″, 1.25″, 0.75″, 1.25″, 0.75″ = total of 4.75″
Sides (x2):
W: 0.75″, 0.75″, 0.75″, 0.75″ = total of 3″
H: 1.25″
NOTE: I used chipboard for the TV stand and table, which I do NOT recommend; a nice heavier weight cardstock will serve you better, chipboard was just too thick.
Downloadable Templates (PDF)
If you want to print out downloadable templates for these designs, you may do so below.
Step 2: Cut & Score Your TV Parts
Use scissors, a craft knife, or a Cricut/Silhouette machine to cut out the shapes outlined in black.
Use a bonefolder or unopened pen to pre-crease the dashed lines and then fold along the scored lines.
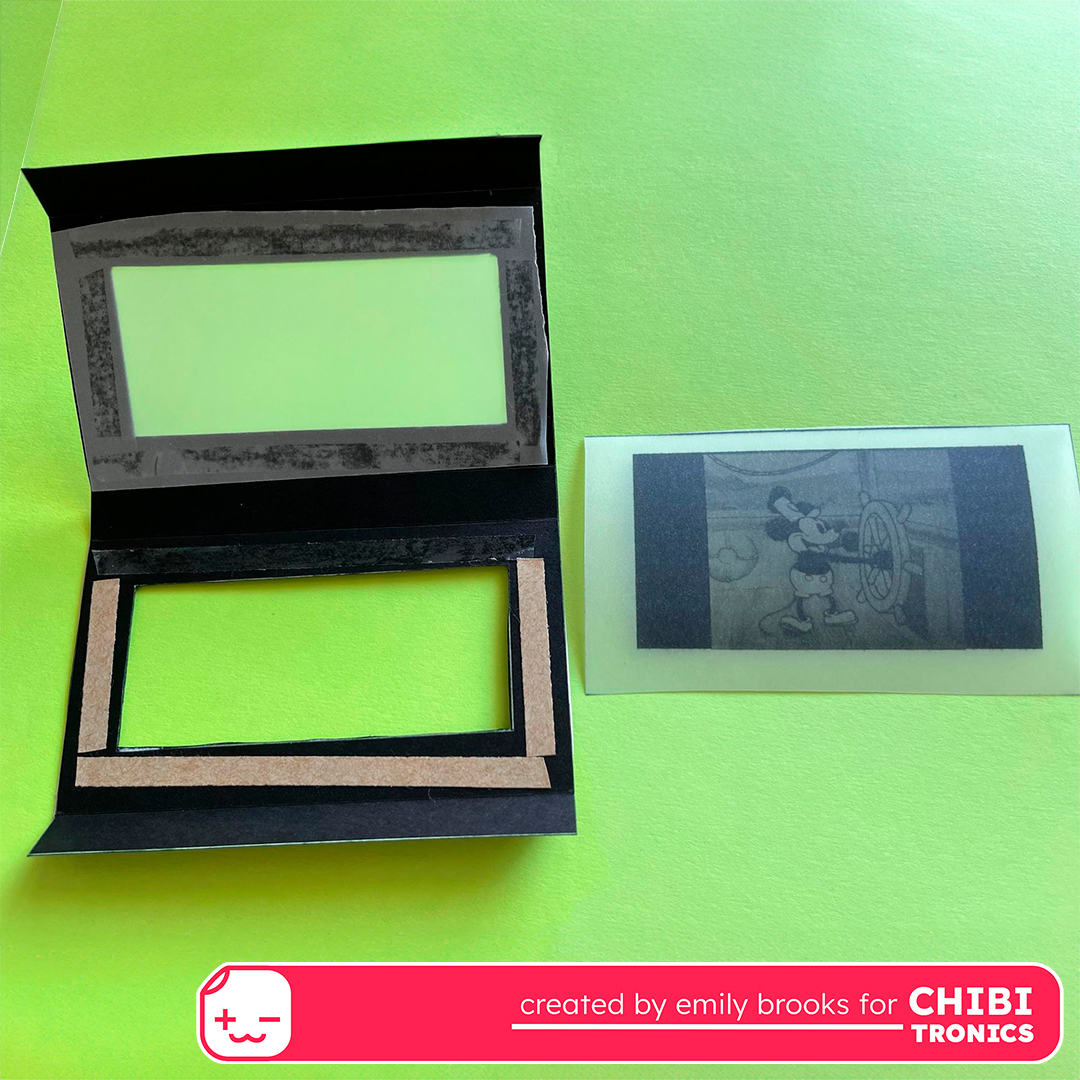
Step 3: Set Your Scene
The next step is to decide what image you want your TV to show!
I love Mickey Mouse, so I am using a scene from a Disney cartoon, Steamboat Willie, which entered the Public Domain on 1 January 2024!
For this step, you’ll need two pieces of vellum cut to 4.5″ W X 2.5″ H.
Print or draw your design on one piece of the vellum.
Then, tape or glue the second, blank piece to the inside of your TV’s frame.
To add the scene to the inside of your TV, tape or glue your vellum to the inside of the windows.
NOTE: Your design should fit inside the 3.5″ W x 1.5″ H window, and should leave a 0.5″ border around to secure to edge, so cut the vellum to 4.5″ W x 2.5″ H.
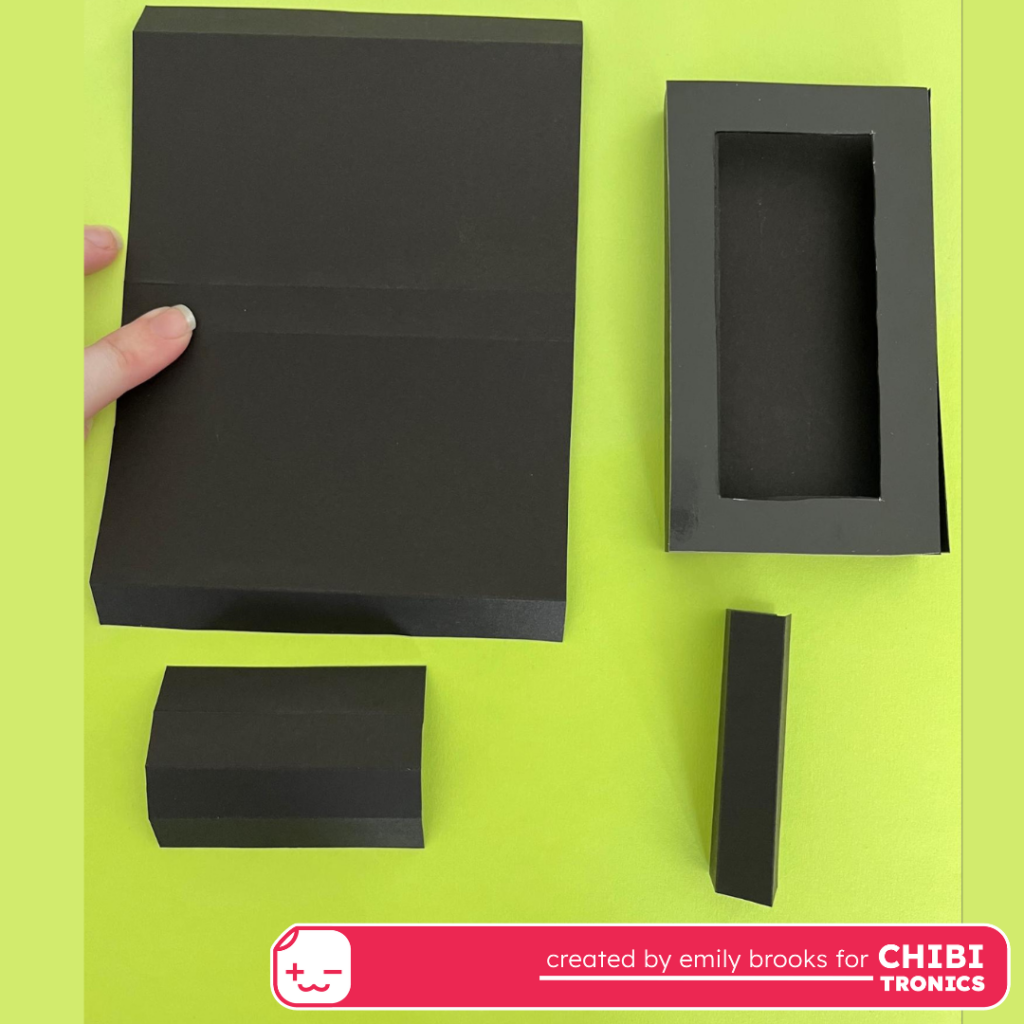
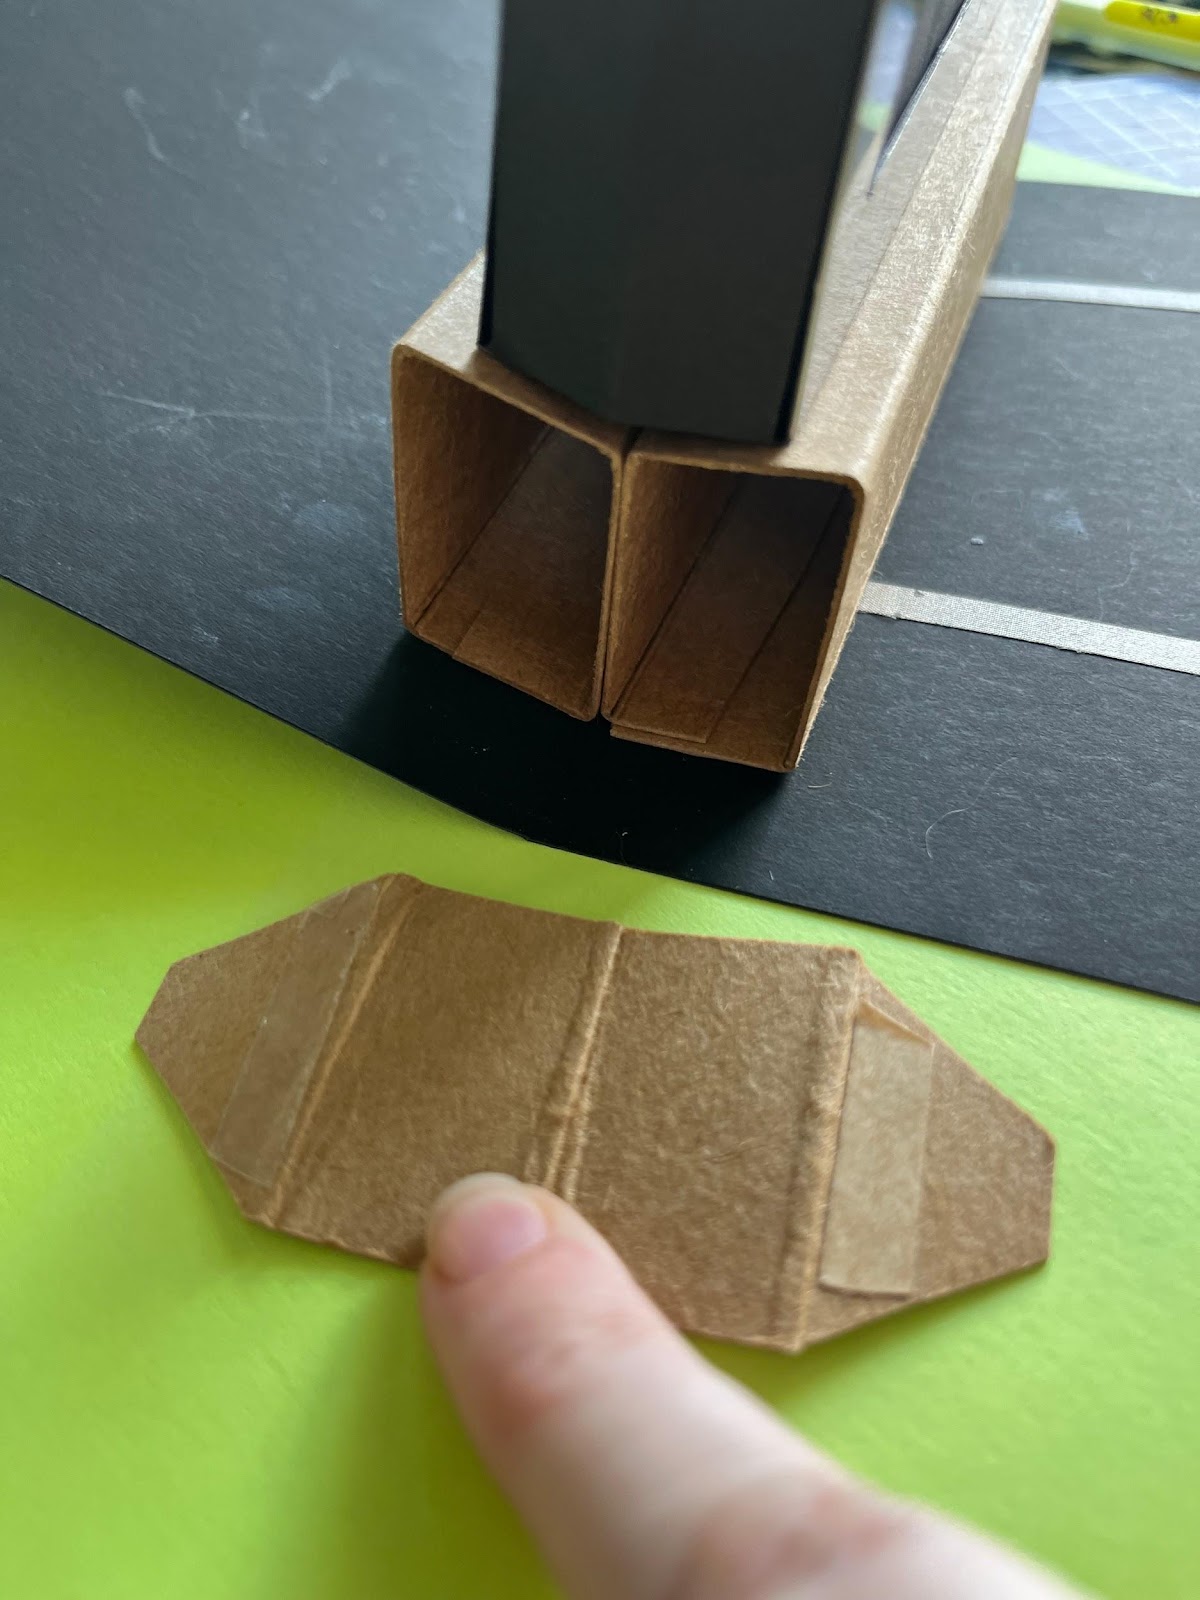
Step 4: Assemble the Pieces
The next step is to put the pieces together. To do this, fold and assemble your pieces with either glue or double-sided tape.
NOTE: For the large pieces, the 0.5″ and 0.75″ flaps will overlap
Step 5: Create Your Base Card
To create the base card that you will be adding your pop-up to, cut your 12″ x 12″ cardstock in half for a 6″ W x 12″ H sheet, and then fold it in half to make a 6″ x 6″ inch card (when folded).
Tape or glue the back half of the TV stand, aligned behind the center fold.
Tape or glue the front half of the TV stand flush against the center fold.
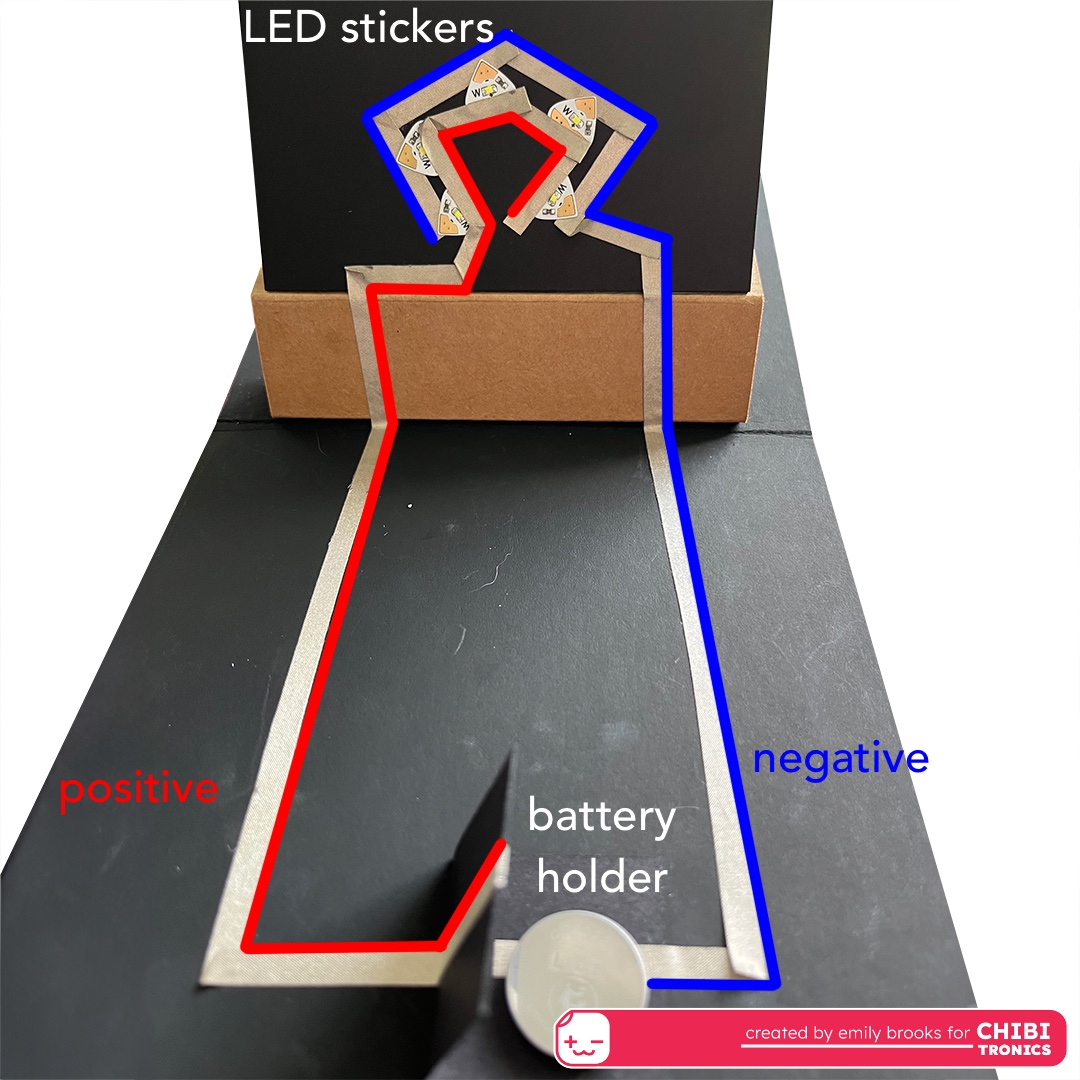
Step 6: Assemble Your Circuit
The next step is to assemble your circuit.
Use a battery holder template (or make your own with a folded scrap of paper) to hold the battery so that the negative side of the battery is facing down, and the positive side will be facing up.
Although not depicted in the next two photographs, I used a foam ring inside of my battery holder, which helped me to create a fun on and off switch.
Use conductive fabric tape to trace the negative outline of your circuit.
Then use another piece of the conductive fabric tape to trace the positive outline of your circuit.
Then place your LED stickers so that the larger positive side of the stickers face the inside, and the smaller negative side of the stickers face the outside.
Use additional small strips of conductive fabric tape to tape over and secure your connections.
Test your circuit by placing a CR 2032 in the battery holder and connecting the flap to the top of the battery.
Step 7: Finish Assembling TV & Stand
Tape or glue the bottom of the front TV stand piece to the front of the center fold.
Then tape or glue the back of the front TV stand piece to the front of the back TV stand.
Lastly, tape or glue the sides so that the flaps are inside and the center fold of the side pieces align with the center fold of the card.

Step 8: Add Design Elements of Your Choice
Accessorize your scene and enjoy!
You can add a table with a double stack of foam tape to cover your battery holder, a remote to indicate where to press to close your circuit, a rug to cover your conductive fabric tape tracks, and any other design choices, like a Love To Code coffee table book.