Video Tutorial
Introduction:
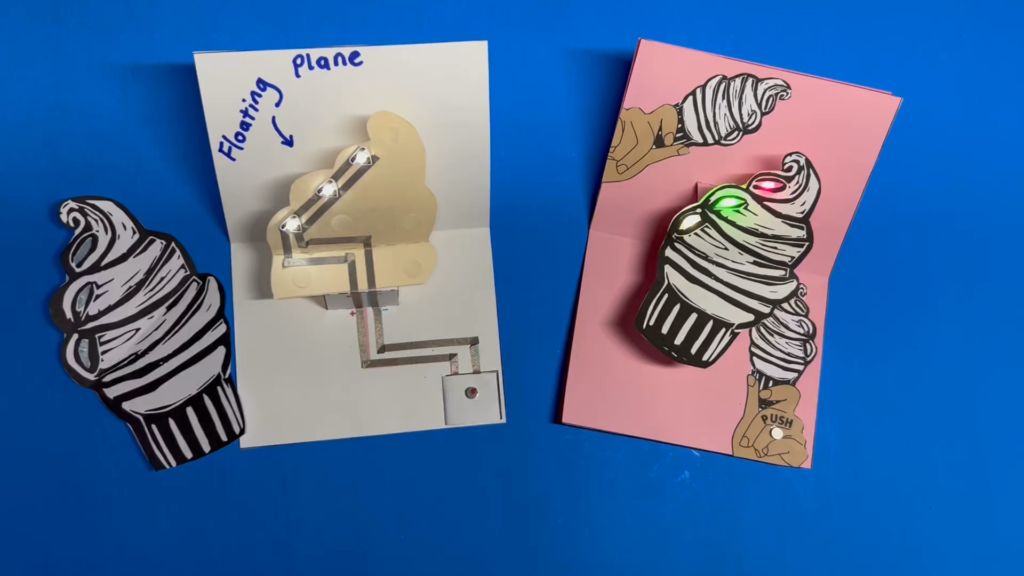
Left: Single Layer (No Slot) Right: Double Layer (With Slot)
In this video tutorial for #PopUpTober, I’ll show you two different methods for building a light-up pop-up structure called a Floating Plane. A Floating Plane is useful for creating large pop-up shapes that appear to float upon a flat plane that rests upon three parallel supports.
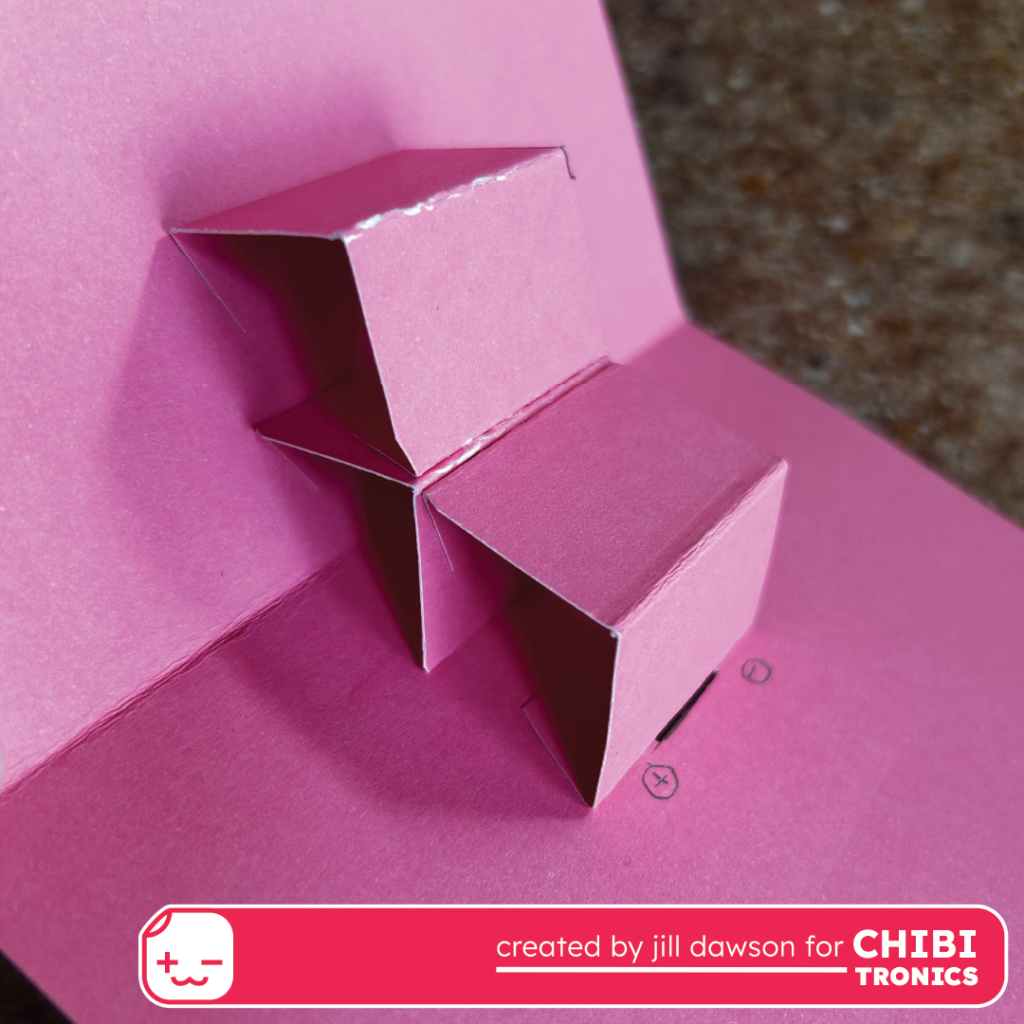
A Floating Plane may be folded parallel to the crease of a Base Card, or diagonally!
Directions:
To view a full demonstration, please watch the video.
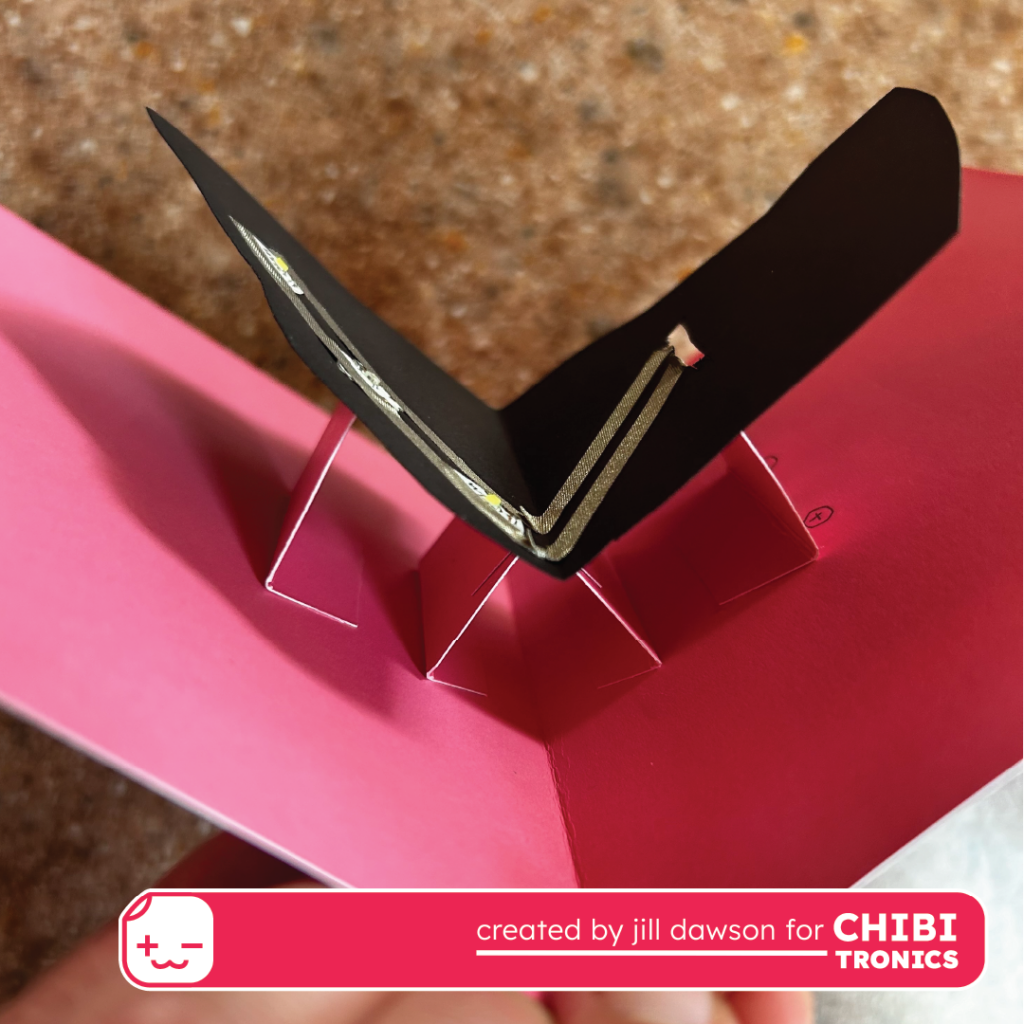
In the video, I’ll show you the process that I use for gluing the mechanism together and adding a circuit behind a piece of artwork. My hope is that it will help you get started with your own designs. The shape of a floating plane may be easily customizable, as can the shape of your circuit.
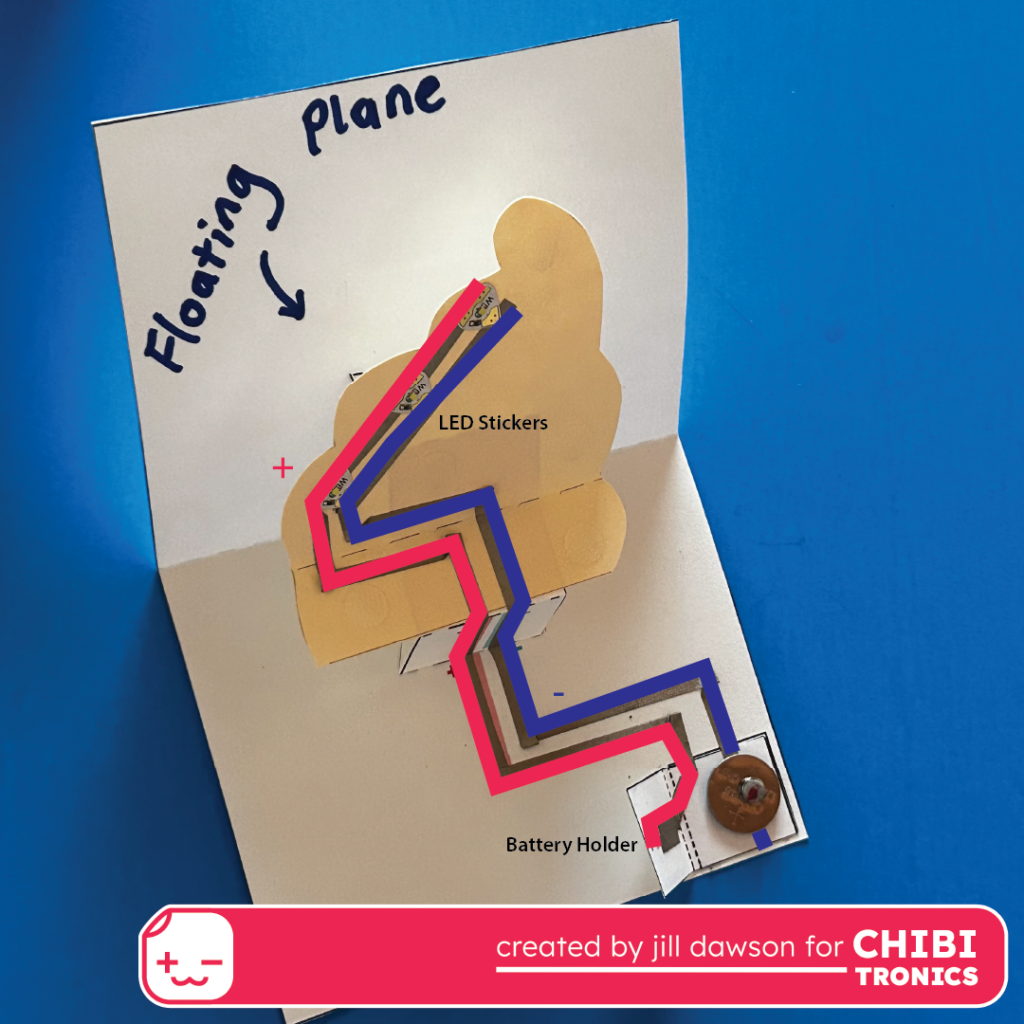
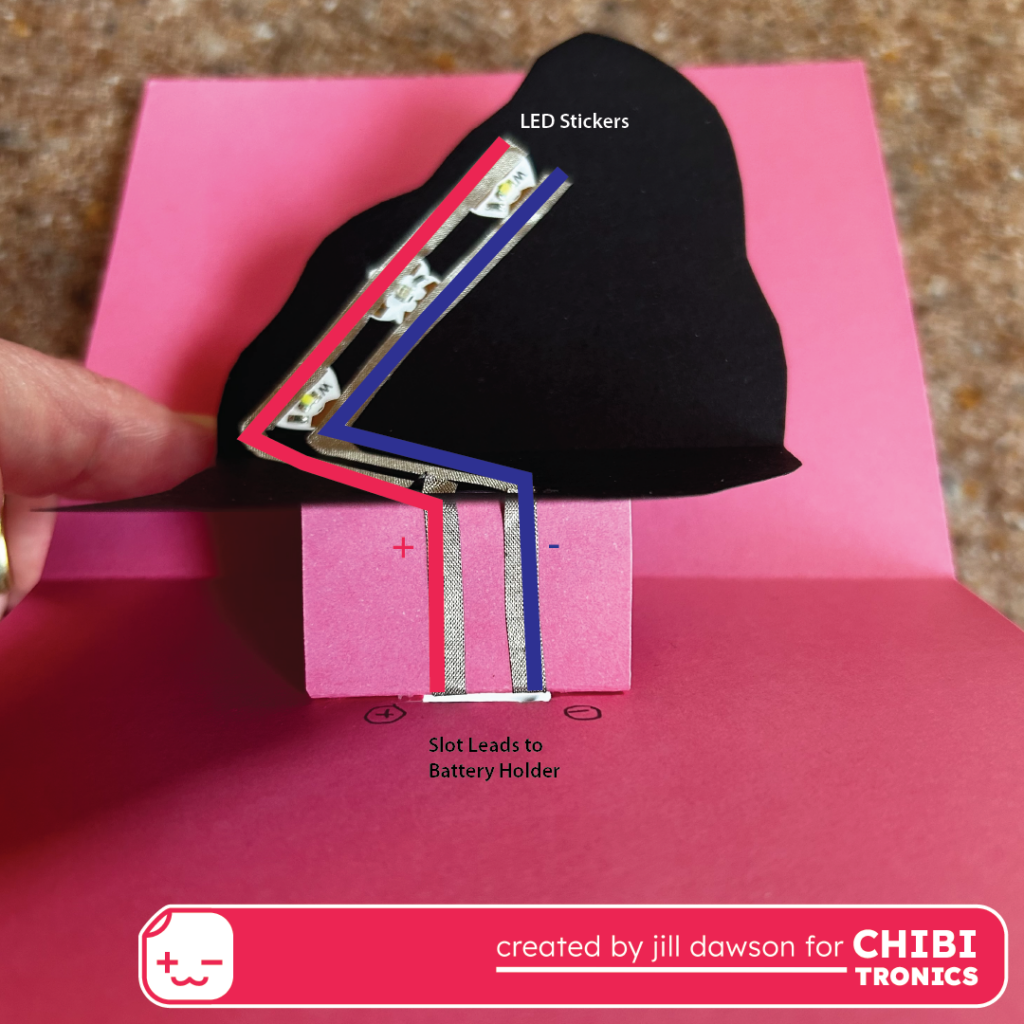
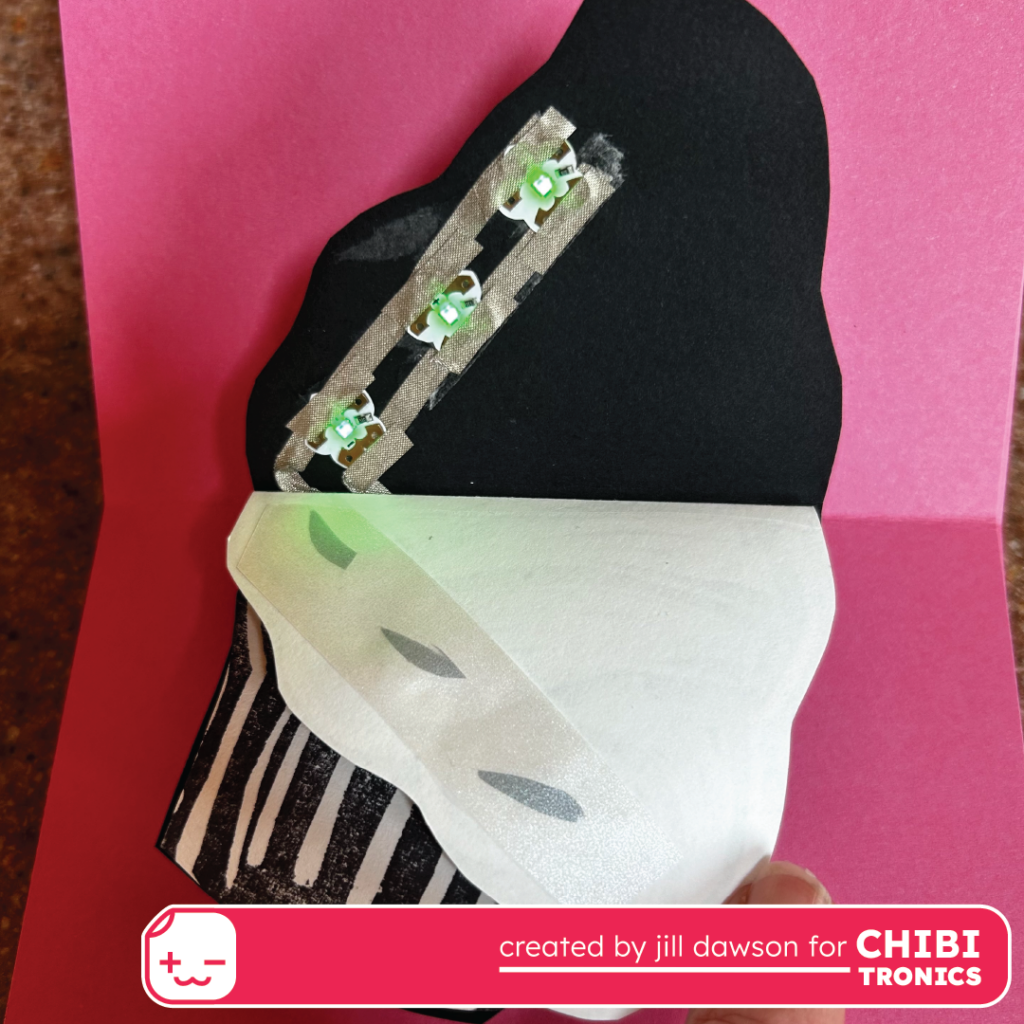
In order to conceal the circuit, one of the two designs has a slot cut in the Base Card for the conductive tape traces to slip through, allowing them to connect with a battery holder on the Backing Card.
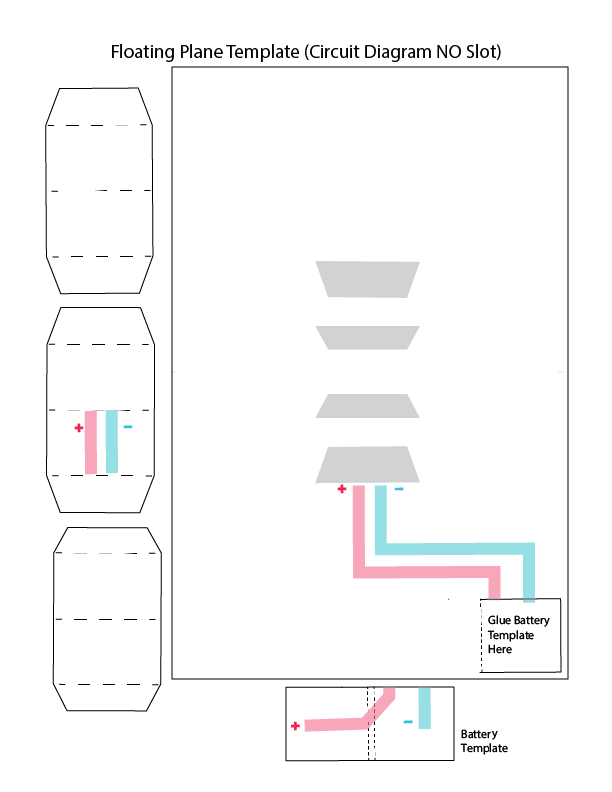
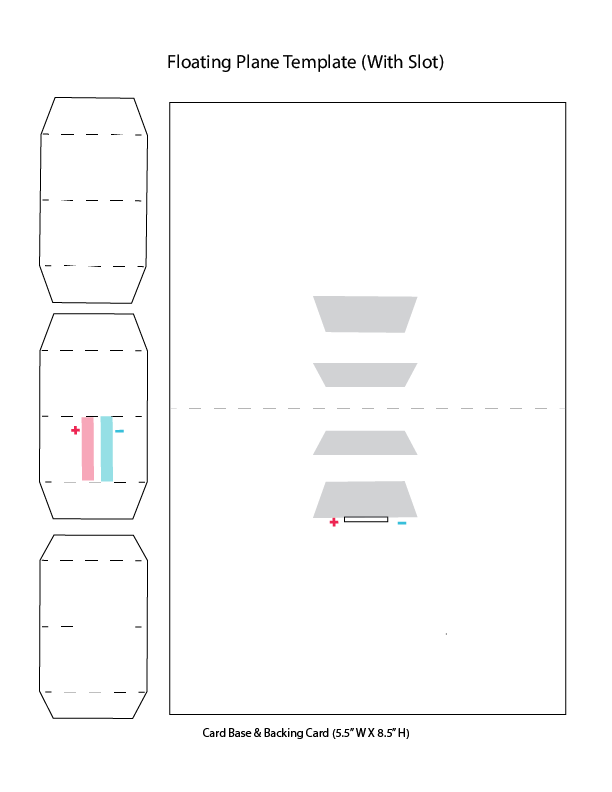
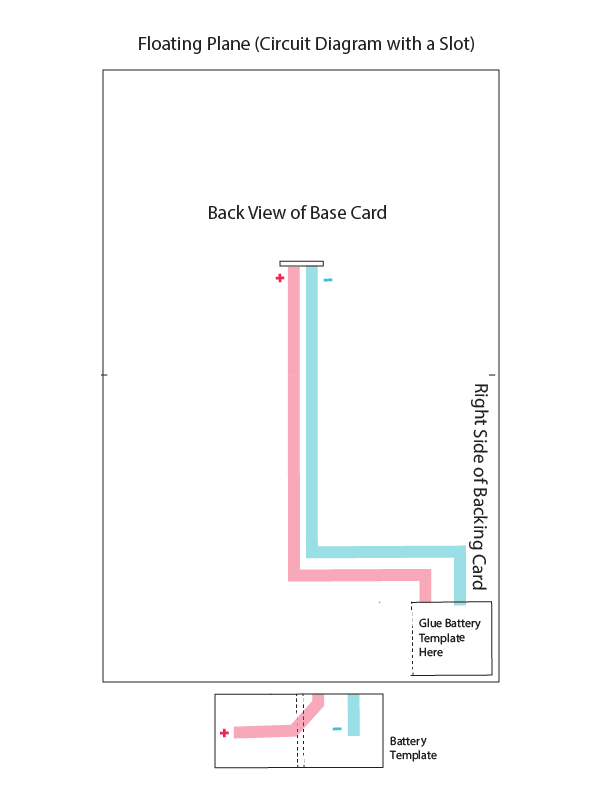
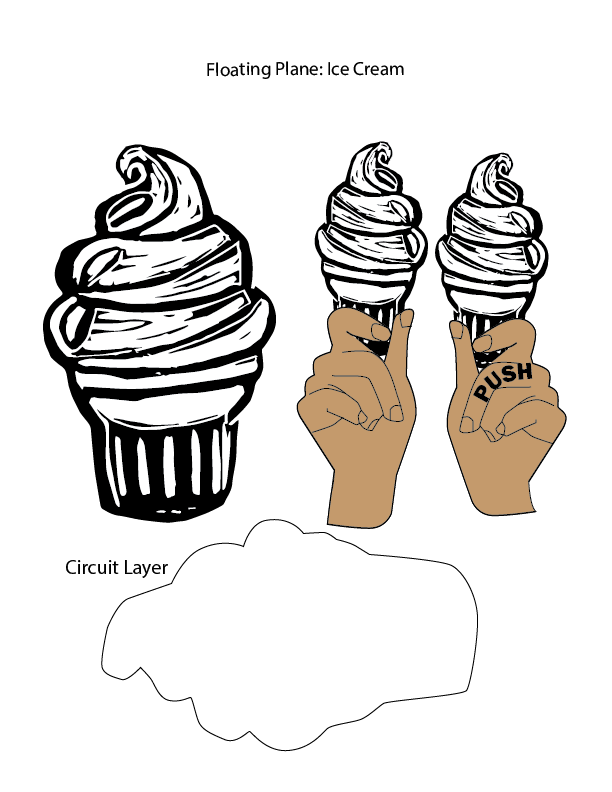
Templates, Circuit Diagrams, & Props
To make it easier to follow along with the video, it’s helpful to print out the template of your choice onto cardstock.
To help place focus upon the underlying circuit, I’m providing templates, circuit diagrams, and ice cream artwork that I made by carving a rubber stamp. These support materials may be downloaded below.
Base Card/ Circuit Diagram (All One Layer)
The first model, which is the easiest, builds the circuit right on top of the Base Card. The advantage of this version is that the structure is built upon a single piece of paper. The disadvantage is that the circuit will be visible until you cover it up.
Base Card: Circuit Diagram (Two Layers)
The second model does a better job of hiding the circuit, but it requires extra steps. In this version the circuit is threaded through a slot cut from the Base Card and connected with a battery on another sheet of paper, a Backing Card.

Props
Useful Tools & Supplies:
- 1 or more Circuit Sticker LEDs (I used three Rainbow Fade Animating LEDs for my ice cream cones)
- Conductive Fabric Tape
- Coin cell battery
- Cardstock in colors of your choice (110 pound is ideal, but 65 pound will work)
- Vellum scrap (to diffuse the light)
- Scissors
- Cork-backed steel ruler and a scoring tool (a bone folder or toothpick both work)
- Pencil with an eraser
- Pen-knife
- Japanese Screw Punch or a hole punching tool of your choice
- Double-sided tape
- Glue or an adhesive of your choice
- Printer (for printing the templates, circuit diagrams, and embellishments).
- Art Supplies of your choice
- (Optional) Chibitronics or WeRMakers Battery Holder
- (Optional) Chibi Stencil or Craft Stencil
Learn More
To learn more about the Floating Plane mechanism, check out pages 60-63 of Duncan Birmingham’s book, Pop-Up Design and Paper Mechanics: How to Make Folding Paper Sculpture. You may also check out Tutorial 12: Floating Planes and Tutorial 54: Diagonal Floating Planes over on YouTube on Duncan Birmingham’s Pop-UpChannel.