Slot & Joint Video Tutorial:
Introduction:
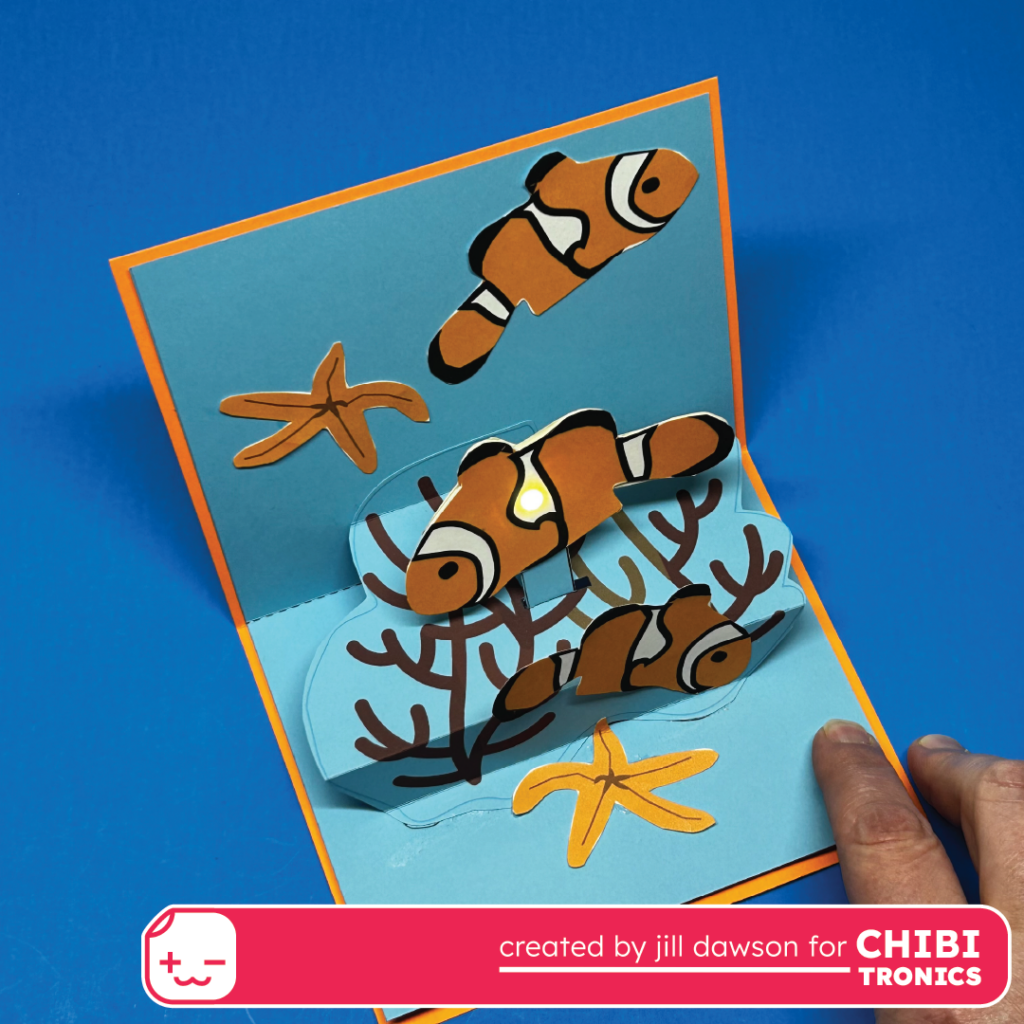
In this video tutorial for #PopUpTober, I’ll show you two different methods for building a light-up pop-up mechanism called a Slot and Joint. A Slot and Joint mechanism is useful for creating pop-ups that appear to jut out from a parallelogram adhered to a base card. This type of pop-up works well for adding a paper circuit, because it’s possible to expand the surface area of your jutting arms to add more LEDs!
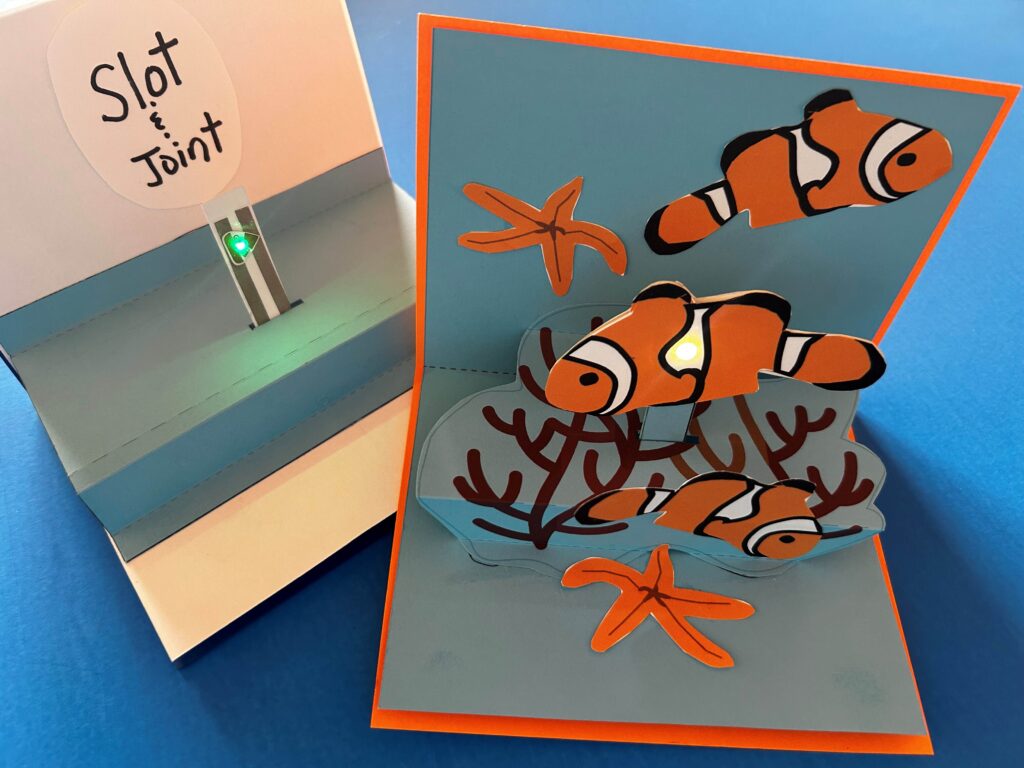
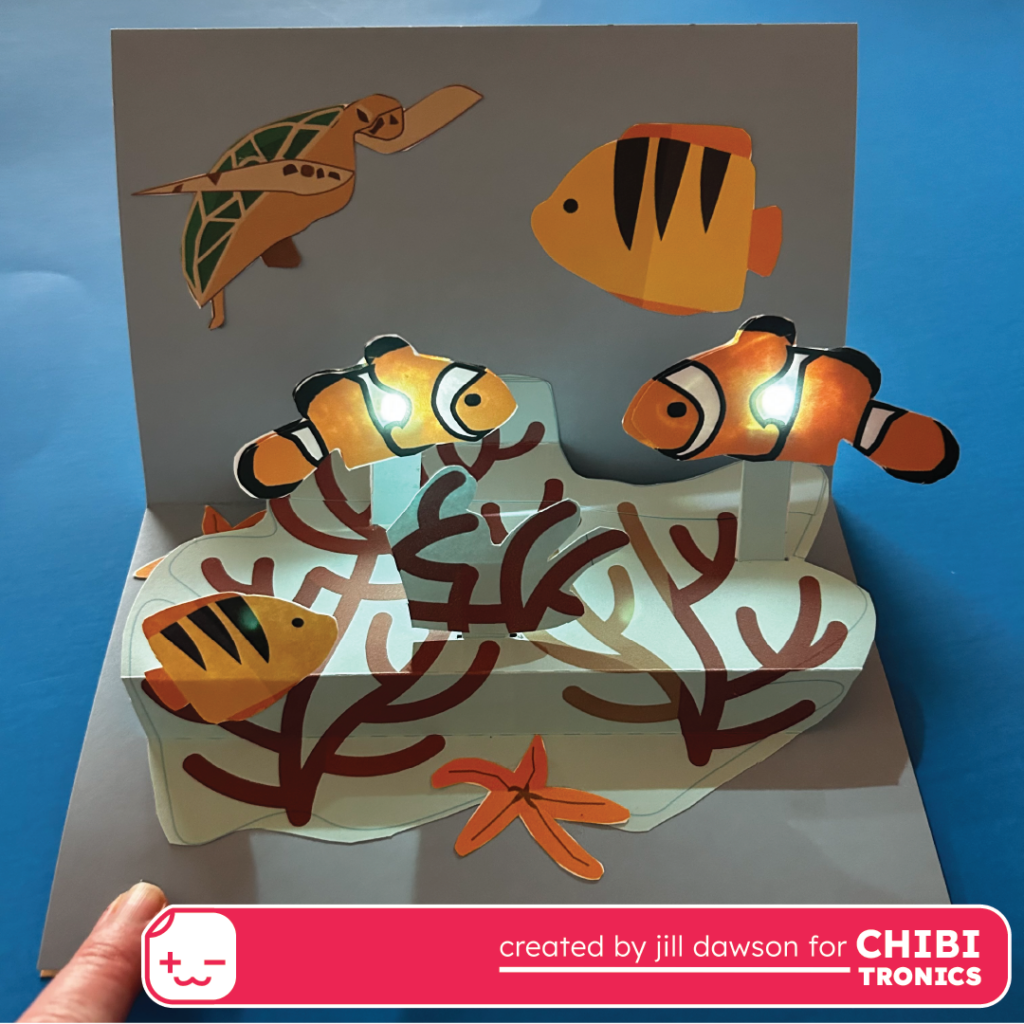
While this tutorial will focus on creating one jutting arm that lights up, it’s possible to add multiple glowing arms with a bit more planning.
Directions:
To view a full demonstration, please watch the video.
In the video, I’ll show you the process that I use for gluing the mechanism together and adding a circuit to a moving arm. The shape and theme of this mechanism are easily customizable, so I hope that you’ll think of these models as a launching point for your own designs.
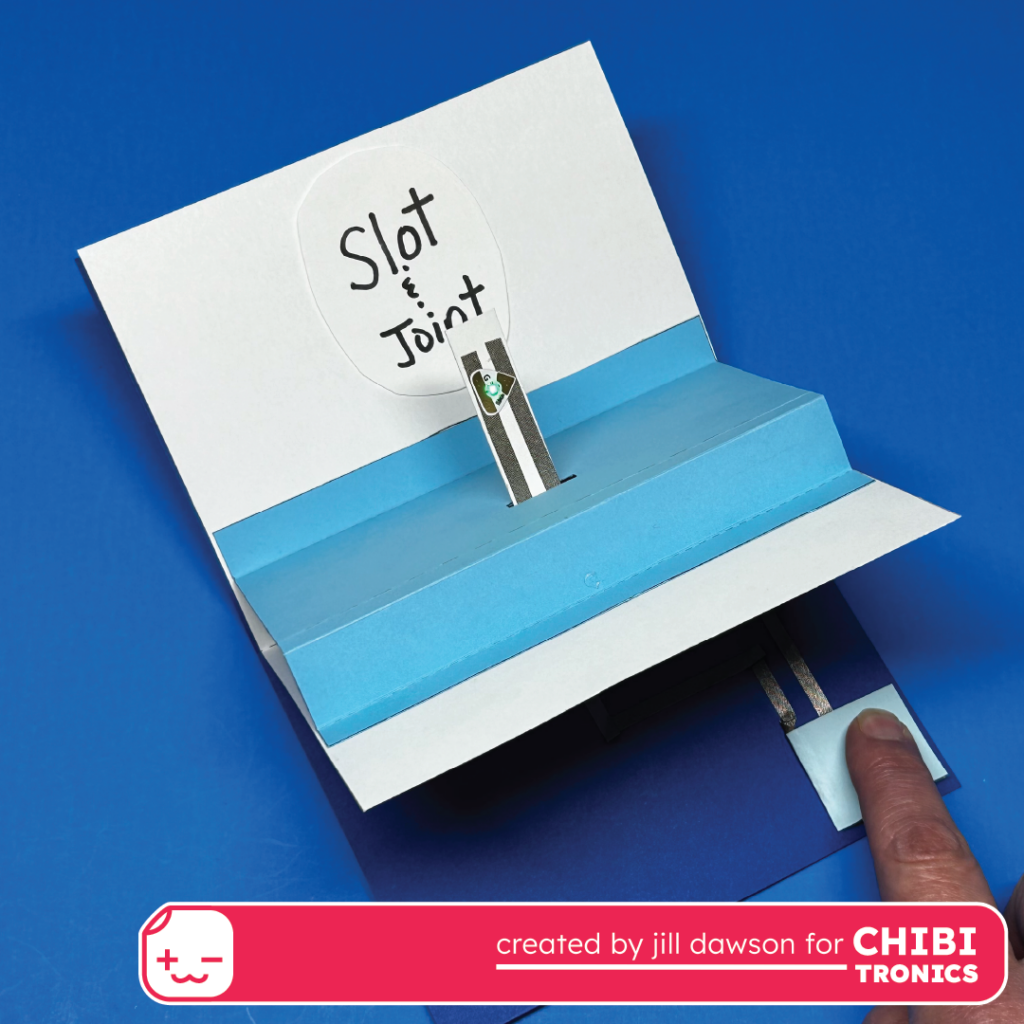
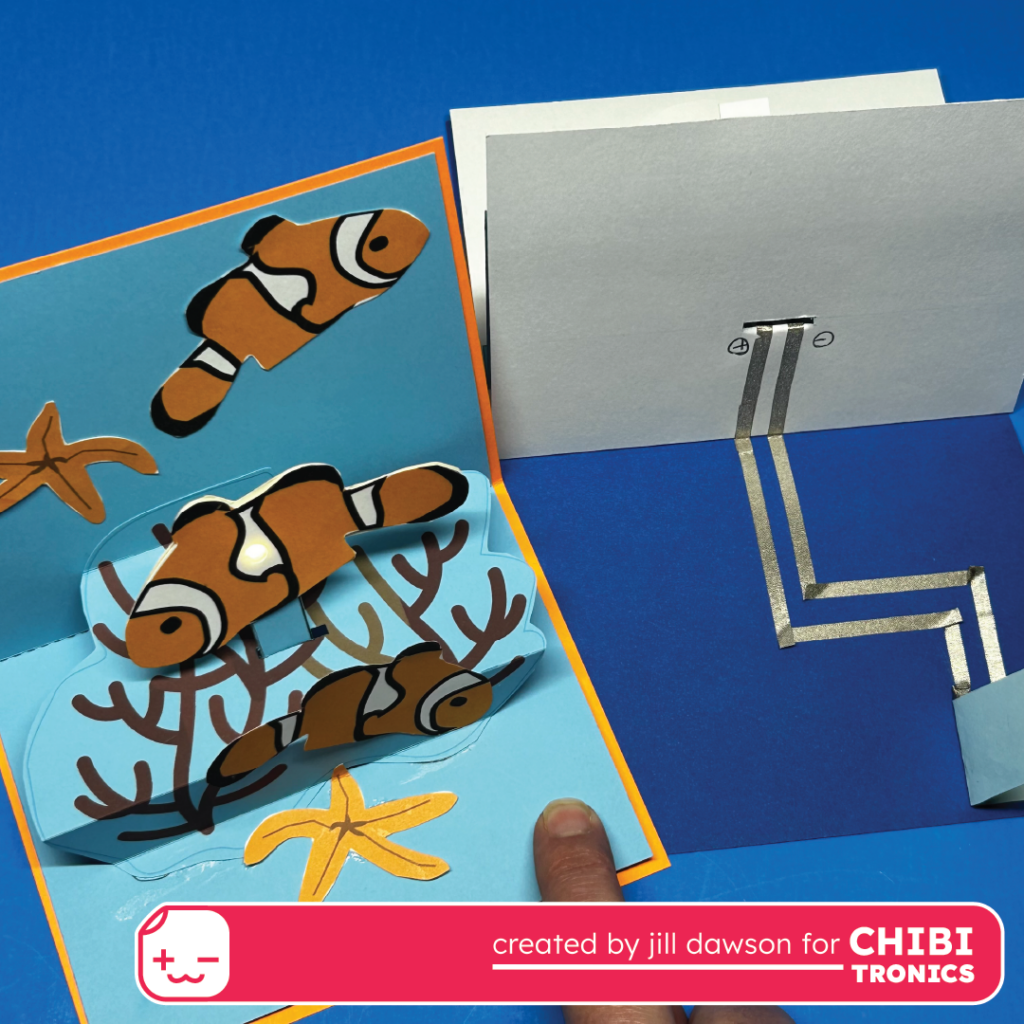
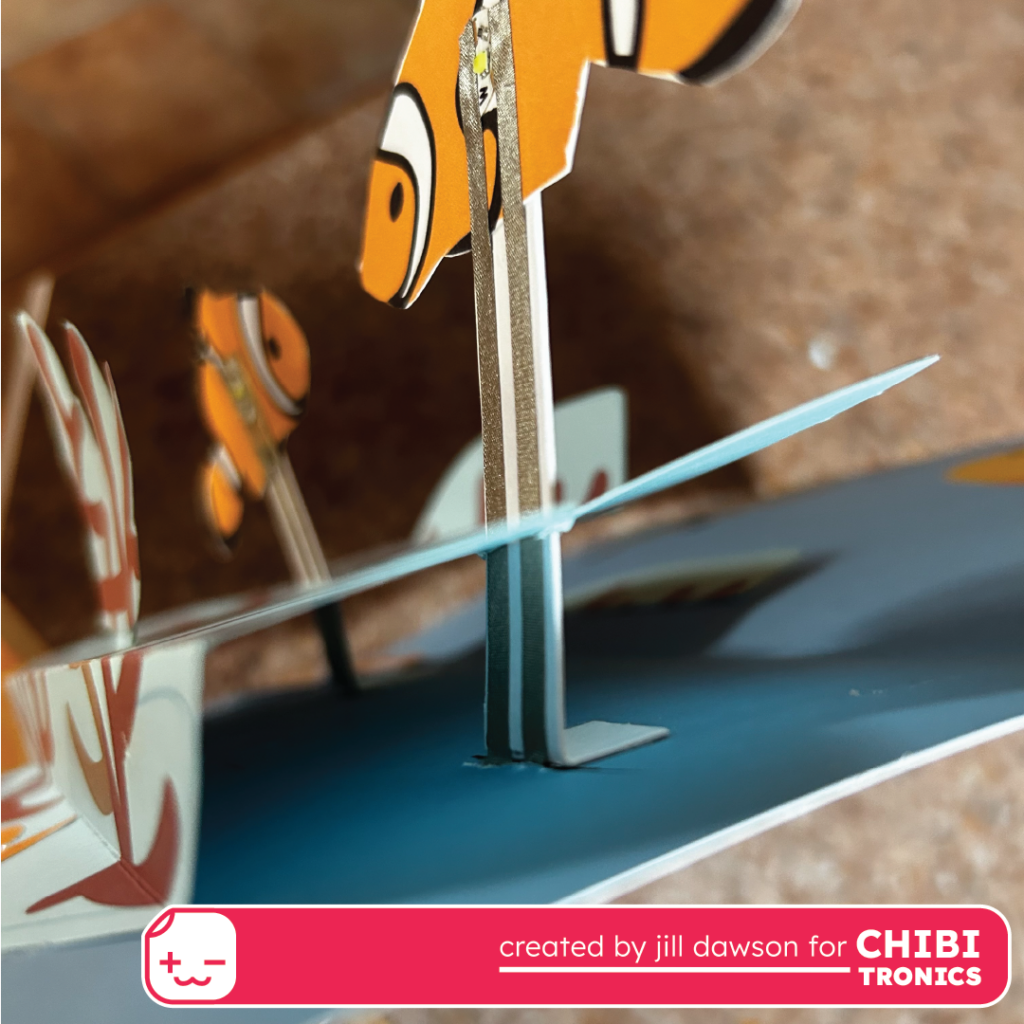
In order to conceal the circuit, this design has a slot cut in the Base Card for the conductive tape traces to slip through, allowing them to connect with a battery holder on the Backing Card.
Templates, Circuit Diagrams, & Props
The dimensions that I’m using worked for my project, but the shape, angles, and measurements you use might end up being different.
To help place focus upon the underlying circuit, and to make it easier to follow along with the video, I’m providing templates, circuit diagrams, and coral reef inspired artwork that I made in Adobe Illustrator. These support materials may be downloaded below.
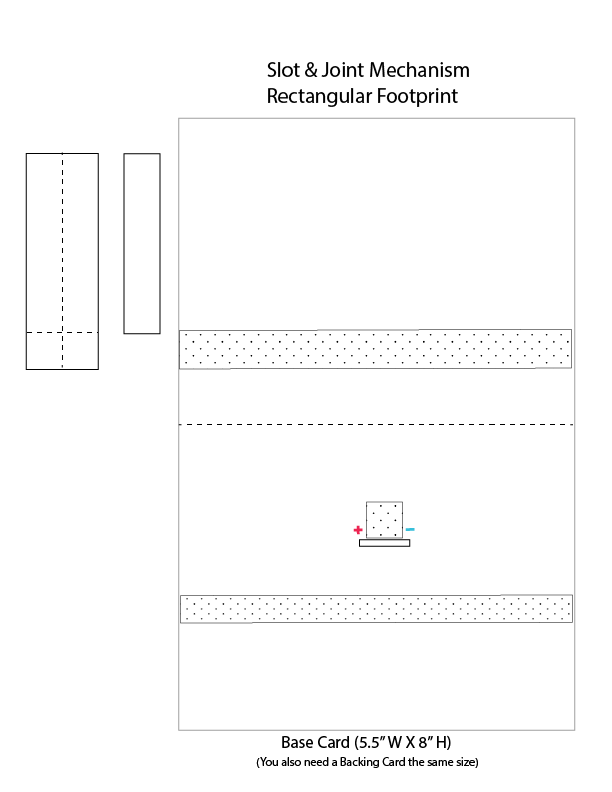
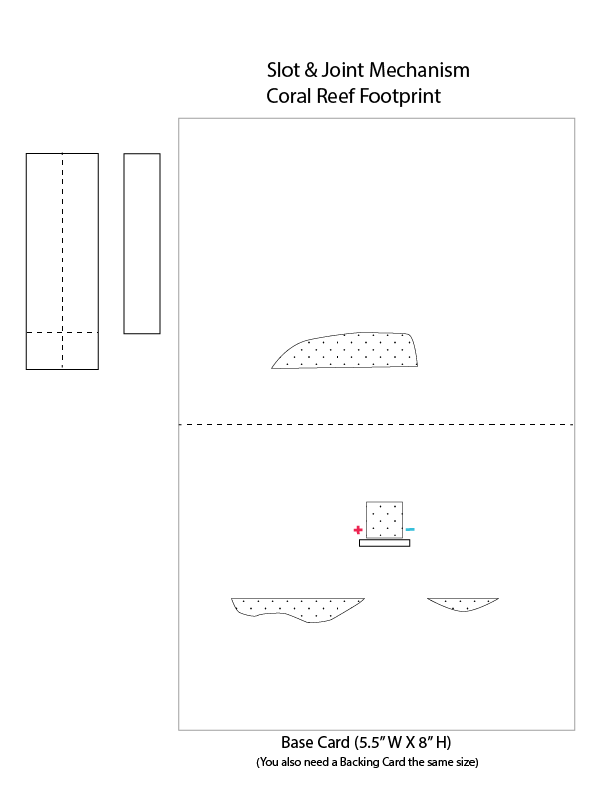
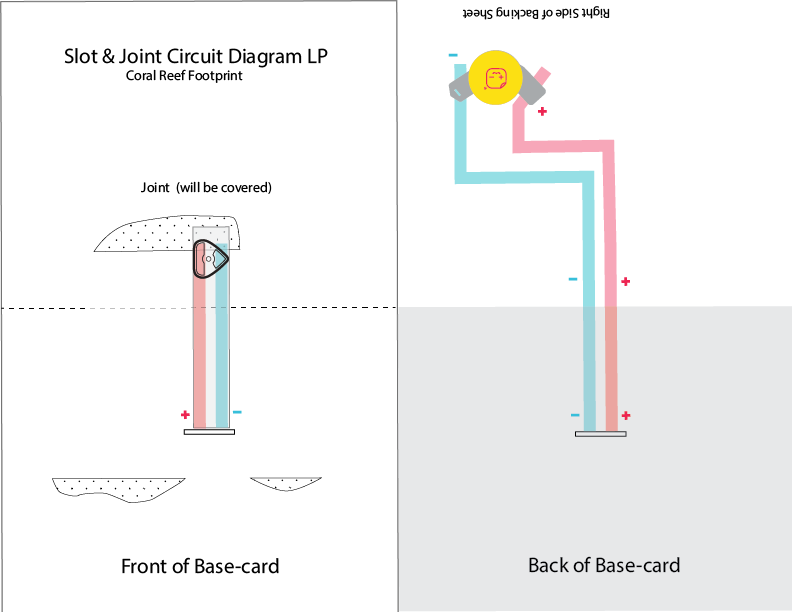
I’ve created templates for two different models, one with a rectangular parallelogram and another shaped like a coral reef. Other than the shape differences, they are identical in functionality.
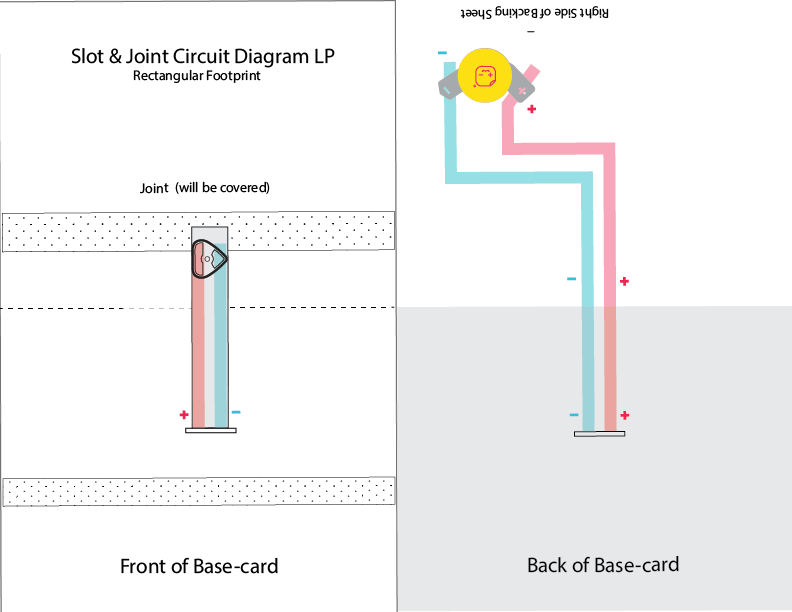
Base Card: Circuit Diagram (Two Layers)
This model does a good job of hiding the circuit, but it requires two layers of paper and a craft knife. The knife is used to cut out slots in both the base layer and the parallelogram that it’s slotted through. Then, to conceal the circuit, the Conductive Fabric Tape must be threaded through the slots and connected with a battery on another sheet of paper, a backing card the same size as the template (5.5″ W X 8″ H).
Templates & Props
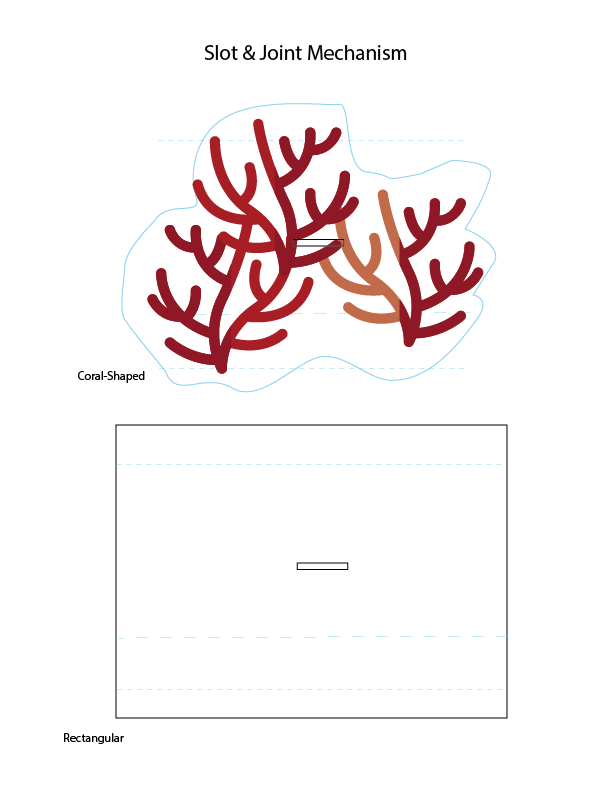
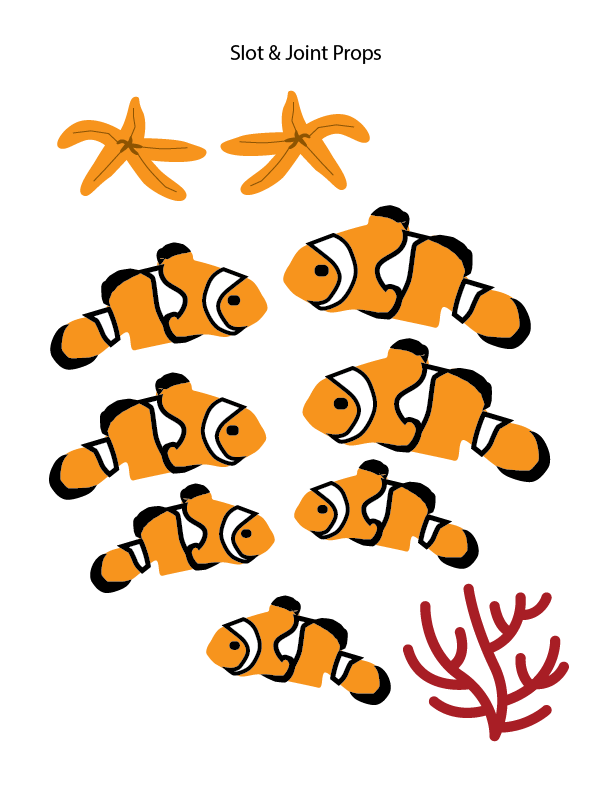
Circuit Diagrams
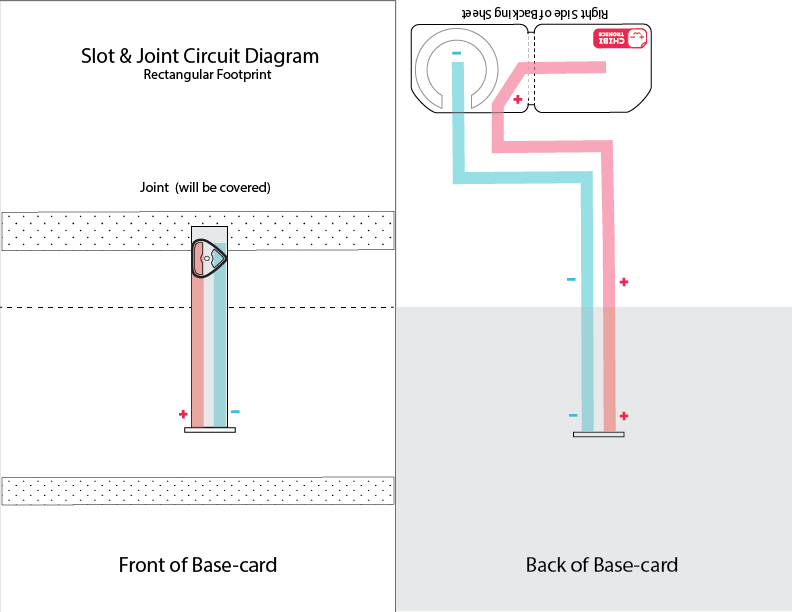
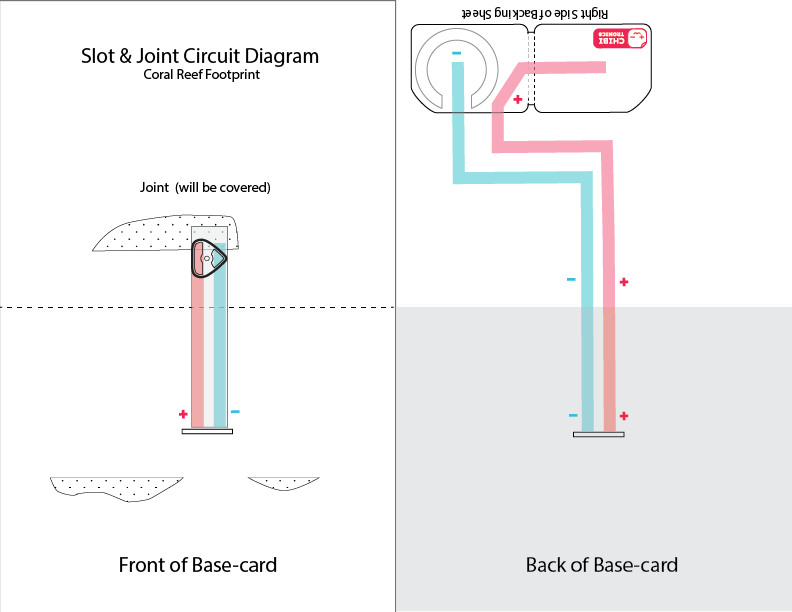
Updated 10/24/2025: We’ve added Circuit Diagrams that depict our new Launchpad Battery!
Useful Tools & Supplies:
- 1 or more Circuit Sticker LEDs (I used one White Fade LED for my fish)
- Conductive Fabric Tape
- 3V Coin cell or Launchpad Battery
- 8 1/2 X 11 Cardstock in colors of your choice (110 pound is ideal, but 65 pound will work)
- Vellum scrap (to diffuse the light)
- Scissors
- Cork-backed steel ruler and a scoring tool (a bone folder or toothpick both work)
- Pencil with an eraser
- Pen-knife
- Japanese Screw Punch or a hole punching tool of your choice
- Double-sided tape
- Glue or an adhesive of your choice
- Printer (for printing the templates, circuit diagrams, and props).
- Art Supplies of your choice
- (Optional) Chibitronics Battery Holder
- (Optional) Chibi Stencil or Craft Stencil
Learn More
You can learn more about this building technique by watching Pop-Up Tutorial 11 – Slots (on the Pop-Up Channel), or reading page 116 of Duncan Birmingham’s book, Pop-Up Design and Paper Mechanics: How to Make Folding Paper Sculpture.
