Video Tutorial
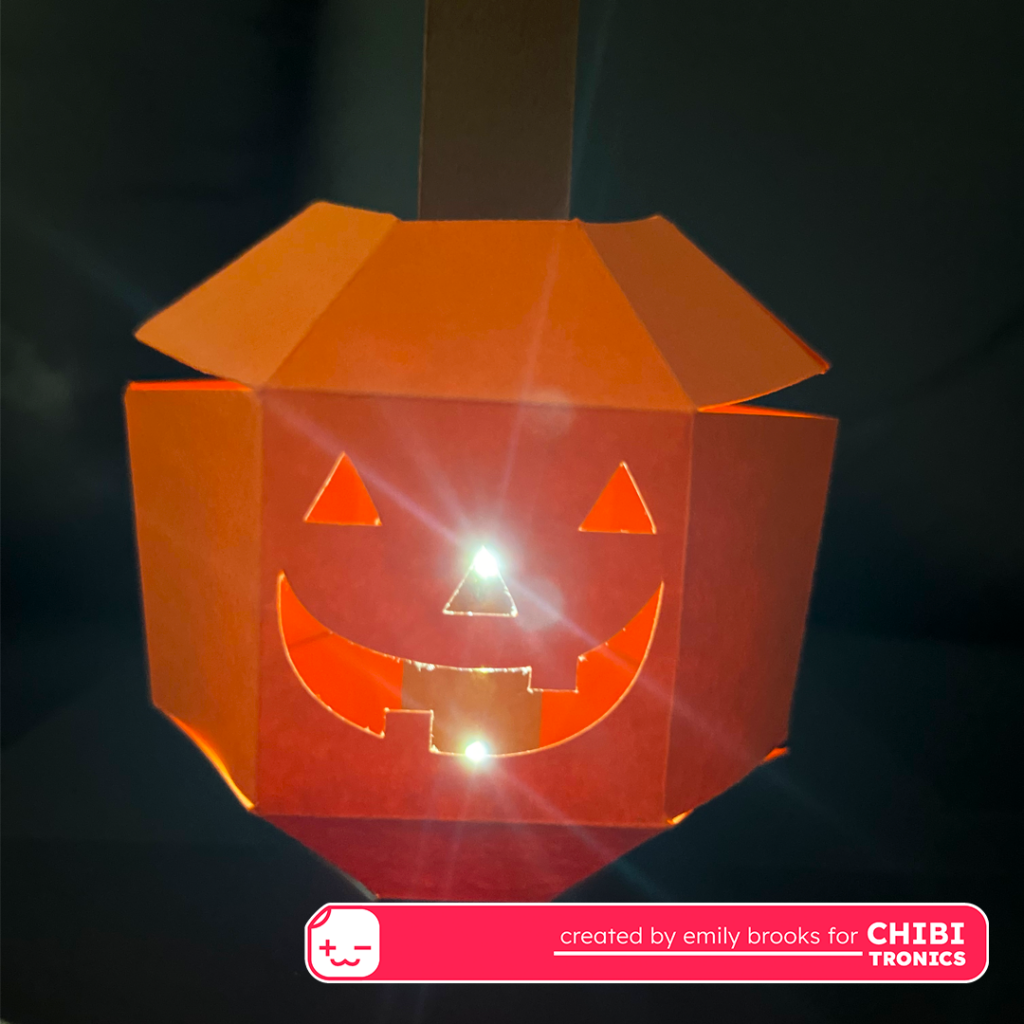
For everyone that knows that Halloween is a season, not a day, this light-up pop-up jack-o-lantern card video tutorial is for you!
Watch the video to see how to make your own paper pumpkin pop-up!

Materials:
- Chibitronics White Fade Animating LED Stickers
- Chibitronics Conductive Fabric Tape
- Chibitronics Conductive Fabric Patches
- CR 2032 coin cell battery
- Craft blade
- PVA glue (or double-sided tape)
- 8.5 x 11 Orange and Brown Cardstock
- 12 x 12 Black Cardstock
- Silhouette or Cricut cutter OR Printer
- Paper
- Scissors
Step 1: Prep Your Jack-O-Lantern Piece
Choose one of the four options below to create your Jack-O-Lantern.
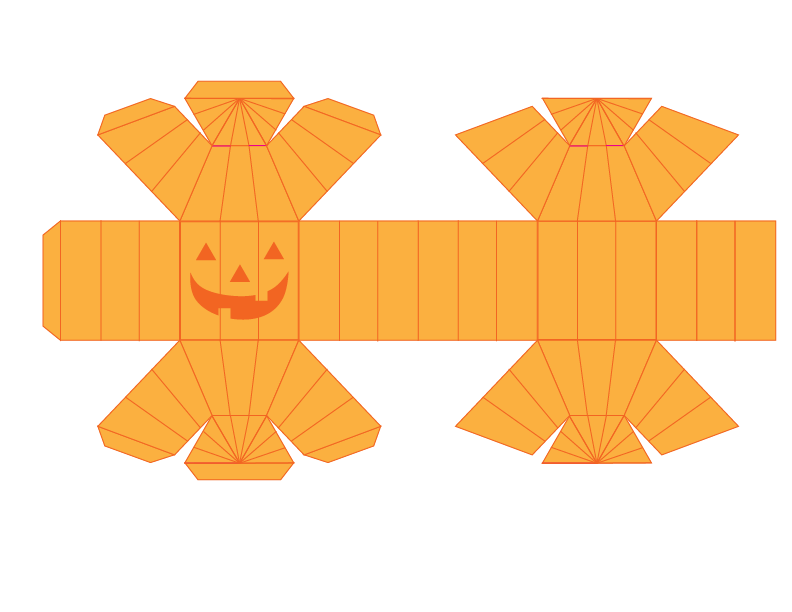
Option 1:
Print Color PDF and cut around edges with scissors.
Option 2:
Print B&W PDF, decorate with preferred drawing utensils (crayons, markers, colored pencils) and cut around edges with scissors.
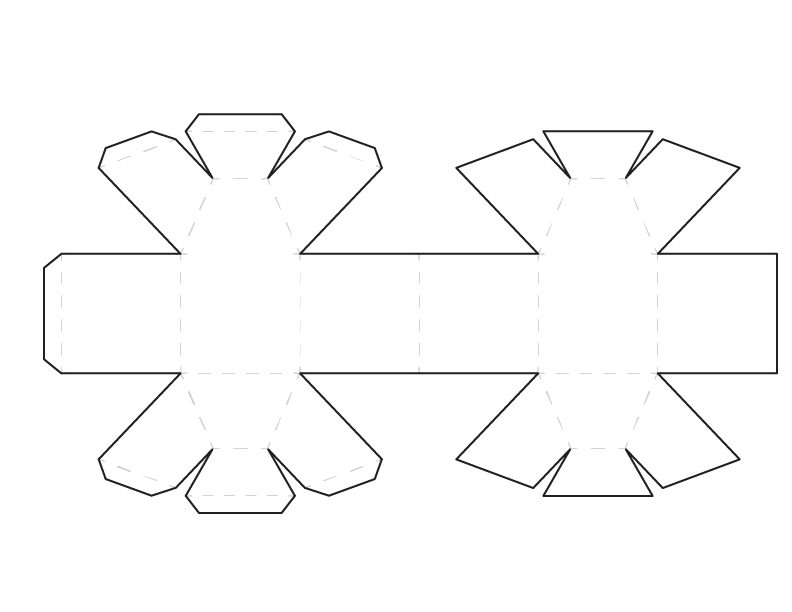
Option 3:
Cut orange cardstock with Silhouette Cameo using .dxf.

Option 4:
Cut orange cardstock with Cricut using .svg.
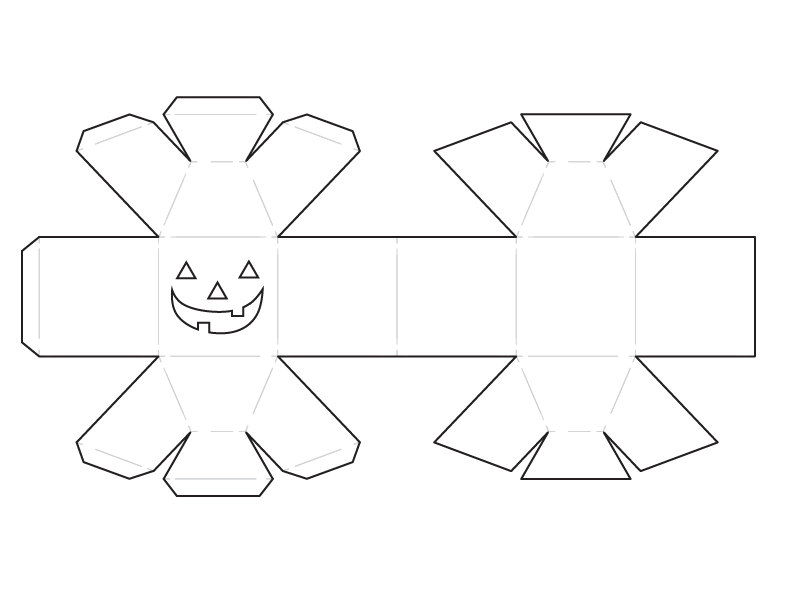
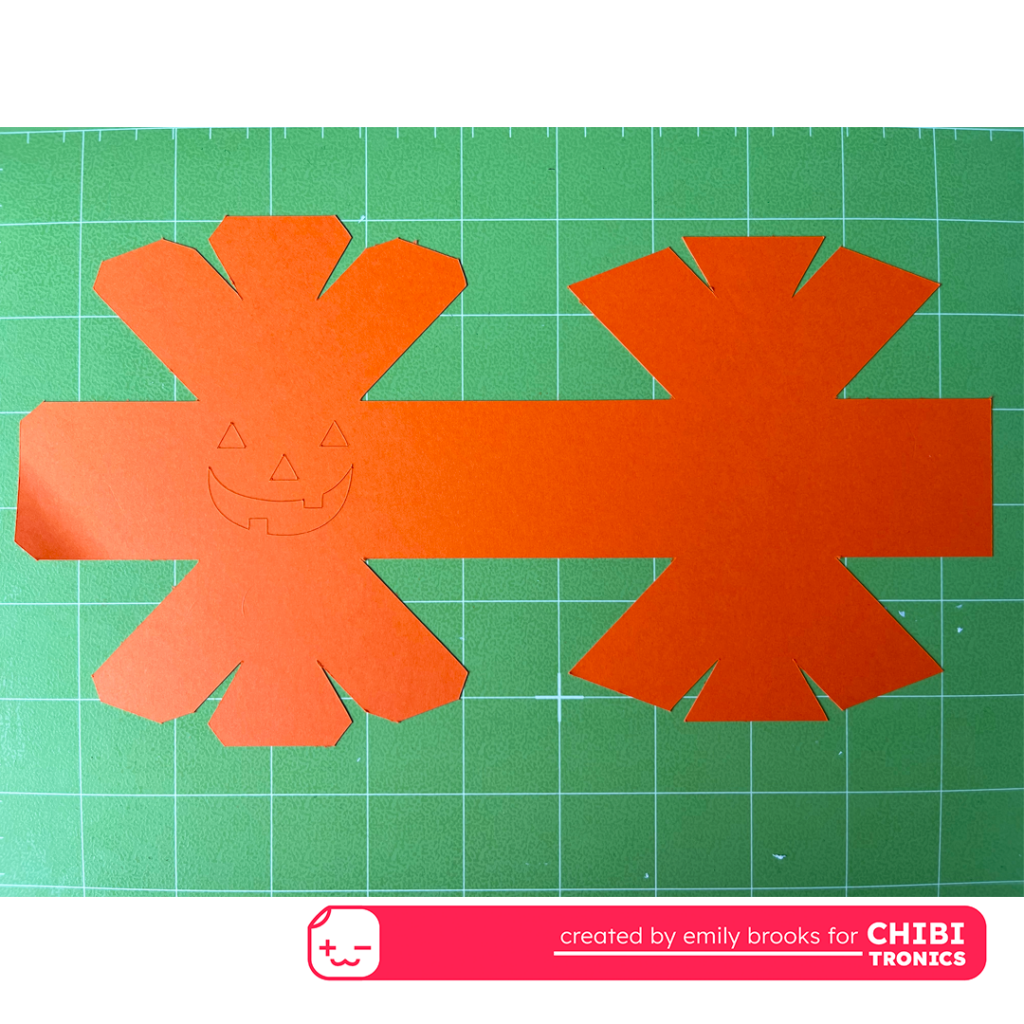
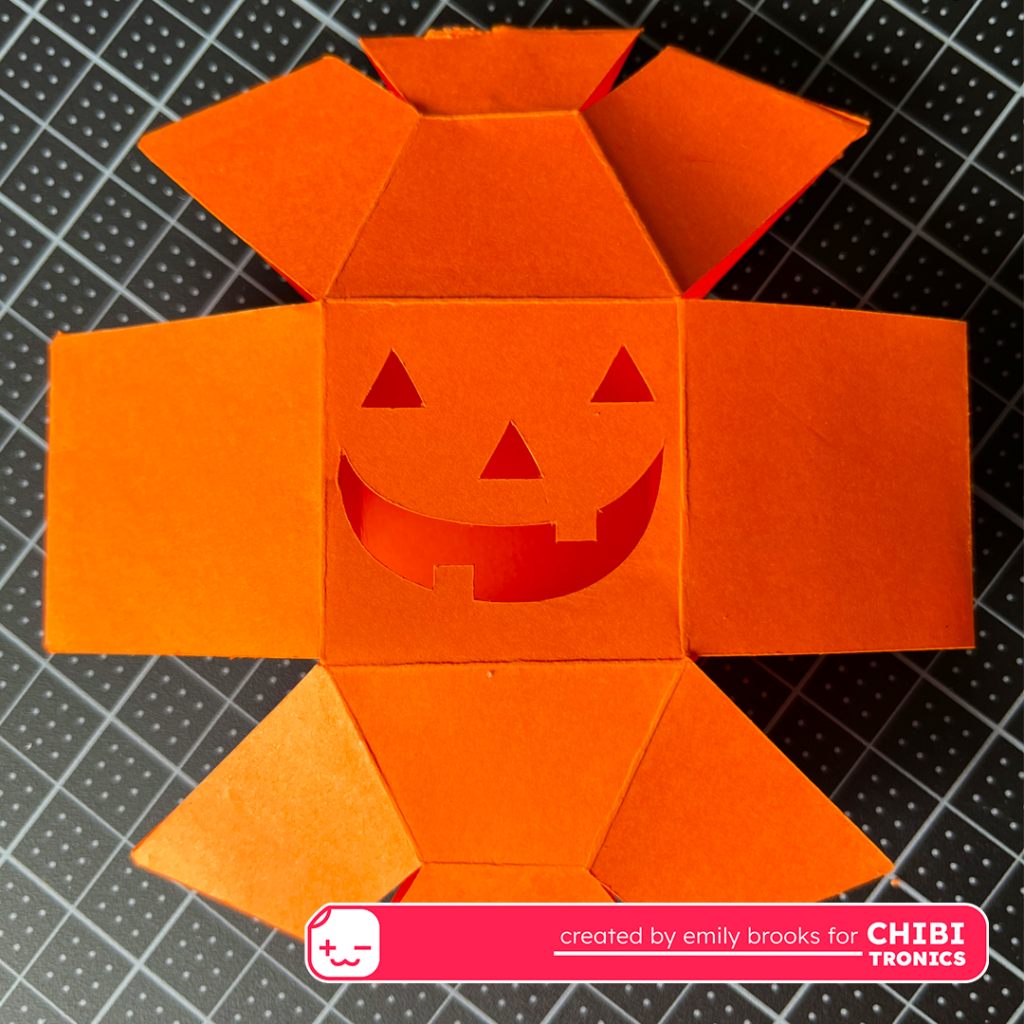
Once you have your outline, fold along the edges so that the center stripe has 6 squares, and each “arm” has 4 trapezoids. You may want to view the B&W PDF to see the fold lines.
The next step of the assembly is to fold the entire shape in half and align the back to the front. Then glue or double-sided tape the tabs to the back of the shape.
Step 2: Make Card Base
To make the card base, fold 12” x 12” black cardstock in half from top to bottom so you have a 12” x 6” rectangle, and then with the fold on the top, fold in half again from left to right so you have a 6” x 6” square.
(You can also fold two 8.5” x 11” sheets of paper and attach them later if you do not have 12” x 12” cardstock)
Then reopen your card and use a ruler to locate the center of the center fold (3”) and use your craft knife to make a 3/4” slit in the middle of the card fold (⅜” on each side).
Step 3: Make Pumpkin Stem
To make the stem that you will use to stabilize your pumpkin and add your circuit to, cut two strips of 3/4” x 11” of brown cardstock and fold them both in half so you have ¾” x 5.5” that will stick out from the center.
Step 4: Create Circuit
I opted to have the White Fade Animating LED Stickers on the front face of the back stem and the circuit lines on the back face of the front stem so that the battery and switch would be in the front.
This is a bit complicated as the circuit is on three different pieces of cardstock, so please refer to the video.
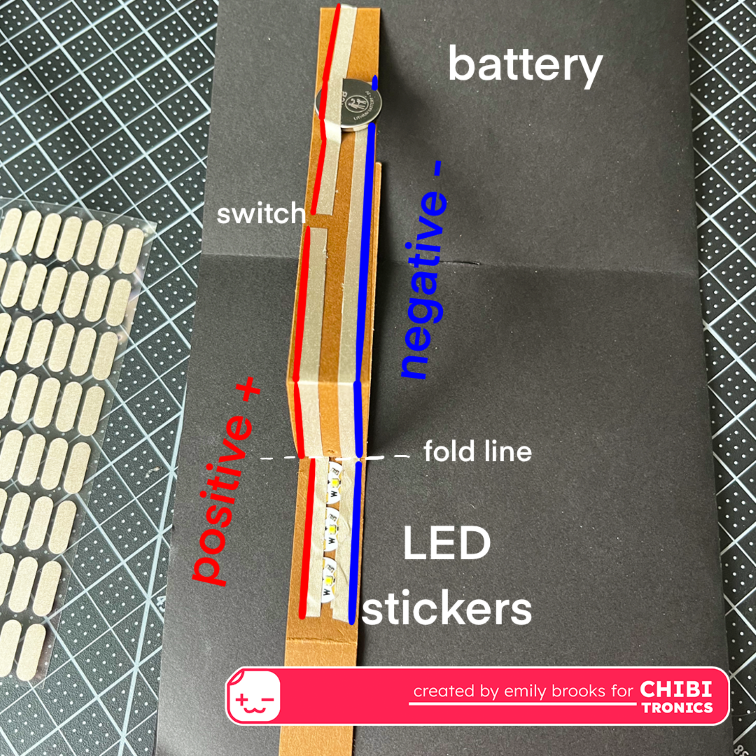
Gently poke holes in the front stem so that the light can shine through.
Once the circuit is complete, glue the front and the back of the stem together and push through the slit in the card.
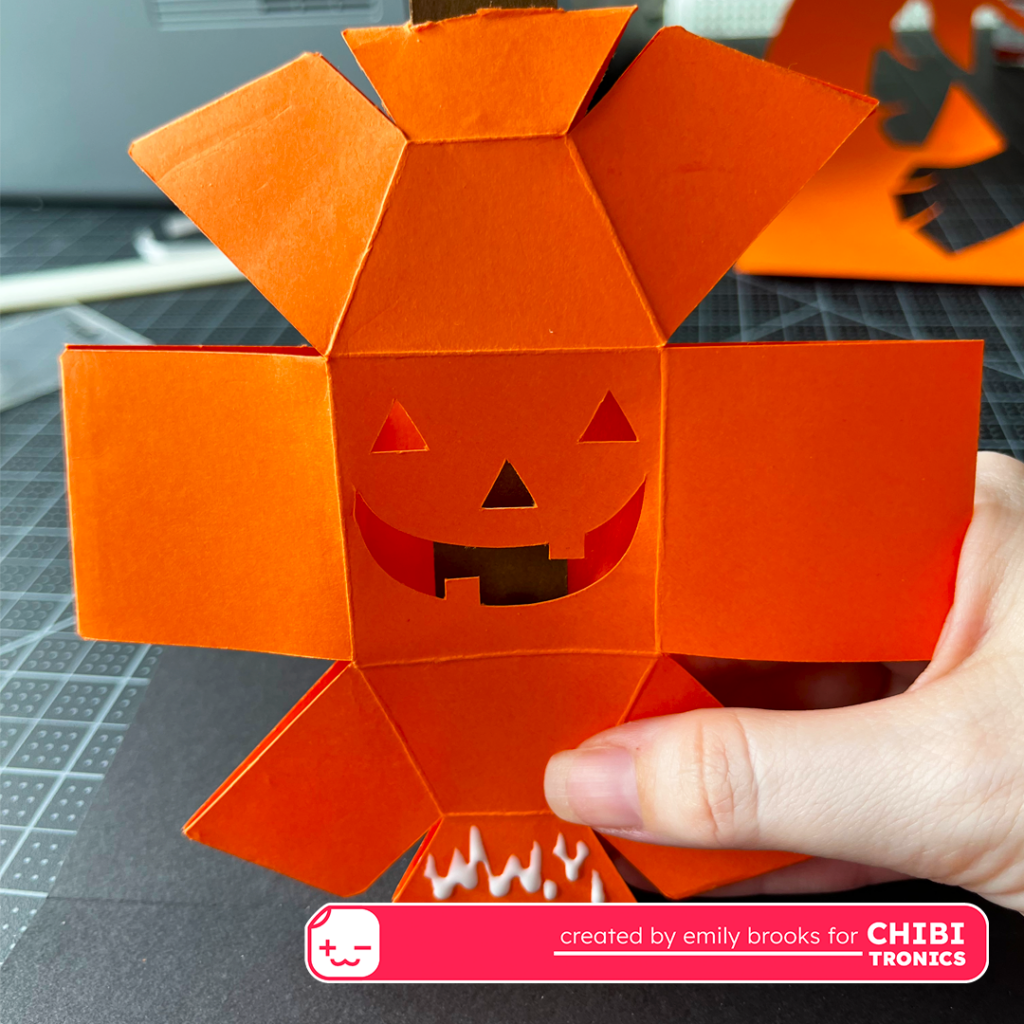
Step 5: Attach Pumpkin
Use a craft blade to cut a 0.75” slit in the center of the top and bottom of the pumpkin.
Carefully slide the pumpkin onto the stem.
Glue only the bottom two flaps so that they are at the crease when the card is folded.
Step 6: Light it Up!
Press and hold your switch and watch your jack-o’-lantern flicker! It’s more fun in the dark!