Candy for the Eyes!
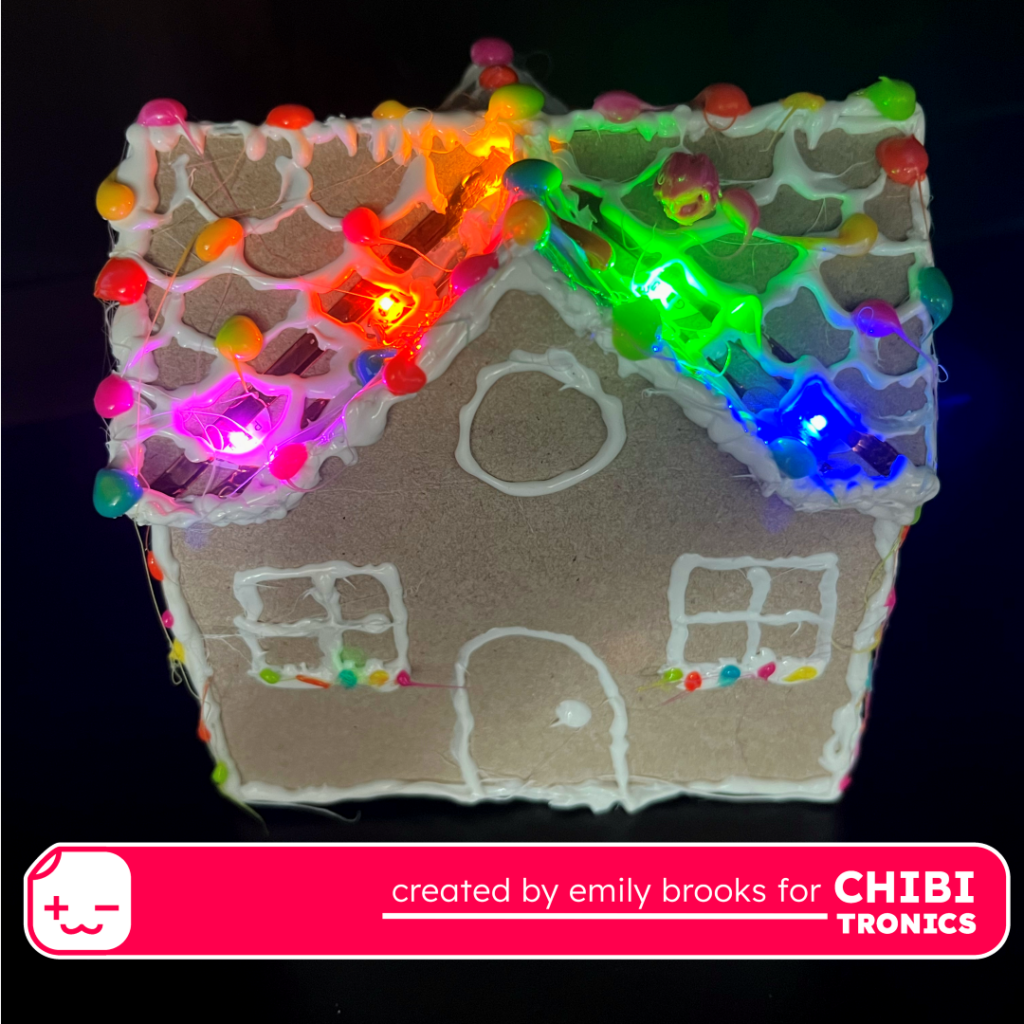
Did you know that November 4th is National Candy Day? What better way to celebrate this sweet part of the season than with a light-up gingerbread house using some recycled materials, some hot glue, some circuit stickers, and some imagination.
Materials Required:
- Chipboard (I used a cereal box)
- Chibitronics Copper Tape
- Chibitronics Reed Switch
- Chibitronics Circuit Stickers (I used Pink, Orange, Yellow, Green, Blue)
- Mini Hot Glue Gun
- Colored Mini Hot Glue Sticks (I used White, Yellow, Orange, Magenta, Lime, Teal)
- CR2032 battery
- Mini magnet
- Tape
- Marker
- Scissors/Craft Knife
- Printer
- (Optional): Laser Cutter or Home Crafting Machine
Directions:
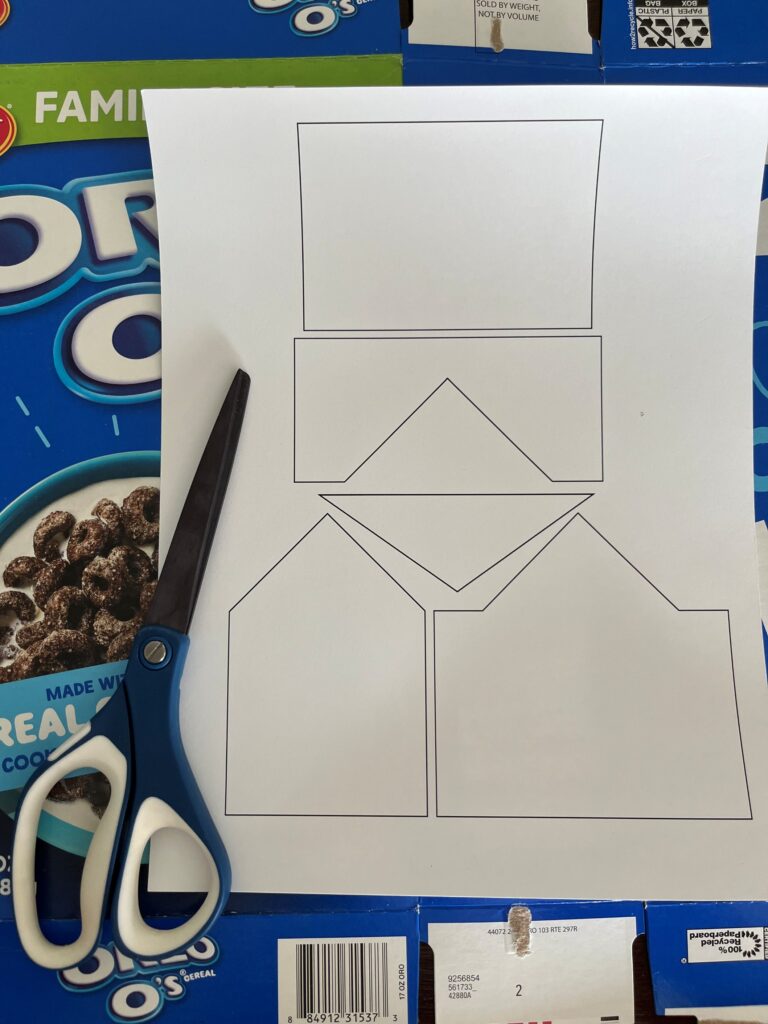
Step 1: Print and Cut Out Template
- Download and print out this template on cardstock or paper. (Or, if preferred, upload the SVG below into your cutting software to prep your pieces.)
- Cut out the shapes with scissors or a craft knife. (Or, use your preferred cutting machine.)
Step 2: Trace Template on Chipboard and Cut
- Trace out two of each piece except the rectangle onto your chipboard (I traced on the printed side).
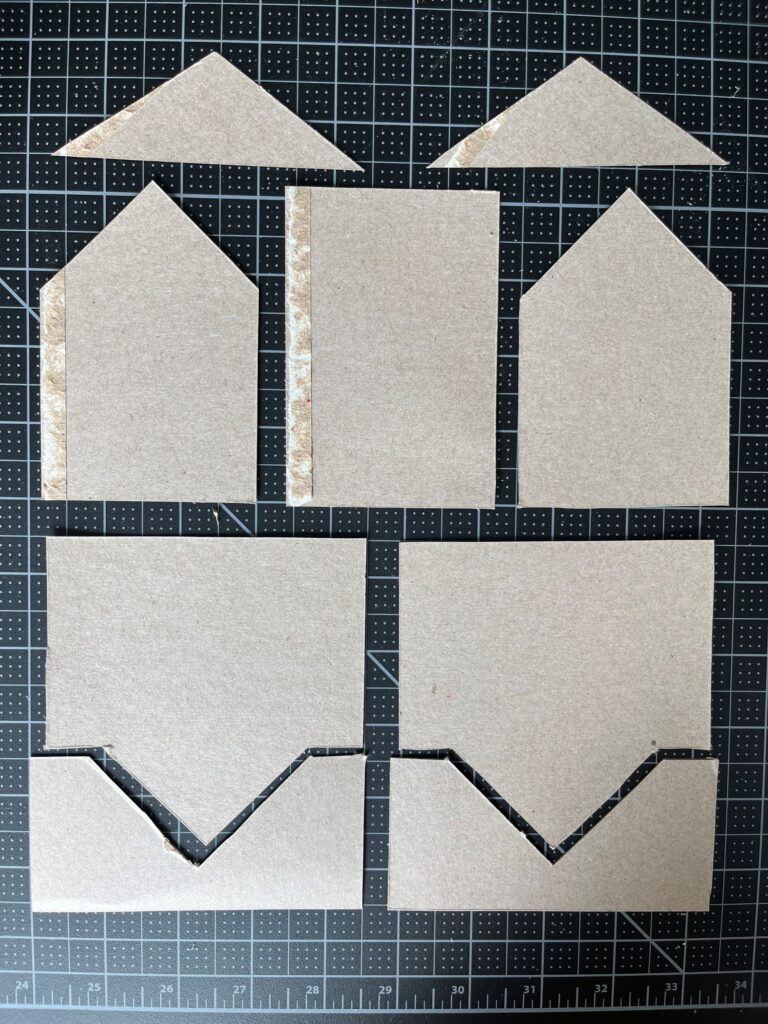
- Cut out each piece with a craft knife or scissors so that you have the bottom, the front and back, two sides, two roof pieces, and two gable pieces.
Step 3: Create Circuit
- Tape your two roof pieces together on the printed side.
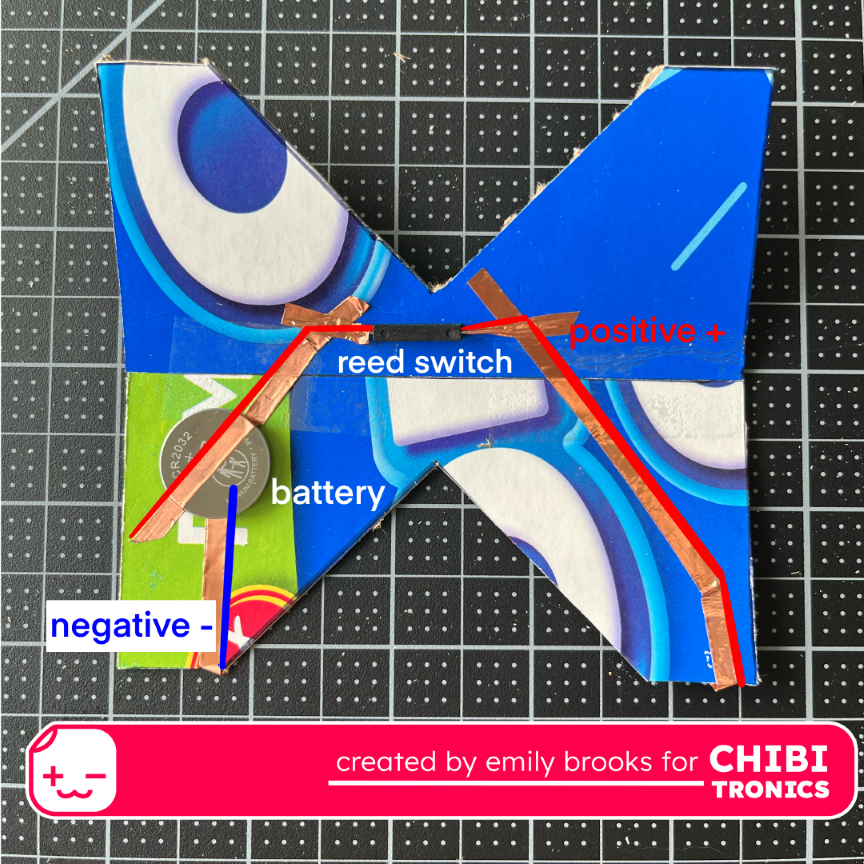
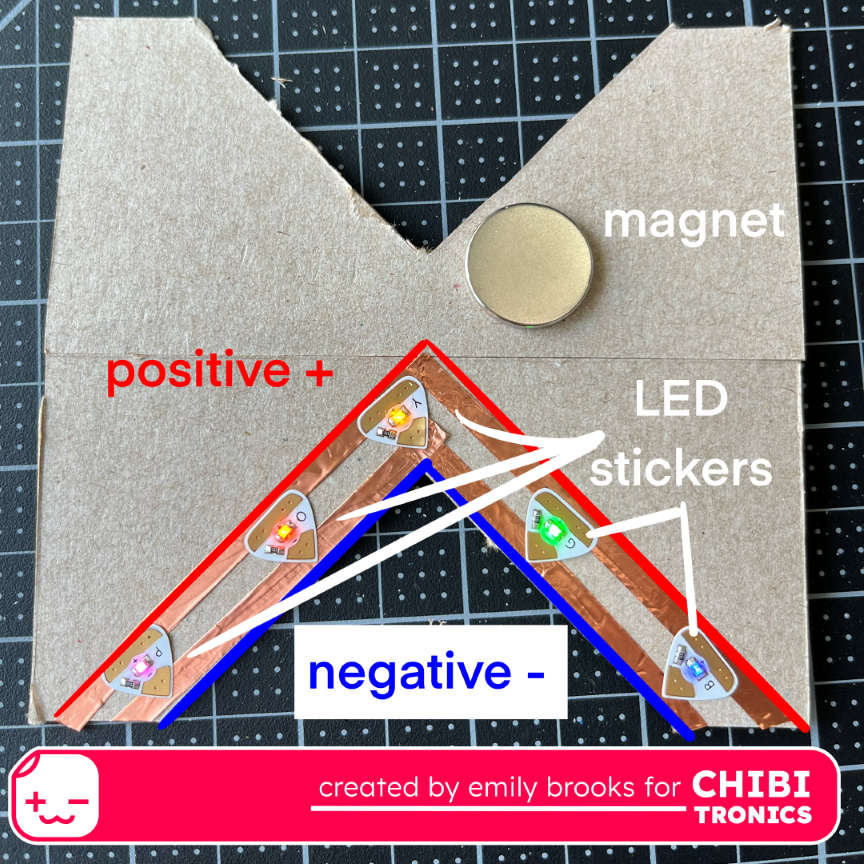
- Use copper tape to create your parallel circuit, starting with the negative side underneath the battery on the printed side, folded over to the top side and traced around the edge.
- Then use another piece of copper tape spaced a bit apart from the negative track on the front and fold over to the back to connect to a reed switch.
- Then use a third piece of copper tape to tape down the other side of the reed switch to the positive side of the battery.
- Next place your circuit stickers along the track so that the smaller negative side faces the negative track and the larger positive side faces the positive track.
- You can use additional pieces of copper tape to reinforce the connections.
Step 4: Assemble Your Gingerbread House
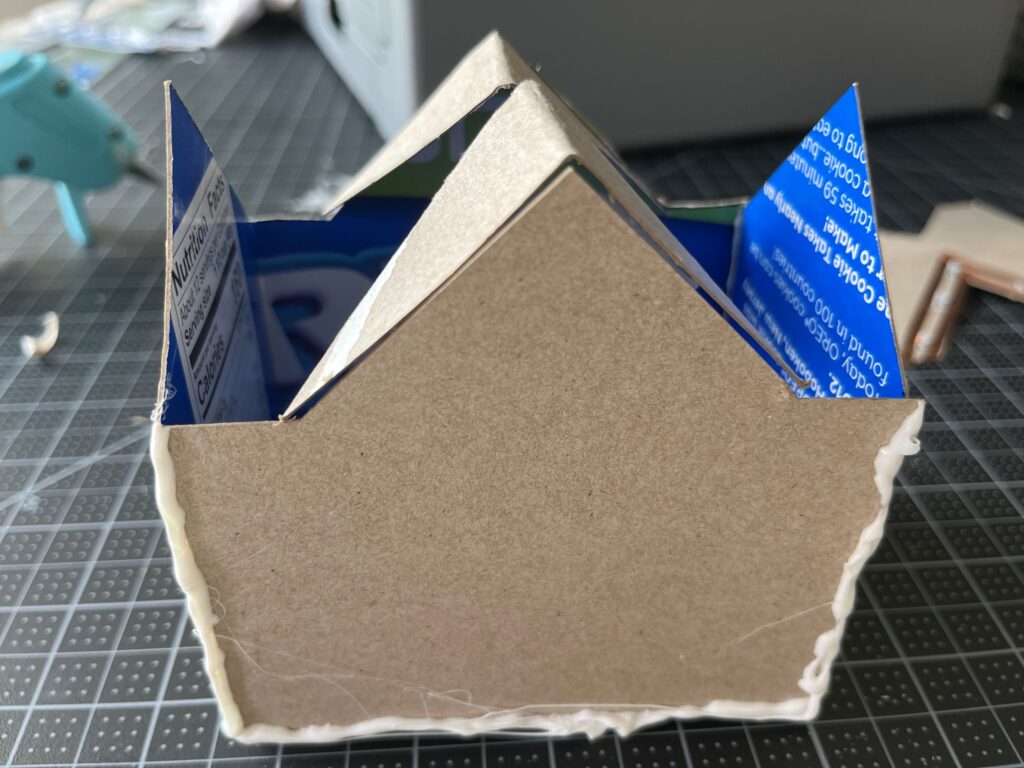
- To make it easier, you can first tape the base, sides, and front and back together.
- Then use white hot glue to mimic icing to connect your gingerbread house pieces.
- Fold your gable pieces in half so that you have two triangles.
- Tape them to the triangle pieces of the front and back.
- Then use white hot glue again to connect your gable pieces to the base of your house.
- Finally, use white hot glue to attach your roof to your house. (You will notice there is some overlap of the roof, gables, and house in this design. Feel free to trim down.)
Step 5: Finishing Touches
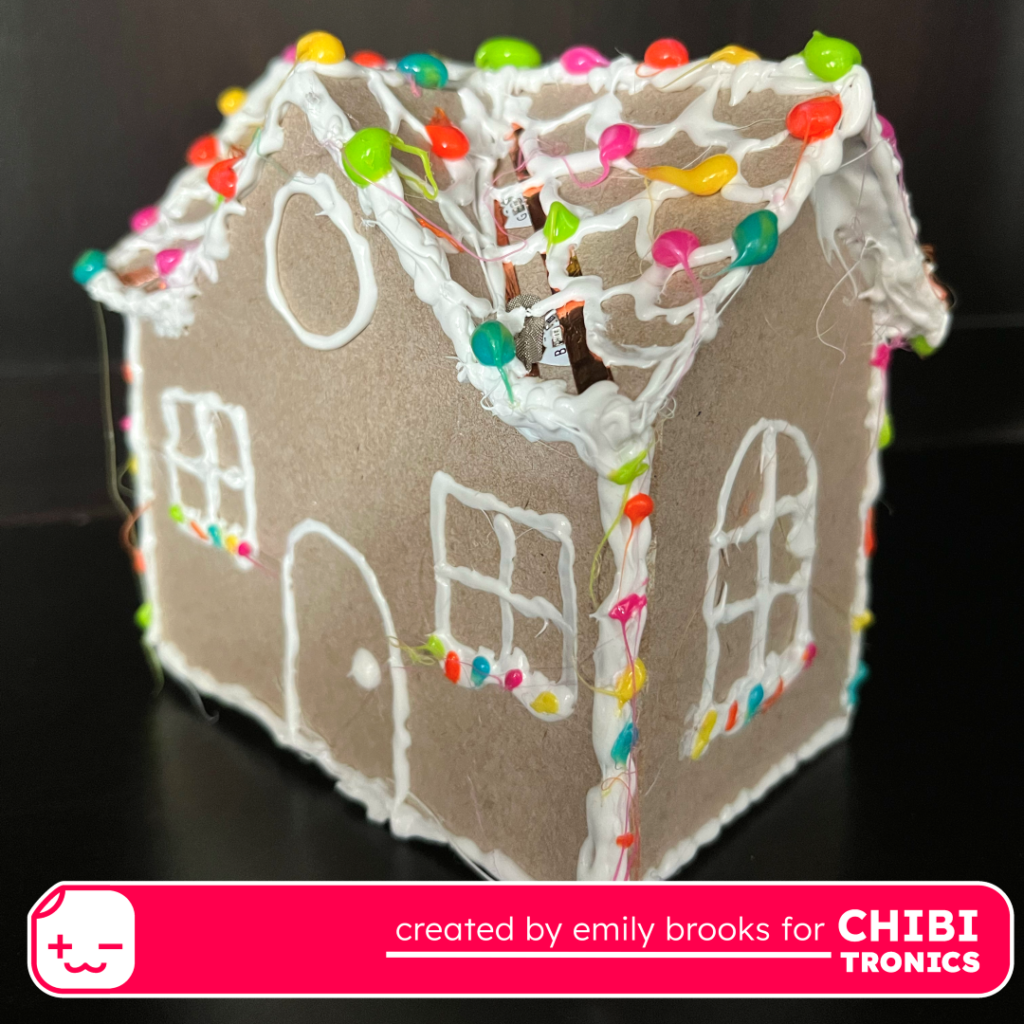
- Decorate your gingerbread house with your own touches! I used white hot glue to draw doors, windows, and shingles, and magenta, orange, yellow, lime, and teal hot glue to create candy dots on the roof and sprinkles around the windows.
- I used magenta hot glue to disguise my mini magnet as a candy that could be added to the roof to complete the circuit and light up the roof!
Light Up a Faux Gingerbread House with Chibitronics LEDs (by Emily Brooks)
