View Video Tutorial:
In this video tutorial, created in anticipation of #PopUpTober 2025, I’ll show you a way to create a light-up pop-up structure based upon a parallelogram.
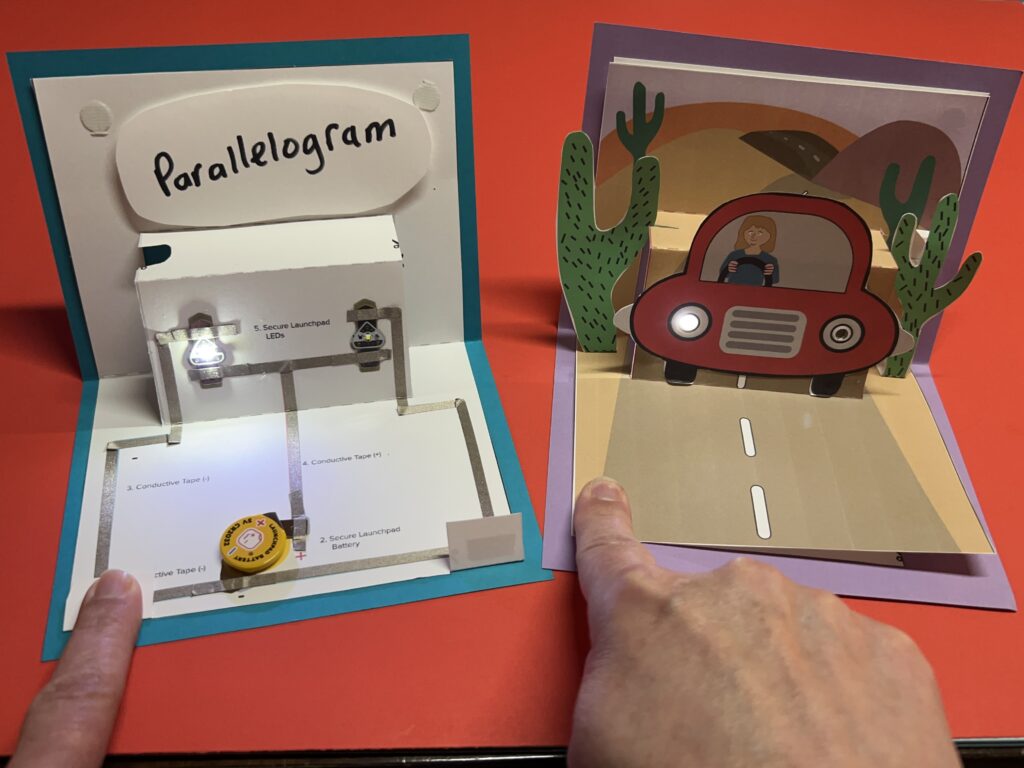
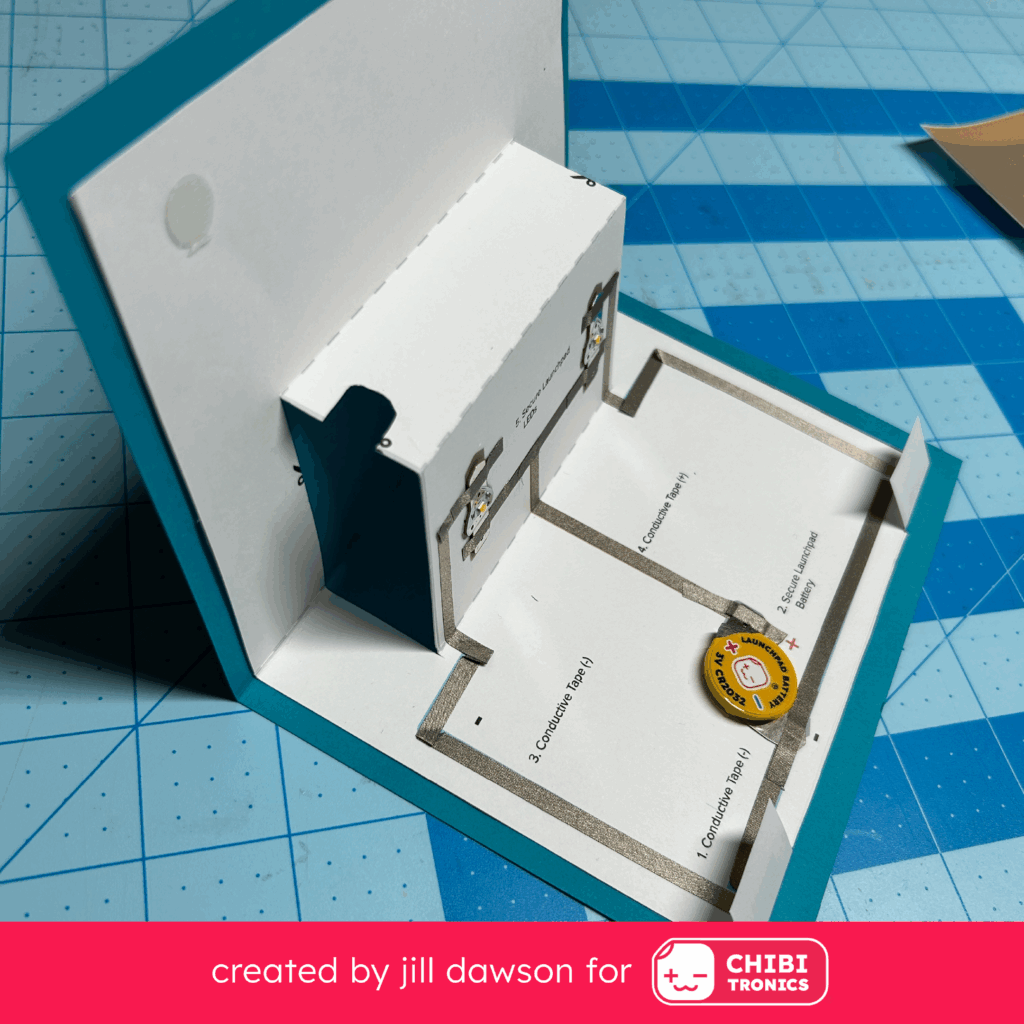
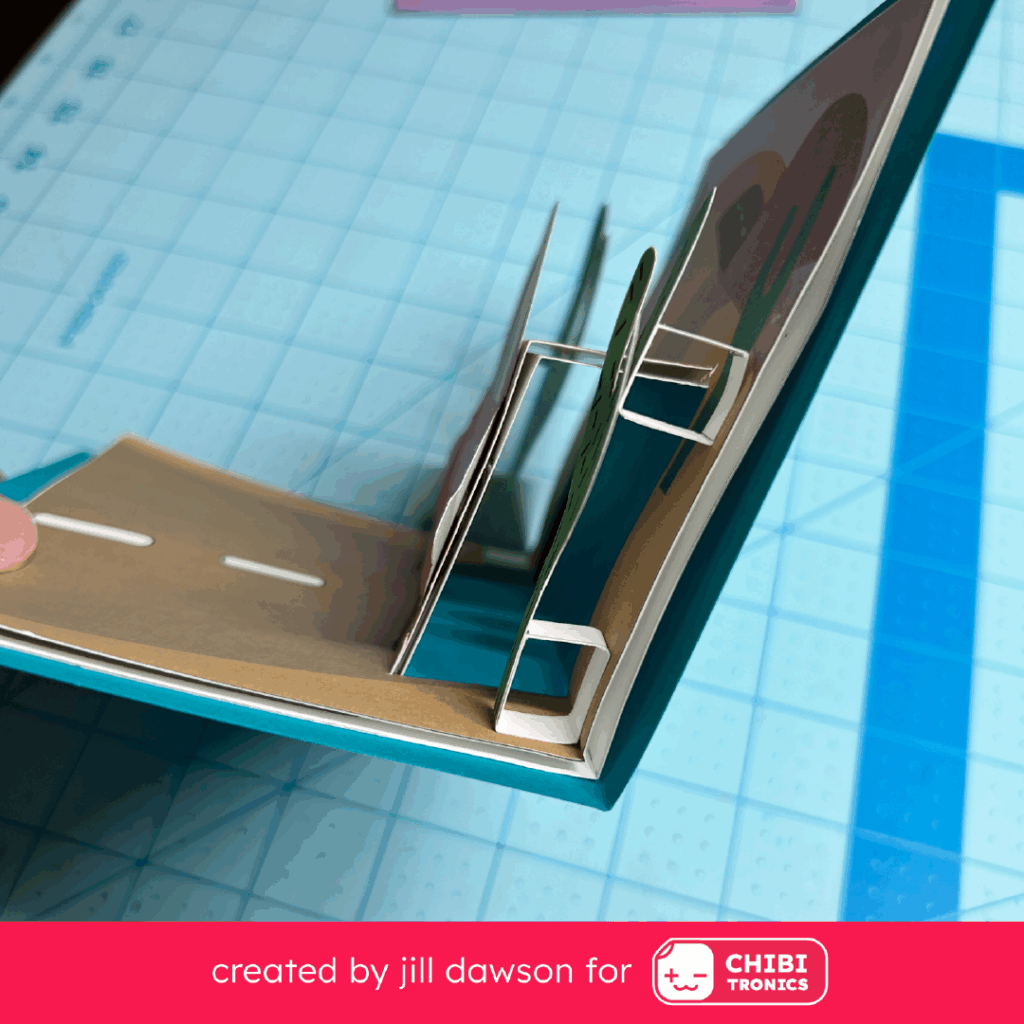
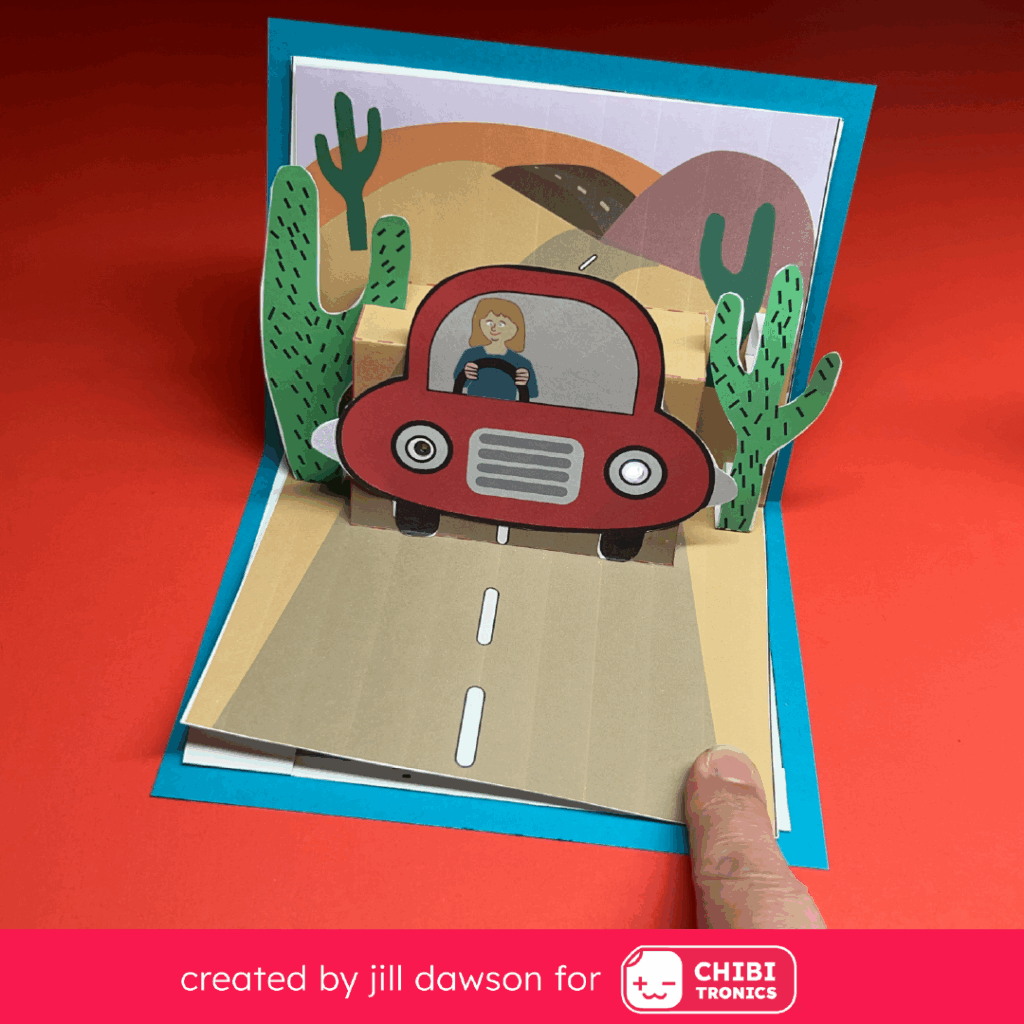
The pop-up parallelogram provides a flat surface that is useful for adding lights, scenery, and props to add dimension to a story. When the card is opened at a 90 degree angle, a box pops out, with folds parallel to the spine of the card.
With help from an OR Switch, made with Chibitronics Launchpad LEDs, the headlights on my paper car can work independently or together.
Directions:
To view a full demonstration, please watch the video.
In the video I’ll show you the process that I use for cutting, scoring, and assembling the mechanism and adding an interactive circuit behind a desert scene. My hope is that it will help you get started with your own light-up pop-up designs.
To help place focus upon the underlying circuit, I’m providing circuit diagrams and artwork to help get you started. These support materials may be downloaded below.
Templates, Circuit Diagrams, & Props
To make it easier to follow along with the video, it’s helpful to print out the circuit diagram template of your choice onto white cardstock.
I’ve included two templates; one uses our new, safer Launchpad LEDs and a Launchpad Battery.
The second features Circuit Sticker LEDs with a traditional coin cell battery.
Feel free to mix and match the components or experiment with the placement of your LEDs!
Prep Your Materials
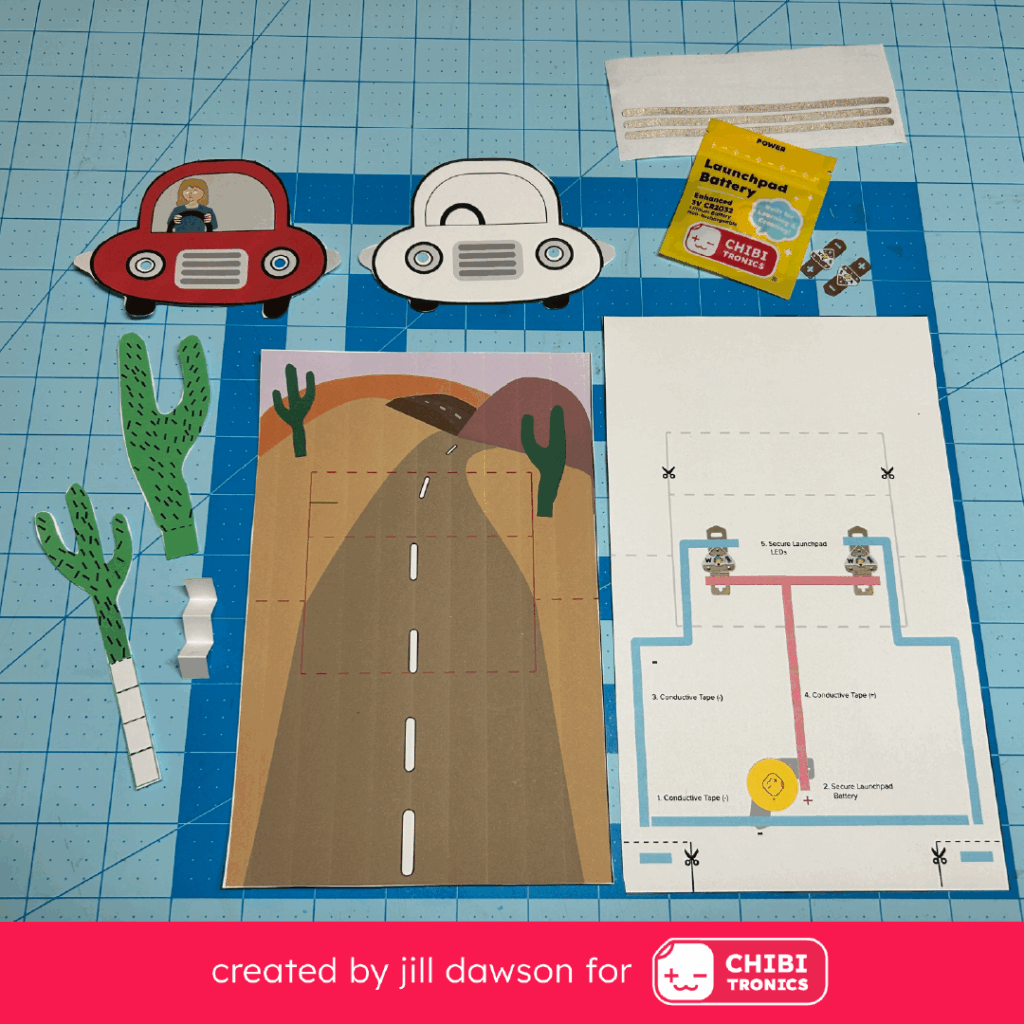
First, gather your tools and supplies.
Then, print and cut out a circuit diagram and optional props.
Use a hole punch on the headlights of the cars.
Next, carefully cut the solid lines on your circuit template, marked with the scissors symbol.
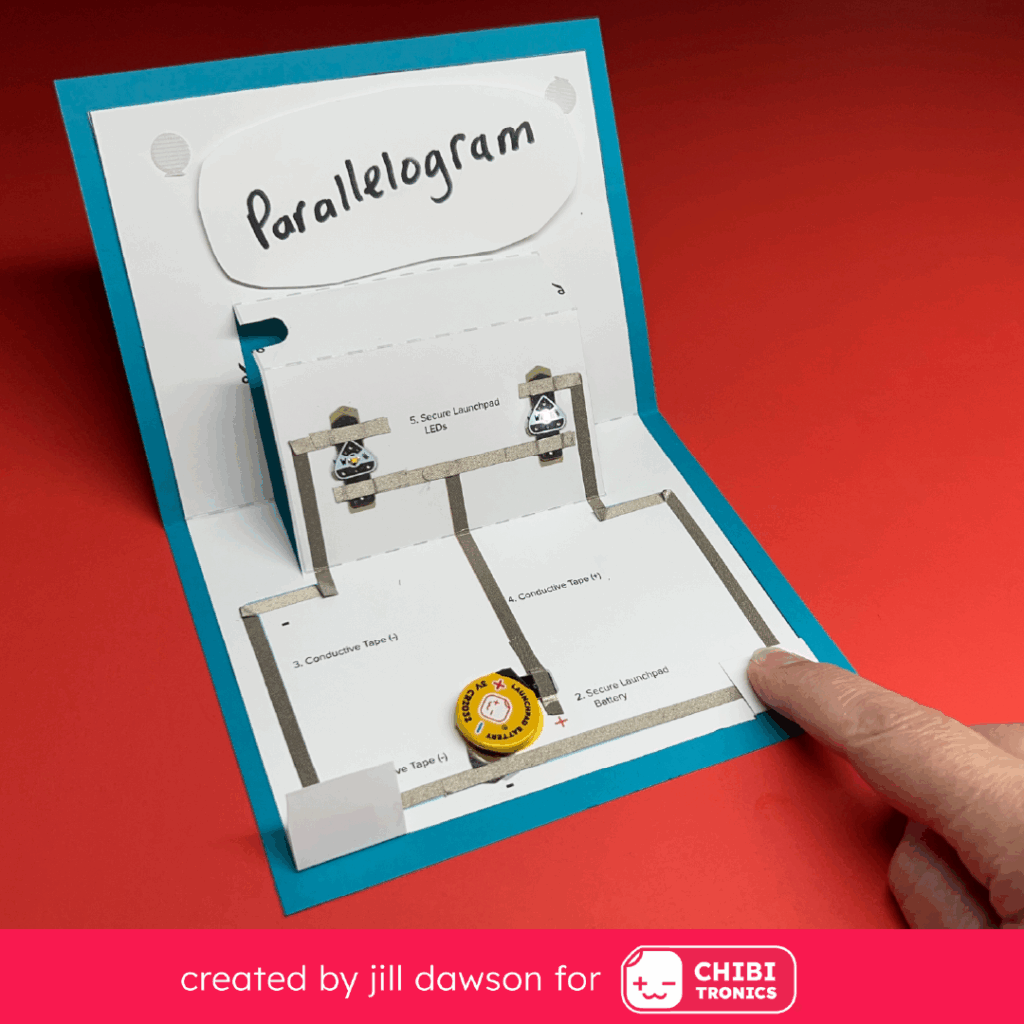
Lastly, score and fold the dashed lines, carefully pushing the parallelogram forward from the spine. Use a bone folder to flatten the creased pieces.
Build the Circuit
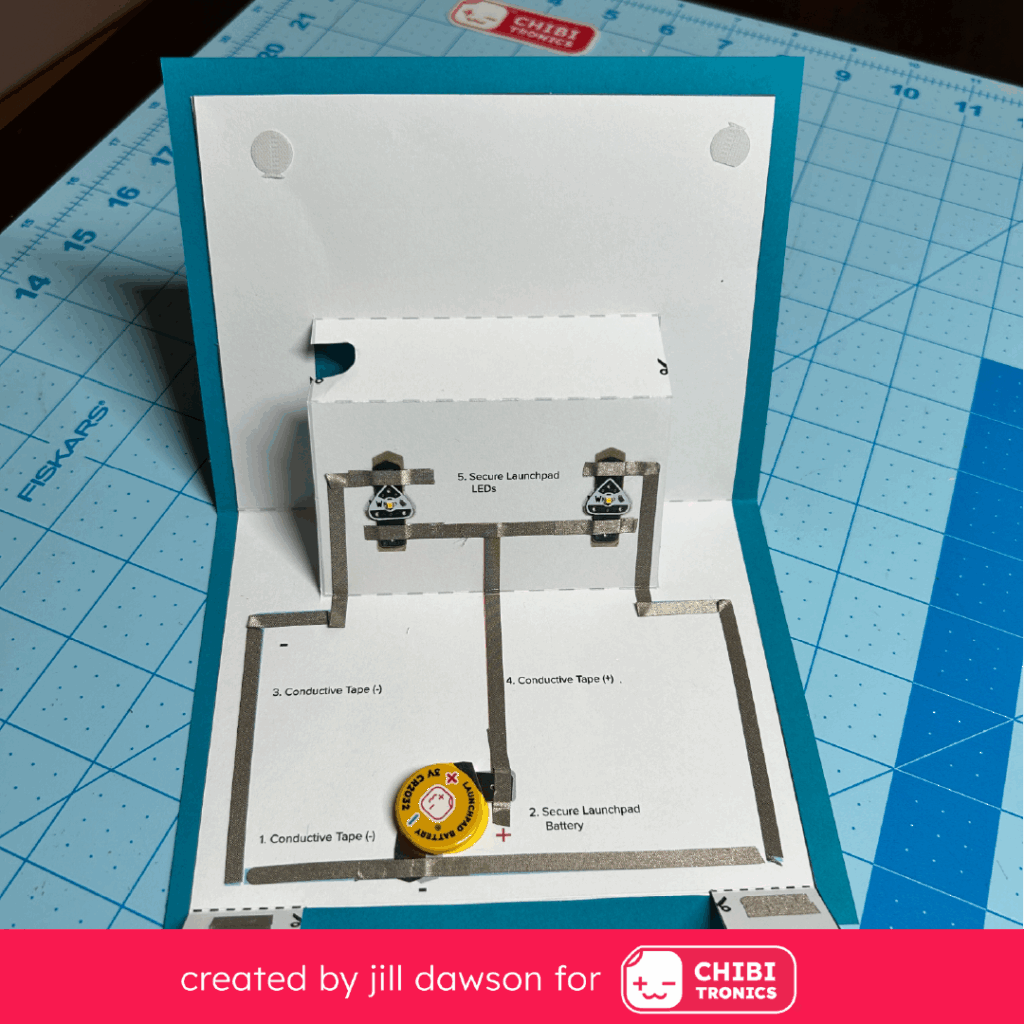
Next, use Conductive Fabric Tape, LEDs, and a battery to construct your circuit directly upon the template of your choice.
Be sure to follow the outlines on the template to ensure that the positive and negative traces don’t accidentally touch one another, or you’ll end up with short circuit. This is especially important on the edges of the T-junction.
When you get to the T-junction, be sure to use a generous overlap of conductive tape to ensure a robust physical and electrical connection. And be sure to apply conductive tape to the switch pads.
Adhere your Launchpad Battery with a piece of Conductive Fabric Tape, following the outline on the template.
Repeat this step, using the Launchpad LEDs.
Make sure that you secure both tabs of the LEDs with conductive tape.
Test your switches as you go.
Circuit Diagrams
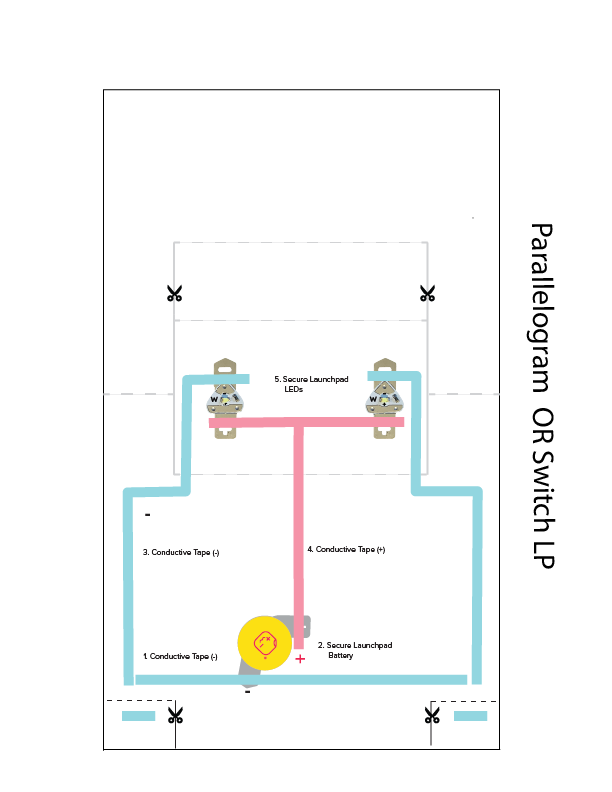
For this project, I’ve chosen two white Launchpad LEDs and a Launchpad Battery.
If you prefer to use Circuit Sticker LEDs, refer to the template below.
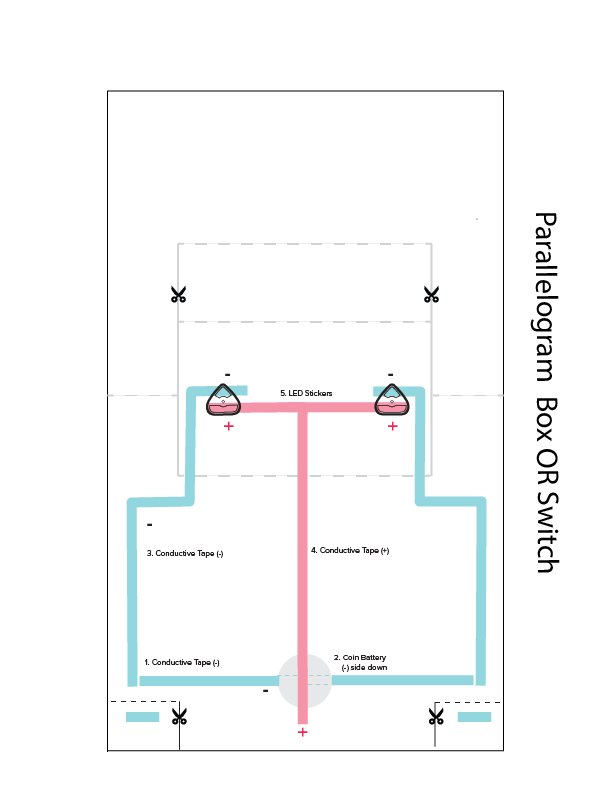
This project may also be created using our classic Circuit Sticker LEDs and an ordinary coin cell battery.
You may substitute one of our safer, Launchpad batteries by referring to the previous circuit diagram.
Props
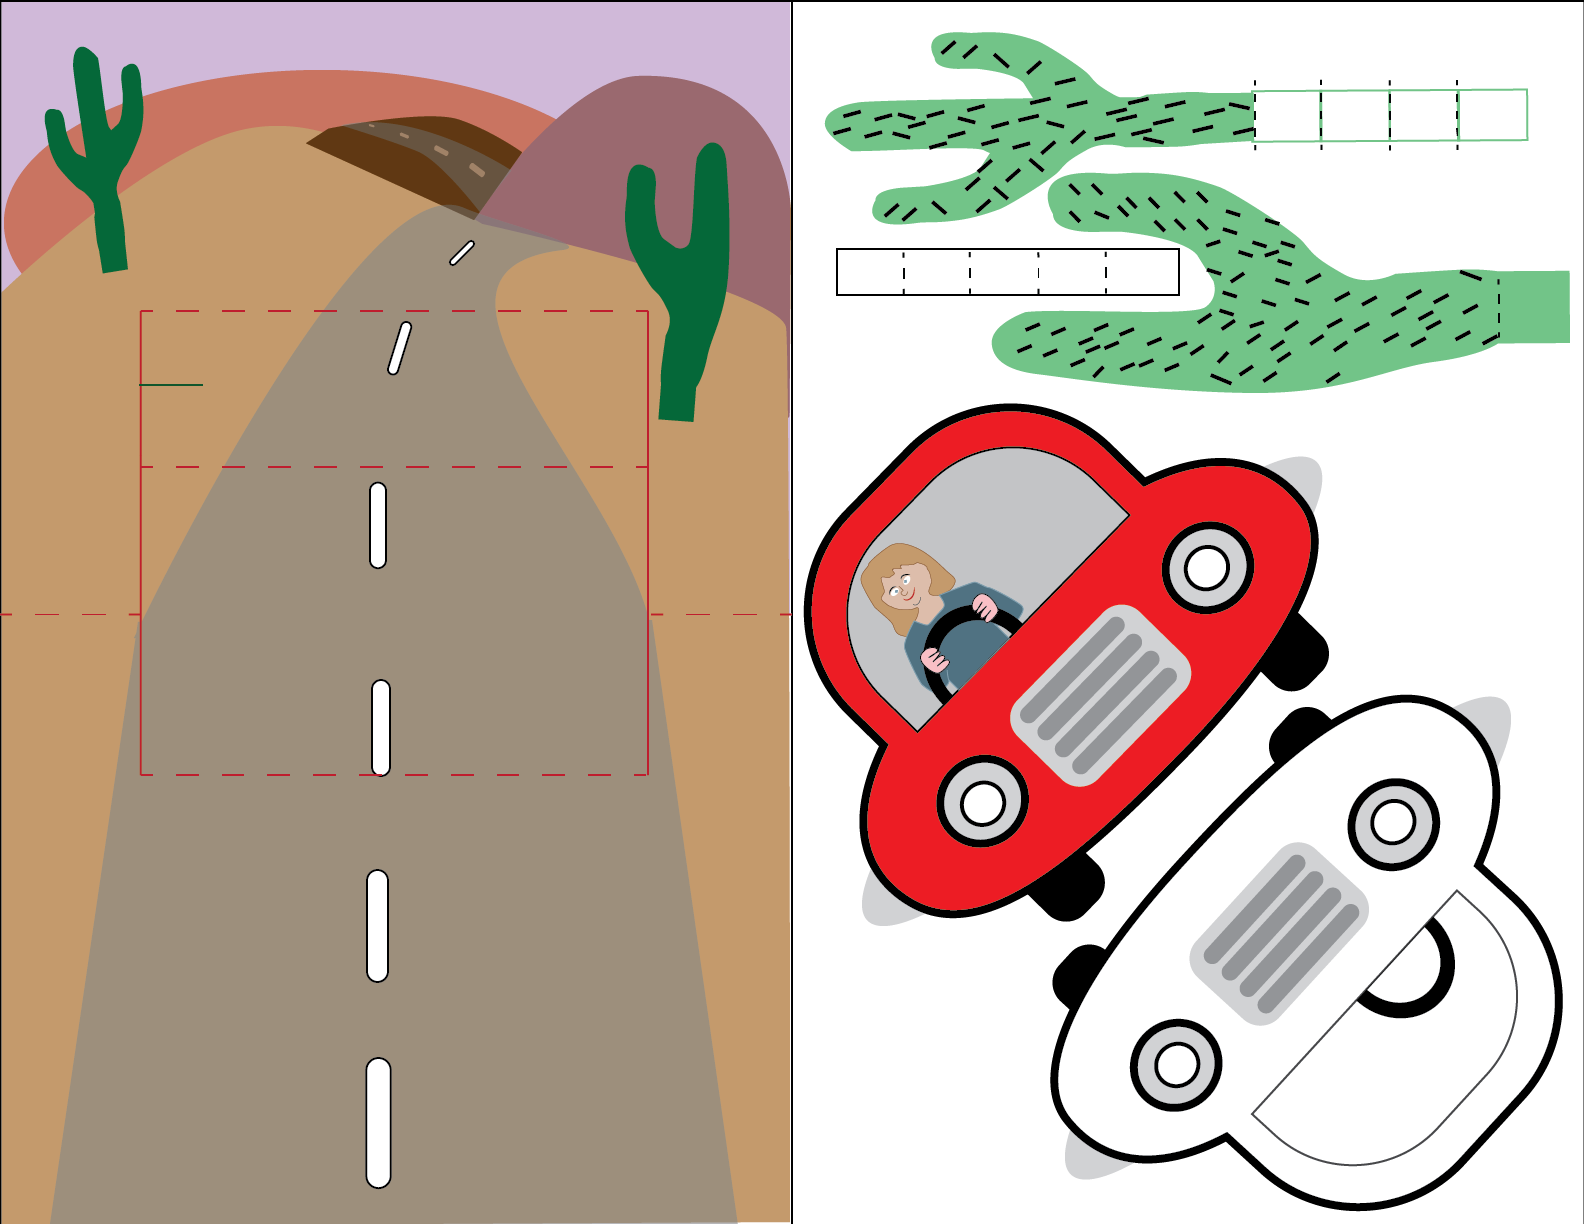
After cutting out your scenery and props, make incisions along the solid lines of the parallelogram.
I’ve included a slit in on the top left side of the parallelogram to help secure the large cactus.
Score and fold along the dashed lines.
Useful Tools & Supplies:
- 2 Launchpad LEDs or Traditional Circuit Sticker LEDs
- 1 Spool of Conductive Fabric Tape or a sheet of Conductive Fabric Tape Strips
- 1 Launchpad battery (or another 3V coin cell battery)
- White cardstock for printing out the template (colored cardstock for the card backing)
- (Optional) Vellum scrap to diffuse the light
- Scissors
- Cork-backed steel ruler and a scoring tool (a bone folder or toothpick both work)
- Pencil with an eraser
- Pen-knife
- Japanese Screw Punch or a hole punching tool of your choice
- Double-sided tape
- Glue or an adhesive of your choice
- Printer (for printing the circuit diagrams and props).
- Art supplies of your choice
Learn More
To learn more about the Parallelogram mechanism used in this project, check out pages 35 and 36 of Duncan Birmingham’s book, Pop-Up Design and Paper Mechanics: How to Make Folding Paper Sculpture. You may also check out Tutorial 5: Parallel-folds Part 1 Parallelogram over on YouTube on Duncan Birmingham’s Pop-UpChannel.