Video Tutorial
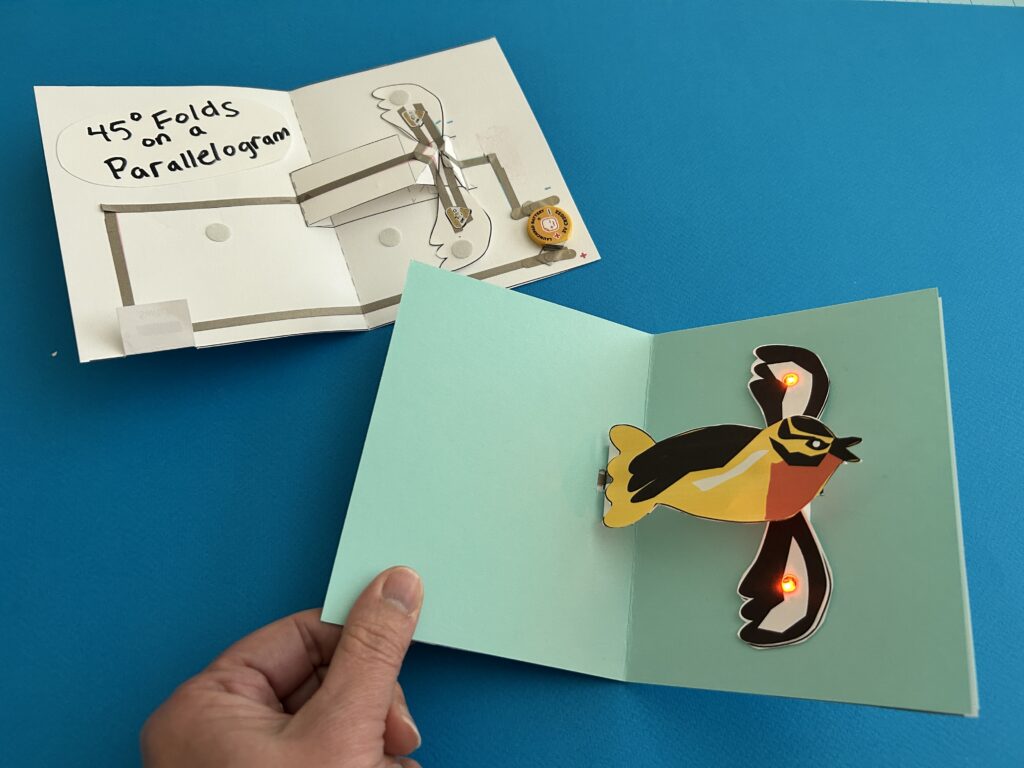
In this video tutorial, created in anticipation of #PopUpTober 2025, I’ll show you a way to create a light-up pop-up bird with wings that tuck into a parallelogram at 45° angles.
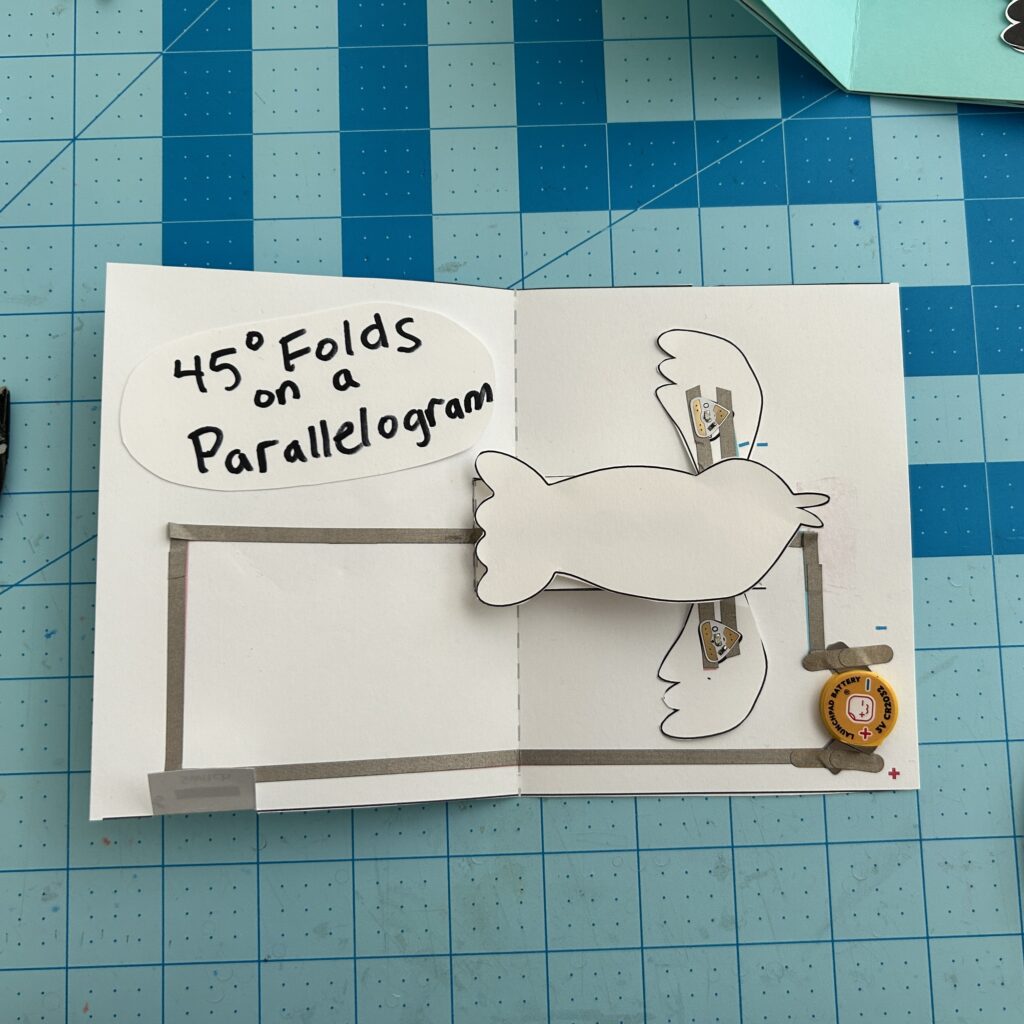
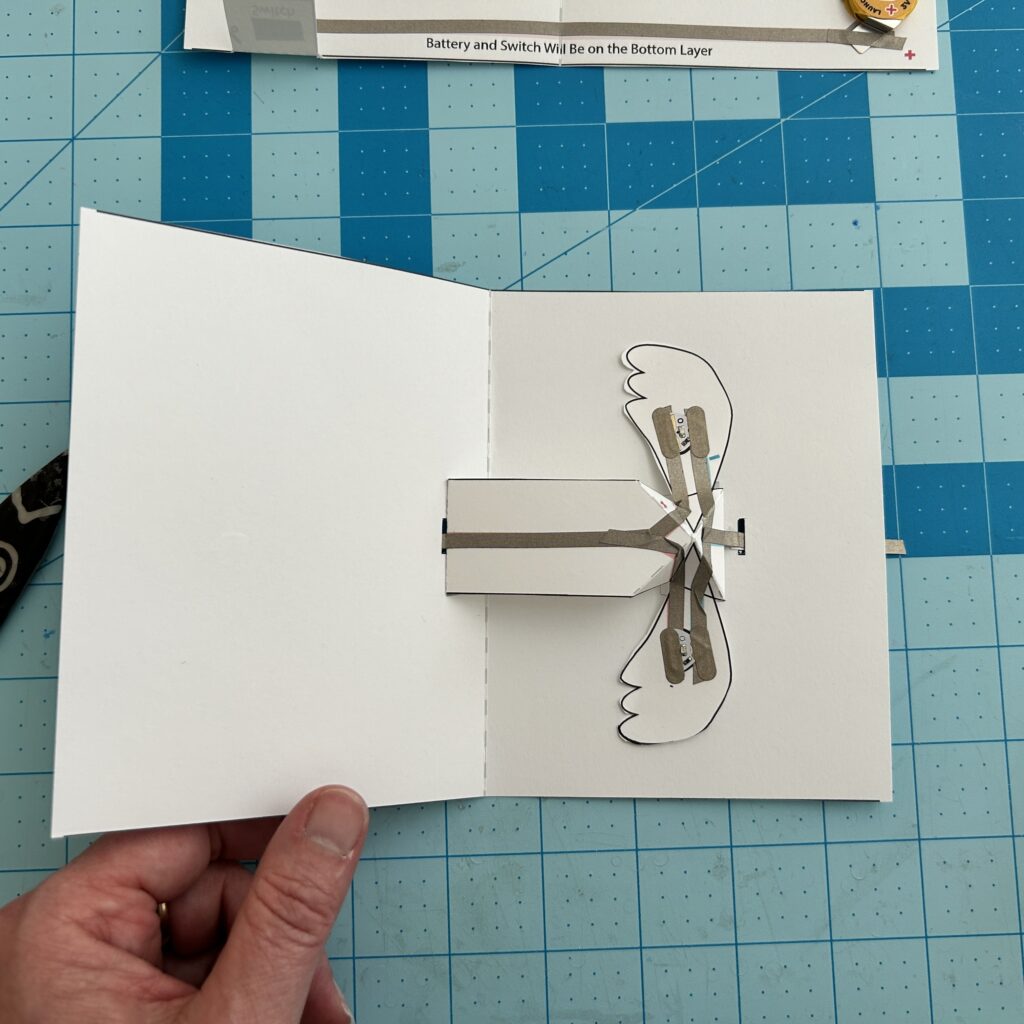
The folding mechanism provides a dynamic surface that is useful for adding a protrusion or extension that may be adorned with lights. When the card is opened at a 45° angle, wings appear to fly out from the body of a bird. The bird’s body rests upon a flat plane that moves perpendicular to the card’s spine.
With help from a simple paper switch, decorative lights add a pop of drama.
Directions:
For a full demonstration, please watch the video.
In the video I’ll show you the process that I use for building the circuit and assembling the mechanism. My hope is that it will help you get started with your own light-up pop-up designs.
To help place focus upon the underlying circuit, I’m providing circuit diagrams and artwork to help get you started. These support materials may be downloaded below.
I’ll be sharing a couple of different ways to construct this mechanism. A simple one with the circuit built on top of the base page, and another with a circuit that requires two sheets of paper and assistance from a craft knife.
Templates, Circuit Diagrams, & Props
To make it easier to follow along with the video, it’s helpful to print out the circuit diagram templates for the two-layer card.
Prep Your Materials

First, gather your tools and supplies.
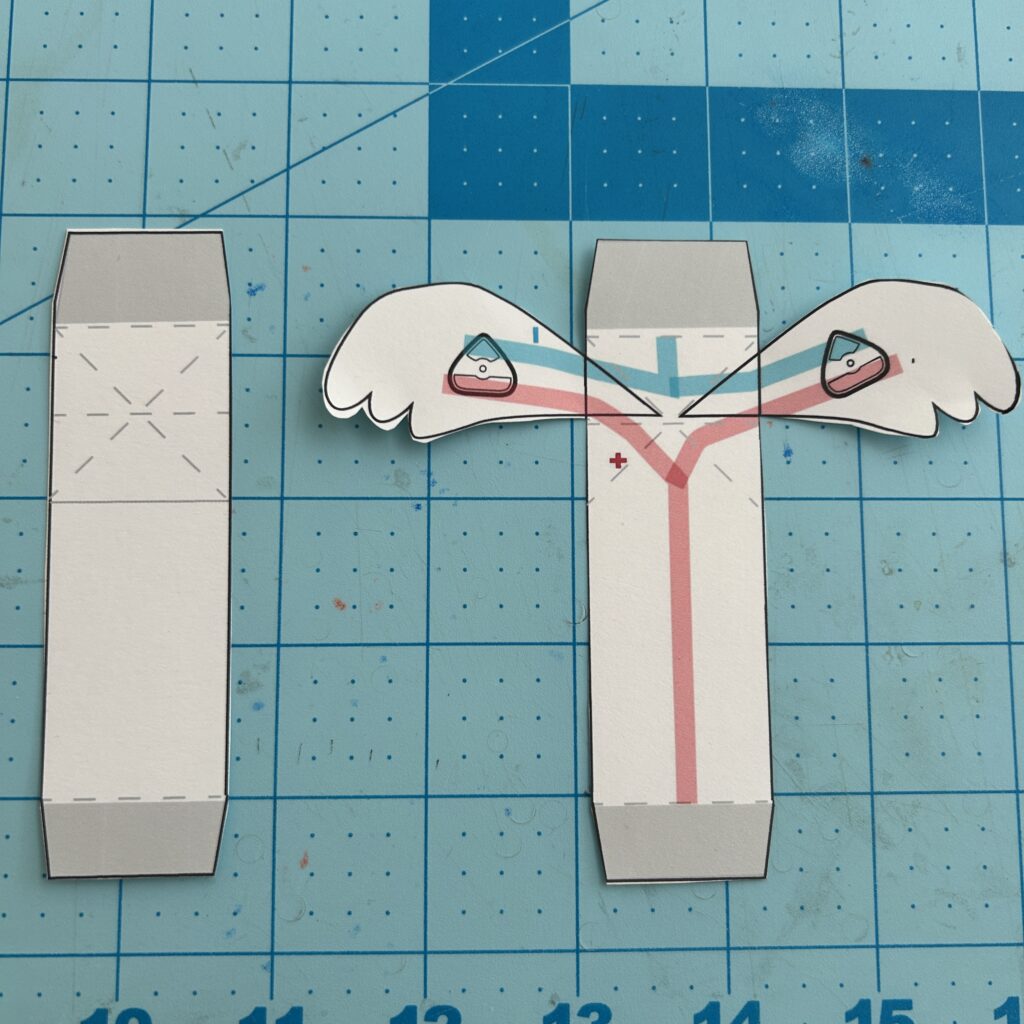
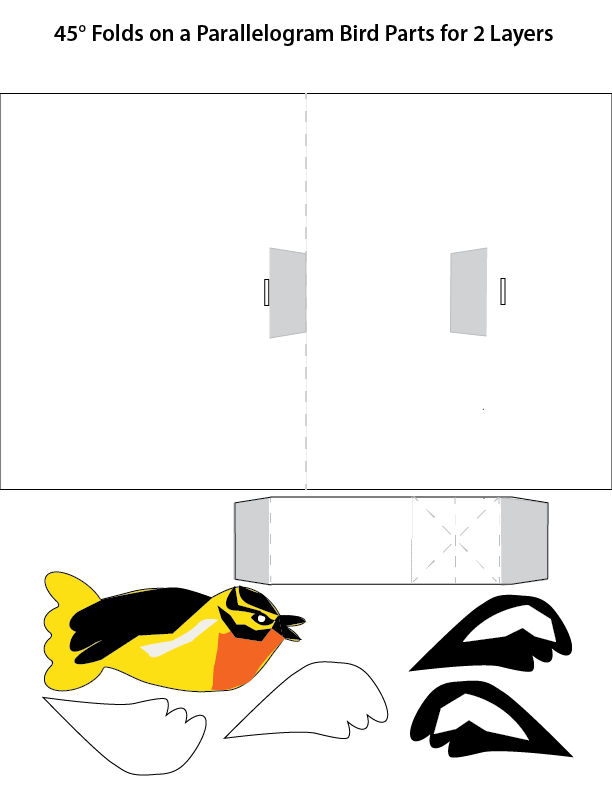
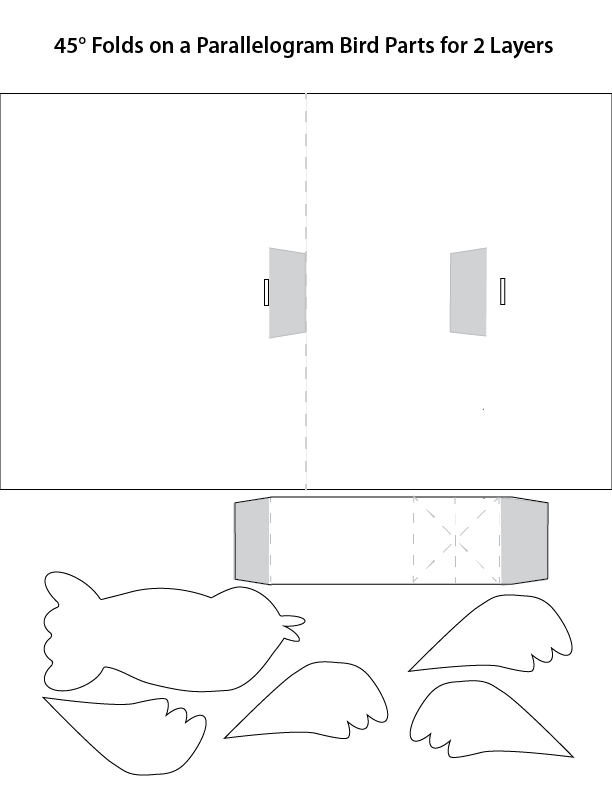
Then, print and cut out a circuit diagram and the bird pieces. If you plan to color in your own bird body and wings, do so before you adhere the pieces to the mechanism.
Next, carefully cut the solid black lines on your circuit template, marked with the scissors symbol.
Then, score and fold the dashed lines. Use a bone folder to flatten the creased pieces.
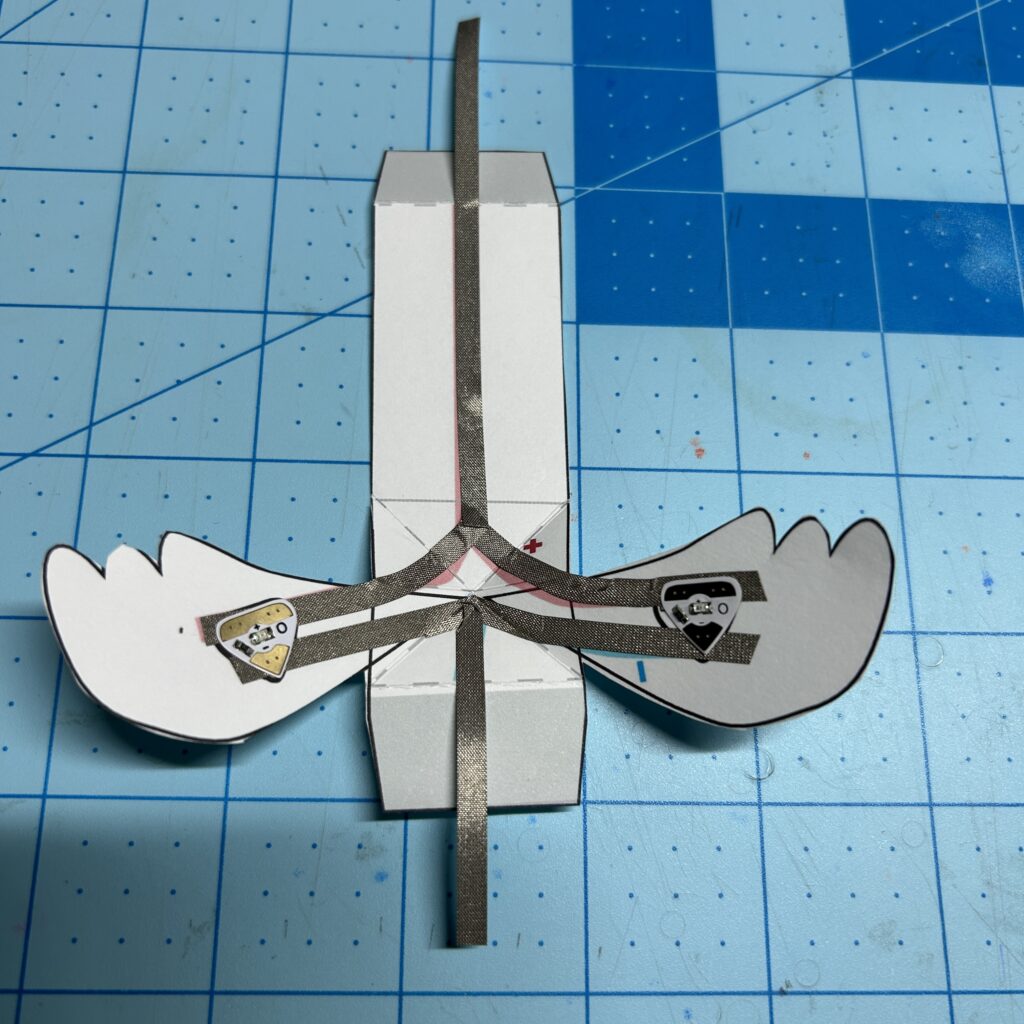
Build the Circuit
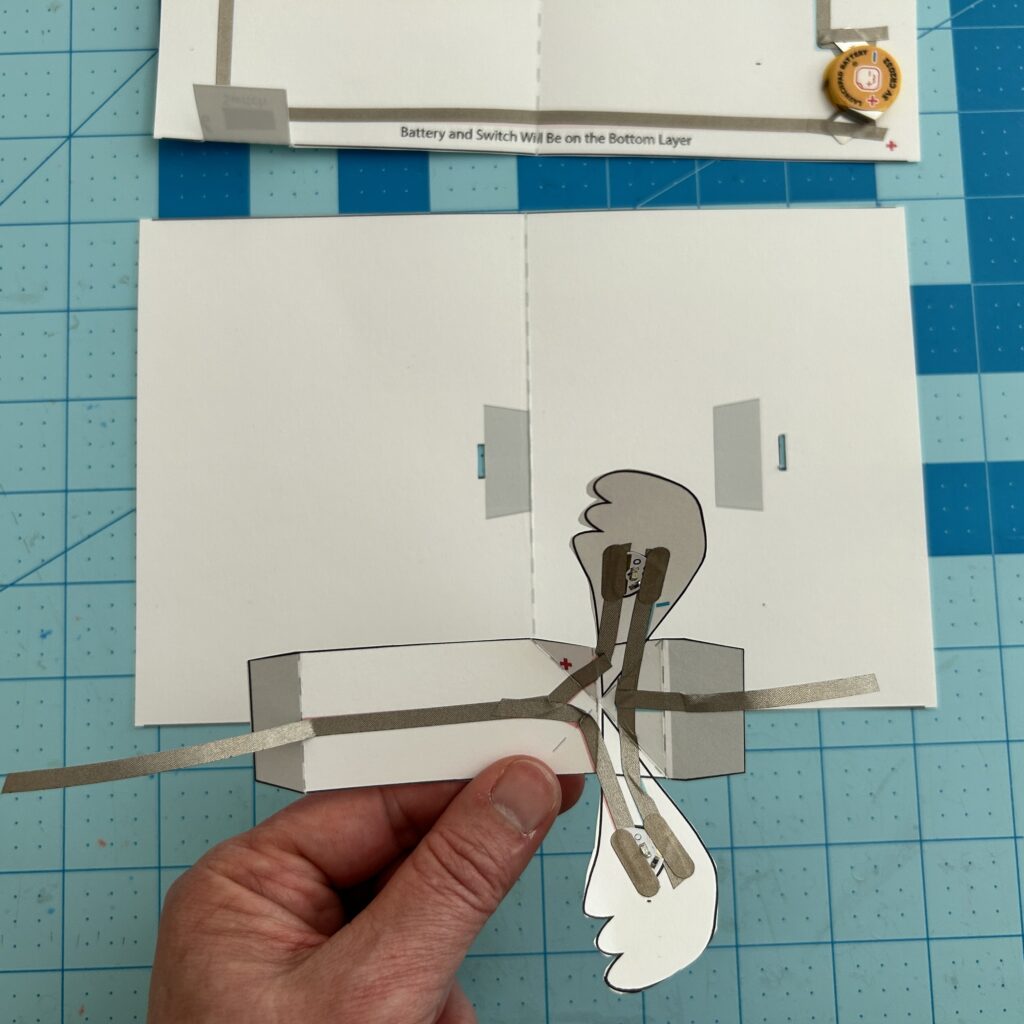
Once your pieces are prepped, it’s time to build the circuit. To make it easer to build the circuit, I’ve created a version of the hinge mechanism that already has wings attached. If you decide the change the shape of the wings (or you prefer to create something other than a bird) you can use the straight piece.
Tech Tip:
The circuit on this project will be tucked into a compact space that will require some strength at the hinges. I’m using Conductive Fabric Tape, because it is strong and flexible, making it a more durable choice.
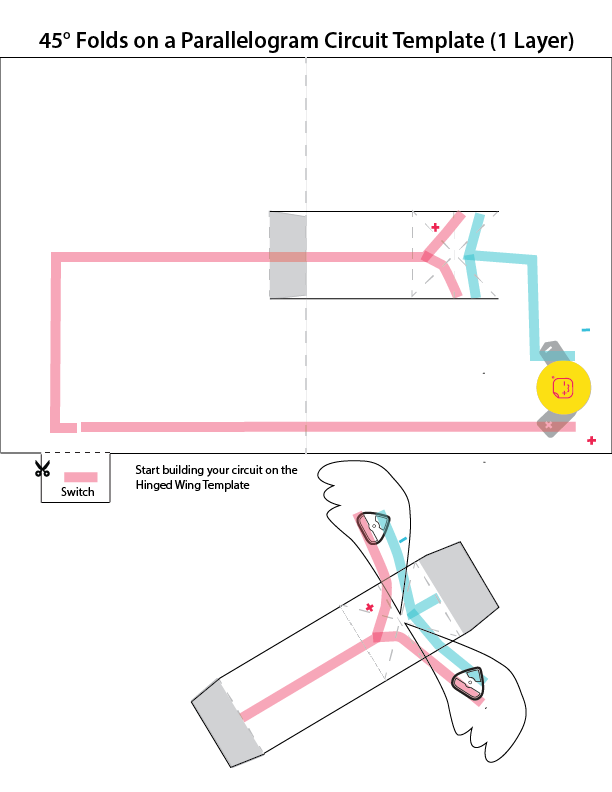
I’ve created templates for an easy, one-layer version of this project and templates for a more complex, two-layer version (which requires a craft knife).
Circuit Diagrams & Templates
The one-layer version allows you to build your circuit directly on top of a sheet of cardstock. If you use this option, and you don’t want to see the circuit, you’ll need to be creative about using layers to cover it up.
Templates for One-Layer Card

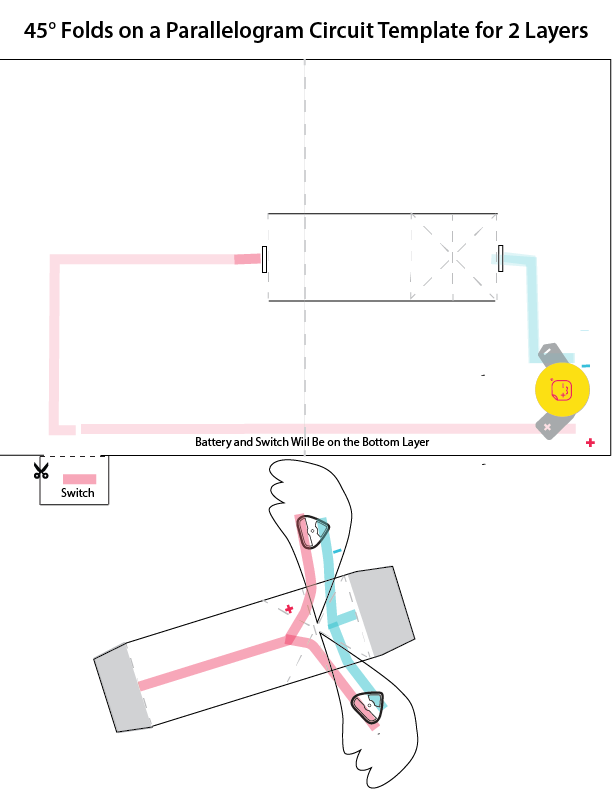
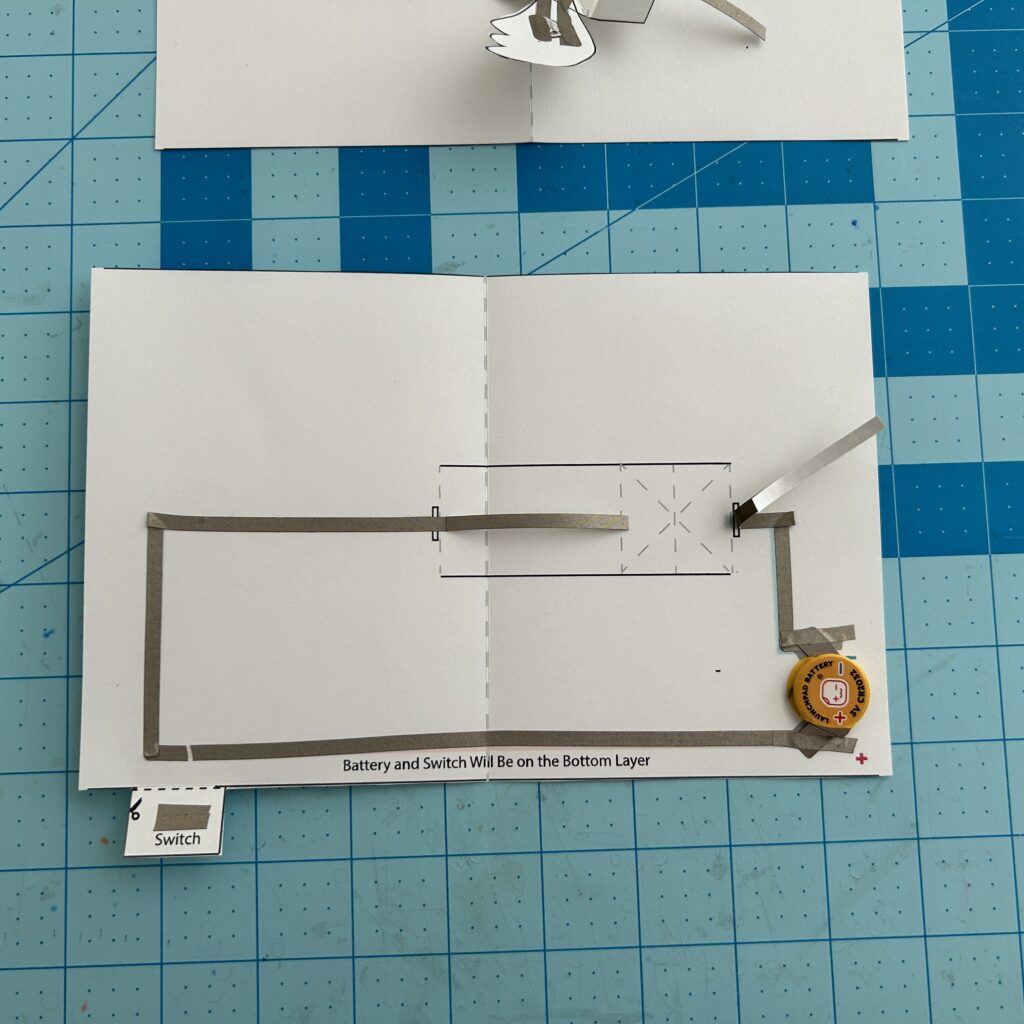
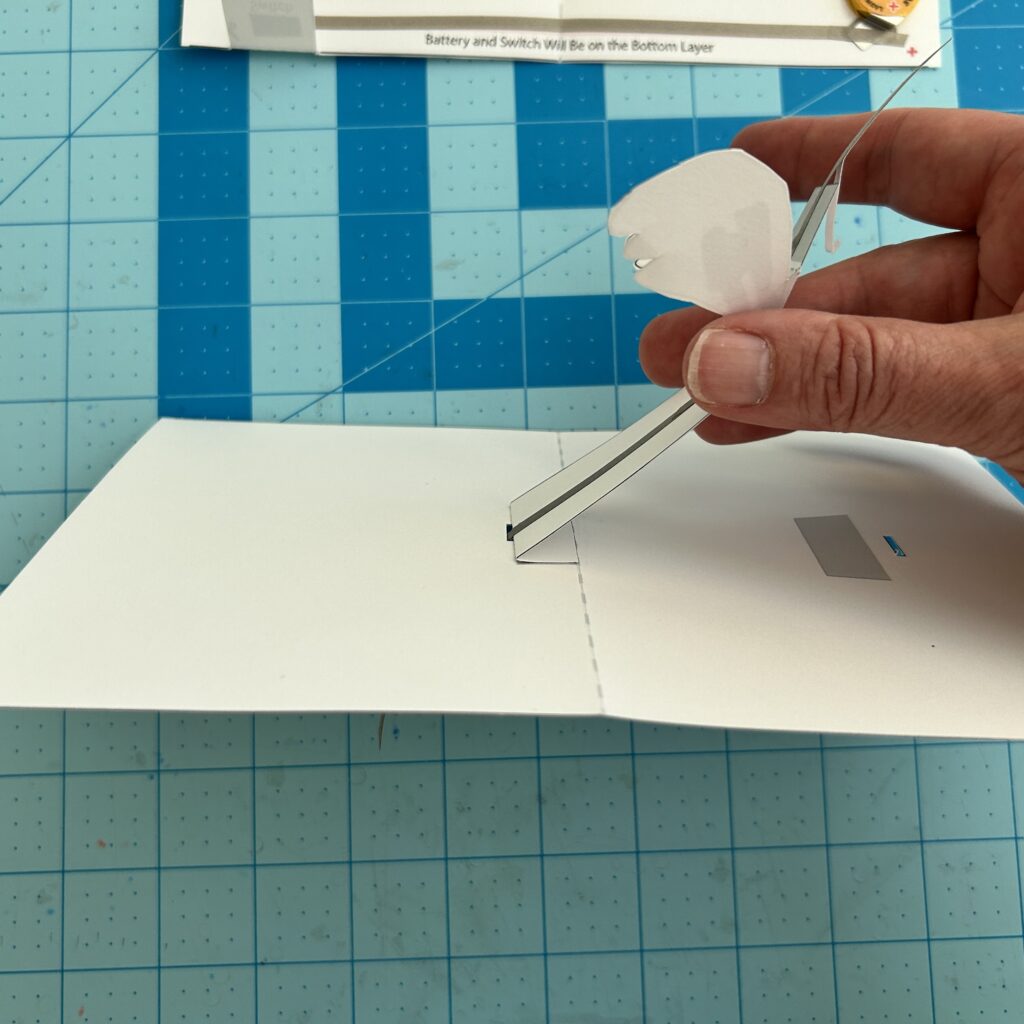
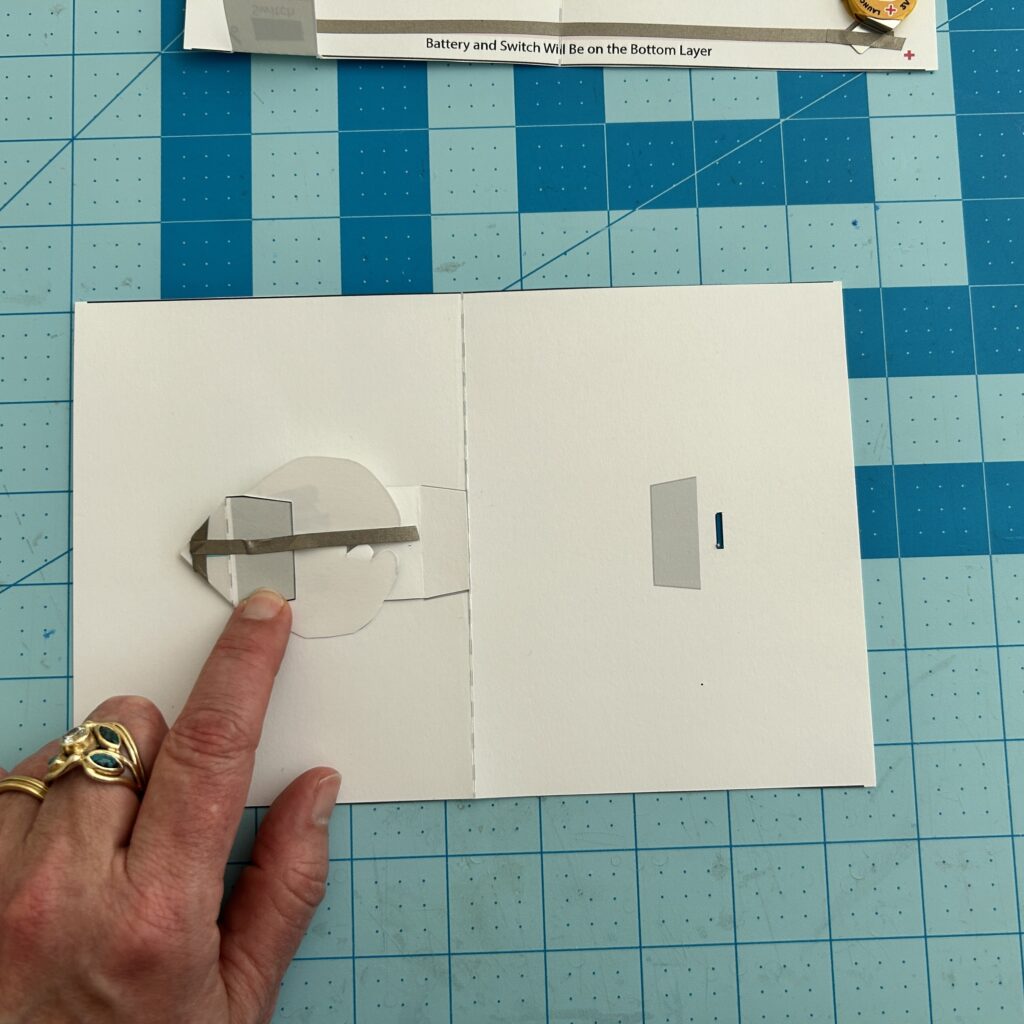
The two-layer version (which I build in the video) allows you to conceal the battery on an additional layer of cardstock; but, it is a bit more difficult to build. This design requires you to thread conductive fabric tape from the bottom of the card up to the mechanism on the top.

Templates for Two-Layer Card

Tech Tip:
Building a circuit in three dimensions requires a bit of concentration and care. Be sure to use generous overlaps when connecting two pieces of conductive tape together at a joint. It’s also a good idea to test your circuit before you apply artwork on top.
Close-Ups of the Circuit Construction on the Two-Layer Version

Useful Tools & Supplies:
- 2 Circuit Sticker LEDs in a color of your choice
- Spool of Conductive Fabric Tape or a sheet of Conductive Fabric Tape Strips
- 1 Launchpad battery (or another 3V coin cell battery)
- White cardstock for printing out the template (colored cardstock for the card backing)
- (Optional) Vellum scrap to diffuse the light
- Scissors
- Cork-backed steel ruler and a scoring tool (a bone folder or toothpick both work)
- Pencil with an eraser
- Pen-knife
- Japanese Screw Punch or a hole punching tool of your choice
- Double-sided tape
- Printer (for printing the circuit diagrams and templates)
- Art supplies of your choice
Learn More
To learn more about making 45° Folds on a Parallelogram, check out pages 60 and 61 of Duncan Birmingham’s book, Pop-Up Design and Paper Mechanics: How to Make Folding Paper Sculpture. You may also check out Tutorial #: 45° Folds on a Parallelogram over on YouTube on Duncan Birmingham’s Pop-UpChannel.