Fred Gets an Upgrade
In this tutorial, we will take inspiration from the 1970’s to show you how to create an interactive puppet toy with color changing, LED Sticker eyes, triggered by reed switches and magnets.
Video 1: Overview
Introduction
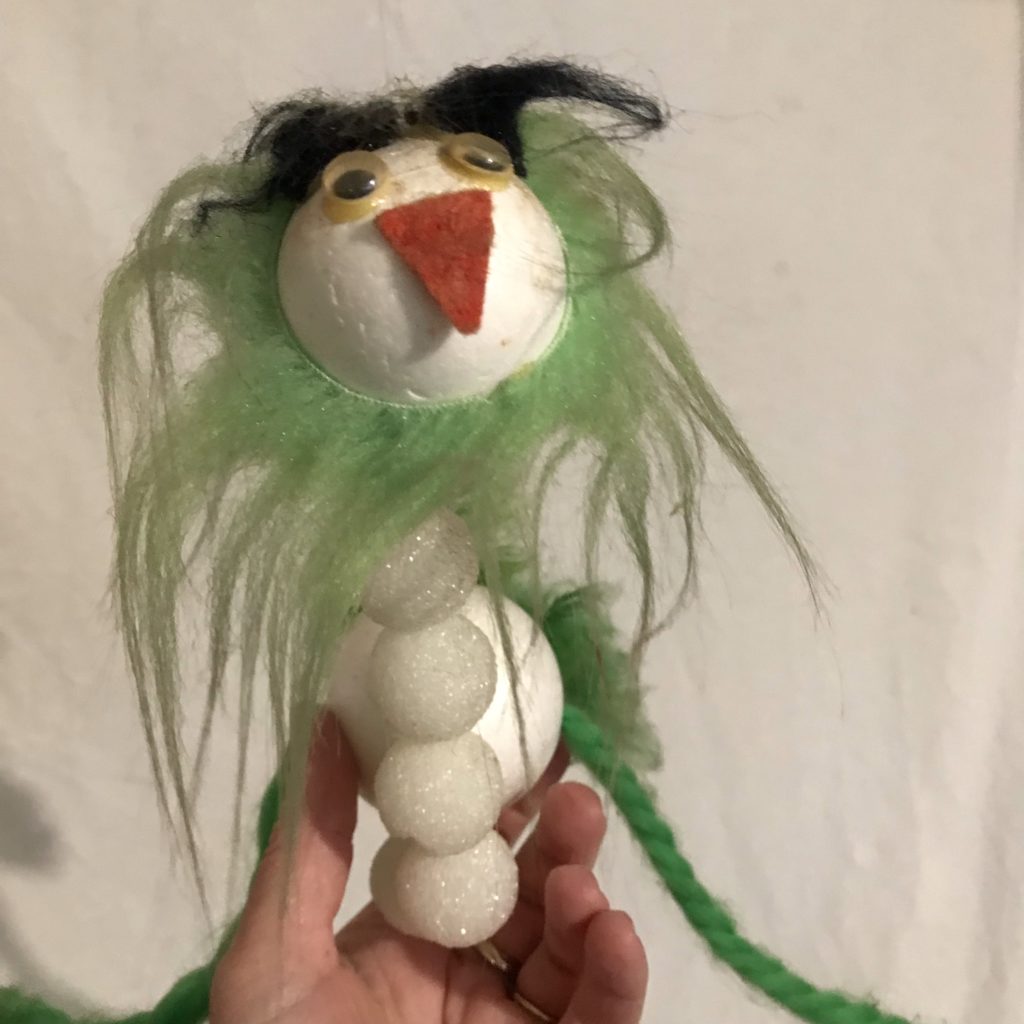
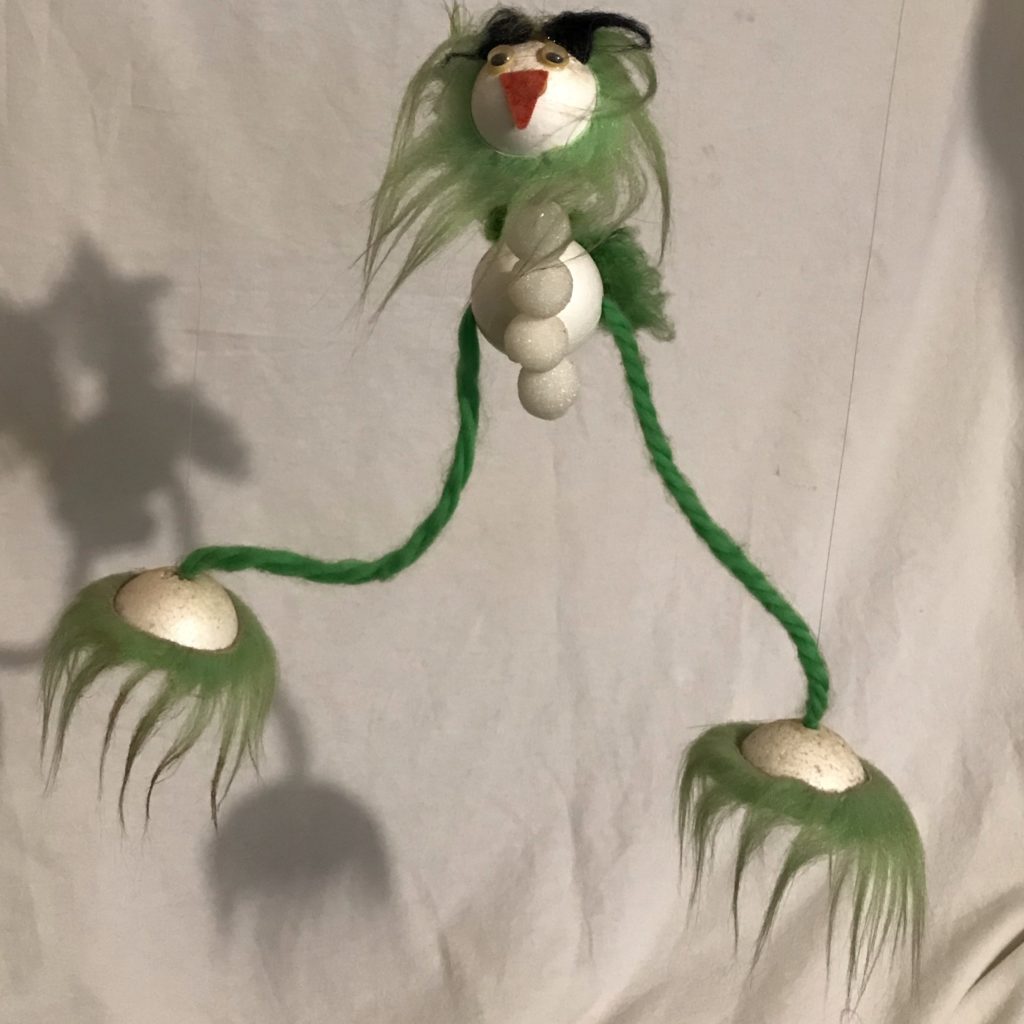
One afternoon, while puttering in my basement, I took a closer look at an object that my husband had hanging on a hook for over twenty years. The object, a well-loved bird puppet (named Fred), was made by him and his grandmother some time in the mid- to late- seventies. Crafted from Styrofoam balls, yarn ribbon hair ties, and straggly faux fur, Fred was far from picture perfect; but, there was something so compelling (and goofy) about the way he moved, that I wanted to know more.
As a result, I did some research and learned that bird puppets like Fred were a fad in 1976, with the introduction of Arrow’s “Wacky Walkin’ Bird” kit, which contained everything needed to build your own. Retailing back then for $5.95, the kit in today’s dollars (adjusted for inflation) would cost a whopping $31.95!
So Fred, having been cobbled together from odds and ends laying around his grandmother’s house, was a far more affordable alternative!
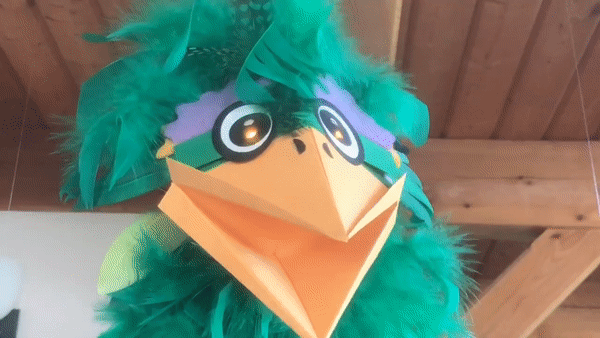
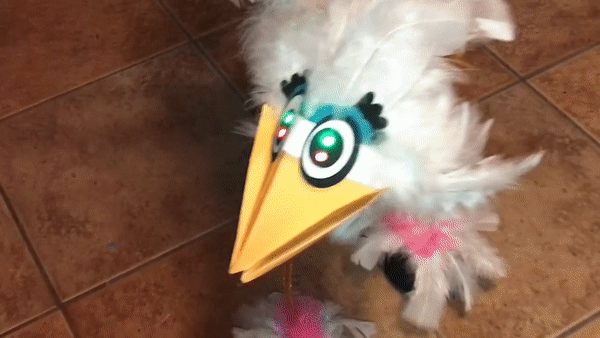
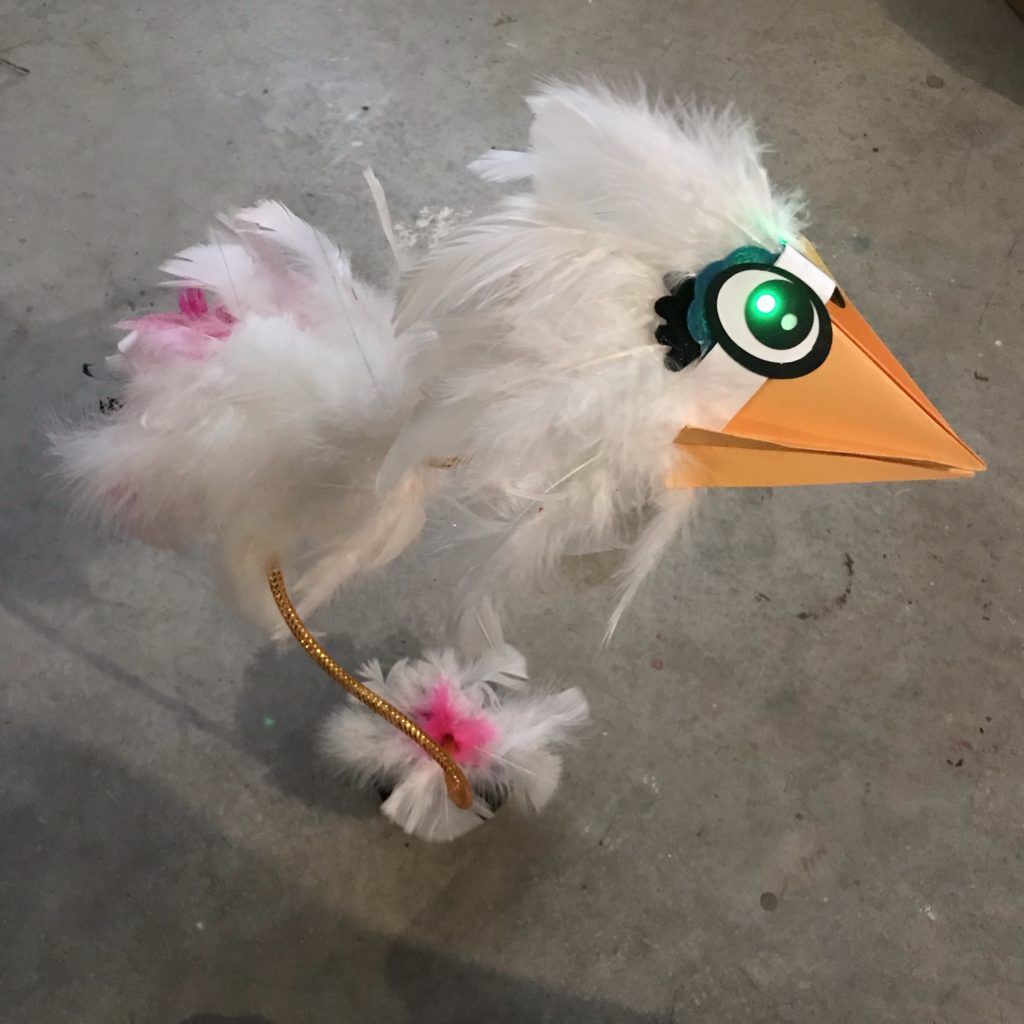
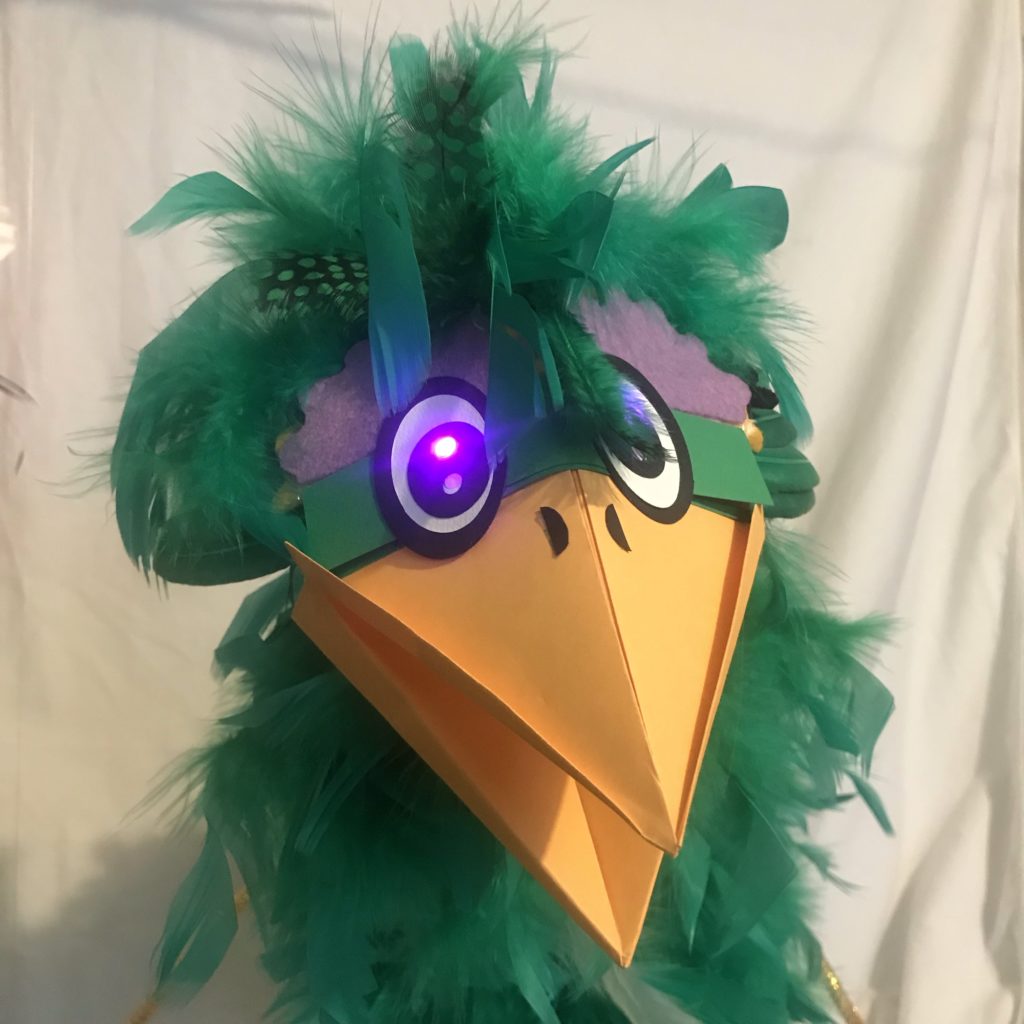
Fast forward to 2023, and Fred 2.0 has been born! And he is a super star!
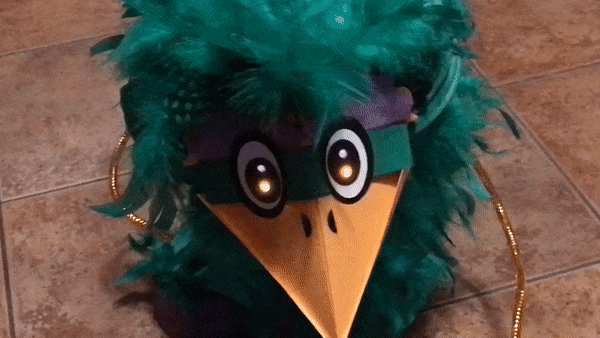
While maintaining most of the features that made his predecessor so much fun to play with, Fred 2.0 has been upgraded with bright, glowing, LED Sticker eyes that can change their color to match his mood (with the help of hidden reed switches).
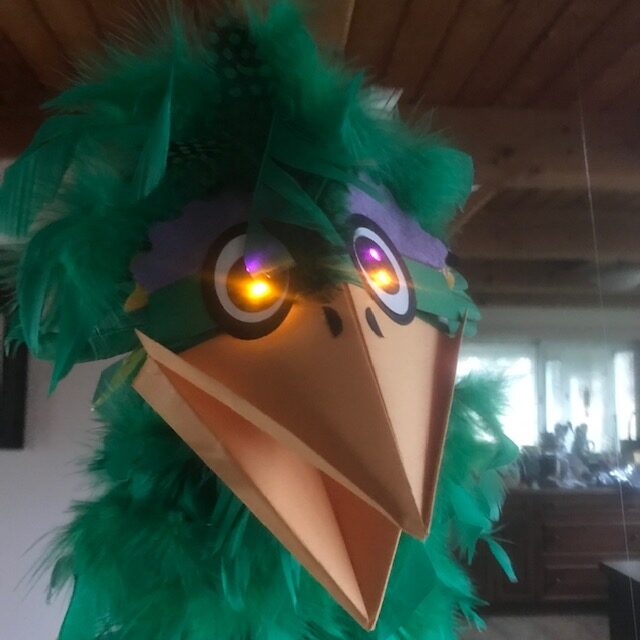
It could even be said that Fred 2.0 has a magnetic personality!
Related
Categories
reed switch, puppet, toy, switch , STEAM education
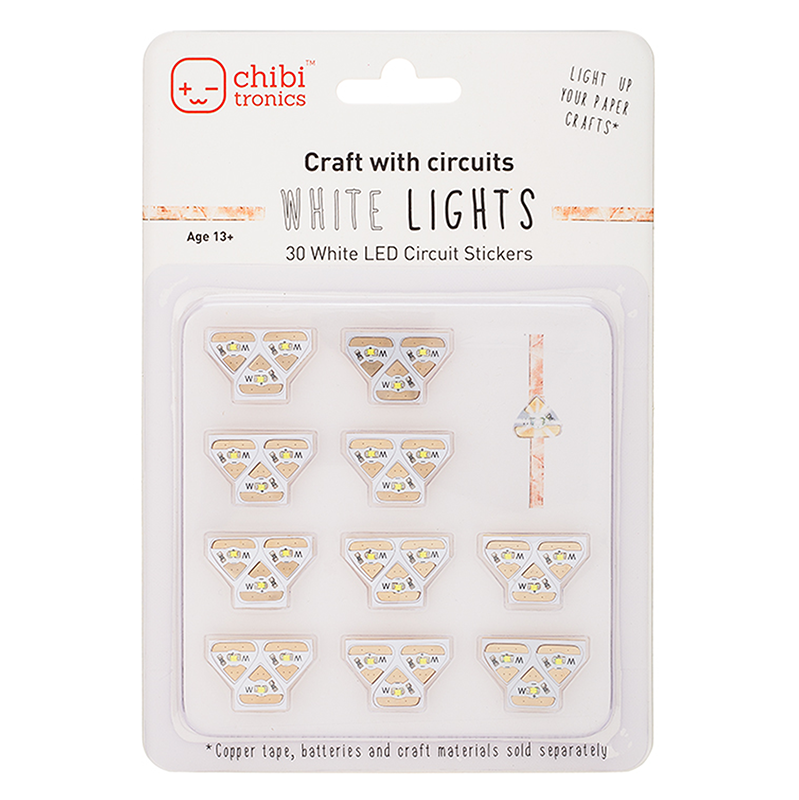
Materials & Tools
Electronic Supplies
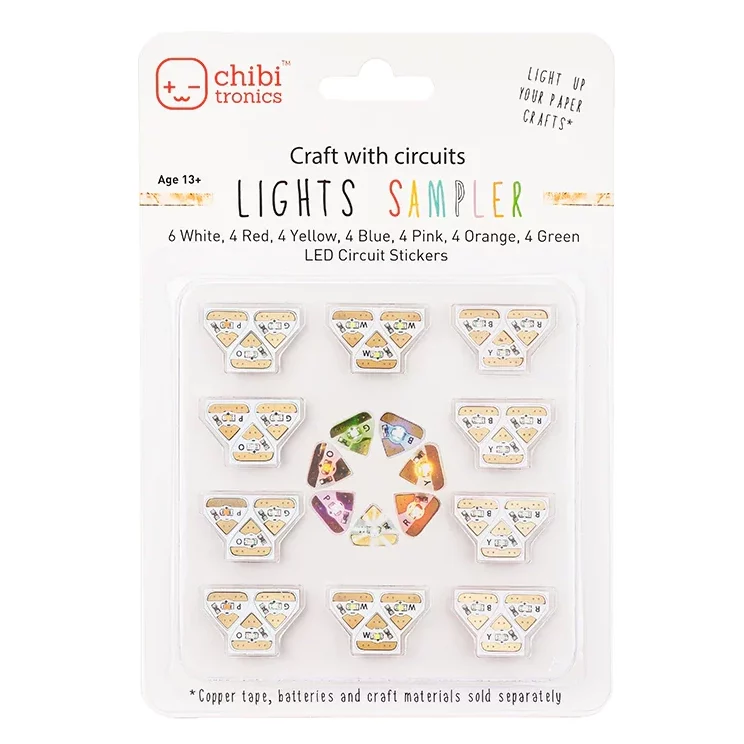
- 2 pairs of Circuit Sticker LEDs (in 2 different colors)
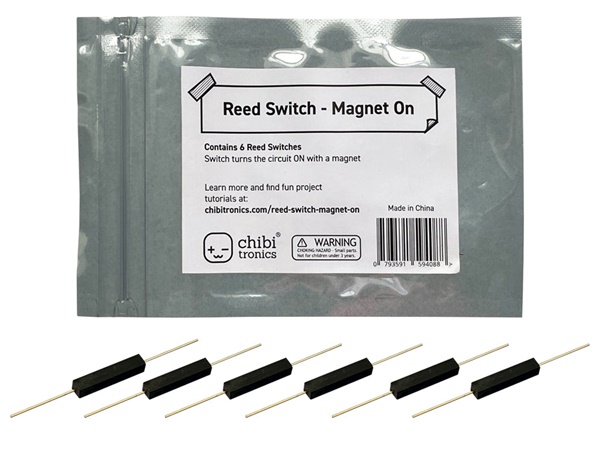
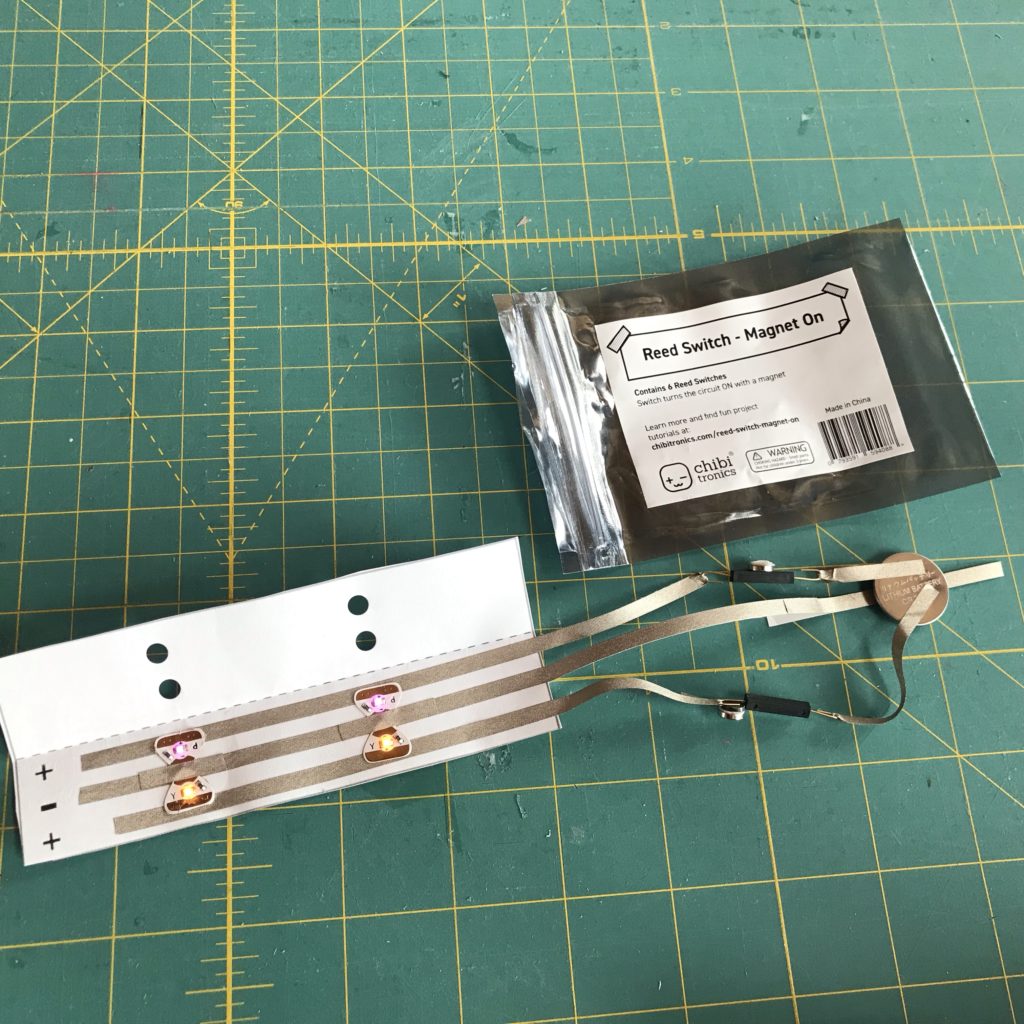
- 2 Reed Switches (Magnet on)
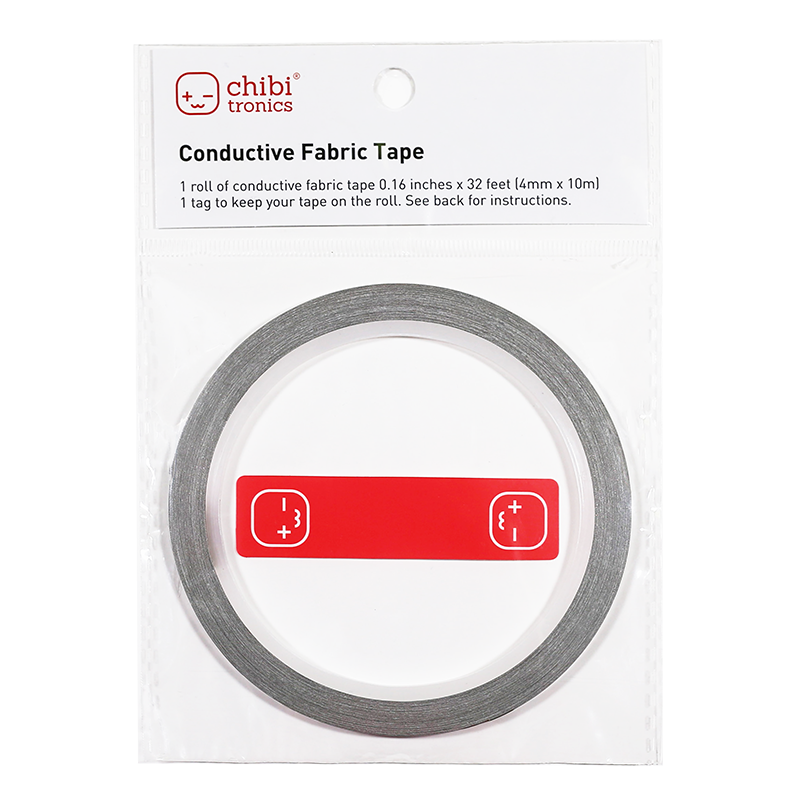
- Conductive Fabric Tape
- CR2032 or CR2016 Battery
Other Tools & Supplies
- 2 magnets
- 1 sheet of orange printer paper (8 ½” X 11”) for folding into a beak
- Black and white paper for the eyes (or print out the Circuit Diagram/ Eye Template)
- Scraps of paper, felt, and translucent vellum
- Mesh tubing (or a suitable substitute) for neck & legs
- Feathers (or an old feather duster)
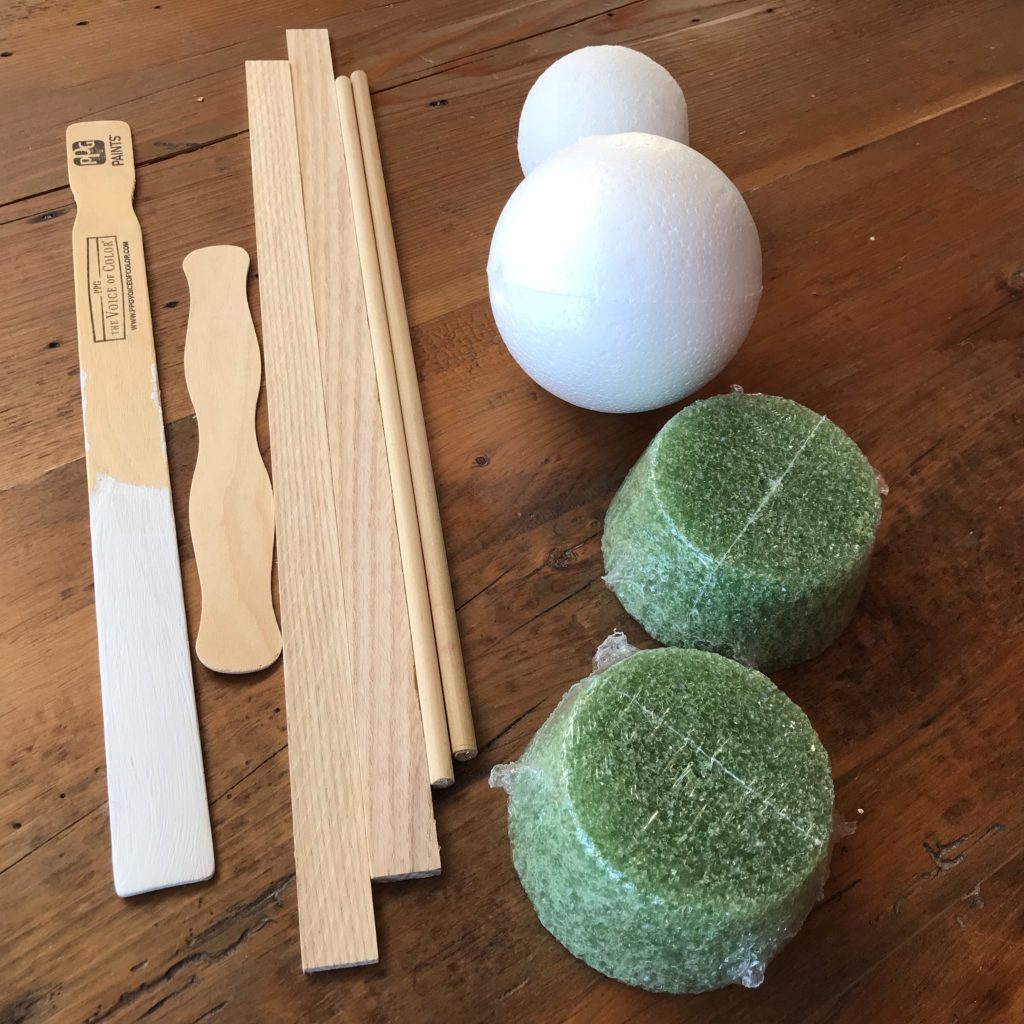
- Sturdy material for the cross support that holds the puppet up (ex. wood scraps, paint stirrer sticks, large popsicle sticks, dowel rods, or reinforced cardboard)
- 2 polystyrene balls (I used a 3.8” ball for the body and a 3” ball for the head)
- 2 pieces of floral foam or small yogurt containers (for the feet)
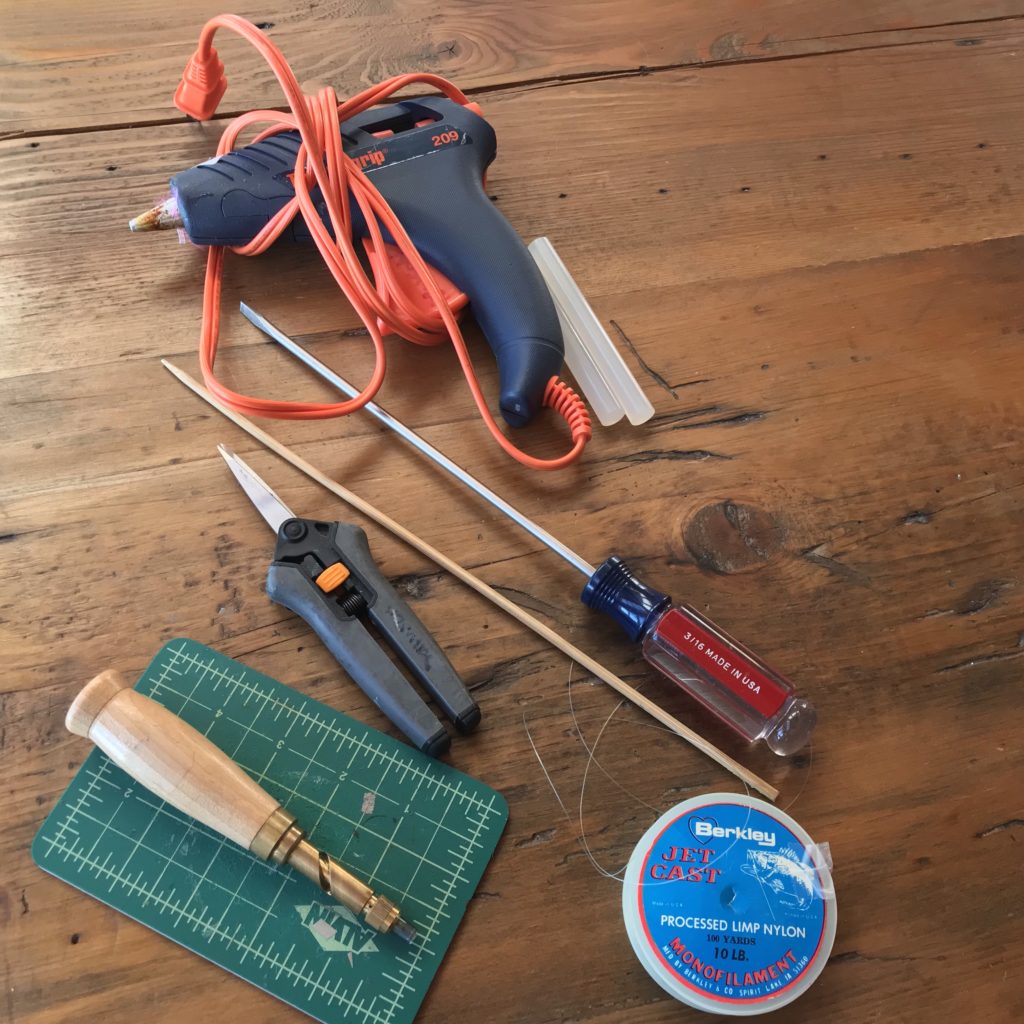
- Scissors
- Ruler
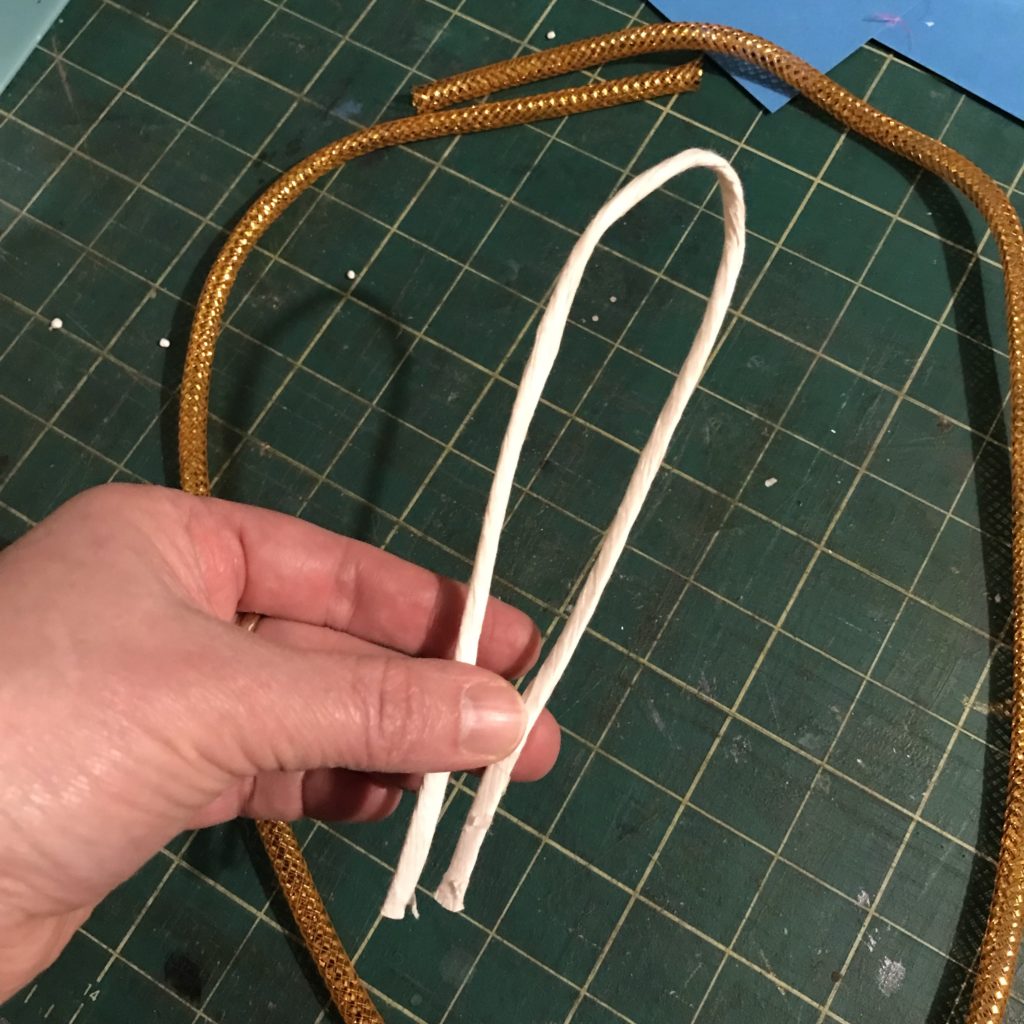
- Fishing Line (or yarn)
- Glue gun
- Long screwdriver (dowel rod or wooden skewer)
- Hole punch or Japanese Screw Punch & Self-healing Mat
- Glue
- Double sided tape/ foam tape
- Printer (if you plan to print out the Circuit Diagram/ Eye Template)
- Craft cutting machine, such as a Cricut (if you plan to cut out shapes for the eyes)

Directions
Set Up Your Workspace:
If possible, work with a partner to make this project easier to manage (and perhaps, more memorable). Since feathers and polystyrene can get messy, I set up a workspace in my basement that allowed me to use a glue gun, spread out my supplies, and hang my puppet pieces from a clothesline as I worked. I used a wide flower vase as a chair for my puppet’s body, while I was attaching the feet.
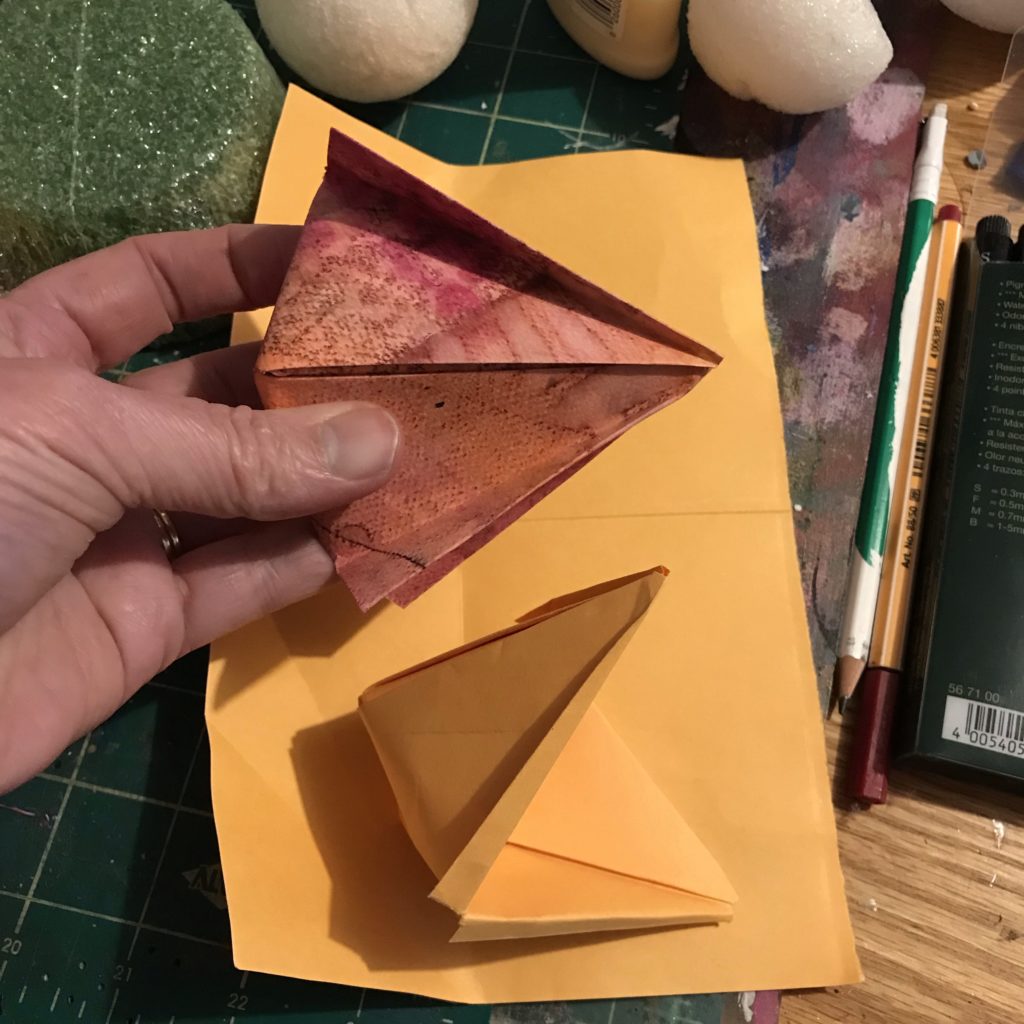
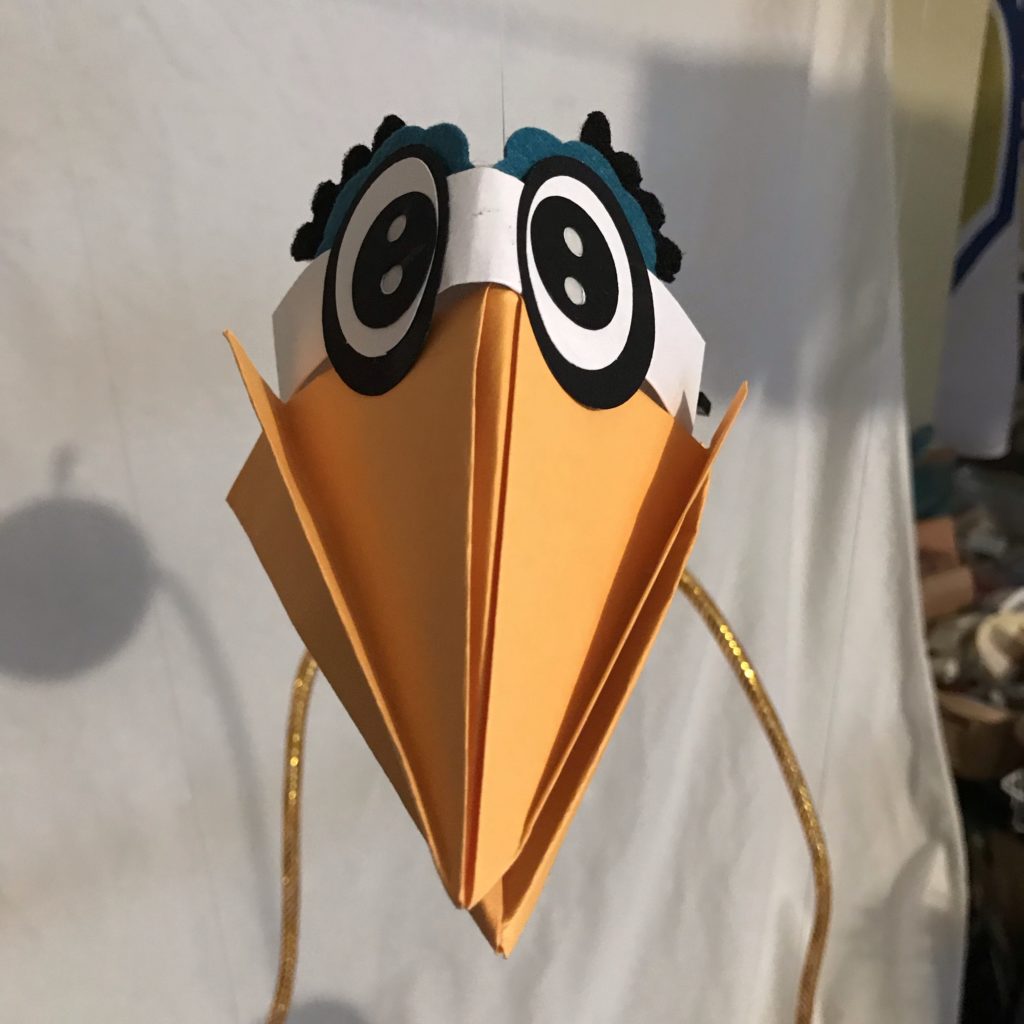
Step 1: Fold a Beak
To create a beak, I folded a paper snapper from an orange piece of 8 ½” X 11” printer paper.
If you would like to see a video showing how to do this, visit “How to Make an Origami Snapper.”
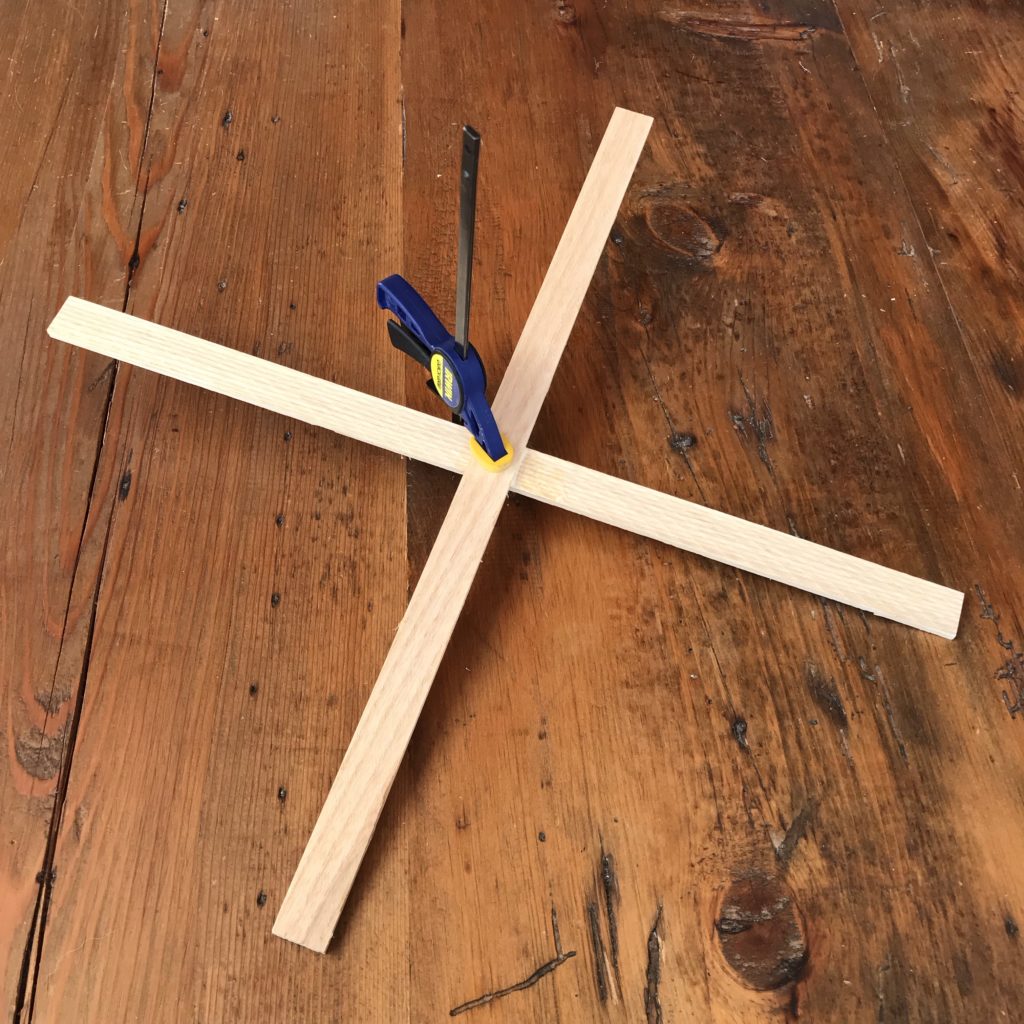
Step 2: Glue the Cross Support
Create a cross support for your puppet by gluing two perpendicular pieces of wood or cardboard together. Paint stirrers or large popsicle sticks work well. Alternatively, using two pieces of reinforced cardboard secured at the middle with tape would likely do the trick. Allow the cross support to dry while you work.
Step 3: Make the Legs & Feet
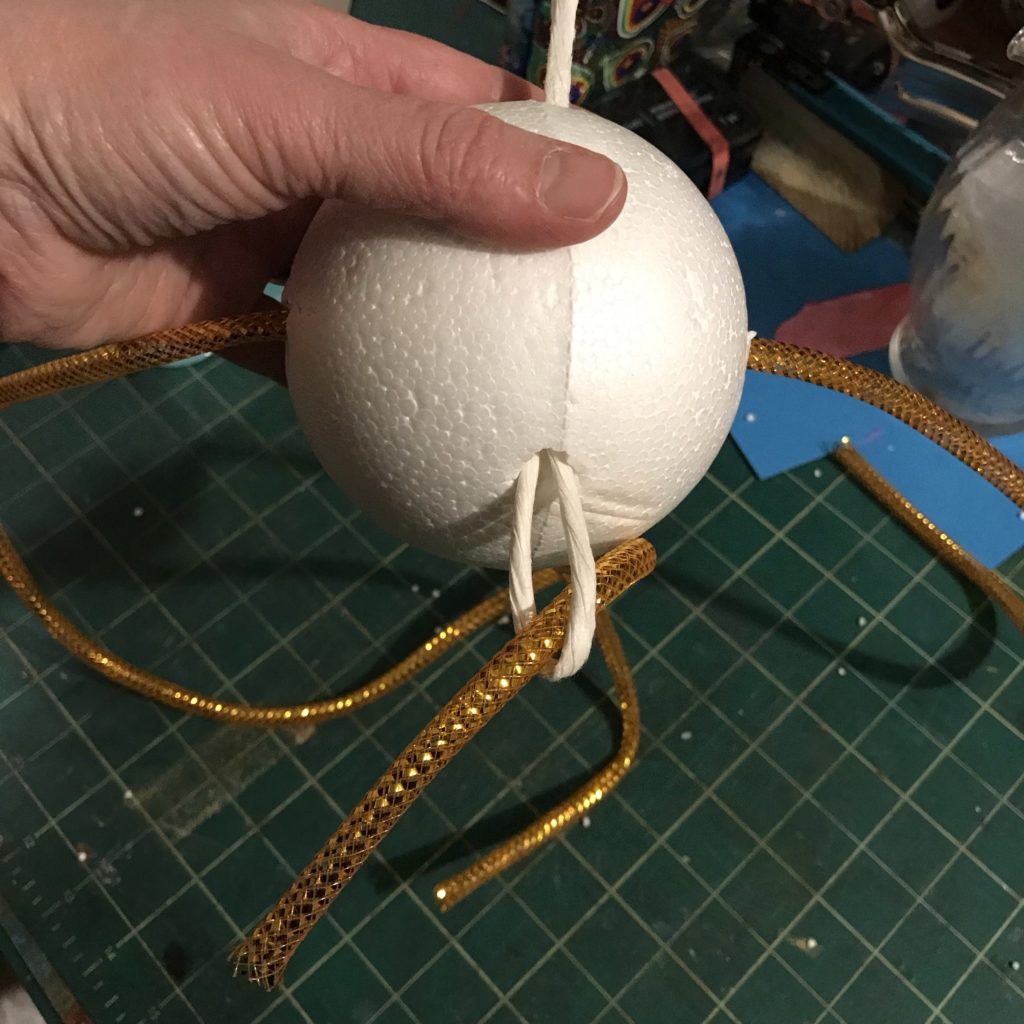
Make two sets of perpendicular holes through the body piece. I used a screwdriver to make the initial holes and then pushed a thicker wooden dowel through to enlarge them
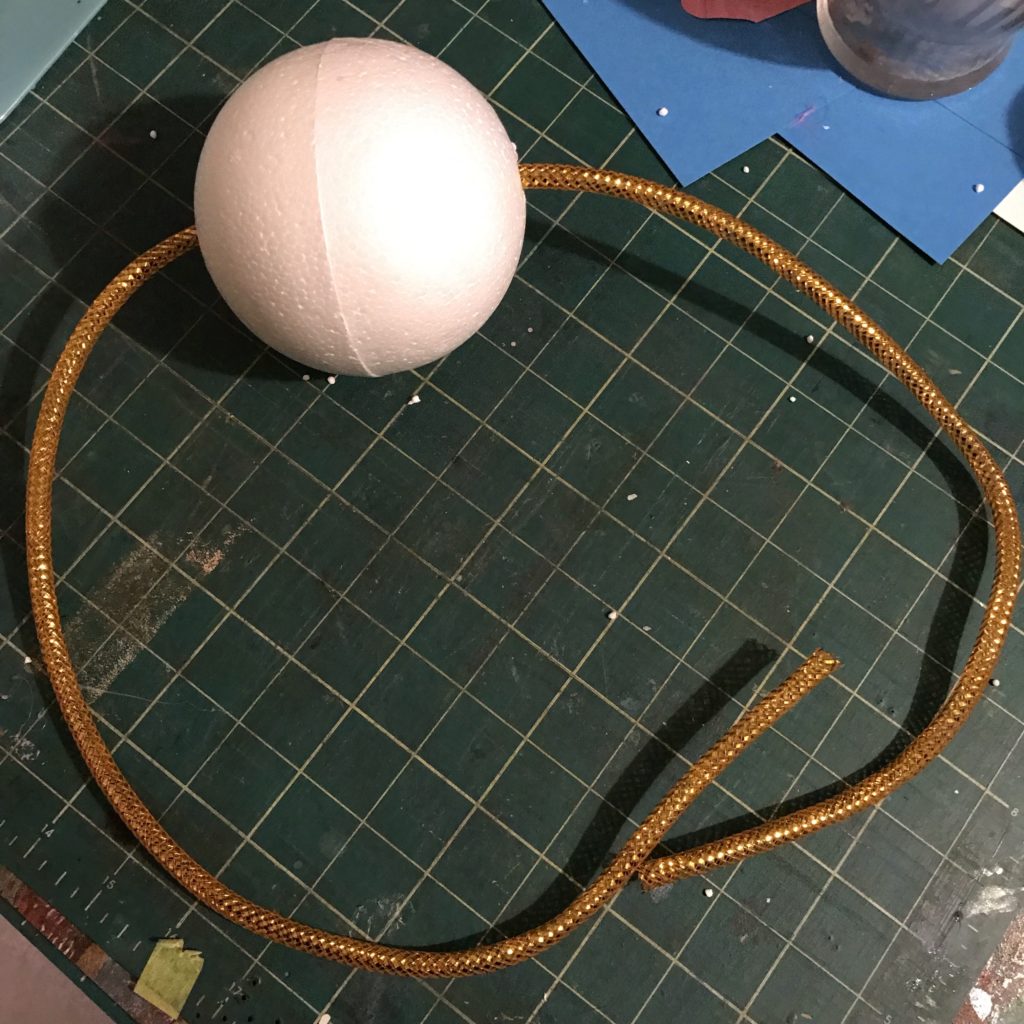
Determine how long you want your puppet’s legs to be and cut a piece of mesh tubing that is twice that length. Then, thread the mesh tubing evenly through one set of holes to create the legs.
I found it helpful to use a stiff paper handle, removed from an old paper bag, to create a paper threader to pull the mesh through with.
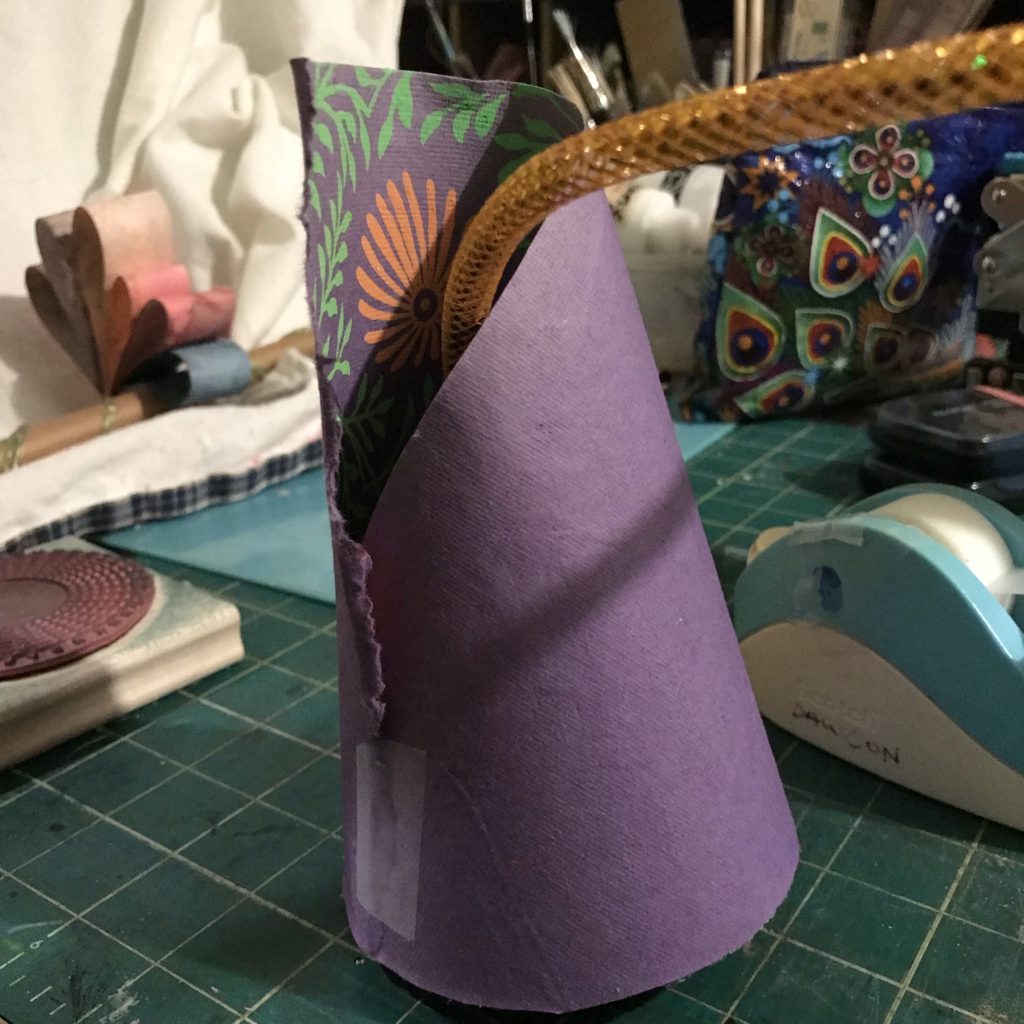
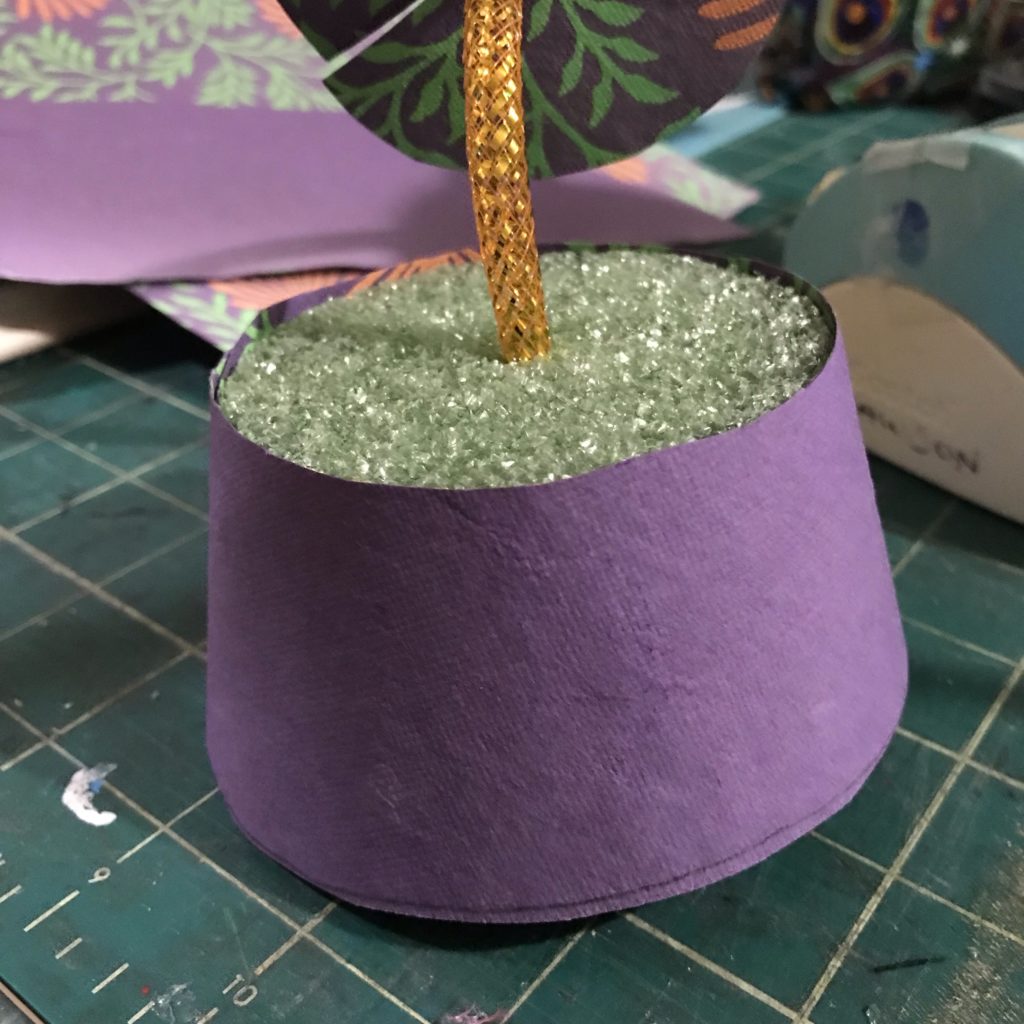
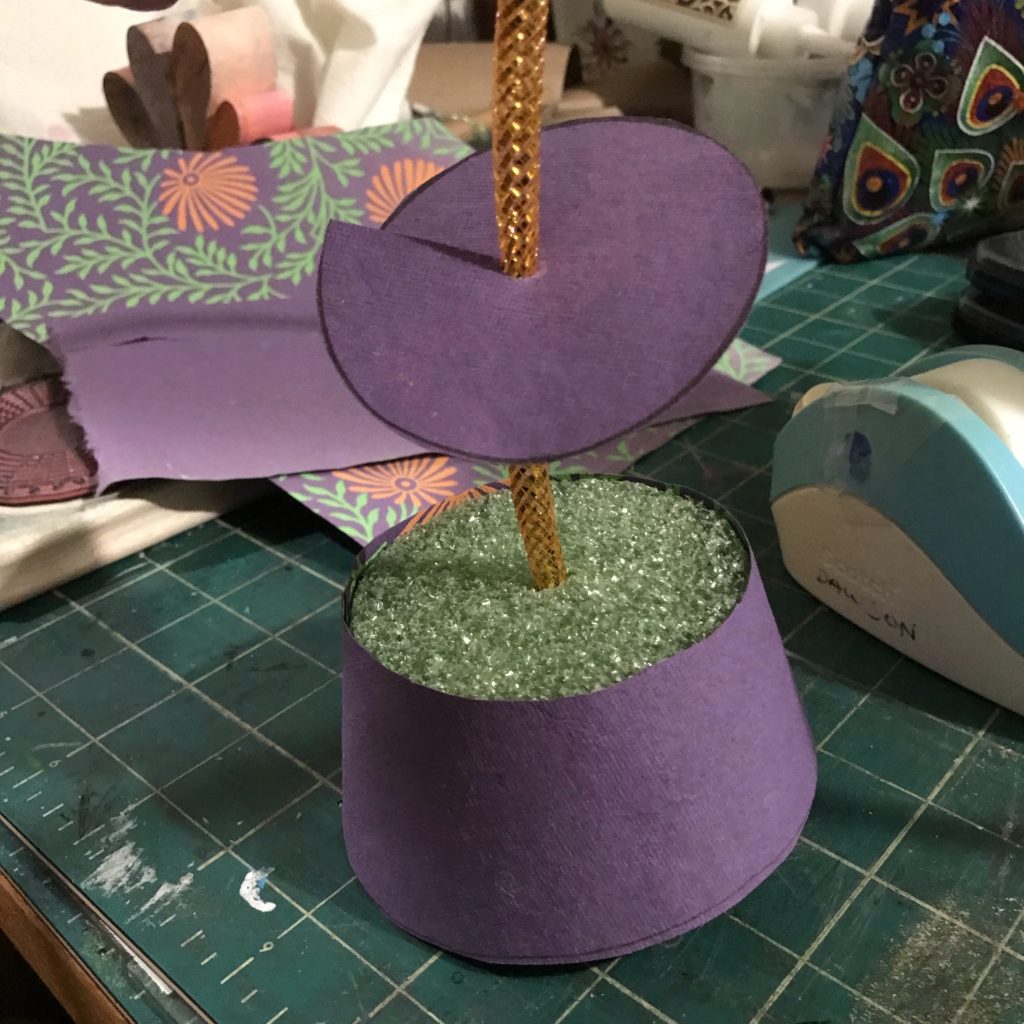
I used floral foam covered in paper for my puppet’s feet, but pierced plastic yogurt cups would also work.
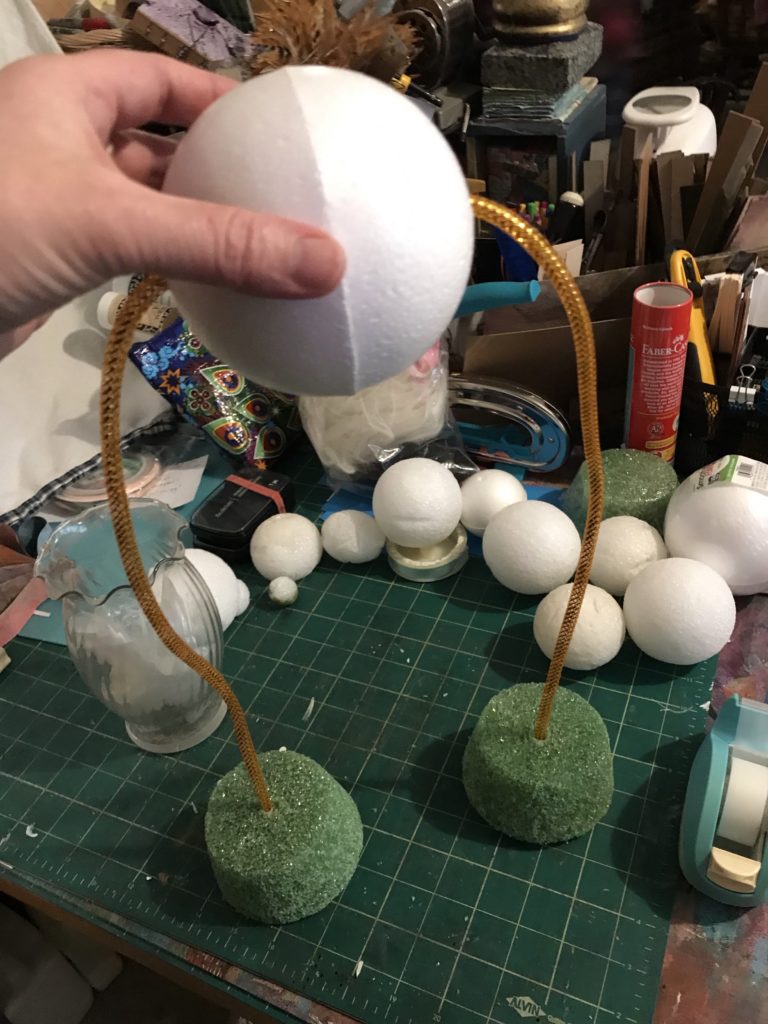
After threading the mesh tubing through the center of the feet, I threaded it through a paper washer (made with scraps), tied a knot, and used hot glue to secure the knot.
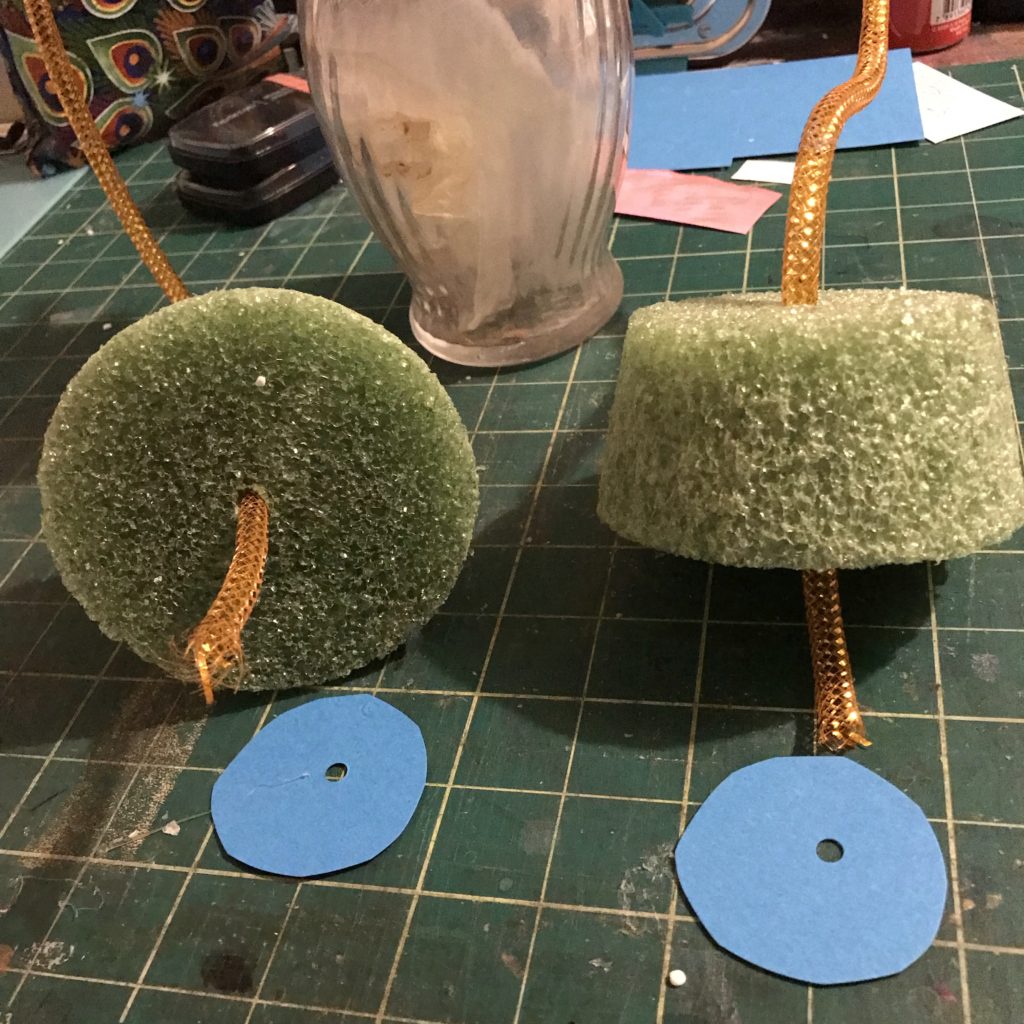
To get the paper to fit just right, I wrapped it around the feet in a cone shape, taped it closed, and then cut around each foot.
To cover the tops of the feet, I cut out slotted circles that I could easily remove, decorate with feathers, and replace.
Step 4: Make the Head & Tail
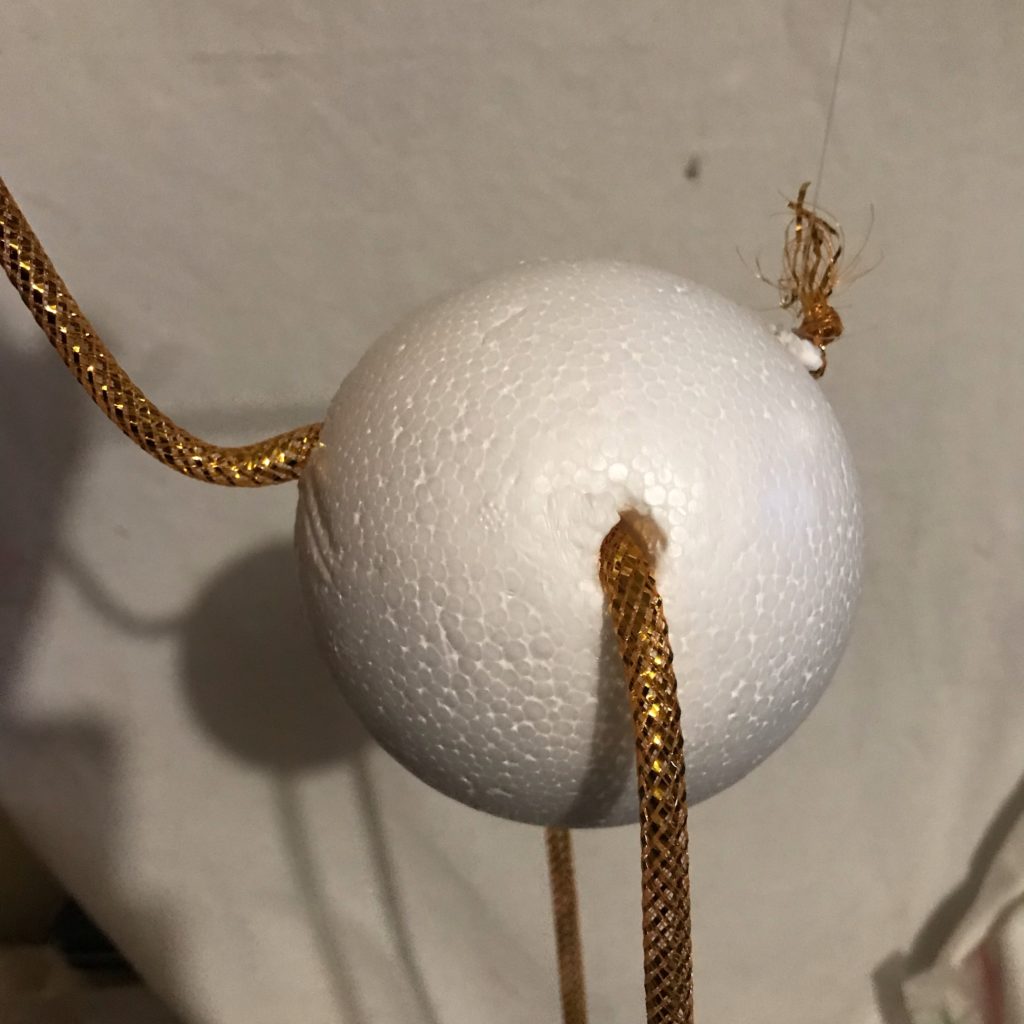
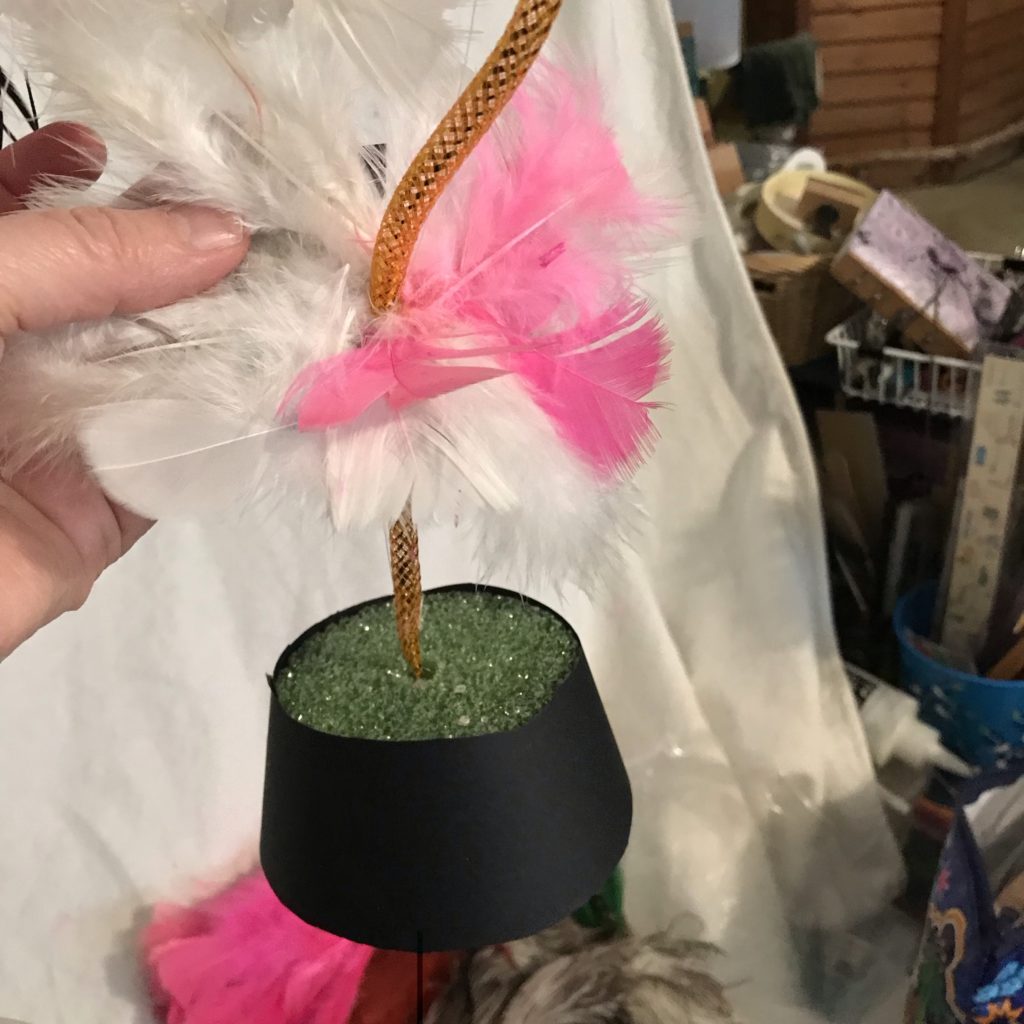
Once the feet were secured, I pulled another length of mesh tubing through the second set of holes in the body to create the neck and tail piece. I tied a knot at the tail end of the tubing to keep it from sliding out and left the rest loose on the opposite side.
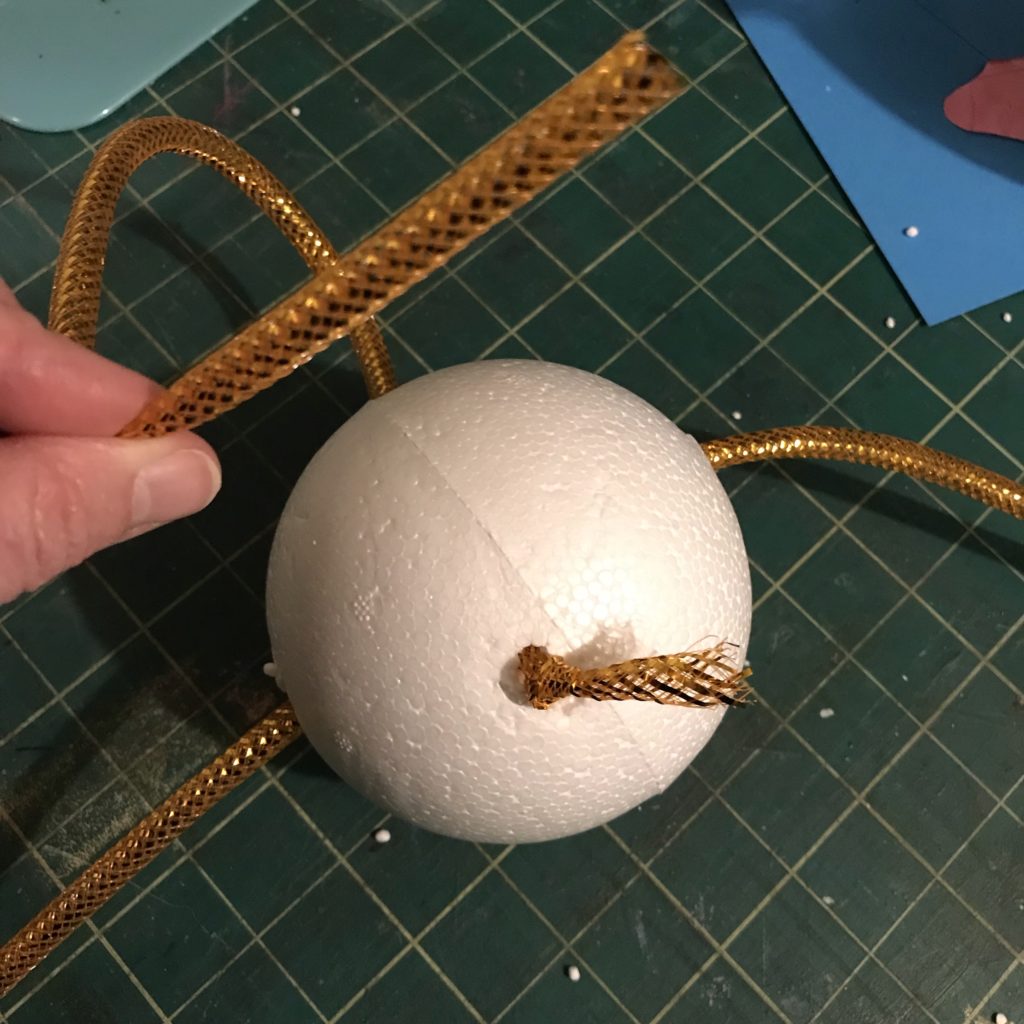
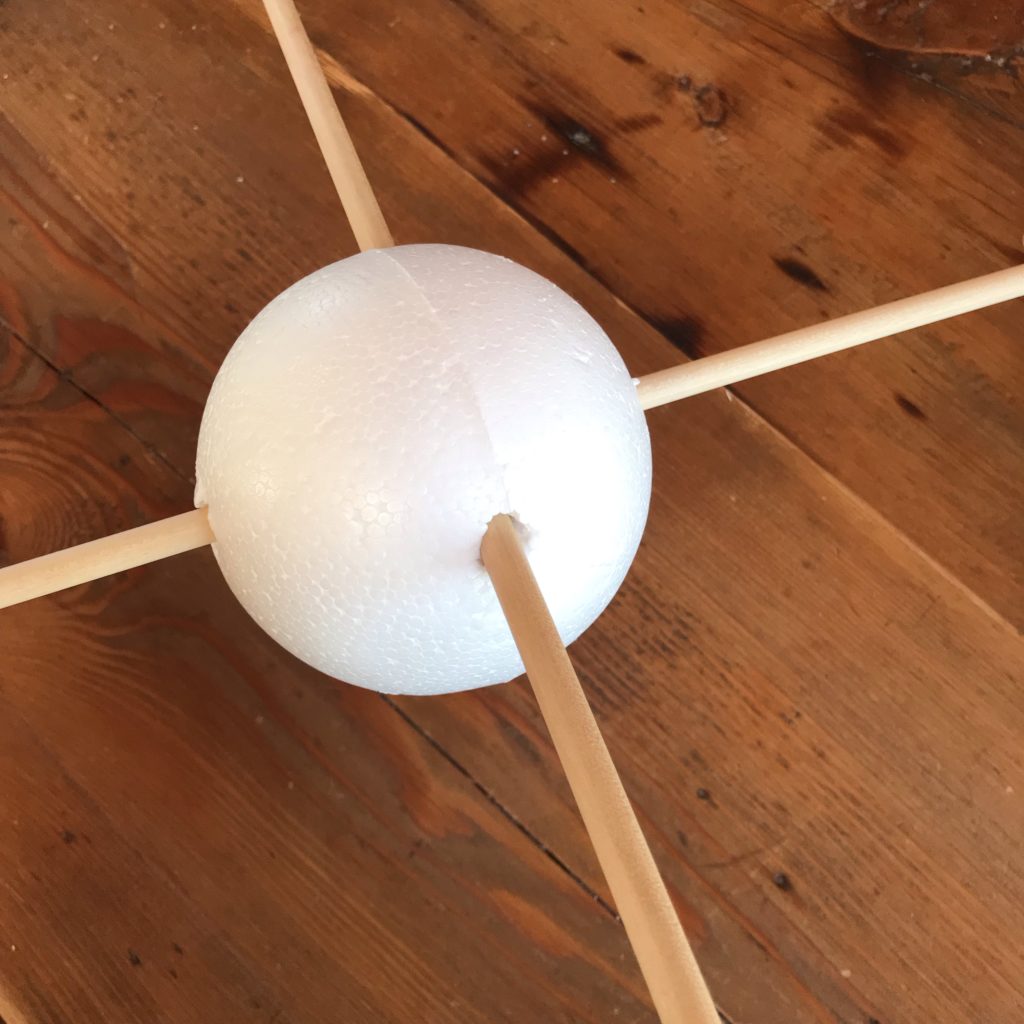
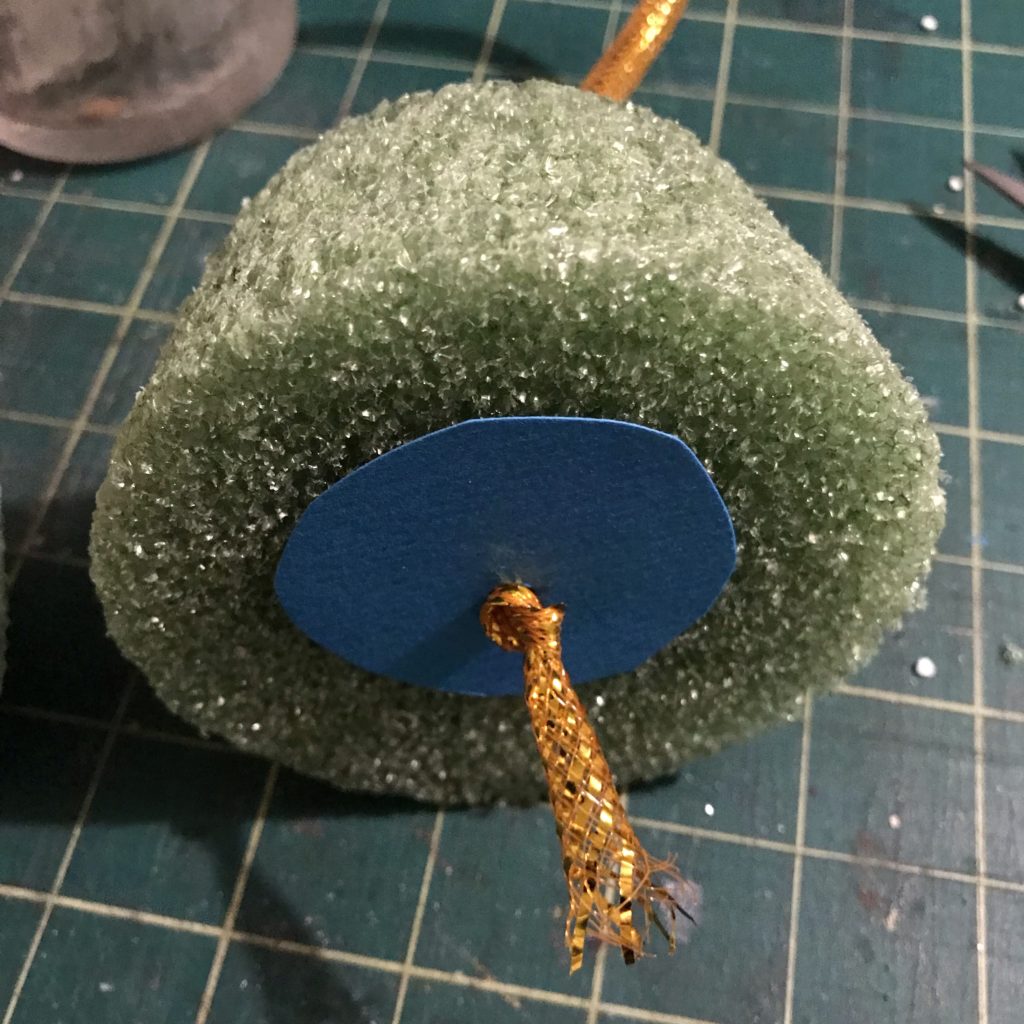
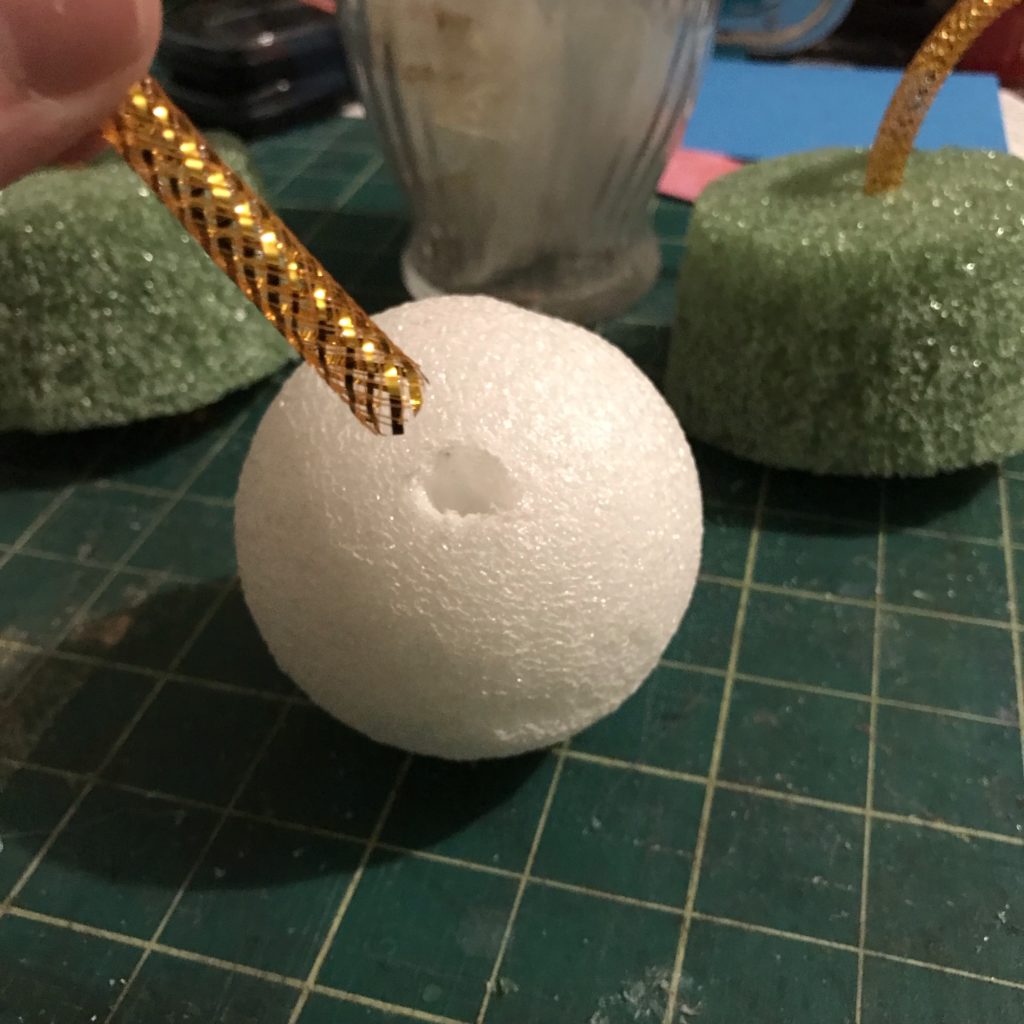
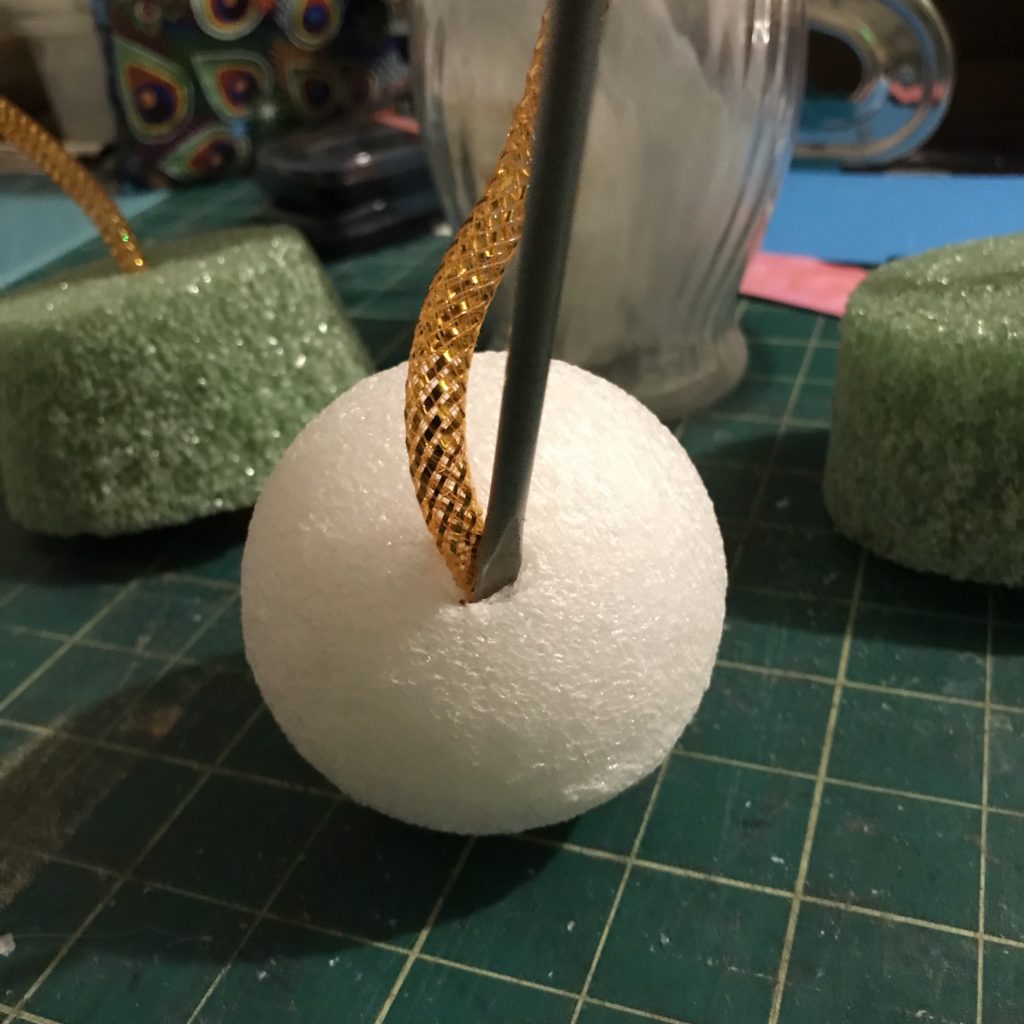
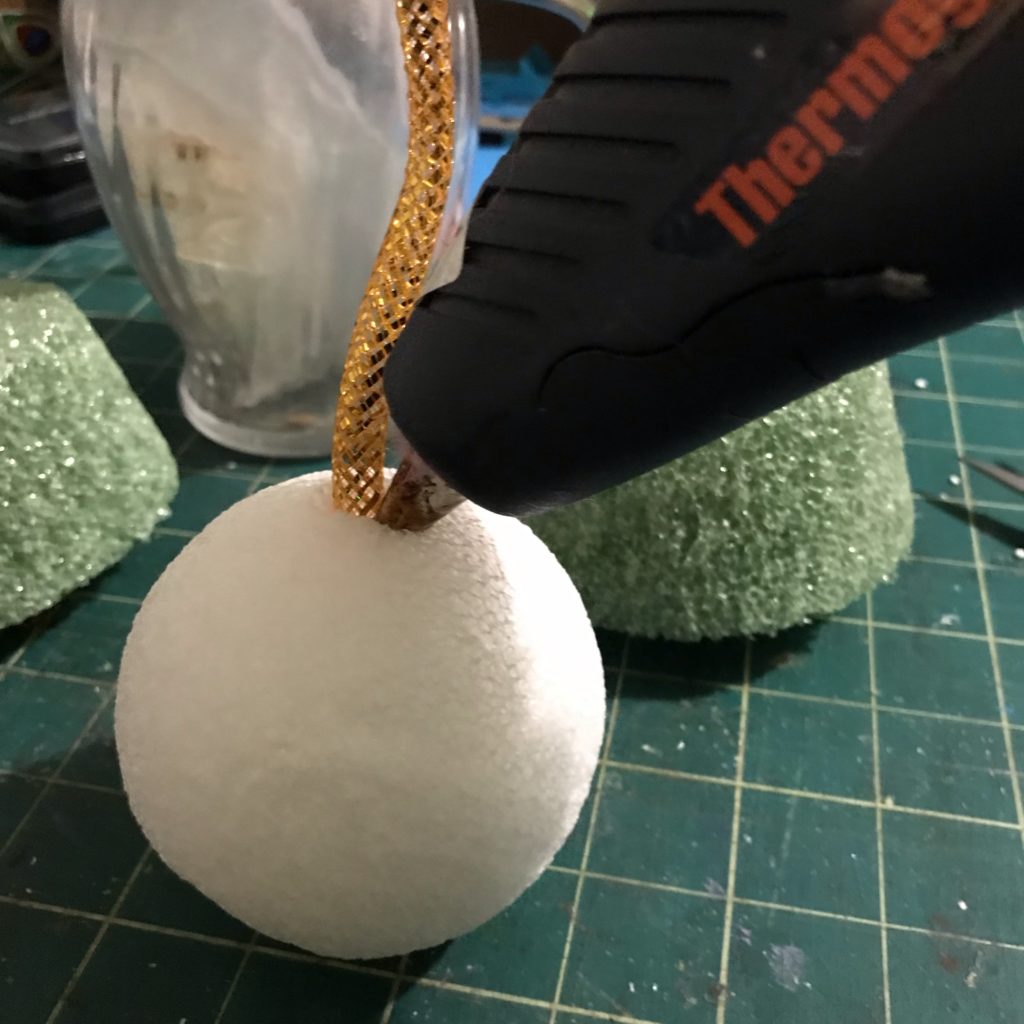
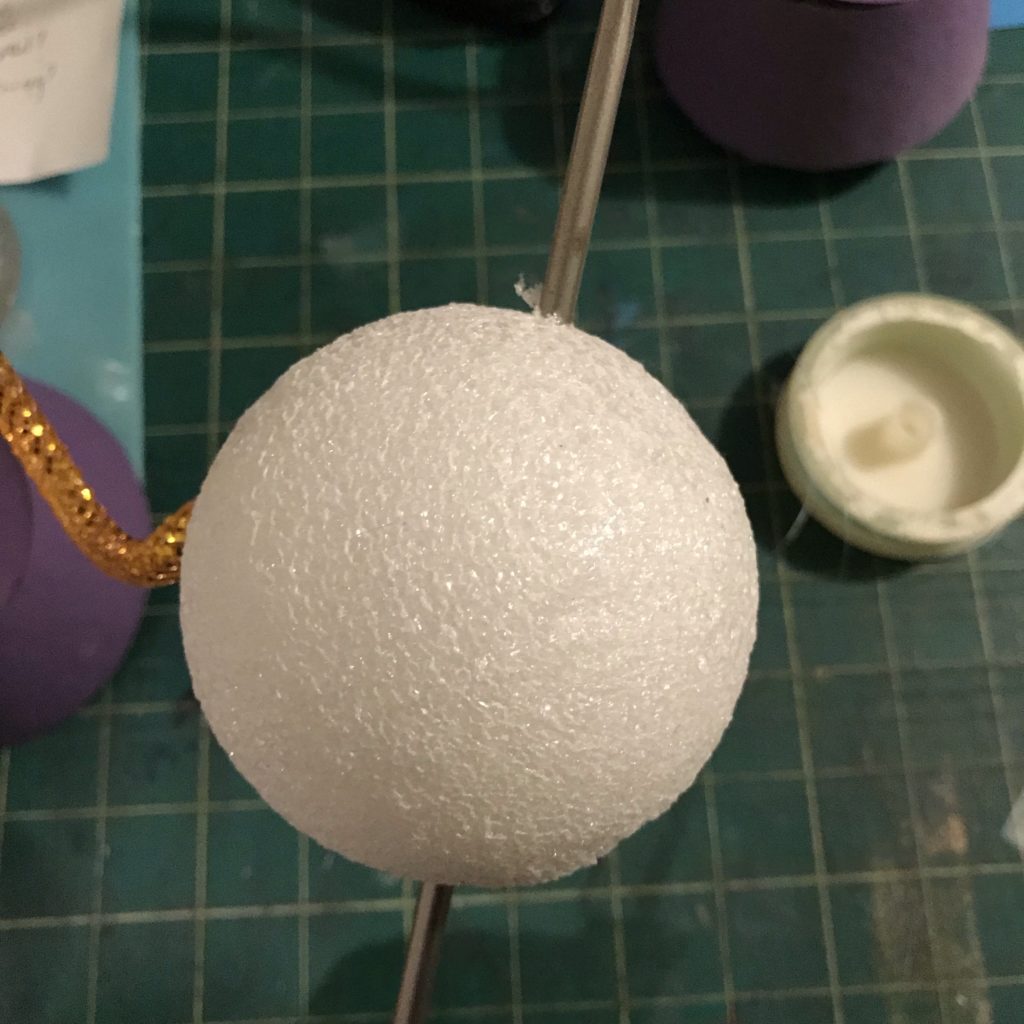
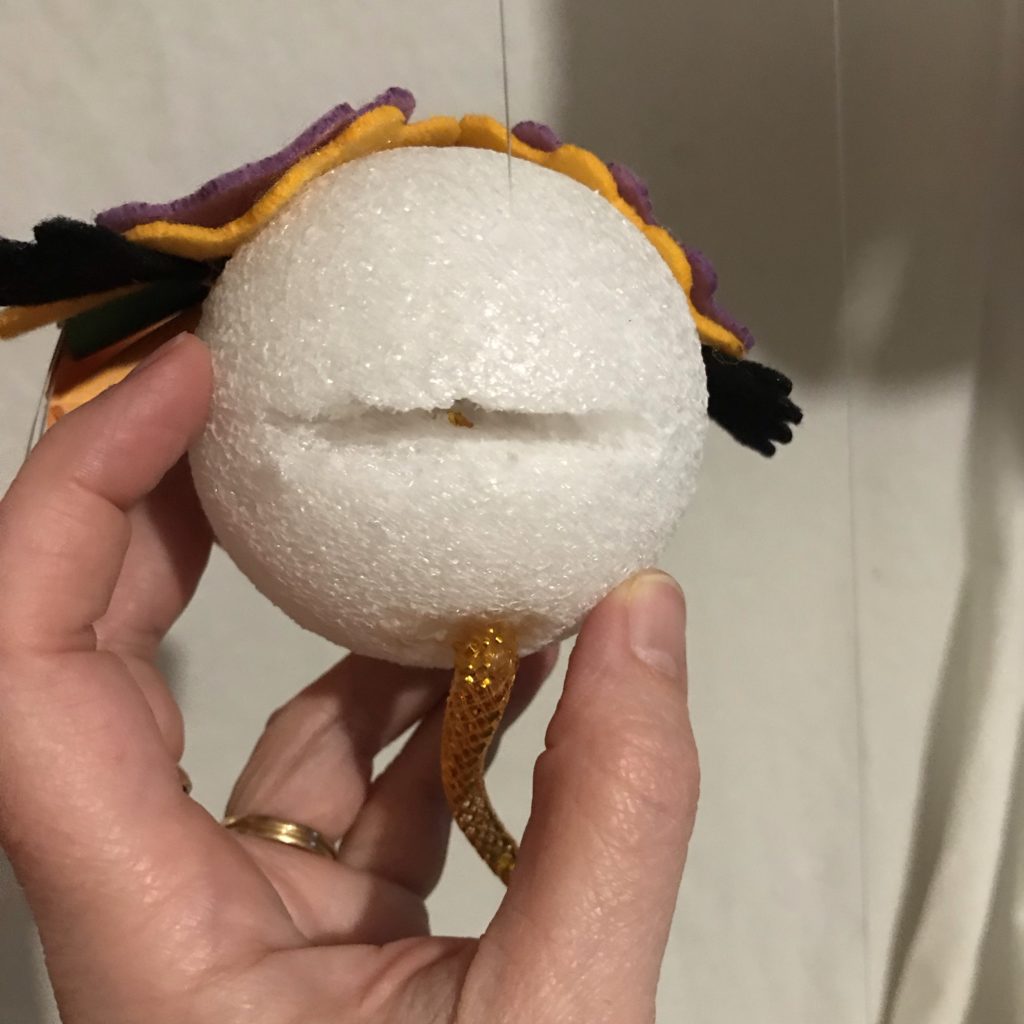
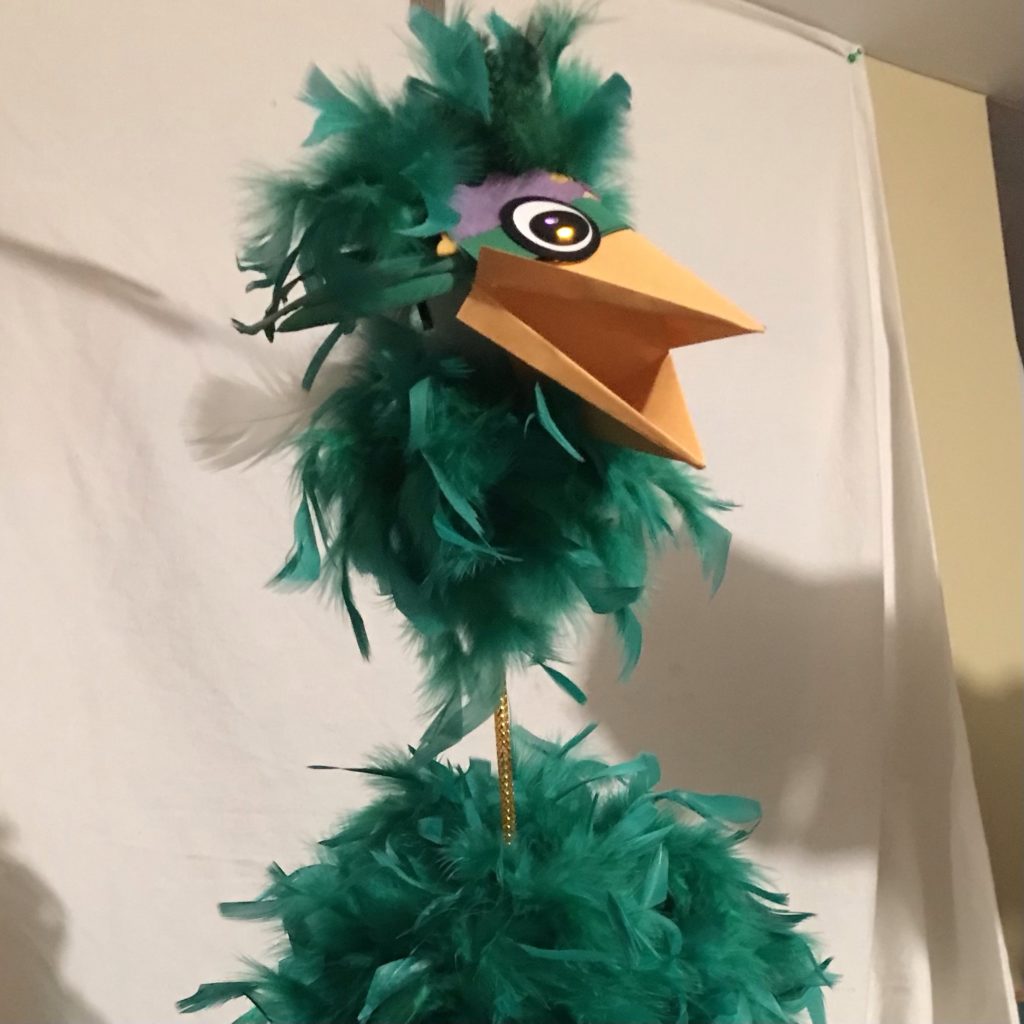
Then, to create a head, I grabbed the smaller polystyrene ball and poked a single hole in one end of it (not all the way through). To attach the head to the neck, I used a screwdriver to push the free end of the mesh tubing into the hole and secured it with hot glue.
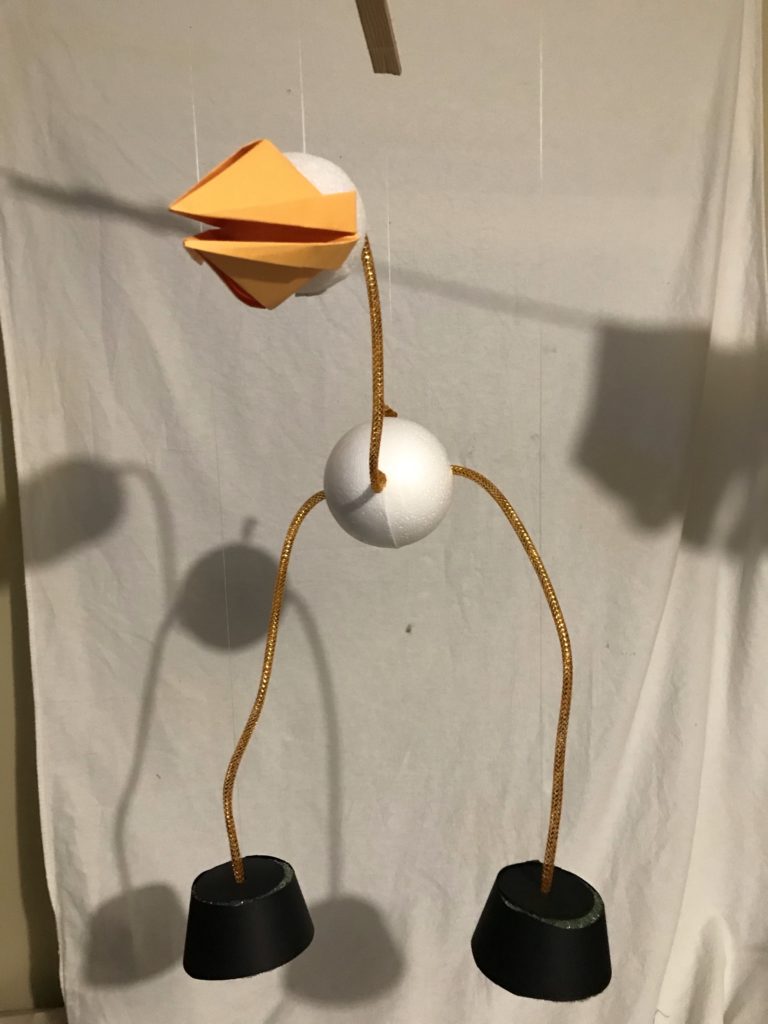
At this point, your puppet’s head, body, and feet should be attached.

Step 5: Tie Puppet to Cross Support
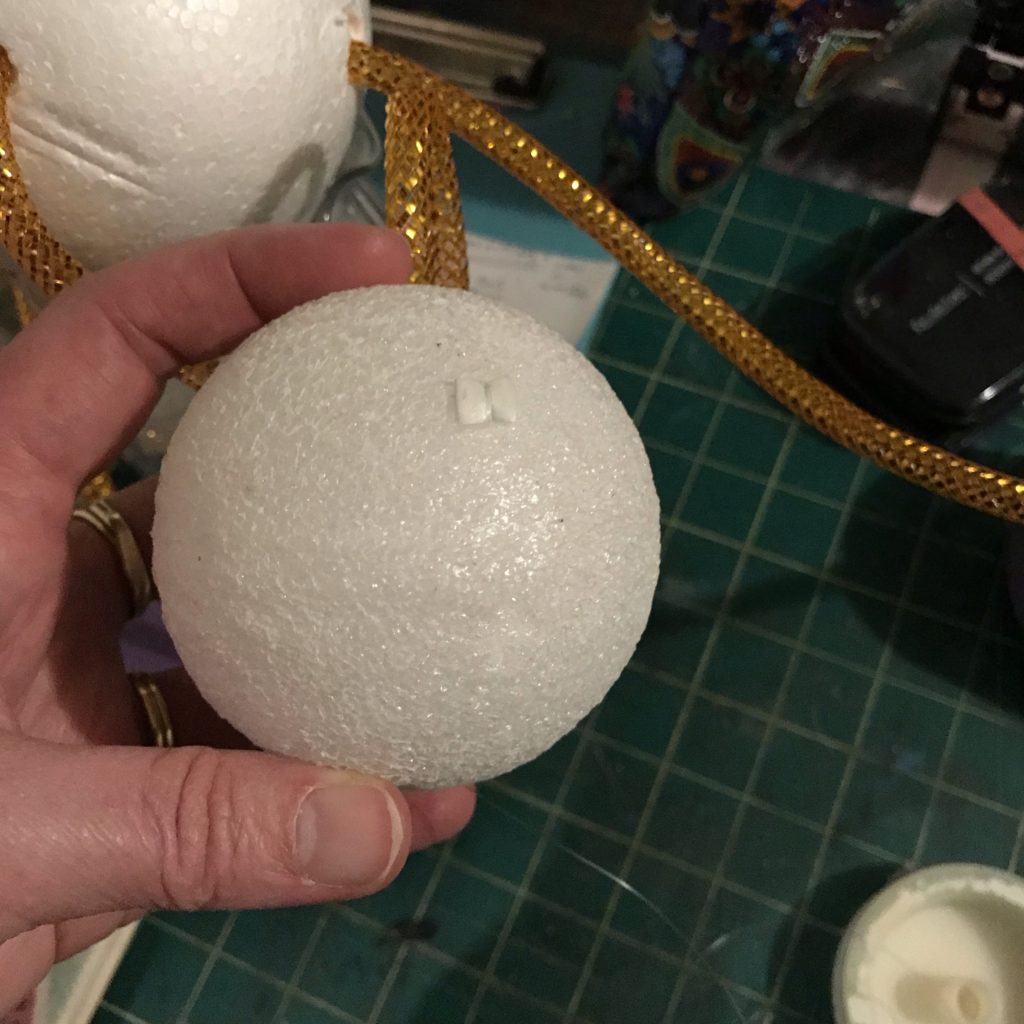
Before connecting the puppet’s head to the cross support, I inserted a screwdriver all the way through the center of the head, perpendicular to the neck. I then threaded the fishing line through the hole and used a small piece of double-sided craft foam at the bottom of the head to anchor the fishing line in place, reinforcing it with a spot of hot glue.
I tied another piece of fishing line to the knot in the puppet’s tail, and tied its loose end to the cross support opposite the head.
Lastly, I attached two more pieces of fishing line from the tops of each foot to the remaining arms of the cross support and attached the paper beak with hot glue.
Note: It’s okay to hold off on adding the beak until the eyes have been constructed.
Video 2: Building the Circuit & Battery Holder
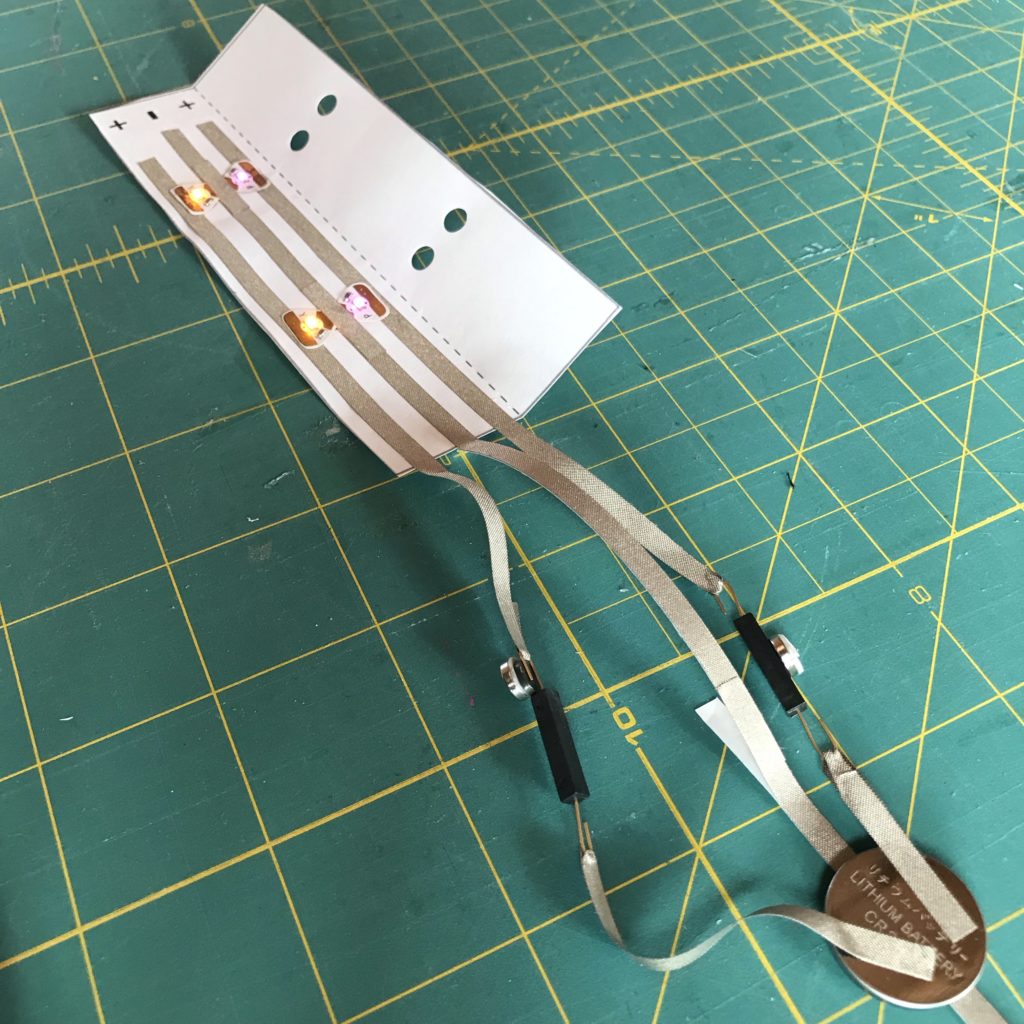
Step 6: Make the Circuit & Eyes
Using the Circuit Diagram as a guide, your circuit will be completed in two parts, starting with the eyes.
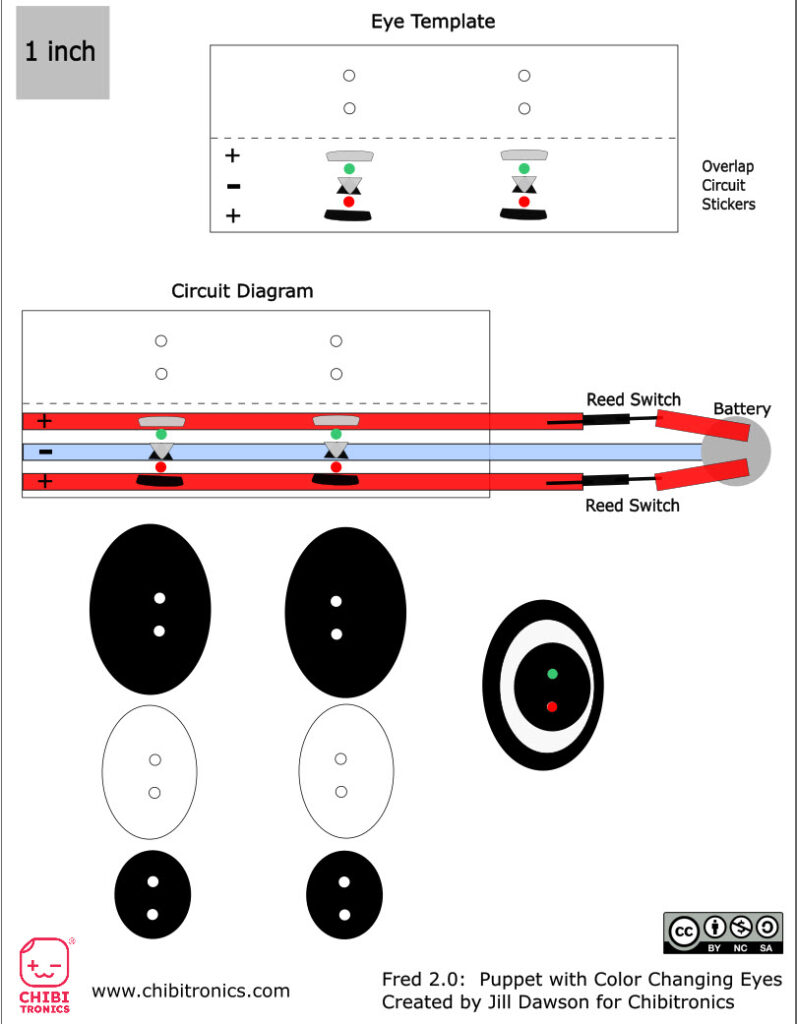
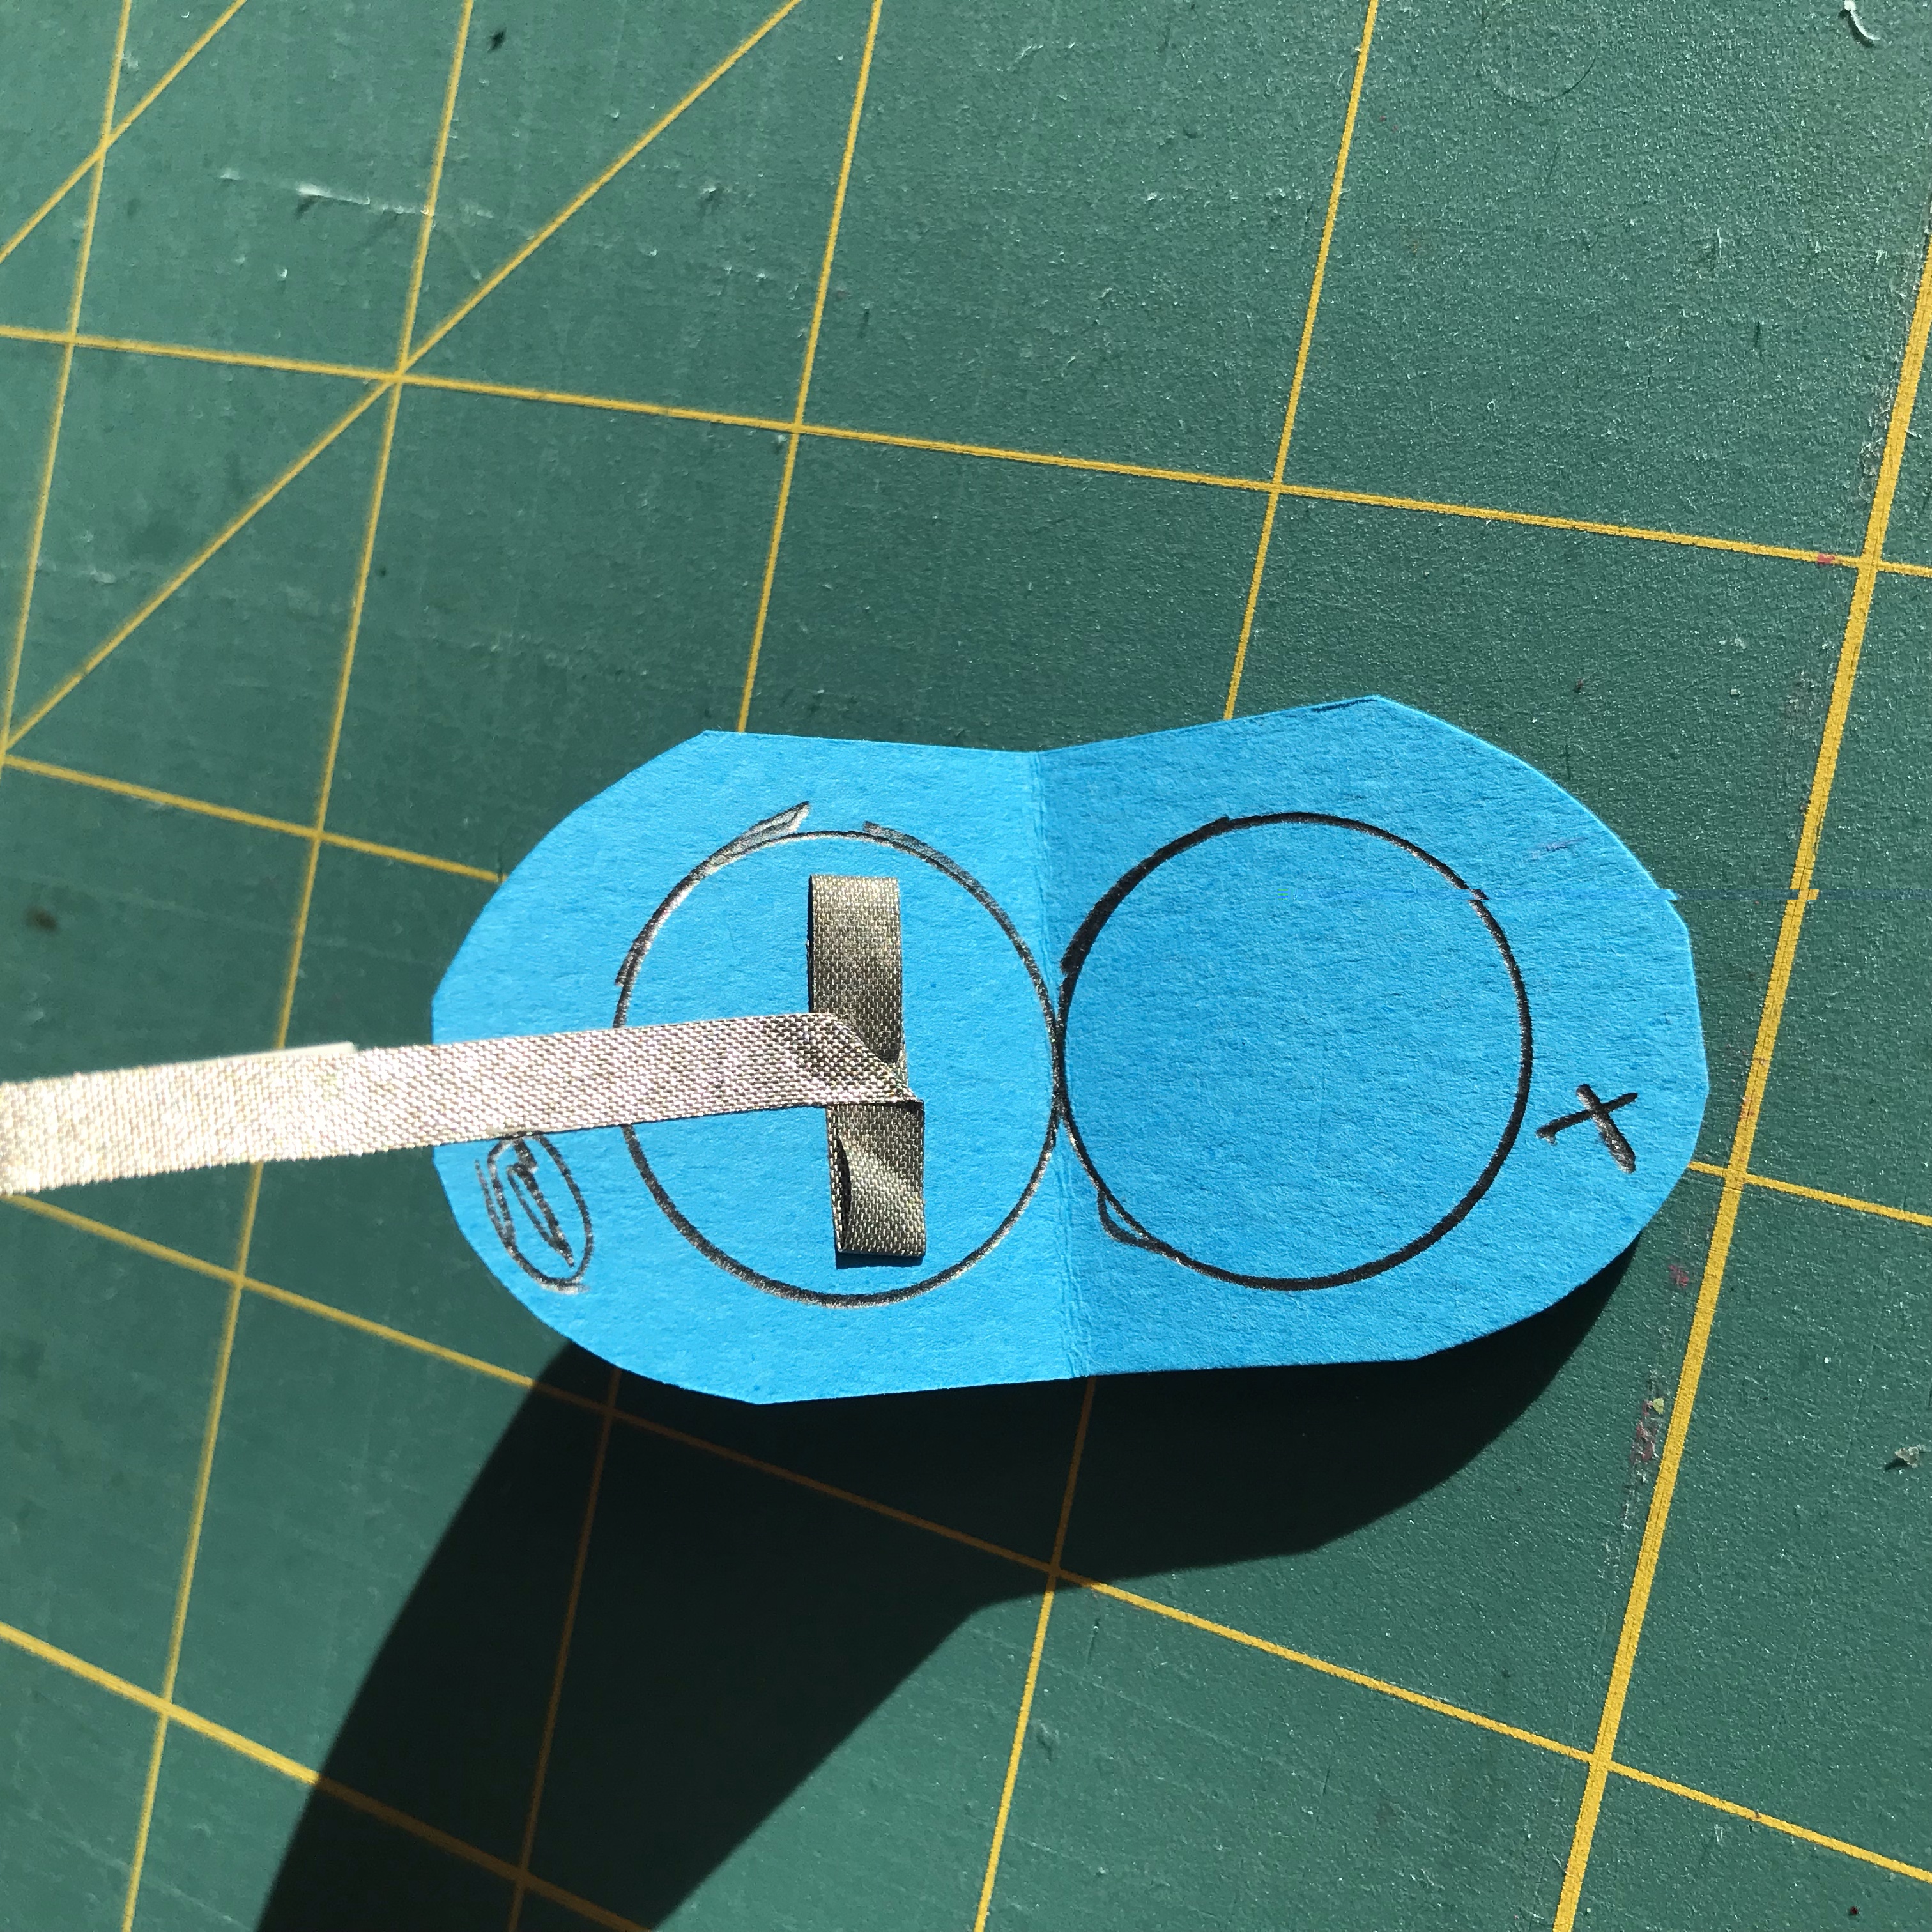
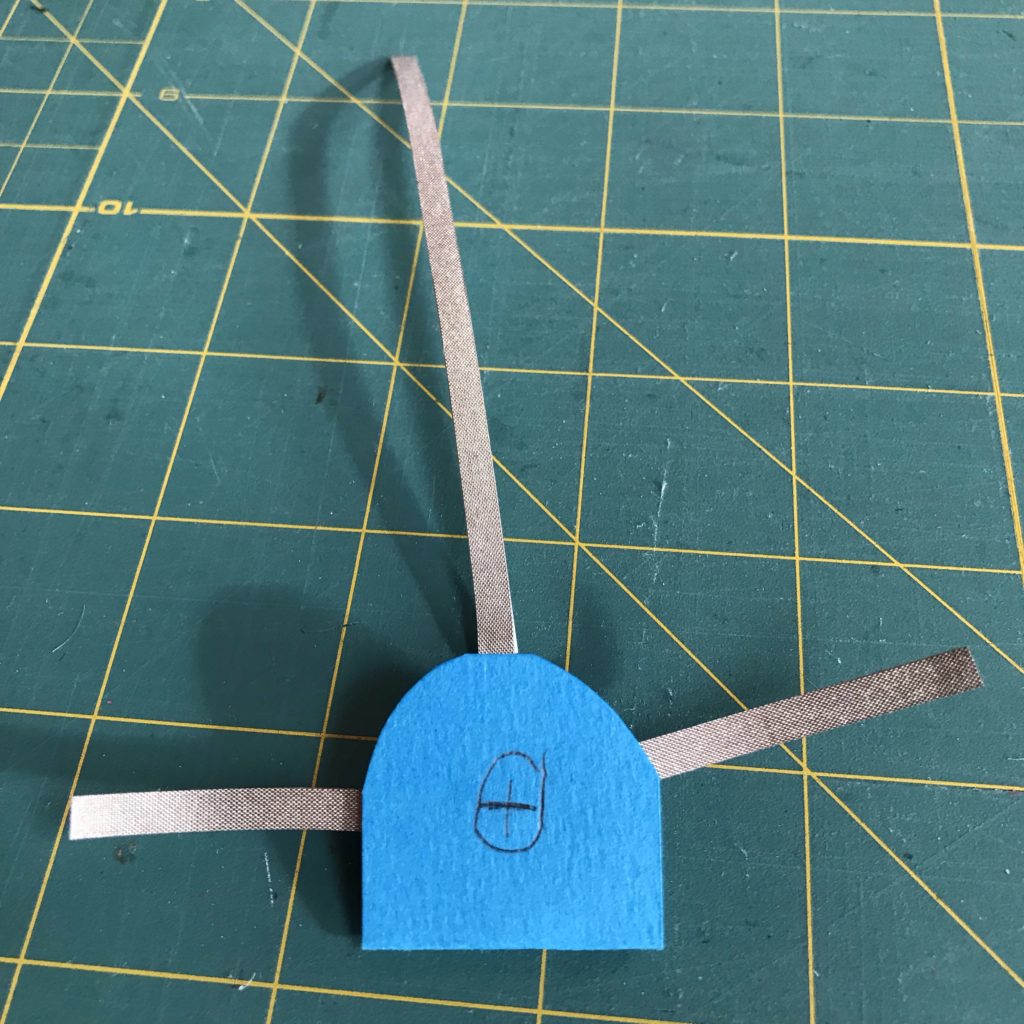
The first part of the circuit will be made upon a piece of folded paper that you’ll be attaching to the beak. I suggest using a color that will blend in well with your bird’s feathers.
The paper in my design is 5” wide and 2” high, which is long enough to extend across the entire width of the beak and deep enough to fold in half lengthwise to accommodate a circuit with two positive traces and one negative trace. You can measure this out for yourself, or use a printed copy of the Circuit Diagram/ Eye Template to cut a premeasured piece.
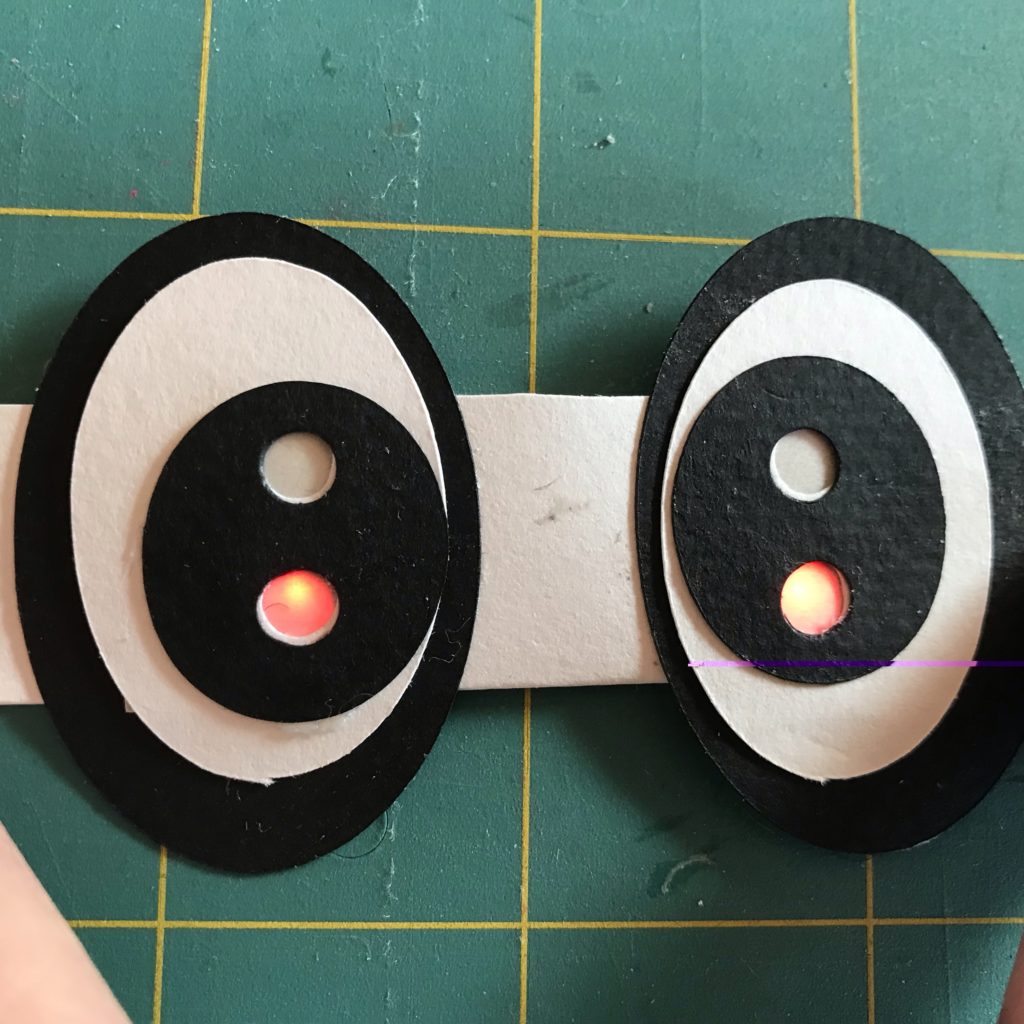
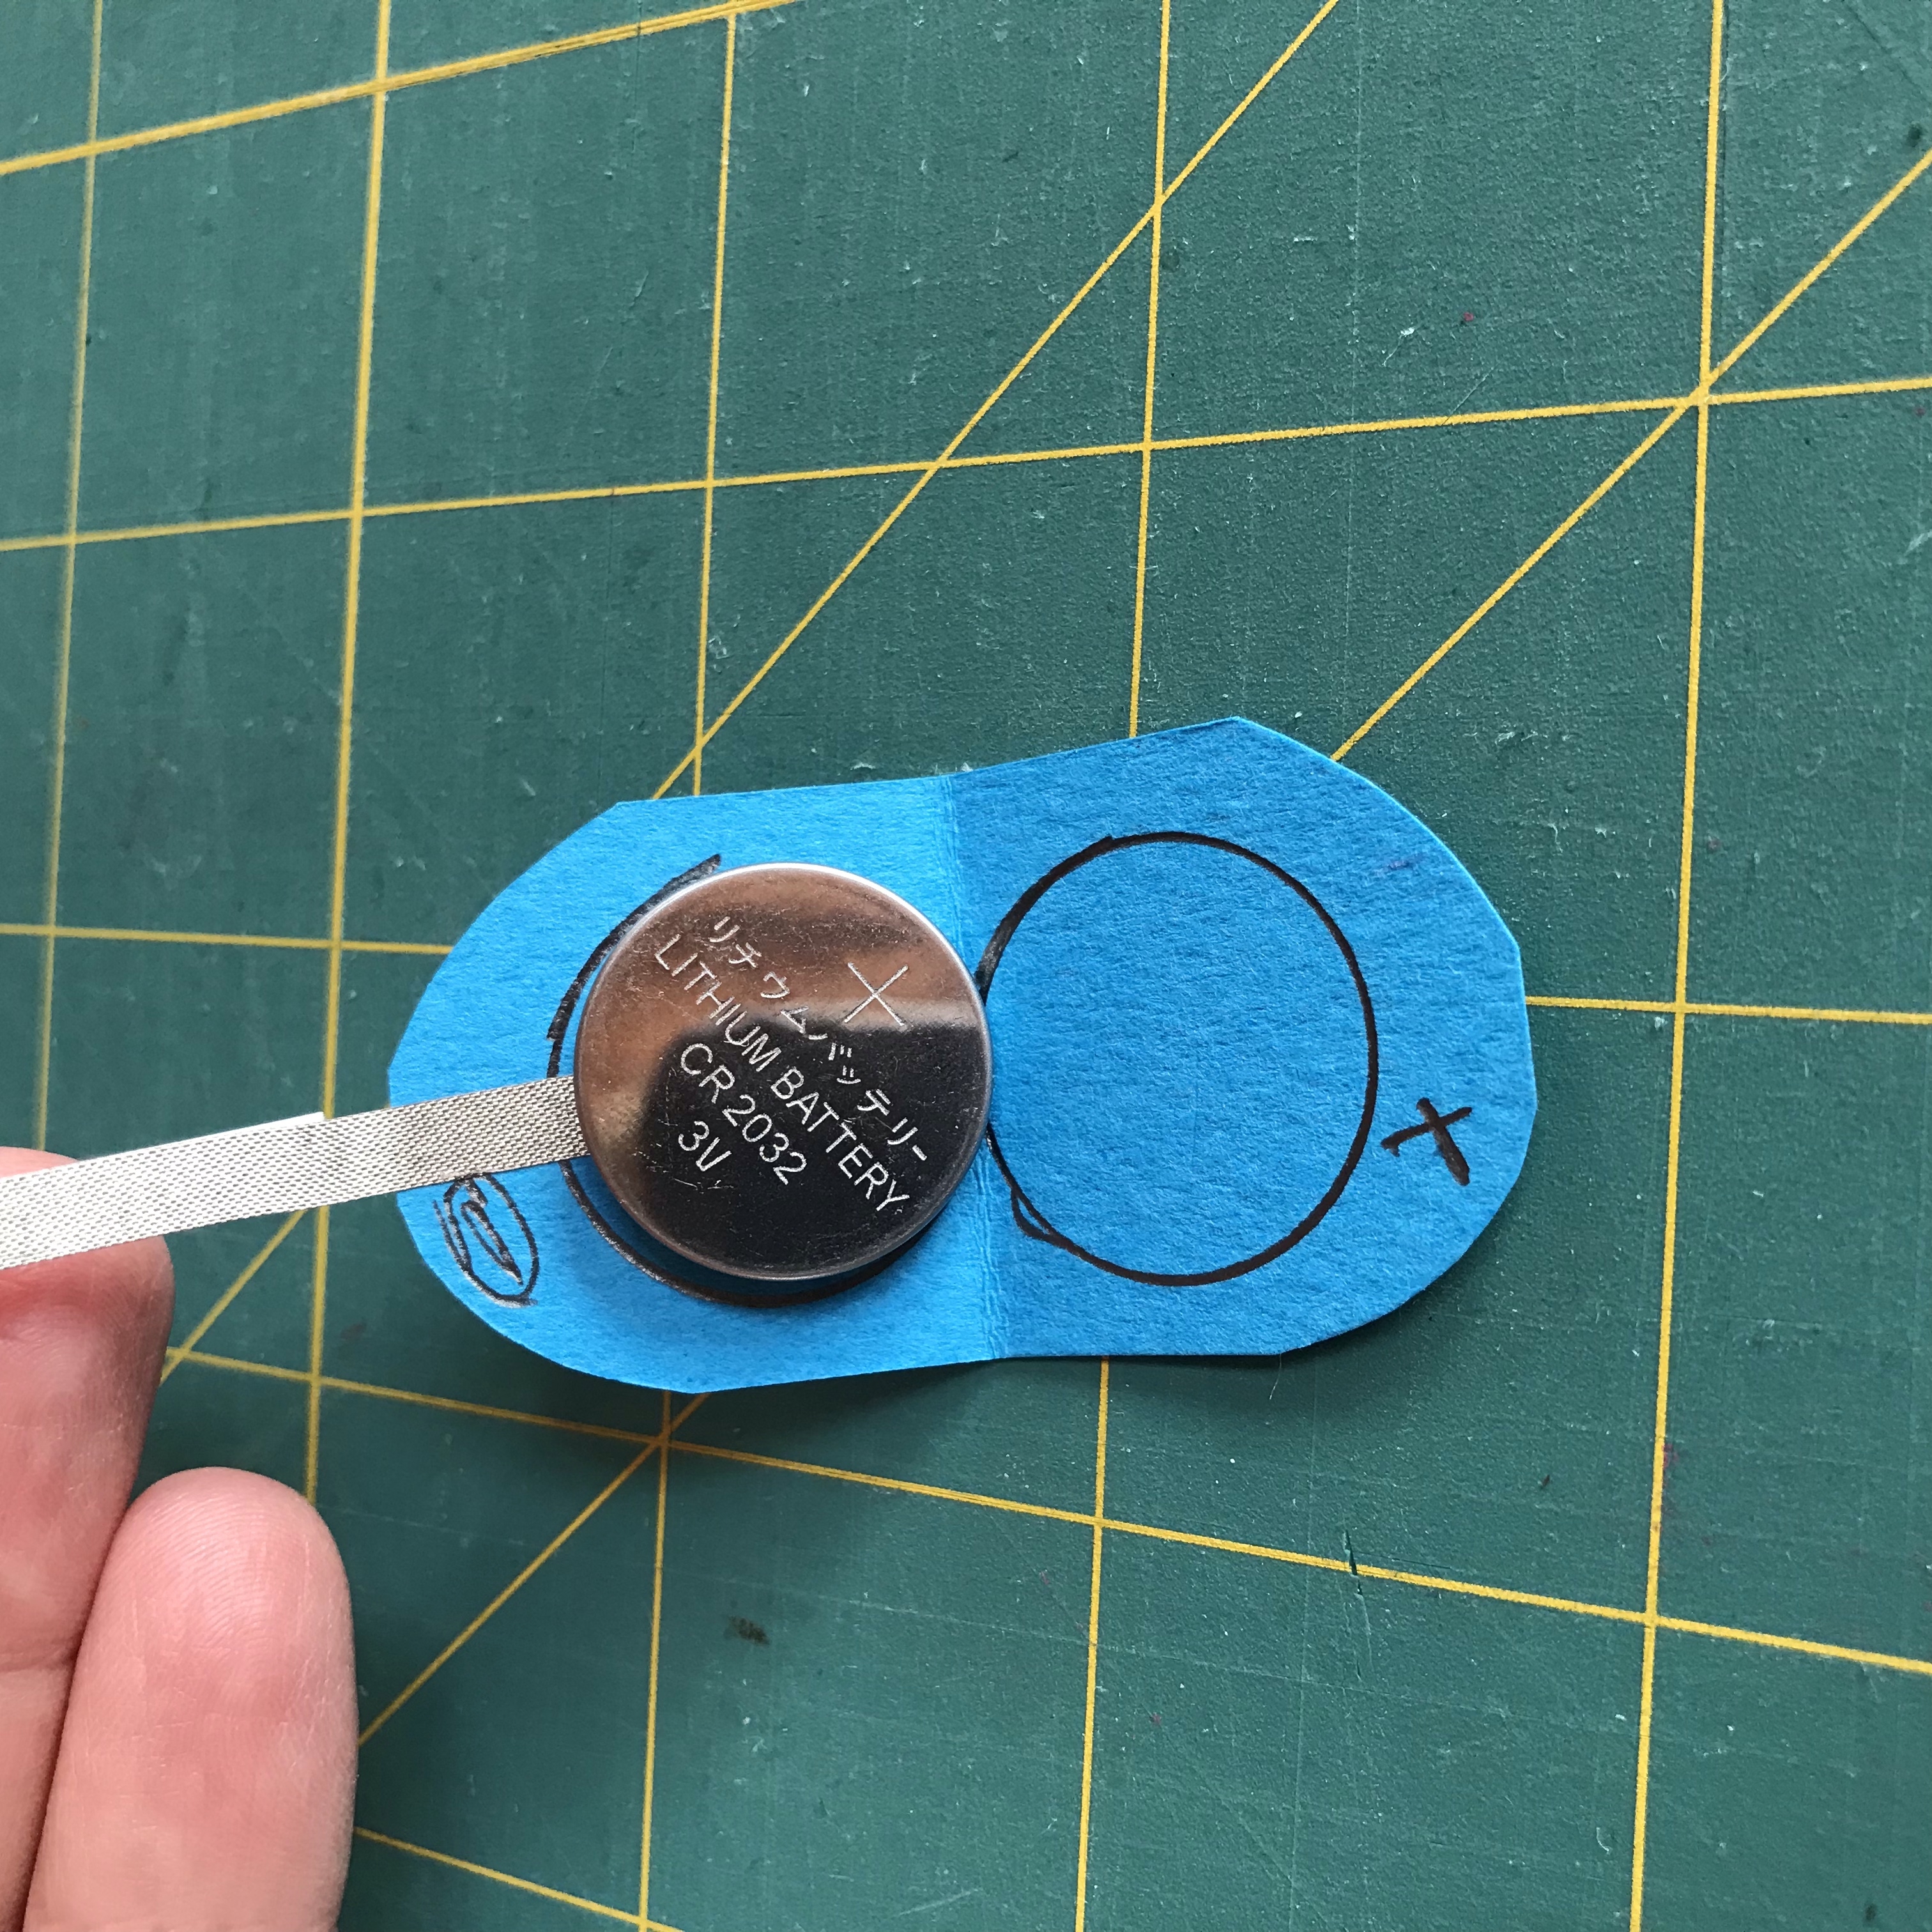
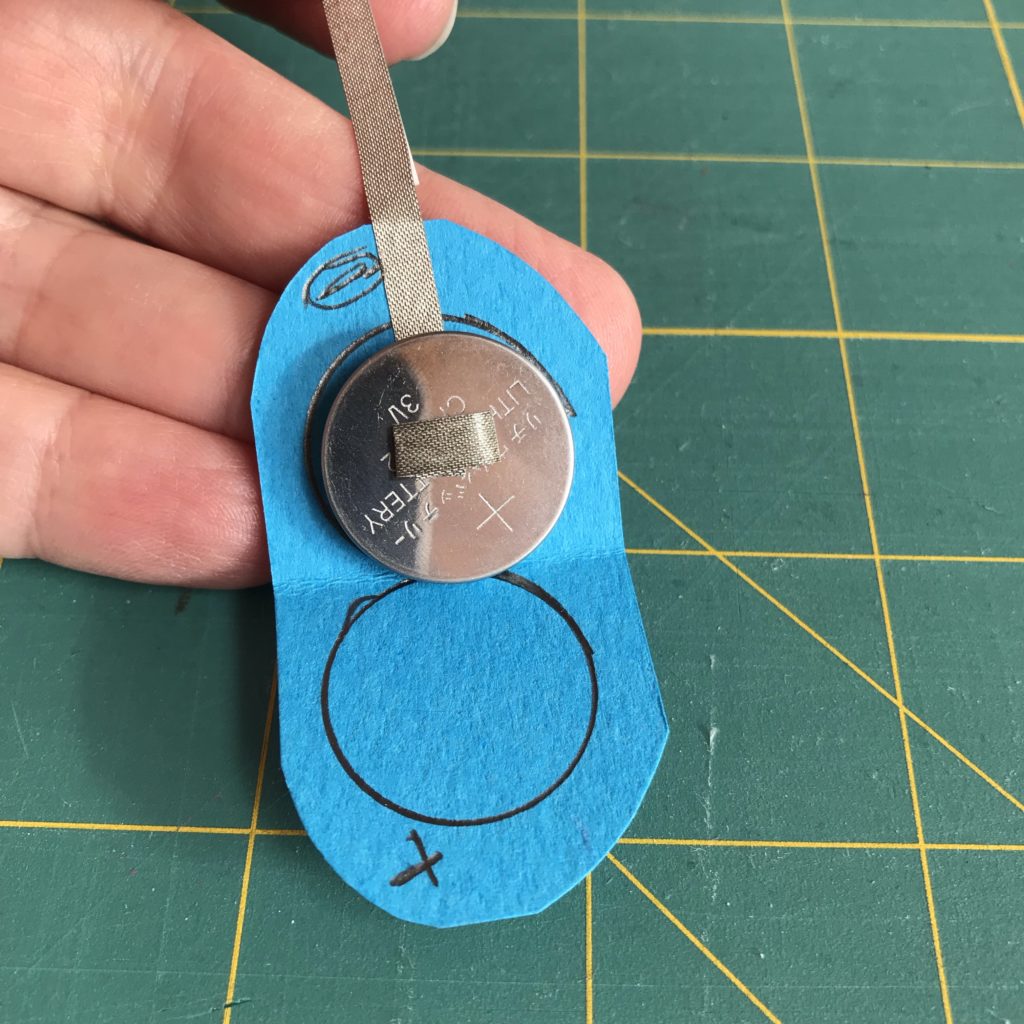
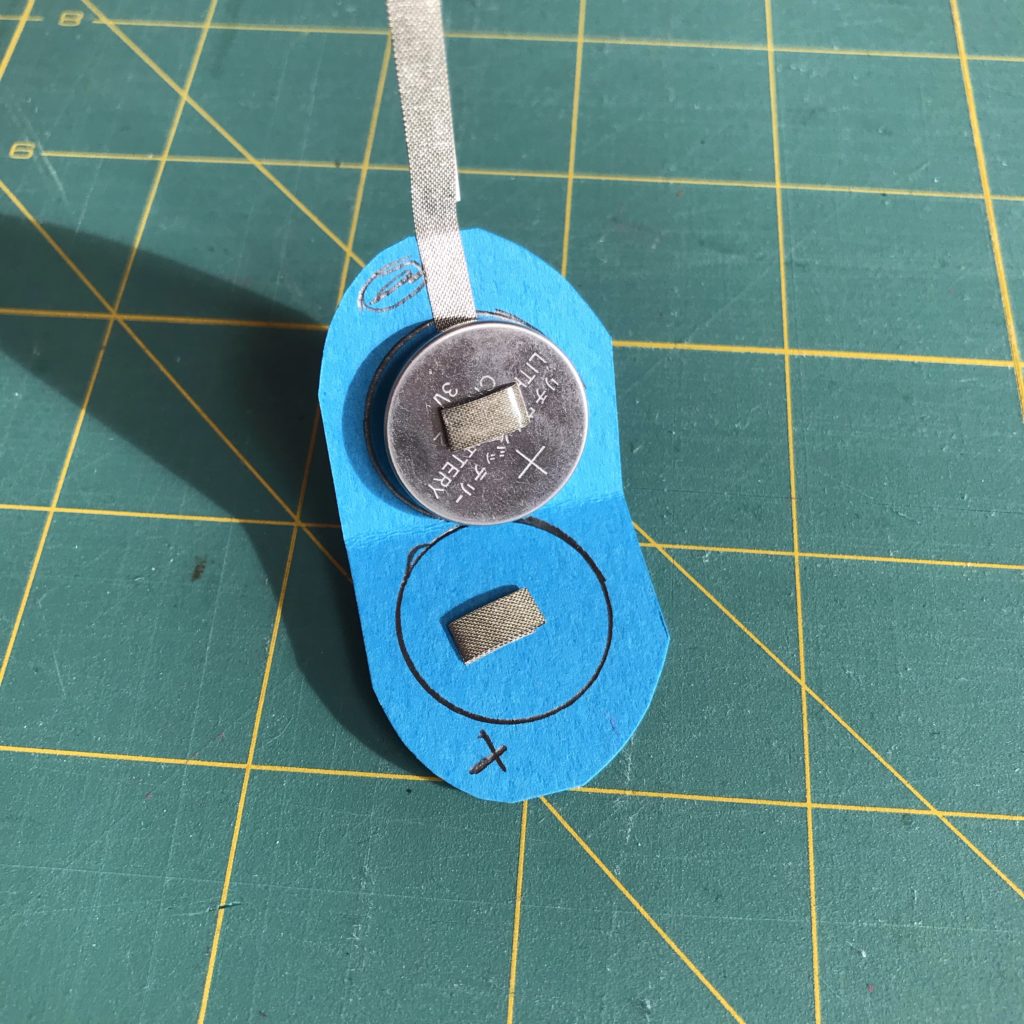
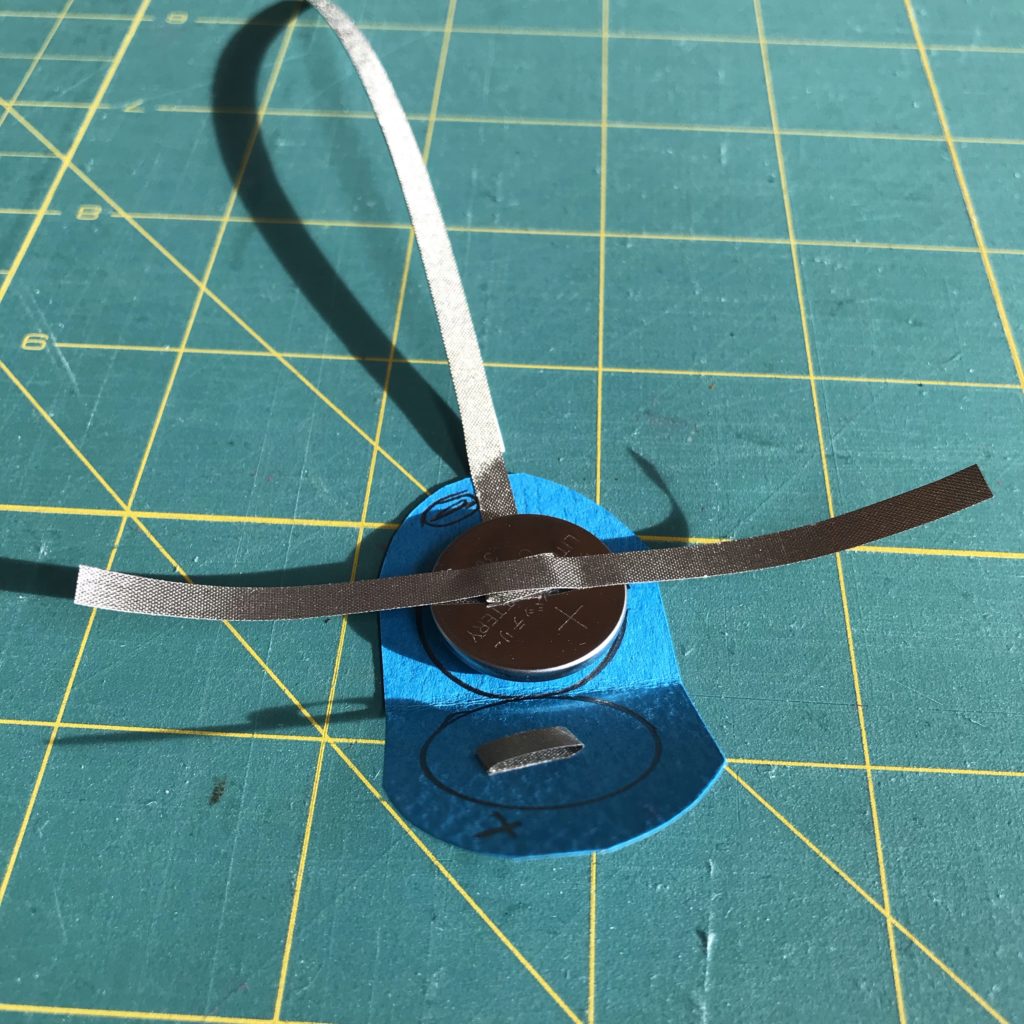
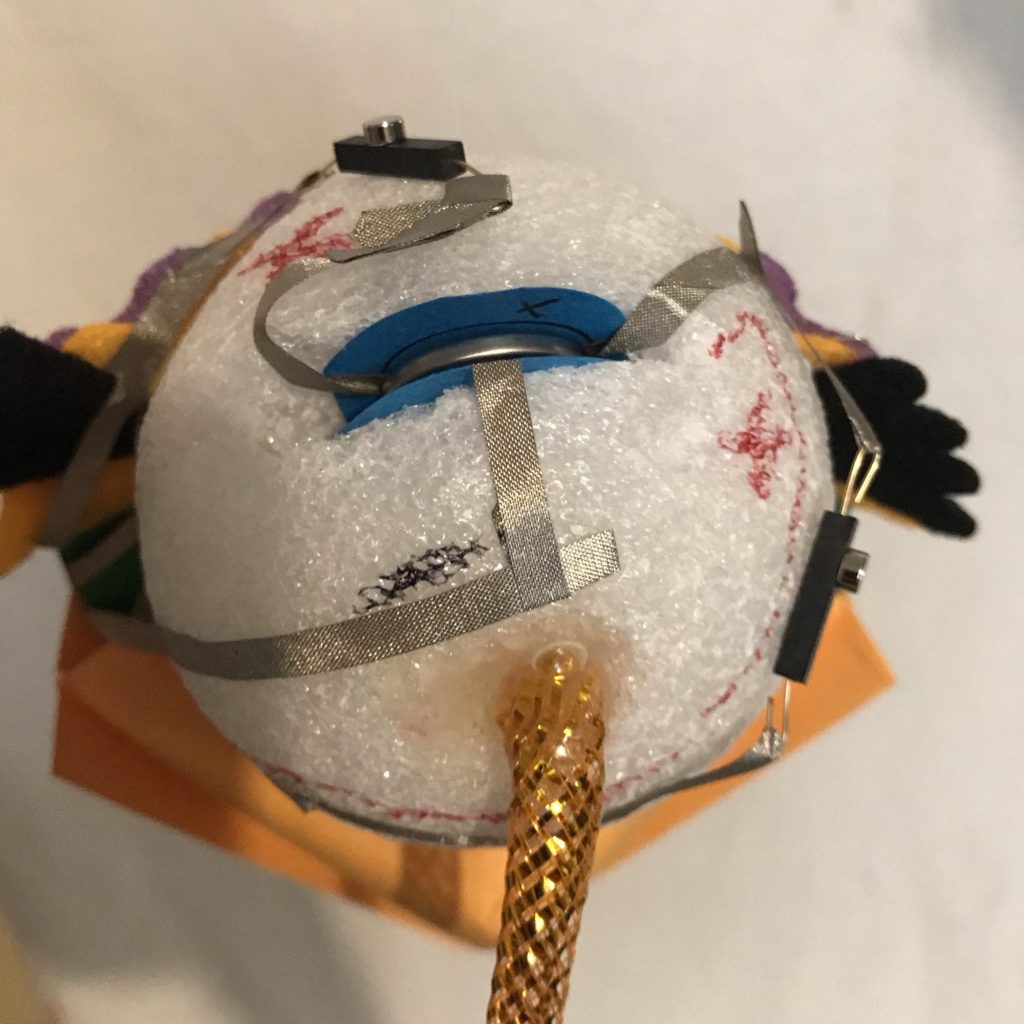
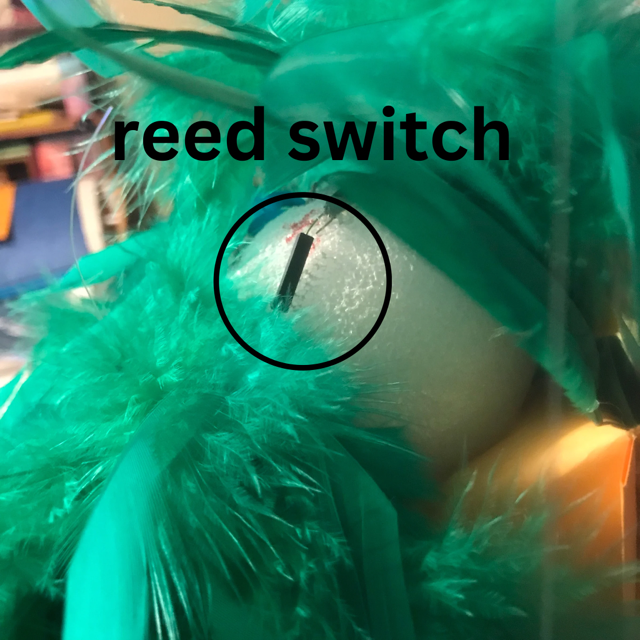
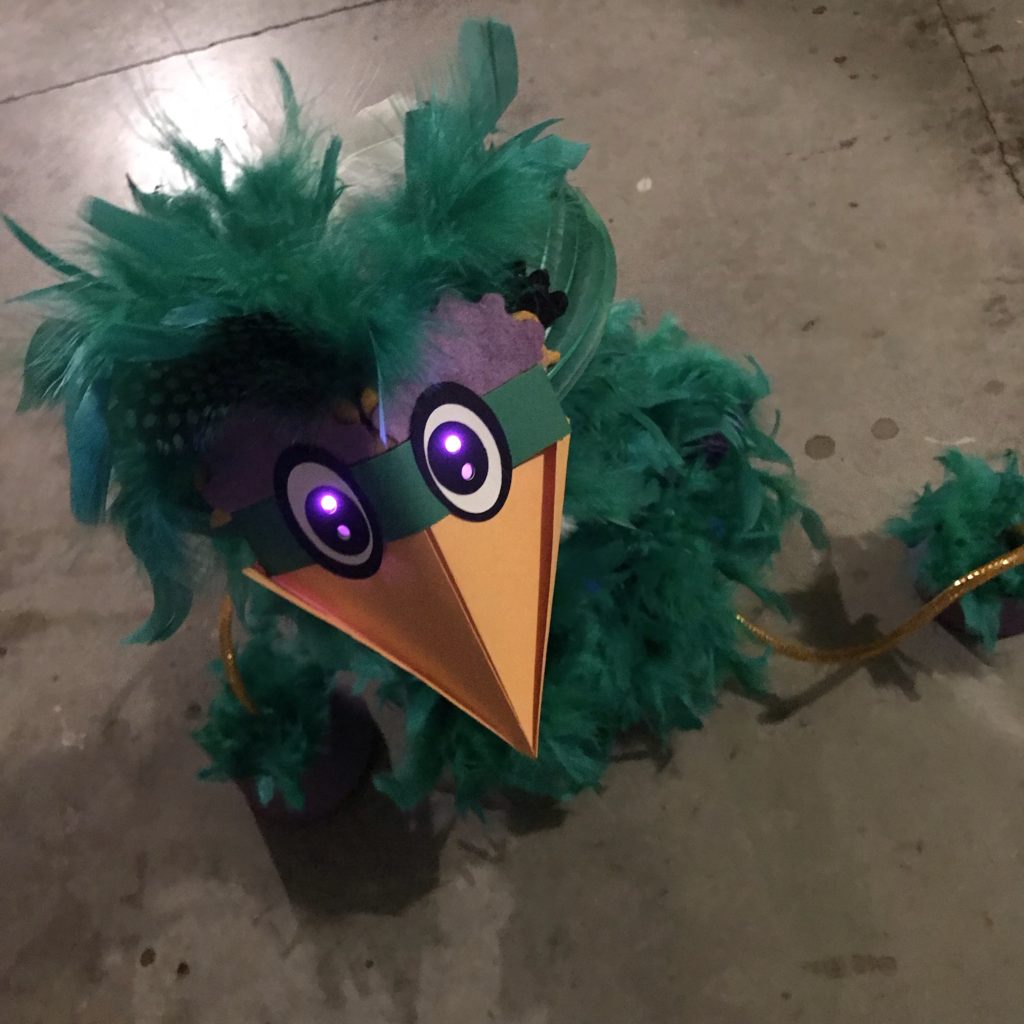
To give my puppet color changing eyes I added reed switches to each of the positive leads, between the Circuit Sticker LEDs and the battery. It’s helpful to curl the legs of your reed switches to make them easier to connect to the conductive fabric tape (see video below).
Using the circuit diagram as a guide, build your circuit so that both sets of Circuit Sticker LEDs share the same negative trace, while having separate positive traces that will connect to a reed switch and then the battery. Once connected to the battery, the reed switches may be triggered by placing small magnets on or near the switches.
Note: Keep in mind that you may need to extend the leads of your circuit in order to place the reed switches where you want them on your puppet’s head, allowing you to connect the eyes to the battery.
Test your circuit to ensure that you like the color combination that you’ve chosen and that all your connections are secure. Reinforce the area where the negative parts of the LEDs overlap using conductive fabric tape.
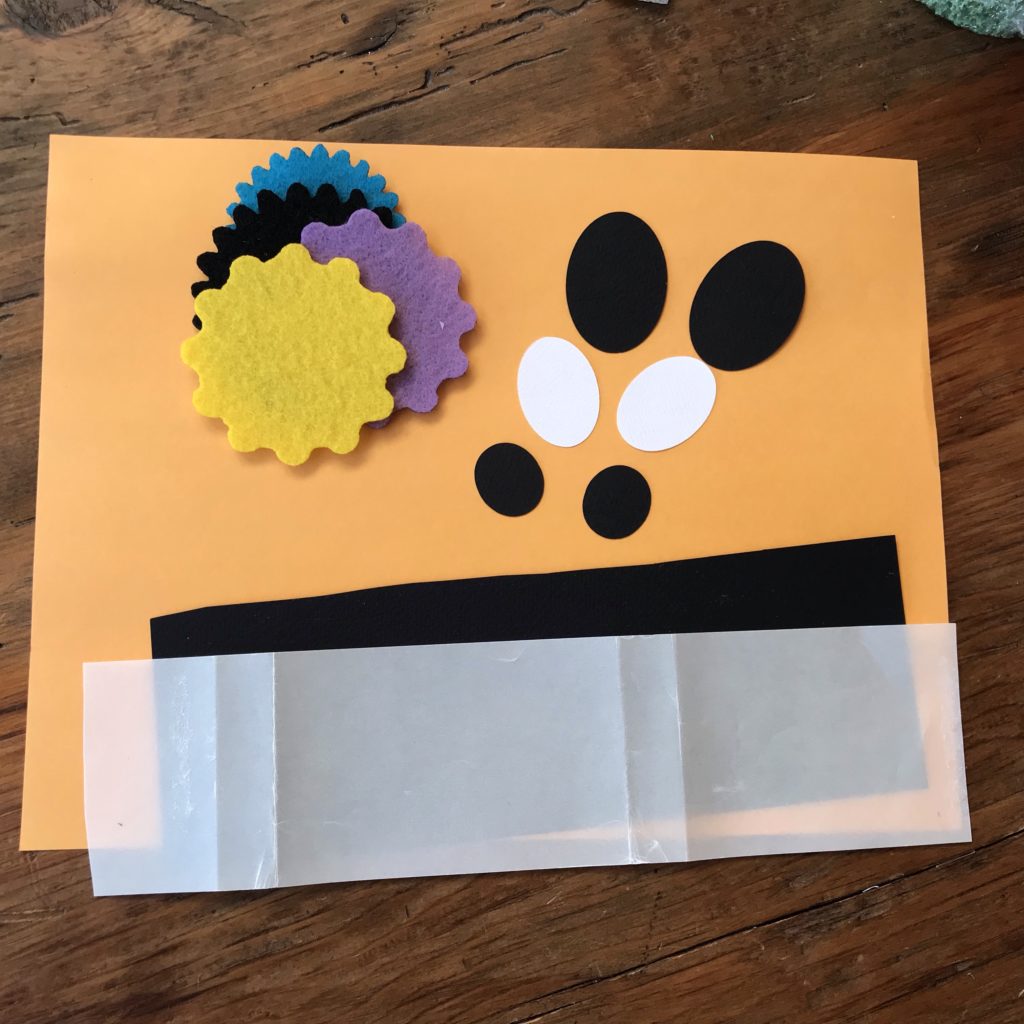
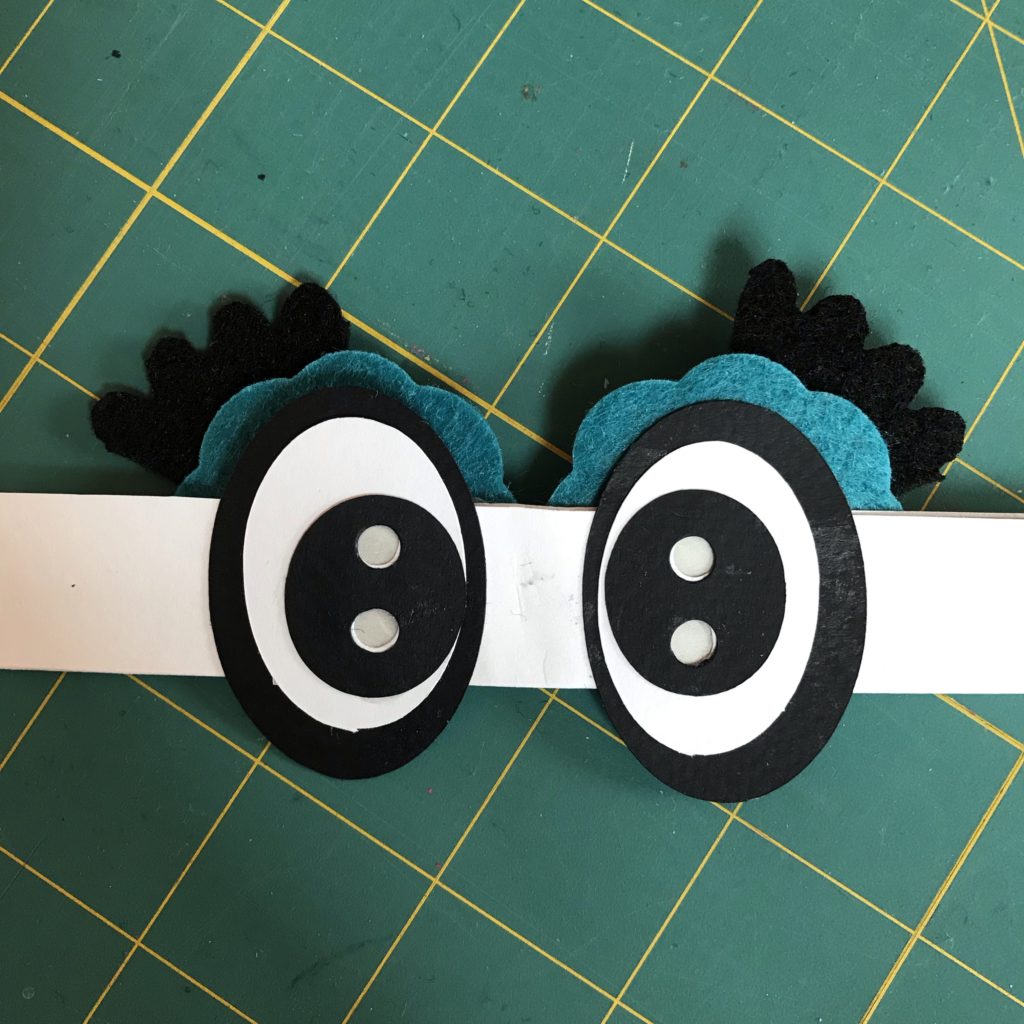
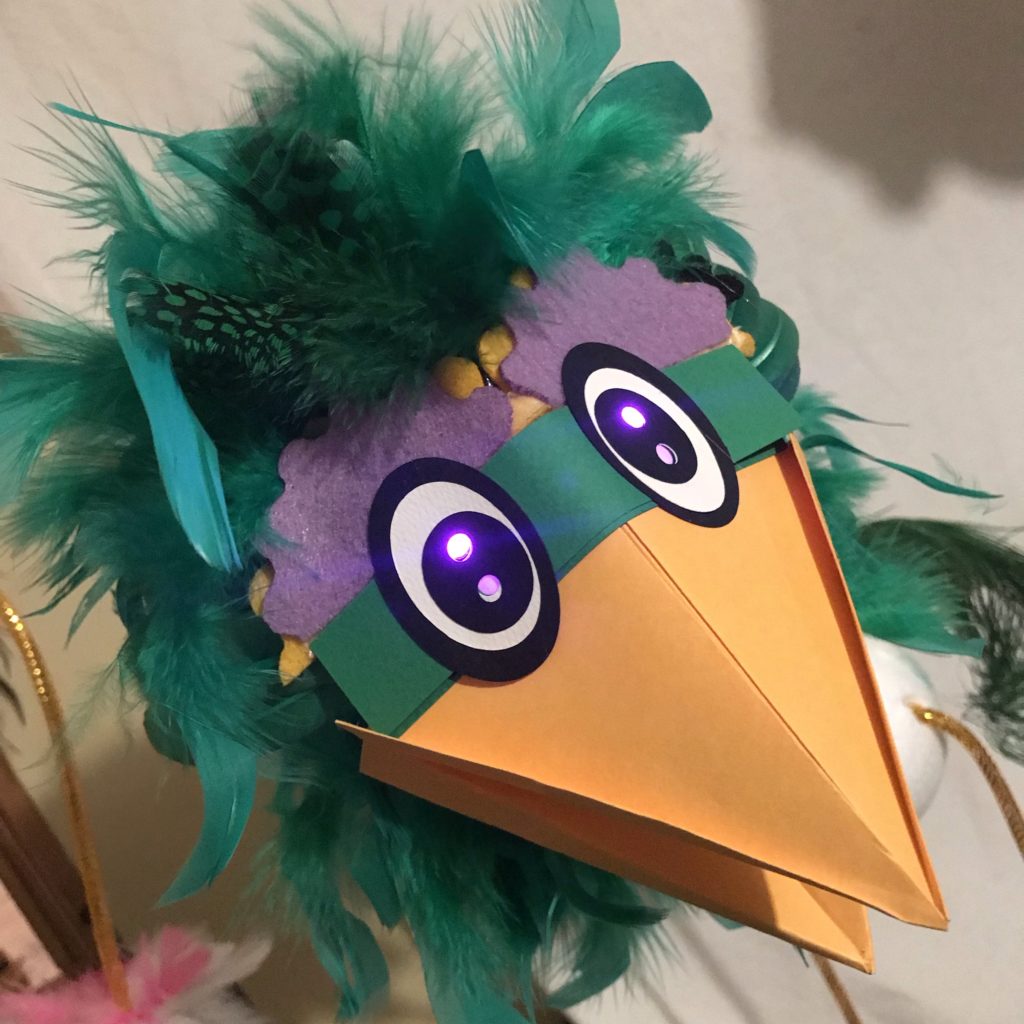
I made the eyes with four layers of paper, including a scrap of translucent vellum to help diffuse the light from the LEDs. After applying the Circuit Sticker LEDs, I used a Japanese screw punch to make holes in the eye pieces.
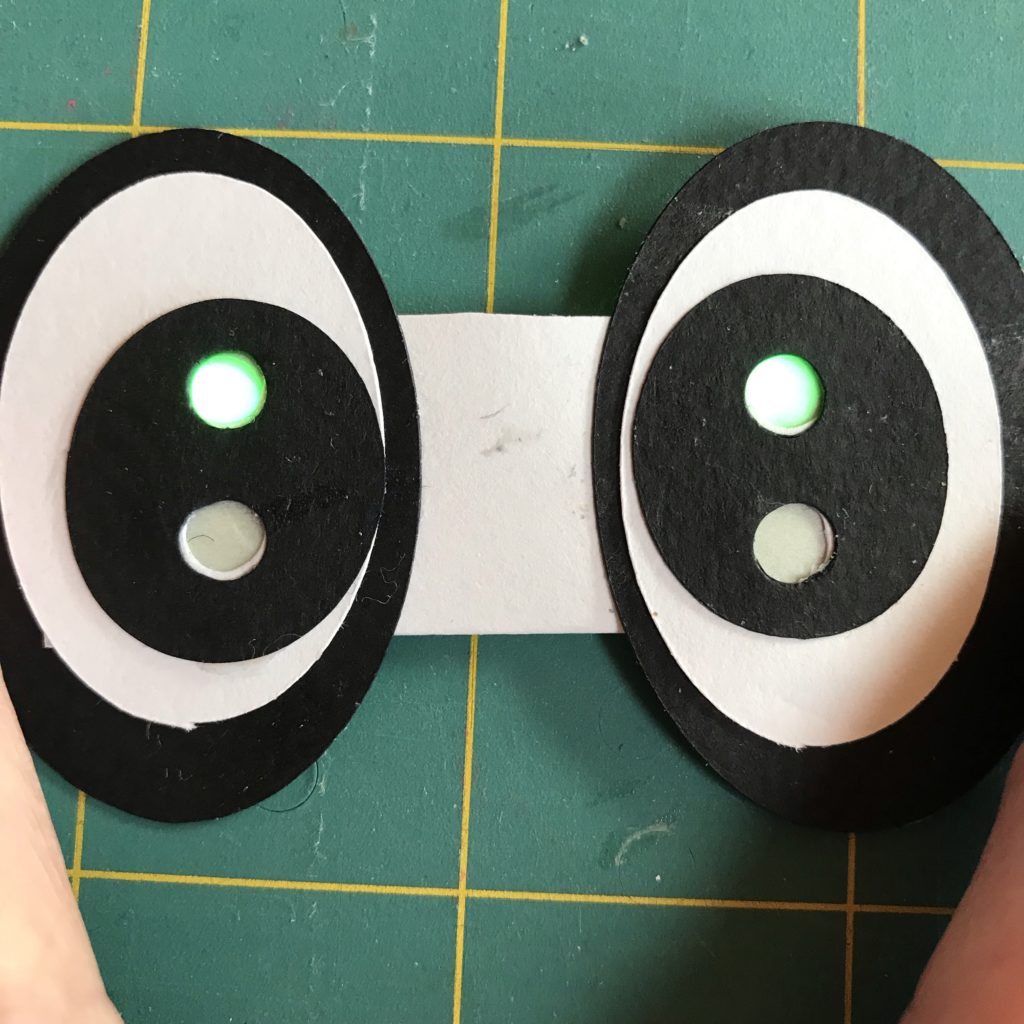
As a decorative element, I cut felt scraps to create eyeshadow and lashes.
To adhere the eyes to the puppet, I folded the paper circuit eye piece in half lengthwise and again in half widthwise over the center of the puppet’s beak. I tacked the piece to the sides of the beak with double sided foam tape, leaving the reed switches and the negative trace dangling on one side.
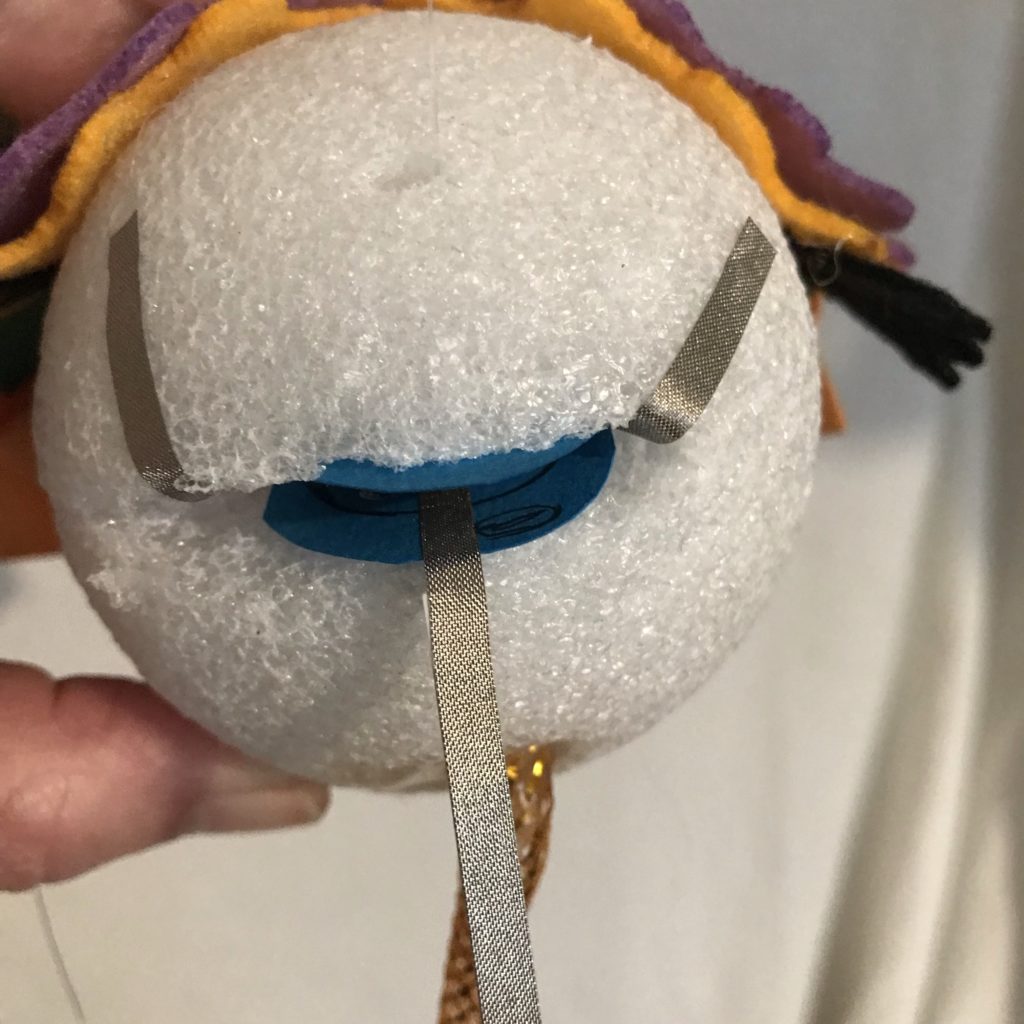
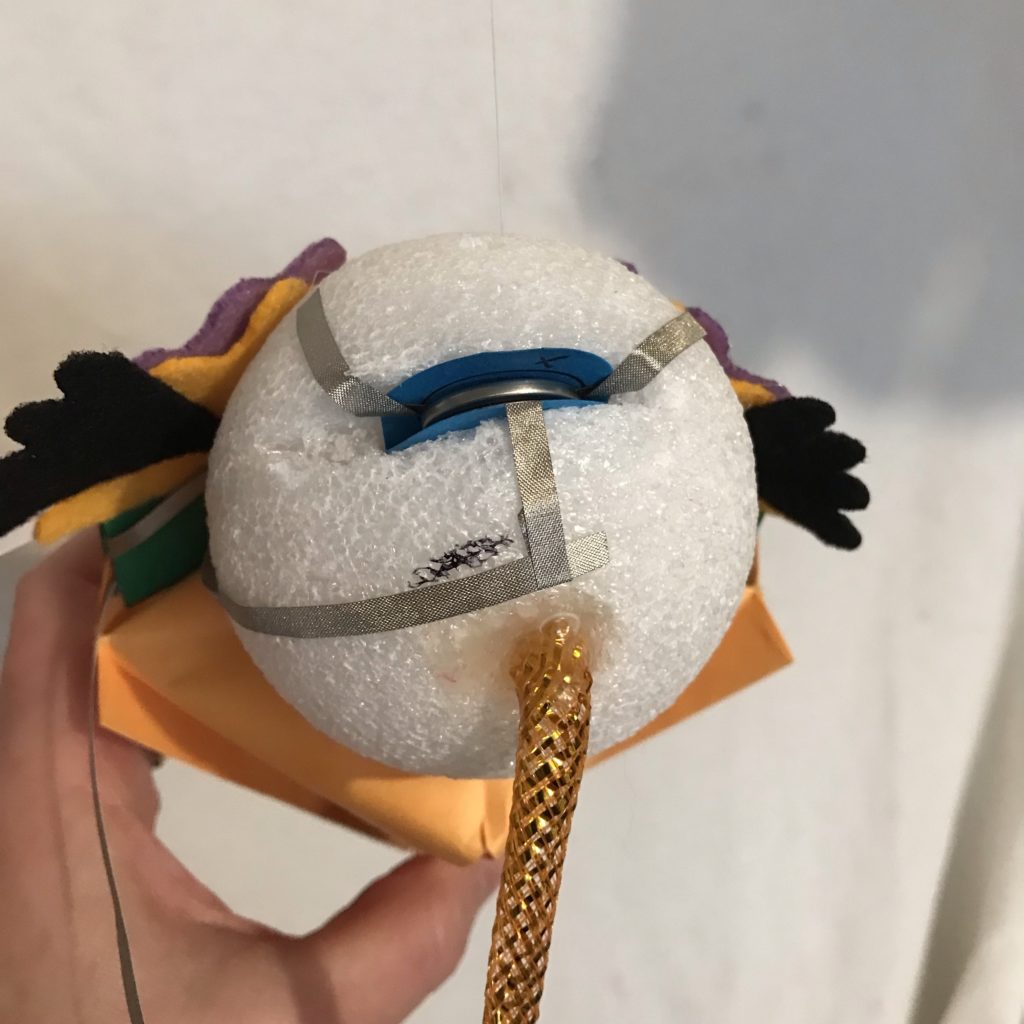
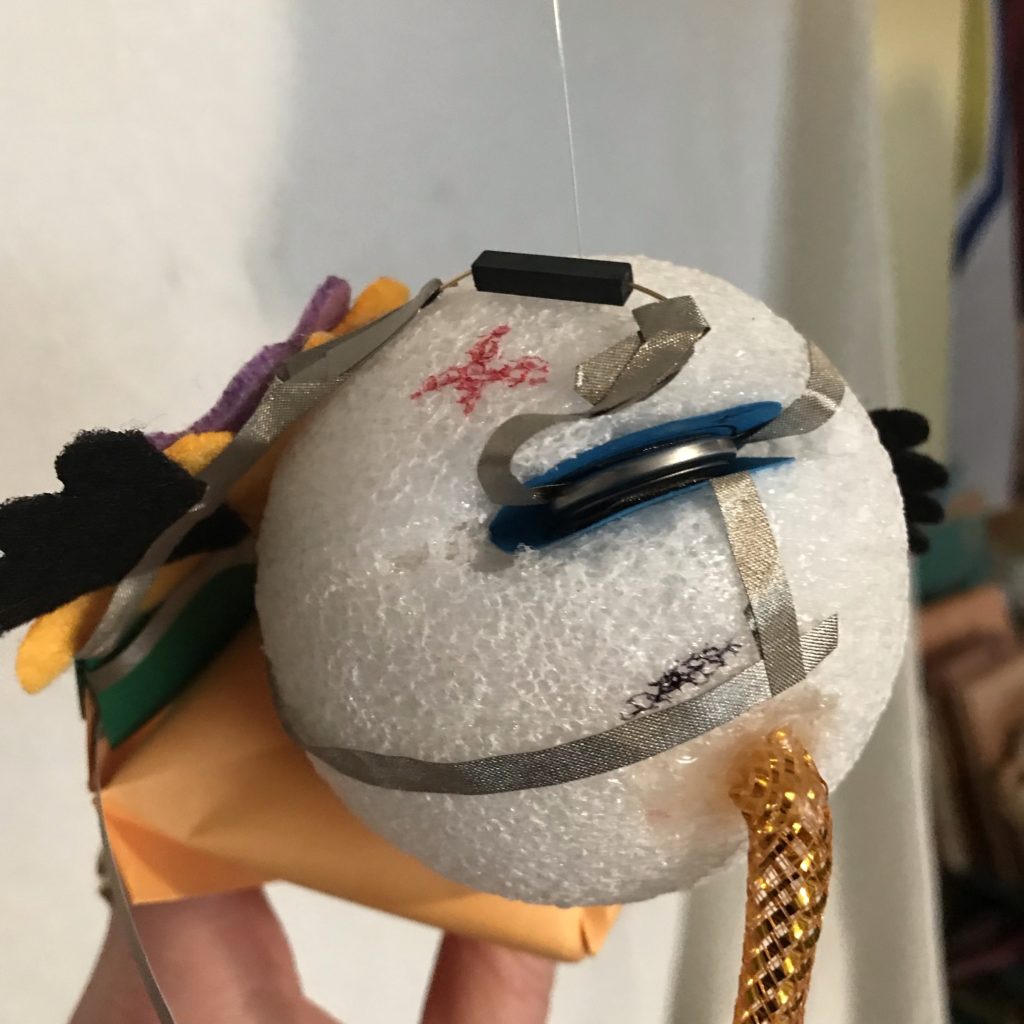
Step 7: Add the Battery & Complete the Circuit
The trickiest part of this puppet is completing the circuit in three dimensions around the puppet’s head. Connecting the first part of the circuit to the battery can be a little fiddly and is much easier to achieve with an extra set of hands.
To make the battery holder, I cut a scrap of paper and folded it in half. I traced the battery on both sides and added conductive fabric tape to hold it in place.
To conceal the battery holder, I cut out a recess in the back of the puppet’s head to wedge it in sideways. Keep in mind that you may need to add more conductive tape to your circuit, to have enough length to position the reed switches in optimal locations.
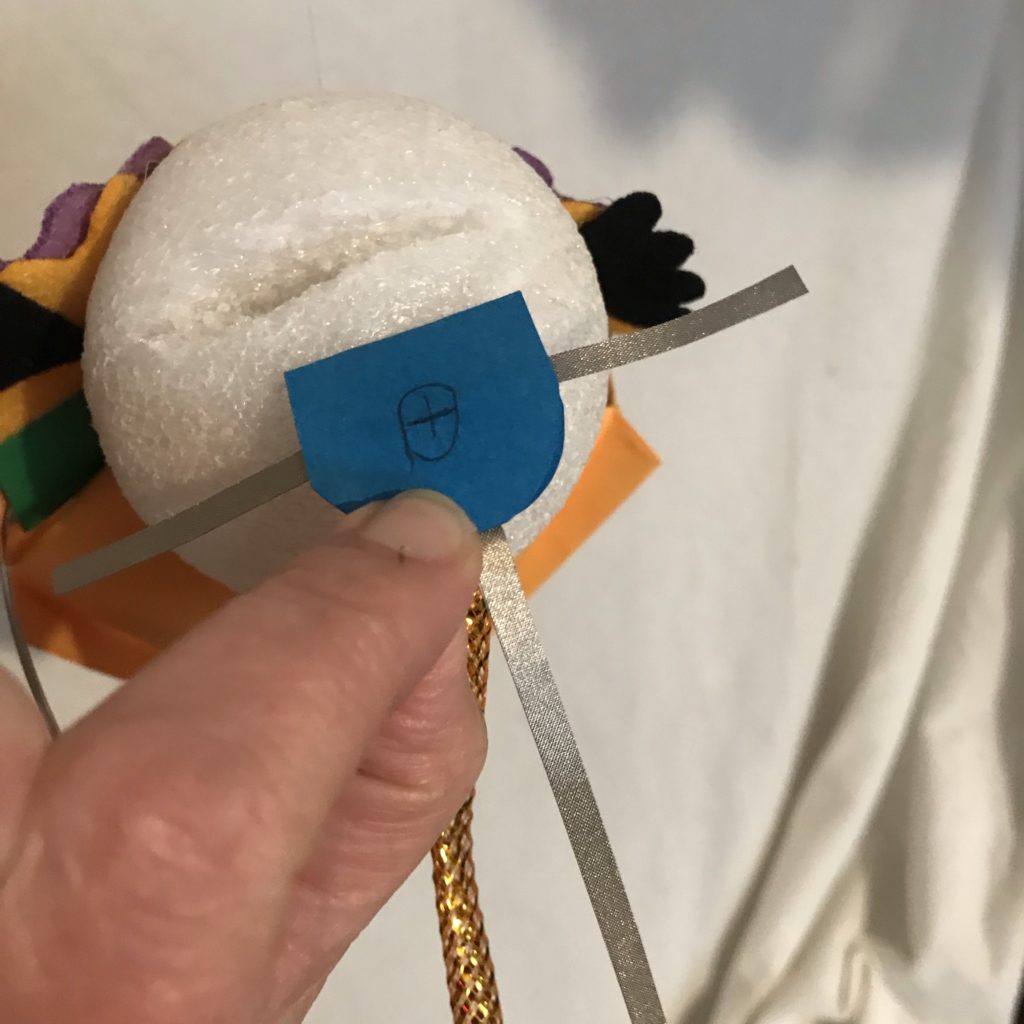
Please watch the second video, to see 3D views of the circuit joined with the battery holder.

After testing your circuit with magnets, I suggest that you use hot glue to adhere the conductive fabric tape in place. Then, you can begin adding feathers to the back side of the eye piece, hiding the circuit while giving yourself easy access to it.
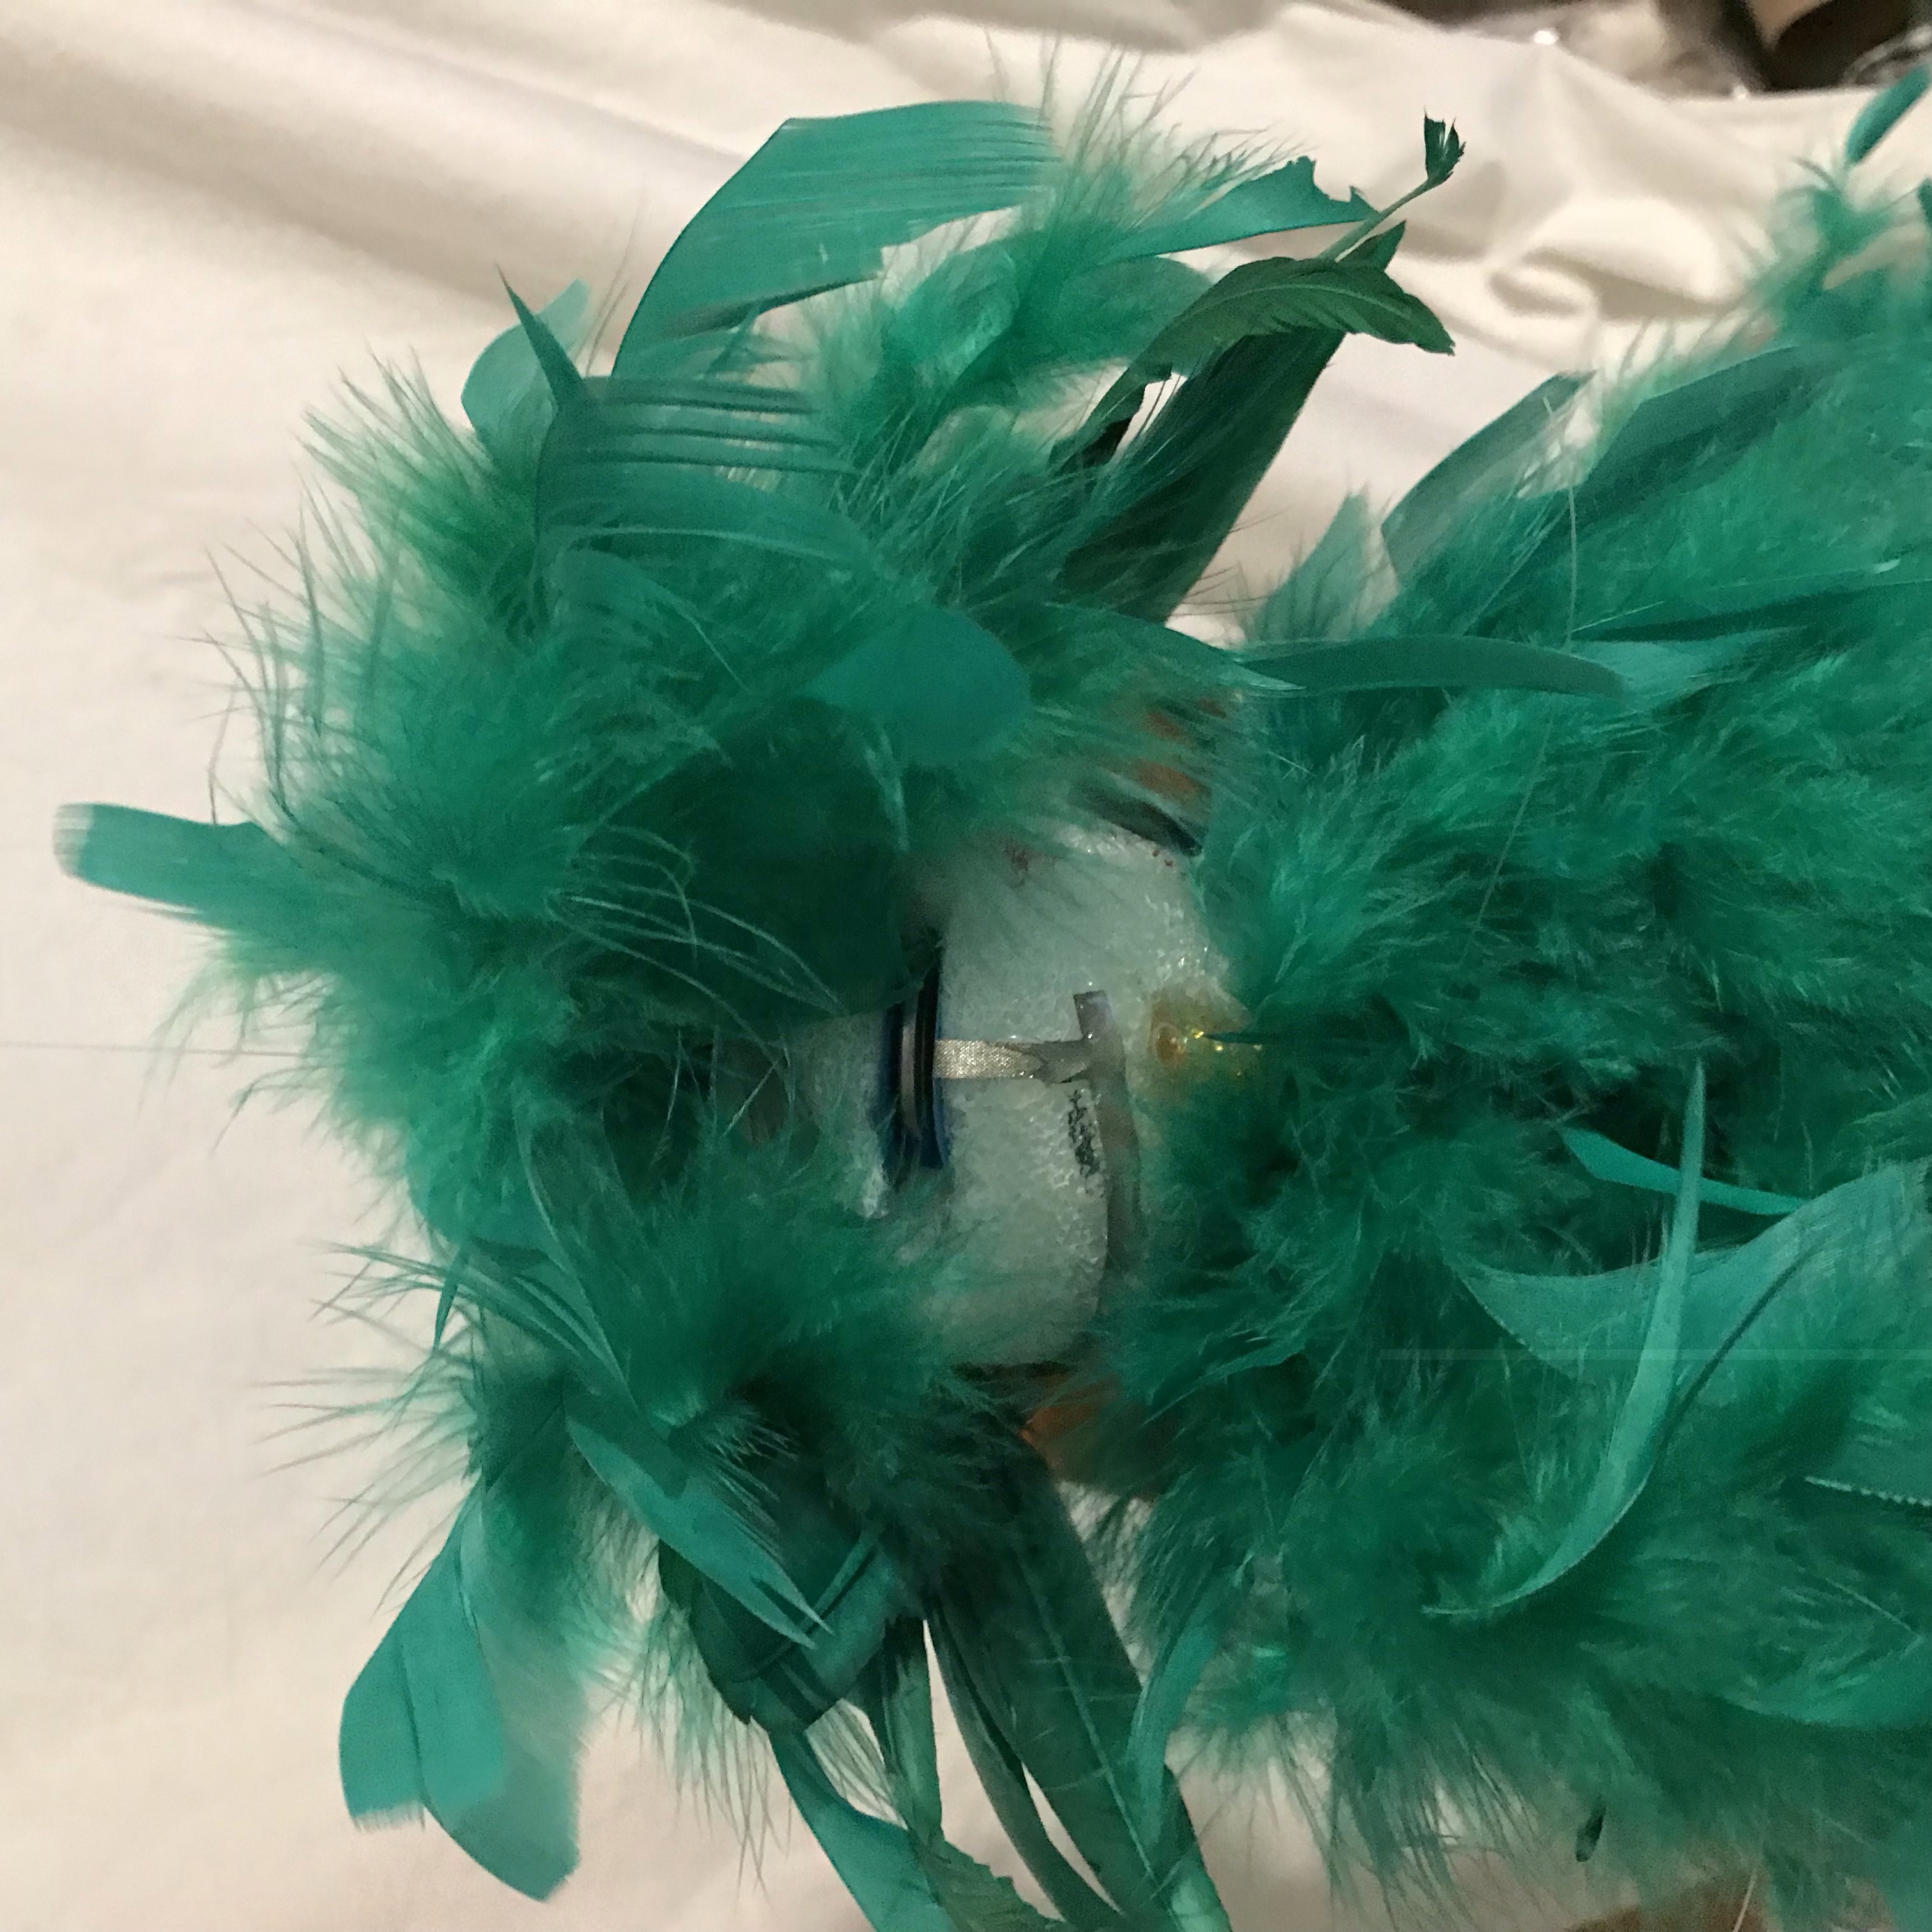
Step 8: Add More Feathers
Once the circuit is working, use a glue gun to add more feathers to the head, body, and feet.
Use the paper eyepiece to build a tented frame of feathers around the circuit, while leaving the reed switches and battery accessible.
Step 9: Add Feathers to the Magnets
To make your magnet(s) easier to use, adhere them to feathers that are easy for you to see. .
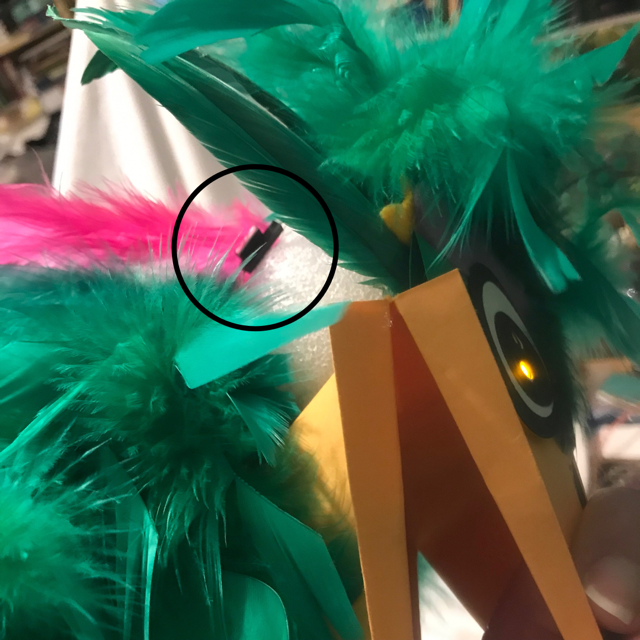
Then, when you want to change the color of your puppet’s eyes, toggle the feathered magnets from reed switch to reed switch. To turn your puppet off, remove the magnets). I found it helpful to conceal a metal binder clip at the base of my puppet’s neck for storing the magnetic feather pieces.
Step 10: Enjoy!
If all has gone well, you can now enjoy your new family heirloom!
Test out your puppet’s goofy moves at different times of the day to see how it looks! Perform a puppet show for your family or friends! Work with a partner to build another puppet and to tell a story, using the color changing eyes to help convey your puppet’s emotions!
How might you apply your new skills to build a different type of creature?
Why Bring Puppets into the Classroom?
If you are interested in doing this type of project with students, there are plenty of good reasons for doing so. Making puppets can help students practice iteration and design, communication, and story telling. To learn more, check out Joshua Balkan’s article, “Using Puppets to Animate STEM Ed.”
Gallery
Similar Posts You Might Enjoy
Holiday Train

Yukiko Inami’s train decoration lights up when two circuits, each containing a reed switch, come together with help from magnets.
Candy Treats
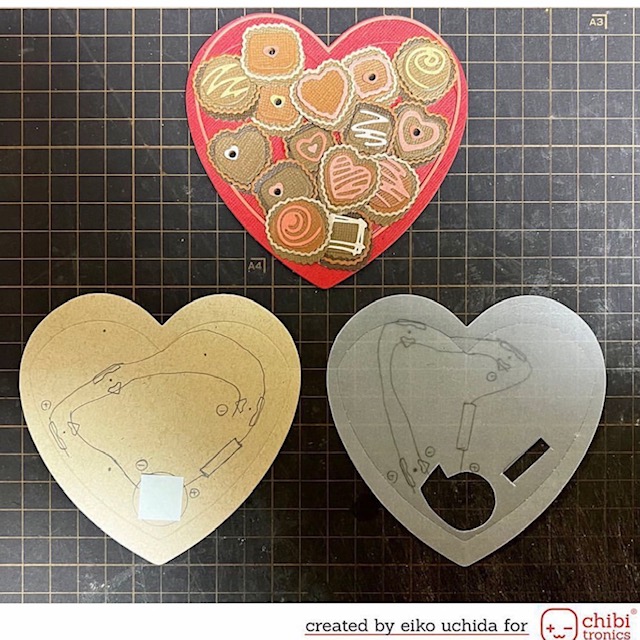
Eiko Uchida’s Valentine’s Day chocolatier (on Instagram) is an interactive feast for the eyes, with two reed switches lighting up paper sweets!
Hexagon Box
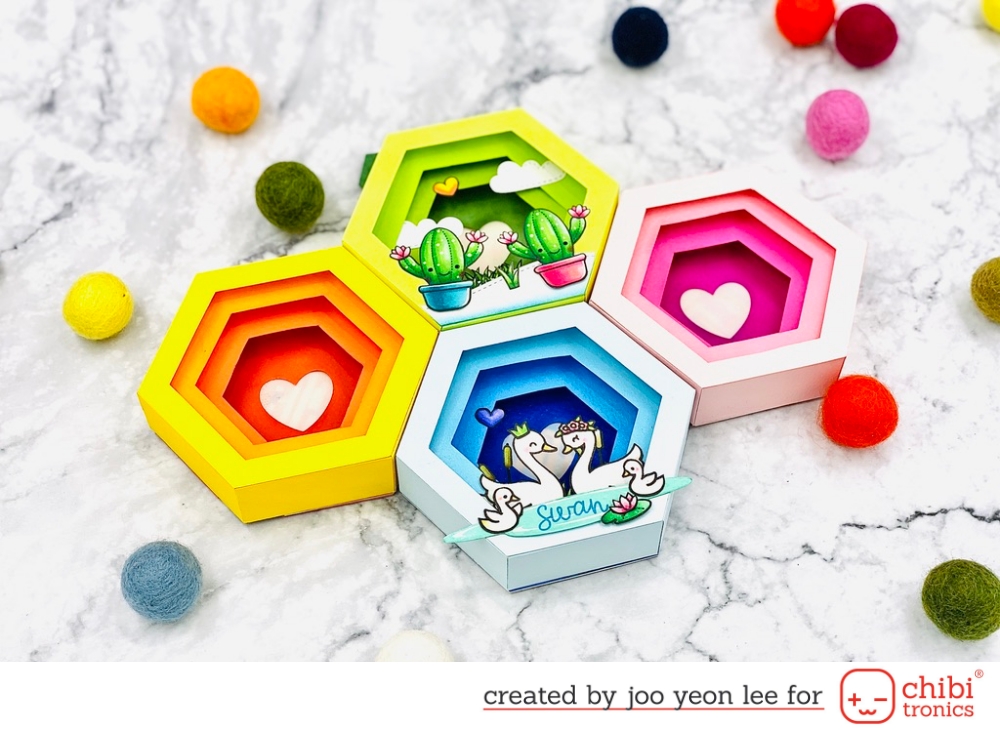
Joo Yeon Lee shares an original design (and templates) for a hexagon shaped shadow box in this inspiring post!