How To > Sensors & Switches > Projects > Tutorial
Magical Magnetism: Intro to Reed Switches (Normally Closed)
Written by: Jill Dawson
Lift to Light
In this tutorial, we will demonstrate key differences between two types of reed switches and teach you how to make a piece of interactive art, an electrified “cobweb” card, that lights up when it’s lifted.
Contents
Compare & Contrast Two Different Reed Switches
Introduction
In our first reed switch tutorial, Magical Magnetism: Intro to Reed Switches (Magnet On), we introduced the most common type of reed switch, demonstrated how to use one in a circuit, and explained how to make a magnetic wand that can trigger any circuit you make with one.
In this tutorial, we’ll be continuing our exploration of magnetic switches by introducing you to a less common type of reed switch (“normally closed” or “magnet off”) that has a slightly different look and functionality. We will also show you how to apply this type of switch in an electrified version of a Victorian Era valentine that works a bit like a refrigerator door, only lighting up when it’s open.
What is a reed switch?
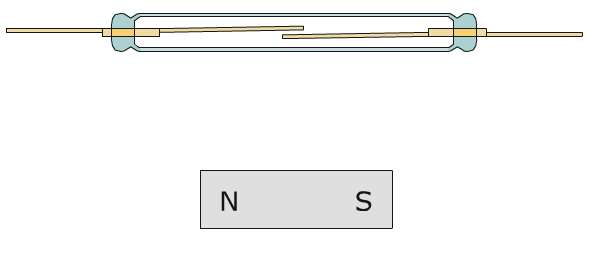
A reed switch is a small electrical component containing two thin fibers, or reeds, that are highly susceptible to magnetization. Reed switches respond to the presence and absence of a magnetic field
What is the most common type of reed switch?
The most common type of reed switch is called a “normally open,” or NO reed switch. At Chibitronics, we refer to this type of a magnet as a “Magnet On” reed switch.
What are the properties of the most common type of reed switch?
In the most common type of reed switch, called a “normally open” or “Magnet On” reed switch, thin contacts encased inside usually contain an open gap between them, as illustrated in the diagram below.
When part of a circuit, this open gap prevents electricity from flowing through the switch unless a magnet is placed nearby.
How does a magnet impact the most common type of reed switch?
If a magnet is within range of a “normally open”/ “magnet on” reed switch, the force of its magnetic field causes the reeds inside to move closer together until they touch, closing the opening and forming a connection that allows electricity to flow through it. When this happens, and the circuit closes, you’ll notice some sort of actuation in the circuit, such as the lighting of an LED, the turning of a motor, or even the sound of a buzzer!
When the magnet is pulled away from the “normally open”/ “magnet on” reed switch, the reeds move apart again, recreating the gap that was there before. With the switch now open, the flow of electricity within the circuit is once again disrupted.
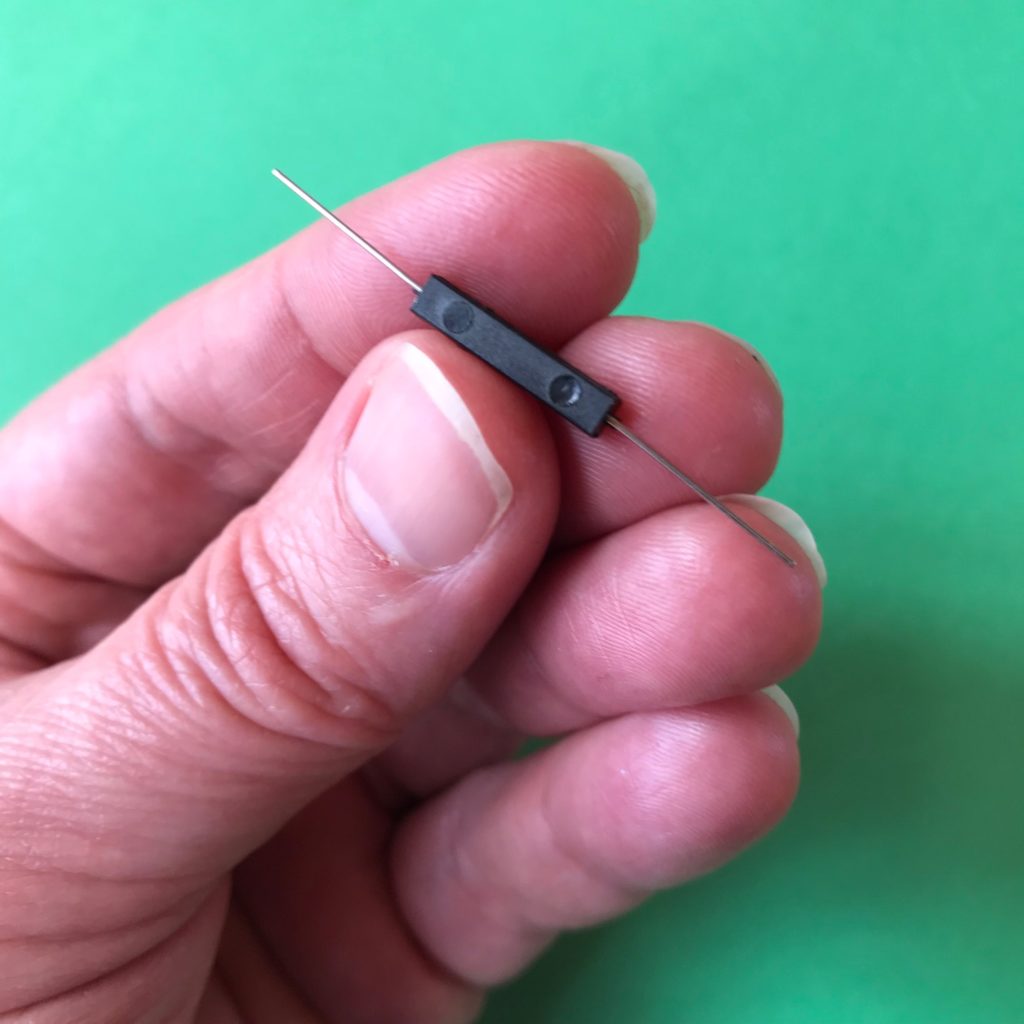
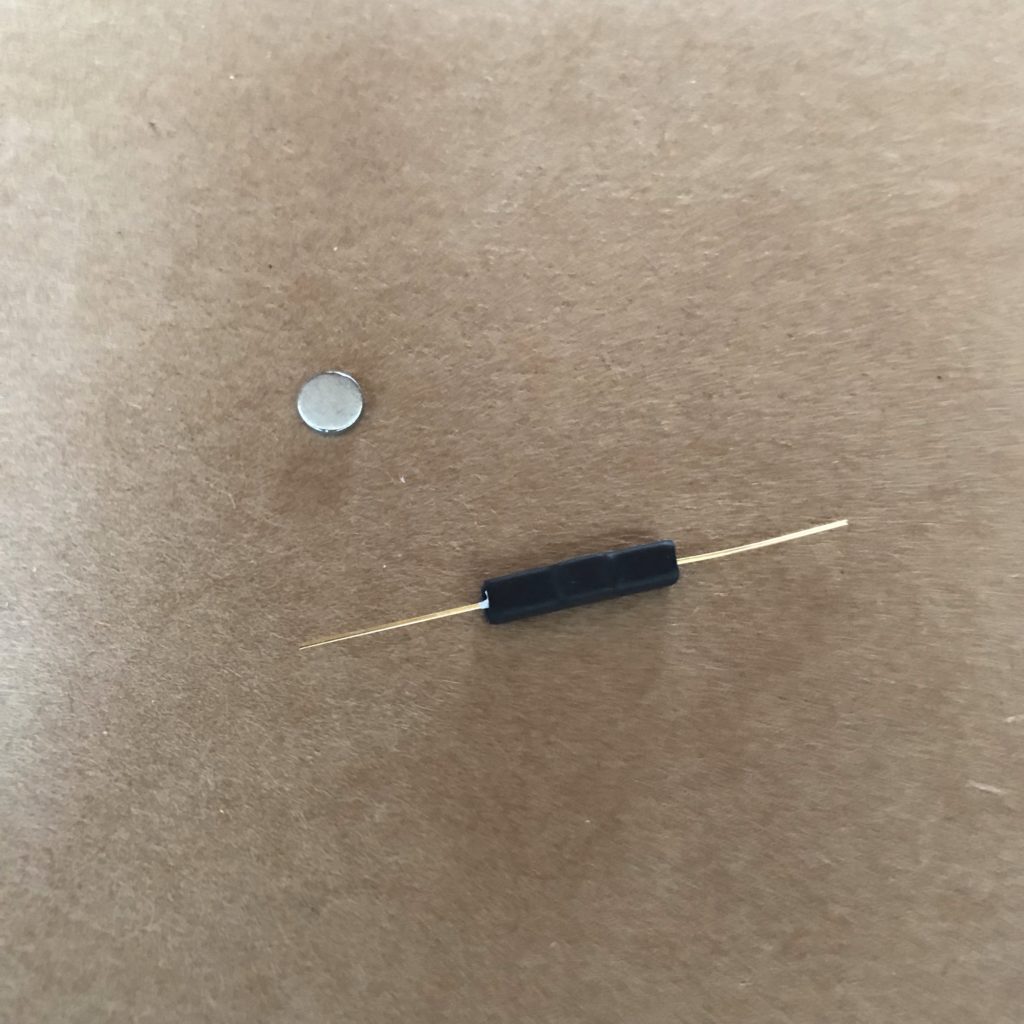
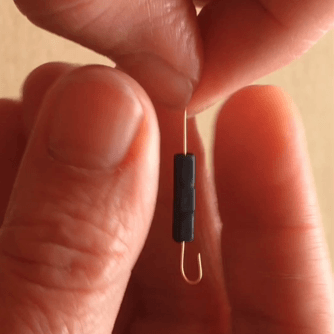
A Reed Switch With a Bump
Unlike the “normally open” / “magnet on” reed switch, which normally does not allow current to flow through it (unless a magnet is near enough to close it), a reed switch that is “normally closed,” reacts in an opposite manner (with help from an extra, smaller magnet hidden inside).
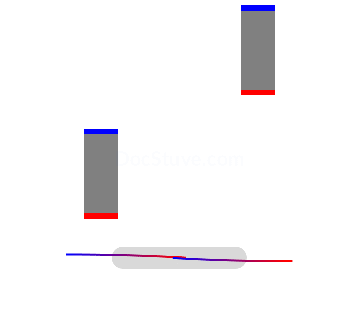
Source: docstuve.com.
The reeds inside of a “normally closed” reed switch are normally pulled closed with help from a tiny magnet contained inside of the switch enclosure. In addition to holding the reeds inside of the switch in a closed position, the inclusion of this magnet inside of the switch also causes the “normally closed” reed switch to have a visible bump. The presence of a bump is useful for telling the two reed switches apart, but it can be more fiddly than its counterpart in paper circuit applications.
Normally Open/ Magnet On
Normally Closed (Bumpy)/ Magnet Off

The gap inside of a “normally open”/ “magnet on” reed switch CLOSES when a magnet is nearby, completing the circuit and causing the LED to switch on.
A magnet nearby turns the LED on.
The gap inside a “normally closed” /”magnet off” reed switch OPENS when a magnet is nearby, interrupting the circuit and causing the LED to switch off.
A magnet nearby turns the LED off.
Normally Open/ Magnet On
Normally Closed (Bumpy)/ Magnet Off
Tips, Tricks & Call-outs
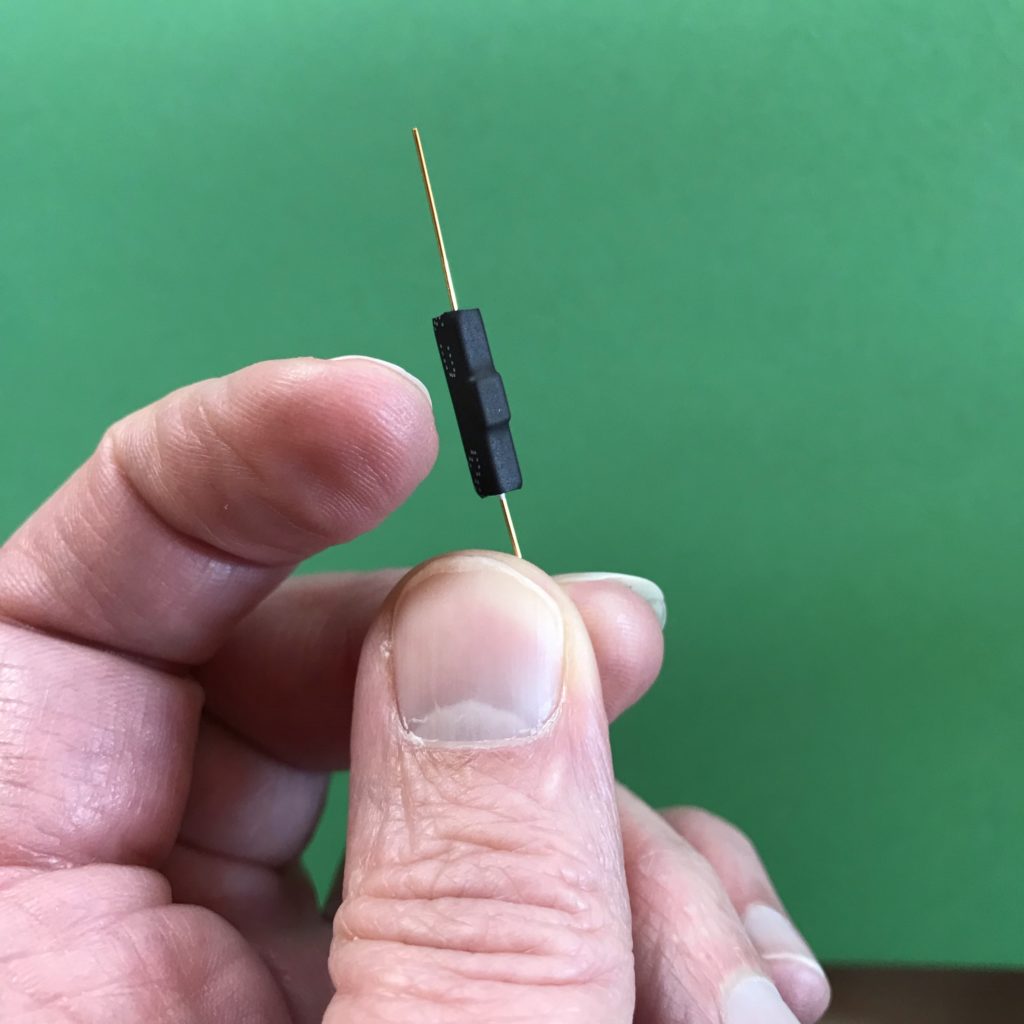
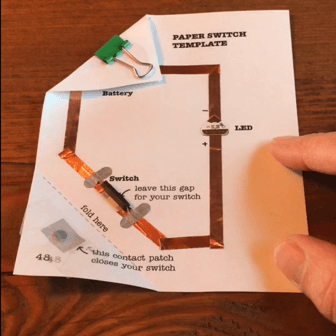
For details on building this circuit using our Paper Switch Template, please visit Magical Magnetism: Intro to Reed Switches (Magnet On). The process for integrating a “normally closed” reed switch is identical. While curling the leads of a “normally closed” reed switch is not required (see the right-most image above), it can increase stability, making it easier to line up the magnet in a paper circuit where precision is required. A demonstration of this technique may be found later in this tutorial.
One example of a circuit using a “normally open”/ “magnet on” reed switch is a magnetic wand bringing an illustration to life as it hovers above it.
One example of a circuit using a “normally closed”/ “magnet off” reed switch is a refrigerator that only lights up when the door is open.
Normally Open/ Magnet On
Normally Closed (Bumpy)/ Magnet Off
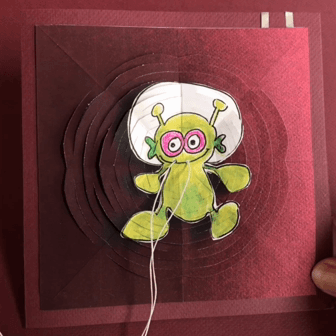
Build an Electronic Cobweb Card
What’s a Cobweb?
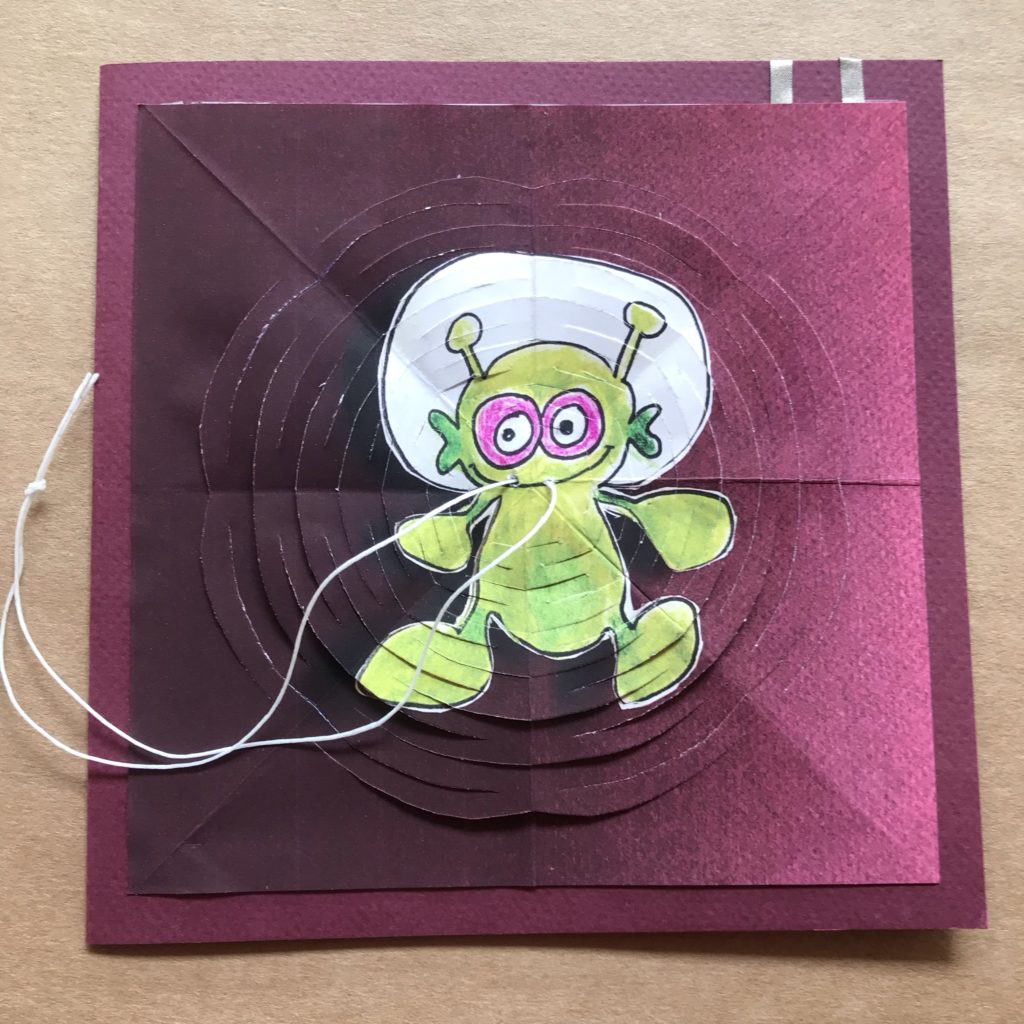
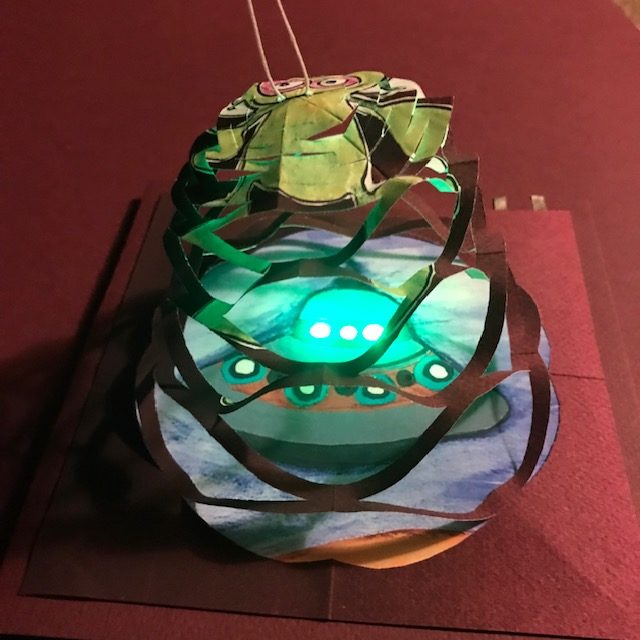
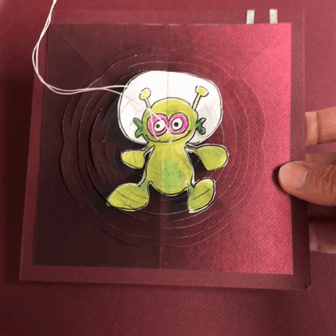
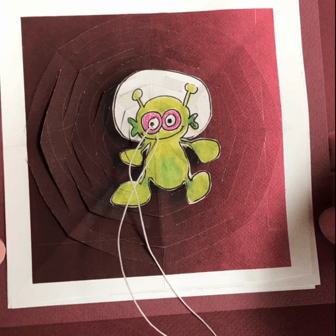
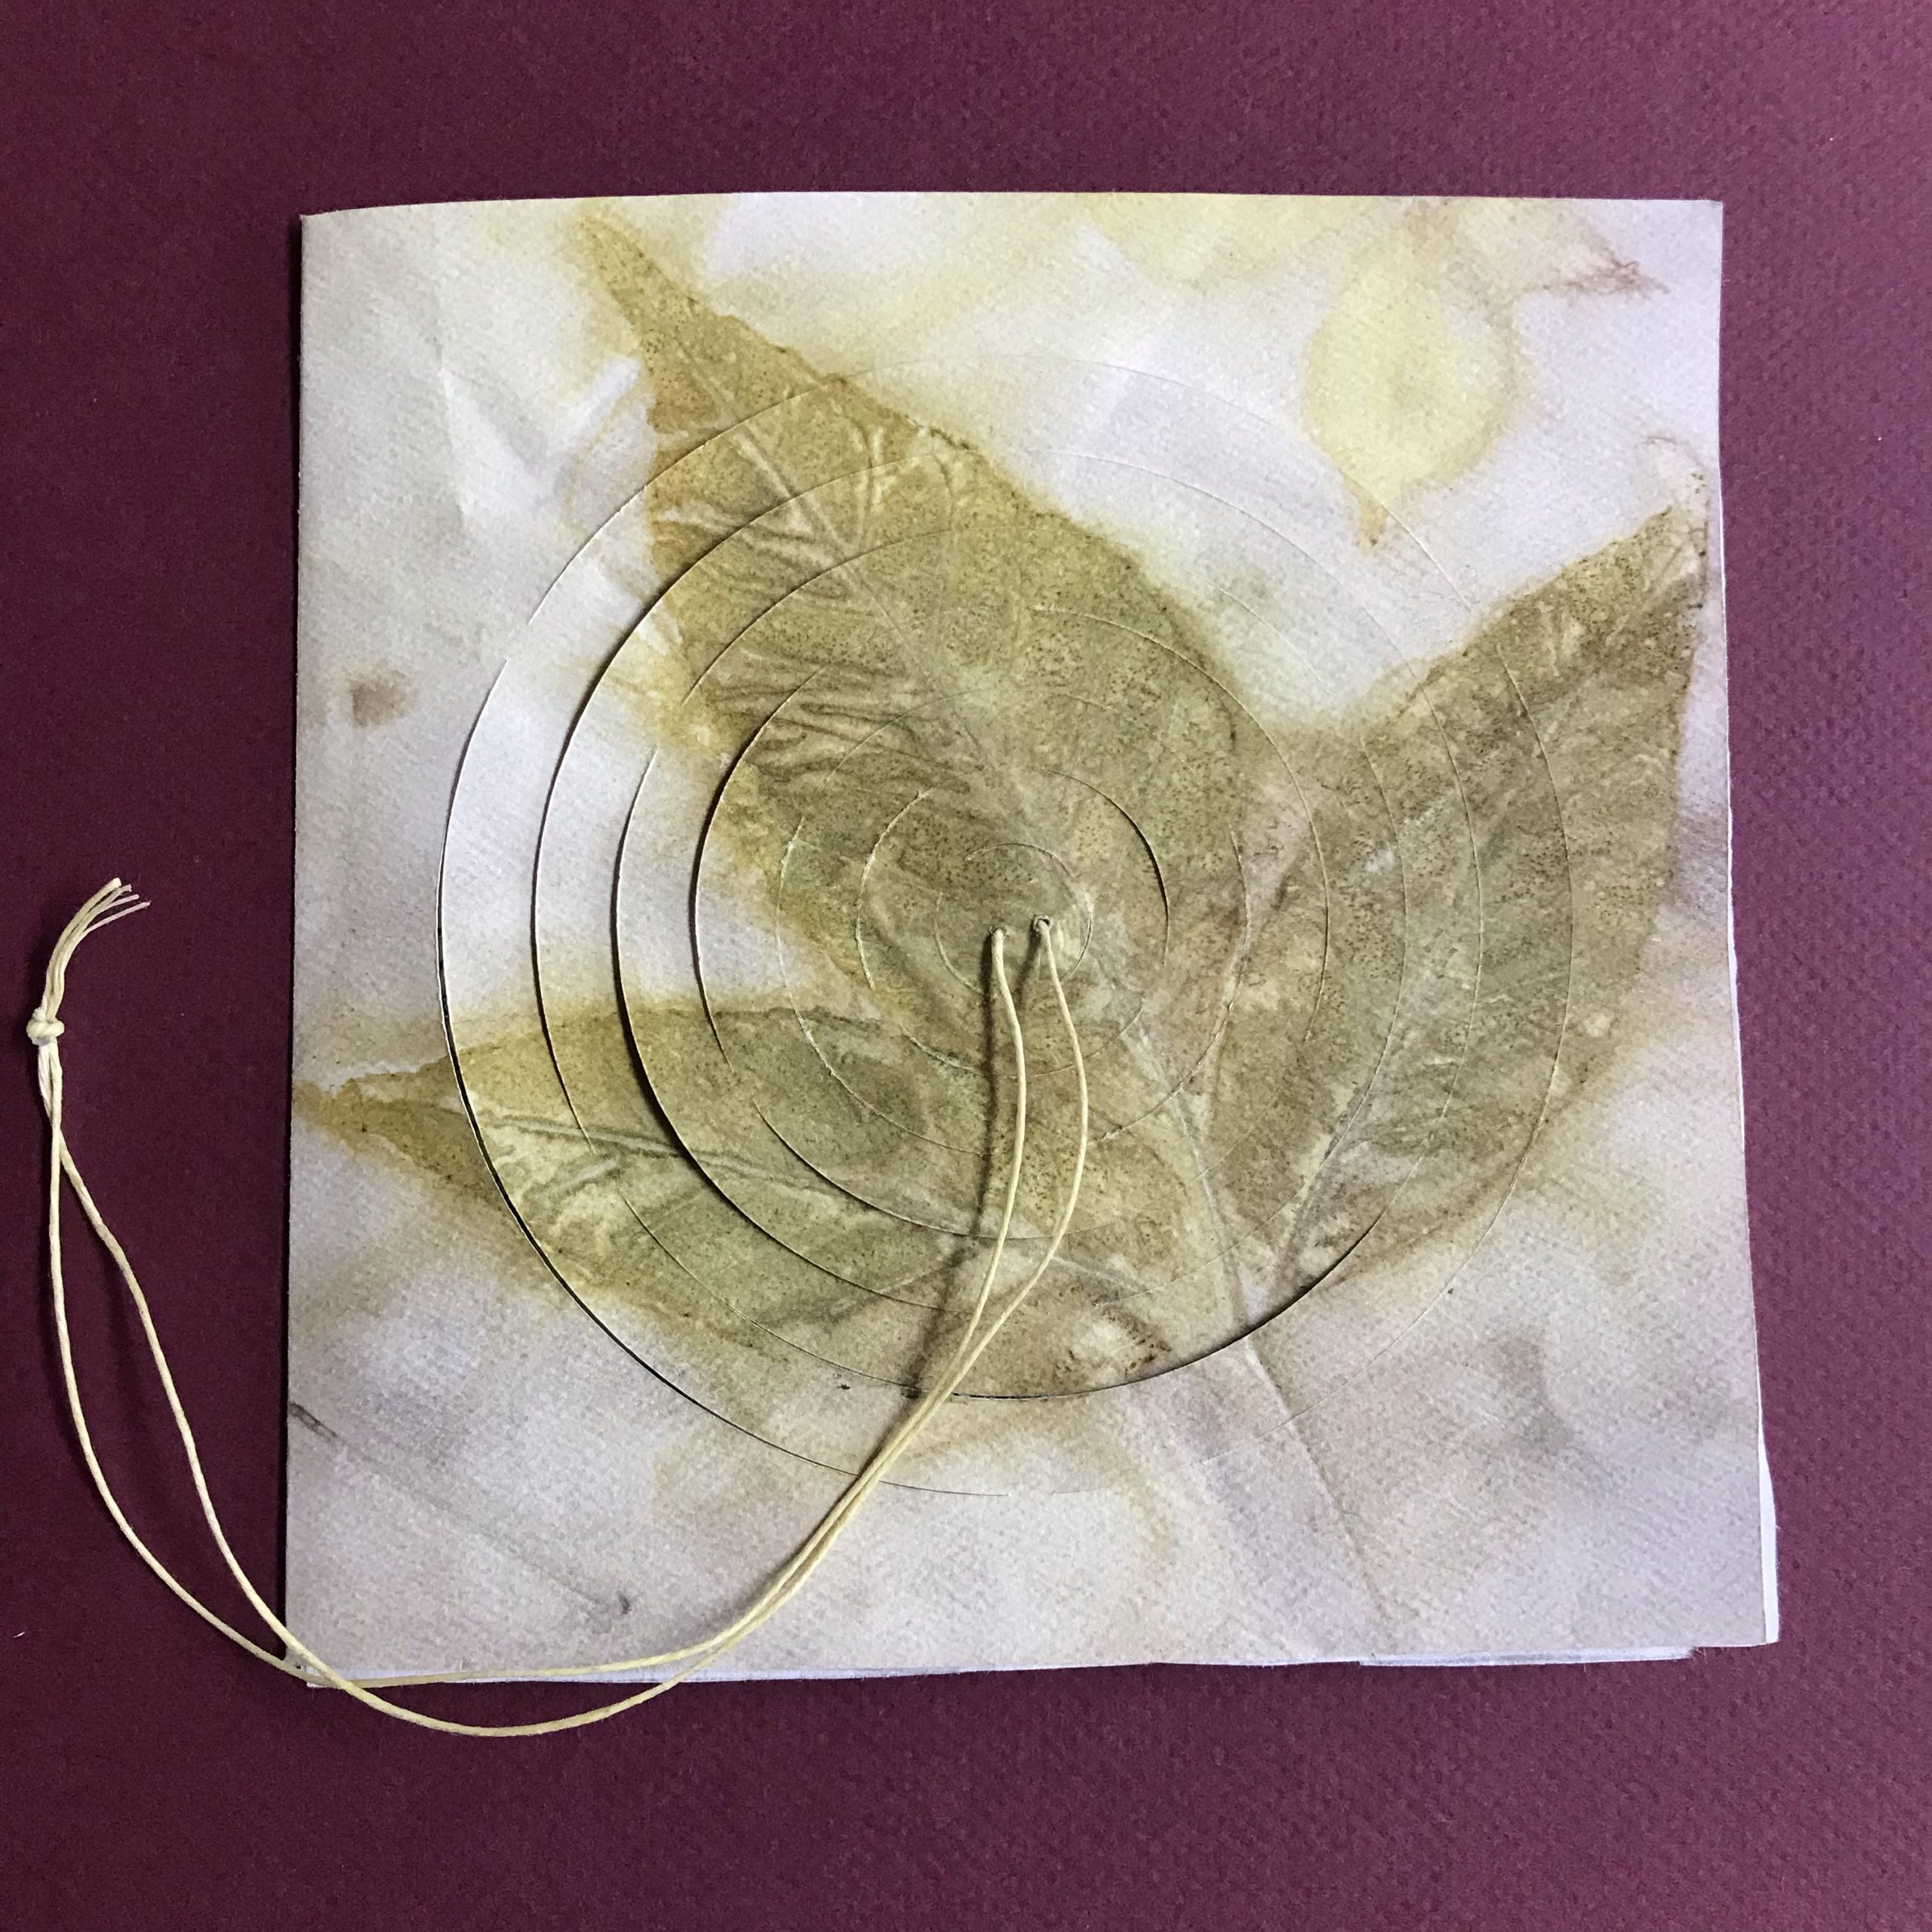
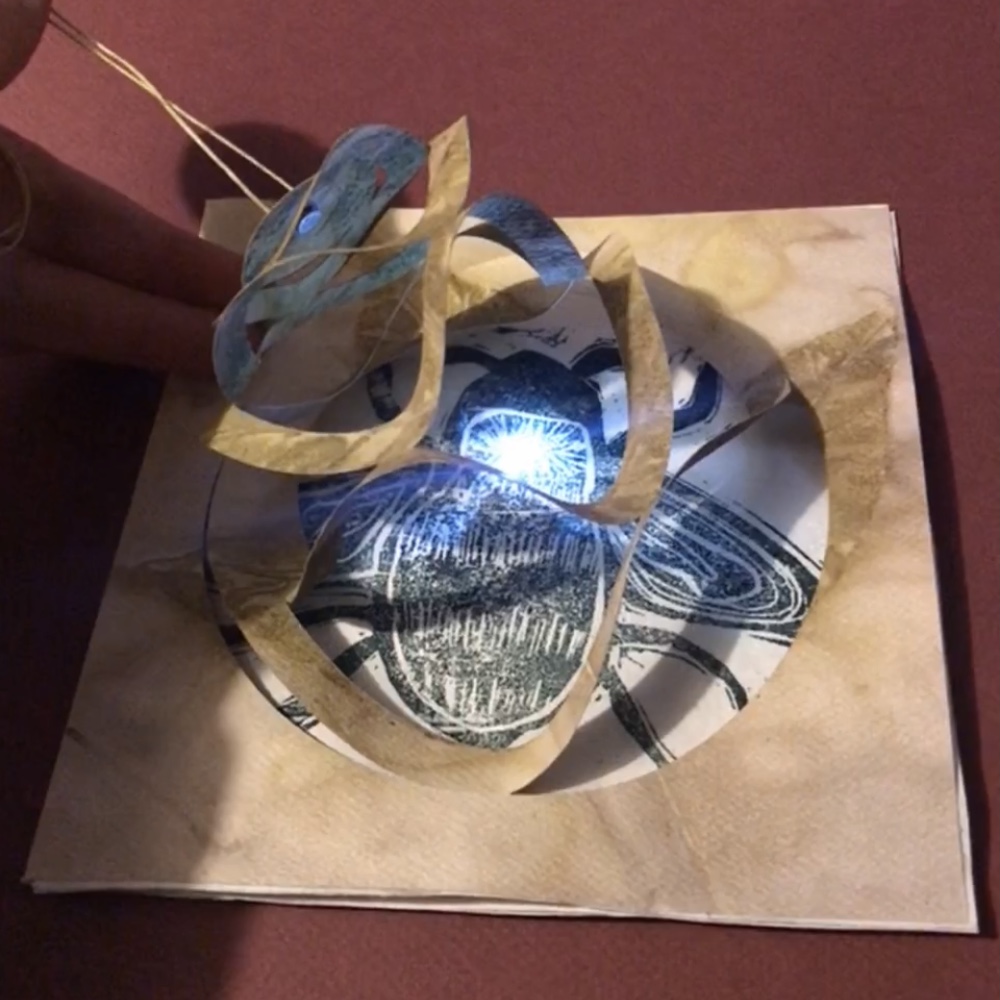
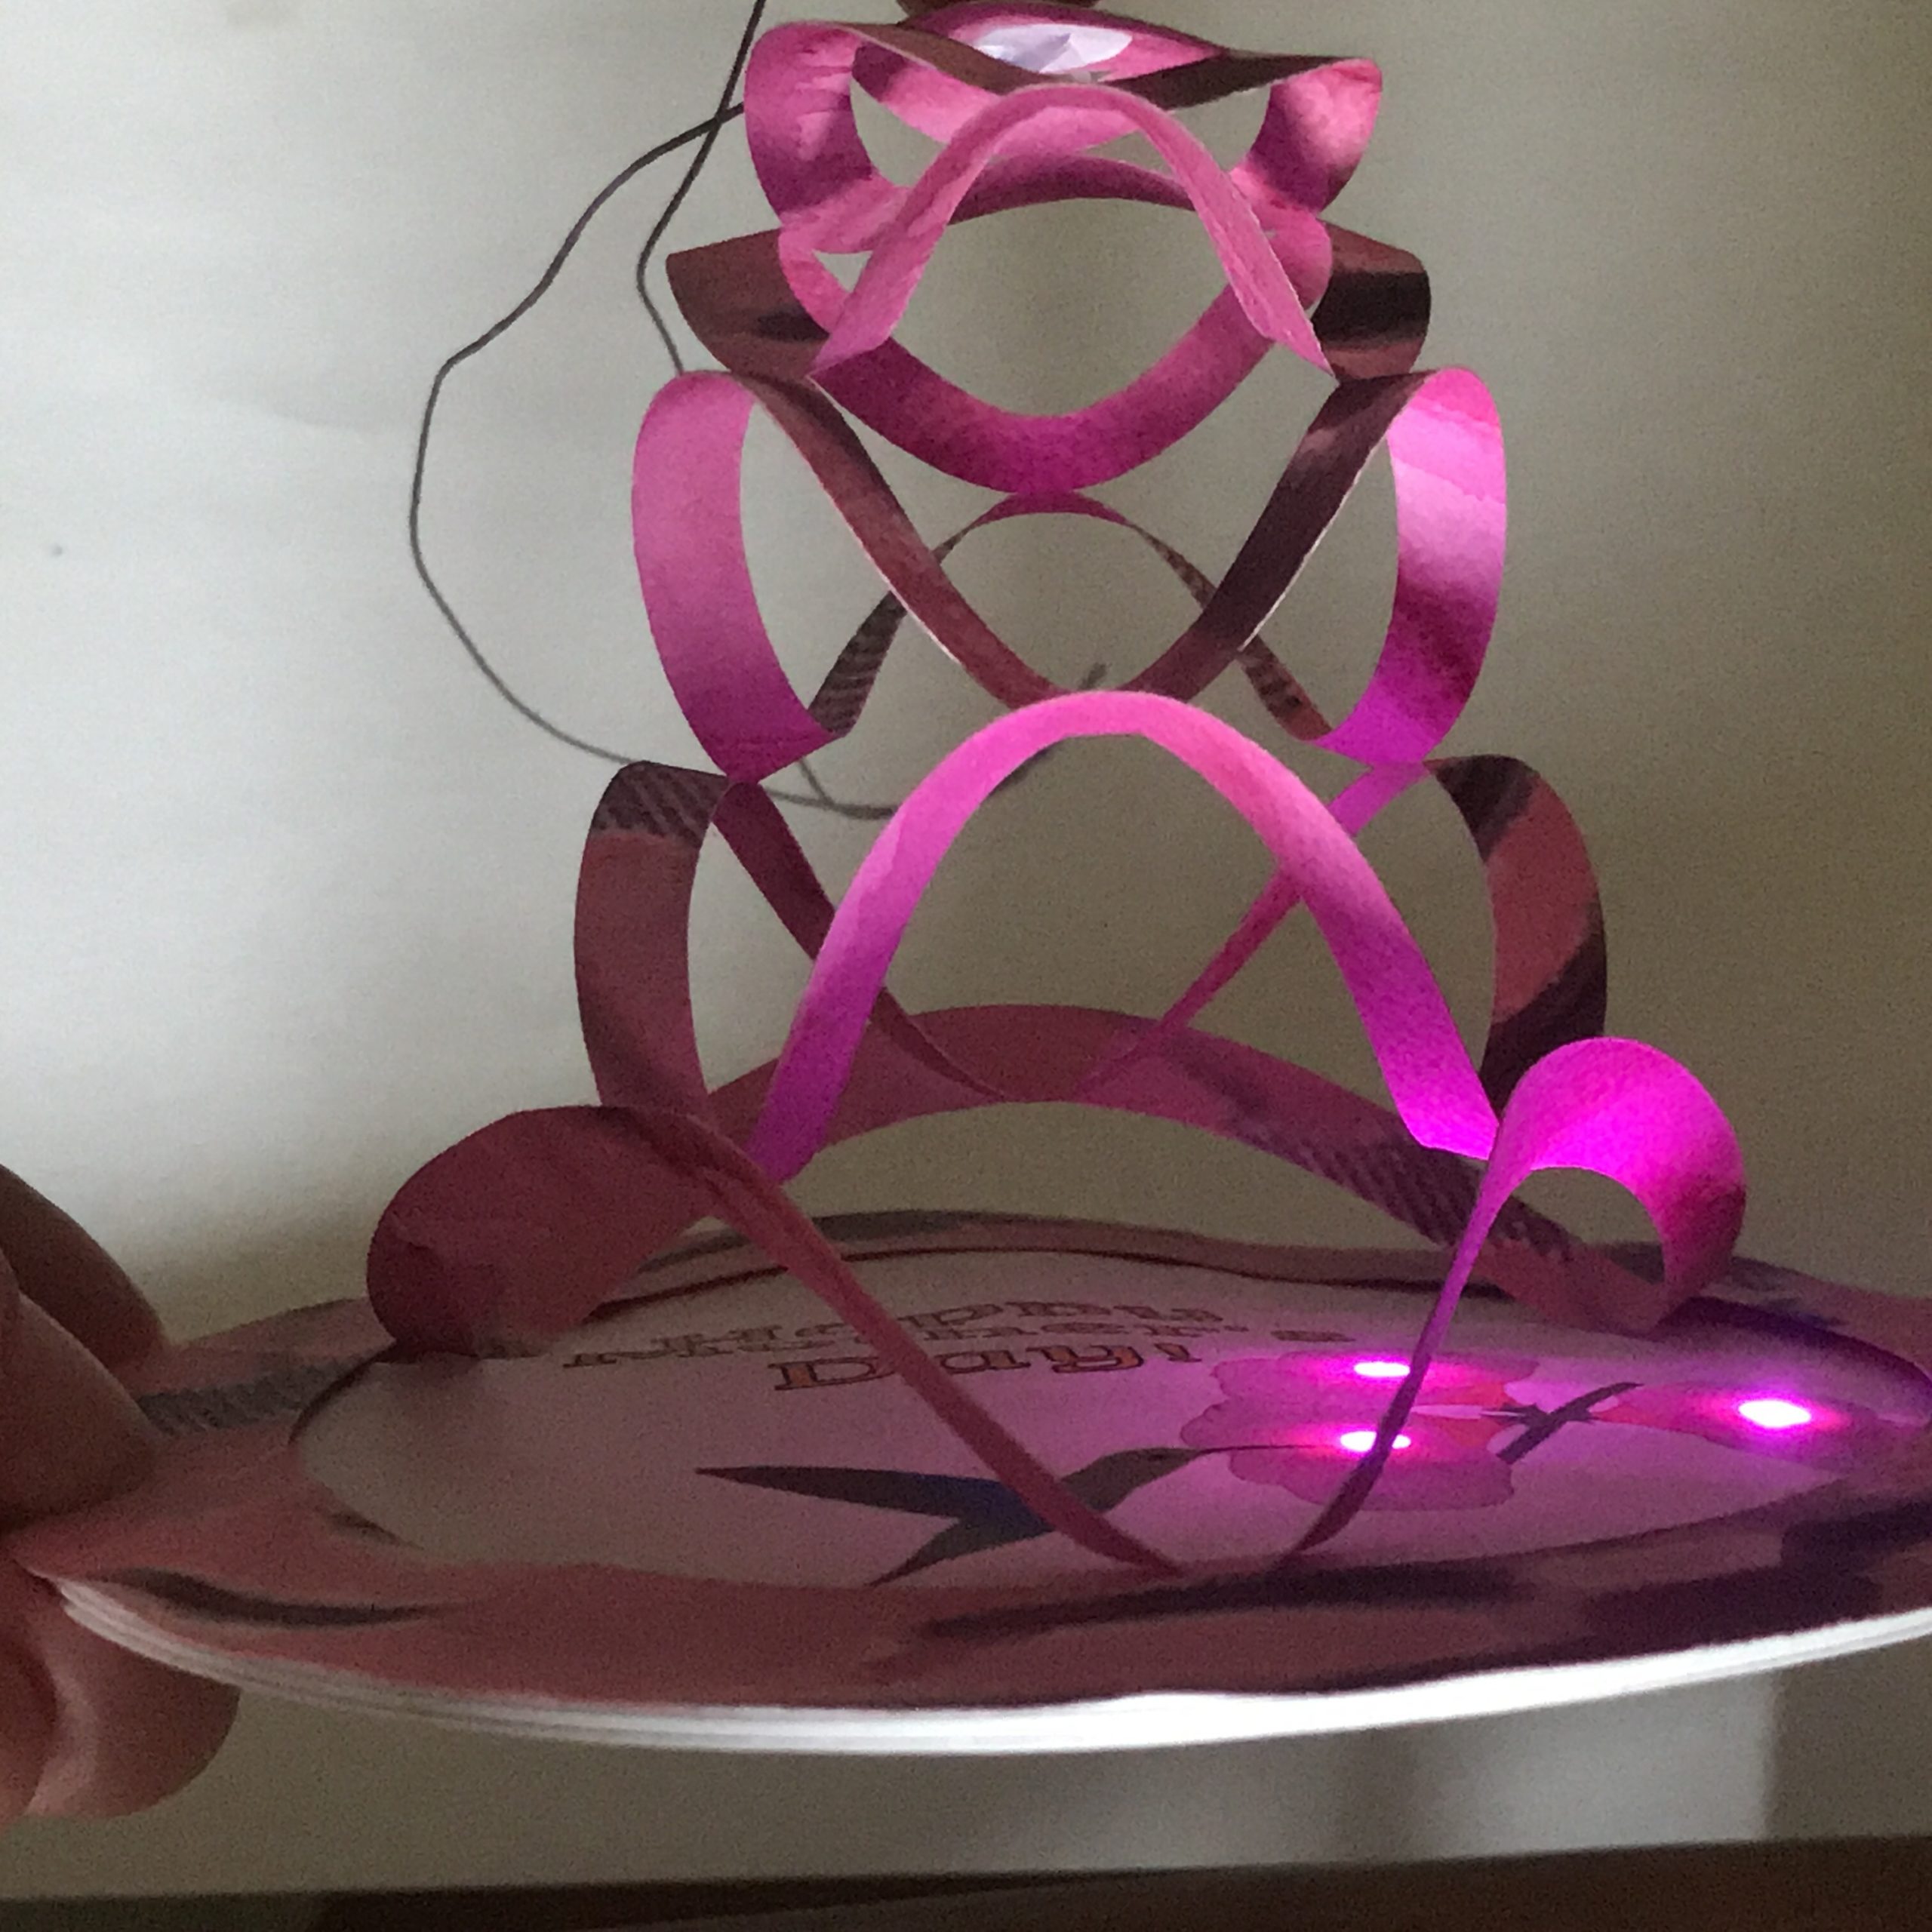
To demonstrate how you might apply a “normally closed”/ “magnet off” reed switch to a paper circuit project, we will be showing you how to construct a modernized version of a design, called a “cobweb,” that has been around for hundreds of years.
Cobwebs—also known as beehives, flower cages, or birdcages—are a rare example of a mechanical or movable valentine consisting of a minimum of two layers of paper. First, a web or cage would be cut from a piece of paper by making a pattern of concentric circles, leaving attachment points at regular intervals. In the center of the spiral, a delicate thread would be attached and its outer edges would be pasted directly on top of a second sheet on which an image or message would be written, painted, or printed.
Nancy Rosin, Cataloger at the Met Museum’s Department of Drawings and Prints
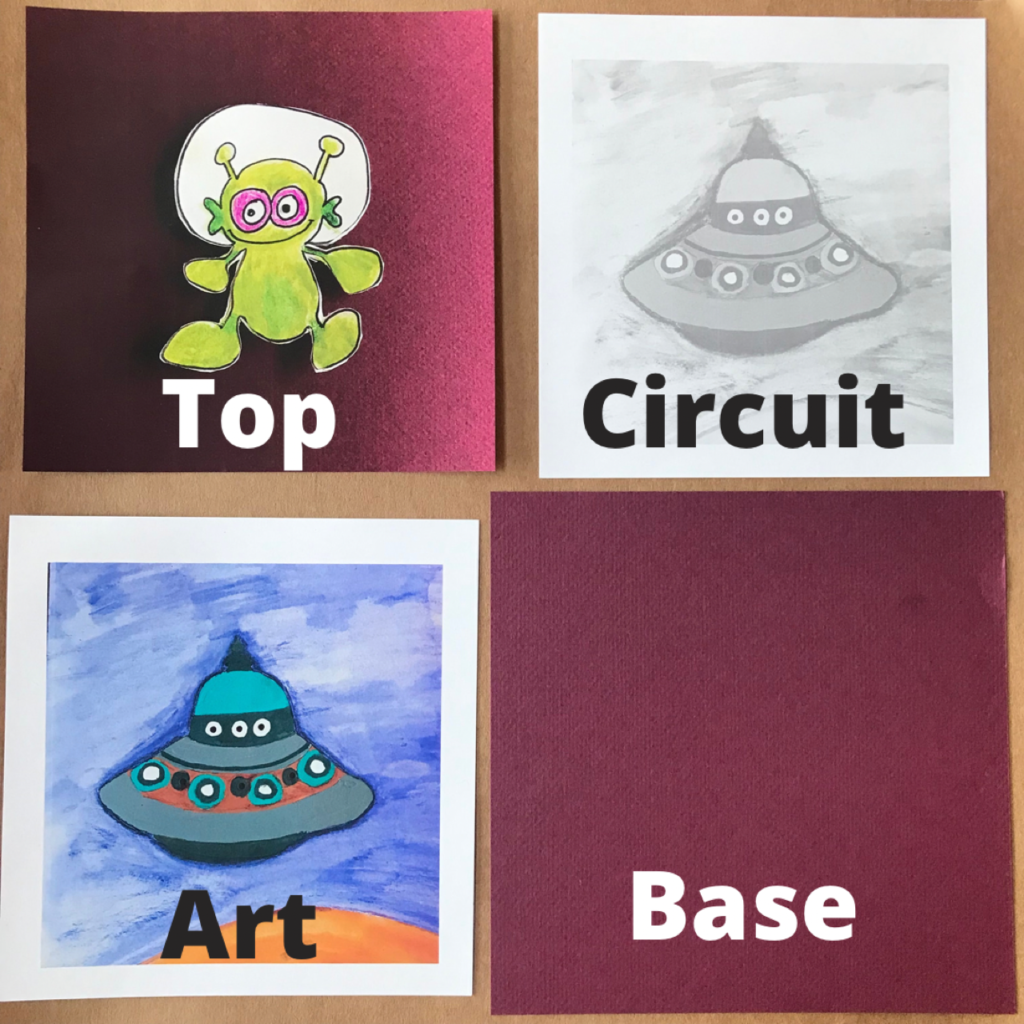
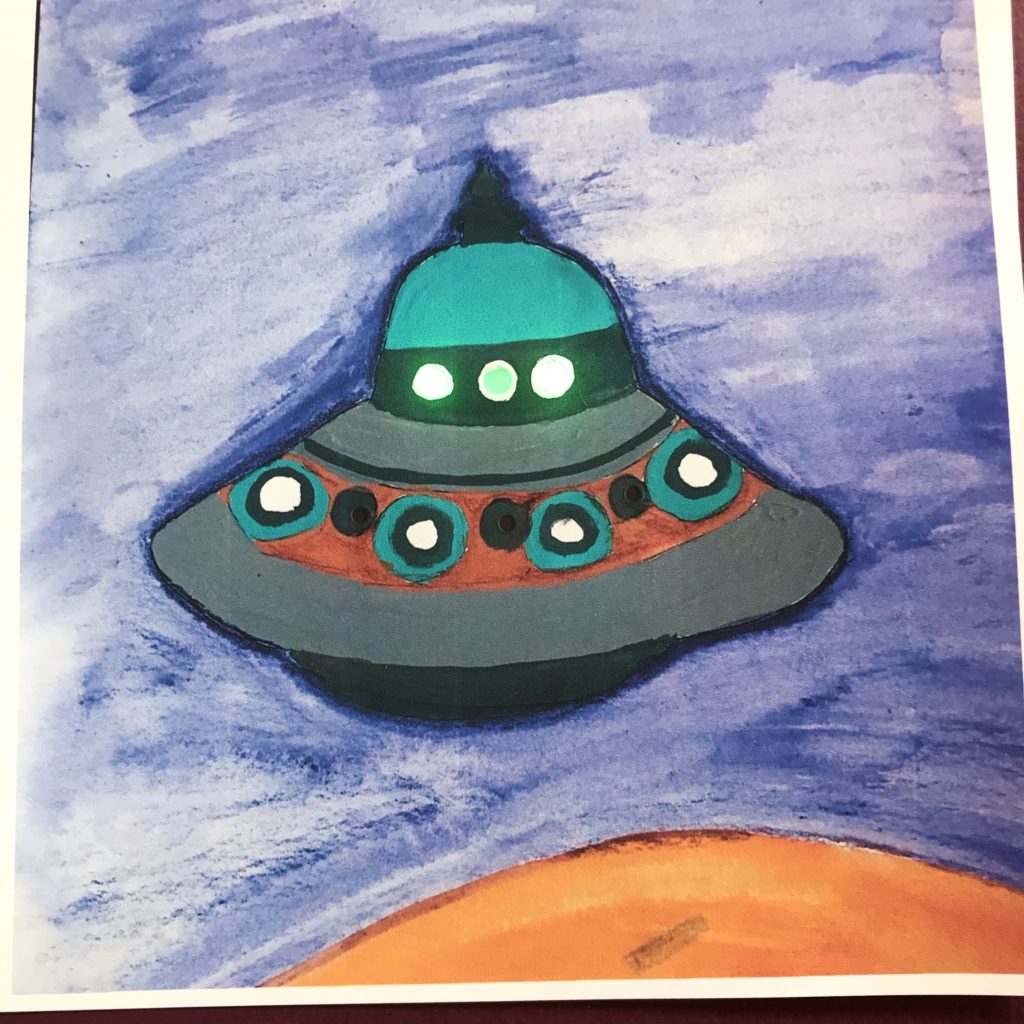
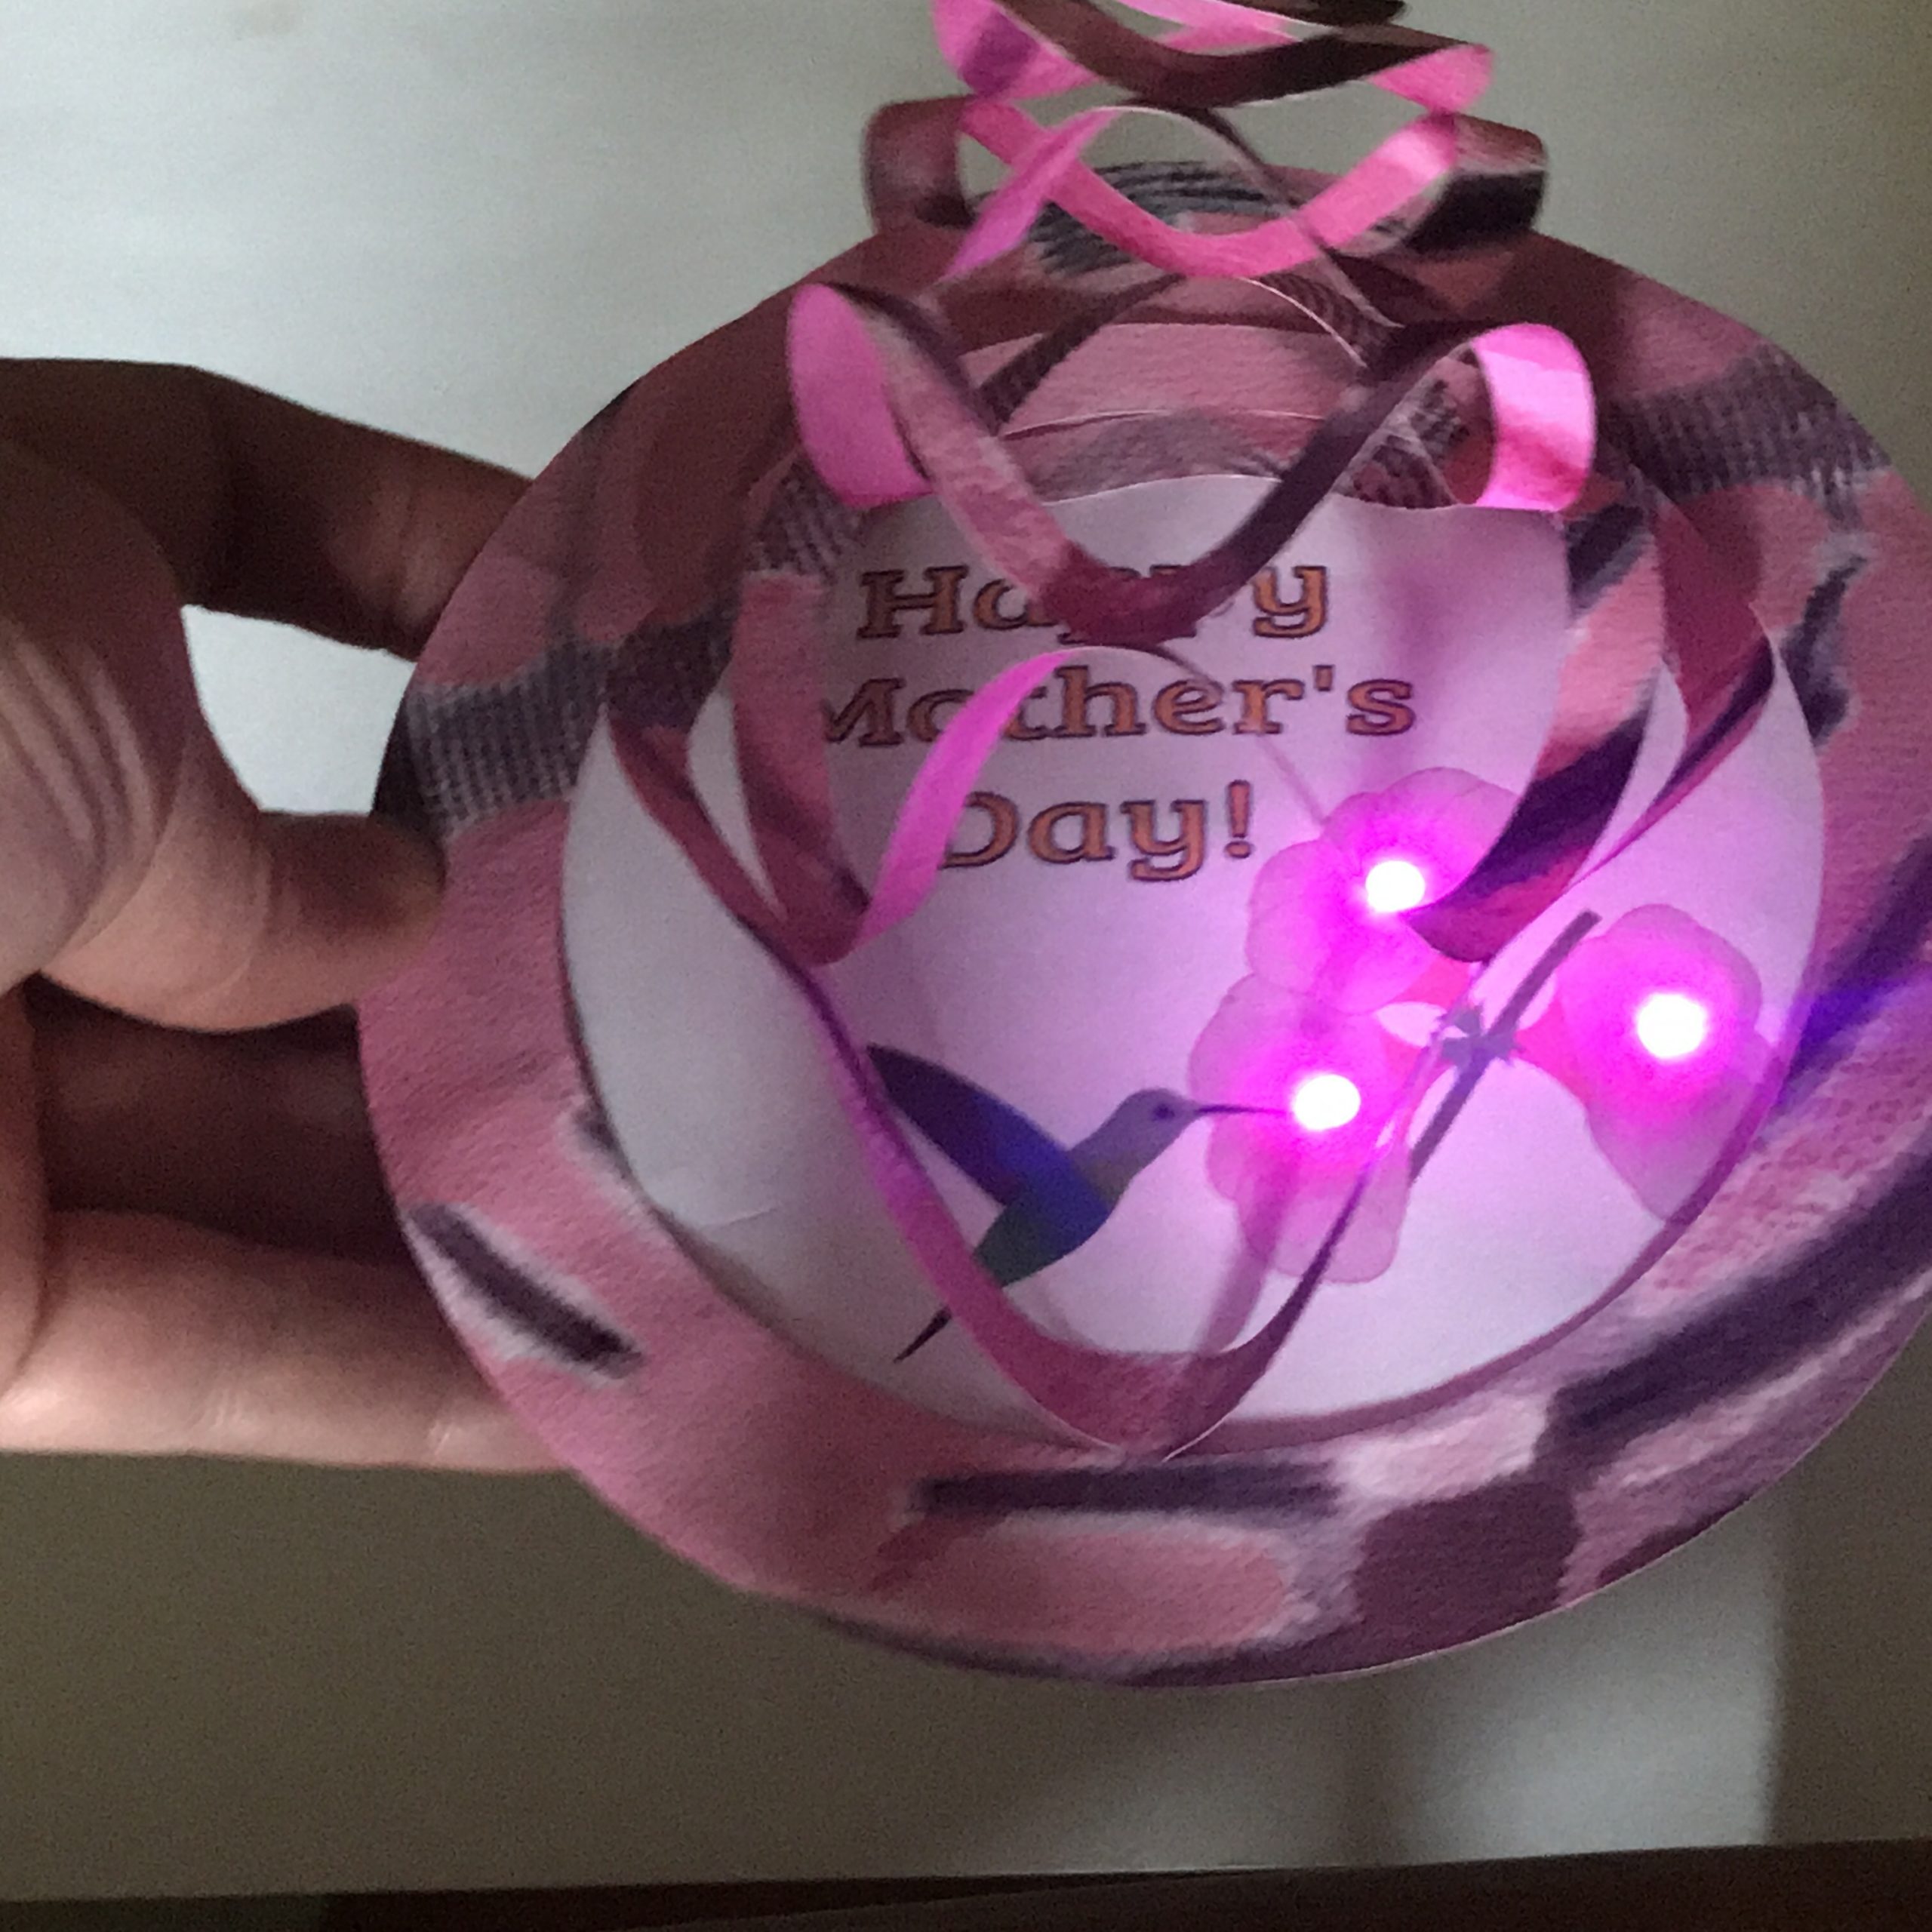
Our project, an electrified cobweb card, will feature four layers: a paper cage, artwork, a circuit, and a backing sheet.
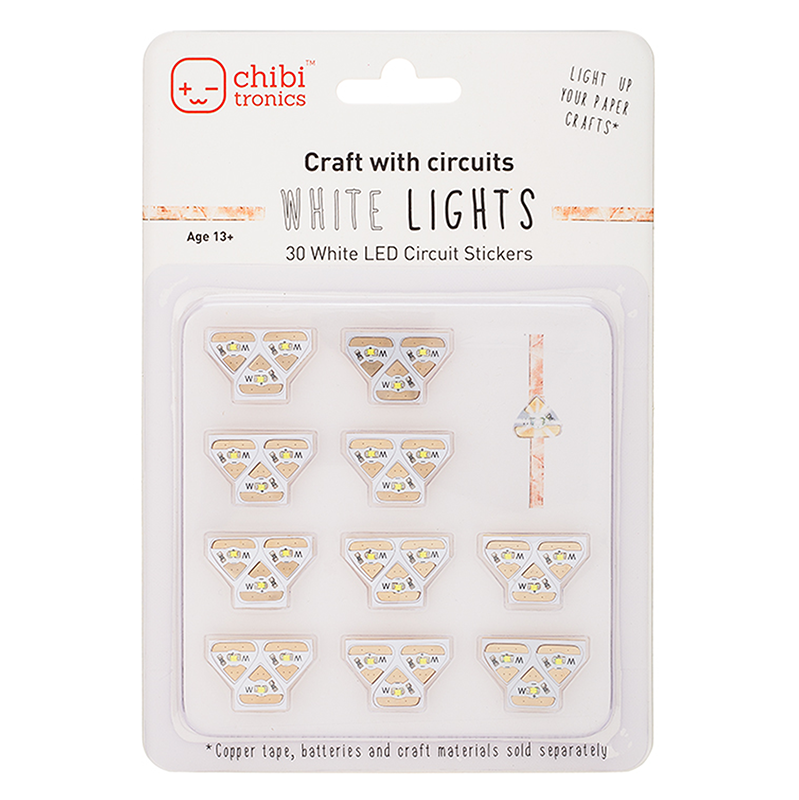
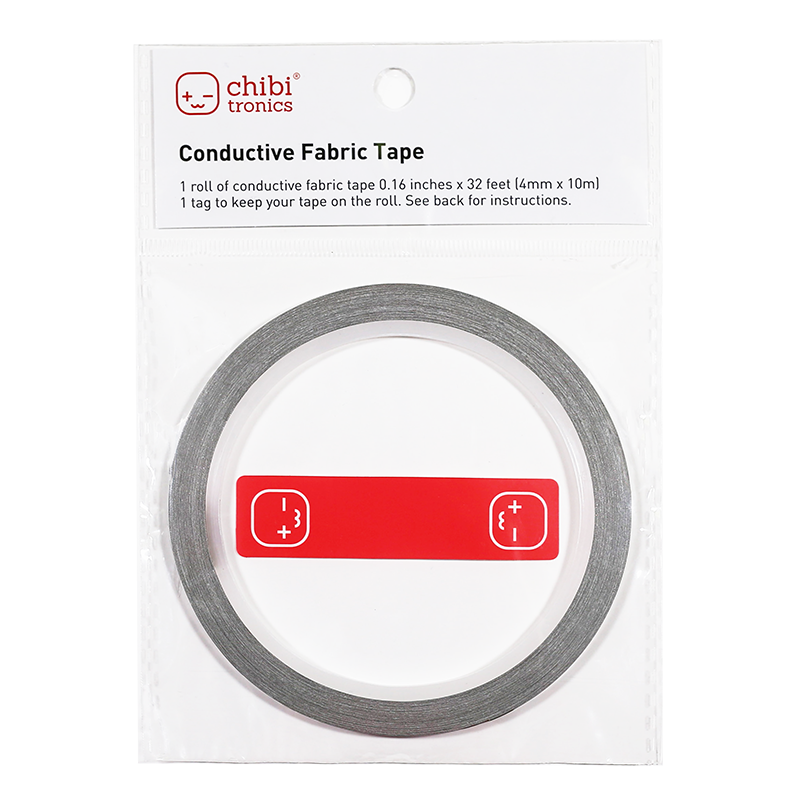
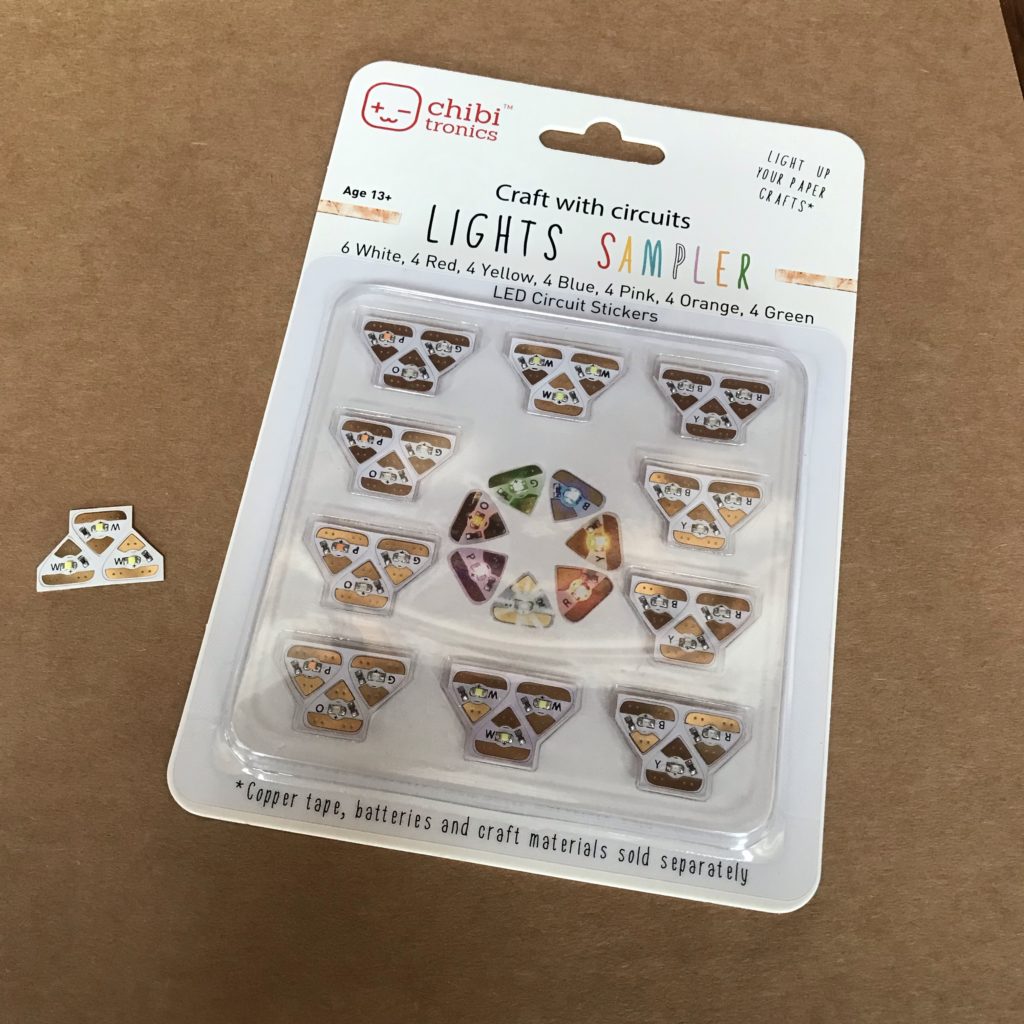
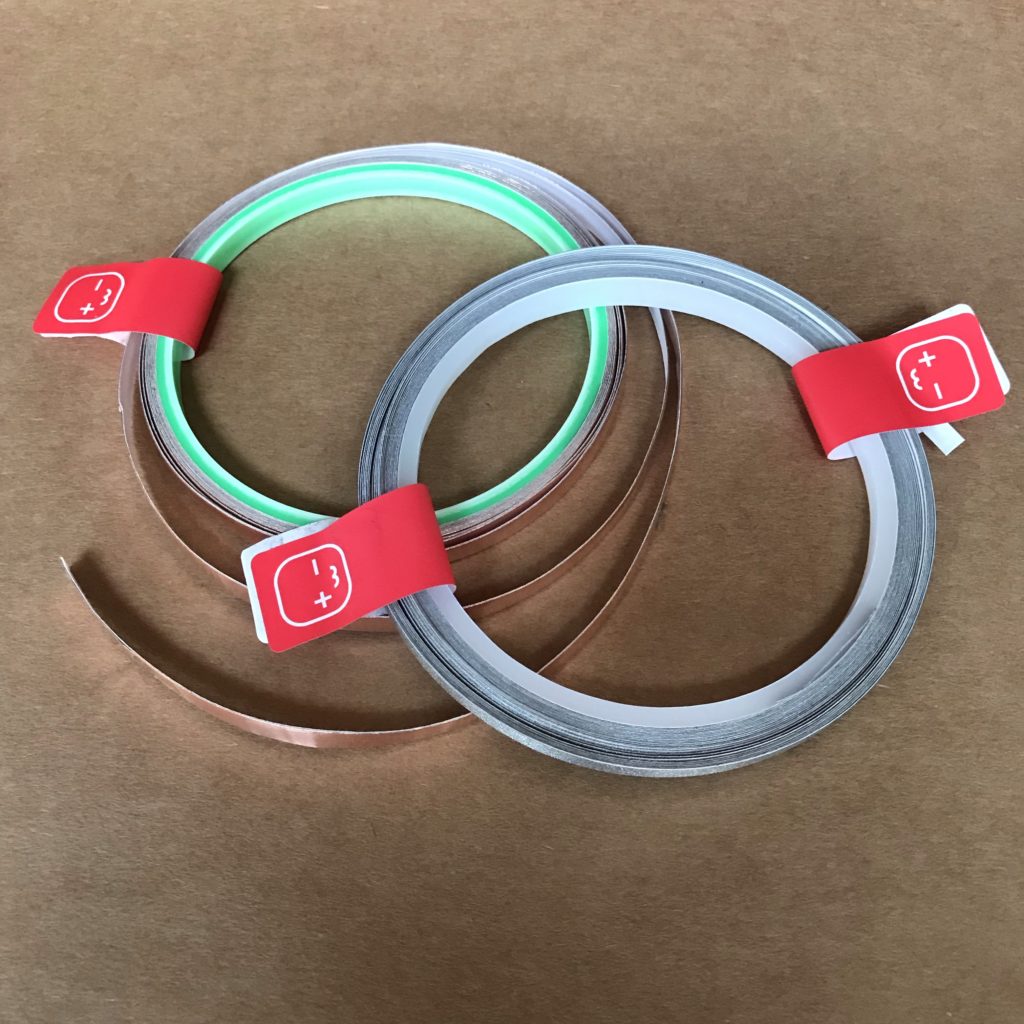
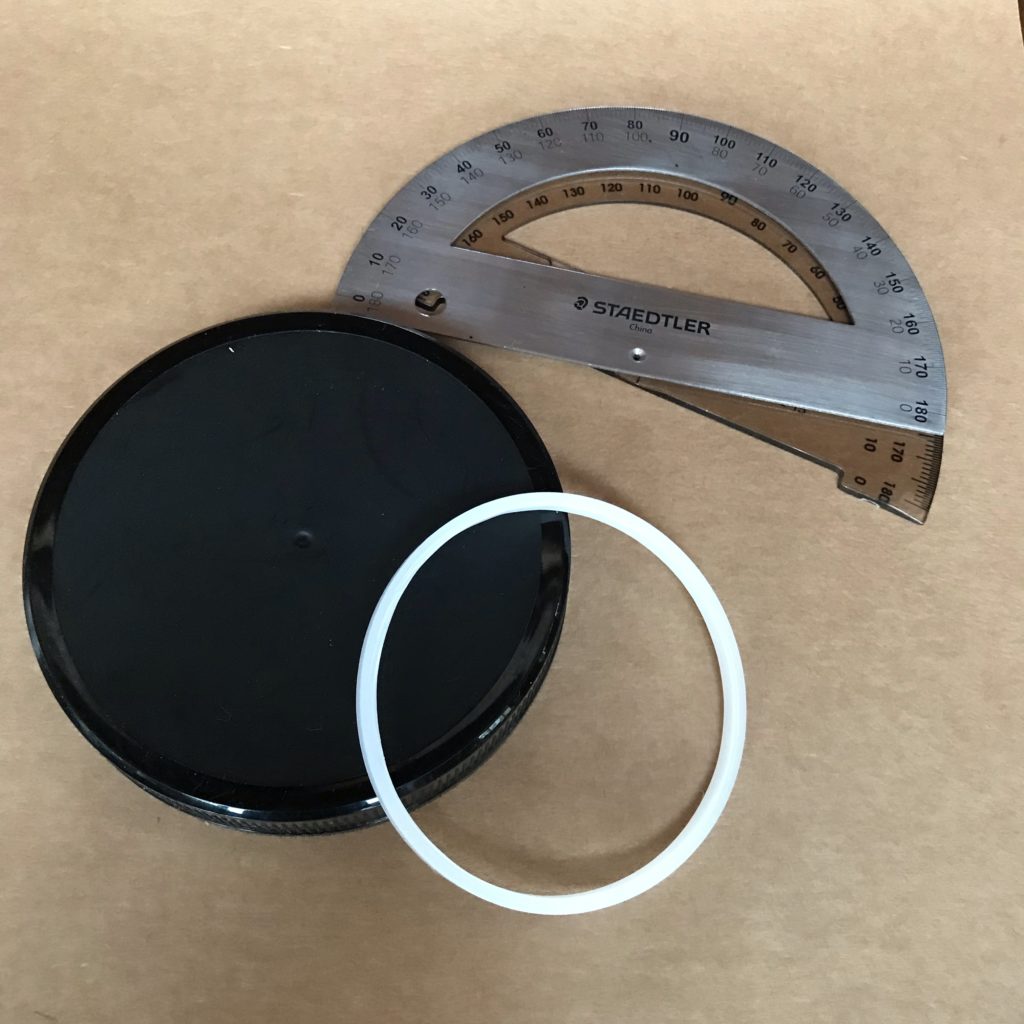
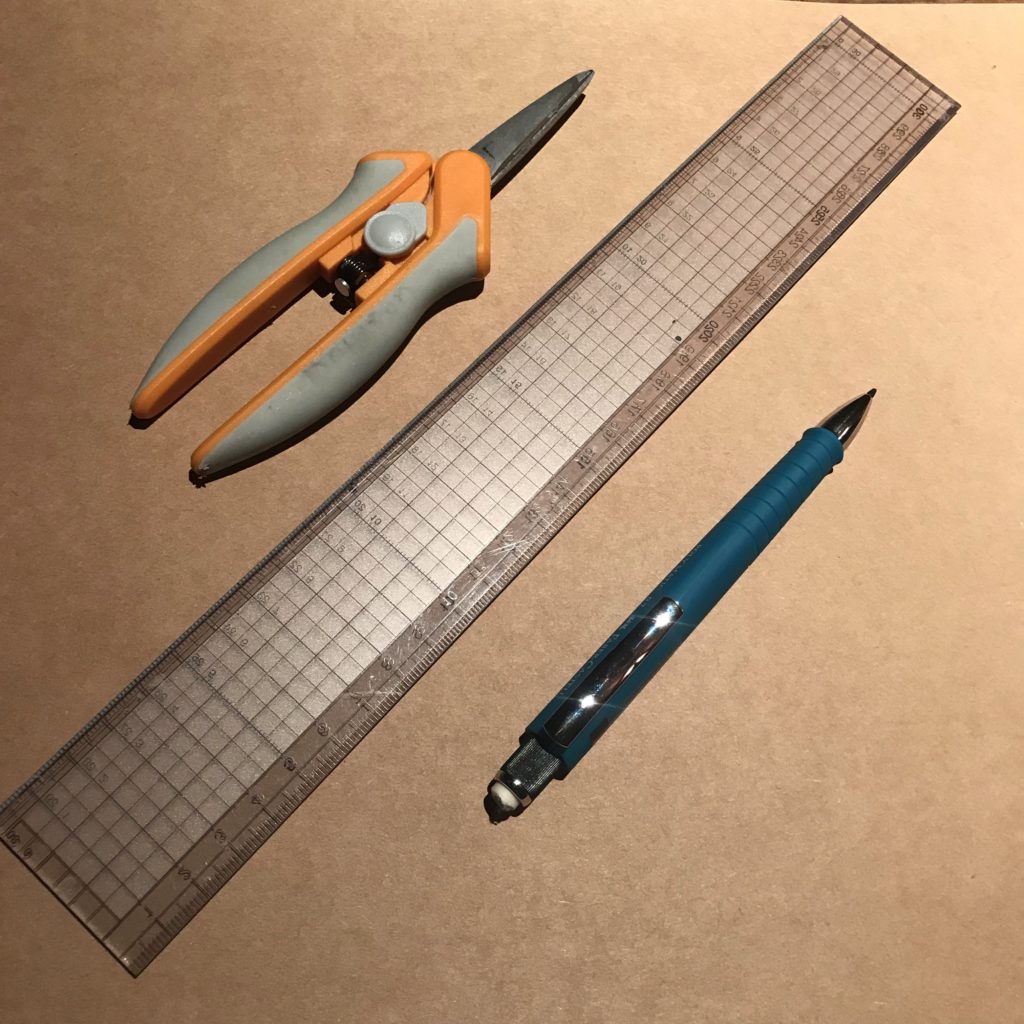
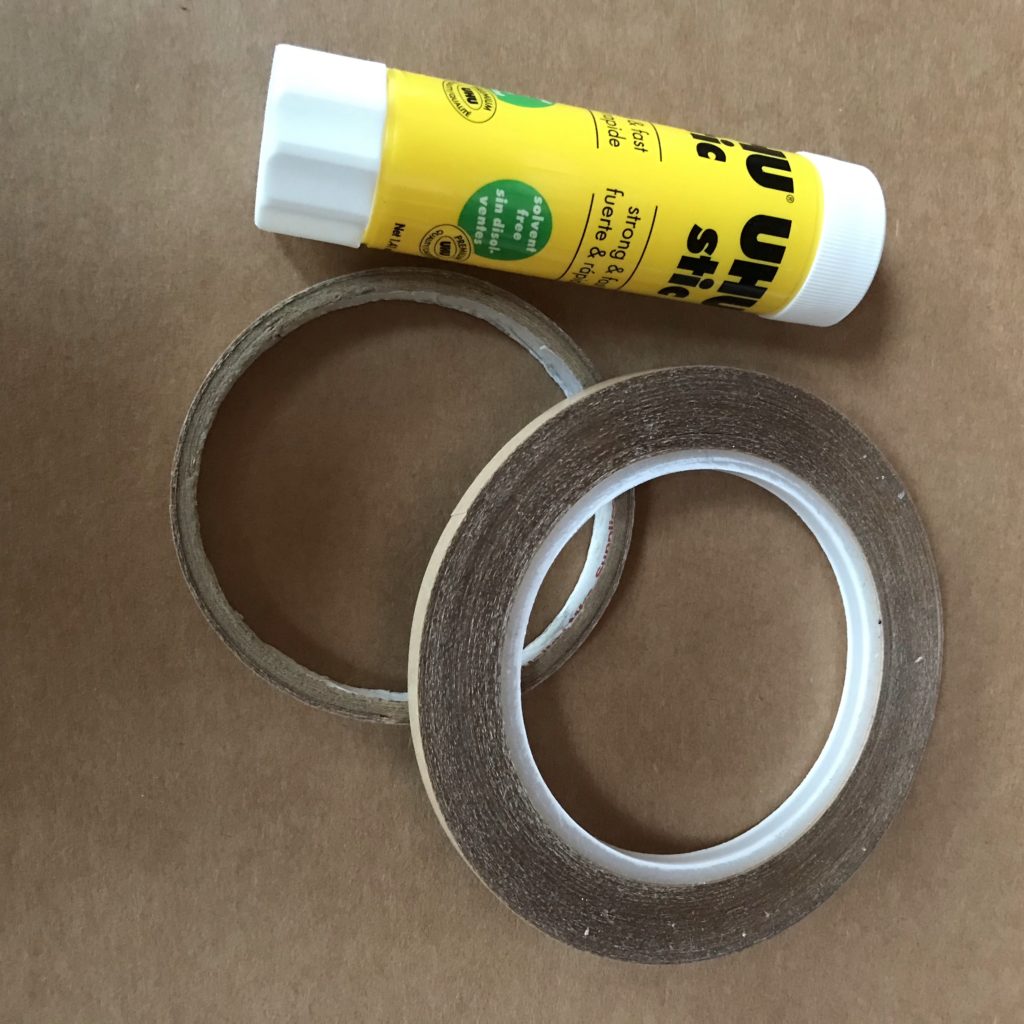
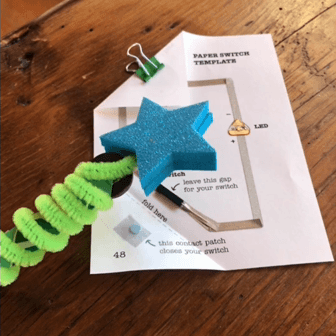
Materials & Tools
Directions
Build the Top Layer
Step 1: Fold
Traditionally, the top layer of a cobweb card was intricately cut by hand while the paper was flat. In interest of time, we will be folding ours to achieve a similar effect.
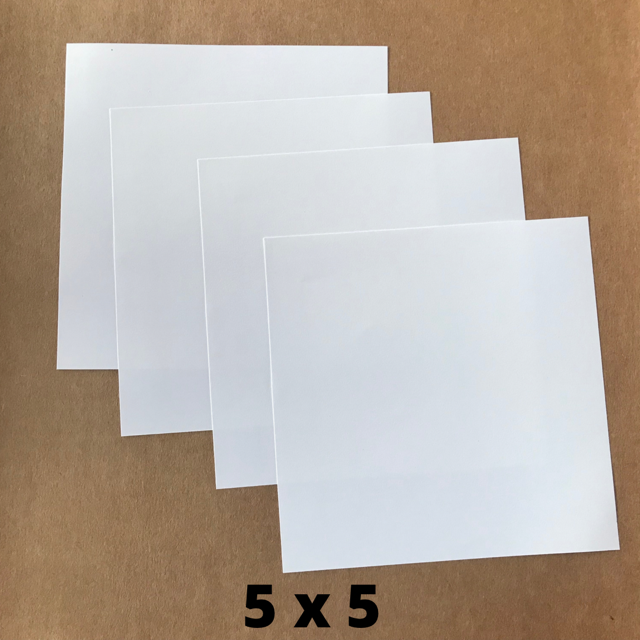
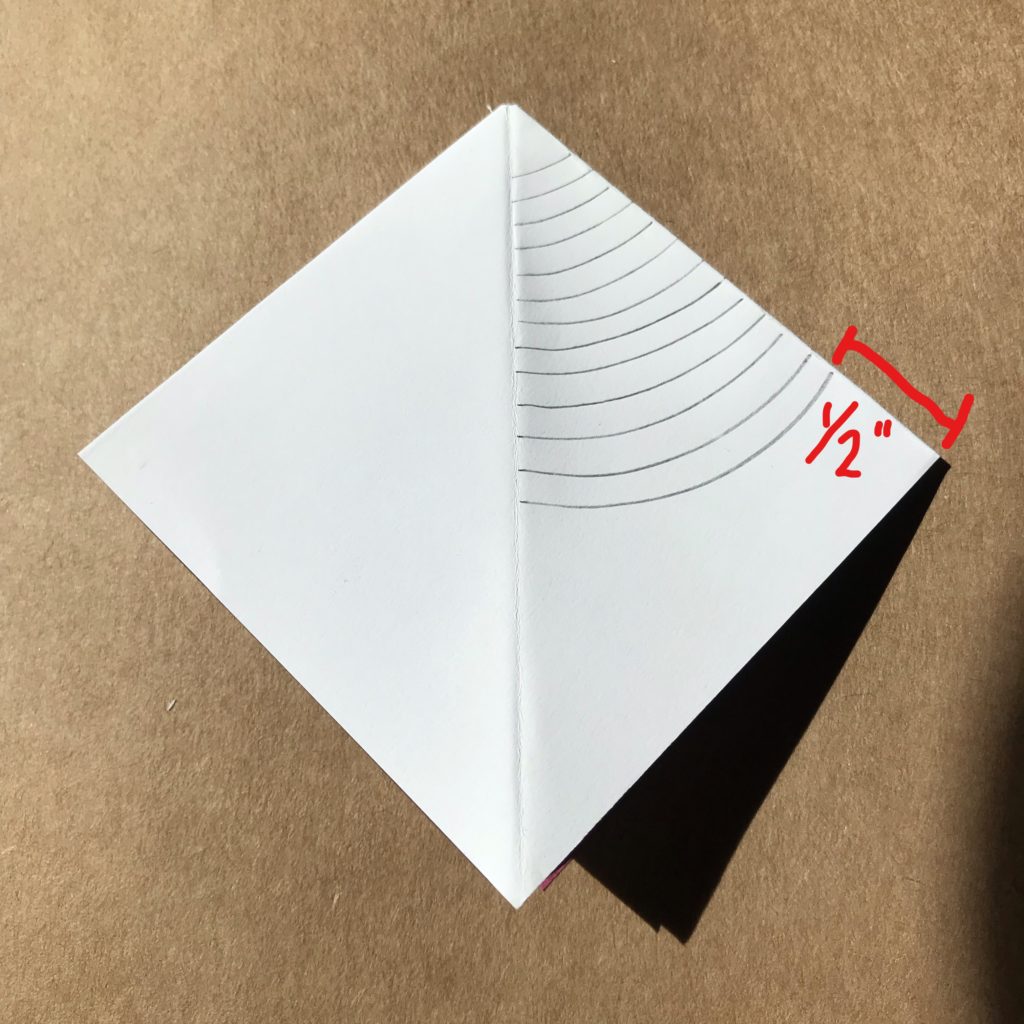
To get started fold one of the 5″ x 5″ sheets of paper into quarters diagonally to create a triangle. Open that triangle up with its long edge facing away from you. Then fold the right and left sides down parallel with the center to create a diamond. Fold the resulting diamond in half and crease the hinge.

Step 2: Plan Your Cuts
Starting from top of the diamond you just folded (the closed end), use a pencil to mark several evenly spaced lines, stopping within 1/2″ from the bottom.
The bend of your lines will determine the shape of your cobweb/ paper cage. If you prefer a rounded top layer, tracing the curve of a protractor, or a circular object laying around your house, is helpful. If you prefer a paper cage with more angles, your lines may be drawn straight across.
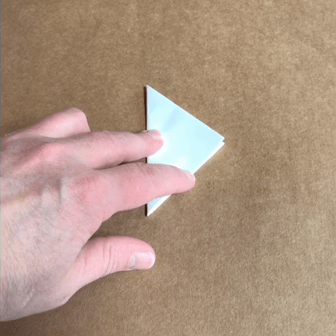
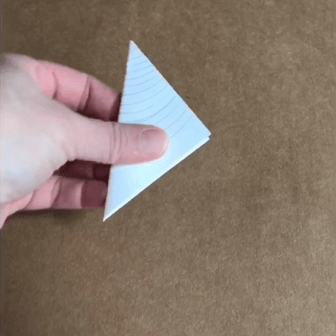
Step 3: Alternate Your Cuts
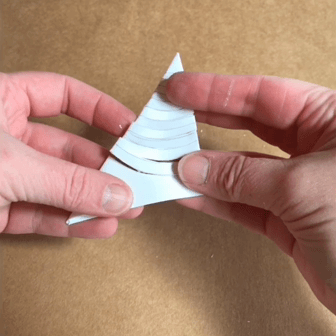
Begin making your first cut from the top open side (not the hinged side) of your paper diamond, stopping before you get completely to the edge. Then, start your second cut from the hinged side, stopping before you get completely to the opposite edge. Continue making alternating cuts, stopping short of the edges, until you’ve only got about 1/2″ or so of uncut paper remaining at the bottom of your diamond.
Step 4: Unfold
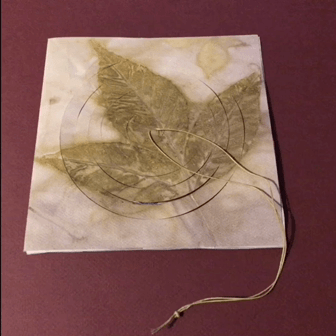
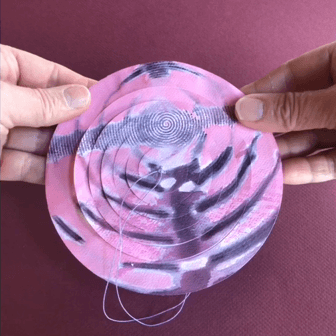
Starting at the top, open edge of your paper diamond, carefully unfold your cobweb and press it flat. Leaving it pressed under a heavy book for a while will help minimize the folds.
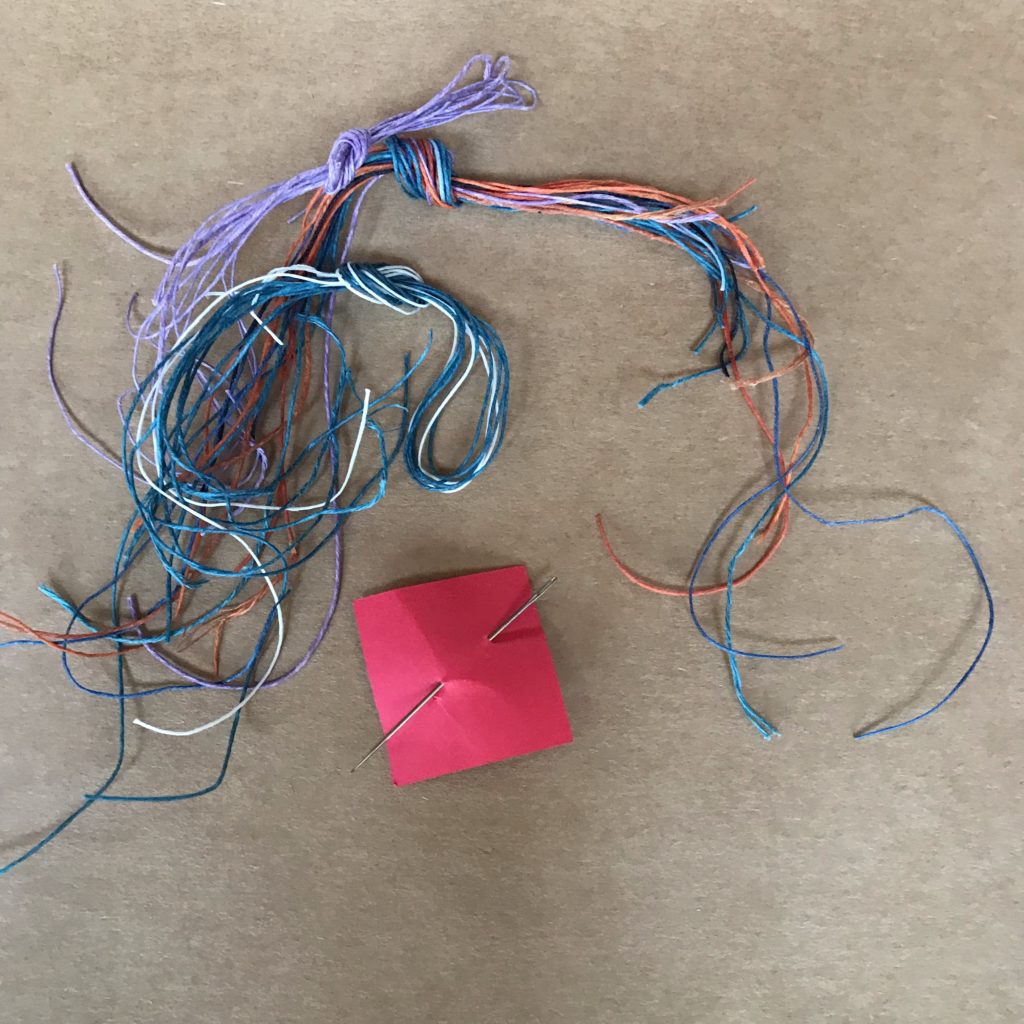
Step 5: Reinforce & Thread the Center
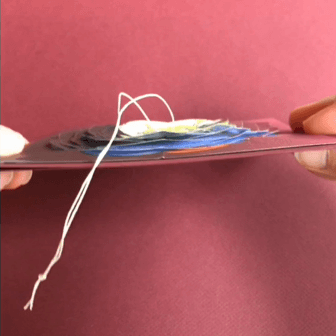
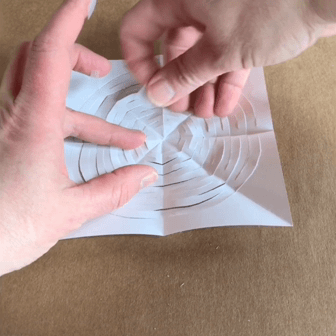
To help prevent tearing, apply a small square of Scotch tape to the center of your cobweb layer as reinforcement. Make sure that the tape does not overlap any of the cuts you made, or the cobweb won’t open properly. Then, starting on the outside of your cobweb, use a needle to pull a piece of thread or thin cord through the center of the cobweb and back around to the outer side. Pull the tails of your thread through so that they are even. Then gently test your design by holding the paper down with one hand and pulling the threads up with the other.
If you are unhappy with the results of your first attempt, repeat steps 1-5 with a second piece of 5″ X 5″ paper. If you are satisfied, proceed to the next step.
Build the Circuit Layer
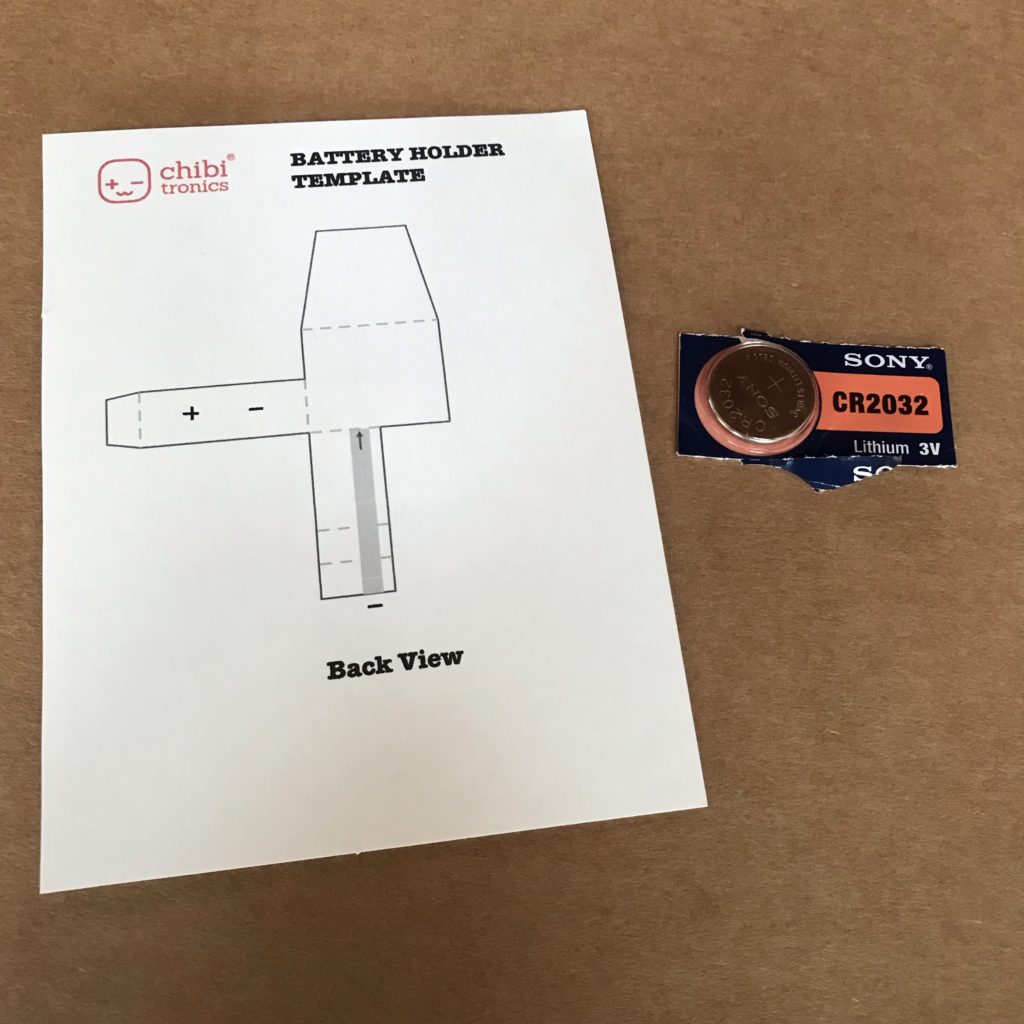
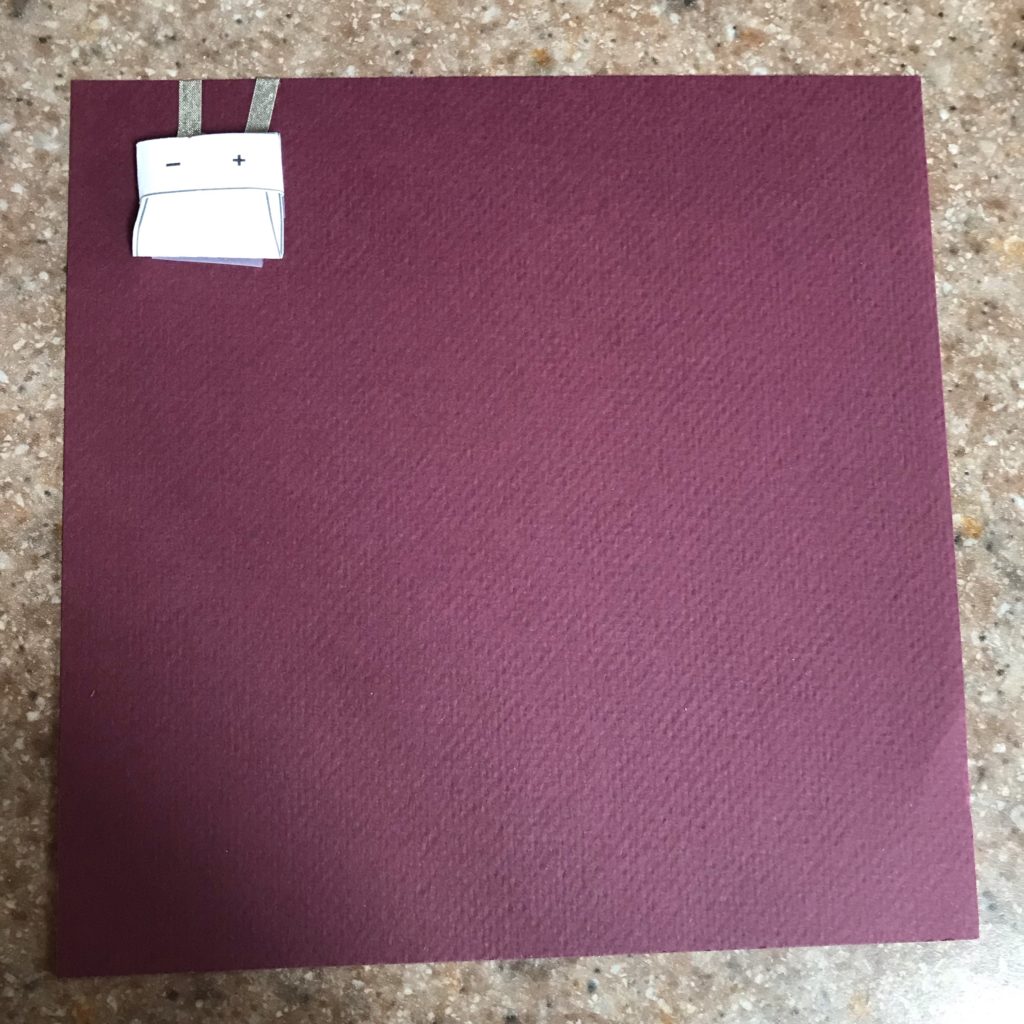
Step 1: Consider the Battery
Decide whether you wish be able to access and/or replace your battery. If battery access is not important, you can adhere the battery onto the circuit layer of your project without using a battery holder. (You may view an example of this method in the gallery below) .
If battery access is important, however, you will need to assemble and use a paper battery holder, which you’ll be placing on the back side of your card. Battery Template (PDF)
Tips, Tricks & Call-outs
If you are unsure how to assemble a paper battery holder, please visit the Paper Battery Holder Tutorial. Using Conductive Fabric Tape, rather than copper tape, is preferable for this project.
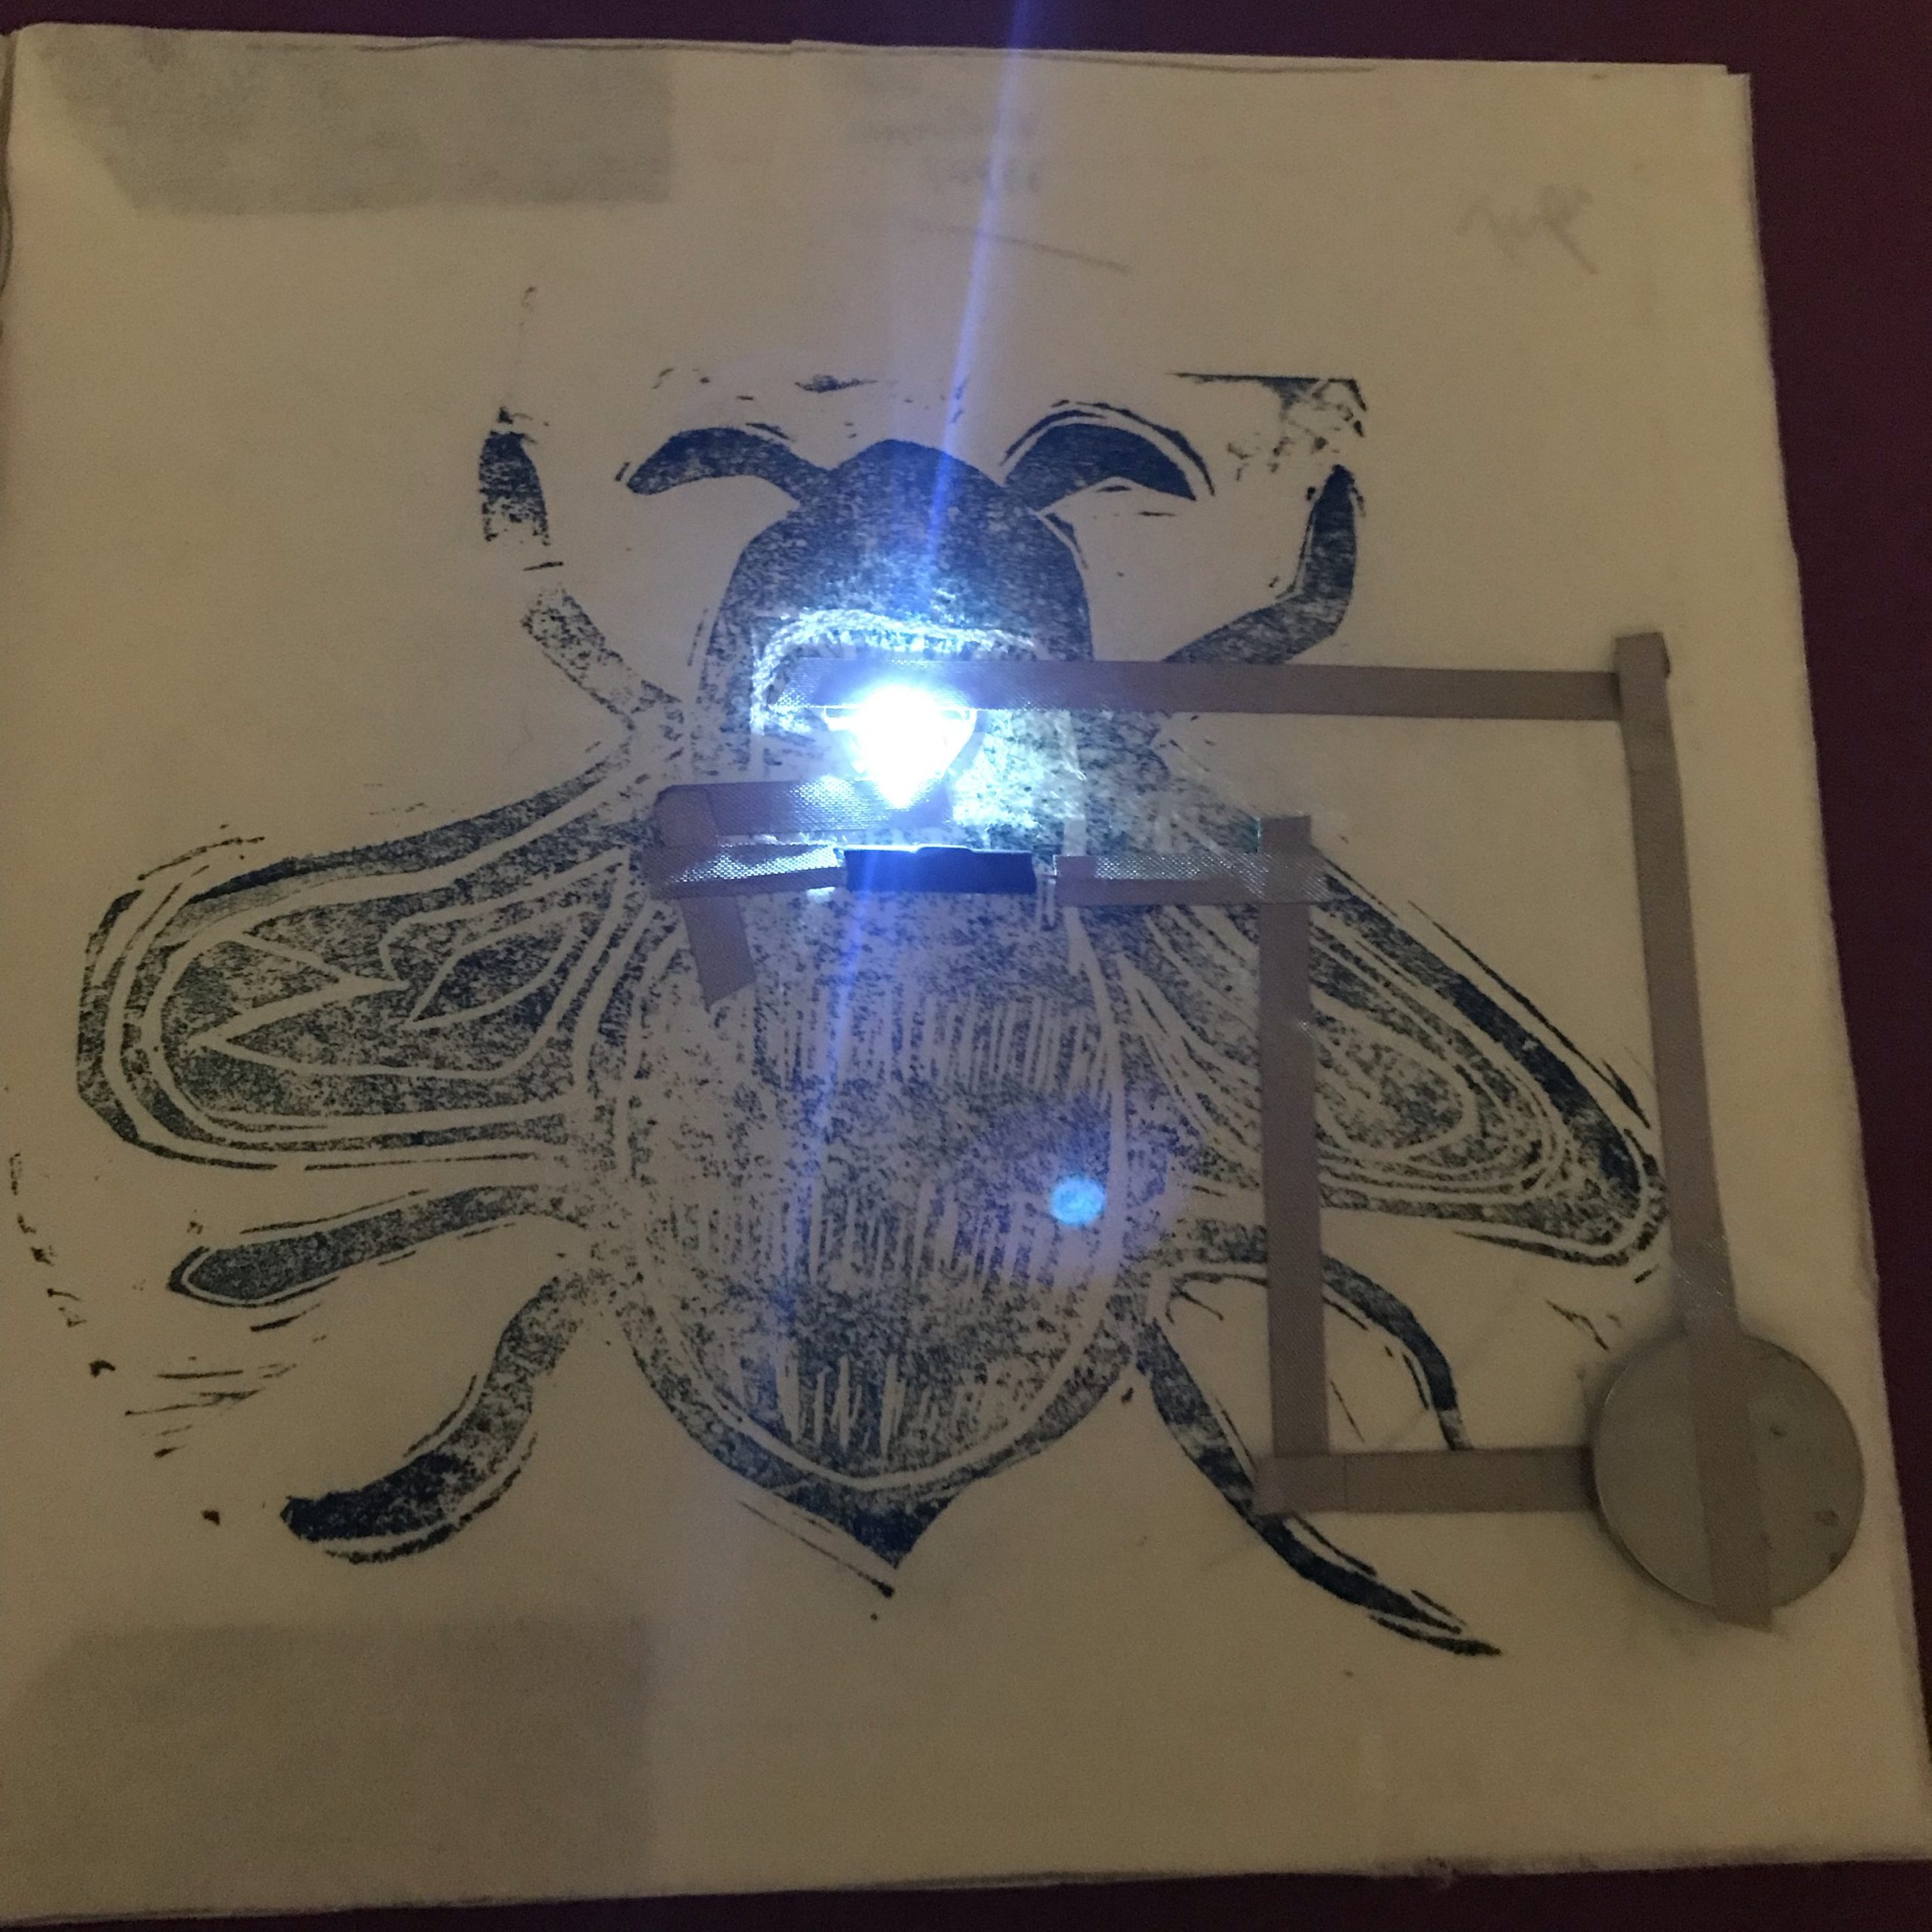
Step 2: Plan & Create Your Circuit
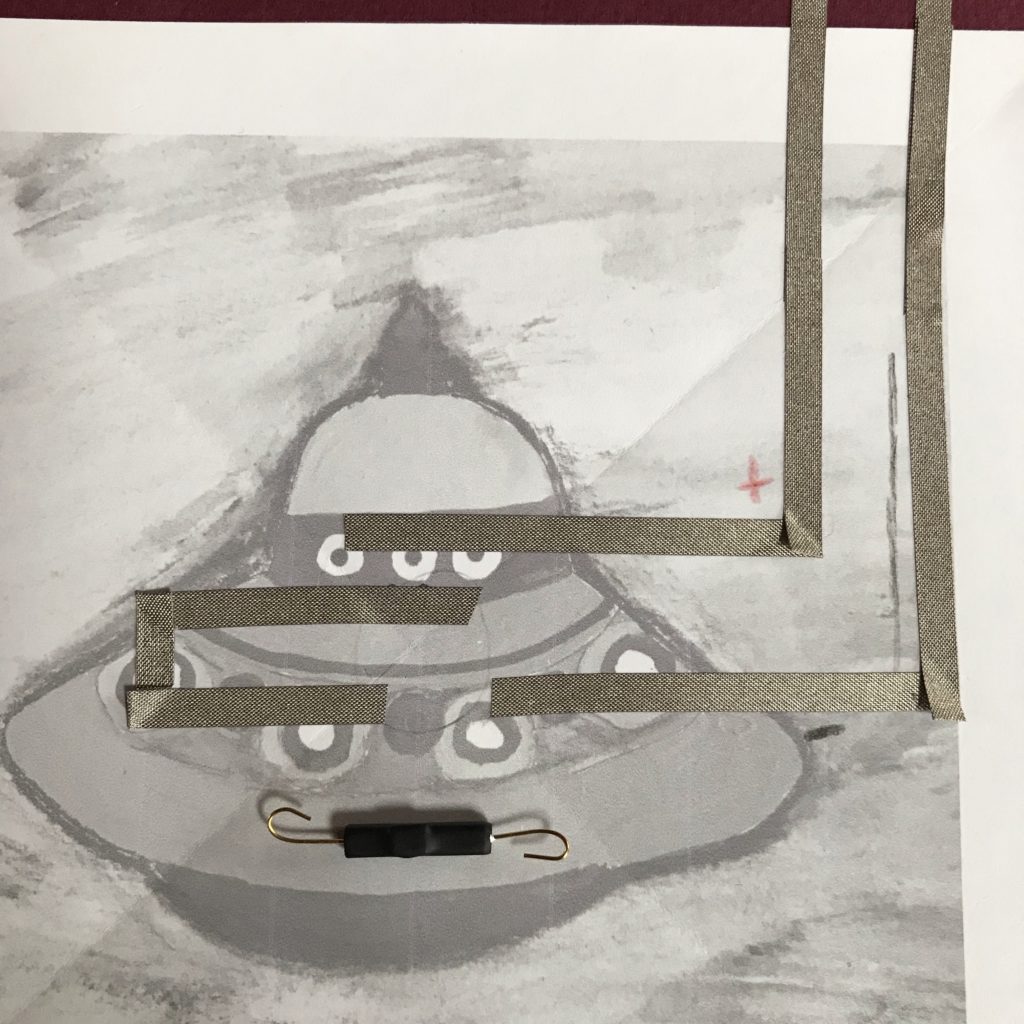
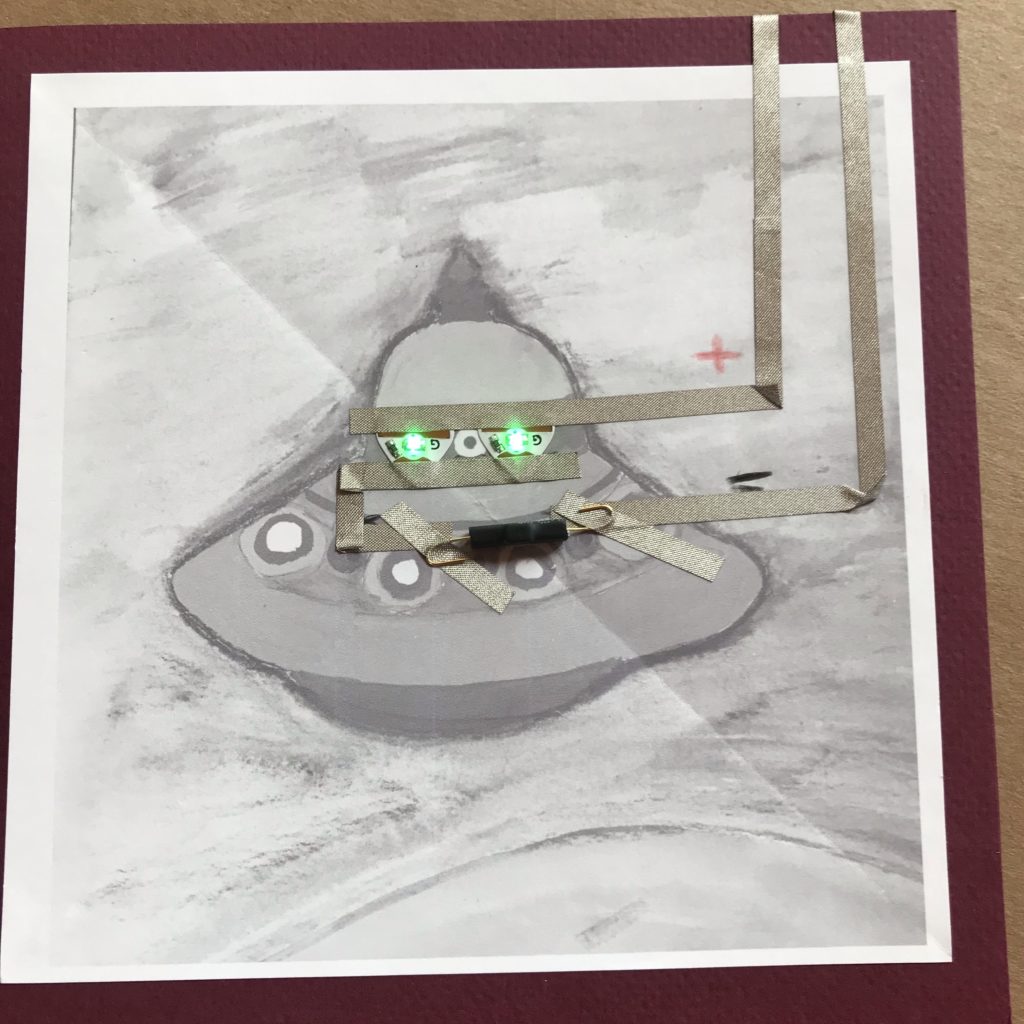
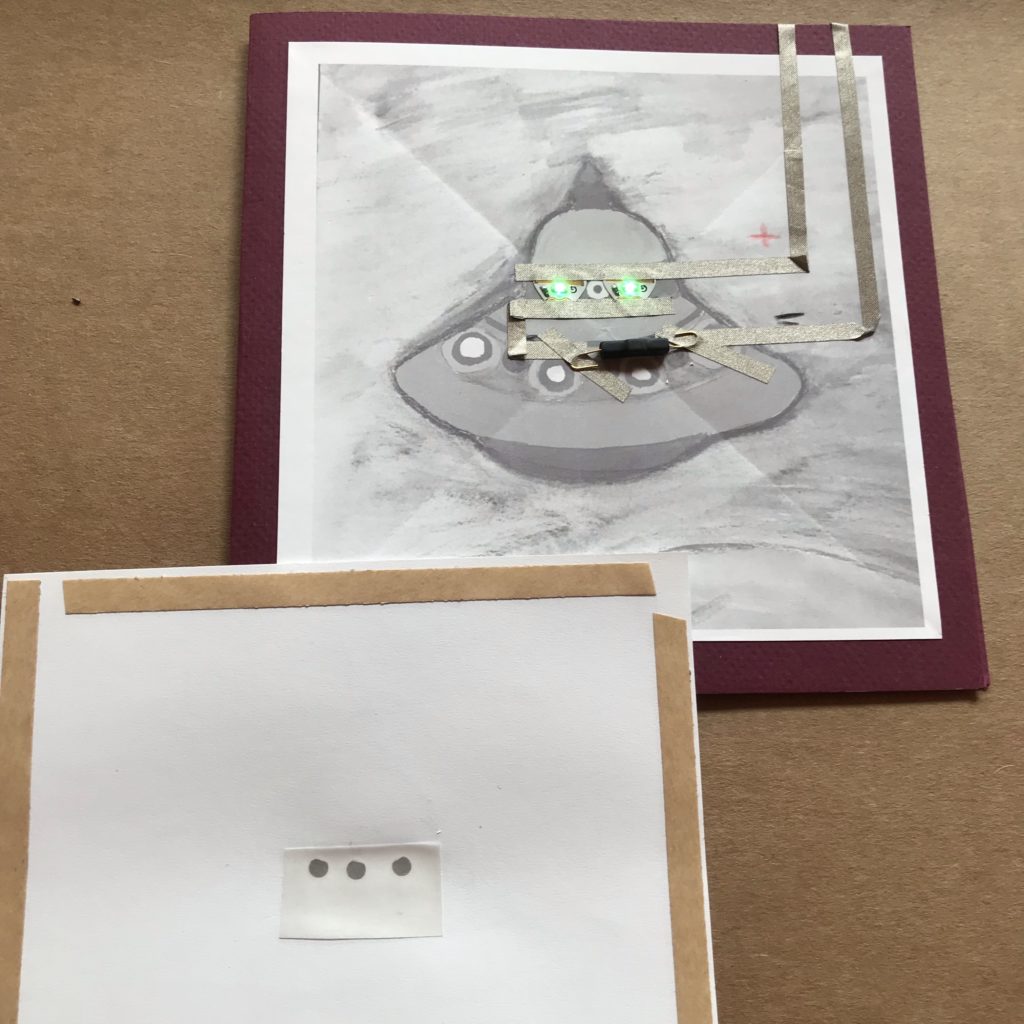
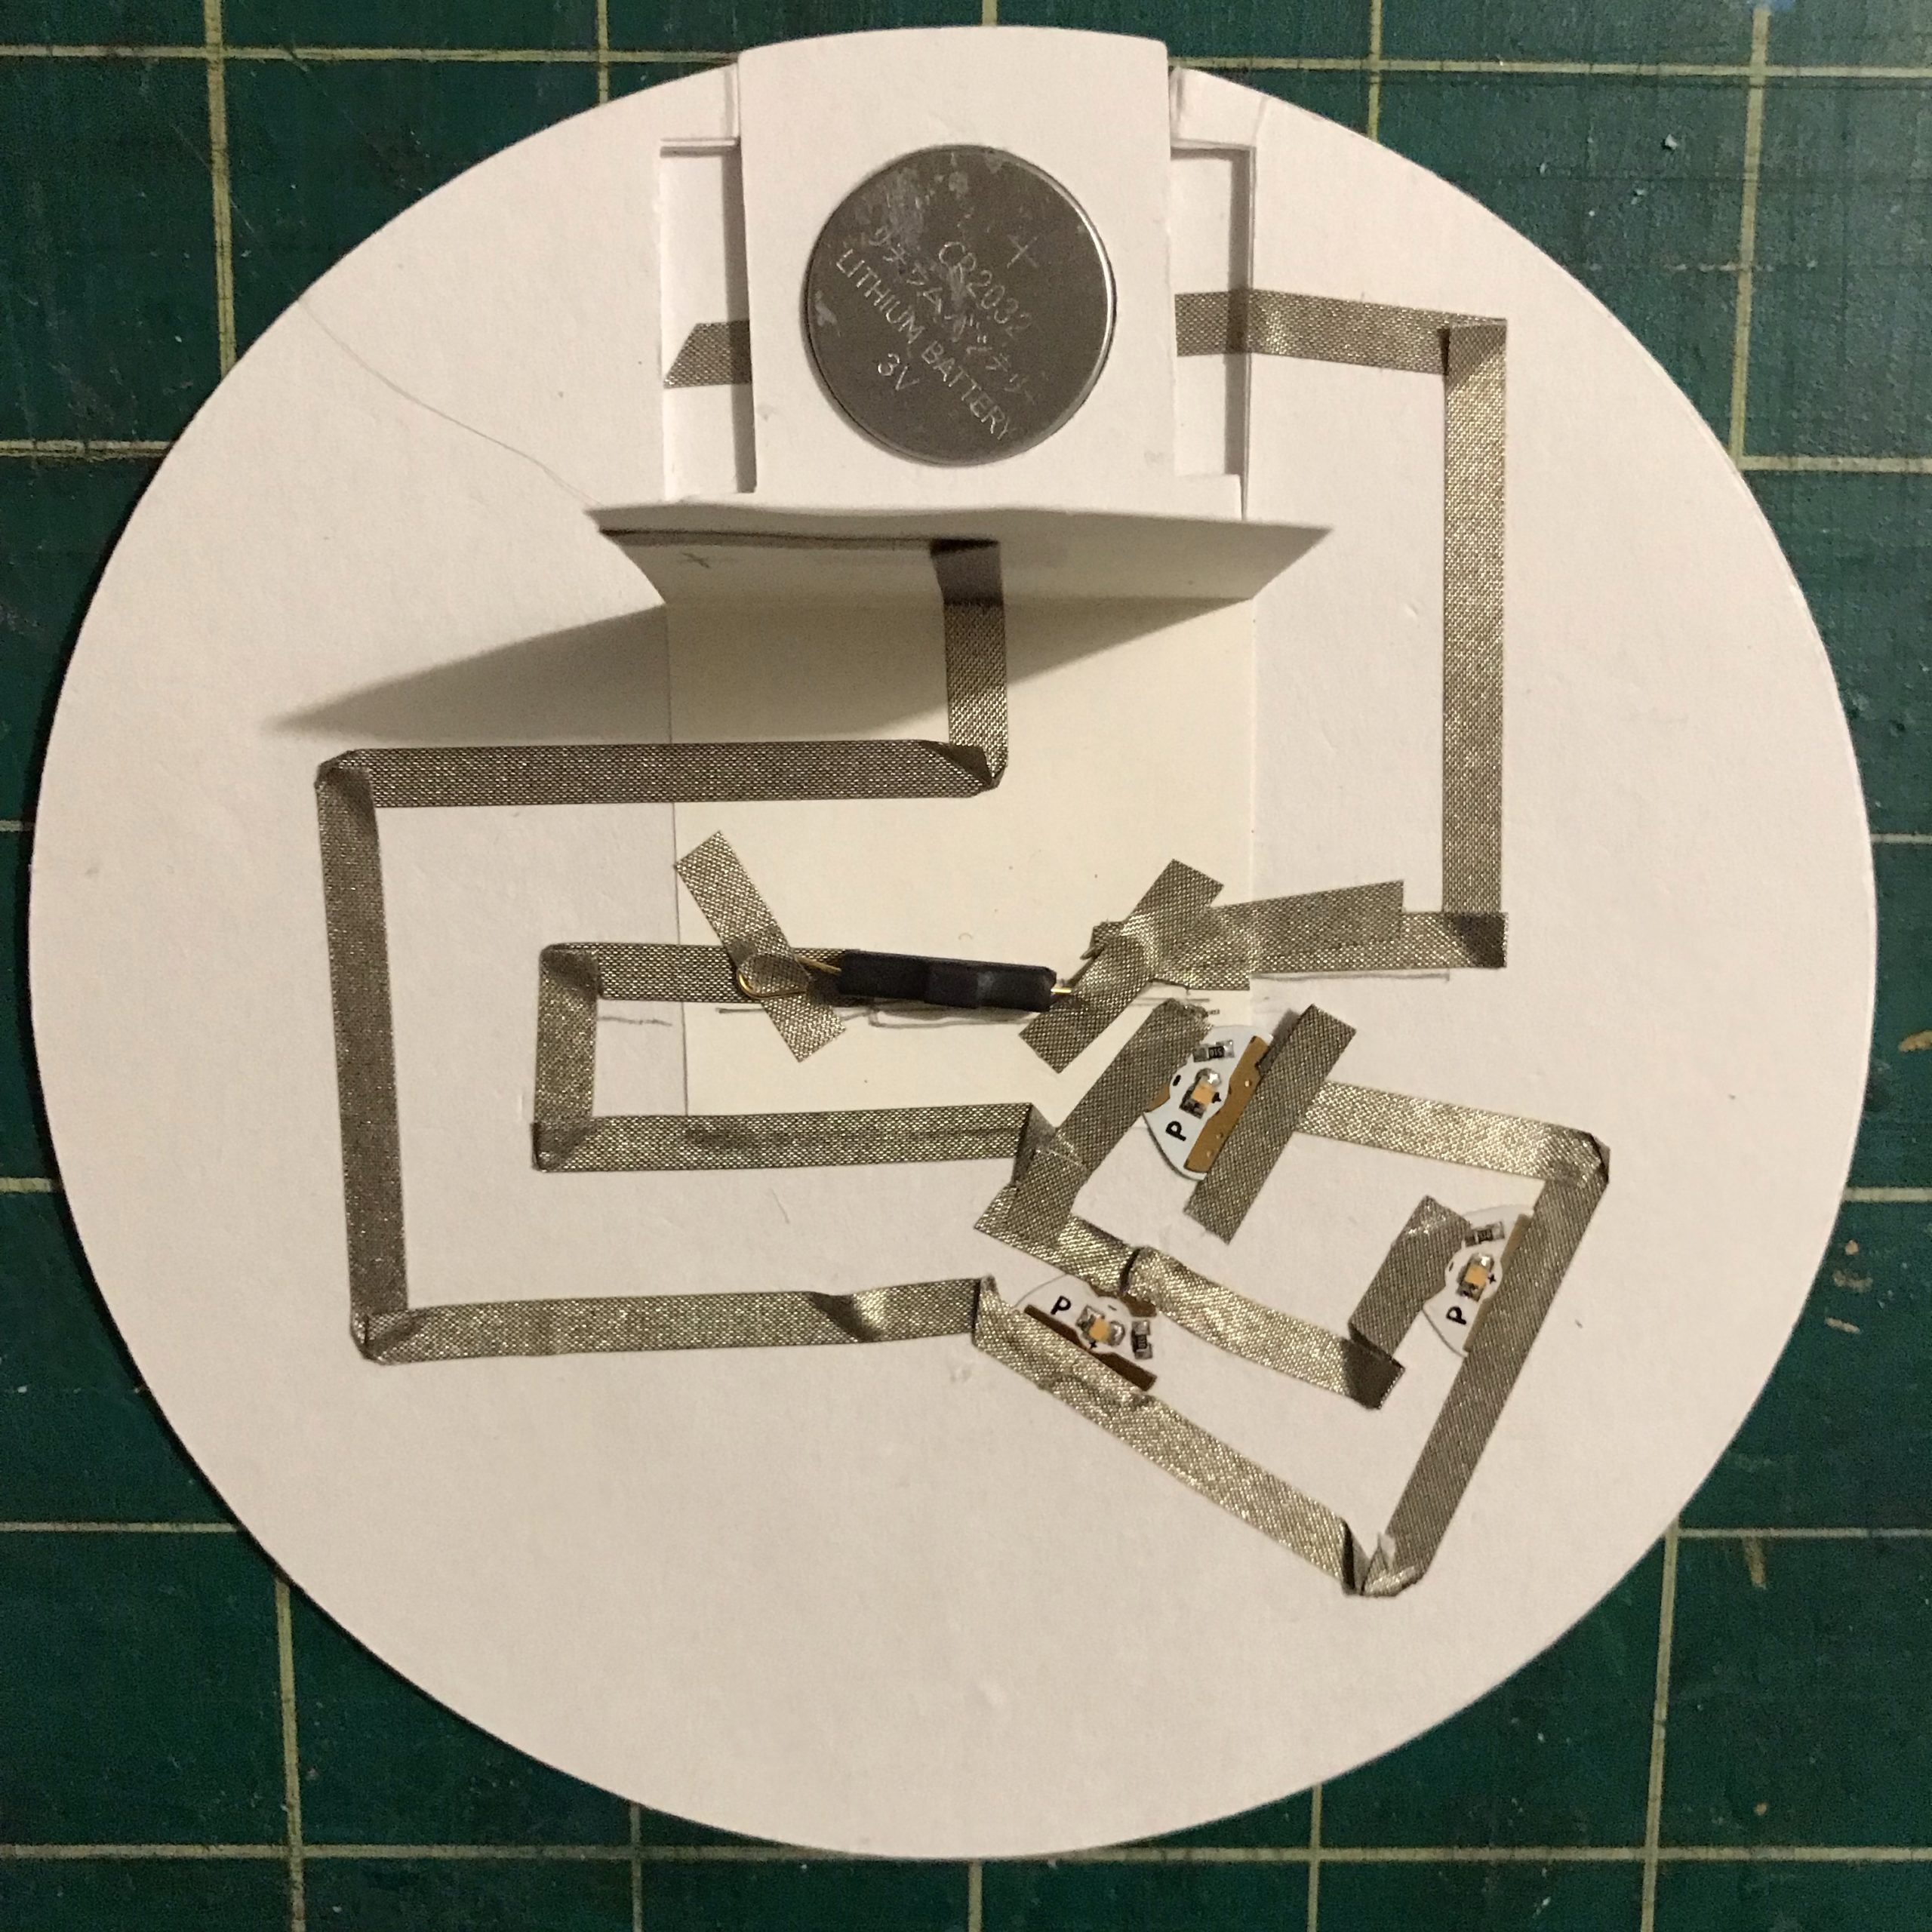
You will be placing your art layer on top of the circuit layer in order to light up an element of your choice; but, you’ll first need to ensure that you leave enough room in your circuit design to accommodate the “normally closed” reed switch in the center of the circuit layer. Because we will be placing the magnet somewhere in the center of our cobweb layer, the reed switch needs to be located near the center of the circuit.
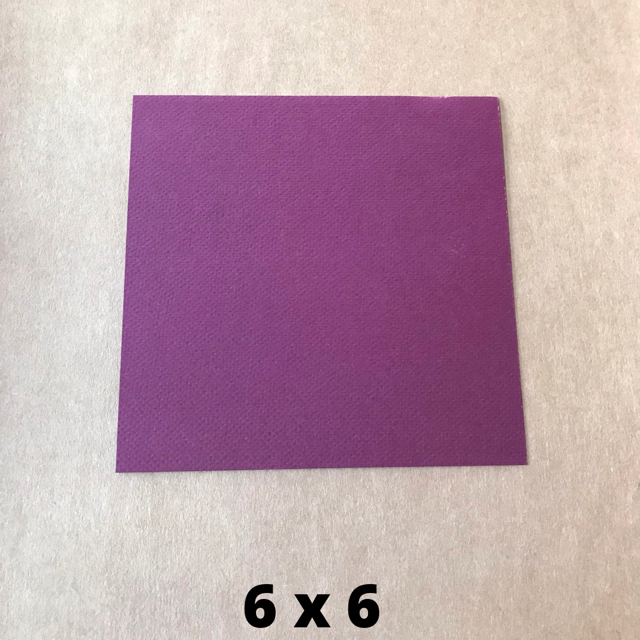
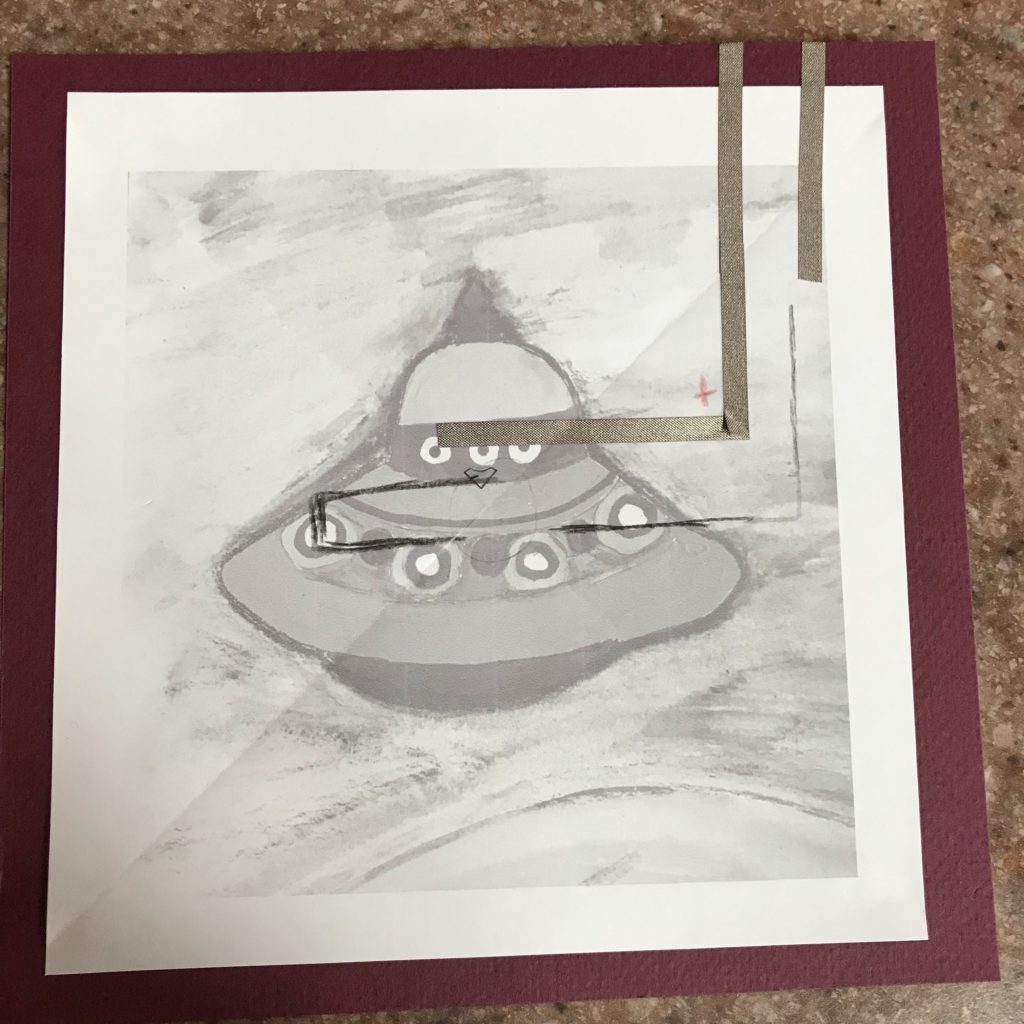
In the images below, I’m using a copy of my artwork layer to plan and build the circuit. I folded it diagonally to locate the center and used double sided tape to adhere it to the 6″ X 6″ backing layer).
Next, I penciled in the location of a Circuit Sticker LED and sketched the positive trace.
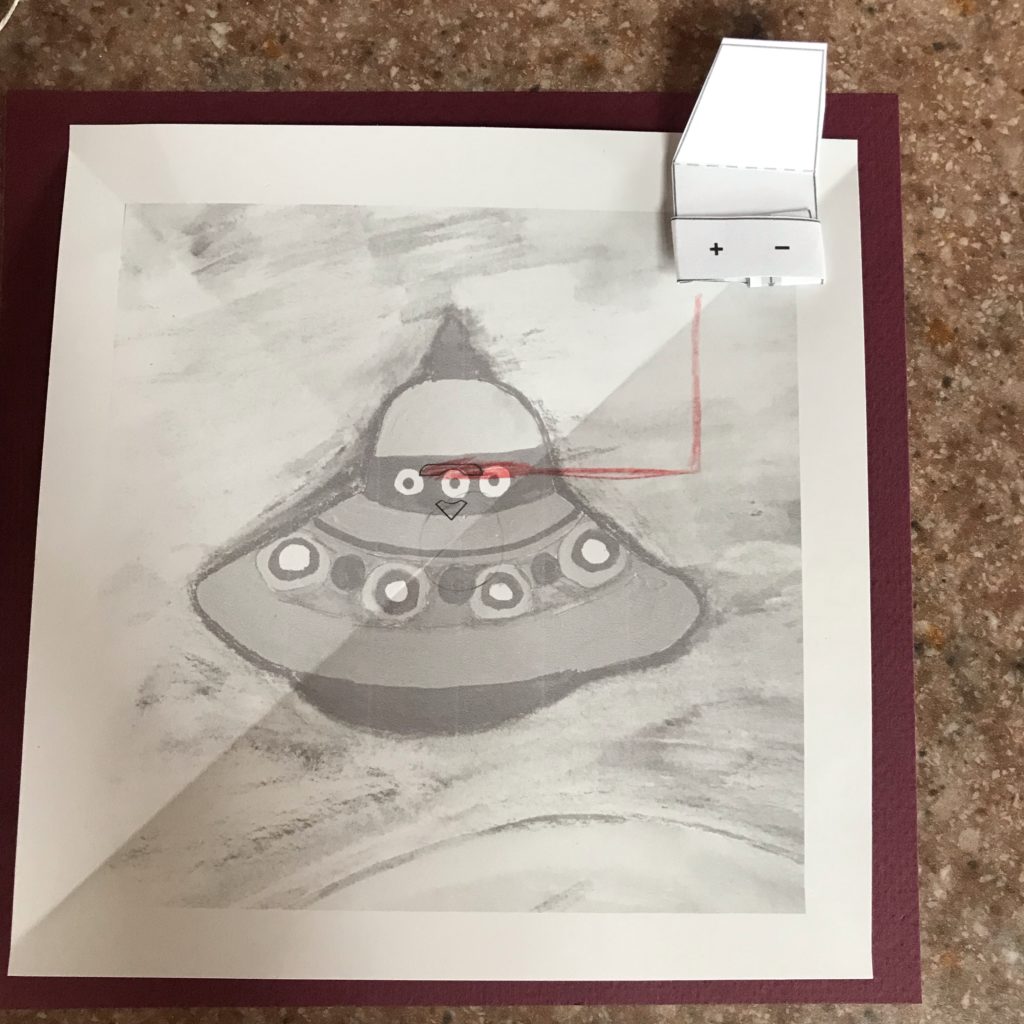

I then sketched the negative trace, leaving a gap in the center for the reed switch. Because I was using a paper battery holder to allow access to the battery, I adhered it to the back side of the backing layer and brought the battery leads around to the front of circuit layer.

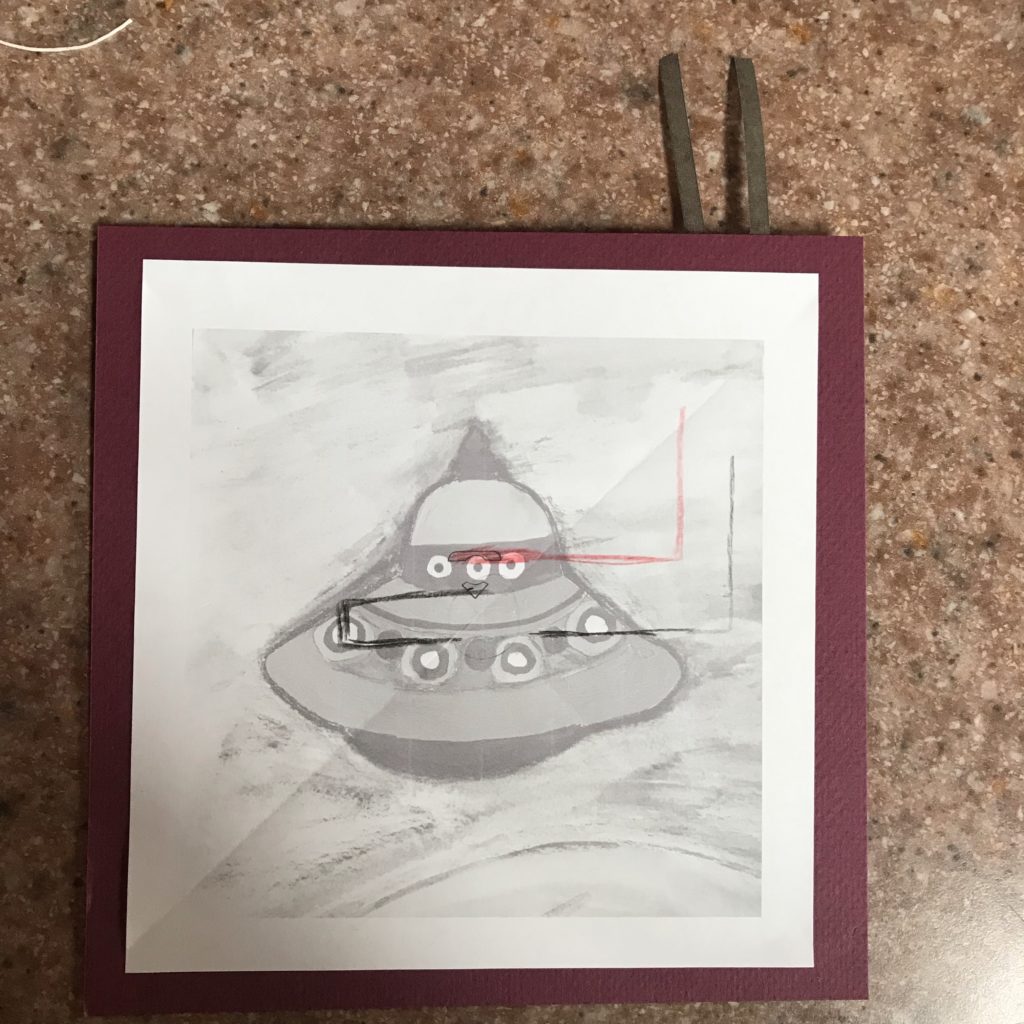
The pictures below show the location of the battery holder and its leads wrapping around to the front side of the circuit layer. I used Conductive Fabric Tape to construct the battery holder and the circuit.
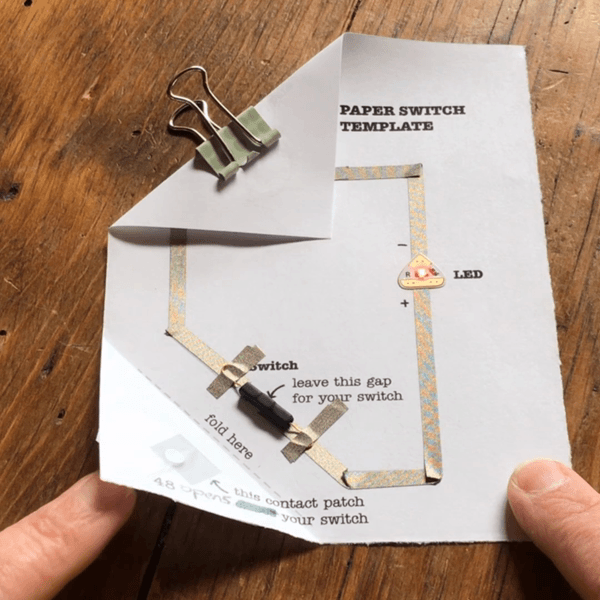
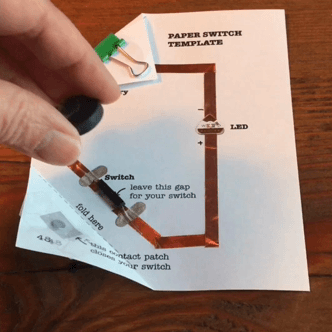
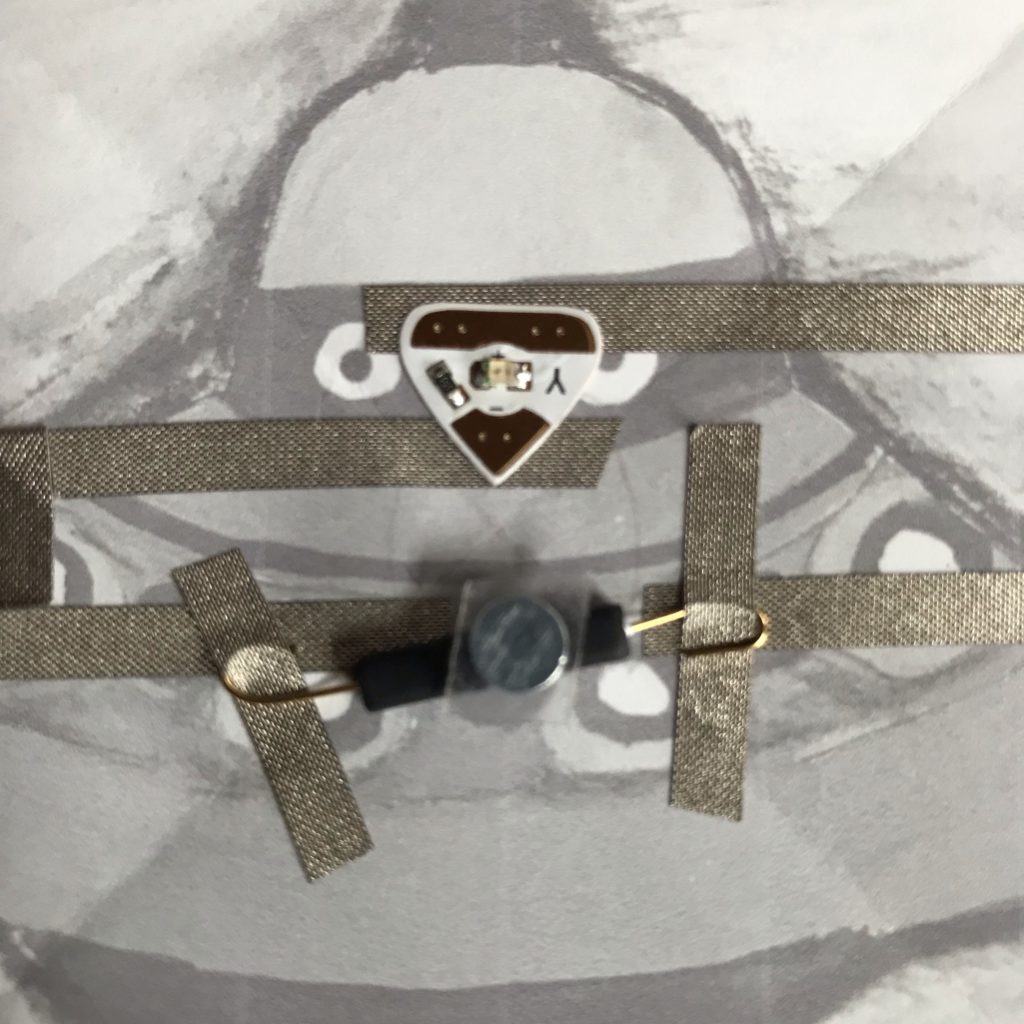
After laying down the positive and negative traces of the circuit, I turned my “normally closed” reed switch with the bump facing upward and used my fingers to gently curve the metal legs on each end to help add stability.
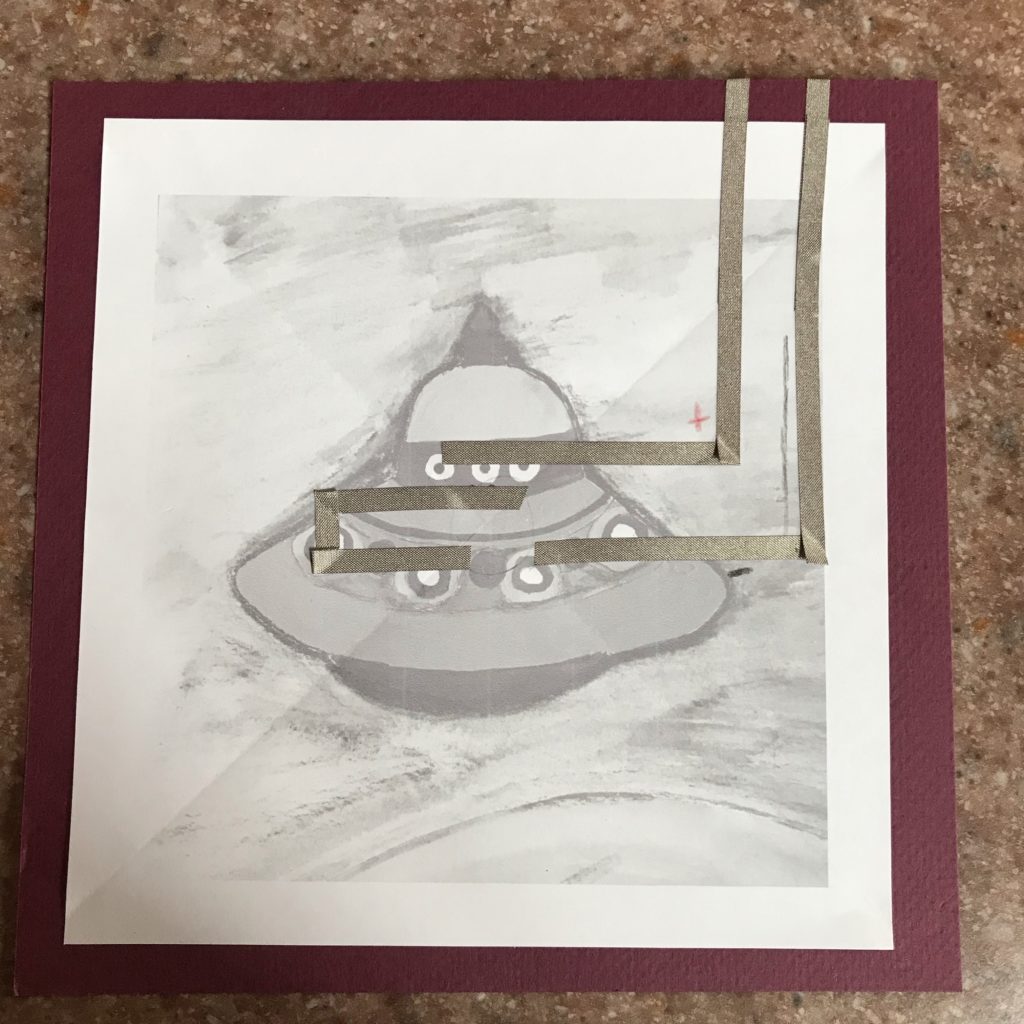
Next, I added the LED and adhered the legs of the reed switch with small pieces of Conductive Fabric Tape.
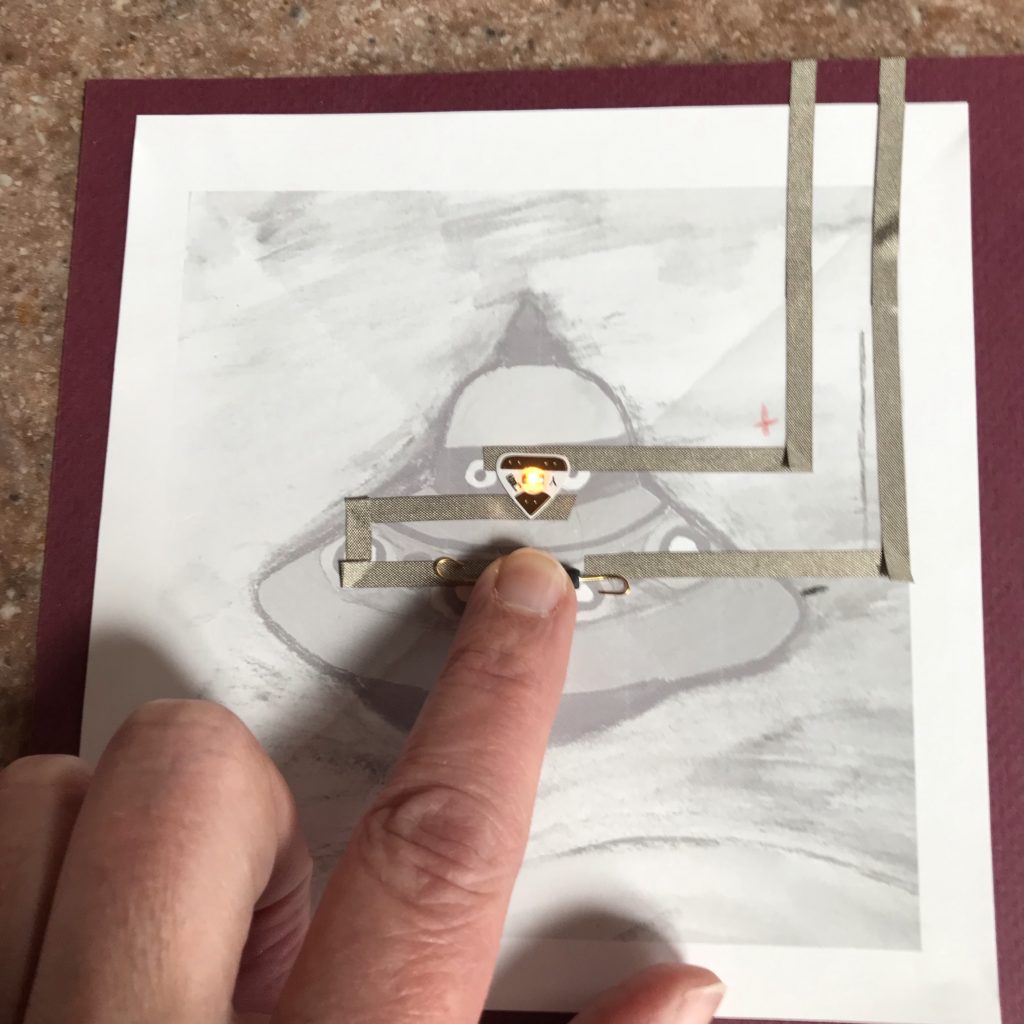
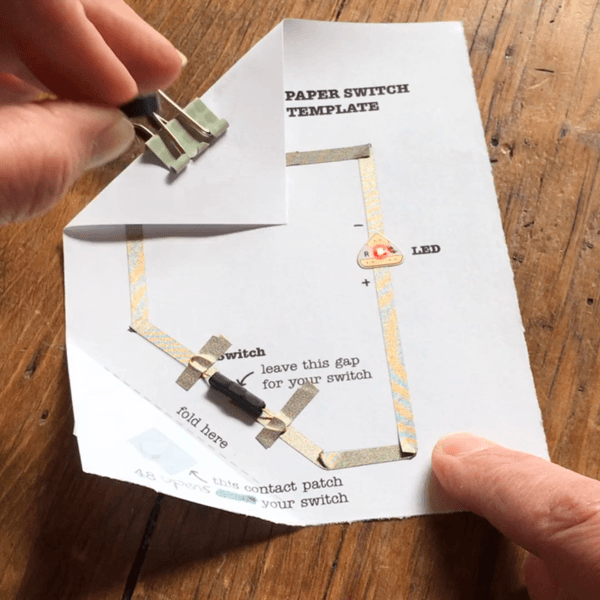
Once the second leg of the “normally closed” reed switch was taped down, the circuit was complete and CLOSED, allowing the LED(s) to turn on.
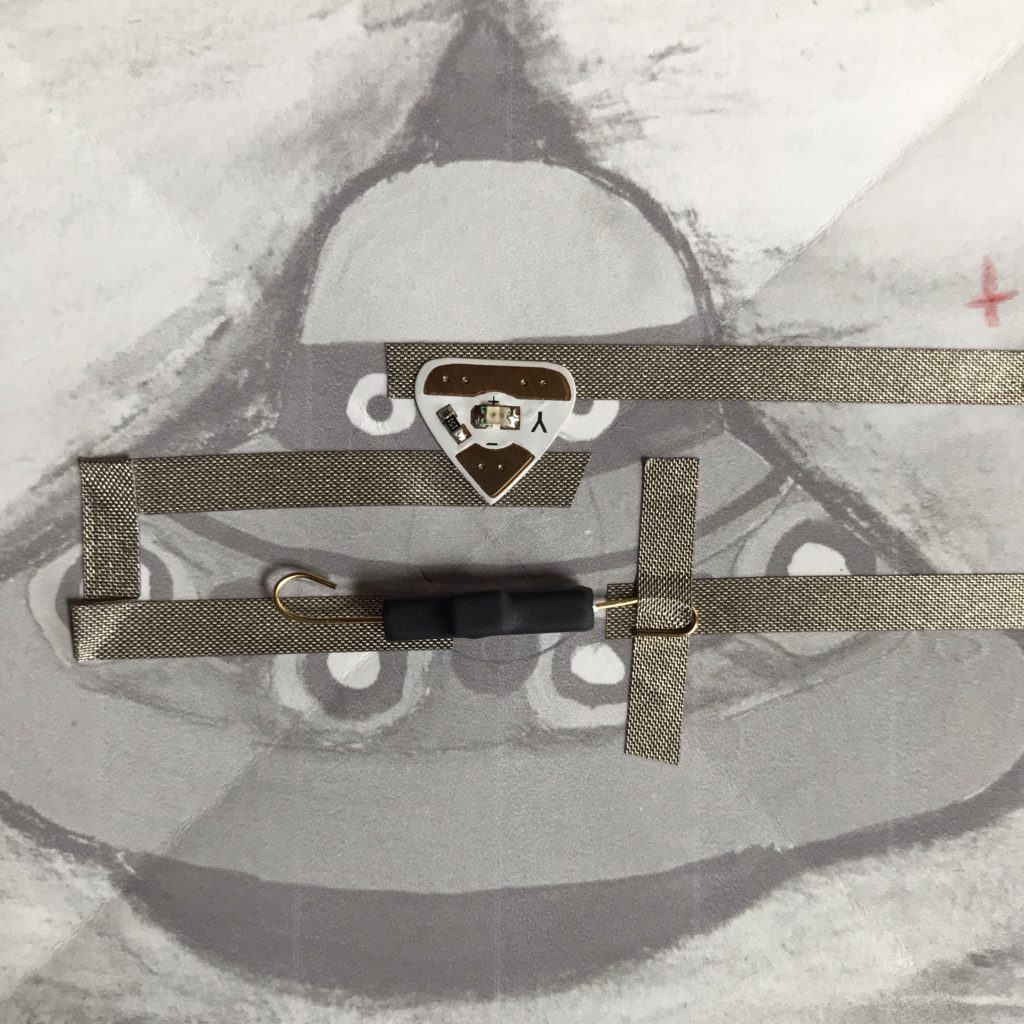
When I placed the magnet on top of the switch to determine its polarity and placement, the switch OPENED and the LED(s) turned off.
With the magnet in place (and the switch turned off), I adhered a small piece of double sided tape on top of it to help with the next step of getting the magnet in the correct place inside of the top layer.
Step 3: Add the Magnet to the Cobweb
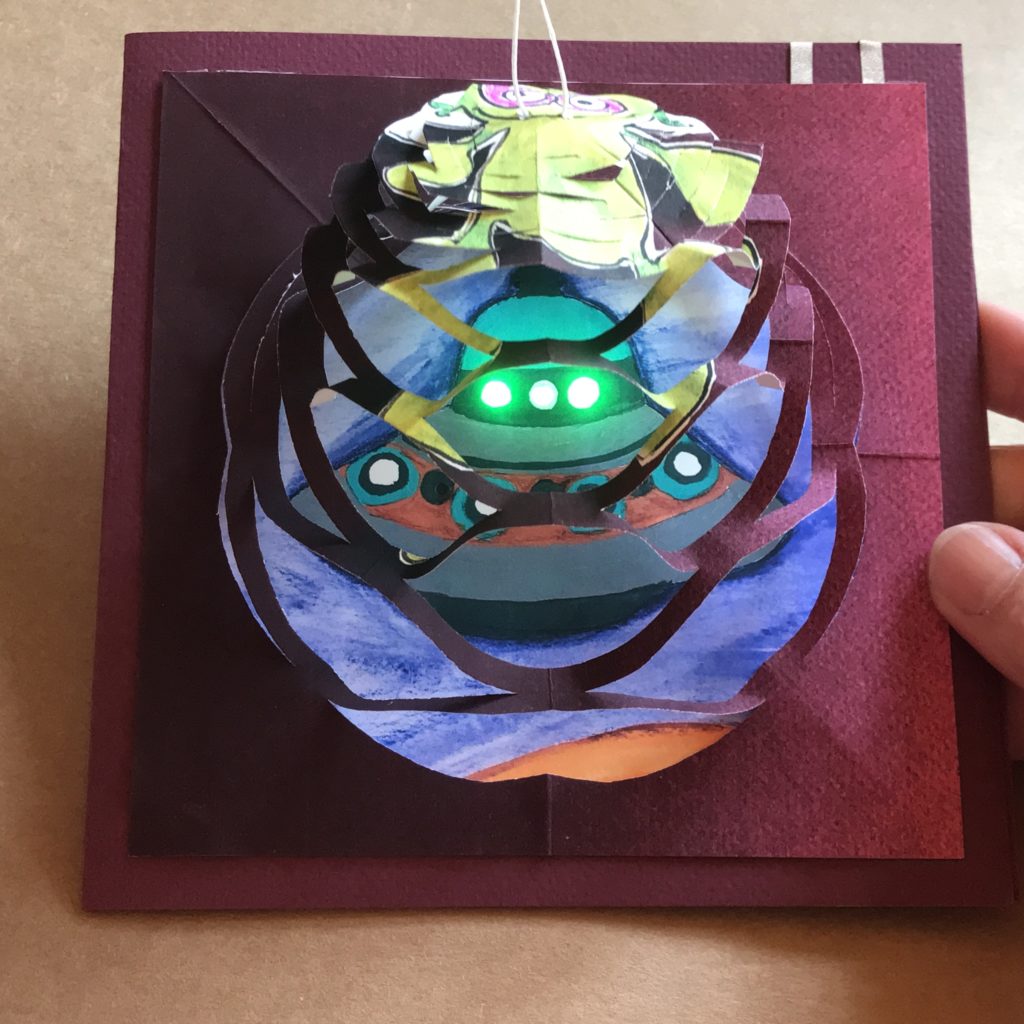
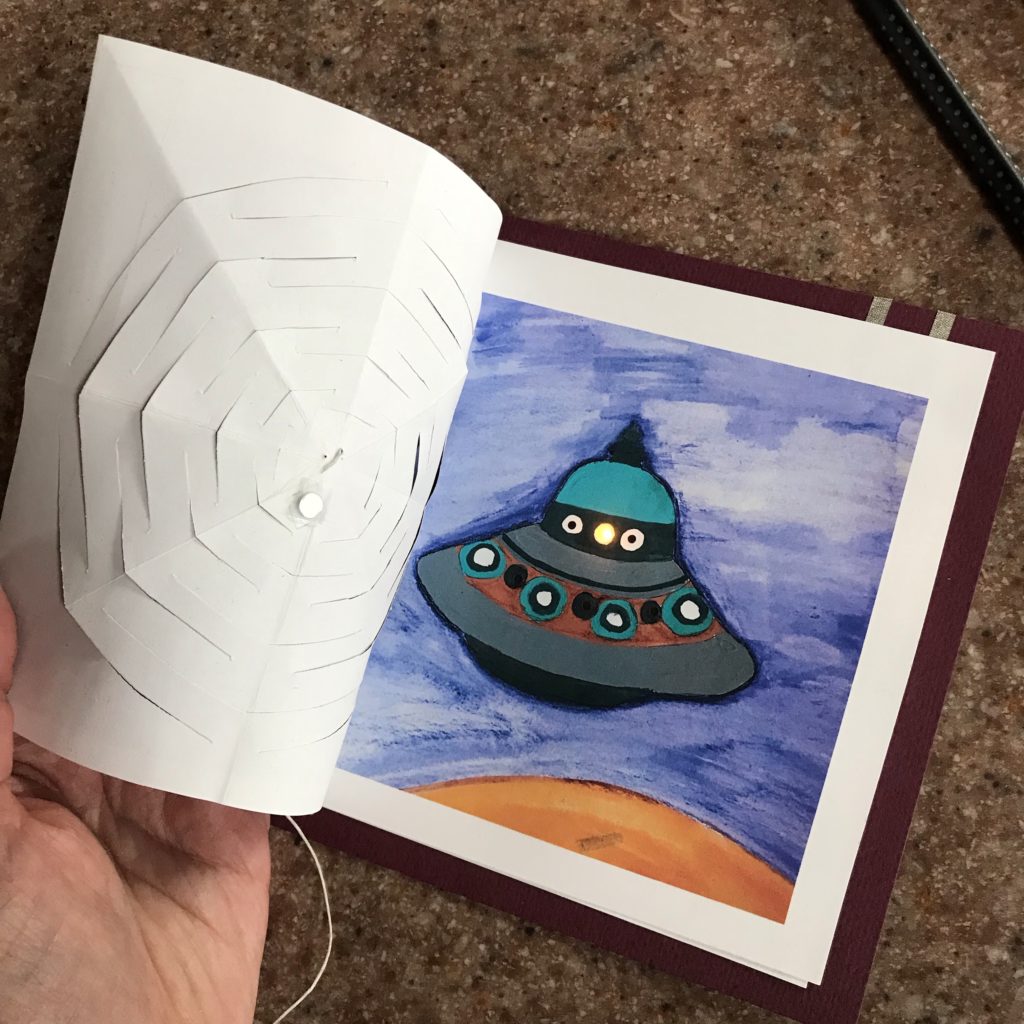
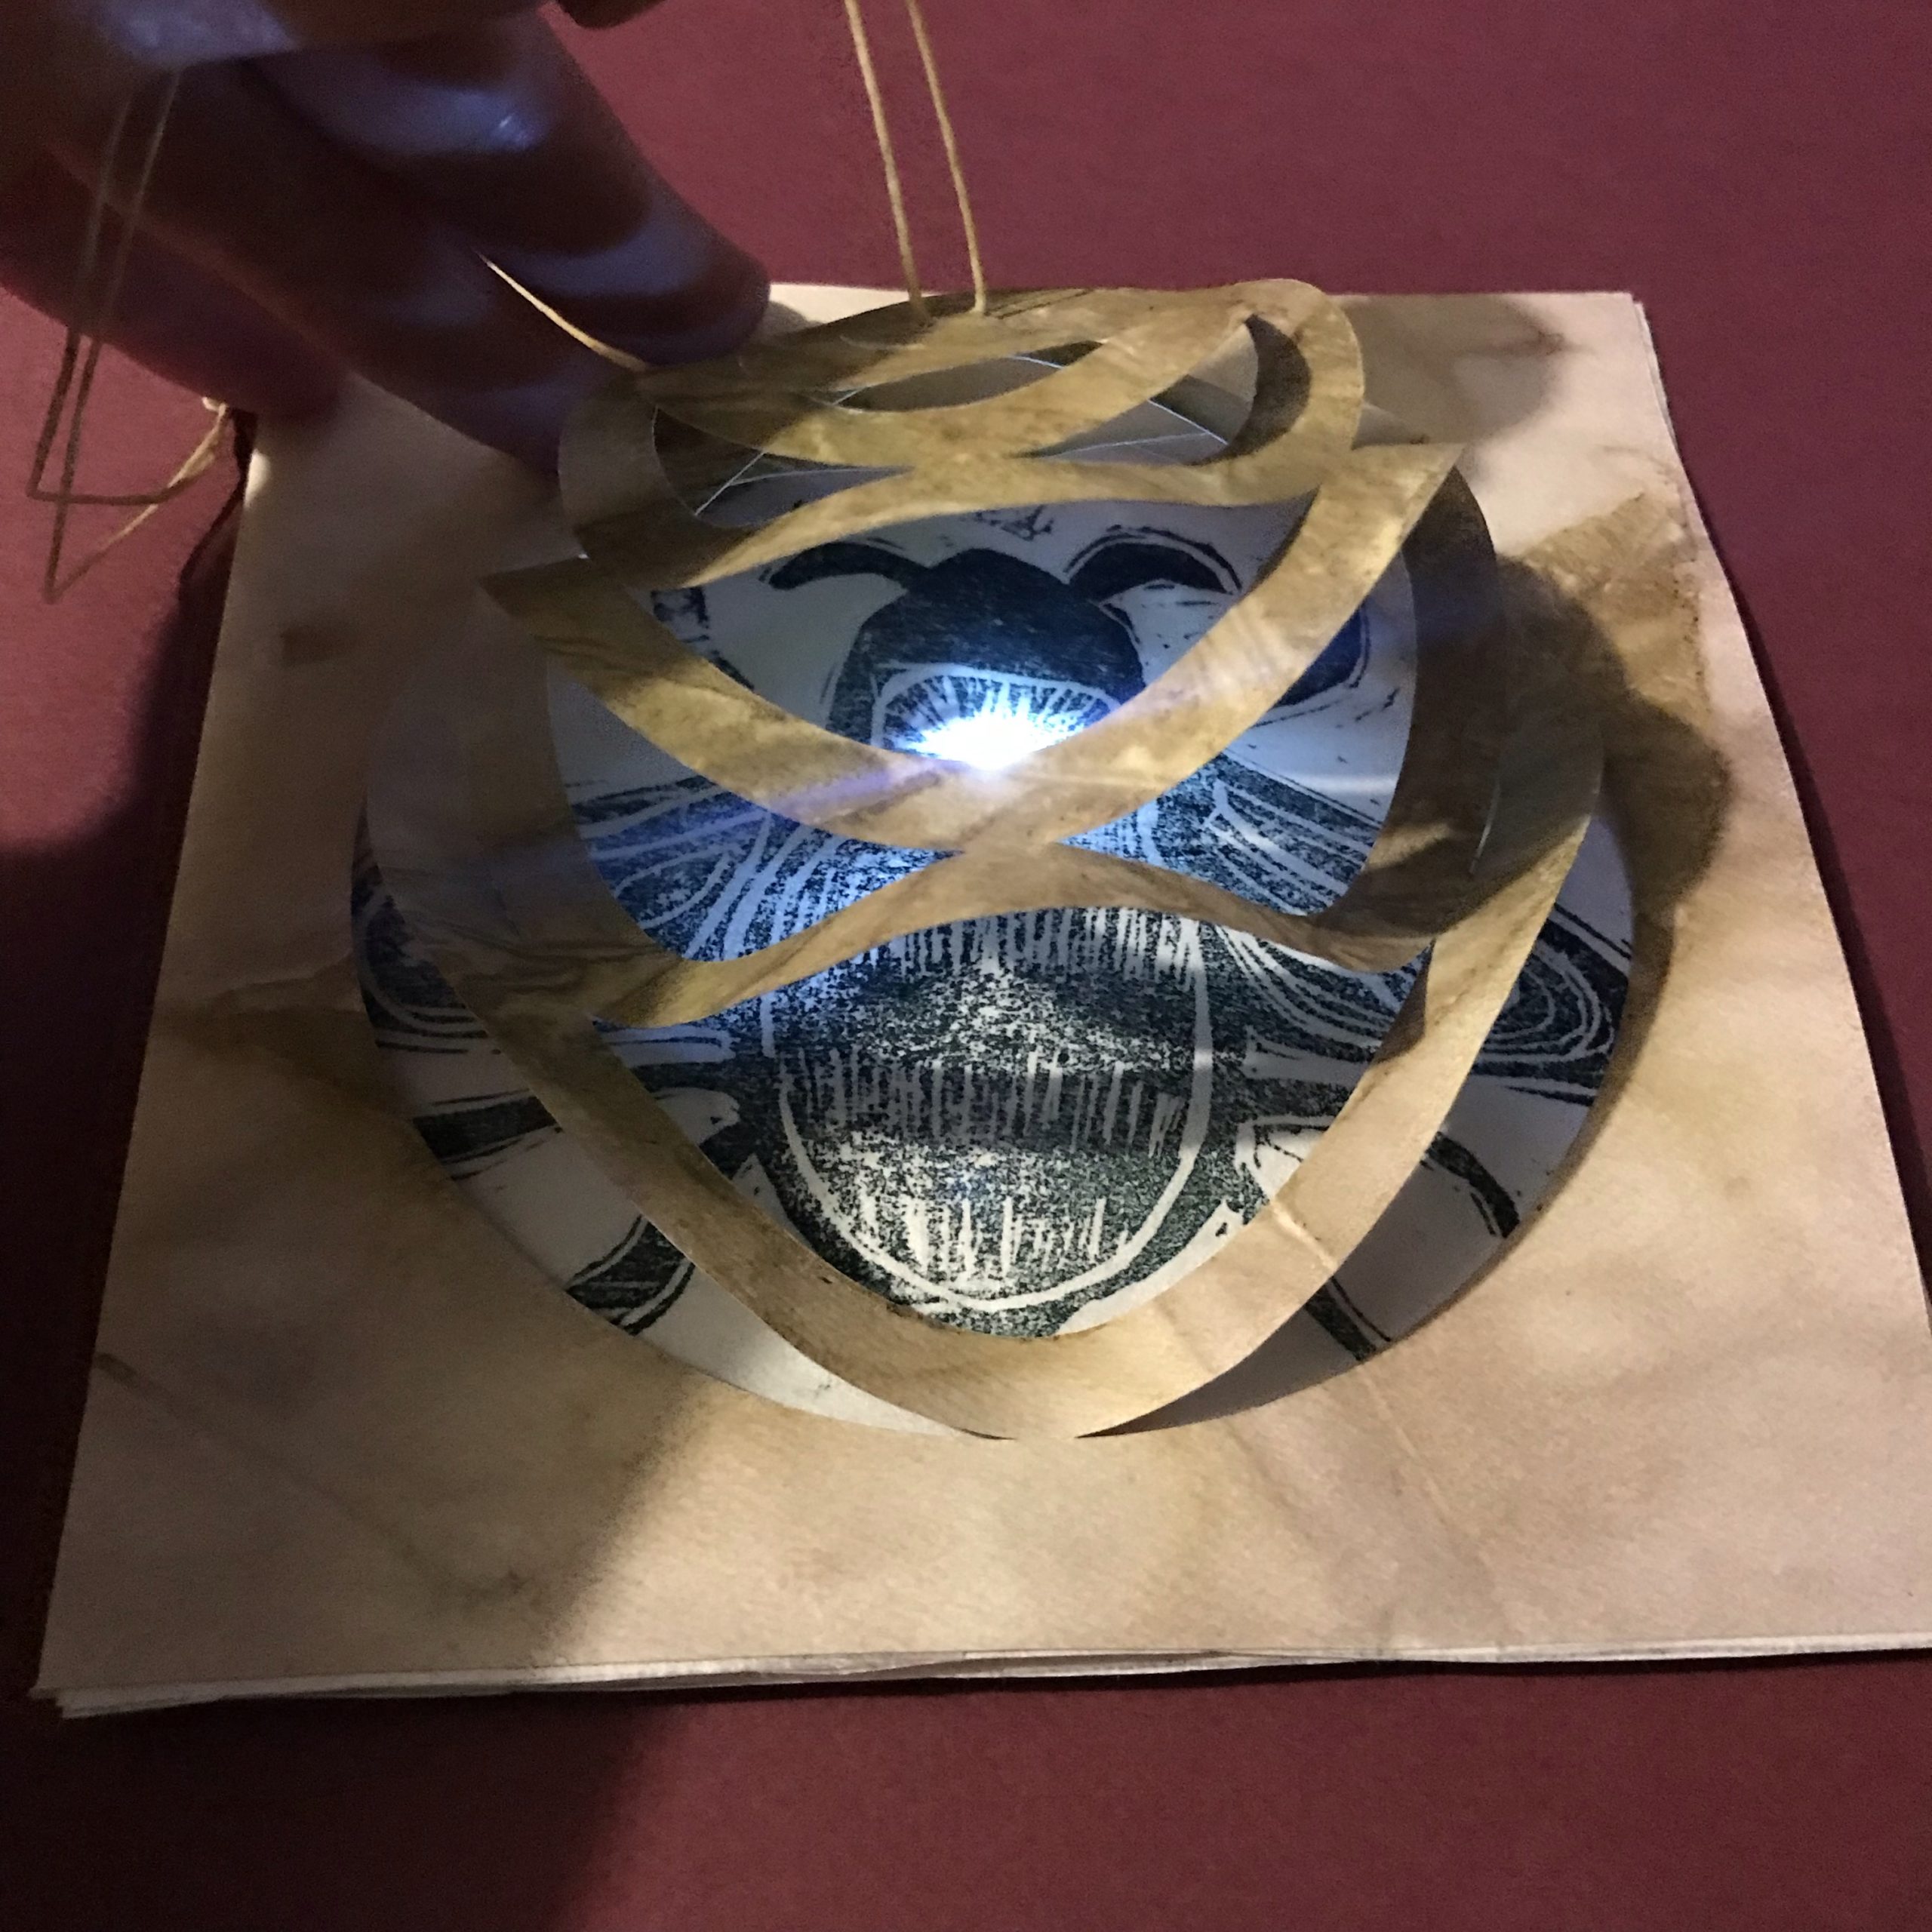
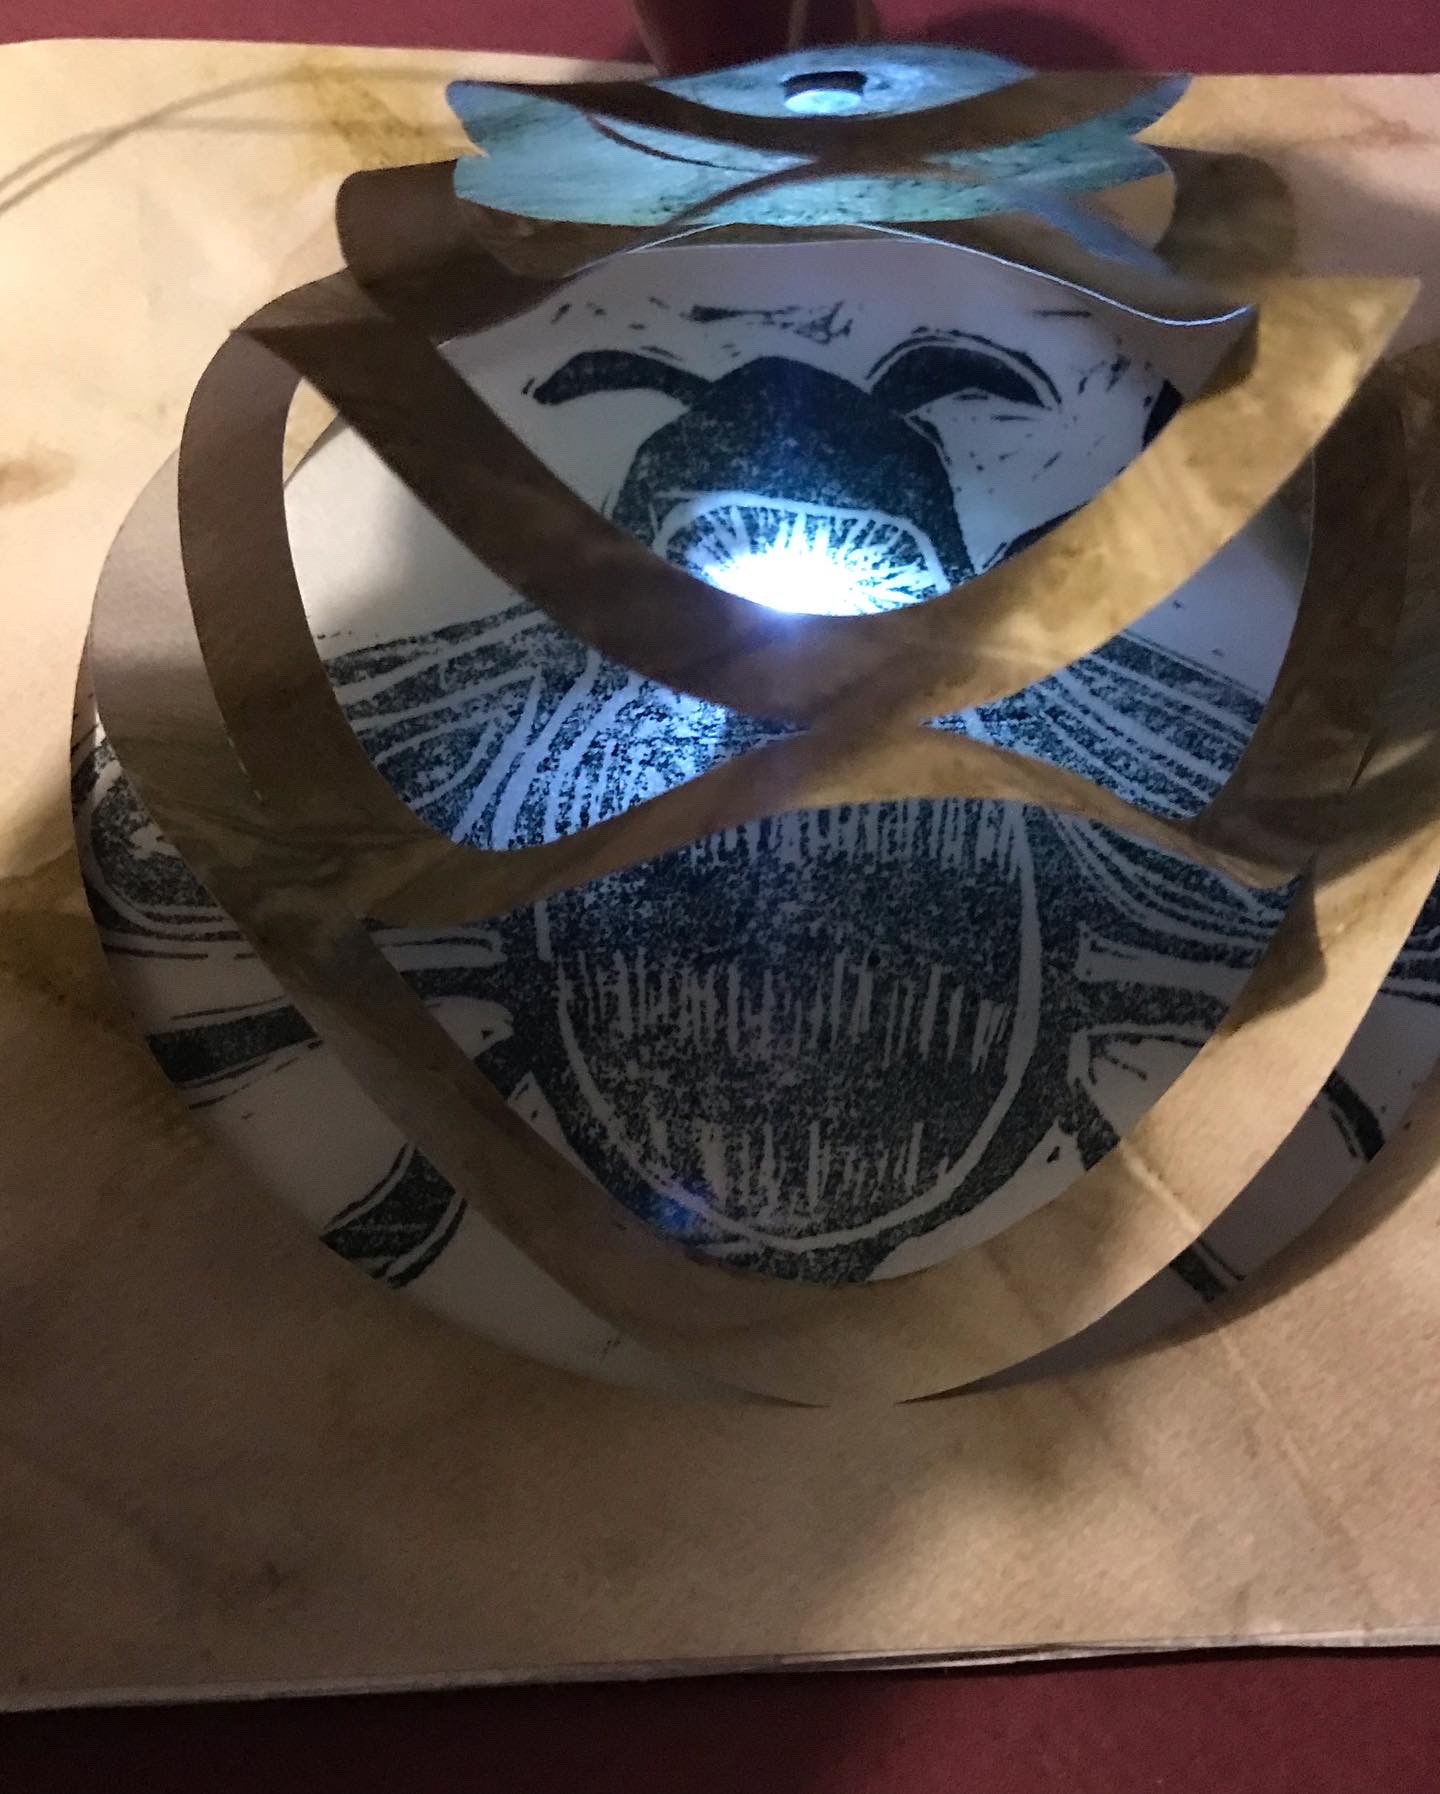
After ensuring that the LED is in the correct location to light up your artwork layer, it’s time to place the magnet on the cobweb layer.
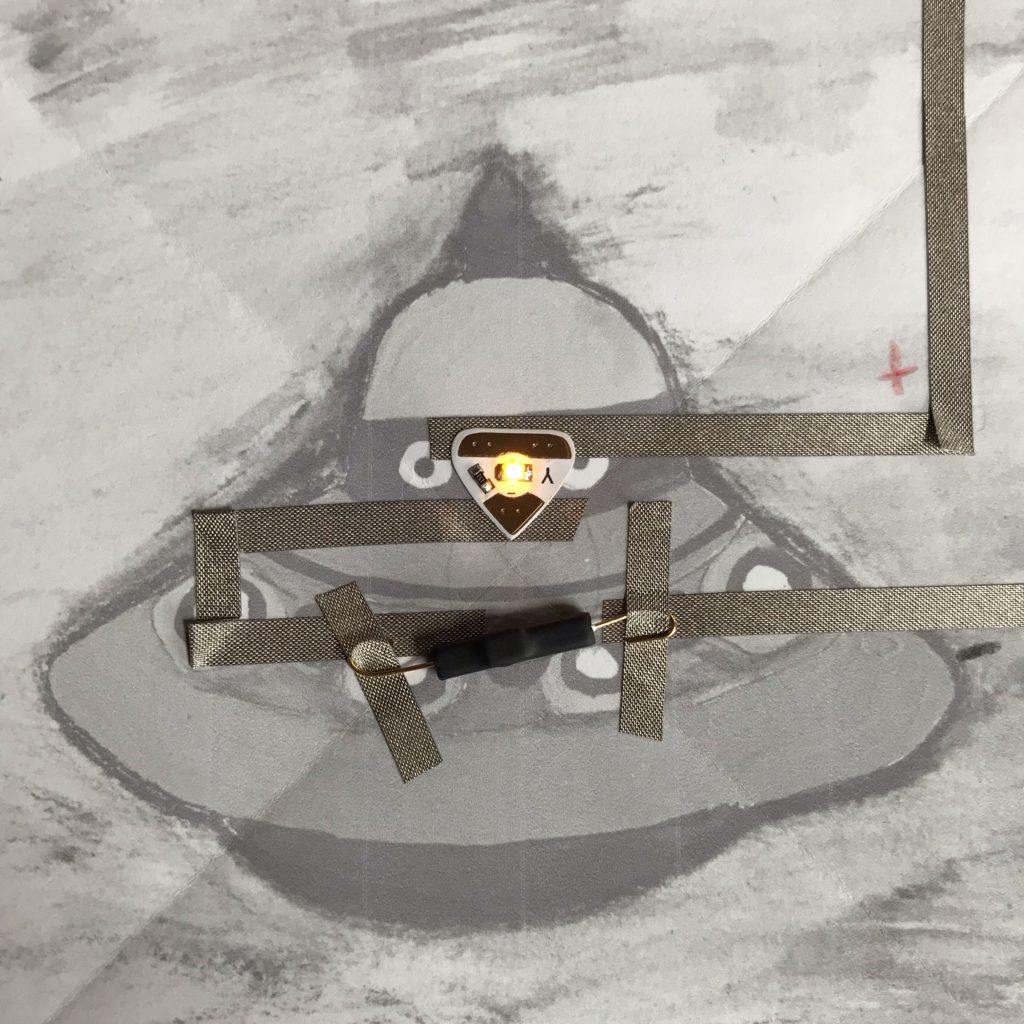
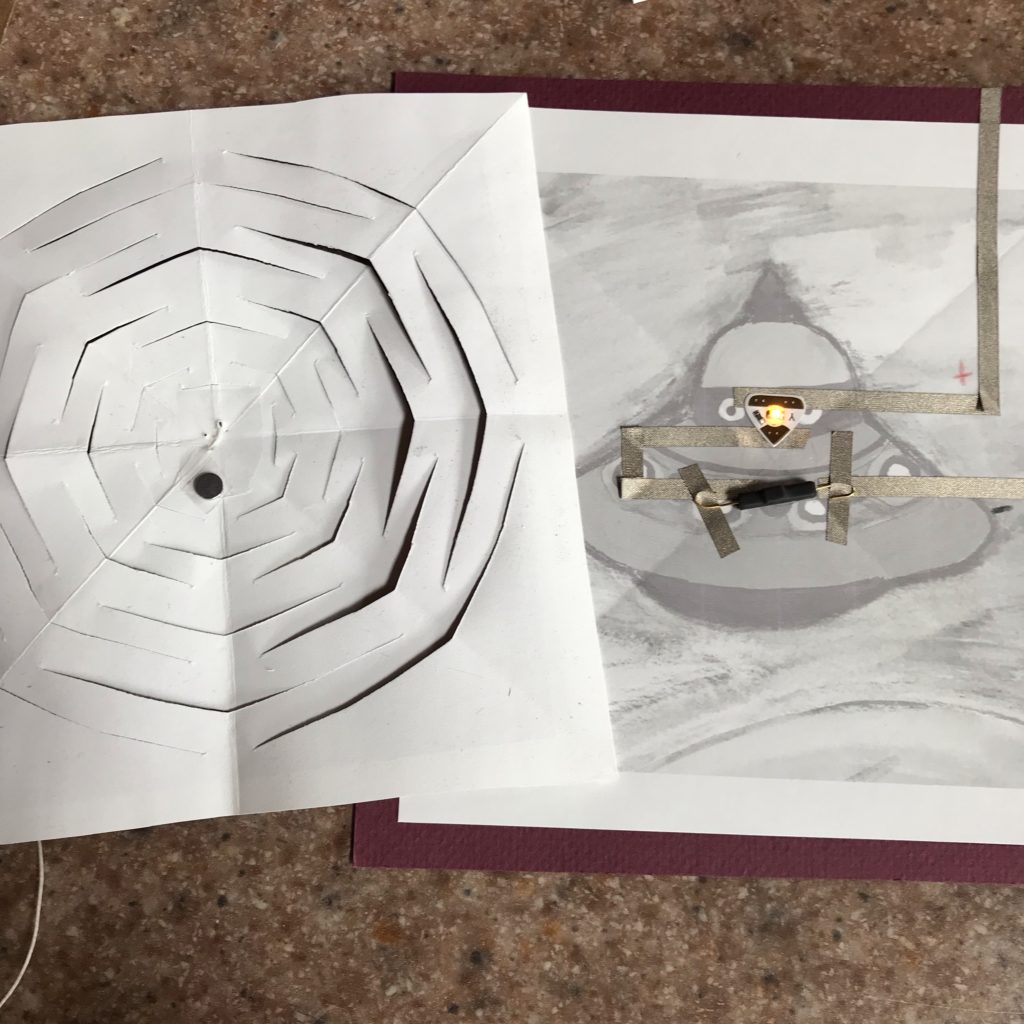
Start by placing the cobweb directly on top of the circuit layer with the string side up, and the sides aligned, and press the center down until it comes into contact with the taped magnet.
The LED should remain OFF when the cobweb layer is in place over the magnet.
Lift up the cobweb layer and flip it over to the side where the magnet should now be. Add a small piece of Scotch tape directly on top of the magnet to keep it in place.
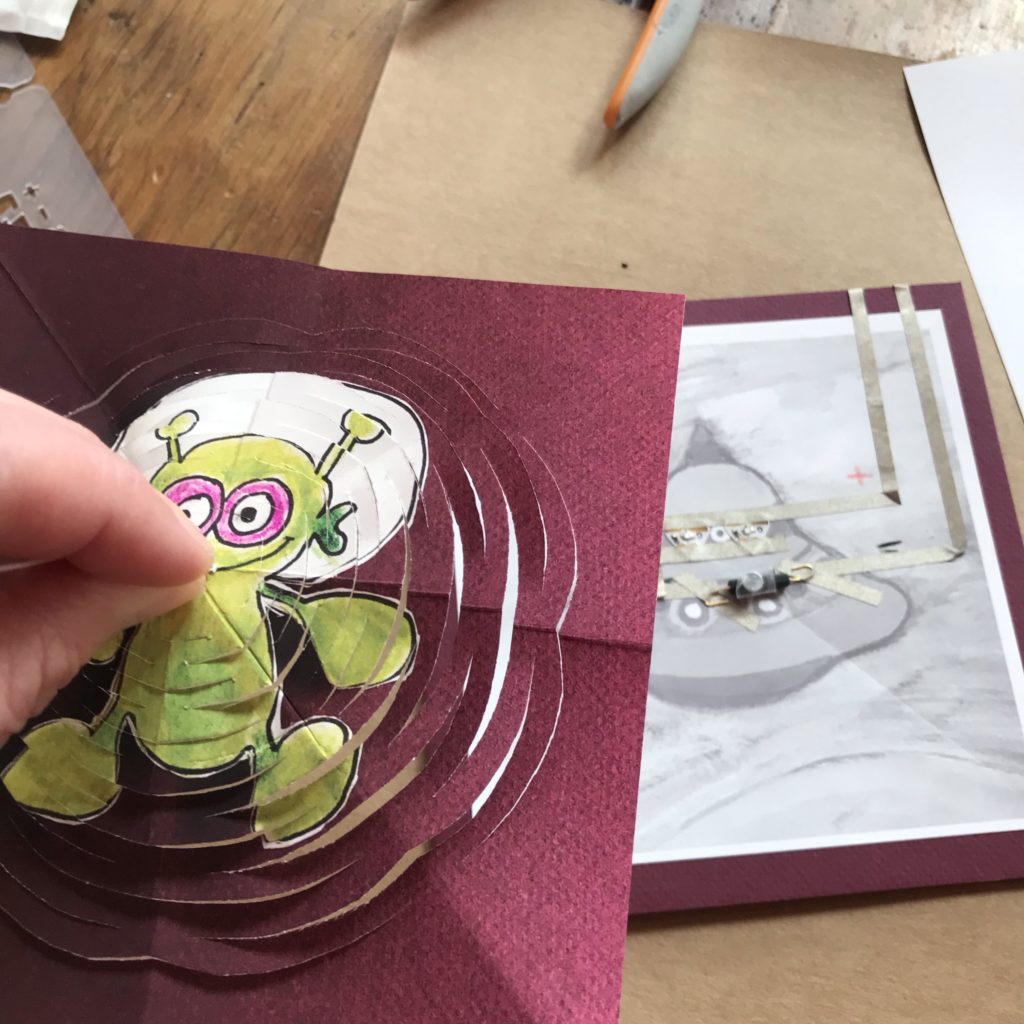
Assemble the Layers
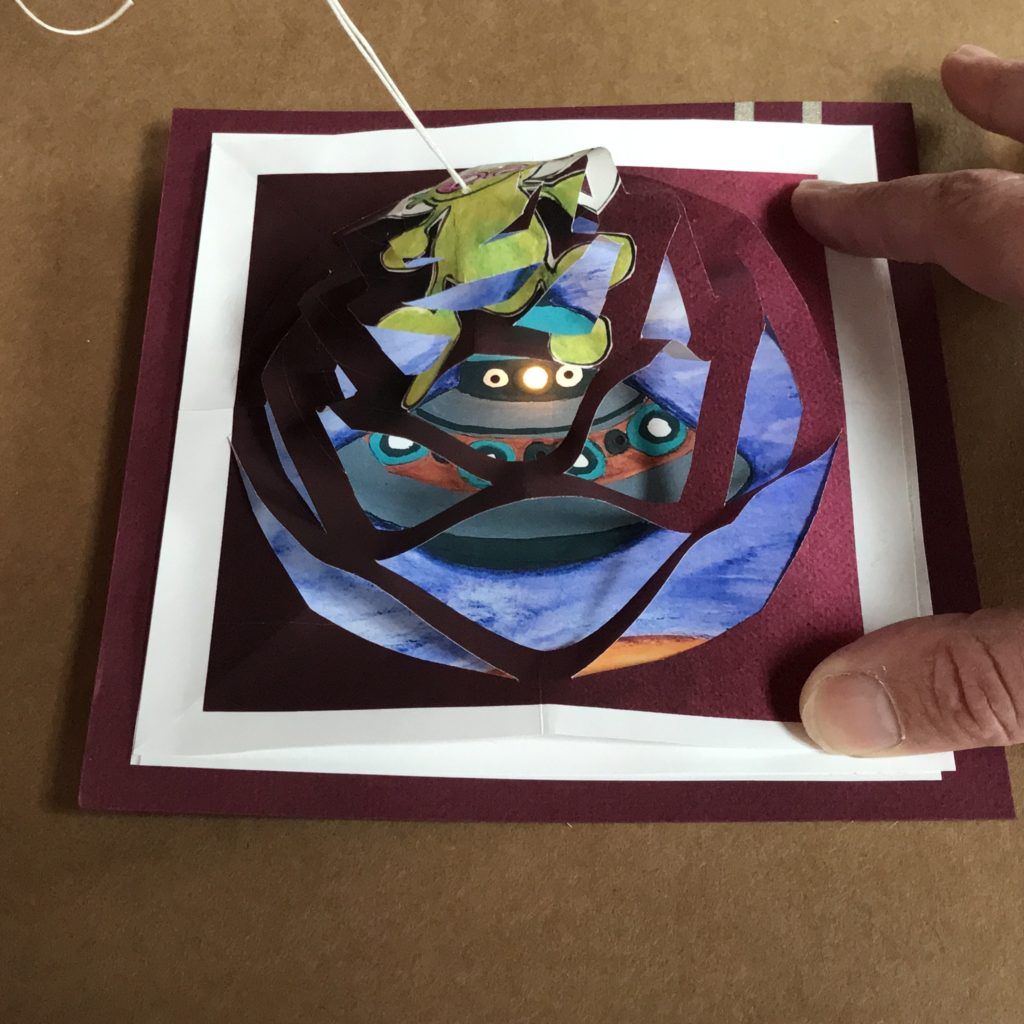
Once you’ve got the magnet in place on the back side of your cobweb layer, you need to tape or glue the art layer directly on top of the circuit layer.
After the artwork is in place, tape or glue the edges of the cobweb layer to the top of the art layer.
If everything is properly aligned, the LED should only light up when the cobweb hiding the magnet is lifted.
Gallery 1

Gallery 2

Similar Posts You Might Enjoy
DIY Wand
In Magical Magnetism: Intro to Reed Switches (Normally Open), you’ll learn how to flip a switch with a flick of your wrist.
Halloween Trick
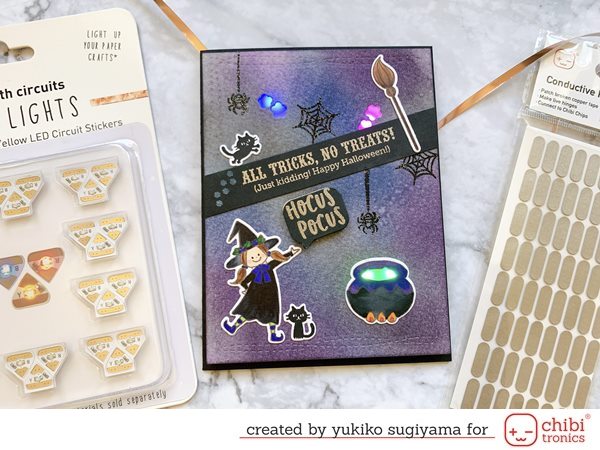
Speech balloon magnets, with a variety of expressions, will light up this tricky Halloween card!
Flying Concertina
This project combines conductive thread & a reed switch to add interactivity & conserve battery life.