
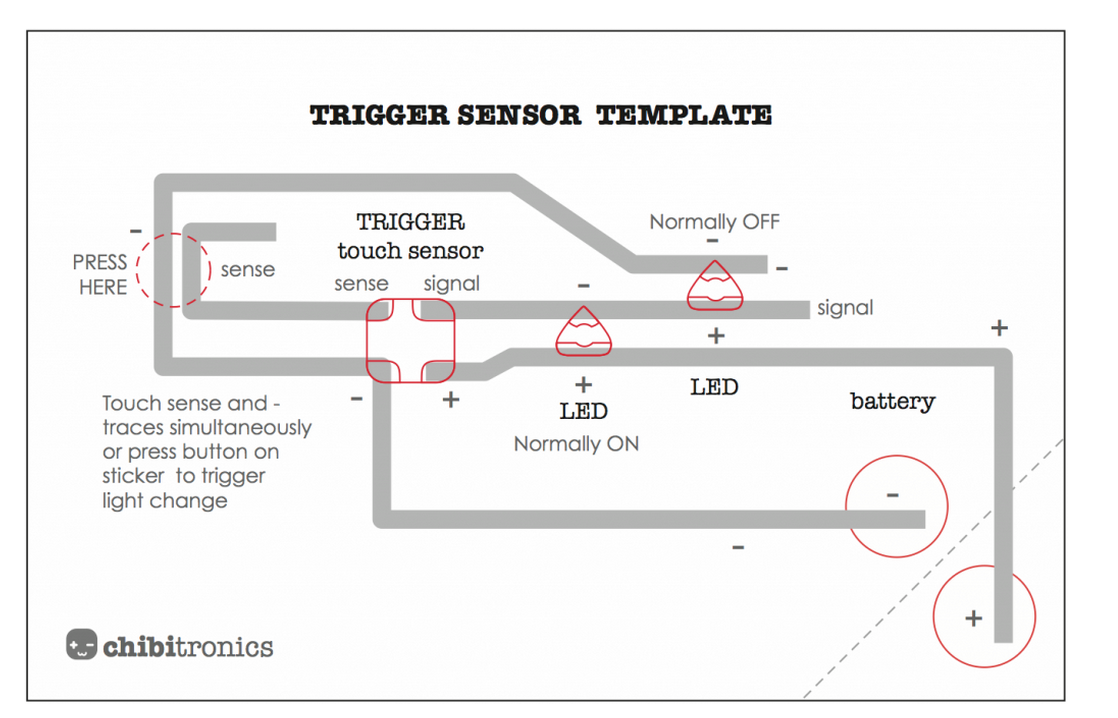
Use the trigger sensor sticker to turn your LEDs on or off for approximately three seconds when triggered.
The trigger sensor sticker has four pads: + and – for power, a signal pad, and a sensing pad. To trigger this sticker simultaneously touch the sensor trace and the – trace. This will cause the voltage on the signal pad to briefly change from ground to positive, changing which LEDs are on. You can also clip conductive materials to these pads, similar to the Makeymakey, and turn other materials into your sensor.
For normally ON, connect your LEDs from + to signal. In this case, your lights will turn OFF briefly when you trigger the sticker.
For normally OFF, connect your LEDs from signal to -. Here your lights will turn ON briefly when triggered.
For more complex interactions, try connecting the signal pad of the sound or light sensor sticker to the input of the trigger sticker.
Follow the tutorial below to create a test circuit for your sound sensor sticker.
TOOLS AND MATERIALS
- Trigger sensor sticker
- LED stickers
- Copper foil tape
- Coin cell battery
- Binder clip
STEP 1: Download and print the trigger sensor template:
Then cut out the template.

STEP 2: Stick copper tape over the gray lines
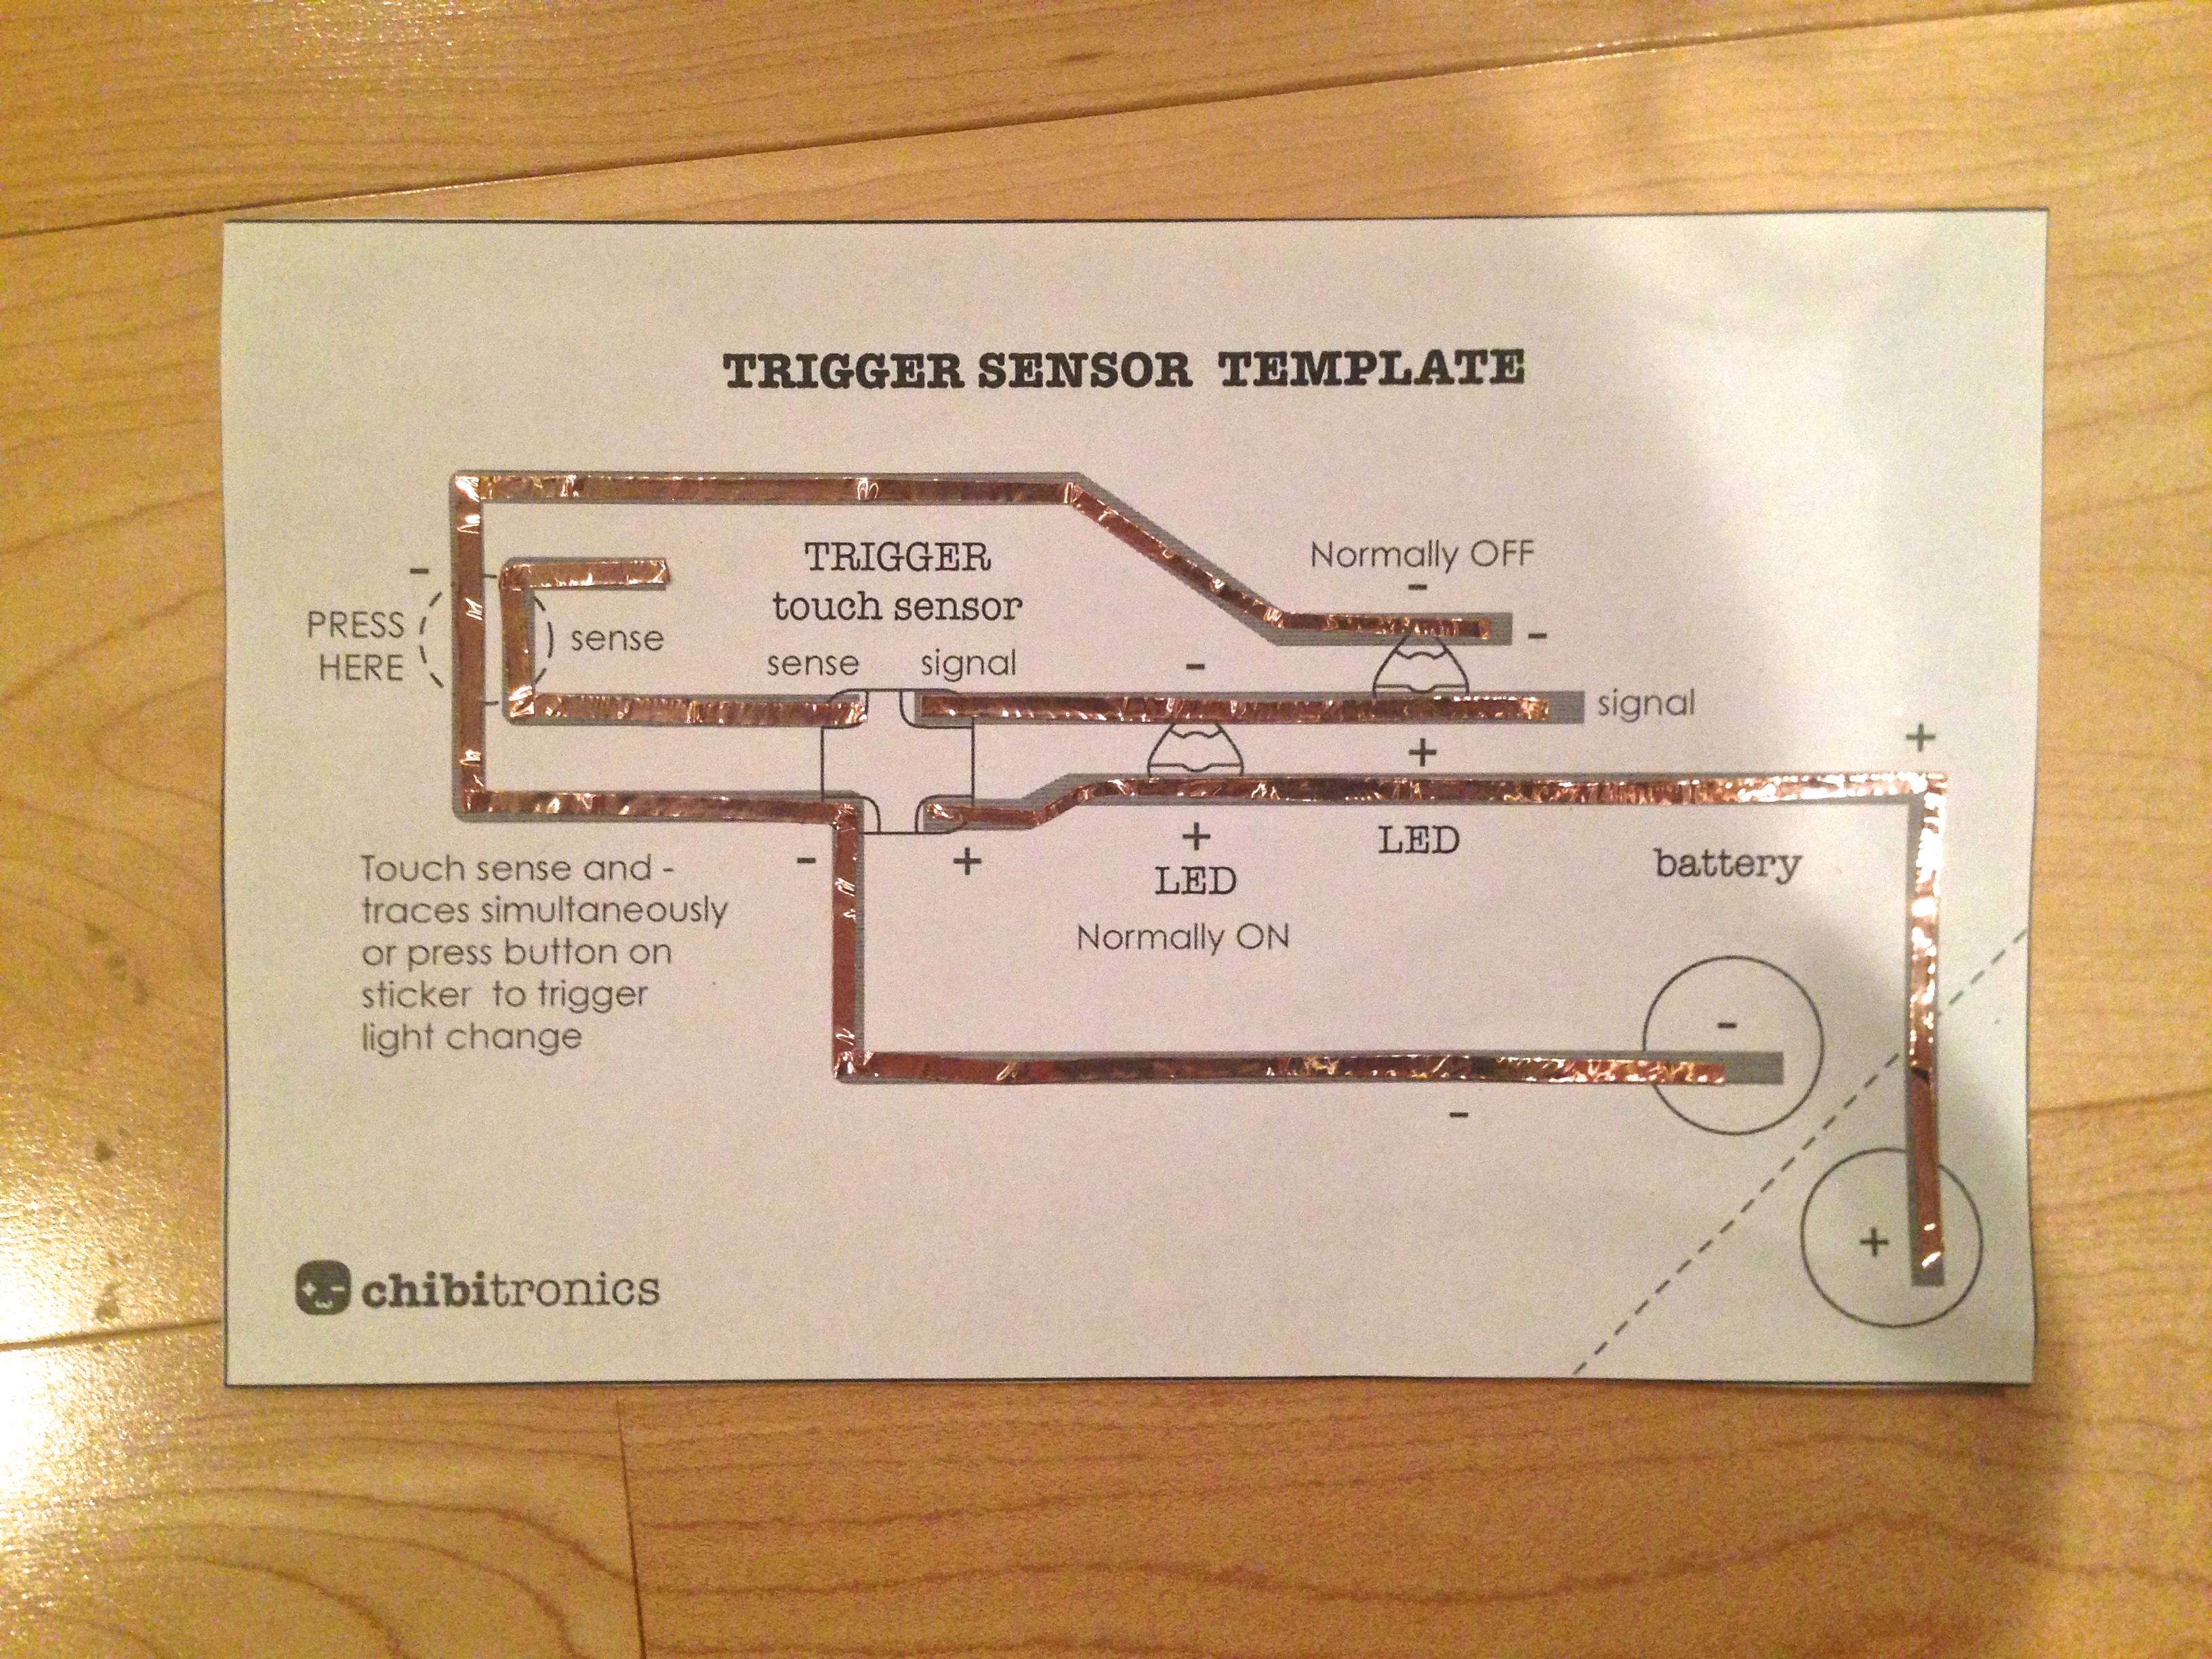
STEP 3: Place the Trigger Sensor and LED stickers over their respective footprints.
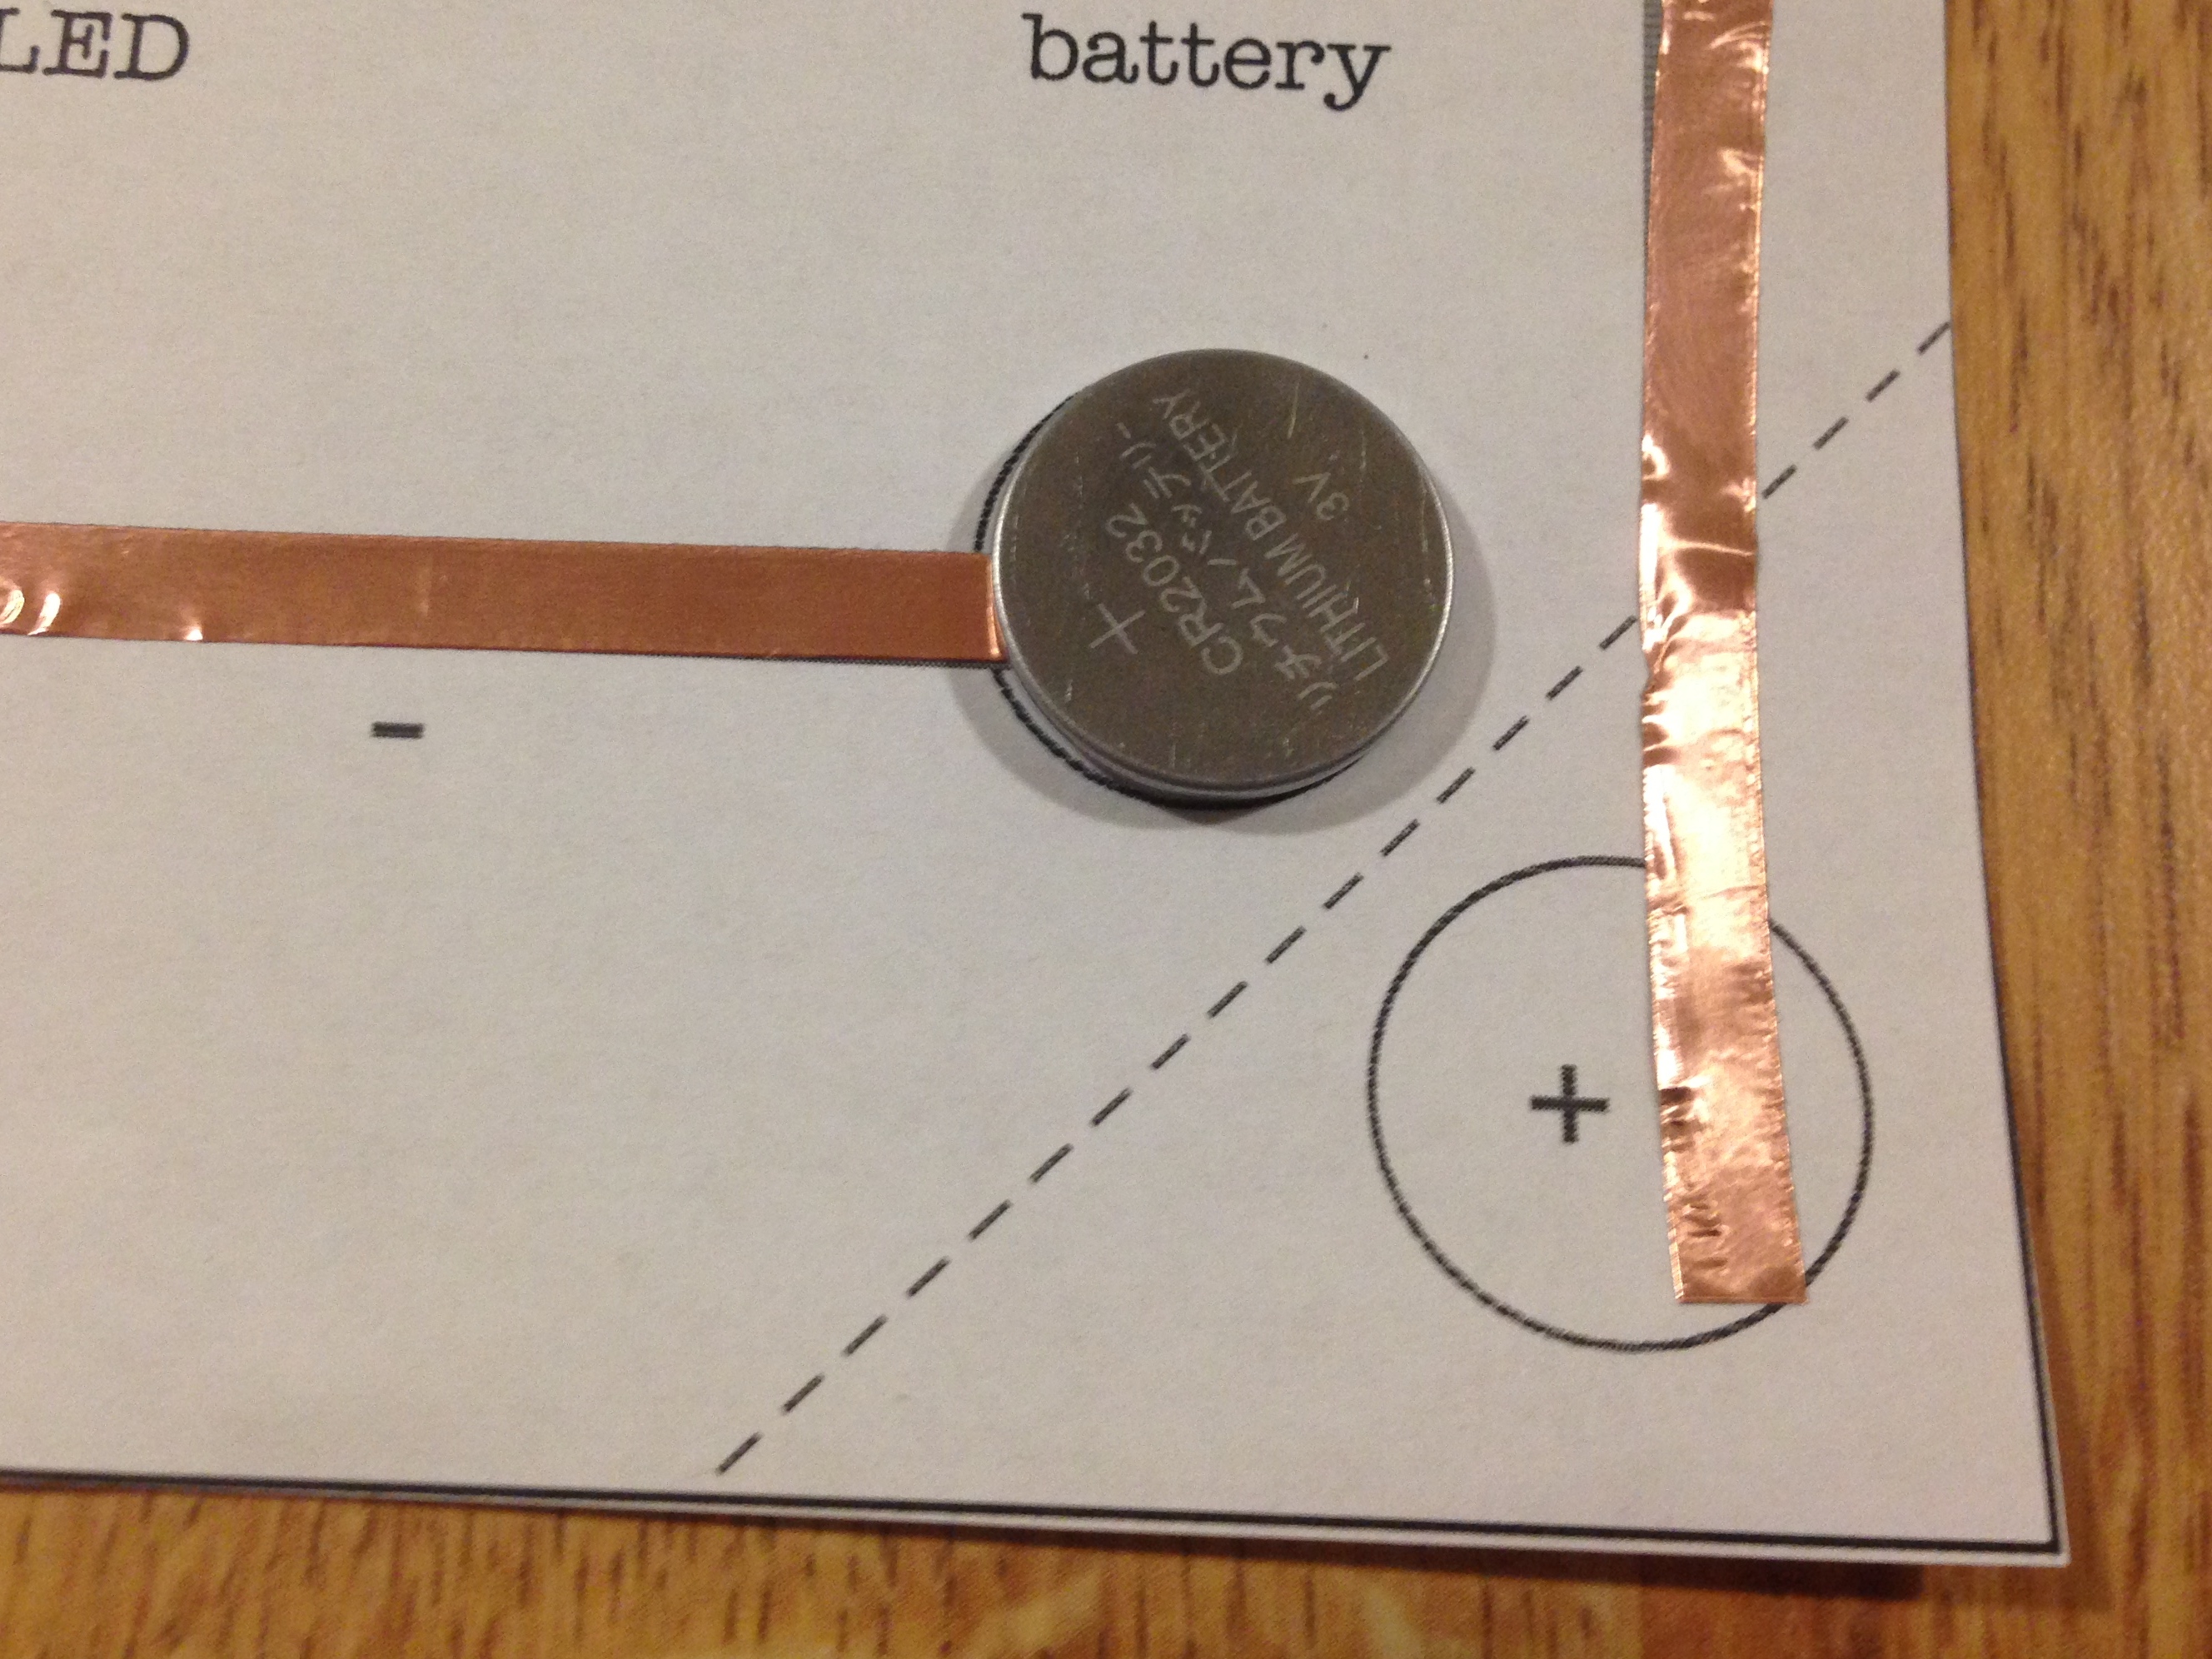
STEP 4: Add the battery. Secure using binder clip.
 |
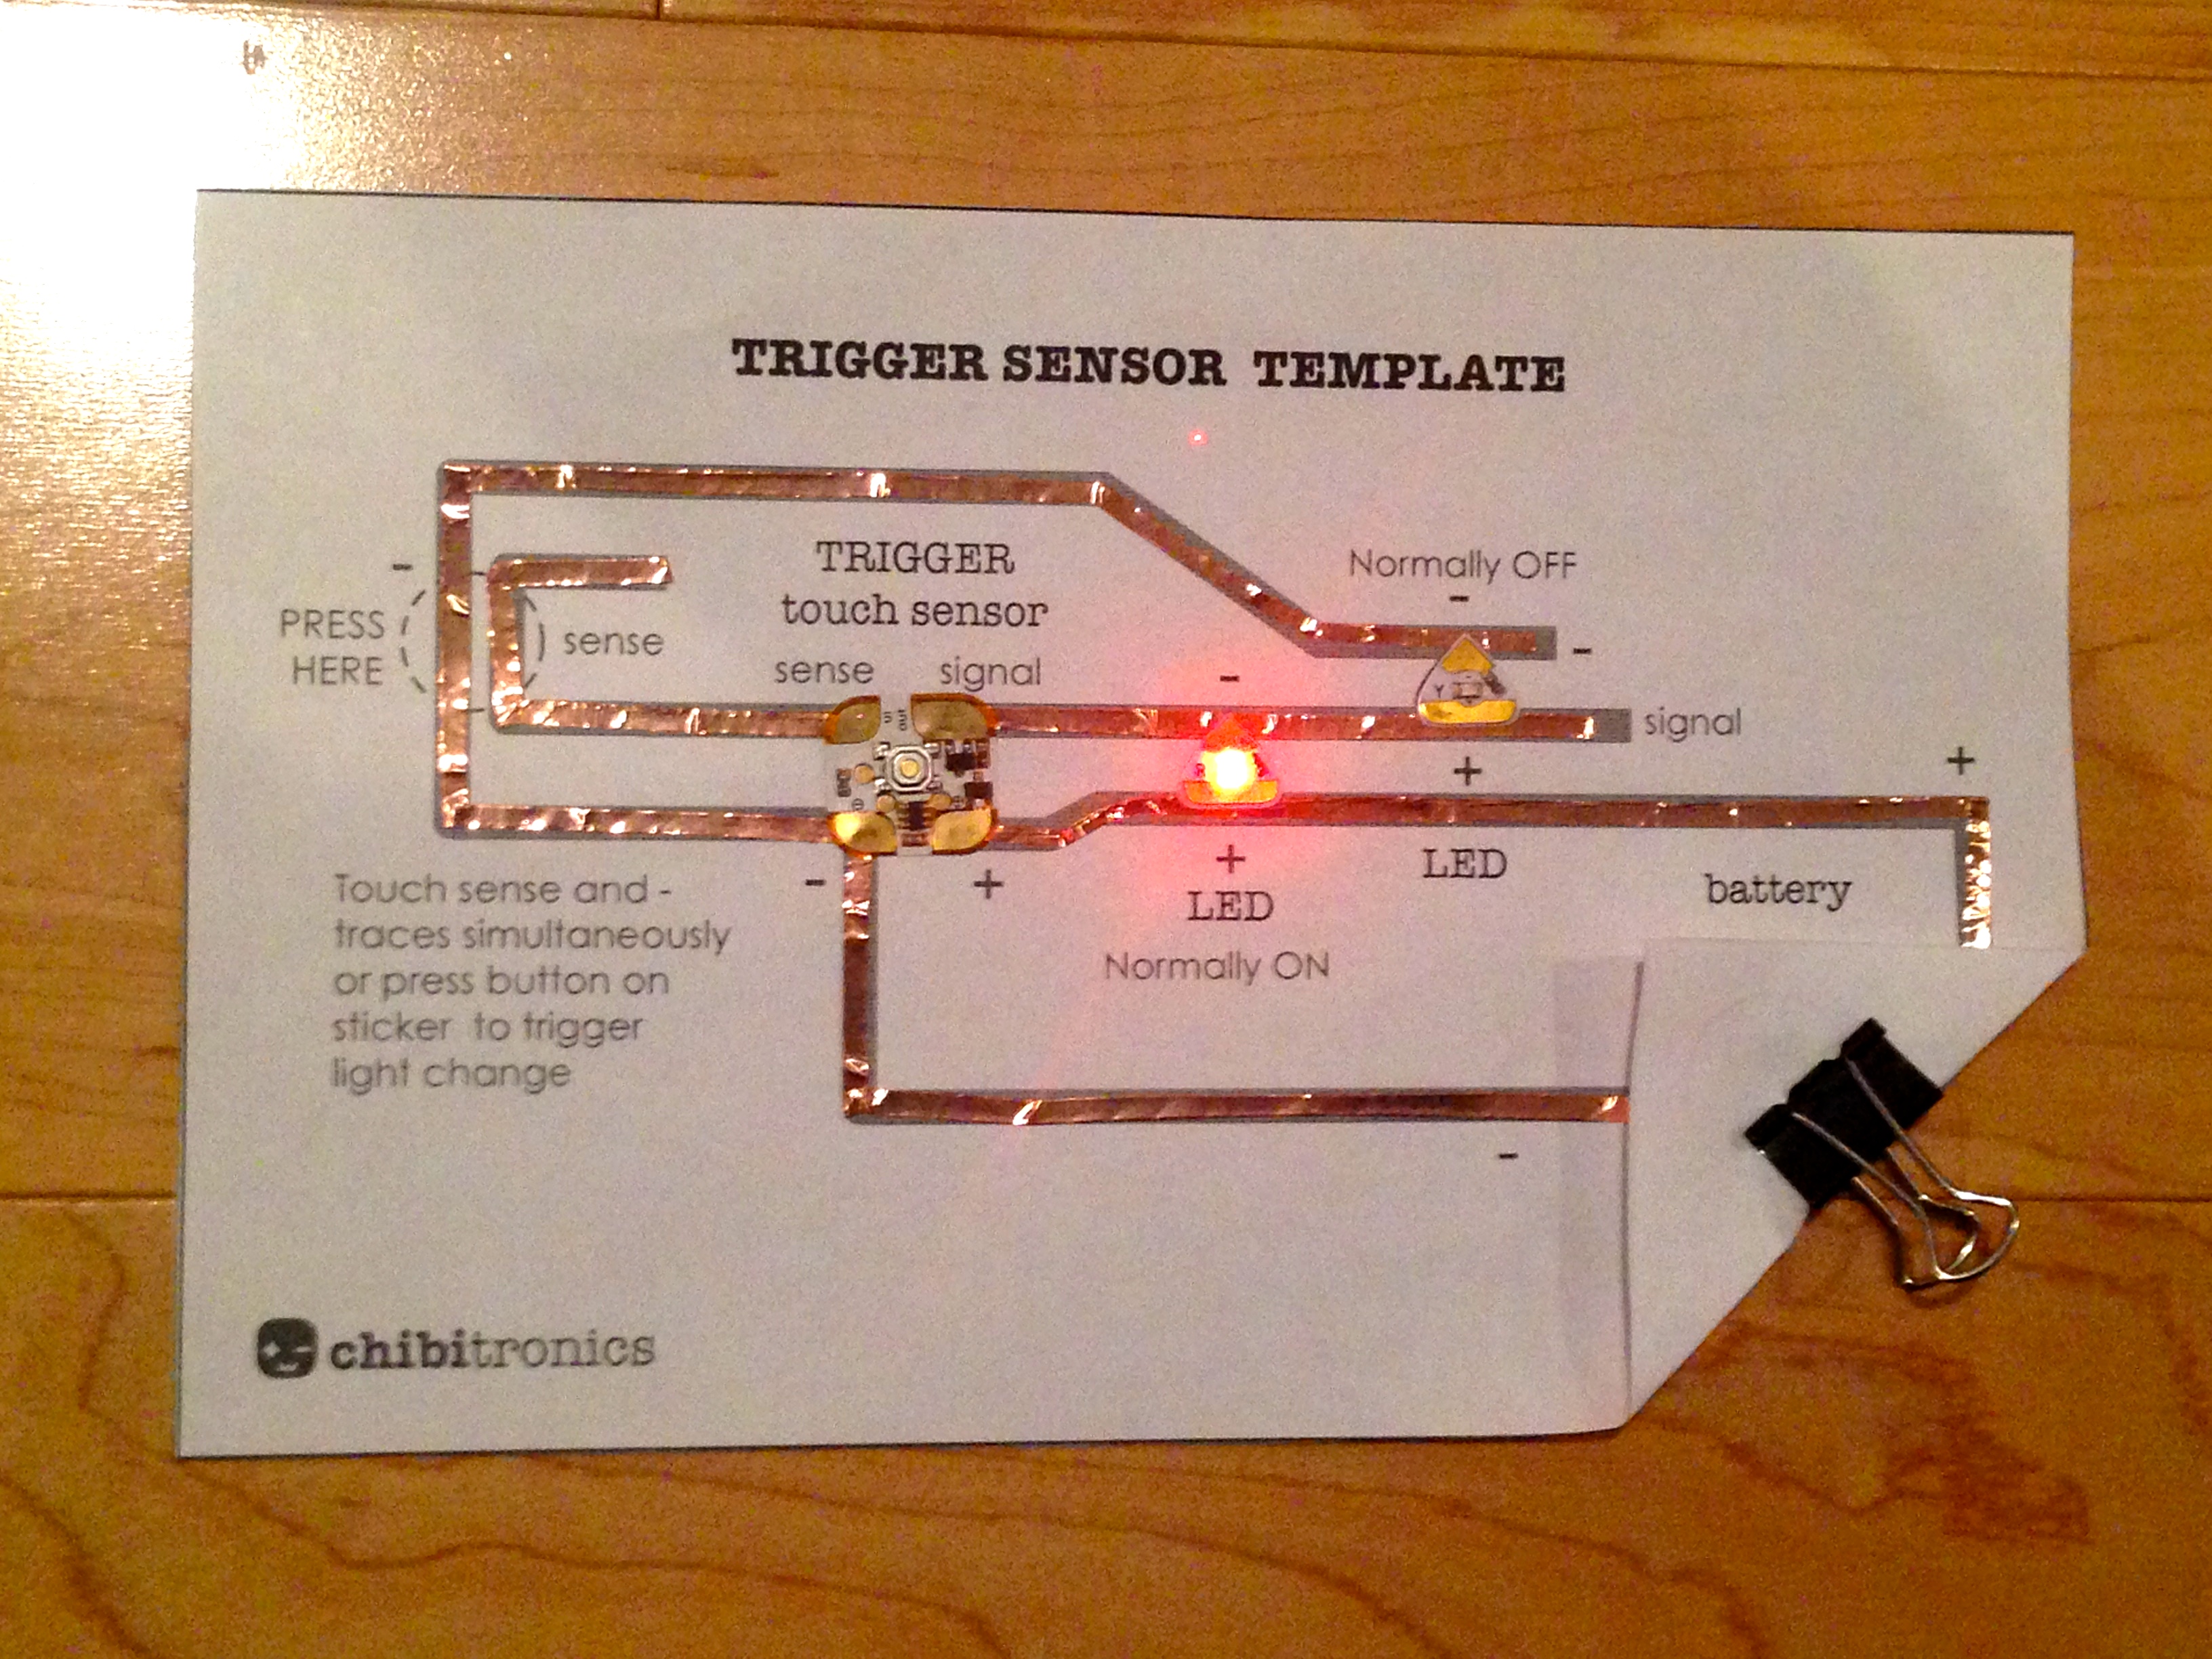 |
You’re done! The top LED should light up briefly whenever you touch the sense and – traces simultaneously!
Below is a video showing the trigger sensor in action.