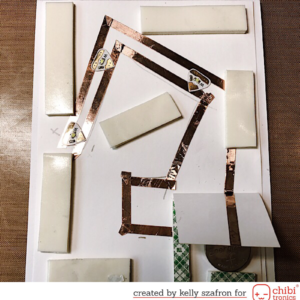
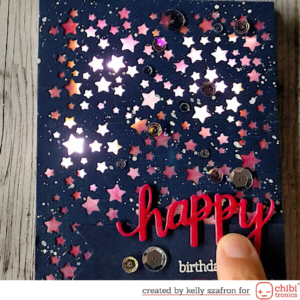
Hello, Kelly here to share how I made this card using Chibitronics and Hero Arts products. To start I diecut the starry background from navy card stock and splattered it with a bit of white paint. I then colored a piece of velum with alcohol inks to place behind the diecut piece. I planned out and made the circuit for the Chibi Lights on a piece of cardstock. Odd number groups (I like to use groups of 3) and triangular placement are design principles that helped me with my light placement.
This card has a simple circuit to make. When the recipient presses on the sentiment it completes the circuit by connecting the copper tape to the battery and turns on the LED lights. The foam tape is to adhere the card front to the circuit. I used a double layer of foam tape to match the thickness of the battery. The foam tape around the battery still has the backing on it so it doesn’t stick to the top flap over the battery keeping the circuit from connecting until it is pressed down.
I diecut the Hero Arts “happy die” 4 times from pink cardstock, glued the layers together to make it thicker then covered it with Wink of Stella Glitter and Glossy Accents. The banner was made by cutting the end of a strip of cardstock with scissors and embossing the sentiment stamp with white embossing powder. The card looks pretty but once the LEDs light up it really shines.
Thank you for stopping by.


This sparkly star card is wonderful! xxx
This is a dreamy card ! Congratulations !