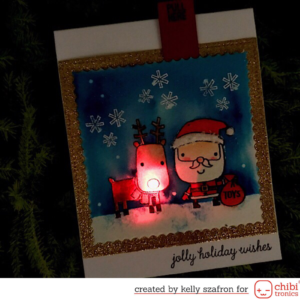
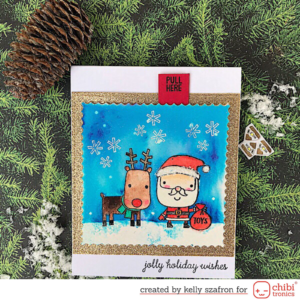
Hello, Kelly Szafron here with a card made with fun stamps from Reverse Confetti and a red LED from Chibitronics. I made a slider to switch on Rudolph’s nose using instructions from Eikos post here. I really enjoyed how simple it was to make this slider switch. I made my card by stamping my images on watercolor paper using ink suitable for watercolouring. I then masked the stamped images and the ground using masking fluid. The sky was made using Turquoise and Blue Brusho powders. Once the sky was dry I removed the masking and watercoloured the deer and Santa. The snow flakes were stamped and heat embossed with a sparkle white embossing powder from Wow.
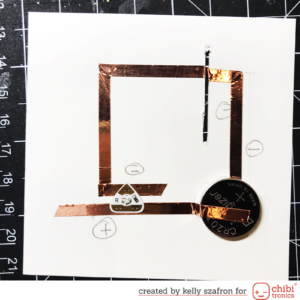
I watched Eiko’s excellent video to learn how she made her slider switch. Photo below is actually from my first attempt to build a circuit for my card. I found this circuit didn’t work as well as I liked because the copper tape on either side of the slit for the slider did not line up so the circuit was not completed when the tab was pulled.
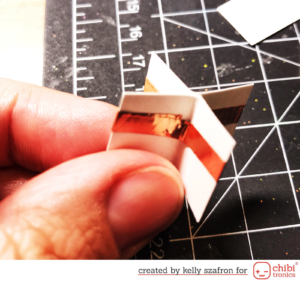
I also found that when adhering the pieces together to make the cardstock x for the slider liquid glue worked well for me. I used a thin line of liquid glue to adhere the two folded pieces of cardstock together and let it dry for awhile to make a strong bond.
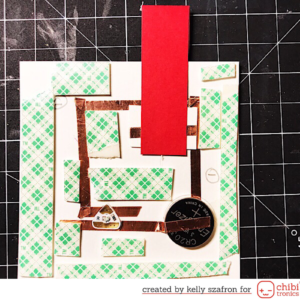
The photo below shows my completed circuit before I adhered the watercolored piece ontop.
I used a Lawn Fawn stamp to instruct the recipient to pull the tab to light up the card. The dies I used for this card to create the decorative border are from Mama Elephant.
Thank you for stopping by. I hope you are inspired to make a fun interactive card with a slider switch.

Gorgeous card and I love Rudolph’s glowing red nose! xxx
What Craftabulous ways to use the lights!
That’s such a sweet card !