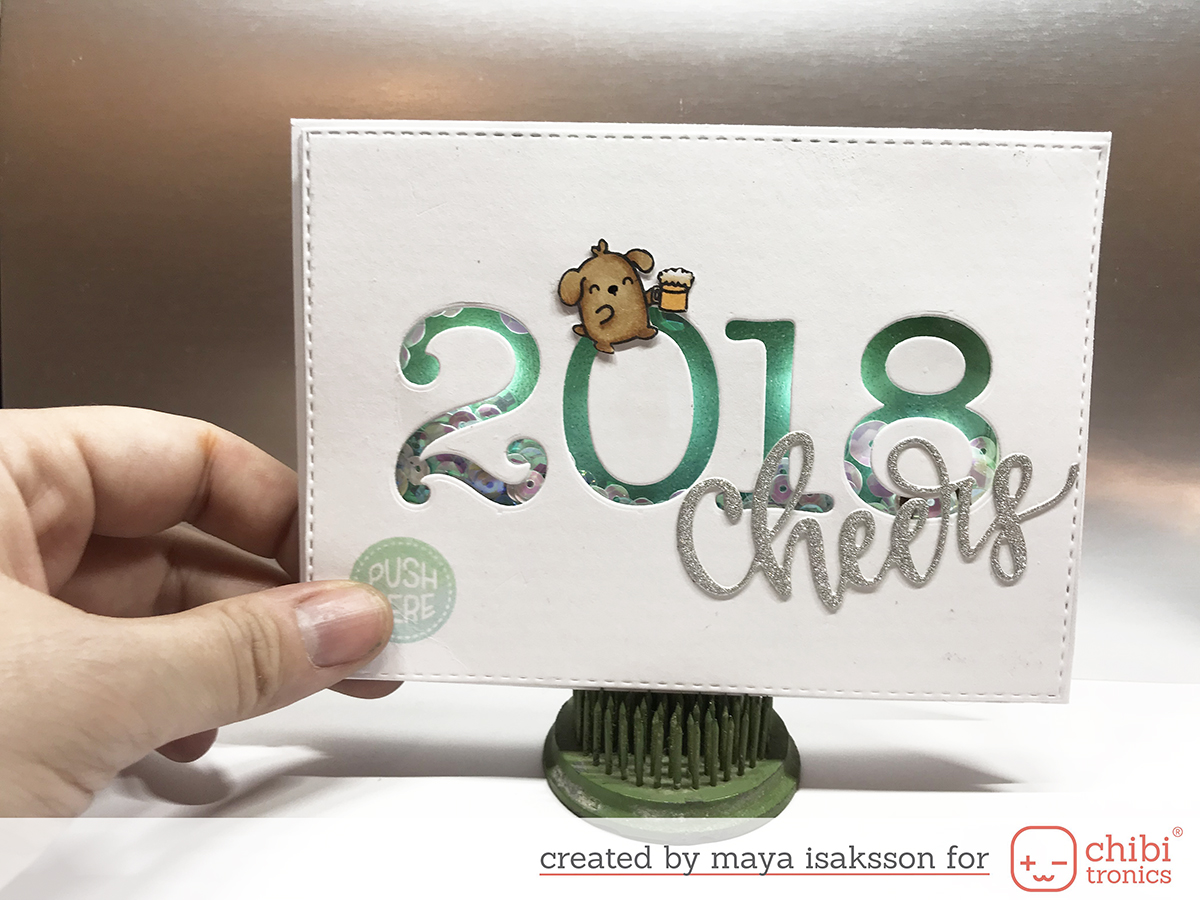
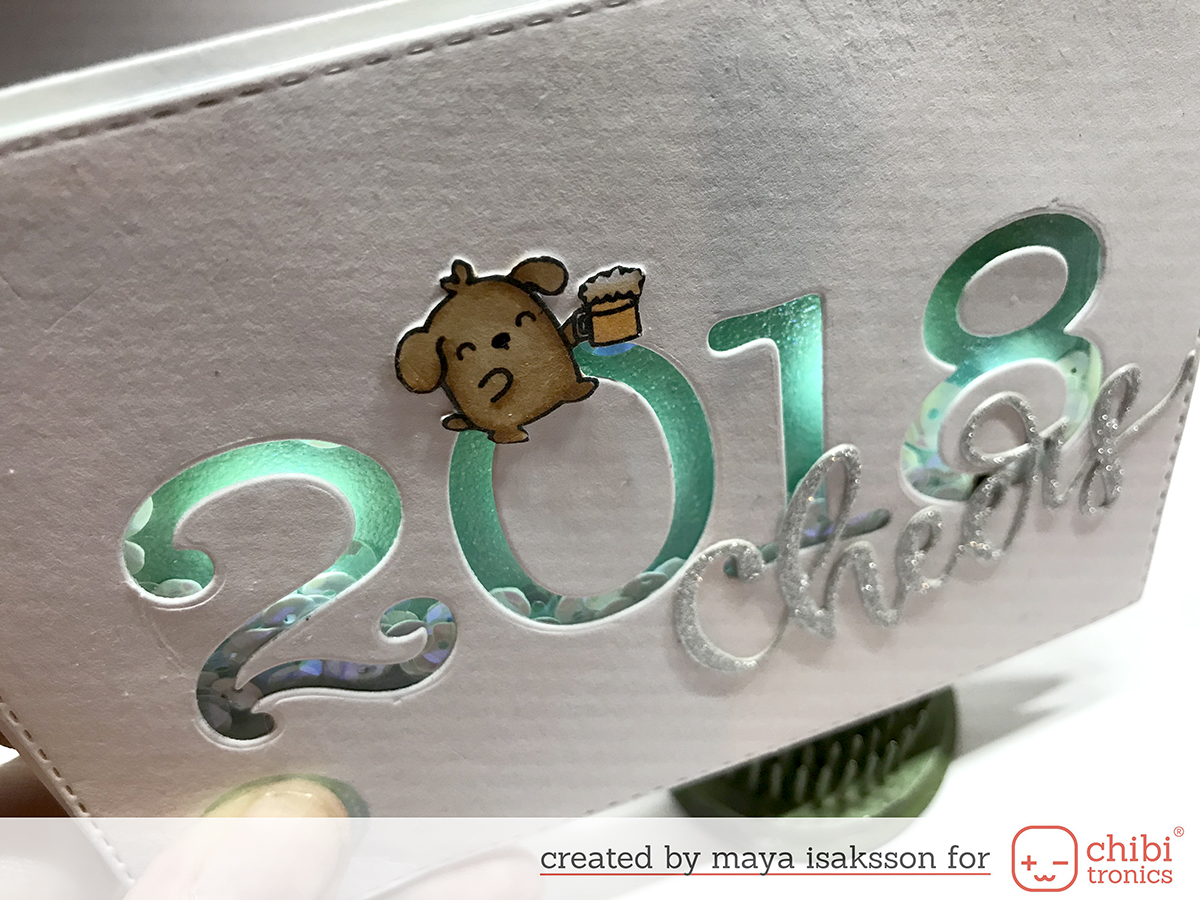
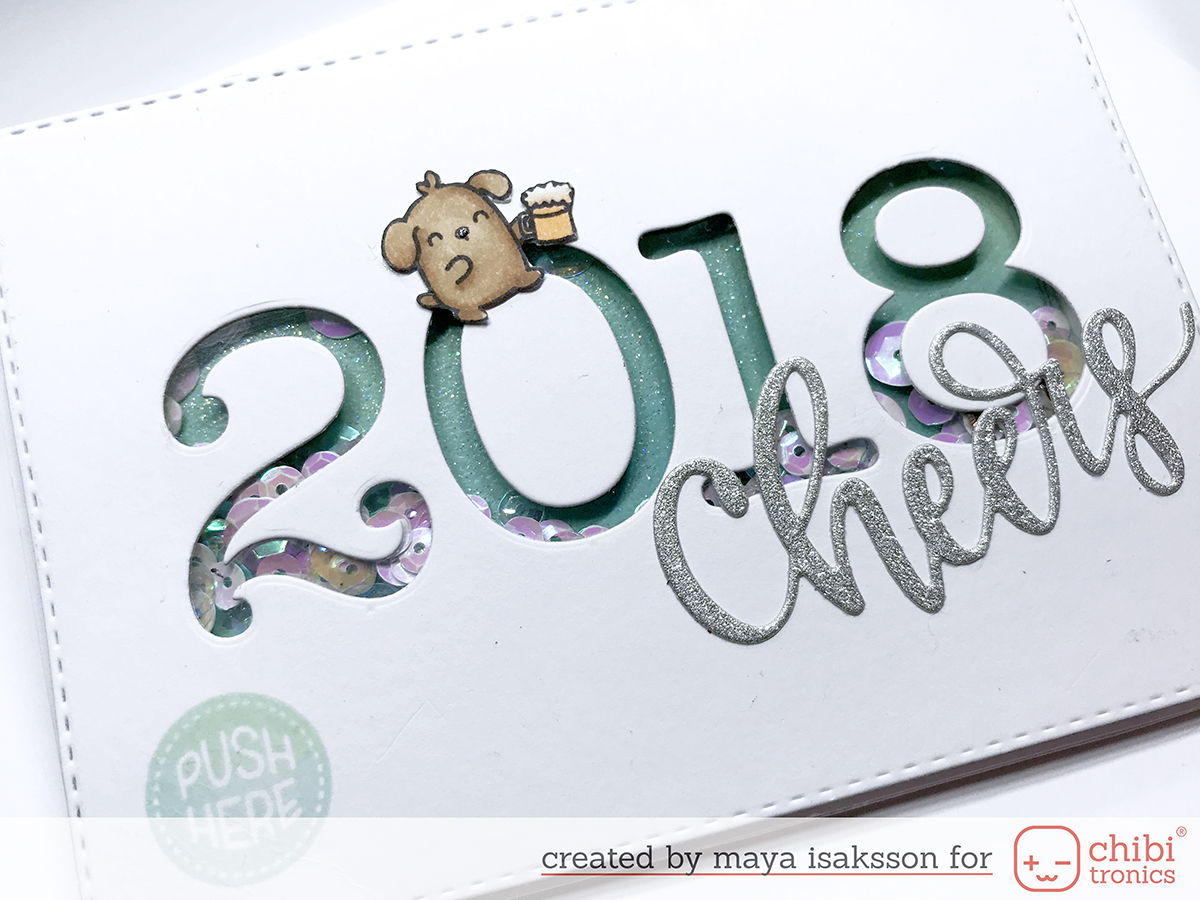
I can’t believe that 2017 is almost over, it just swished by so fast. I really look forward to seeing what 2018 is going to be like, I think there will be a lot of crafting going on at least. We’ll see. As I got to blog on one of the last days of this year I decided to make a new years themed card. It turned into a shaker card that lights up. I glitter embossed the backing panel so the lights would reflect the sparkles. I think it turned out pretty fun. Here’s how I made it.
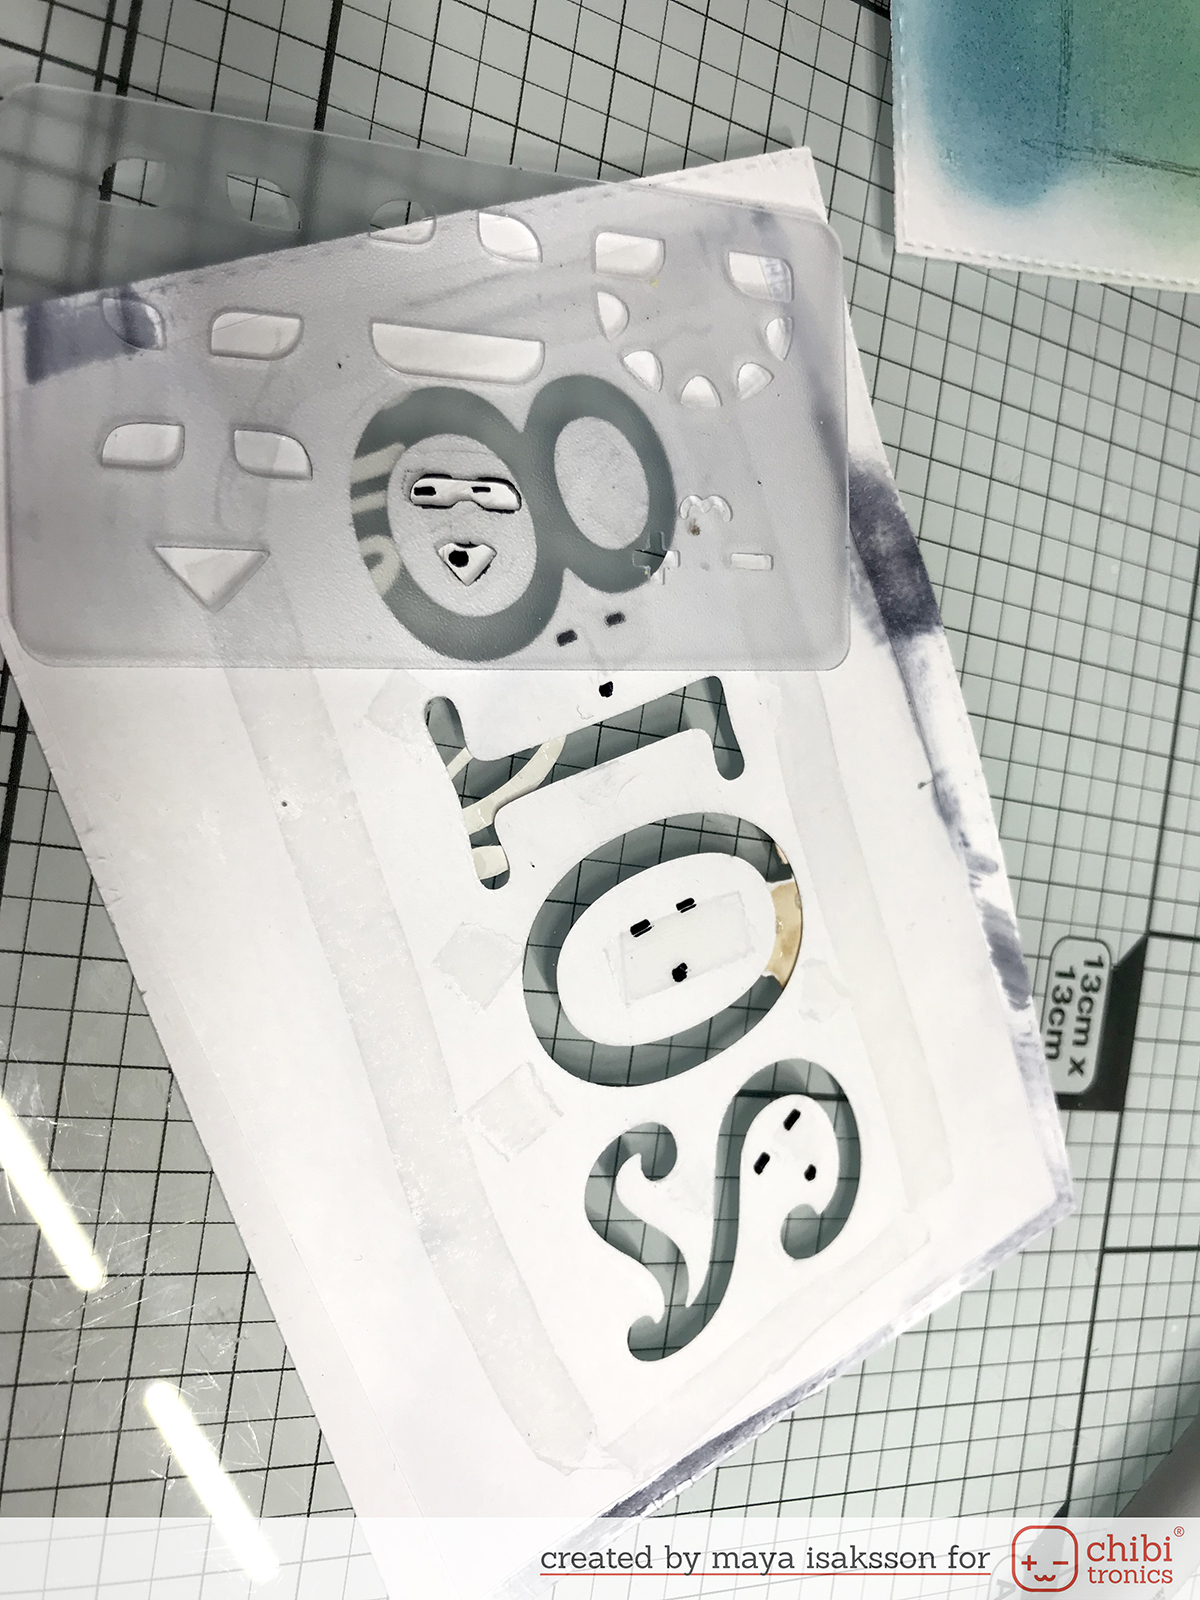
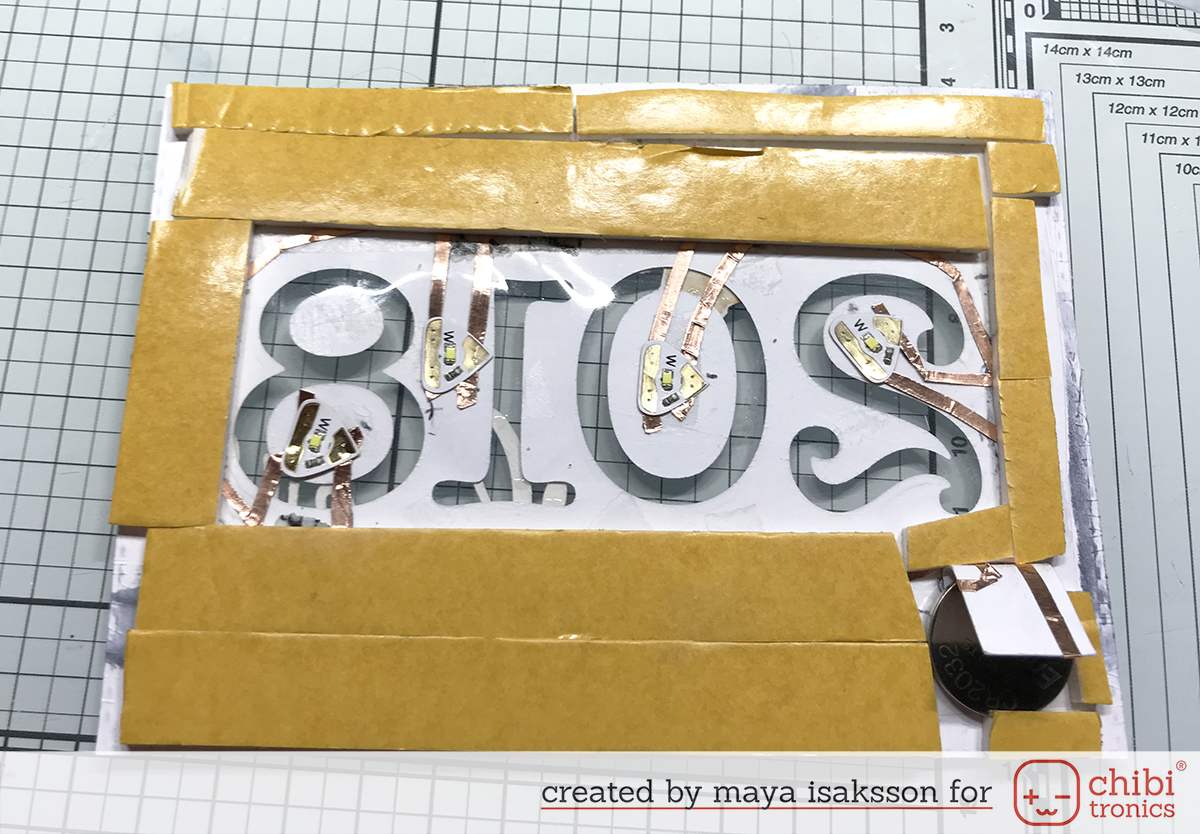
I made the whole front panel first, stamping and cutting out the numbers and backing it with some plastic. Normally I draw the circuit using a pencil so I can erase when I get things wrong. Because of the plastic I had to use sharpies instead but don’t worry. If you are like me and make a lot of mistakes before you get it right you can rub it off using rubbing alcohol. It comes right off the plastic, but as you can see it sticks to the paper around it and if not careful it will bleed through. Ask me how I know this 😉
I used the nifty stencil to mark the placement of my lights. As you can see through the numbers I made sure to cover up some of the 0 and 8 using stamped and diecut images so that the copper tape did not show on the front. This is the first time I put my lights on the front panel so it took a few tries to get it as I wanted it. Good thing no one (except you) will see the inside of the card.
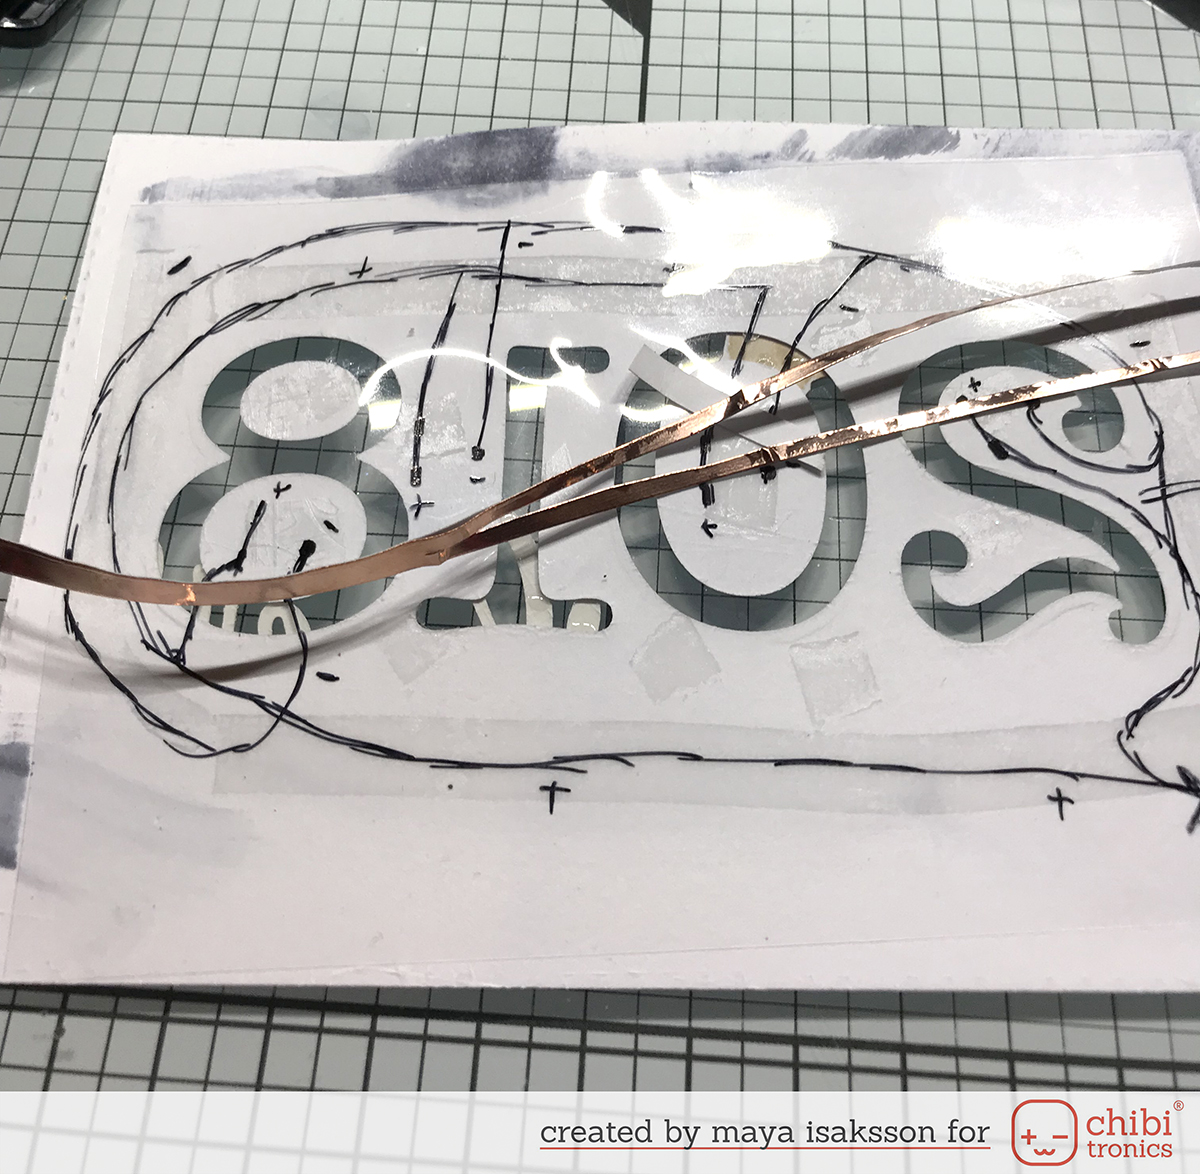
Since the place where I was going to adhere the tape was very narrow I had to cut the tape in half before adhering it. It works just as good as the full width tape so it’s no problems doing this. I did draw out the circuit (twice) on the card front but as I put down the tape I noticed a mistake so I will not show the full sketch. Instead here’s what the circuit looks like when done.
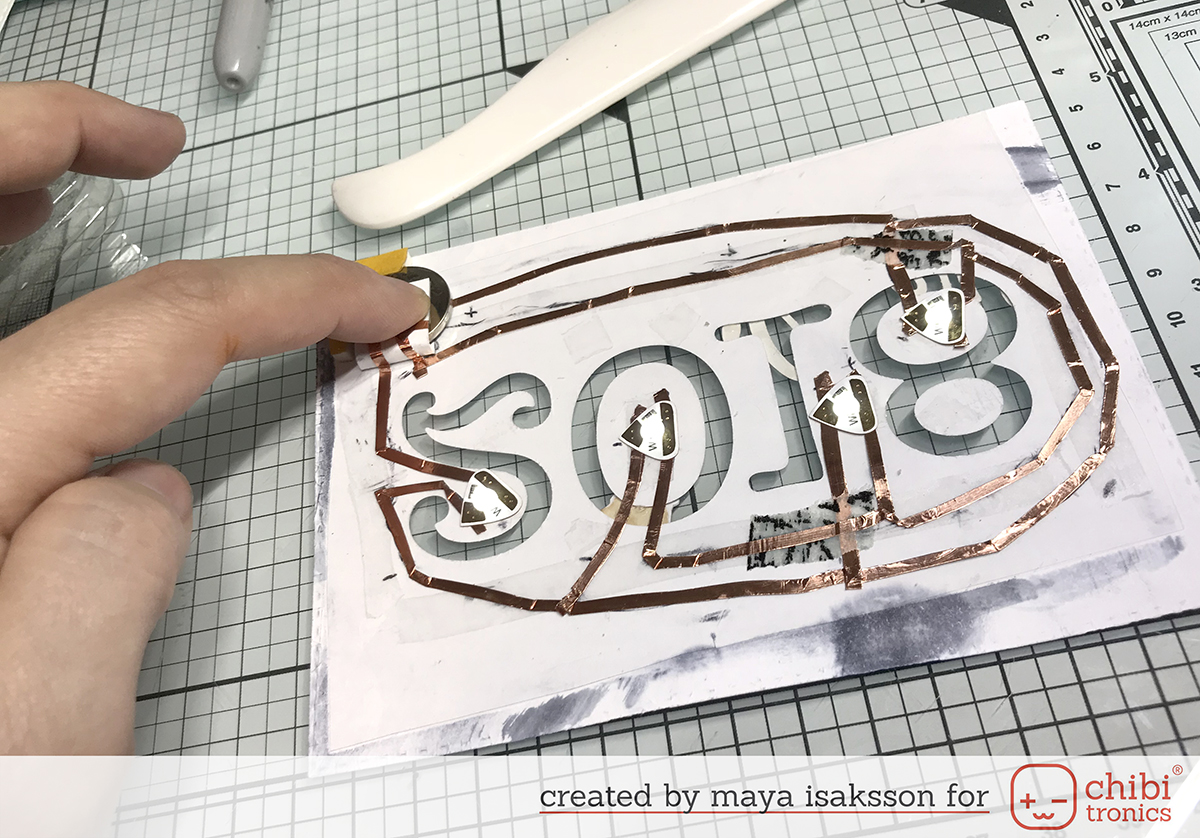
One thing to notice is that my plus and minus tape is crossing at places. As they can’t touch I put some Washi tape as a barrier between the copper tapes and then it’s totally fine to have them crossing each other. The Washi is pretty see through so it looks like thee copper tape is touching when it’s really not. Always test that the connections are good before starting to attach everything together.
I put a layer of foam tape around the numbers leaving a place for the sequins in the middle. After that I attached the backing on top of it. After I glued it it to a top folding card base the card was ready.
I hope your 2018 will be the best year ever. I wish you all the best and see you next year!
Supplies used:
Chibitronics Starter Kit w/ Circuit Sticker Sketchbook
OR
White LED Stickers Pack
Copper Tape
You have a great and gorgeous card there!