Hi, crafty friends!
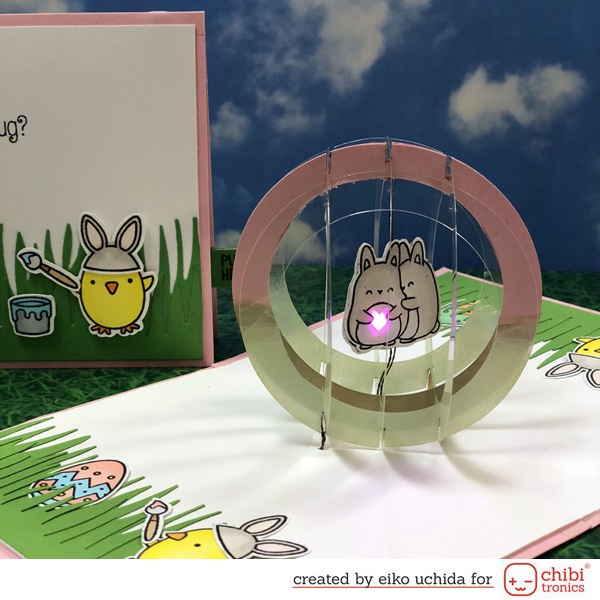
This is Eiko and I make light up pop-up sphere card.
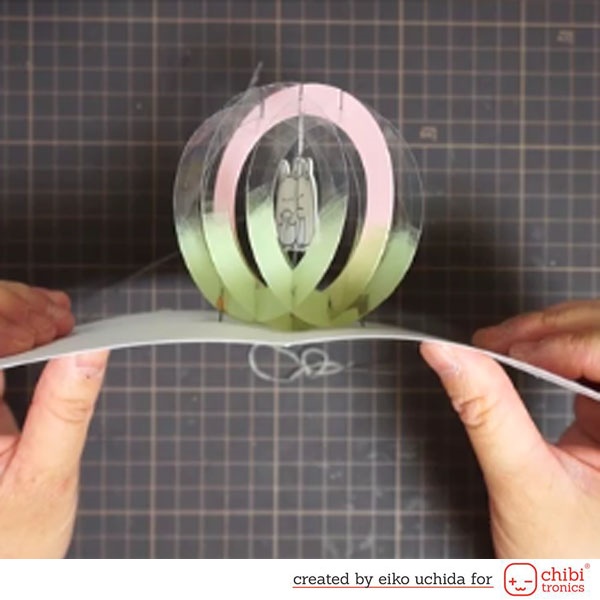
When you open the card, the sphere pops up and when you pull the pull tab, the rabbits glow.
~Make the parts~
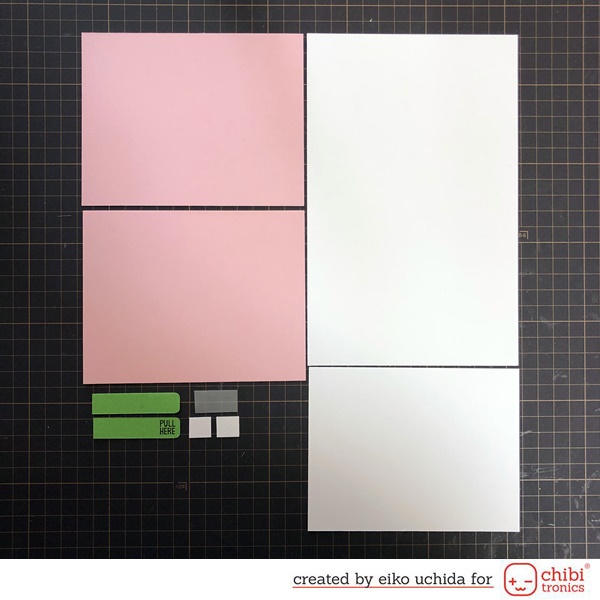
I will make the parts referring to the picture below.
- Two pink cardstock (5.5 x 4.25 inch)
- Folded white cardstock (5.25 x 8.25 inch)
- White cardstock (5.25 x 4 inch)
- Two pull tab parts (0.25 x 2 inch)
- Two switch parts (0.25 x 0.25 inch)
- Vellum paper for the window
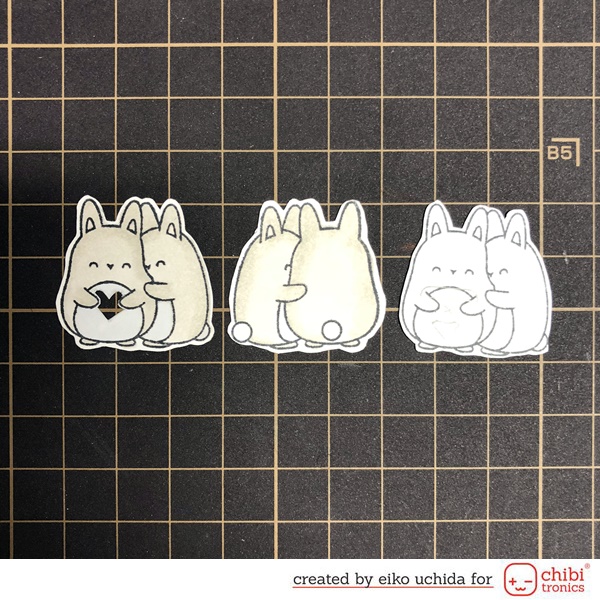
- Color the rabbits with Copic markers. (W0, W2, C0, R000)
- Draw a heart on the stomach of the left rabbit and cut out with a craft knife.
- Cut along the outline with scissors.
- Put the colored rabbit on white rabbit and mark the center of the heart with a pencil.
- Mark the Chibitronics with a pencil.
- Adhere the copper tape from the electrode of Chibitronics to the center of the motif.
- Adhere the pink Chibitronics on the mark.
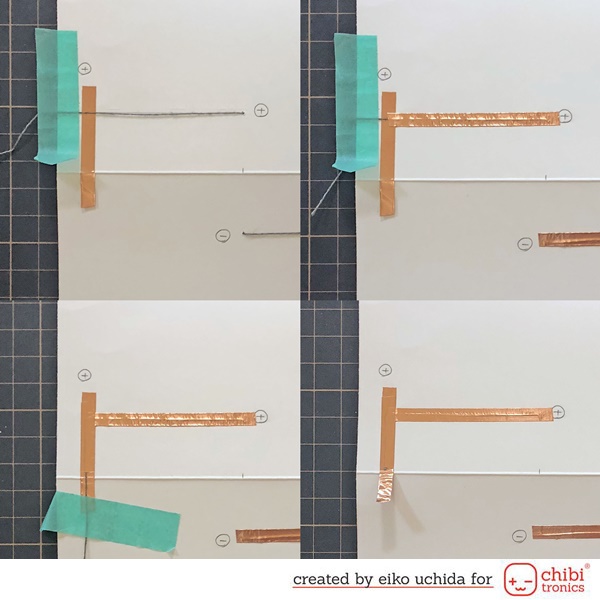
- Sew over the copper tape on the center line with a conductive thread.
- Sew the threads from the front to the back and tie them.
- Adhere the conductive thread with the copper tape along the center line.
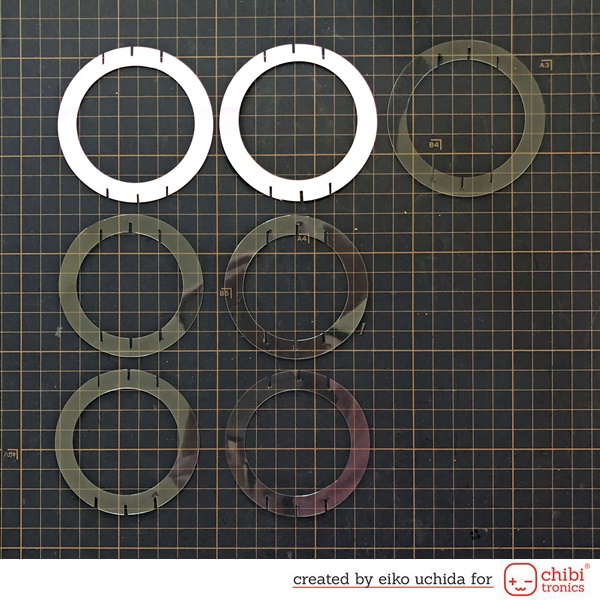
Make the parts of a sphere.
- Die cut two pink cardstocks using 3 inch and 2 1/4 inch dies.
- Die cut acetate sheet using the same dies.
- Die cut four acetate sheets using 2 3/4 inch and 2 inch dies.
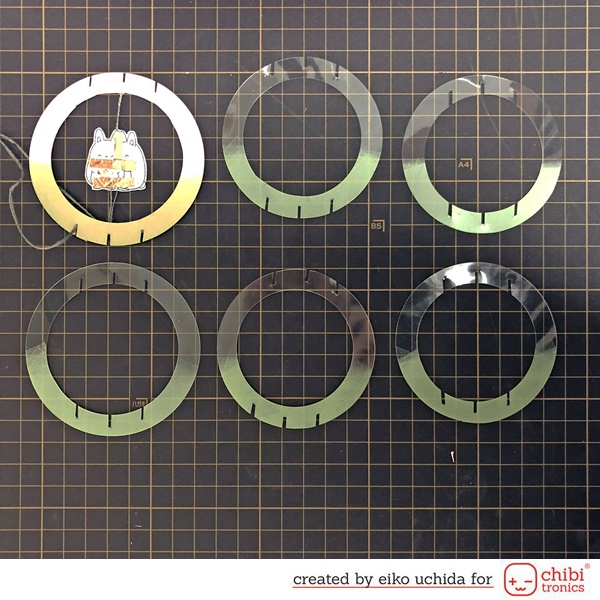
Make a notch refer to the picture below.
- Draw three lines at 5/8 inch intervals on copy paper.
- Mark the 1 mm width notch along the line of copy paper.
- Draw a line from the outside of the ring to half the width of the pink ring.
- Draw a line from the inside of the ring to half the width of the large acetate ring.
- Mark notches on small acetate sheet parts.
- Mark the two from inside, the other two from the outside.
Adhere the rabbit parts on the pink ring.
- Apply the tape glue on the pink ring.
- Adhere the positive side thread to the bottom right notch.
- Adhere the negative side thread to the bottom left notch.
- Paste two rings together.
Color the rings with StazOn Opaque fava green ink.
~Assemble the sphere~
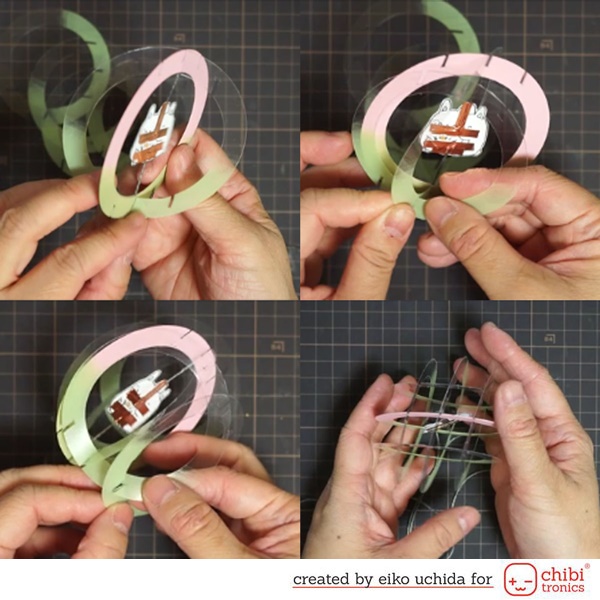
- Combine the central notch of pink ring and large acetate ring.
- Combine the central notch of small ring and the side notch of large ring.
- Combine the side notch of two small rings.
- All rings combine in a grid pattern.
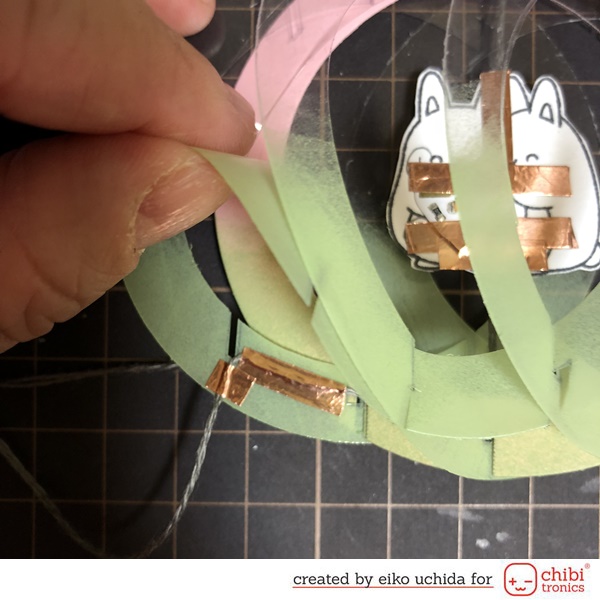
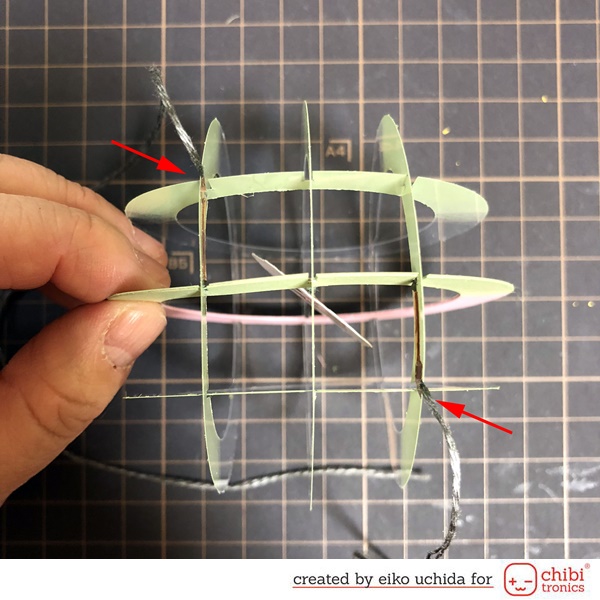
- Pull out the thread diagonally.
- Adhere the thread to the edge of the ring with small copper tape.
- Adhere vellum paper on the back of the colored rabbit part.
- Adhere the colored rabbit parts on the center part of the sphere.
~Make the card base~
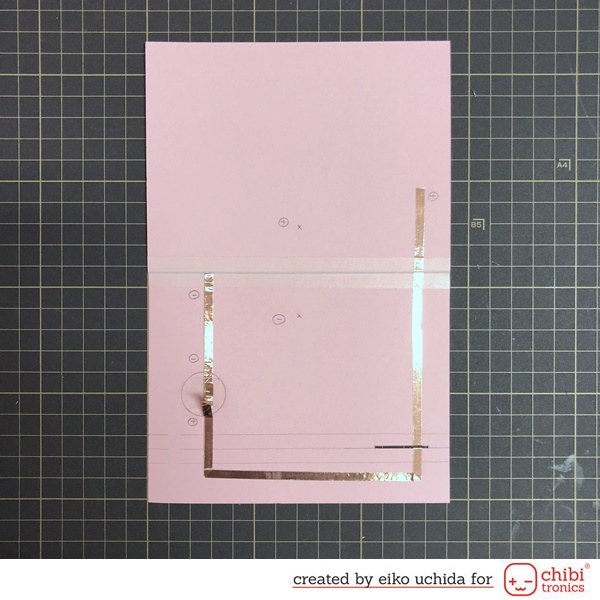
- Put two pink cardstock 1.5 mm apart with washi tape.
- Draw three lines at 1/4 inch intervals from 3/4 inch from the bottom.
- Draw a line of 1 inch length from the 3/8 inch from the right end of the center line and cut the slit with 1 mm width with a craft knife.
- Draw a line 1 inch from the left end.
- Draw a line 1/2 inch from the right end.
- Mark the battery on the left line.
- Adhere the copper tape on the drawing path.
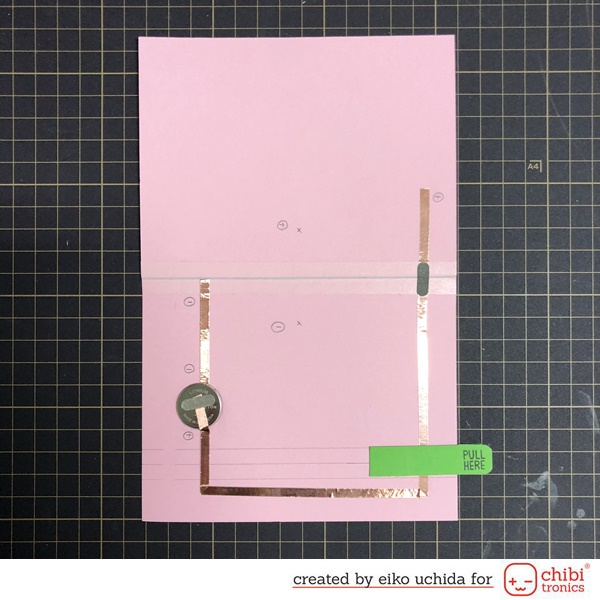
- Place the battery on the copper tape with the positive side up and adhere the positive side copper tape on the battery.
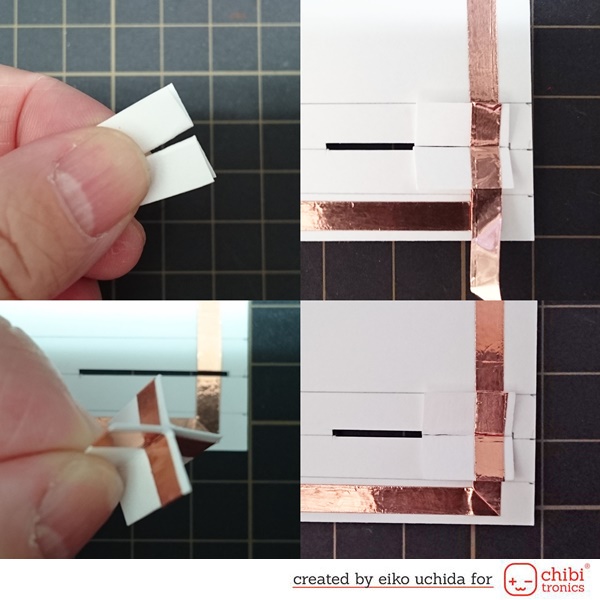
Make the switch parts.
- Fold square parts in half.
- Insert the switch part into the slit.
- Place the switch part on the right end of the slit and adhere the copper tape.
- Pull the switch part out of the slit and adhere copper tape around it.
- Adhere the double-sided tape on the switch part.
- Adhere the pull tab parts from the front and back.
- Adhere two parts together with thin foam tape.
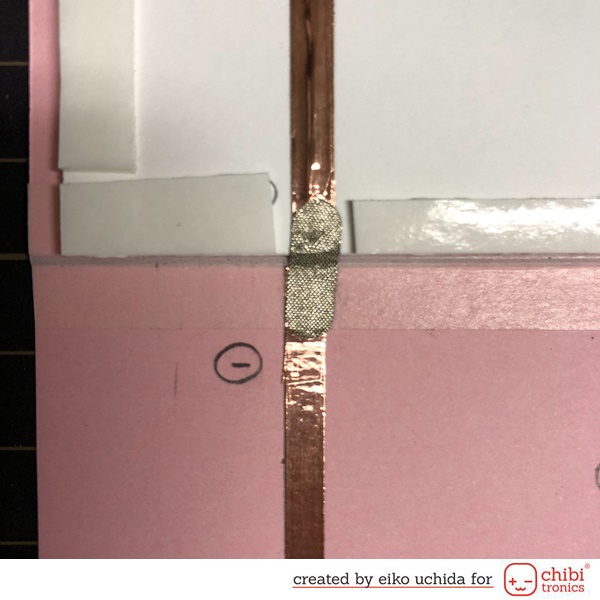
- Attach the conductive fabric tape for reinforcement on the copper foil tape on the fold line of the card.
~Attach the sphere to the card~
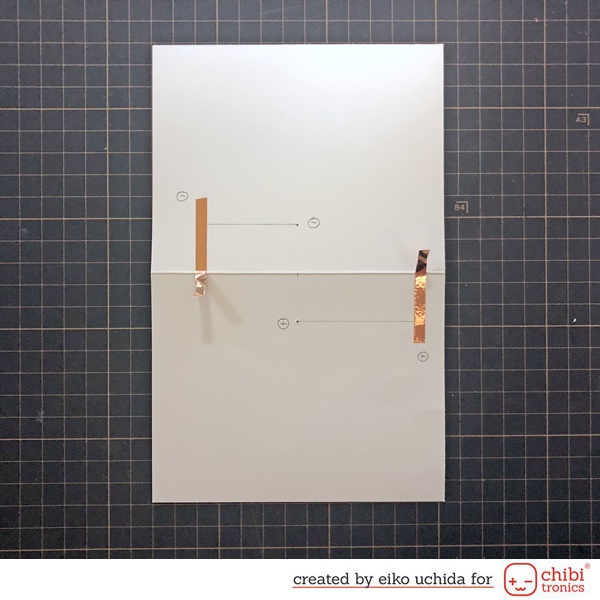
Mark the position to attach the sphere to the card base.
- Mark at 7/8 inch from the center of the card and make a hole at the mark.
- Put white cardstock on pink cardstock and mark the position of the copper tape on the pink cardstock.
- Adhere the copper tape on the drawing path on the white cardstock.
- At the center of the card leave about 1/2 inch copper tape and cut it.
Pass the thread through the hole.
- Pull the left and right thread evenly to raise the sphere.
- Temporarily fix the thread with washi tape.
- Pass the thread from hole to copper tape and adhere copper tape on the thread.
- At the copper tape, place the thread on the copper tape and adhere another copper tape on the thread.
- Adhere a thin foam tape on the lower half of the white card base.
- Adhere a double-sided tape on the upper half of the white card base.
- Put the white cardstock on the pink cardstock and adhere the white card’s copper tape on the pink card’s copper tape.
- Reinforce the folding line with the conductive fabric tape.
- Adhere the white cardstock on the pink cardstock.
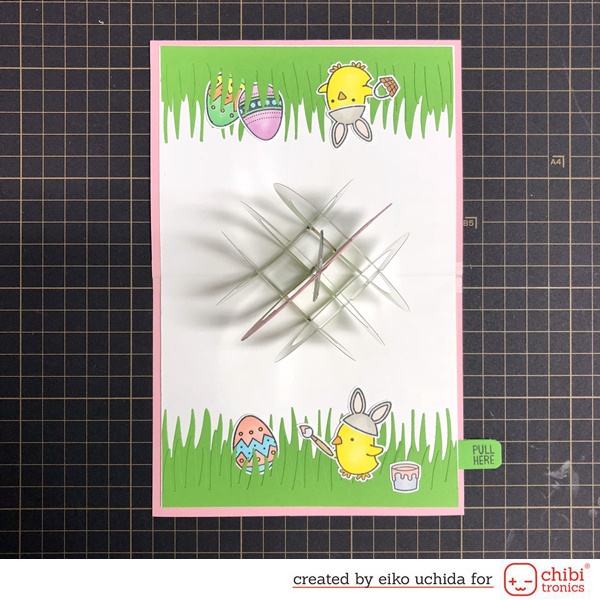
Adhere the die cut parts on the card base.
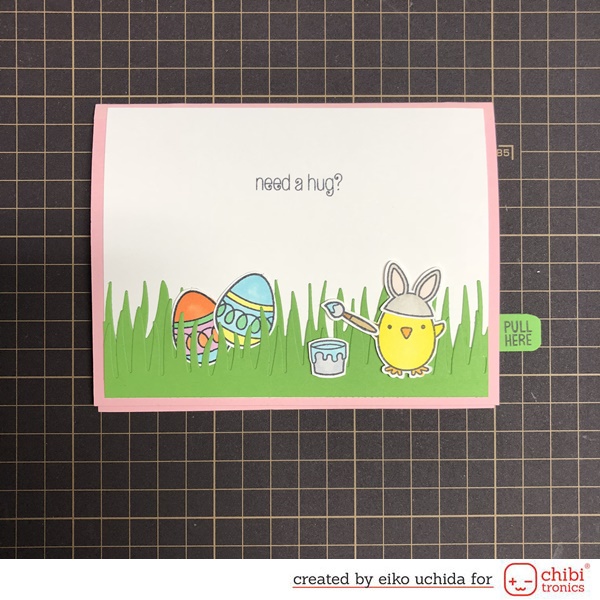
Make the cover panel.
- Adhere the die cut parts on the white cardstock.
- Adhere the chick part using foam tape.
- Stamp the sentiment with black ink.
- Adhere the cover panel on the folded pink cardstock.
I finished it!
Be sure to check out the whole video tutorial for more details.
And please see my blog for detailed tutorial.
>>>How to make light up pop-up sphere card.
Thank you for stopping by!
Eiko Uchida
~Supplies list~
- Chibitronics Pink, Orange, and Green LED Sticker Pack
- 3V coin cell battery (CR2016)
- 5mm wide Copper tape
- Conductive fabric tape patches
- Conductive thread
- Clearly besotted stamps Happy Hugs
- Hero arts Nesting Circle Infinity Dies
- Waffle flower crafts Egg Hunt Stamp Set
- Waffle flower crafts Chunky Grass Die
- Lawn Fawn Chirpy Chirp Chirp
- Hot off the press heat resistant acetate




Holy moly, that’s amazing! Thanks so much for the instructions! 🙂
Are you going to announce the winners of the collab with MFT any time soon? 🙂
Your dsign is so clever! Love it! Thanks for the tutorial and video! Gotta try this!