Hi, crafty friends!
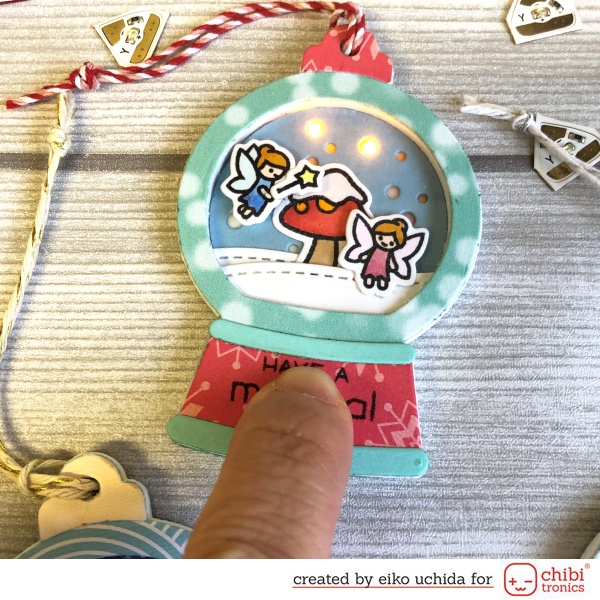
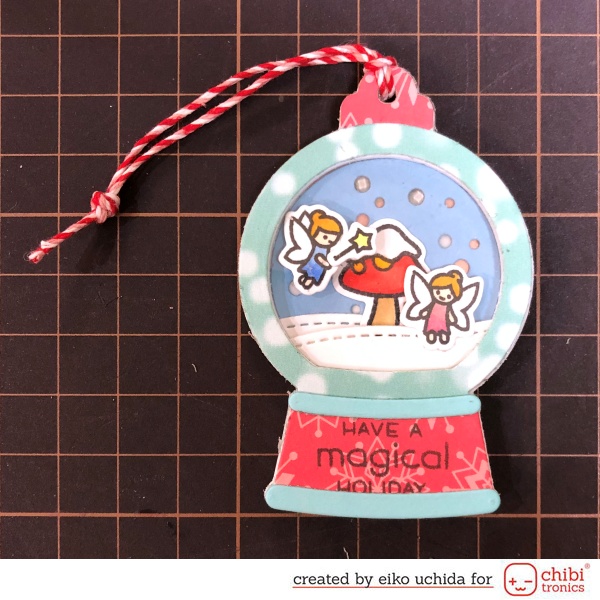
This is Eiko and I make light up tiny snow globe tag using Chibitronics and Lawn Fawn stamps and dies. When you push the sentiment, the snow globe glow.
Prepare these parts.
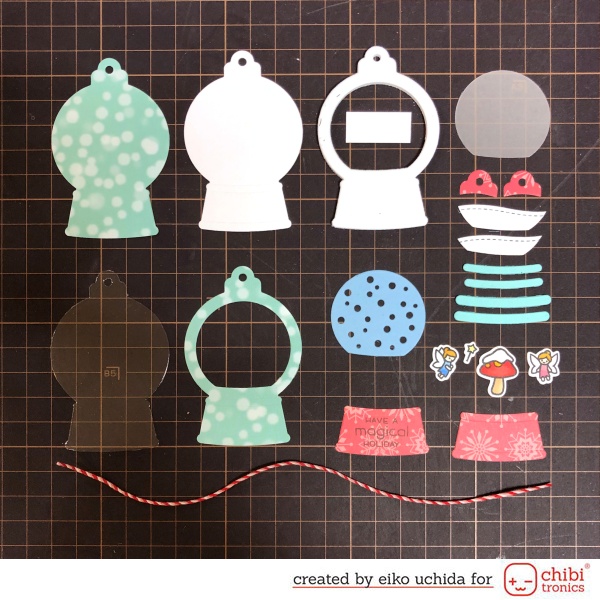
- Die cut the pattern paper, white cardstock and acetate sheet using globe base die.
- Die cut the pattern paper and 3mm thick foam sheet using globe frame die.
- Die cut vellum using background die.
- Die cut moonstone cardstock using snowy background die.
- Two top parts, two hillside border parts, two sets of base decorative parts, two globe base parts.
- Small battery holder size 1/2 x 1 inch.
- Stamp the fairies, wand and mushroom onto white cardstock. Color the parts with Copic markers and die cut using coordinate die.
~Make the circuit.~
Put the globe frame, snowy background, and fairies, mark the position of the lights.
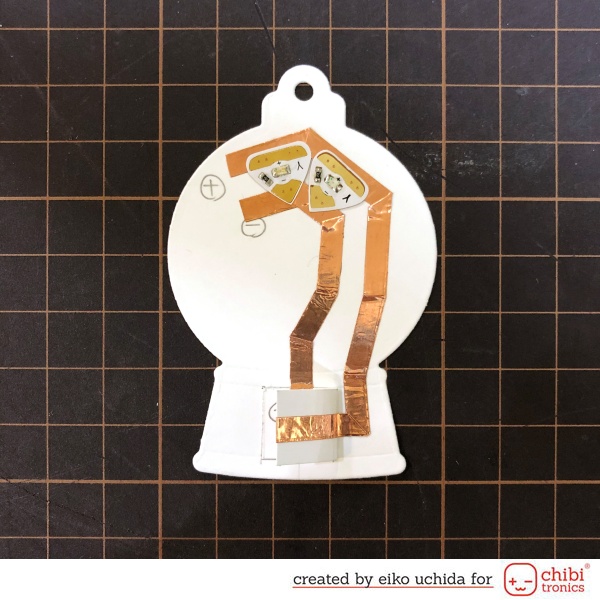
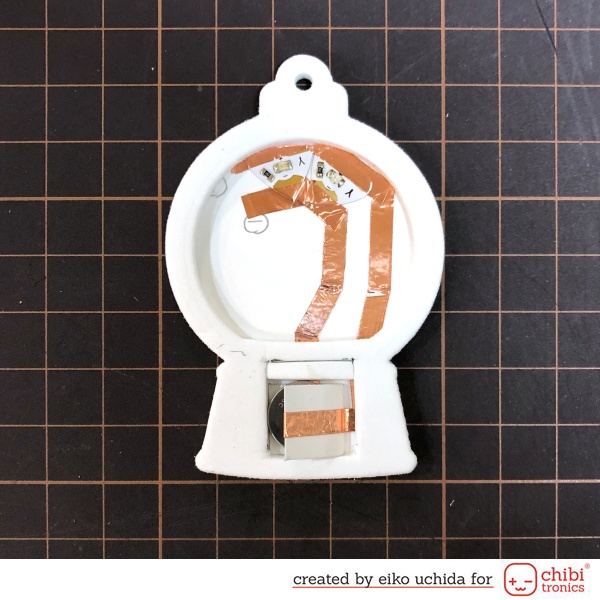
- Fold the battery holder in half and glue it in the center of the globe base.
- Mark the position of the Chibitronics.
- Draw the circuit with a pencil.
- Stick the copper tape on the pre-drawn path.
- Place LED stickers on top of the copper tape.
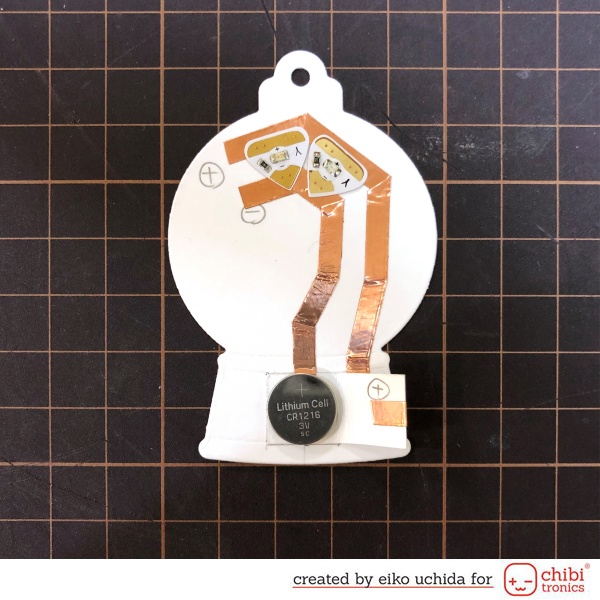
Add battery into the battery holder with positive side up.
Stick short copper tape on the edges of the LED to reinforce.
Stick the foam sheet on the circuit snow globe.
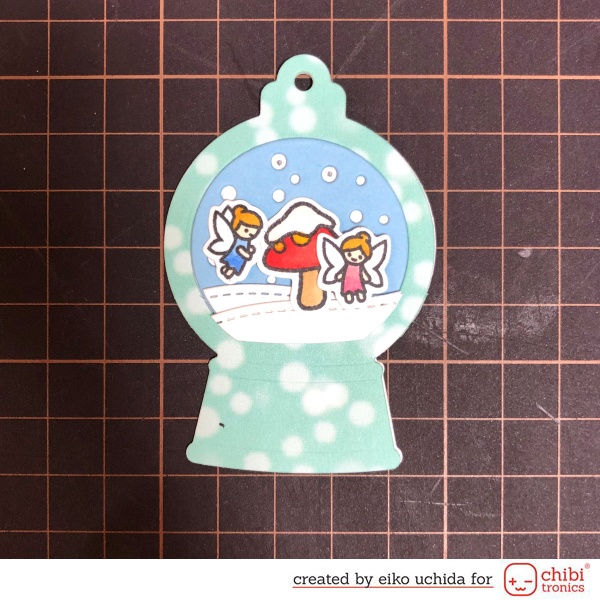
~Create front and back panel.~
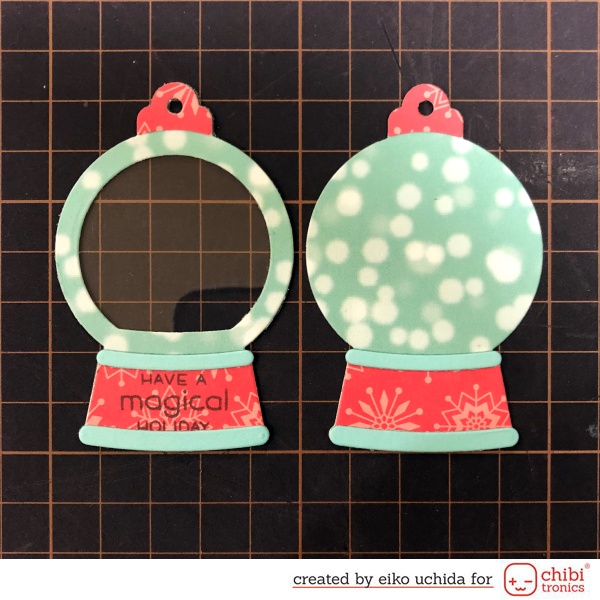
- Put the top parts, decorative globe base parts and globe base parts on the globe base and globe frame parts.
- Put the acetate globe base behind the globe frame.
~Assemble the tag.~
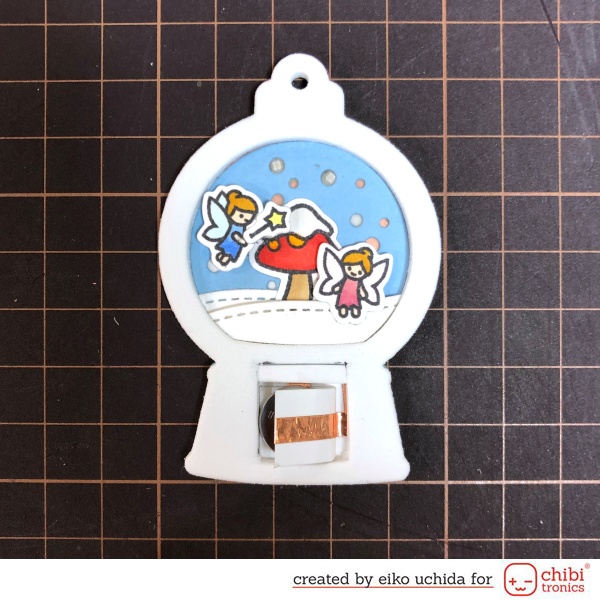
- Glue vellum piece behind the snowy background.
- Stick the mushroom and one hillside border on the snowy background using glue tape.
- Stick fairies and another hillside border with thin foam tape.
- Stick front and back panel on the circuit tag base.
- Pass the twine through the tag hole.
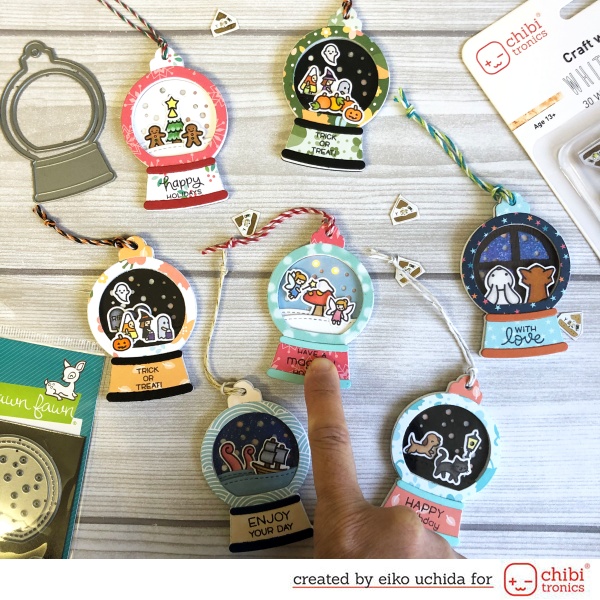
Finished! You can make various types of snow globes by changing the inside parts.
And please see my blog for detailed tutorial.
>>>How to make light up tiny snow globe tag.
Thank you for stopping by!
Eiko Uchida
~Supplies List~
- Chibitronics Red, Yellow, Blue Mega Pack
- Copper Tape
- CR1216 3V coin cell battery
- Lawn Fawn snow globe gift tag die
- Lawn Fawn a little sparkle stamp
- Lawn Fawn a little sparkle die
- Lawn Fawn frosty fairy friends stamp
- Lawn Fawn frosty fairy friends die
- Lawn Fawn say what? Christmas critters stamp
- Lawn Fawn stitched hillside borders die
- Lawn Fawn mittens remix paper
- Lawn Fawn beanie remix paper
- Lawn Fawn moonstone cardstock
- Lawn Fawn mermaid cardstock
- Lawn Fawn white cardstock
- Lawn Fawn vellum
- Lawn Fawn clear acetate
- Lawn Fawn sweetheart single cord
- Darice foamies foam sheet 3mm white
How to make light up tiny snow globe tag.
These are o cool! I think I may have to make these.