Hi, crafty friends!
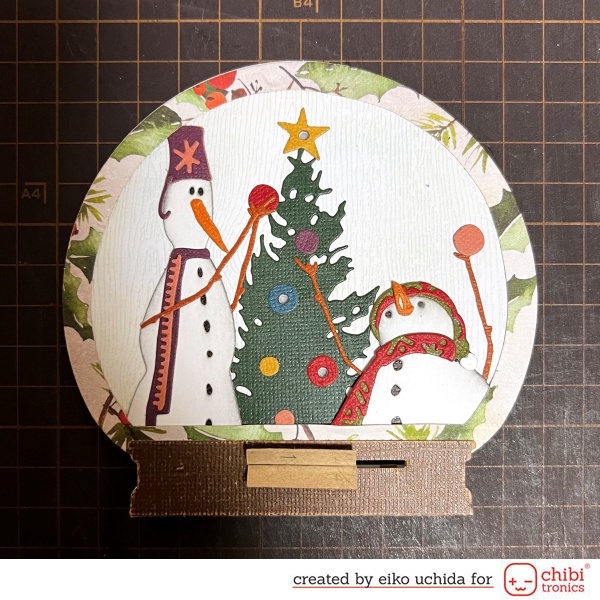
This is Eiko. I make light up snow globe card using Chibitronics and Tim Holtz dies.
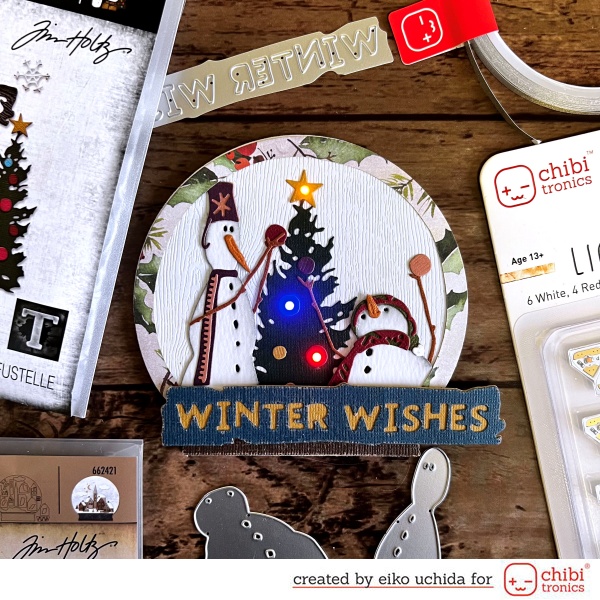
When you pull the sentiment tab, the Christmas tree ornaments shine.
I will make the parts referring to the picture below.
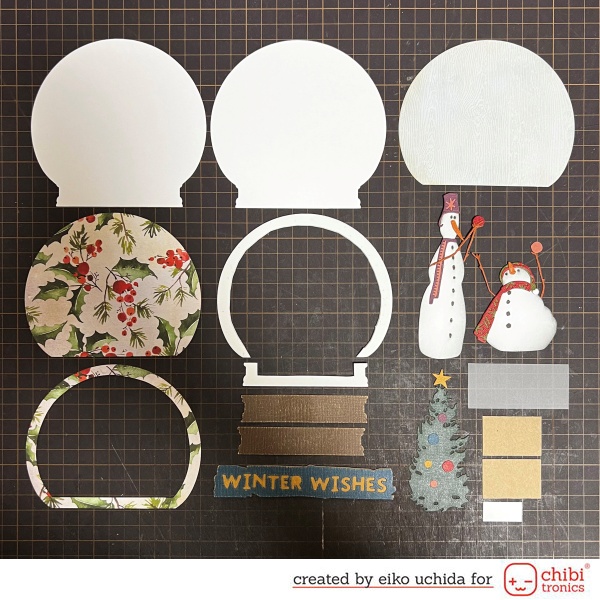
- Die cut white cardstock with snow globe and pedestal dies.
- Die cut white woodgrain cardstock with snow globe die and color with speckled egg and antique linen distress ink.
- Die cut pattern paper with snow globe die. Cut out the inside of one of them as shown in the photo.
- Die cut 2mm thick foam sheet with snow globe and pedestal dies.
- Die cut brown paper with pedestal die.
- Die cut colored paper with snowman, tree and sentiment dies and assemble.
- Small vellum part.
- 1 x 1 1/2 inches kraft cardstock for switch part.
- 1 x 1/2 inches white cardstock for switch part.
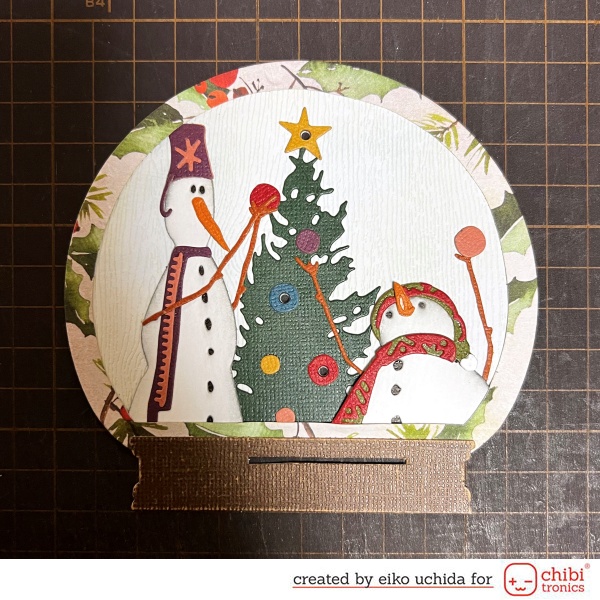
- Assemble the cover panel.
- Put the die cut parts on the snow globe shaped white card base and make holes at the light position.
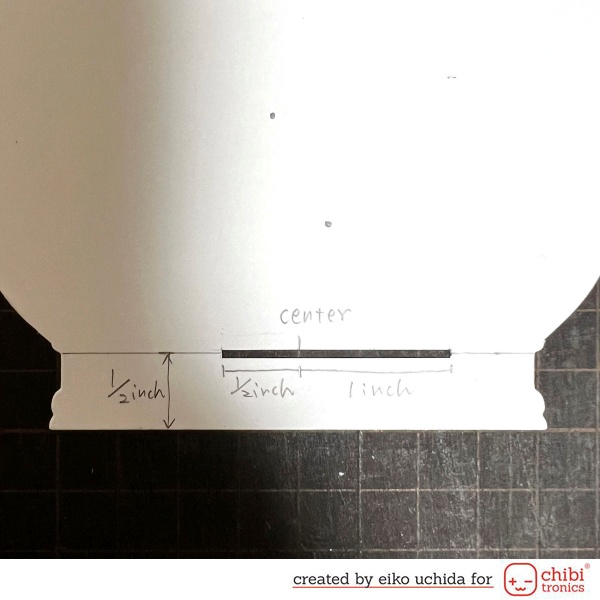
Make a slit by referring to the picture.
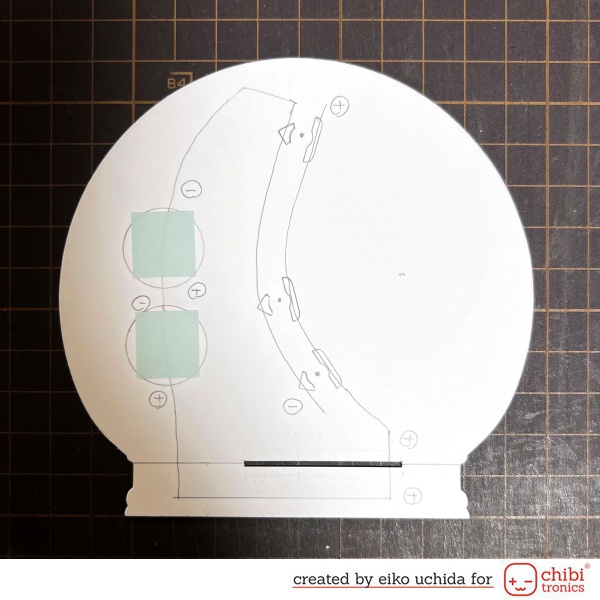
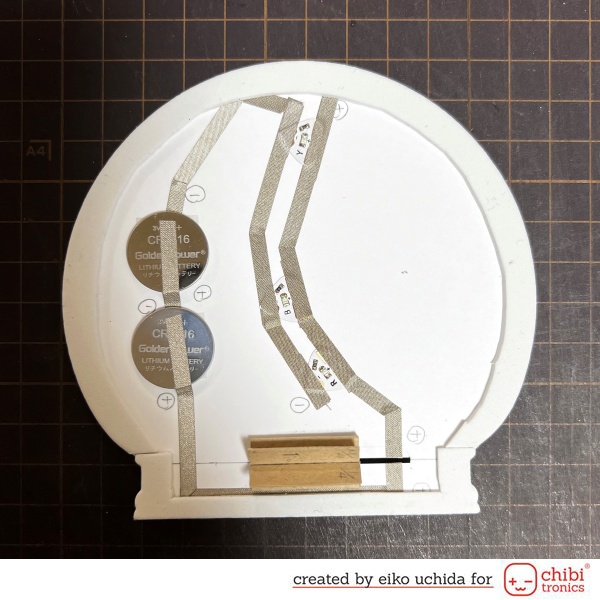
- Put the cover panel on white cardstock and mark the lights with a pencil.
- Mark the position of the Chibitronics and the battery.
- Draw the circuit with a pencil.
- Apply the double-sided tape on the battery place.
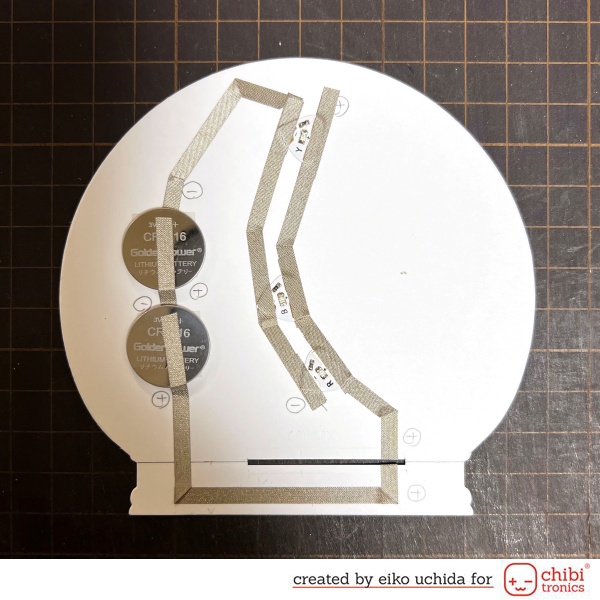
- Stick the conductive fabric tape on the pre-drawn path.
- At the battery place, peel off the release paper, stick the negative side fabric tape, fold it back and cut it.
- Stick the positive side fabric tape.
- At the position of the battery leave the positive side fabric tape about 1 inch and cut it.
- Place the battery on the fabric tape with positive side facing up and stick the positive side fabric tape on the battery.
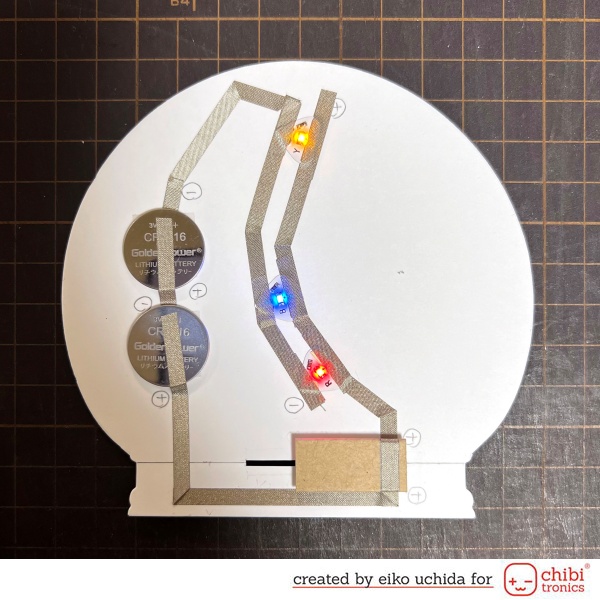
- Attach the red, yellow and blue LEDs to the fabric tape, over the outline.
- Stick short fabric tape on the edges of the LED to reinforce.
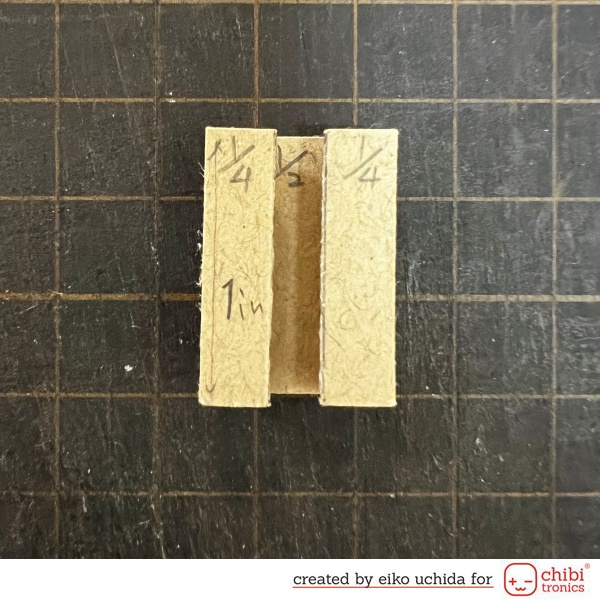
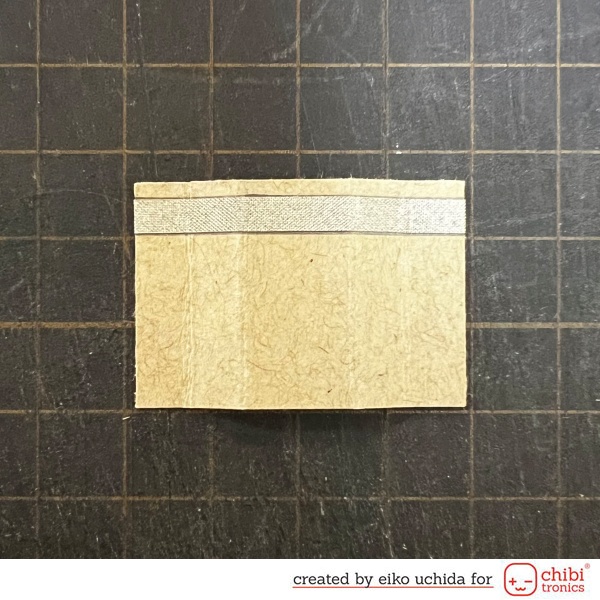
Make the switch part. Cut the kraft cardstock to 1 x 1 1/2 inch size.
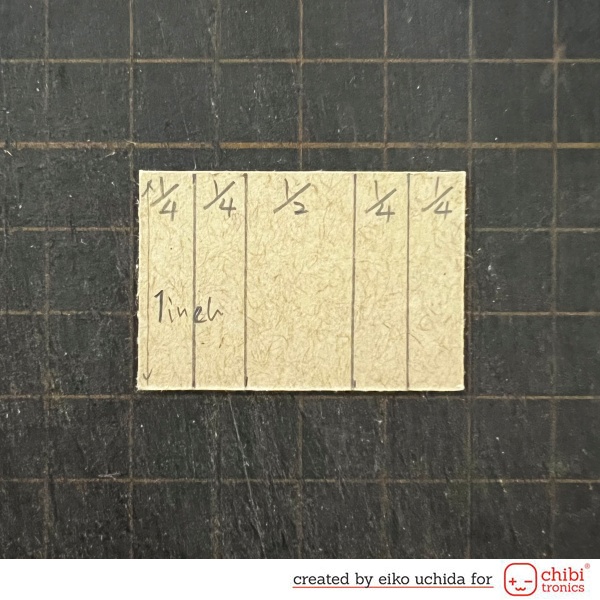
Fold the cardstock as shown below.

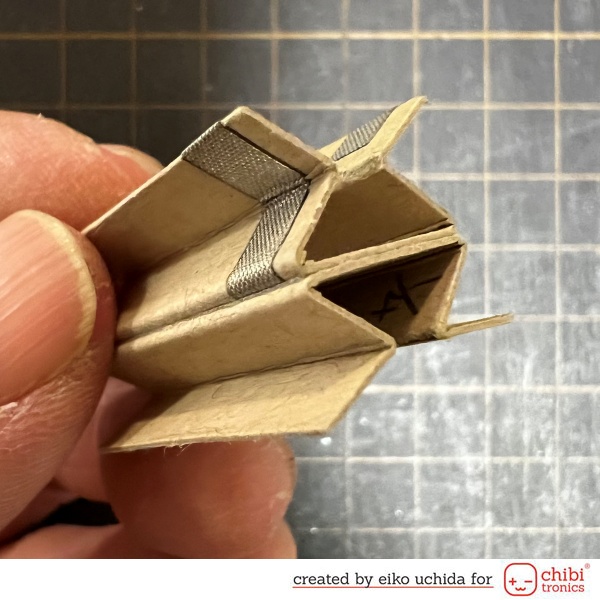
- Insert the flap into the slit and place the switch at the right end of the slit.
- Mark the position of the fabric tape.
- Remove the switch part from the slit and stick the fabric tape on the mark.
- Fold the flap along the crease.
Re-insert the switch part into the slit and test the LEDs turn on.
Fold the other switch part in the same way and glue it together as shown.
Put the snow globe shaped foam sheet on the circuit card base.
- Stick vellum paper on the back of the cover panel.
- Insert the switch part into the slit of the cover panel.
- Stick the cover panel to the card base.
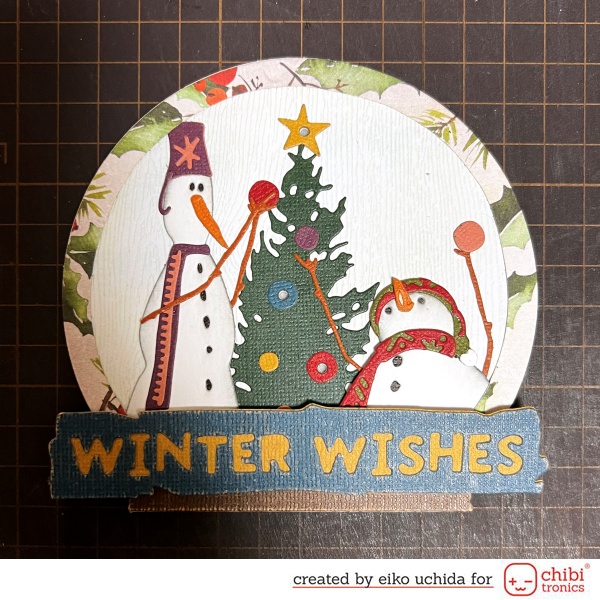
Stick the sentiment banner on the switch part.
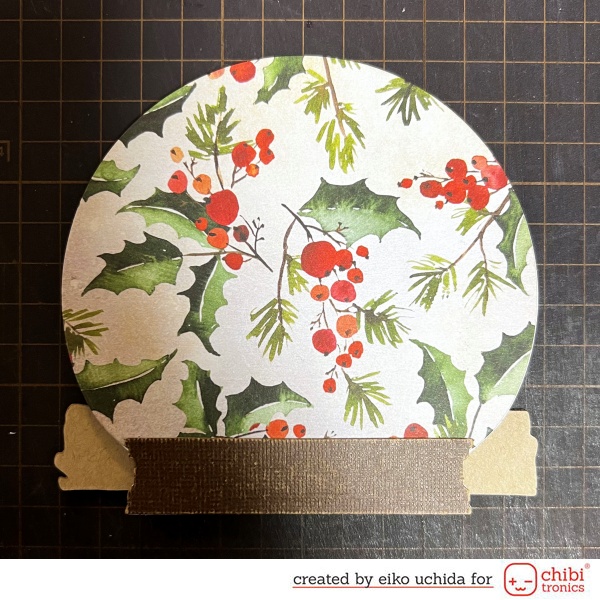
Stick the pattern paper and pedestal part on the backside.
I finished it!
When you pull the sentiment tab, the Christmas tree ornaments shine.

Be sure to check out the whole video tutorial for more details.
Thank you for stopping by!
Eiko Uchida
~Supplies List~
- Chibitronics Red, Yellow, and Blue LED Sticker Pack
- 3V coin cell battery (CR2016)
- Conductive fabric tape
- Tim Holtz twig & stump die
- Tim Holtz snowglobe #2 die
- Distress ink speckled egg
- Distress ink antique linen
- Distress ink hickory smoke
- Distress watercolor cardstock
- Tim Holtz paper stash classic kraft stock
- Tim Holtz paper stash Christmas
- Neenah 100lb smooth desert storm paper
- White woodgrain cardstock
- White cardstock
- White vellum
- 2mm thick white foam sheet