
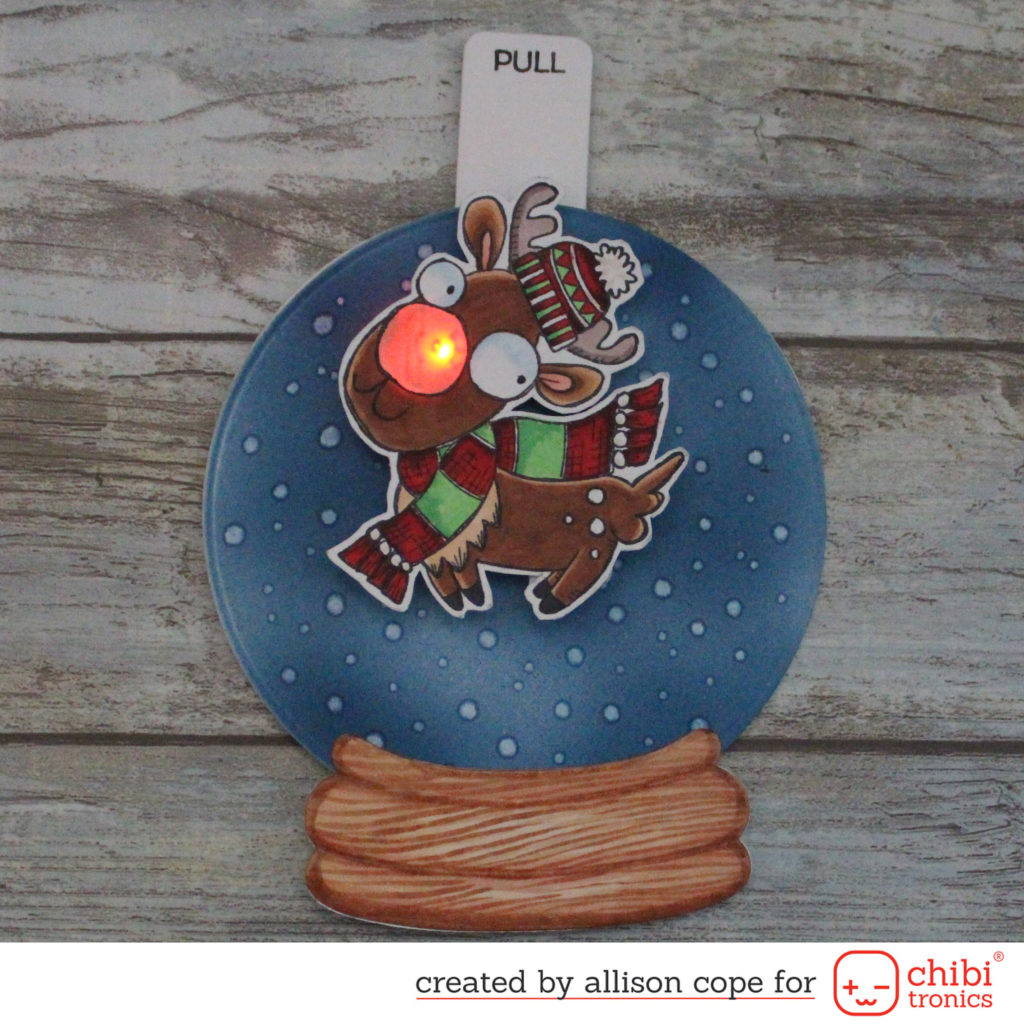
Happy Wednesday everyone! I’m Allison Cope and today we’re going to make a cute little reindeer ornament where our little cutie’s nose is going to fade on and off in red!
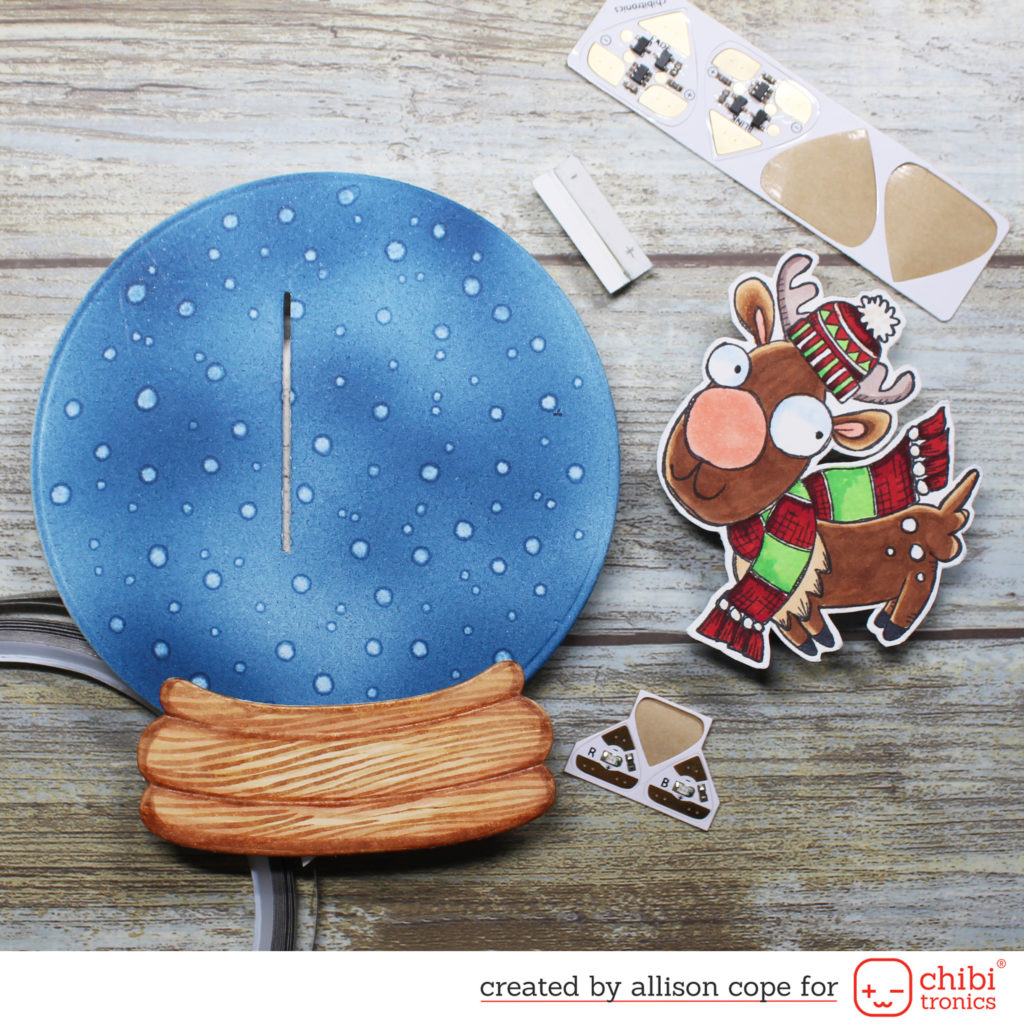
I first began my little snow globe by die cutting all of the pieces, coloring in my starry sky, my wooden base plus stamping and coloring in my little “Reindeer” stamped image from Aall & Create with Copics.
I started by cutting a tiny slit in the sky for my reindeer to travel up and down to close my circuit.
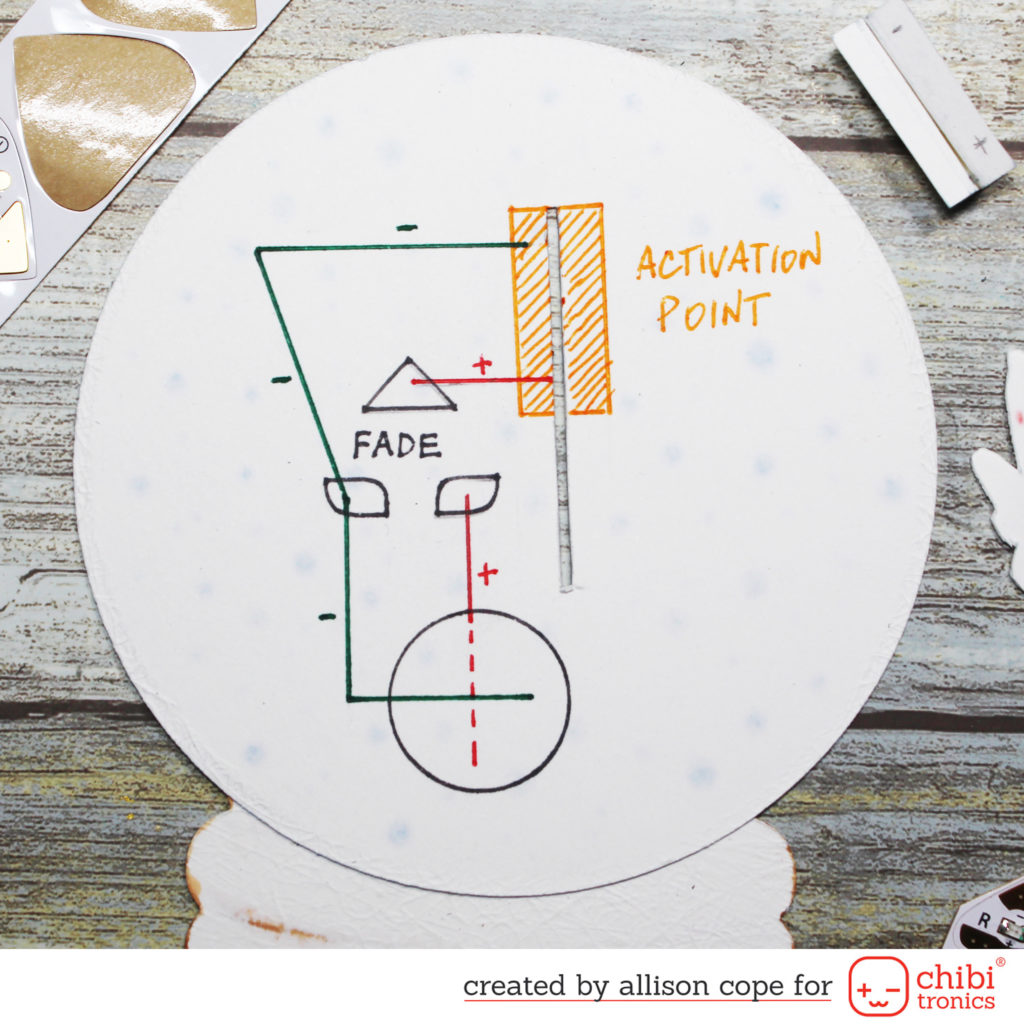
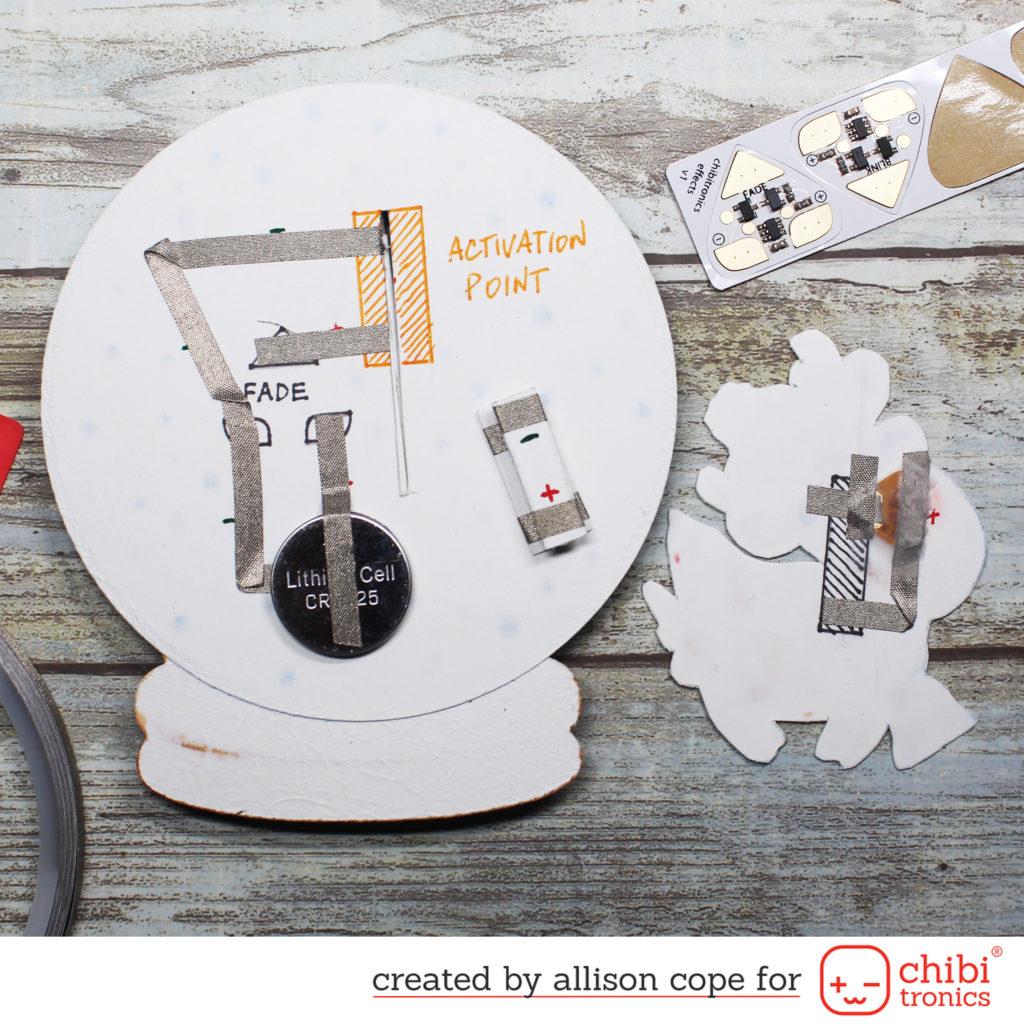
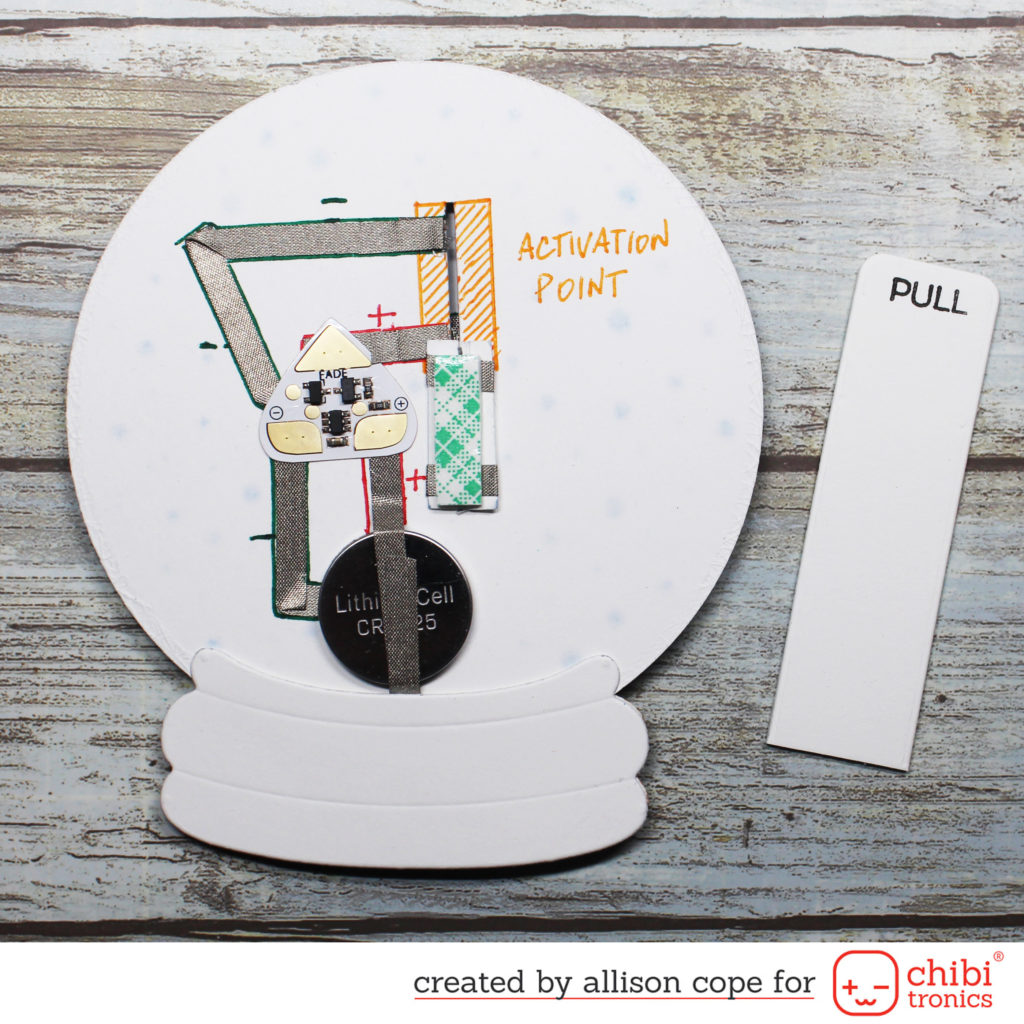
Next, on the back side of the globe, I planned out my circuit. I am using a “Fade” Craft Effects Sticker today to have my reindeer’s nose fade in and out. The “Activation Point” shown is where the reindeer will slide up and make contact with the circuit to turn everything on.
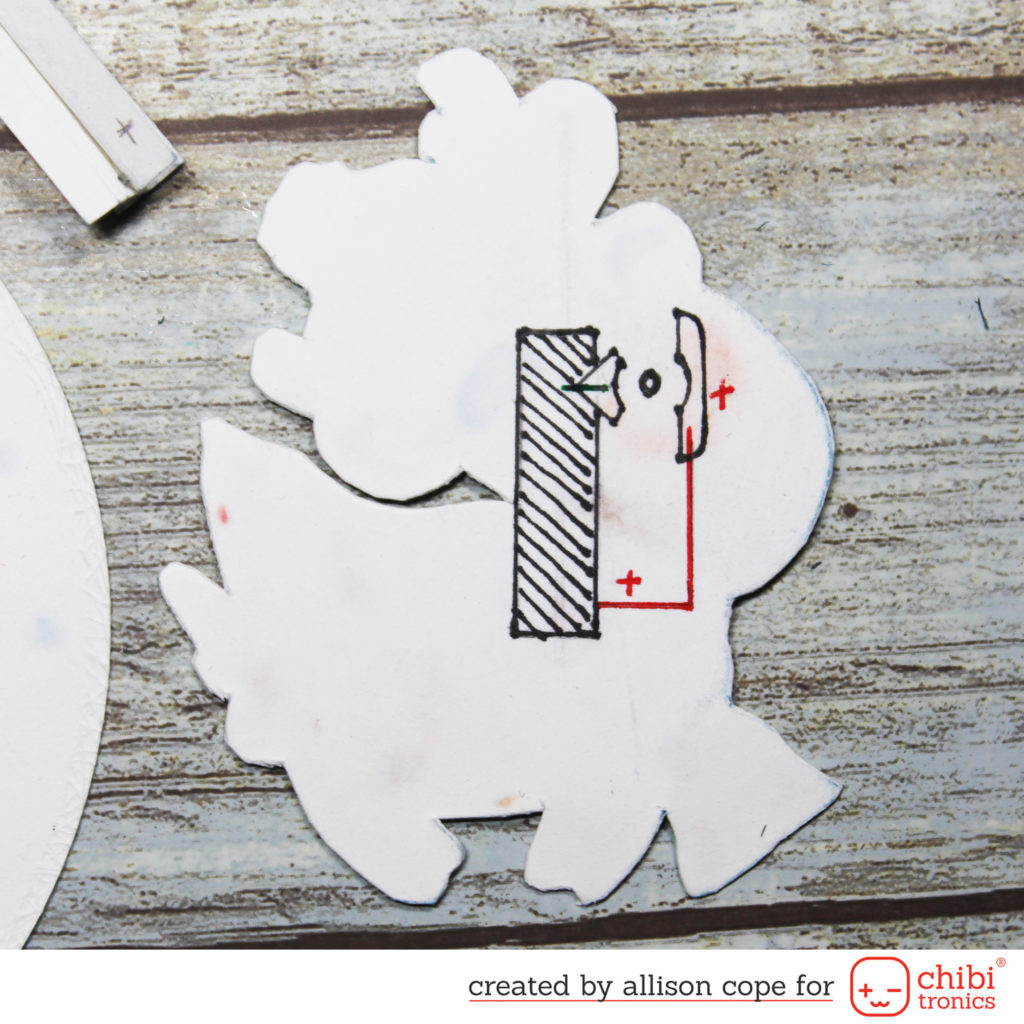
On the back side of the reindeer image, I mapped out the position of my Red LED Light Sticker and where the positive and negative sides of the circuit were. The black hatched rectangle is where the “I beam” is going to be located to allow the reindeer to travel up and down to compete the circuit.
Next I created the little “I” beam for the sliding mechanism for my reindeer. I wrapped each of the beam using our Conductive Fabric Tape so the connections can be made to complete the circuit. You can see a cross section of the “I” beam in the lower left hand corner of the image below – hence the “I” beam description.
I started my circuit by laying down the negative side of the circuit first. This allows me to place the Conductive Fabric Tape underneath the battery.
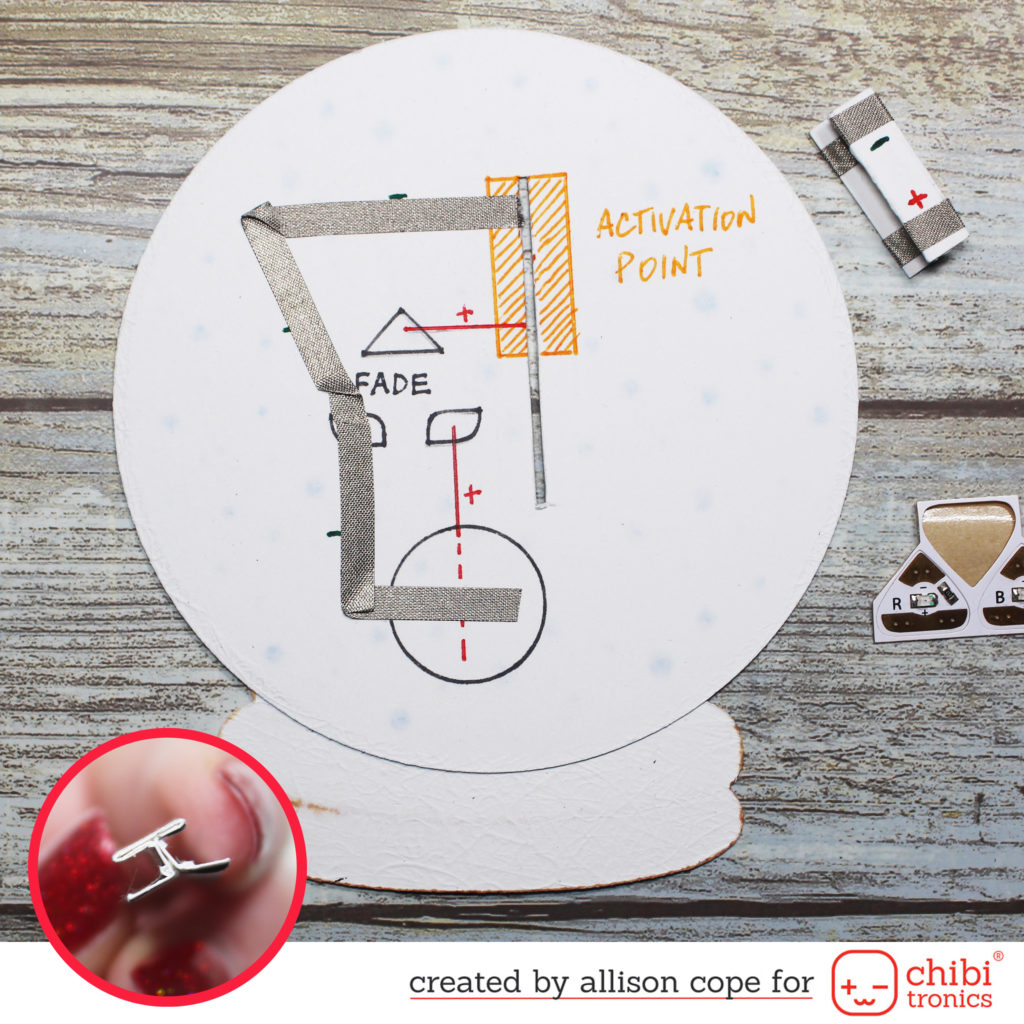
Then I stuck down the positive side of my circuit. For the battery, all I did was run my Conductive Fabric Tape right over top of the battery and down the side to the rest of the positive side of the circuit.
For the reindeer side of the circuit, I taped my Red LED Light Sticker UPSIDE DOWN. This allows the light to show up on the reindeer’s nose. I added a little bit of Scotch tape over the circuit sticker so it wouldn’t accidentally get stuck to any part of the insides of the ornament. I completed both sides of the circuit.
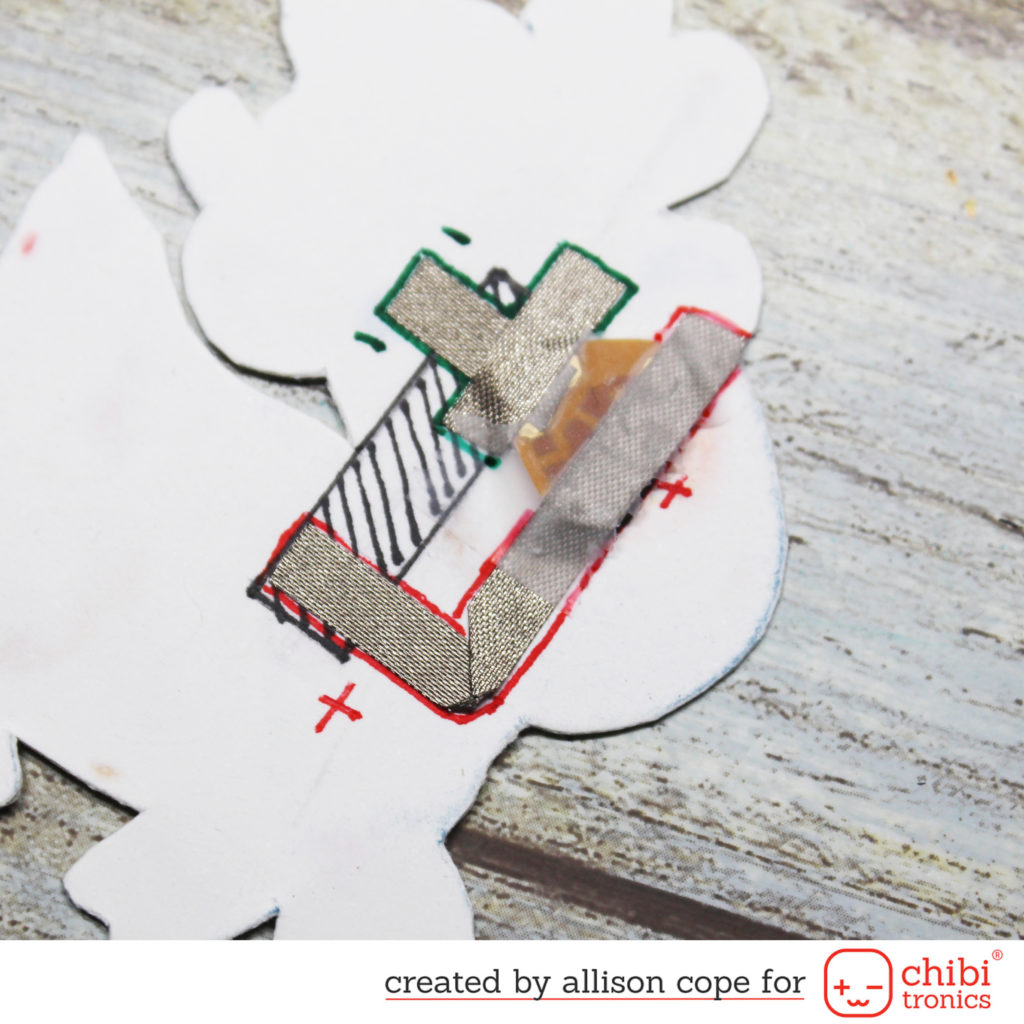
Next I glued in the “I” beam to the rectangle on the circuit. This allowed the positive and negative sides of the circuit to make contact with the rest of the circuit once the reindeer travels up and down the little slit in the globe.
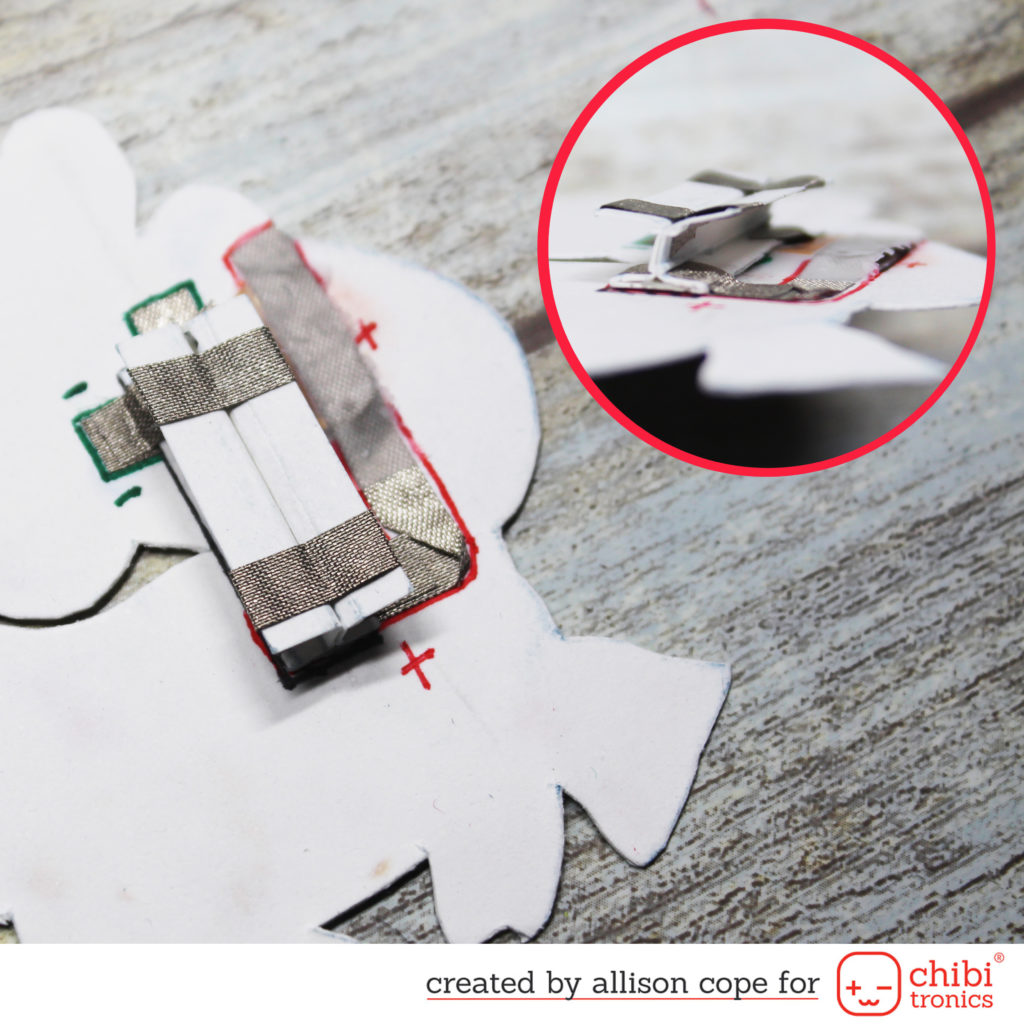
I added some 3D foam to the backside of my reindeer. This helps push out and stabilize the reindeer on the outside of the ornament. I left on the backing to help the reindeer slide.
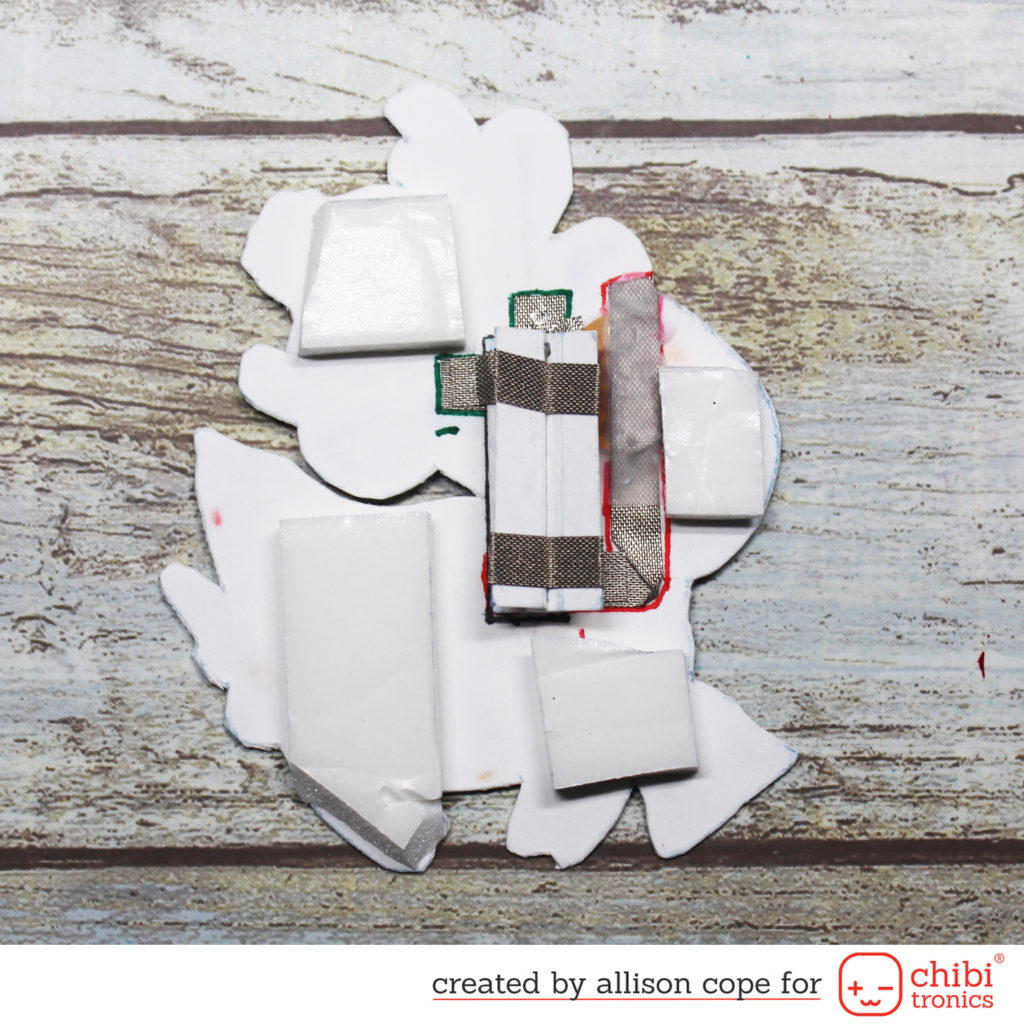
Next I folded up the flaps of the “I” beam and passed them through the slit placing the reindeer now on the front of the globe. I then added a piece of foam tape on top of the “I” beam and I made a pull tab that is going to attach to the “I”beam to allow it to be pulled up and down to activate the light. I also stuck down the “Fade” Craft Effect Sticker to the circuit.
When you pull the reindeer to the upper position, the circuit becomes complete and the Red LED Light Sticker lights up and the “Fade” Craft Effect Sticker causes the light to fade in and out.
I hope this inspires you to create something new and interactive!
~ Ally ~
