If you are reading this post, there’s a good chance that you have:
- heard of reed switches;
- seen an inspiring project that uses them;
- experimented with reed switches and discovered that they are magical;
- discovered that working with reed switches can be fiddly.
In the event that you don’t fit into any of the aforementioned categories, please allow me to suggest that you check out Magical Magnetism: Intro to Reed Switches (Magnet On) before reading on. There, you’ll find an in-depth explanation of what reed switches are, how they work, and why you might want to use them.
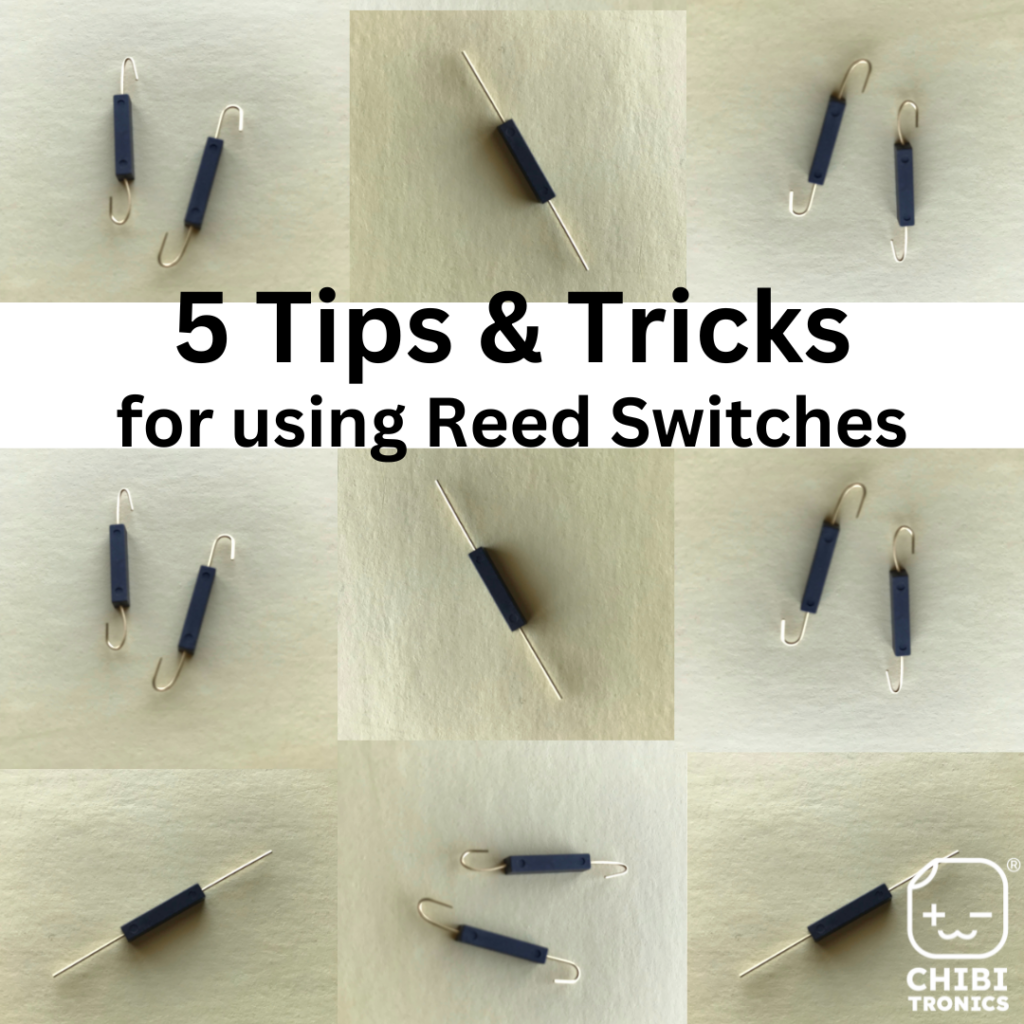
In this post, I will be sharing five tips and tricks for successfully using reed switches in your paper circuit projects. But, before I begin, I’d like offer reassurance that reed switches can require a bit of finessing, even for the most experienced paper circuit practitioner. When they work perfectly the first time, it’s a cause for celebration!
There are a number of reasons for this, ranging from polarity to adhesion. Reed switches, magnets, and circuit tapes can all have slight variations. Magnets have different poles (positive and negative) and reed switches can have some variation for where the little ferromagnetic fibers inside are most likely to react to the changes in magnetism. And sometimes, the adhesive power of the circuit tape we use can also play a role.
So, without further ado, here are a few tips and tricks that might help you overcome some of the most common problems people encounter when integrating reed switches into their paper circuit projects.
1. Wash Your Hands
A fresh, sticky piece of circuit tape is necessary for ensuring a robust physical and electrical connection when working with reed switches. If you attempt to use a piece of Conductive Fabric Tape that has been handled a lot, especially with greasy fingers, it will not reliably do the job. Since humidity and oils on our hands can impact adhesion over time, it’s a good idea to wash and dry your hands before handling the materials.

2. Look for Dots or Circles
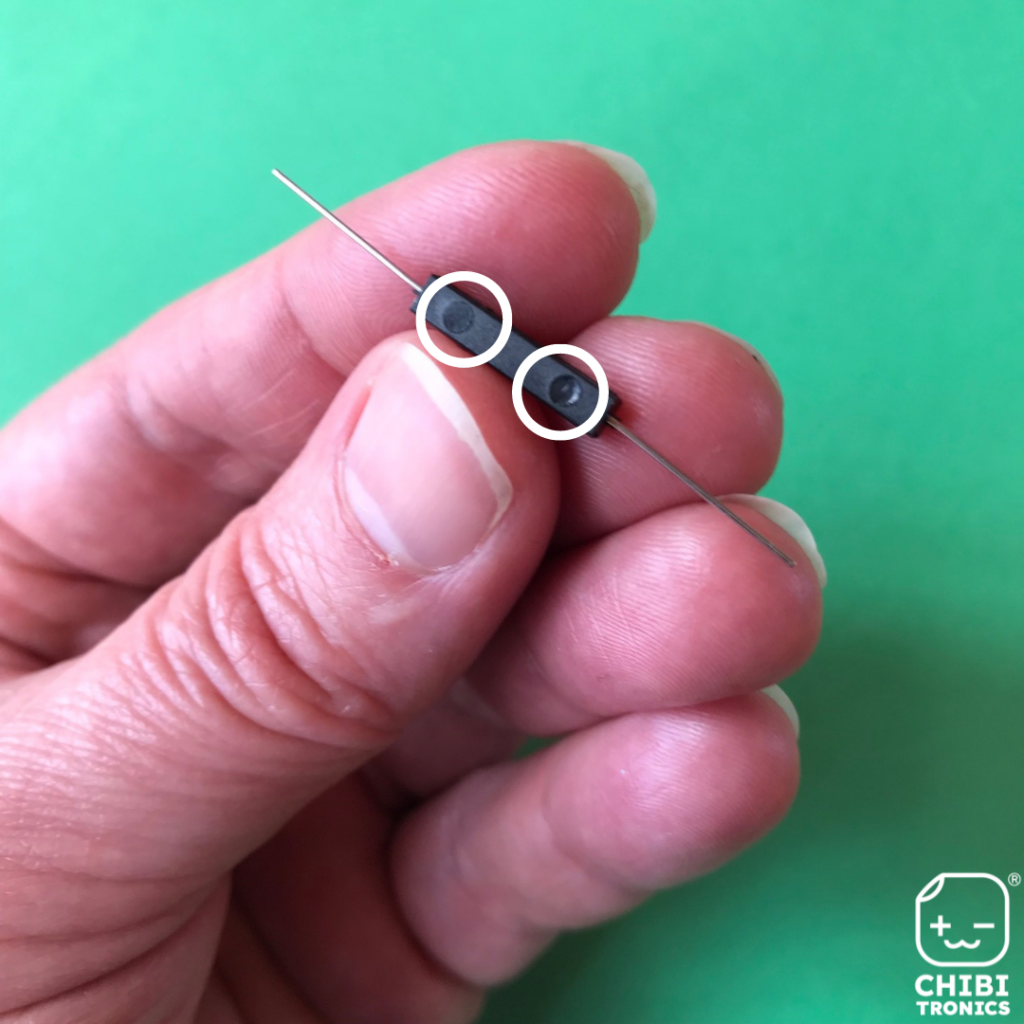
While this does not always work, one thing that I look for when guessing which side of a reed switch to pair with a magnet is visible dots or recessed circles. The presence of either can be a useful visual to help locate the side of the reed switch most susceptible to magnetism.
If one side doesn’t work when added to your circuit, try flipping the magnet. If the switch still doesn’t work, try rotating the switch to another flat side and testing it again with a magnet until you find a side that does.
3. Prototype with Alligator Clips
Alligator clips paired with a bare Circuit Sticker LED are very useful for prototyping with reed switches, because they can quickly help you detect sensitivity with a magnet.
While not everyone has access to alligator clips, they can be a very useful method for determining the best possible reed switch to magnet configuration, before you add a reed switch to your project.
Ordinarily, I have to do a little fiddling to find the sweet spot on a reed switch. If I added the switch to a project first, I might have to undo my work in order to rotate the reed switch over to a different side. To reduce the need for flipping my reed switches after they’ve been adhered, alligator clips help me locate the side or sides most sensitive to magnetism ahead of time.
To see how this works, watch the brief demo video below.
4. Bend the Legs
When working with Conductive Fabric Tape and reed switches, getting the legs to stay in place can be tricky. Gently bending the legs of your reed switches can help keep a reed switch from rolling around, while providing more metallic surface area for circuit tape to adhere to. I’ve found that I often have the best luck getting my reed switches to stay put if I curl the legs and then adhere the Conductive Fabric Tape over one side of the resulting curve, rather than over the entire length of the leg.
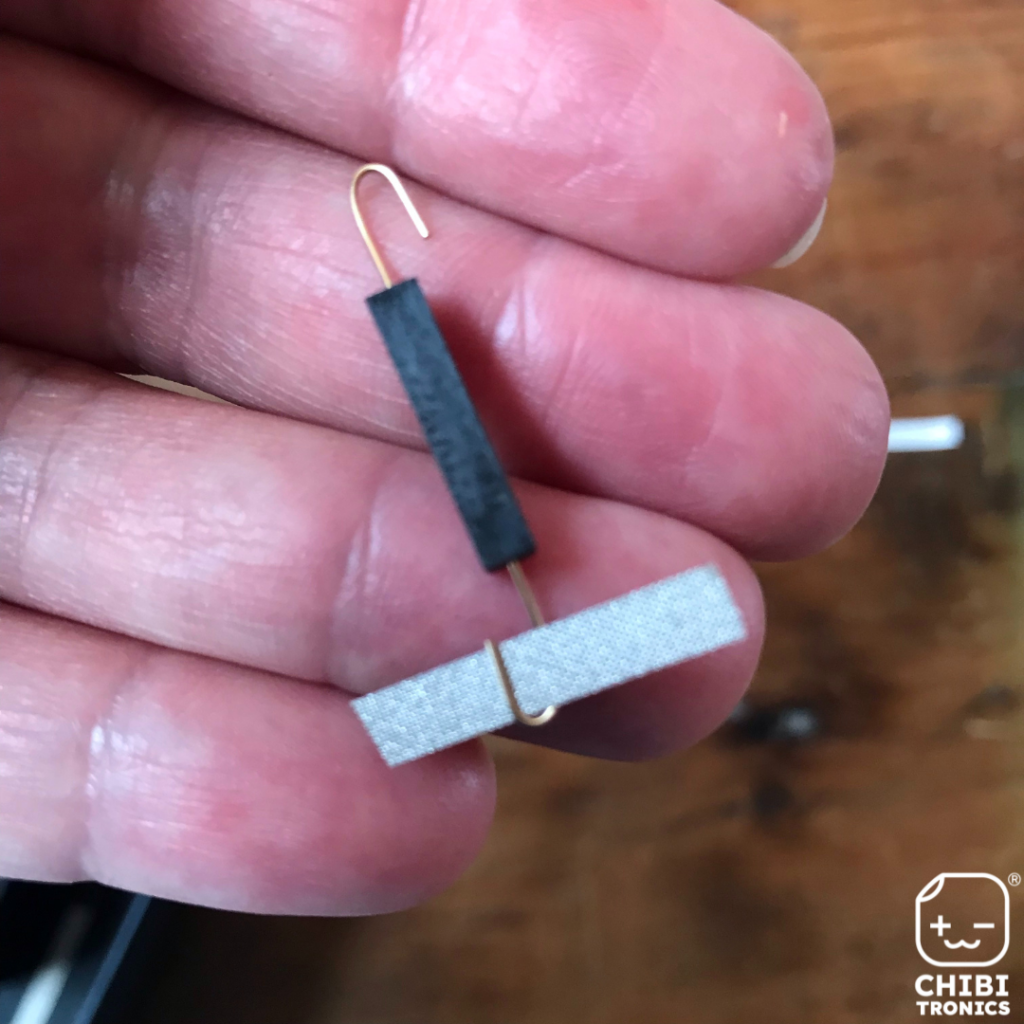
In the example below, I’ve placed the Conductive Fabric Tape that is holding the reed switch in place perpendicular to the rest of the circuit traces, giving the tape some paper to grip onto. When it gets humid at my house, this trick really helps. Of course, this strategy can still require fiddling, if I don’t first get the reed switch oriented in the best place for my magnet.
5. Reinforce Connections
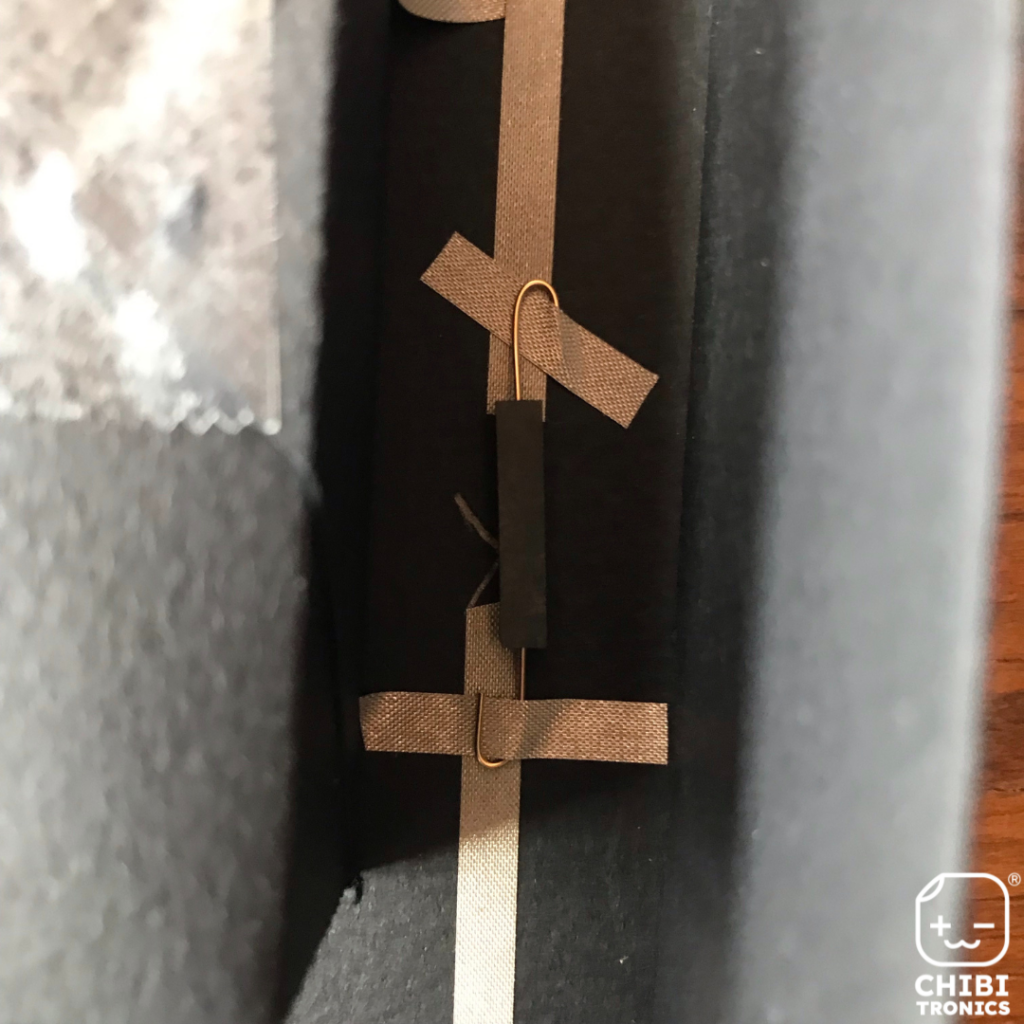
When working with reed switches, it’s not uncommon for them to loosen at the point where the metal legs come in contact with circuit tapes, particularly when using Conductive Fabric Tape. This can be minimized by reinforcing connections over the legs in one of two ways. One way is to increase the amount of paper your circuit tape comes into contact with as it holds down the metals legs. Another way is to add a patch of conductive fabric or copper tape on top of the base layer of circuit tape, using a bone folder or fingernail to remove air pockets and tighten the connections around the metal legs.
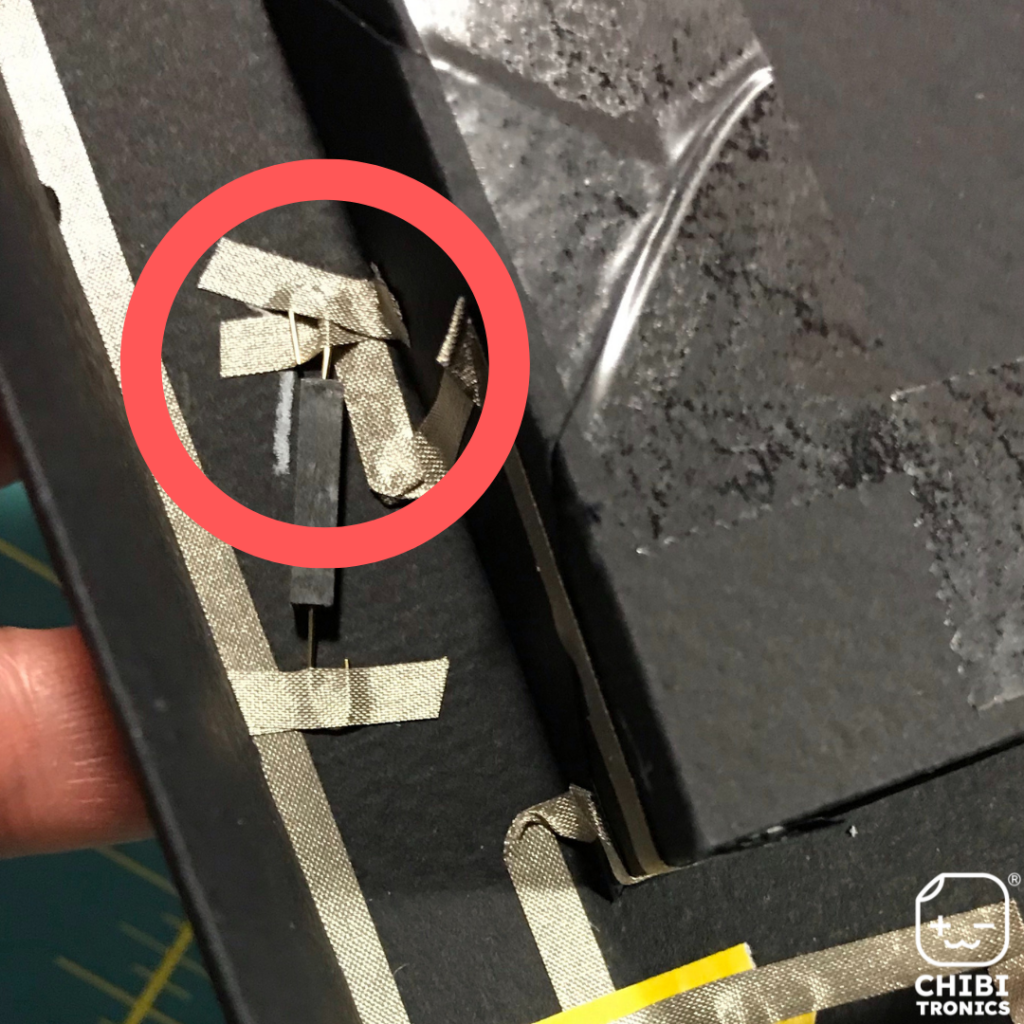
In cases where the legs of my reed switch seem to be coming loose repeatedly, usually in projects involving a lot of vibration or movement, I might also use a bone folder to press the legs down flatter against the paper. In these cases, I’ve found that adding a patch of copper tape can sometimes do a better job than Conductive Fabric Tape alone, as the metal is more malleable, and holds its shape better around the metal legs.
Do you have another tip or trick for using reed switches that you’d like to share?
If so, please consider reaching out on social media and telling us about it!
