Hi, crafty friends!
This is Eiko. Finally, our new animating LED is now available for sale! Chibitronics released three new animating LEDs. Gem-shaped blink type, Heart-shaped fade type, and Flower-shaped rainbow fade type. So today I make light up plumeria card using Chibitronics new animating LED and Altenew stamps and dies.

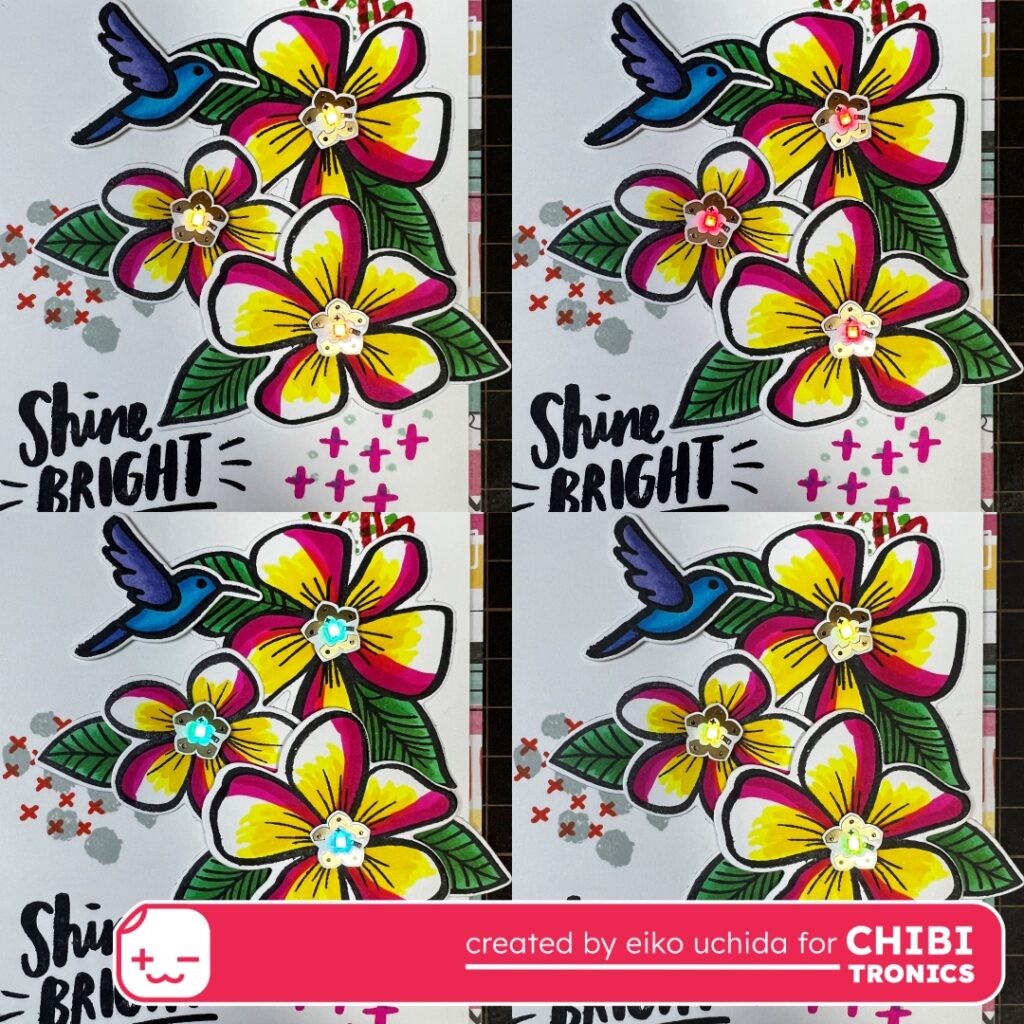
When you pull the tab, the flowers fade to rainbow colors.
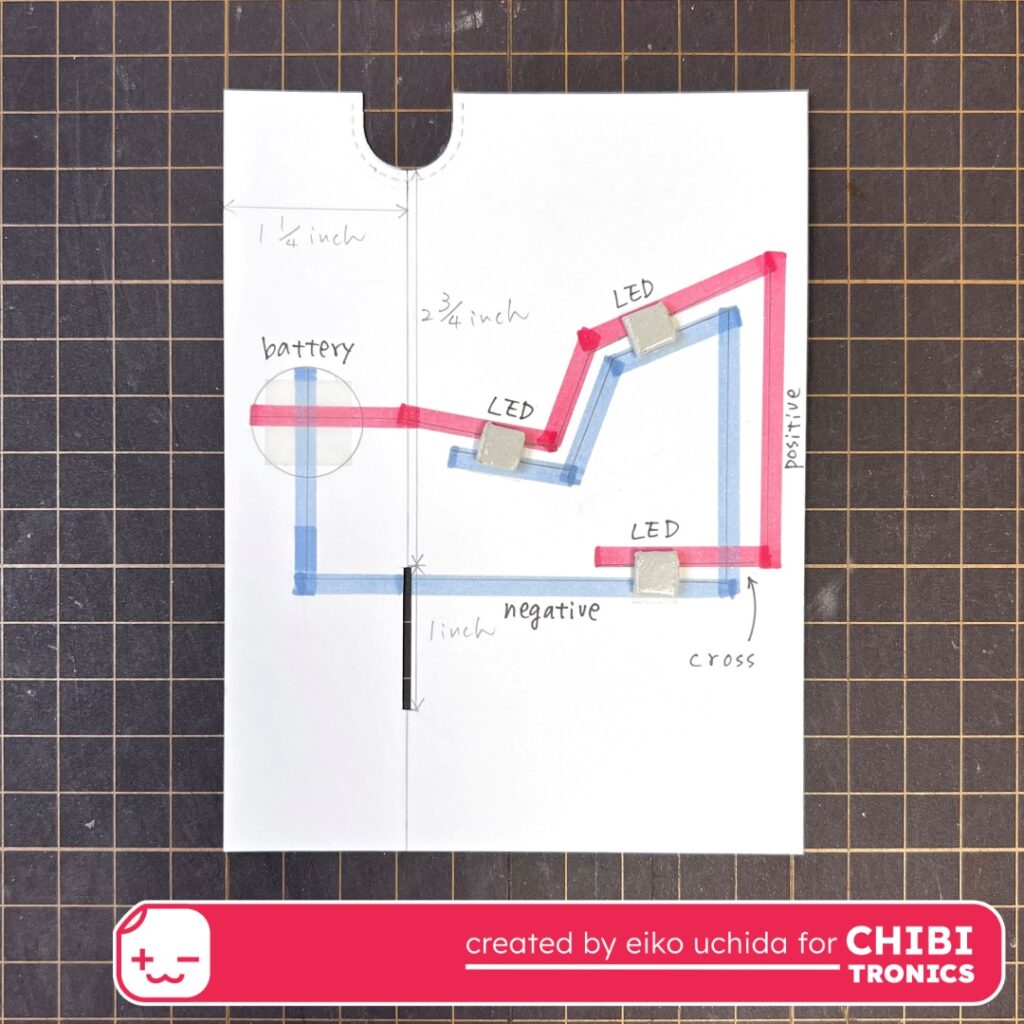
I will make the parts referring to the picture below.

- Cut striped pattern paper to 4 1/4 x 5 1/2 inches.
- Cut two white cardstocks to 4 x 5 1/4 inches. And then die cut them with notch making die. Stamp the sentiment and pattern stamp on one of them.
- Stamp plumeria, leaves and bird on white cardstock and color with Copic markers. Then die cut with the coordinating dies.
- Die cut white cardstock with pull tab, tab topper and sleeve dies.
- Three small pieces of foam sheet 3mm thick.

- Assemble the cover panel.
- Put the die cut parts on the white cardstock and make square holes on the flowers.

Make a slit by referring to the picture.

- Put the cover panel on white cardstock and mark the square holes with a pencil.
- Mark the position of the battery.
- Draw the circuit with a pencil.
- I colored the positive side red and the negative side blue.
- Apply the double-sided tape on the battery place and square holes.
- Apply a small piece of foam sheet to the square hole area.
- Peel off the release paper, stick the foam piece on the double-sided tape.
- Put the one more double-sided tape on the foam piece.
- Peel off the release paper on the foam piece.
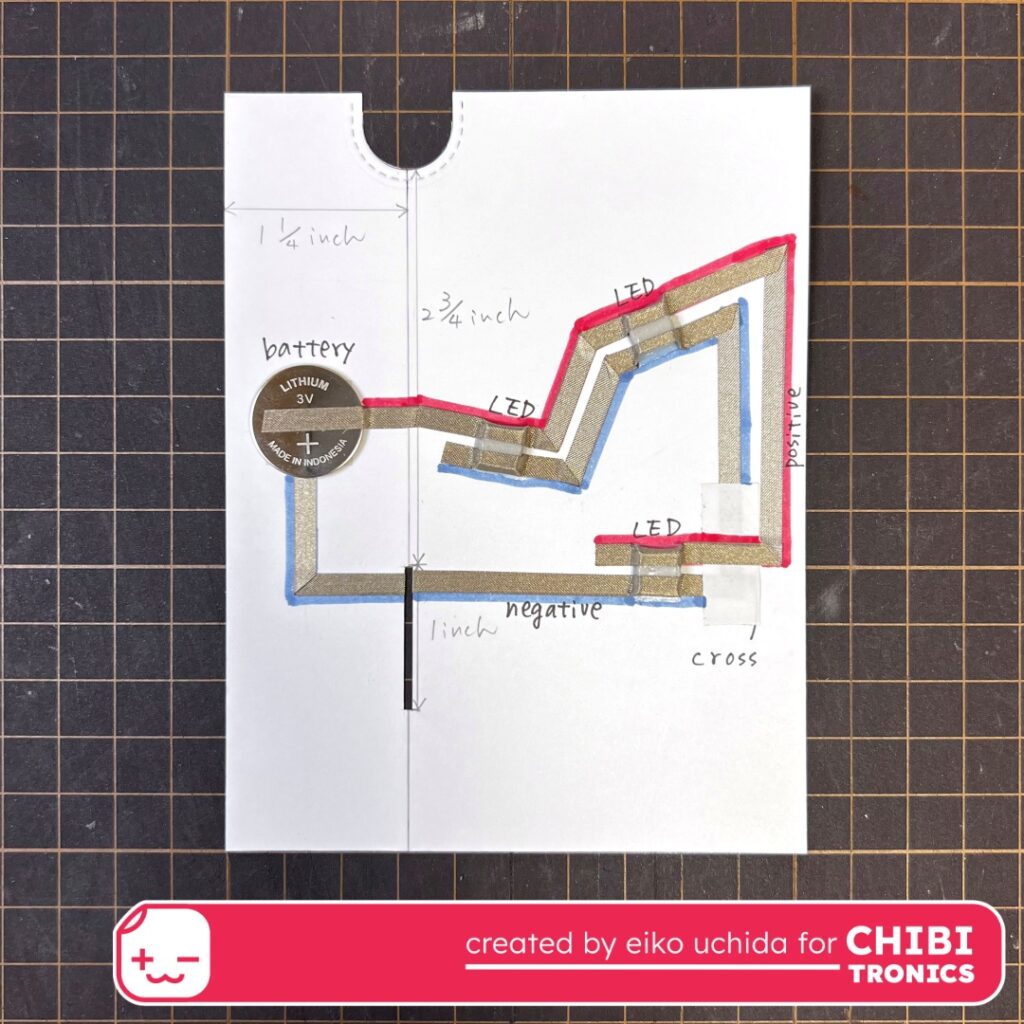
- Stick the conductive fabric tape on the pre-drawn path.
- At the battery place, peel off the release paper, stick the negative side fabric tape, fold it back and cut it.
- Stick the positive side fabric tape.
- At the position of the battery leave the positive side fabric tape about 1 inch and cut it.
- Place the battery on the fabric tape with positive side facing up and stick the positive side fabric tape on the battery.
- For the foam piece, apply fabric tape on the foam piece.

At the intersection of the negative and positive circuits, place a small piece of paper over the negative side fabric tape and the positive side fabric tape over it.

- Make the pull tab. Fold the pull tab along the crease.
- Insert the flap into the slit and place the switch at the top end of the slit.
- Mark the position of the fabric tape.

- Remove the switch part from the slit and stick the fabric tape on the mark.
- Fold the flap along the crease.

- Put the wrap part on the pull tab part.
- Put the foam tape around the entire edge of the circuit card base.

Stick the cover panel on the circuit card base.
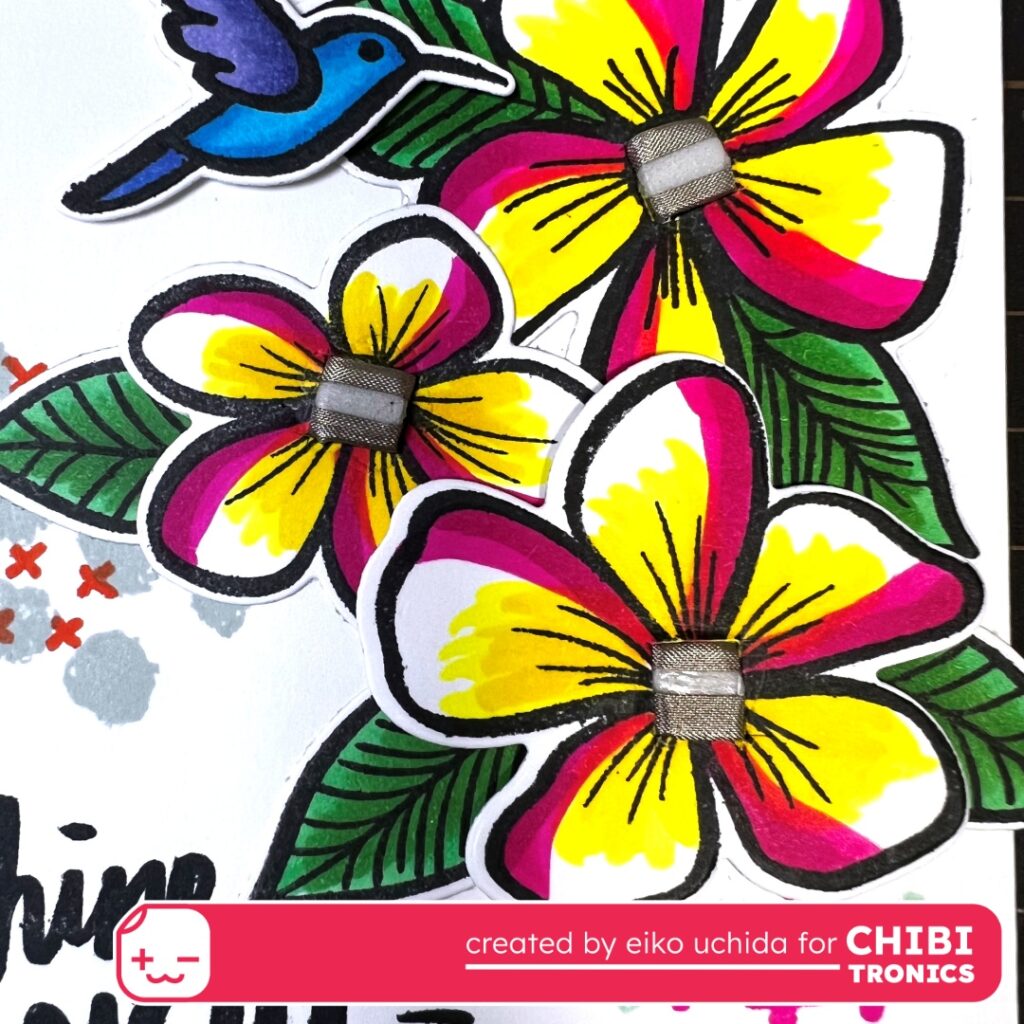
Here’s an enlarged view of the foam piece.

- Stick the finished parts on the striped pattern paper.
- Stick the animating LED on the foam piece.
I finished it!
When you pull the tab, the flowers fade to rainbow colors.
I uploaded this relaxation room card to Instagram yesterday. This card can be made in the same way as this Plumeria card.

When you pull the tab, the light blinks.
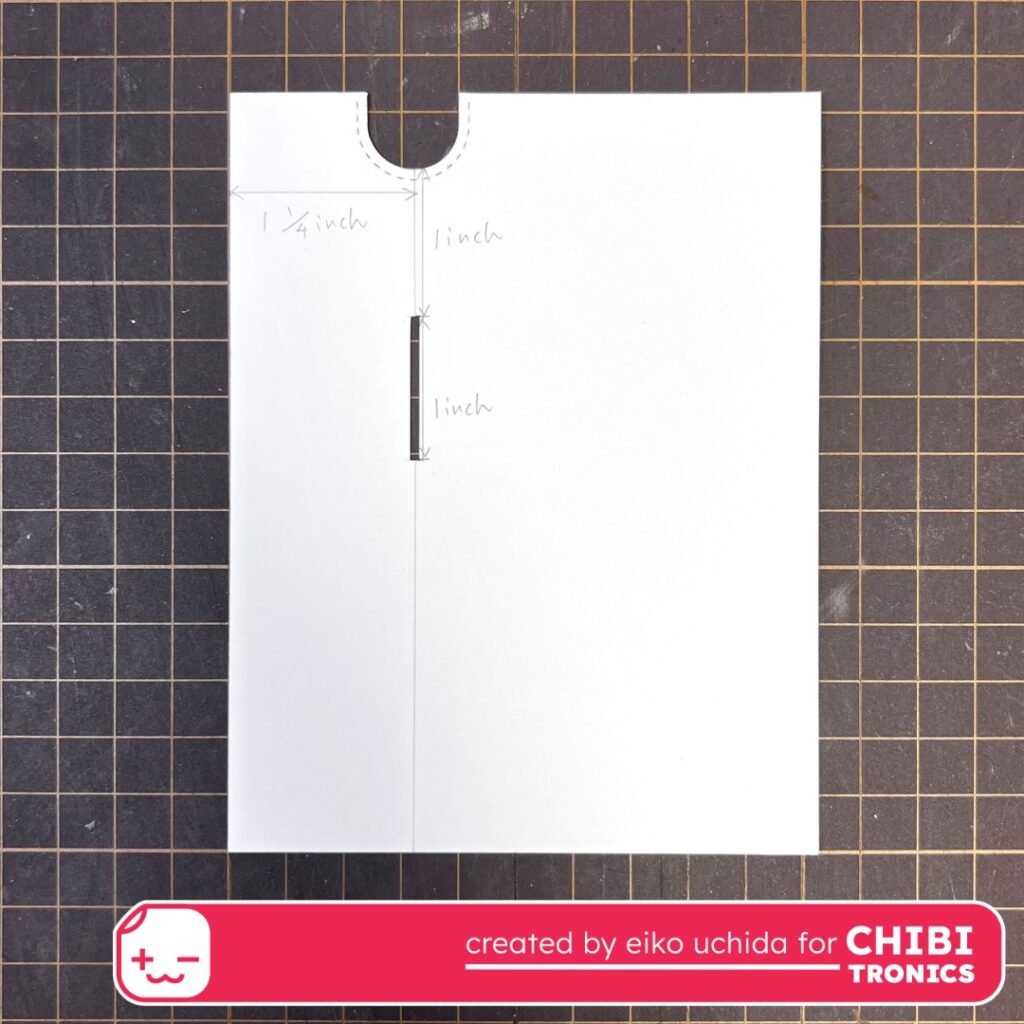
Here are the parts to prepare.

The position of the slit of the relaxation room card is like this.
And here is the circuit of the relaxation room card.
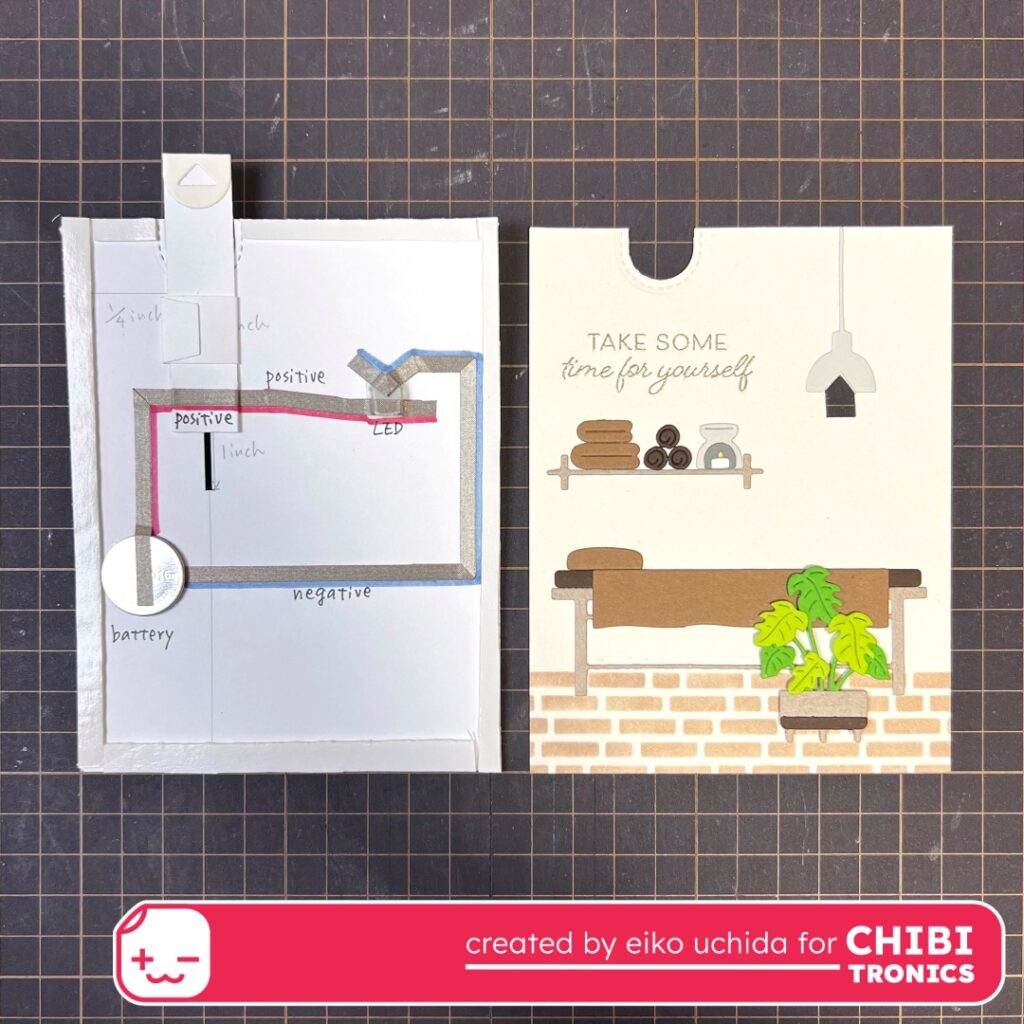
When you assemble the card, it will look like this.


Put the Gem-type animating LED onto this small piece of foam sheet.

Thank you for stopping by!
Eiko Uchida
~Supplies List~
- Chibitronics animating LED
- 3V coin cell battery (CR2016)
- Conductive fabric tape
- Altenew hug life
- Altenew hug life die set
- Altenew through the rainbow
- Altenew through the rainbow die set
- Altenew a fresh start
- Lawn Fawn Let’s toast pull tab add-on
- Altenew Summer Sunrise fresh dye ink 6 mini cube set
- Altenew Ocean Dreams fresh dye ink 6 mini cube set
- Amy Tangerine rise & shine pattern paper
- Neenah 80lb smooth solar white paper
- Copic markers
- 3mm thick foam sheet