Hello everyone!! I’m Laura and I’m very excited to make this project on the Chibitronics blog showing this interactive card with the “Chibitronics LED Stickers” that I hope will inspire you!
If you want to know all the details, please keep reading 👇
For this card I chose the “Hap-bee Birthday” stamps from Whimsy Stamps that I stamped with the black “Memento” ink and then painted it with alcohol markers. To give it more relief I used a white and a black marker, so I could intensify the lights and shadows.
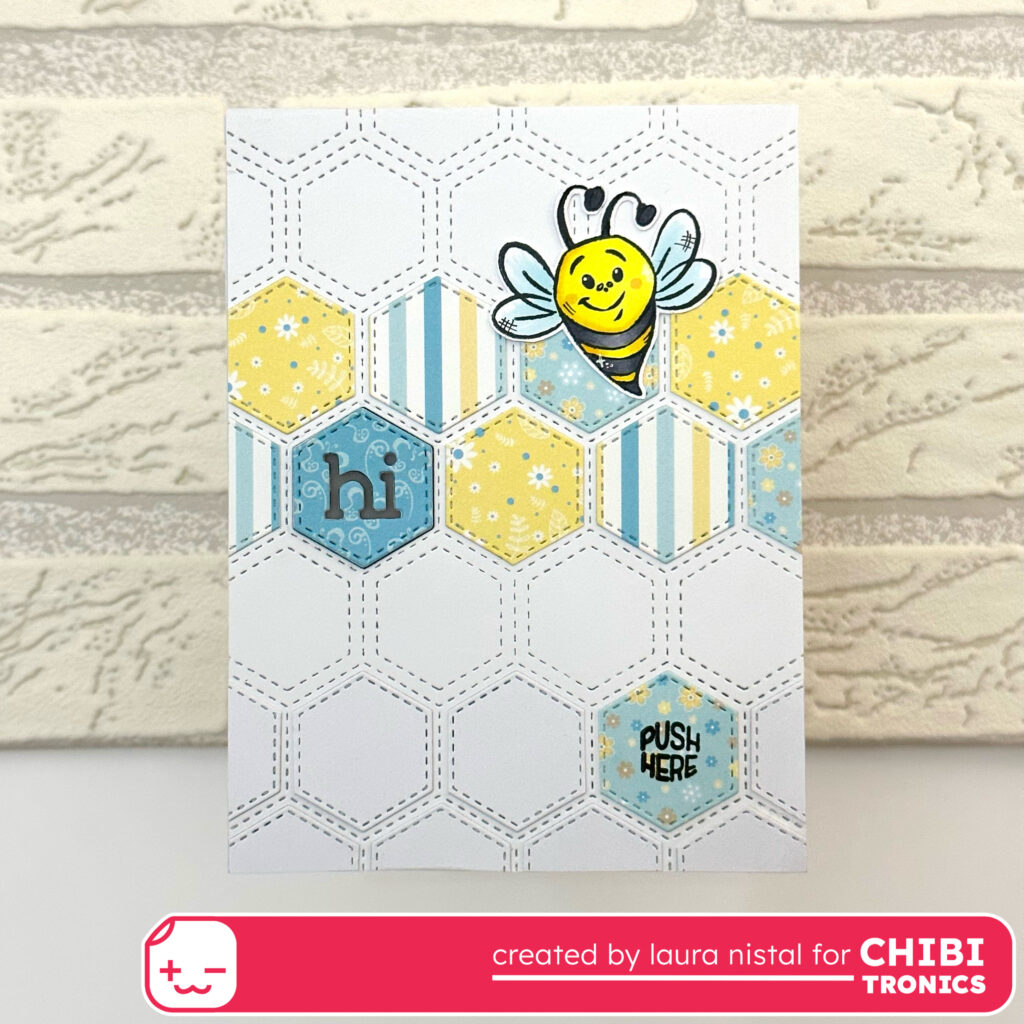
For the background I used the “Honeycomb Quilt Top Dies” from Concord & 9th that I cut out of white cardstock. Next I cut different hexagons from the set with the “Buttercup” papers from Whimsy Stamps and prepared this honeycomb composition!
This card has an approximate measurement of 4×6 inches, so is an standard card.
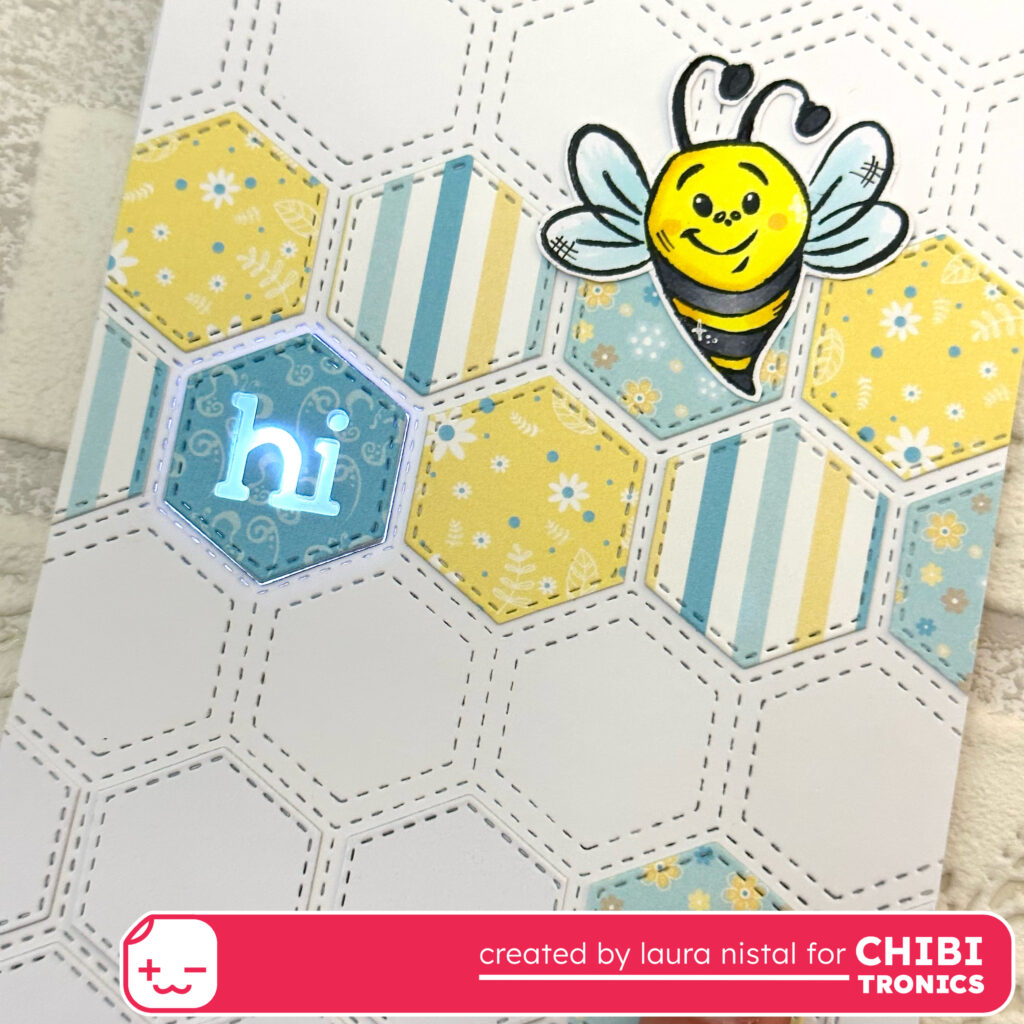
For the sentiment I used the word “Hi” from the same set of dies, and this is where I added the light. 😉
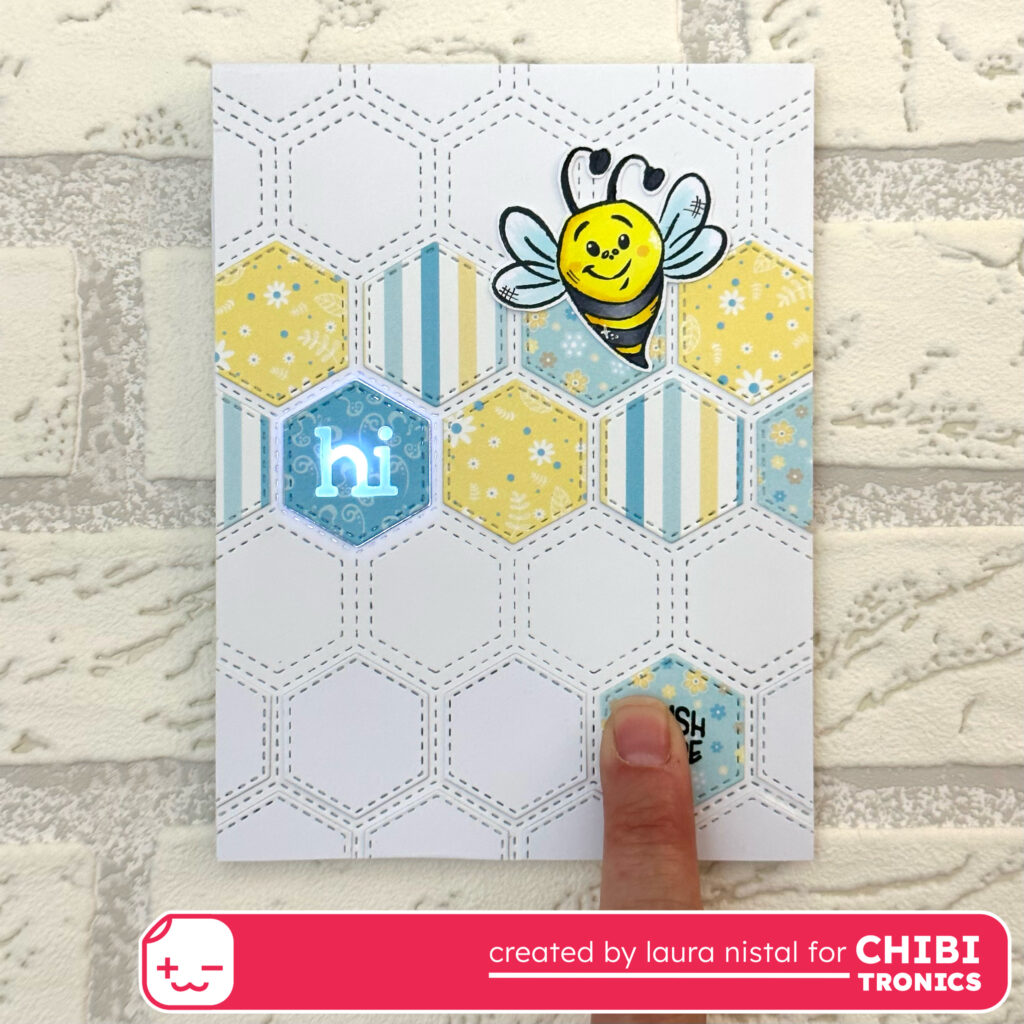
The circuit has been created using Chibitronics LED Stickers and Conductive fabric tape. This circuit will be powered by a 2025 battery and the lights will turn on with you press on the right side. This time I used the flashing lights, in which if you hold the switch down, the light flashes constantly.
Here is a close up picture of the circuit.
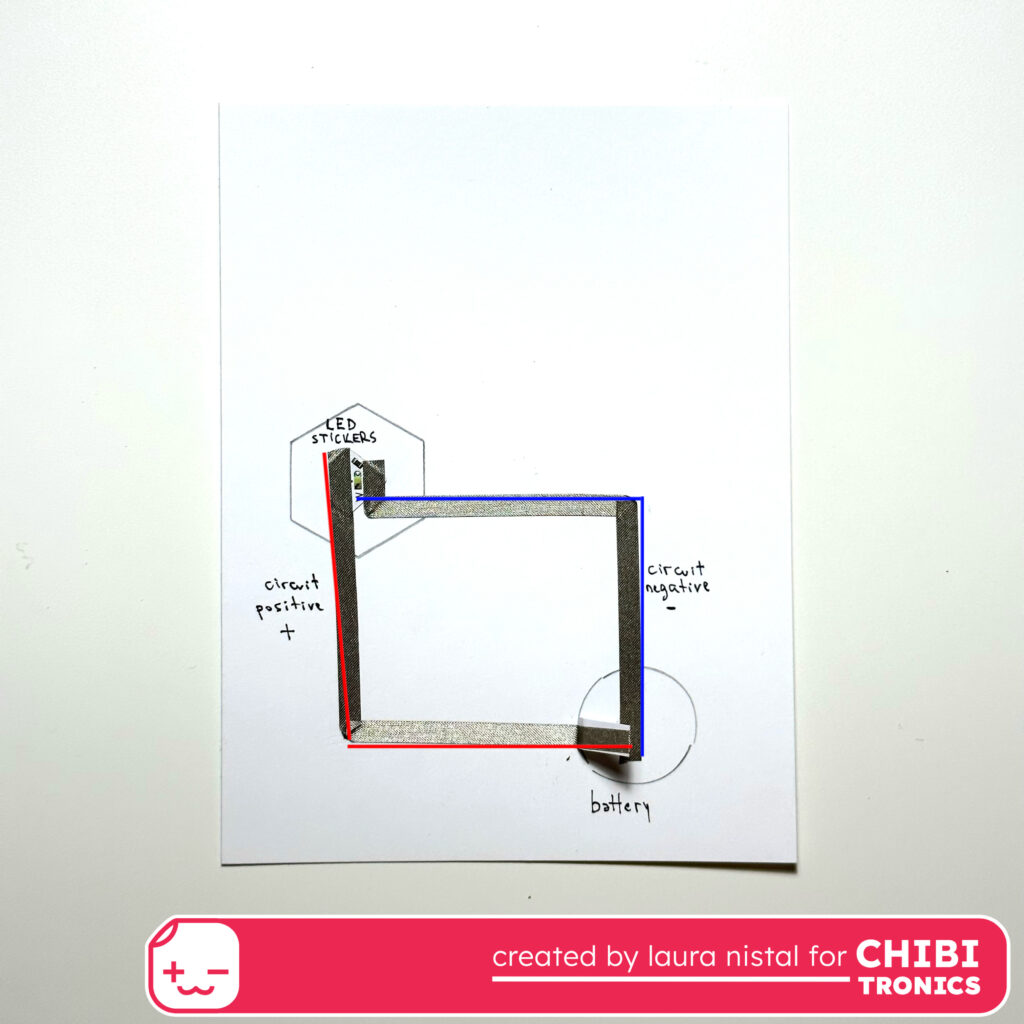
Then I used a 3-millimeter-thick Foam plate, which I cut to the same size as the card and also made a round cut to insert the battery.
I also used the Lawn Fawn stamps to create the “Press here” switch.
Finally I prepared the composition, glued all the pieces with Bearly Arts glue and this is how the result was!
I hope you like it and that it inspires you!
Here below you can find the link to all the products! 👇😉
A huge kiss and until next time!