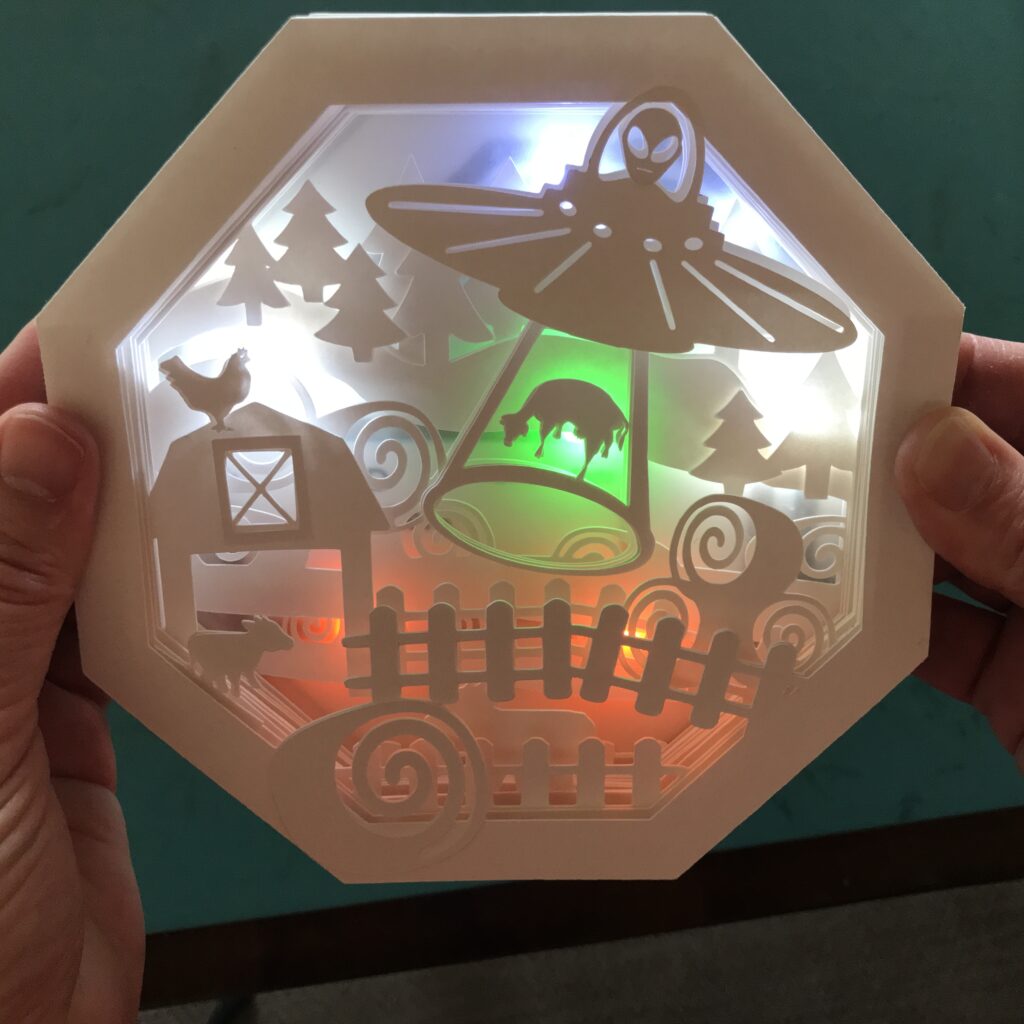
In this tutorial, I’ll show you how to use Chibitronics LED stickers and an optional tilt switch to add illumination, interactivity, and special effects to a tunnel book. The one I’m sharing here is shaped like an octagon and features my own interpretation of a common trope: an alien abduction.


Although a tunnel book may be entirely created by hand, I’ve designed this one to be cut by a Cricut machine. And while my intention is to show you how to create a very specific book (one made for my own amusement), I believe you’ll find that the ideas are easily adaptable.
Tools & Supplies
- Cricut machine
- Circuit Sticker LEDs in colors of your choice (I’m using a Rainbow Fade Animating LED, two White Blink Animating LEDs, and a mix of traditional LED Stickers in a variety of colors).
- Conductive Fabric Tape
- Copper Tape (recommended for making the connections with the tilt sensor)
- 2 X 3V Launchpad Batteries or CR2016 Batteries (two is best for brighter lights, as this is a hungry circuit)
- 1 X Tilt Sensor (for adding interactivity)
- 2 strong Flat Magnets (for making an easy battery holder)
- Sturdy paper for the art layers (I’m using a 260 gsm Bristol)
- 1 X piece of heavy paper or light board (to add stability to the circuit layer)
- 1 X piece of translucent paper, such as vellum, glassine, or tracing paper (to diffuse the light)
- Double-sided tape or an adhesive of your choice (I use a Uhu glue stick or Bearly Art Precision Craft Glue
- Pencil
- Scissors
- Scotch or postal tape (to reinforce the legs of the tilt sensor)
- Velcro dots (to make the circuit layer detachable)
- A printer and cardstock (if printing the Circuit Diagram)
Step 1: Watch Video
Step 2: Imagine
The first step in creating a glowing, tilt-sensing tunnel book is to come up with an idea that inspires you! Tunnel books are terrific for helping to set a scene, whether real or imagined.
The inspiration for this particular book comes from my everyday surroundings (embellished for the fun of it).


I live in Vermont, characterized by hilly hayfields, dairy cows, and working farms. While I haven’t personally seen a UFO, people living nearby often exchange scintillating tales about the mysterious lights they’ve reportedly observed passing over their meadows.
I’ve included a cut file that you may use or adapt.
Step 3: Cut & Prep Parts
Once you have an idea (and an appropriate cut file to use), the next step is to import the SVG into your Cricut software to cut out all of the parts.
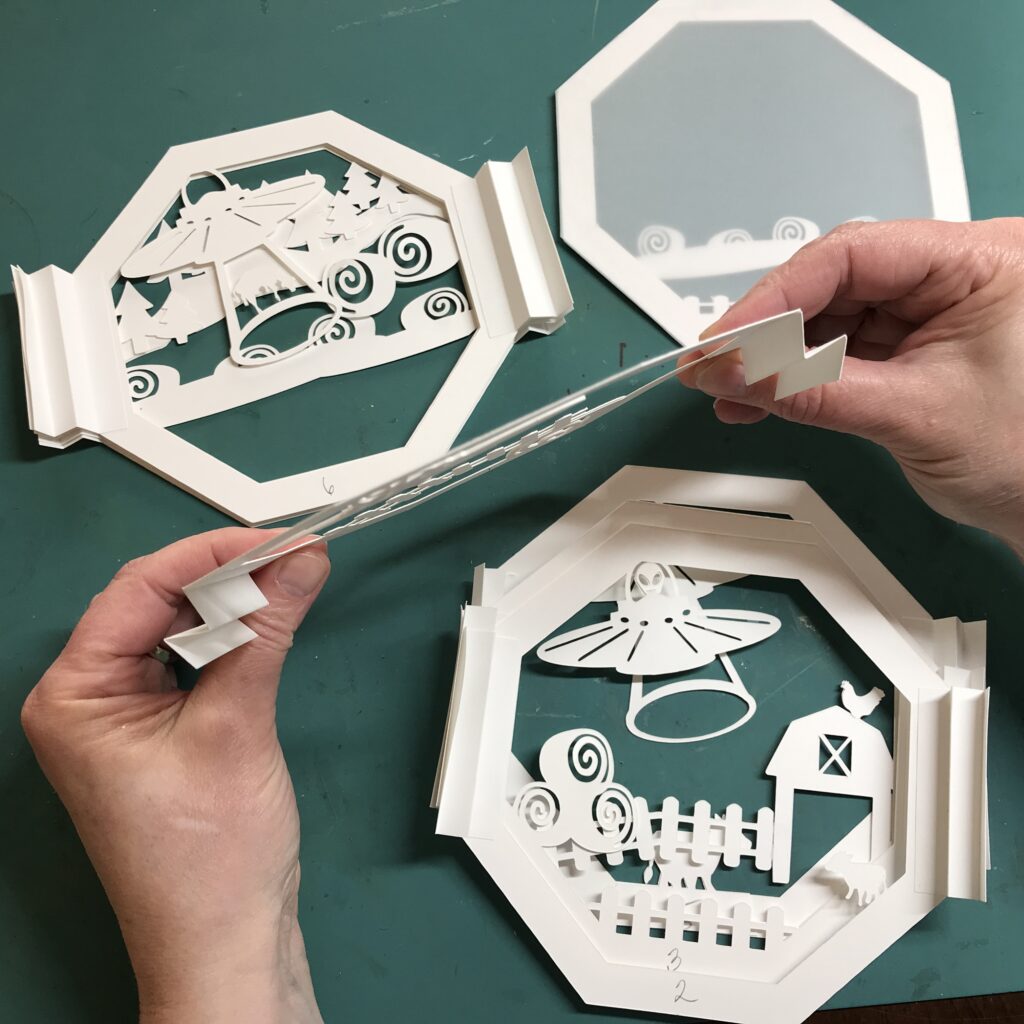
This tunnel book project has three main parts connected with twelve sets of folded paper hinges:
- 12 octagon-shaped art layers
- One octagon-shaped translucent layer to help diffuse the light
- An interchangeable, removable circuit layer (constructed from heavy paper or light board).


Before cutting, use the Cricut Design Space software to change the dashed lines on the hinge pieces into scored lines; remember to attach them. You may also find it helpful to change the informational text I’ve provided into “guides.
After cutting the parts, fold the hinges along the scored lines and set them aside.


Step 4: Assemble Layers
Once your art layers are cut, the next step is to place the pages in the correct order and to use a pencil to label them accordingly. Next, tape or glue the piece of translucent vellum behind the last art layer in your stack and trim off any excess. I use craft glue, but double-sided tape also works. Set this piece aside for the time being.


Then, using an adhesive of your choice, adhere paper hinges to the back sides of each remaining layer, with the mountain folds pointing inward.

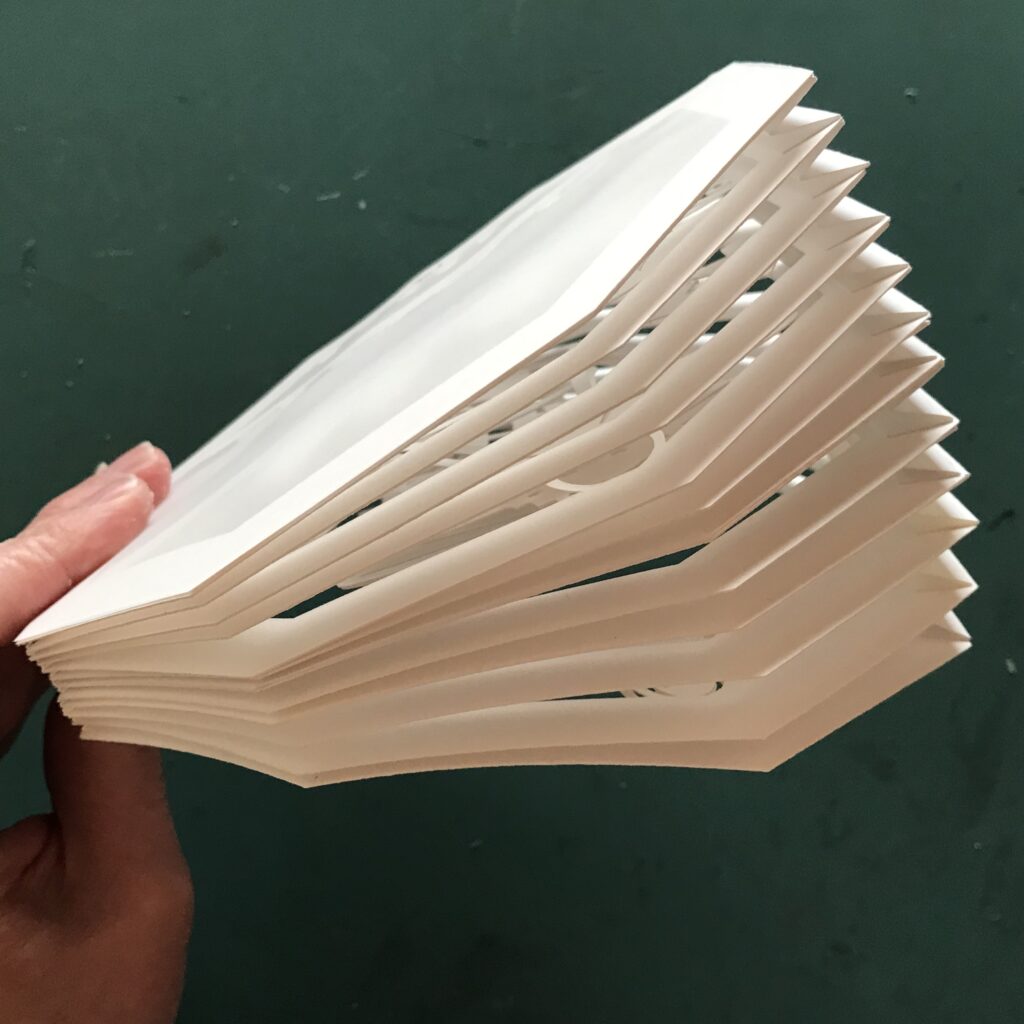
Once you’ve created a stack of hinged layers, you can start joining them together, paying close attention to their order and alignment.


I find it helpful to pull the layers apart as I work, to ensure that the book block telescopes without sticking.
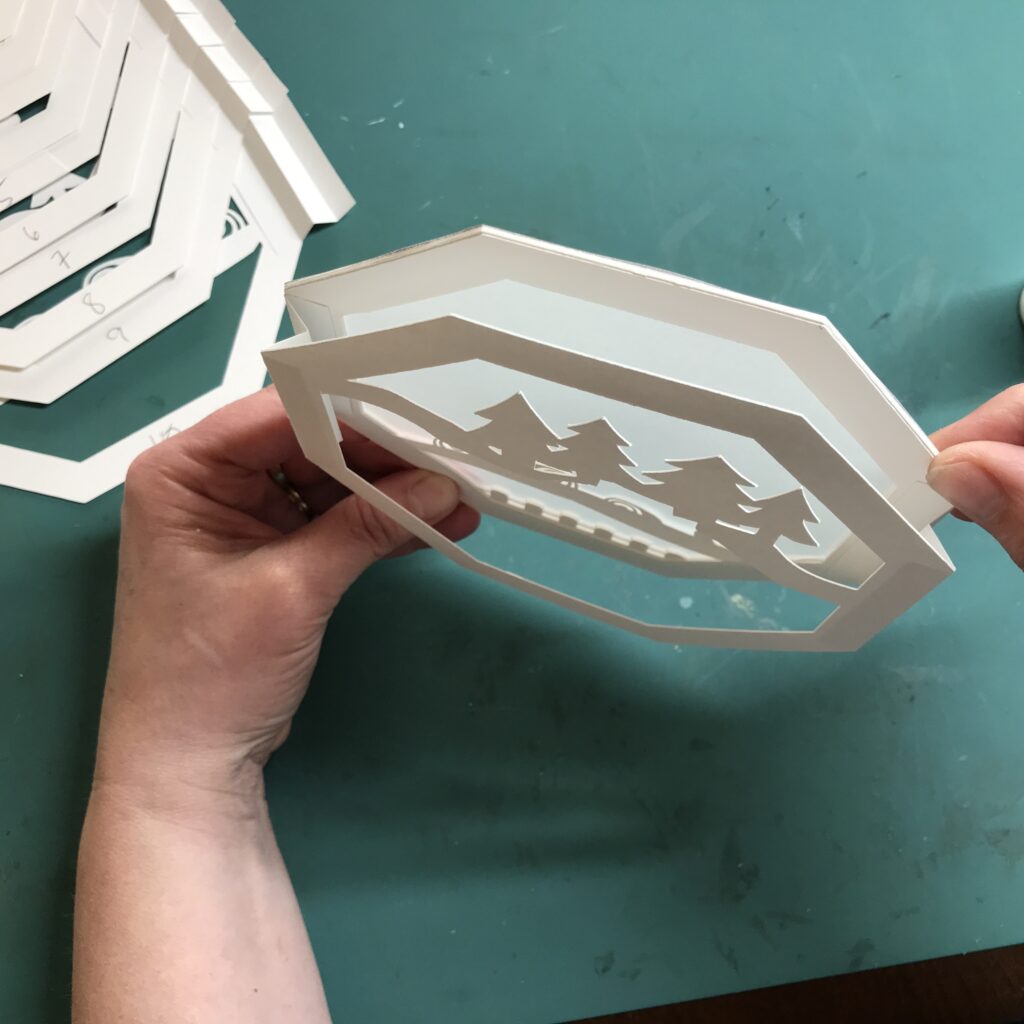

The last layer of your tunnel book should be the one with the vellum behind it.
Save the remaining two hinge pieces for the front of the circuit layer.

Step 5: Prep the Circuit Layer
Once you’ve constructed the main part of your tunnel book, it’s time to prepare your circuit layer.
I’ve shared circuit diagrams for two different types of battery holders. One holder uses magnets to hold two stacked coin cell batteries. The other holder,which does not require magnets, uses conductive fabric tape to secure the wings of two overlapped Launchpad Batteries.
Use cardstock to print out copies of the circuit diagrams.
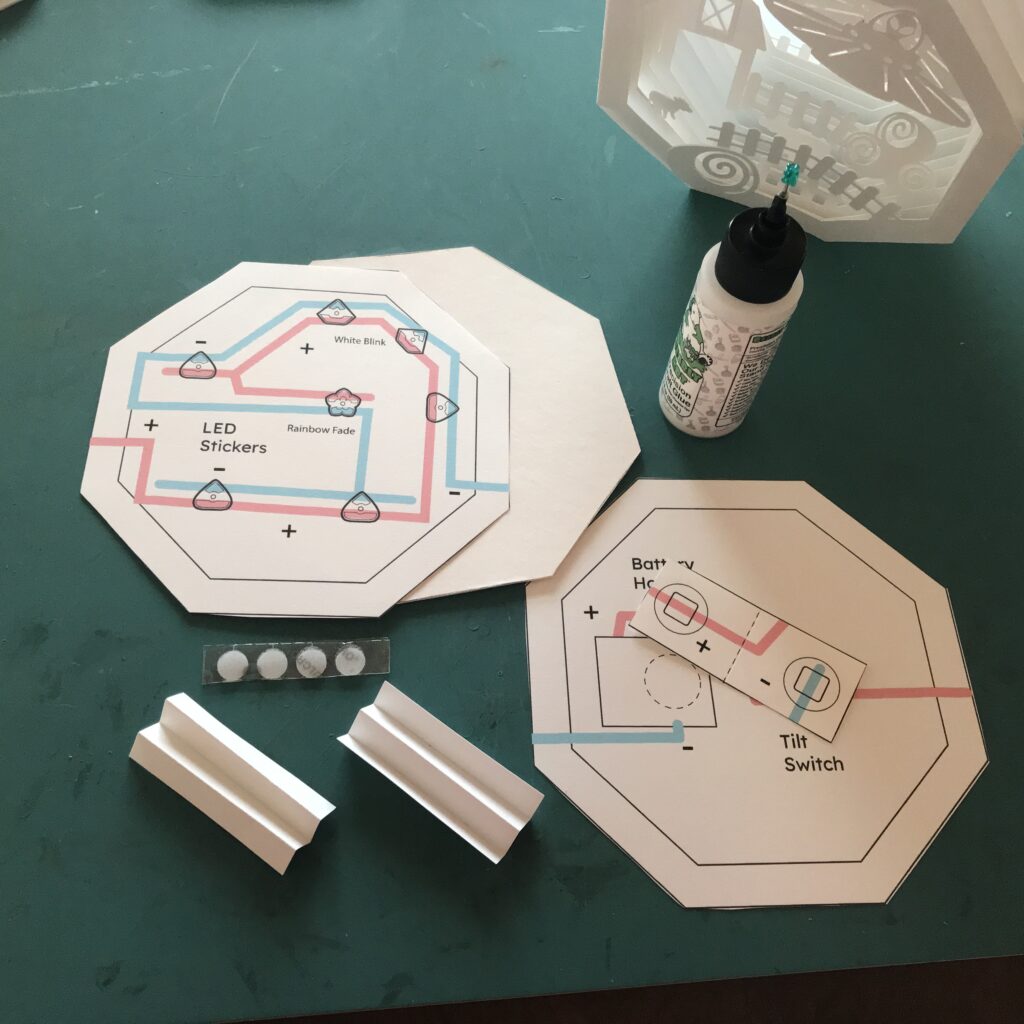

Next, adhere the circuit diagrams (with the battery style of your choice) to both sides of the hexagon-shaped piece of heavy paper or light board you cut out for the circuit layer. This will add a bit of stability and add weight to your tunnel book.

The circuit you’ll be building will be created directly on top of the circuit diagrams that you adhered to the board.
This board will form the rear panel of the tunnel book and will be powered by two coin cell batteries. One version will hold two traditional coin cell batteries in place with magnets, while the other version will hold two overlapping Launchpad Batteries in place with conductive fabric tape.
Adding two batteries to your tunnel book’s circuit will increase the rear panel’s brightness, especially if you plan to combine multicolored Sticker LEDs with Animating LEDs.


(featuring Launchpad batteries)
Step 6: Understanding Tilt Sensors
The lights inside of your book may be turned on and off depending upon the orientation of an optional tilt switch. While not required, adding a tilt switch to the back of the tunnel book will allow you to easily turn it on or off, based upon the way your book is positioned. (If you don’t choose to add a tilt sensor, close the gap where the tilt sensor would go with a piece of conductive fabric tape.)
The circuit will turn off when the book is laid upon its back and turn on when it’s returned to an upright position. If you don’t wish to add the tilt switch, you may turn the lights off by removing the batteries from the magnetic holder.
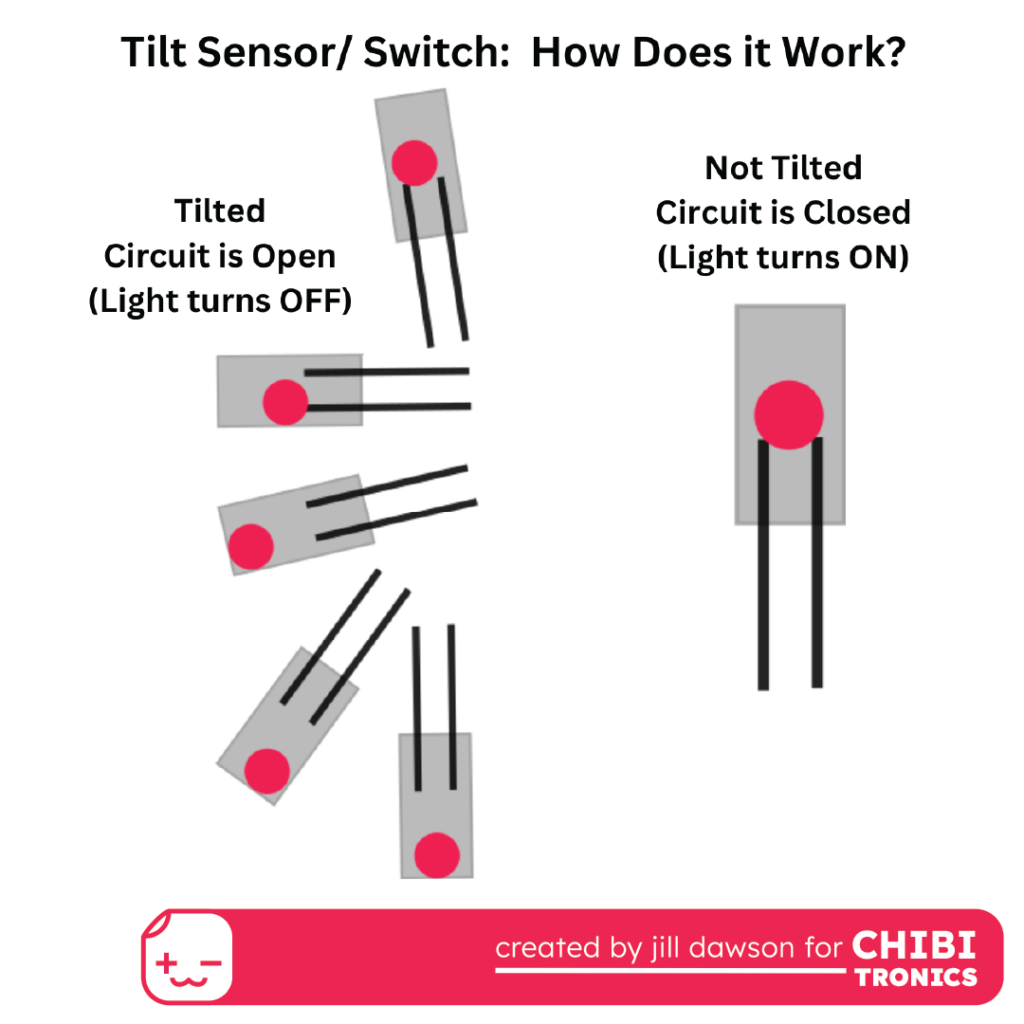
How does a tilt sensor (switch) work?
Traditionally used as a safety device, designed to flip a circuit on or off depending upon its orientation, a typical tilt sensor is a metal cylinder with two legs protruding from one end, that contains a ball bearing. When the legs are used to bridge a gap in a circuit, the ball bearing inside of the cylinder works to open or close the circuit, depending upon which direction it rolls. If it rolls toward the end of the cylinder with the legs, the ball bearing bridges two metal contacts inside of the cylinder to close the circuit. If the orientation of the tilt switch causes the ball bearing to roll away from those metal contacts, the circuit opens.
Step 7: Build Circuit


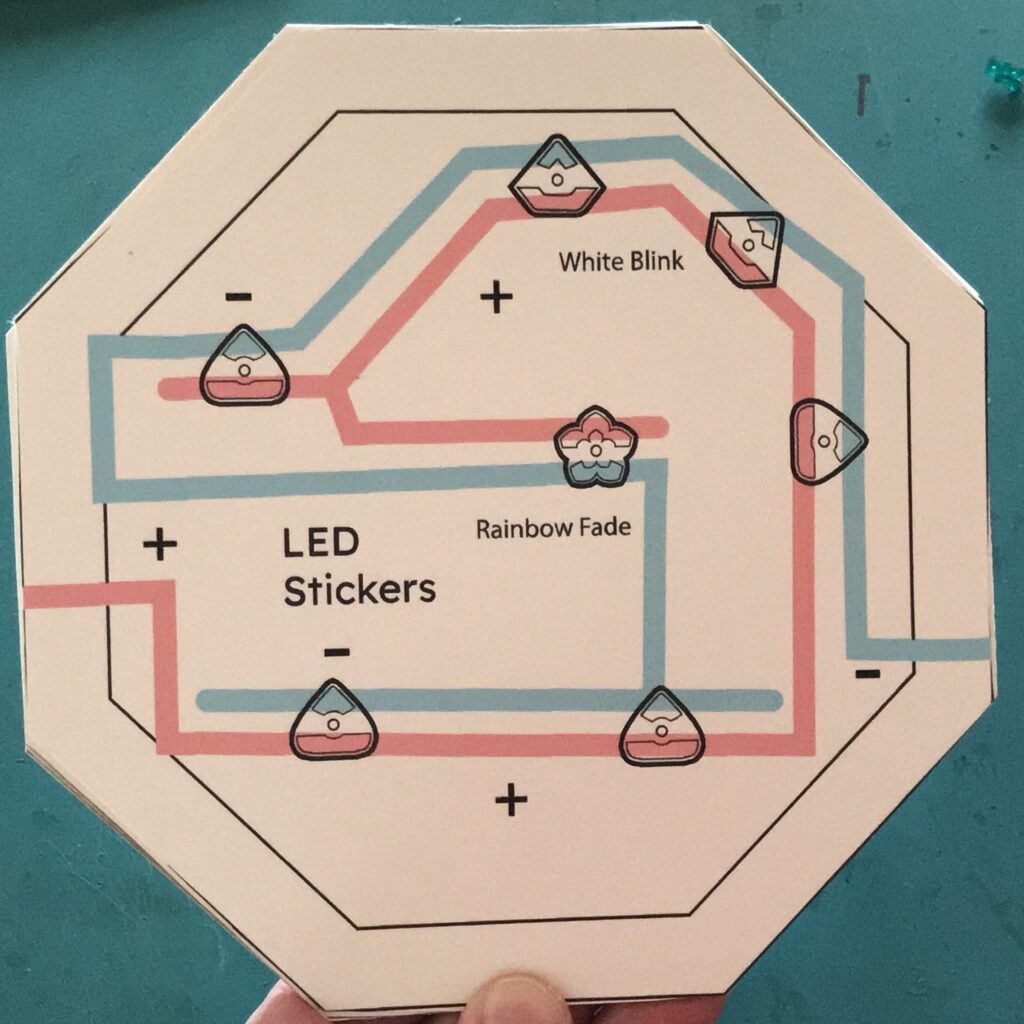
To build the circuit, use conductive fabric tape to follow the positive and negative traces of the circuit, and place LED stickers over their respective footprints. Keep in mind that the conductive traces on the front and back side of the circuit layer are connected.
If you decide to use the tilt switch, follow the circuit diagram to place the switch over the conductive fabric tape, bridging the switch gap.
If you are not using the tilt switch, you will need to apply a piece of conductive fabric tape over the gap in the circuit to close it (allowing the LED Stickers to turn on once the batteries are in place).

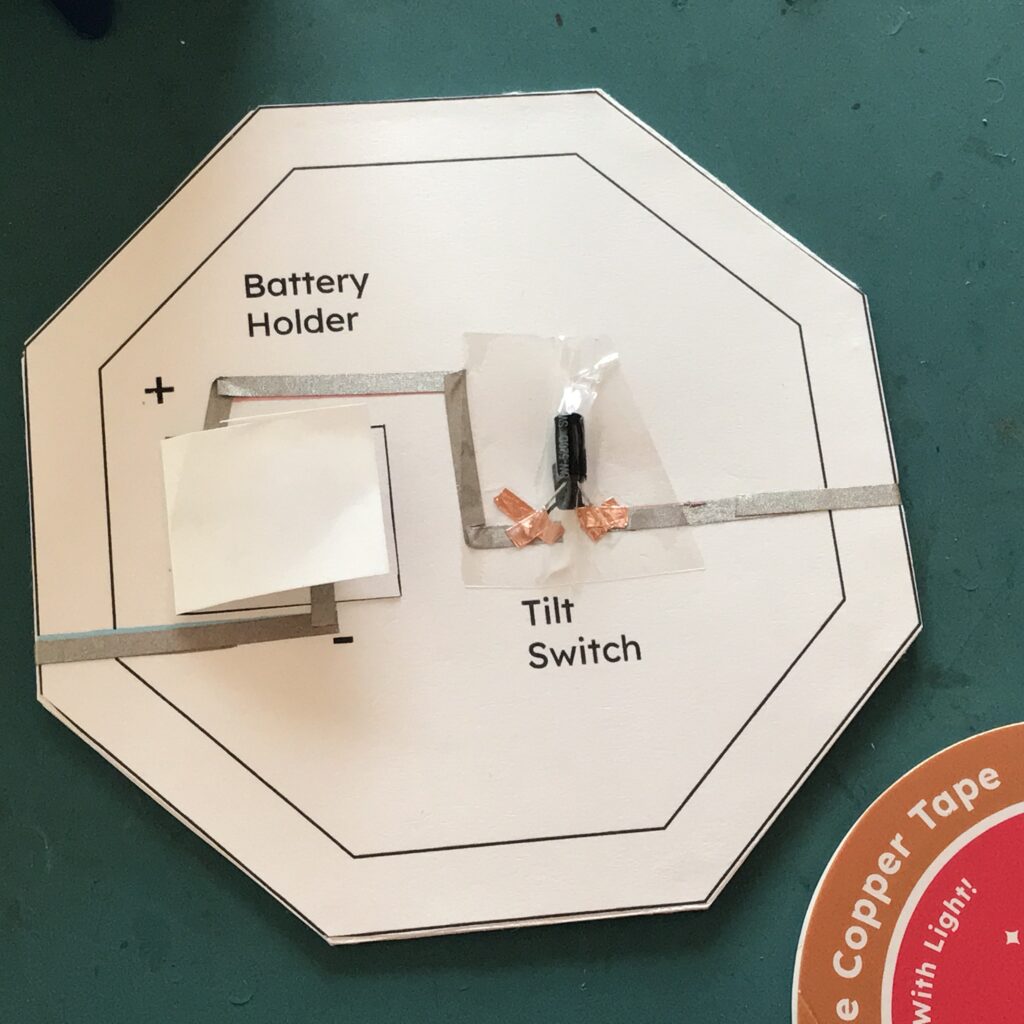
Through trial and error, I discovered that the metal legs of the tilt switch are less likely to come loose from the circuit if patched with copper tape instead of conductive fabric tape on its own. Be sure that the copper tape you are using has a conductive adhesive!
The area securing the tilt switch to the circuit then needs to be reinforced with a piece of tape (I use postal tape). If you don’t protect this area with tape, the tilt switch is likely to shift, tearing the copper tape over time. This will result in the circuit not working properly.
Doubling the Voltage with Traditional Coin Batteries

I find it helpful to place a small ball of copper tape between the two stacked batteries to keep them together while they are stacked (demonstrated in the video).
Doubling the Voltage with Launchpad Batteries
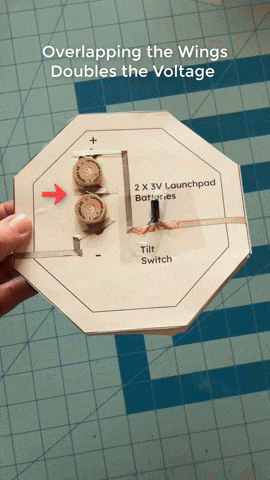

Overlapping the wings of two Launchpad LEDs will double their voltage from 3V to 6V, which is useful for power-hungry circuits that use a combination of colored LEDs and Animating LEDs.
In this case, you must connect the batteries as shown in the circuit above, where the batteries are connected one after the other like beads on a string. The positive of one battery goes to the negative of the other battery. This is called connecting the batteries in series.
Once you have the two batteries connected in series, you can treat them like one large battery with the negative tab on one battery and the positive tab on the other battery. Then you can connect more LEDs in parallel, like in the example circuit below.

Step 8: Add Circuit Board to Book Block
The last step is to add the circuit layer to your book block. To do this, adhere the remaining two hinge pieces to the front edges of the circuit layer using an adhesive of your choice.
Then, flip the book block upside down and place matched pairs of Velcro dots to its left and right sides.


To join the pieces, carefully align the hinges of the circuit layer with the edges of the book block and press down.


Now, if you want to remove or change out the circuit layer to use different colors or achieve different effects, you can do so by detaching it!

Step 9: Experiment
Try experimenting with different colors and configurations of lights!
Using different colors for the LED sticker footprints will result in entirely different effects! I chose to use White Blink Animating LEDs for the lights near the top of the spaceship and a Rainbow Fade Animating LED in the center of the cone radiating from it. I experimented with other LED colors in the remaining footprints.
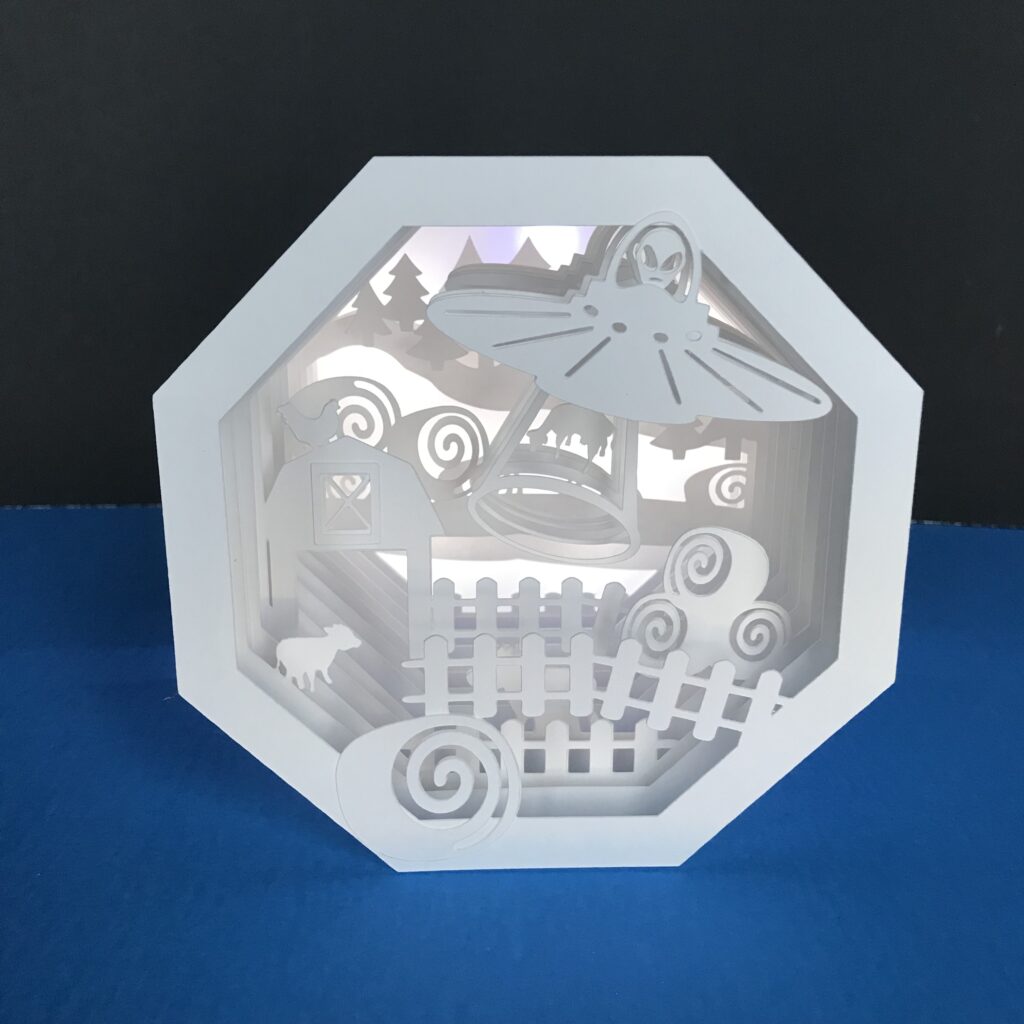

The circuit of this tunnel book was made with all white LED Stickers: 2 White Blink Animating LEDs, 1 White Fade Animating LED, and four classic white LED stickers.
To view this tutorial on Instructables, visit:
https://www.instructables.com/Tilt-Sensing-Octagon-Shaped-Light-up-Tunnel-Book-f/