Light Up Accordion
In this tutorial, we will show you how to make a highly customizable paper circuit accordion book — with a series of connectable templates — powered by a single battery!
Video
Related
Categories
Book Arts, Paper Craft
Introduction
An accordion (also called a concertina) is a type of book that has pleated pages that are folded back and forth from one long continuous piece of paper.
Flashback
Accordion books were devised as an easier way to access, transport, and store the information found in papyrus scrolls, one of the earliest book forms.
Unlike scrolls, however, which had to be unrolled in order to access their information (a time-consuming process if the scroll was exceptionally long), accordions could be flipped through more quickly. Because they are hinged, and could be folded flat for easier storage and portability, they gradually fell into popular use. This remained the case until people devised a way to sew the pages of a book together, into the book form most commonly used today (called a codex).
Flash Forward
Even though accordion books aren’t as popular today as a common paperback, they are fun to make and easy to electrify! Accordions are useful for story telling and art projects, because they can open wide and flat when extended to their full length. They are also practical, as they may be flipped through a couple of pages at a time. Another useful feature of an accordion is that you could keep adding pages, making one as long as you want!
My Inspiration


In this tutorial, I am going to show you how to assemble your own paper circuit accordion book, and share some insight into how I went about creating mine.
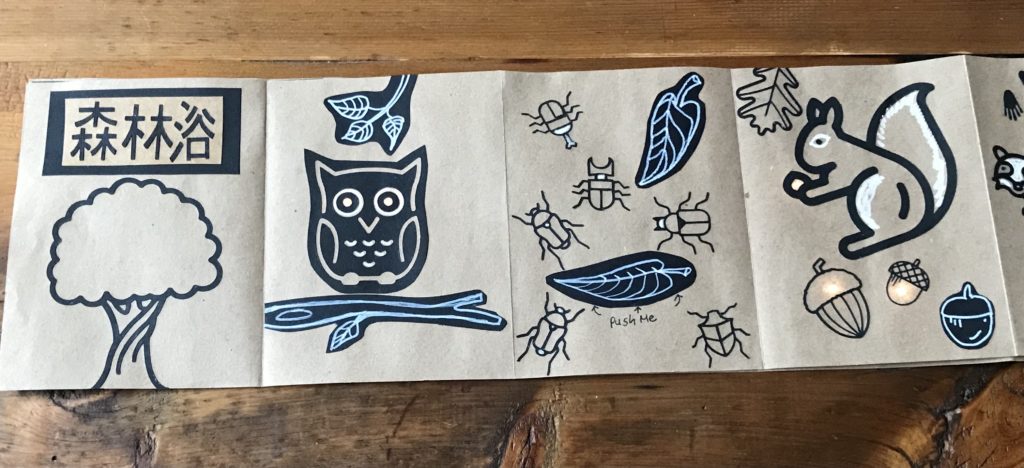
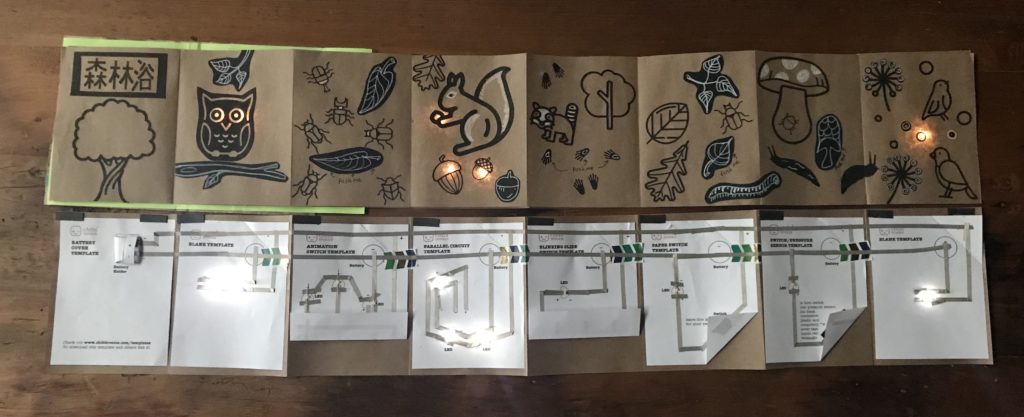
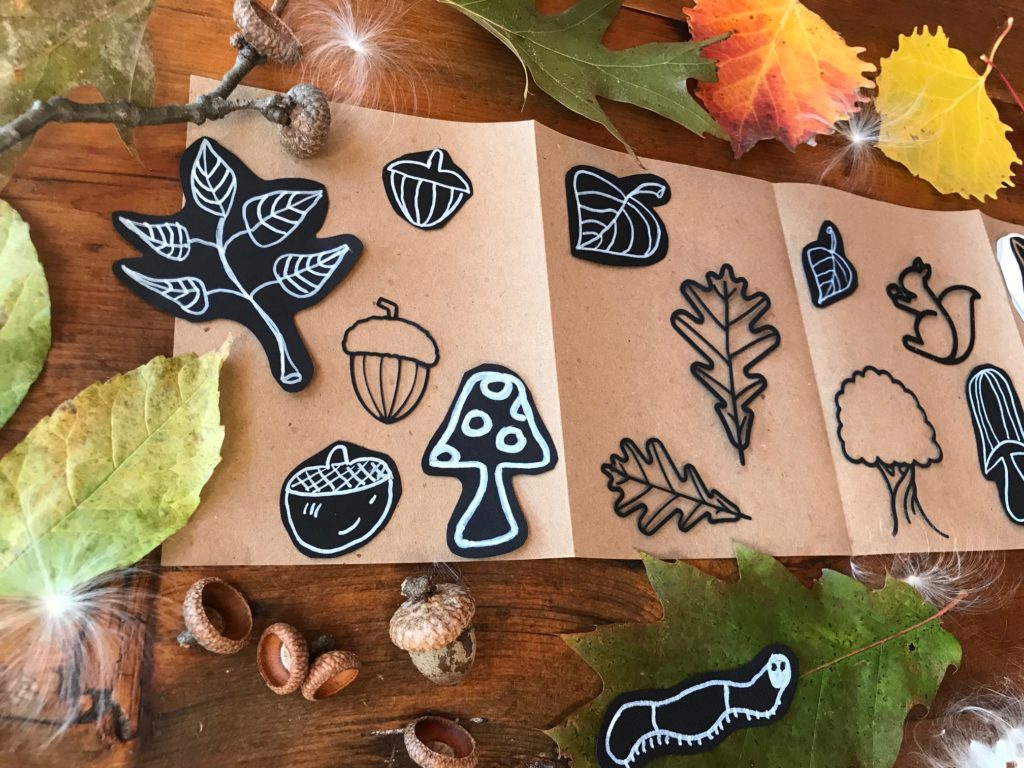
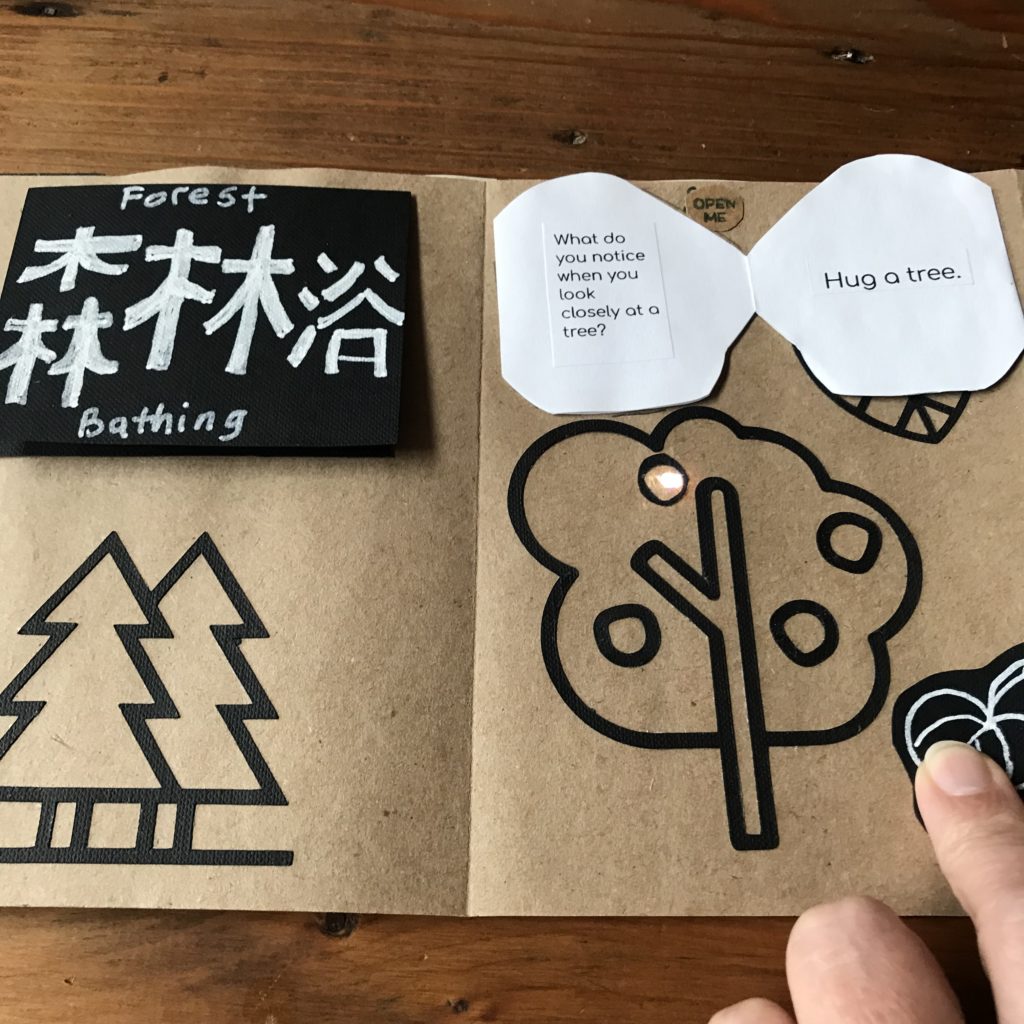
I approached this project by reflecting upon a Japanese expression, shinrin-yoku (森林浴), that I first learned from a friend while we were walking in the woods. Translating literally to “forest bath,” or “forest bathing,” shinrin-yoku is the act of taking in the healing atmosphere of a green space such as a forest. This may be best achieved by slowing down, disconnecting from technology, and letting nature reach you through all five of your senses.
I’ve since learned that “forest bathing” is a form of mindfulness that almost anyone can practice. By surrounding yourself with nature, and remaining open to its wonder, you may improve your mood, increase creativity, and reduce anxiety!

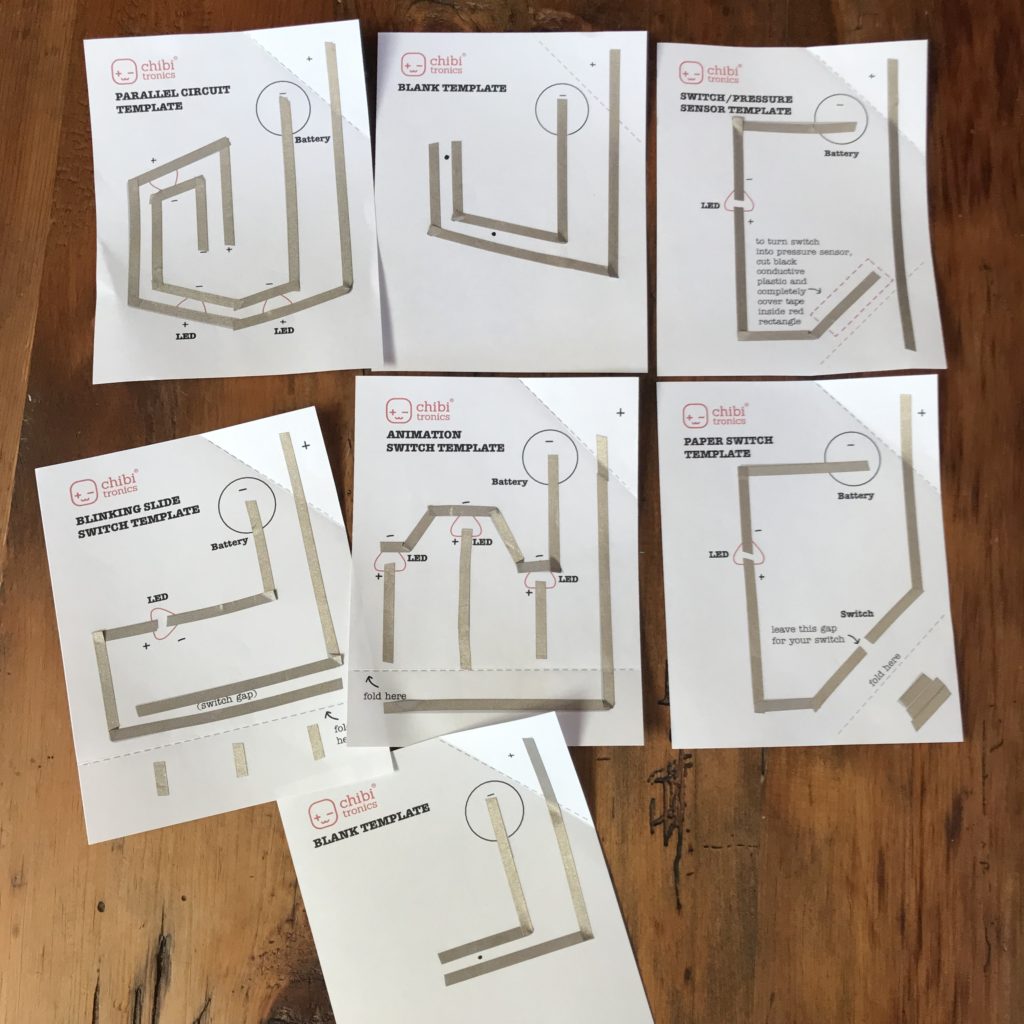
Materials
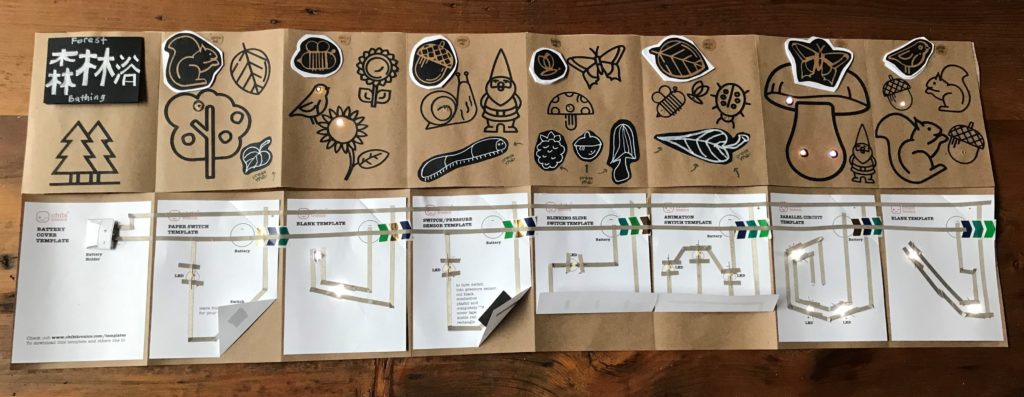
- Accordion Book Parts
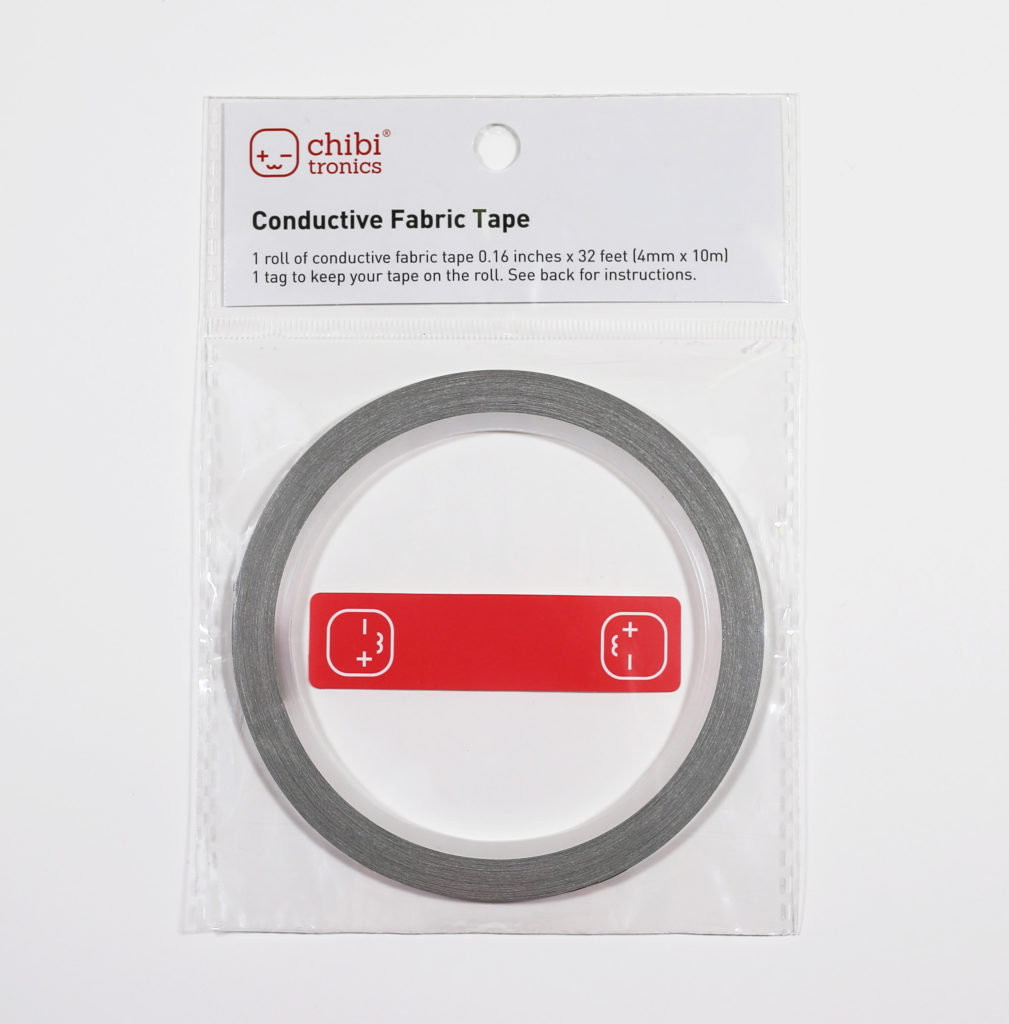
- 2 accordion book pages (6” H X 36” W). I’m using two pieces of brown craft paper, folded into eighths.1 colored paper cover (6 ½” H X 12” W)Conductive Fabric Tape (10 meters/32 feet)12 white prototyping/ axial LEDs OR 12 white LED Circuit Stickers. I’m using axial LEDs.
- 1 X 3V coin cell battery
- 1 piece of Pressure Sensitive Plastic (1 ½” H X ½” W)
- 2 printed battery holders. I printed mine on white cardstock.
- 1 X adhesive backed magnet (2″ H X 3 1/2″ W)
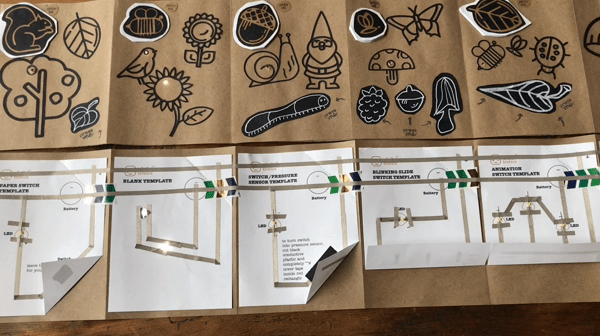
- 8 paper circuit templates. I printed mine on white text-weight paper.
- Battery Cover Template
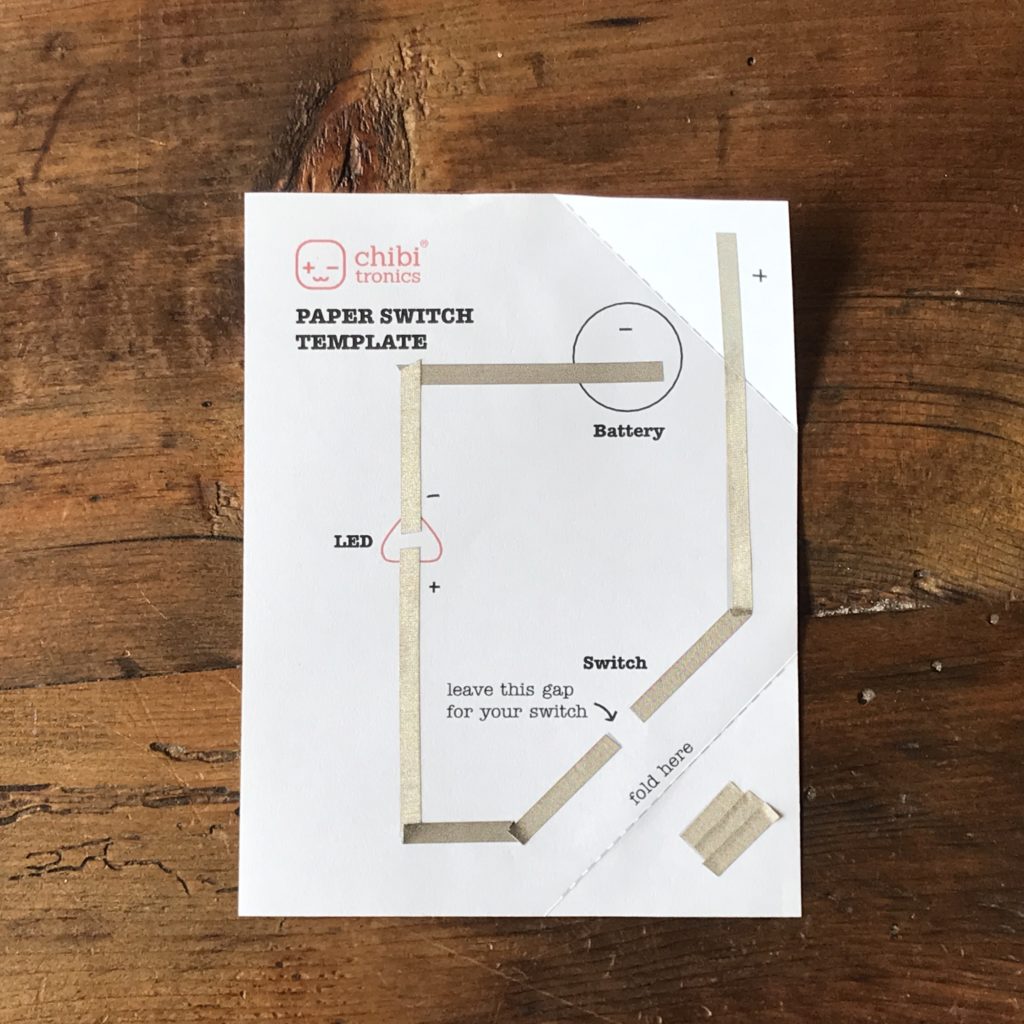
- Paper Switch Template
- Switch/ Pressure Sensor Template
- Animation Switch Template
- Parallel Circuit Template
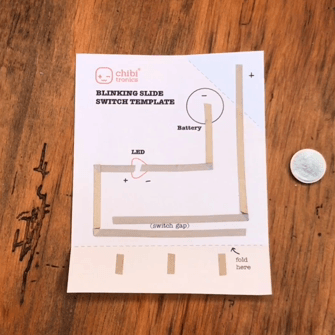
- Blinking Slide Switch Template
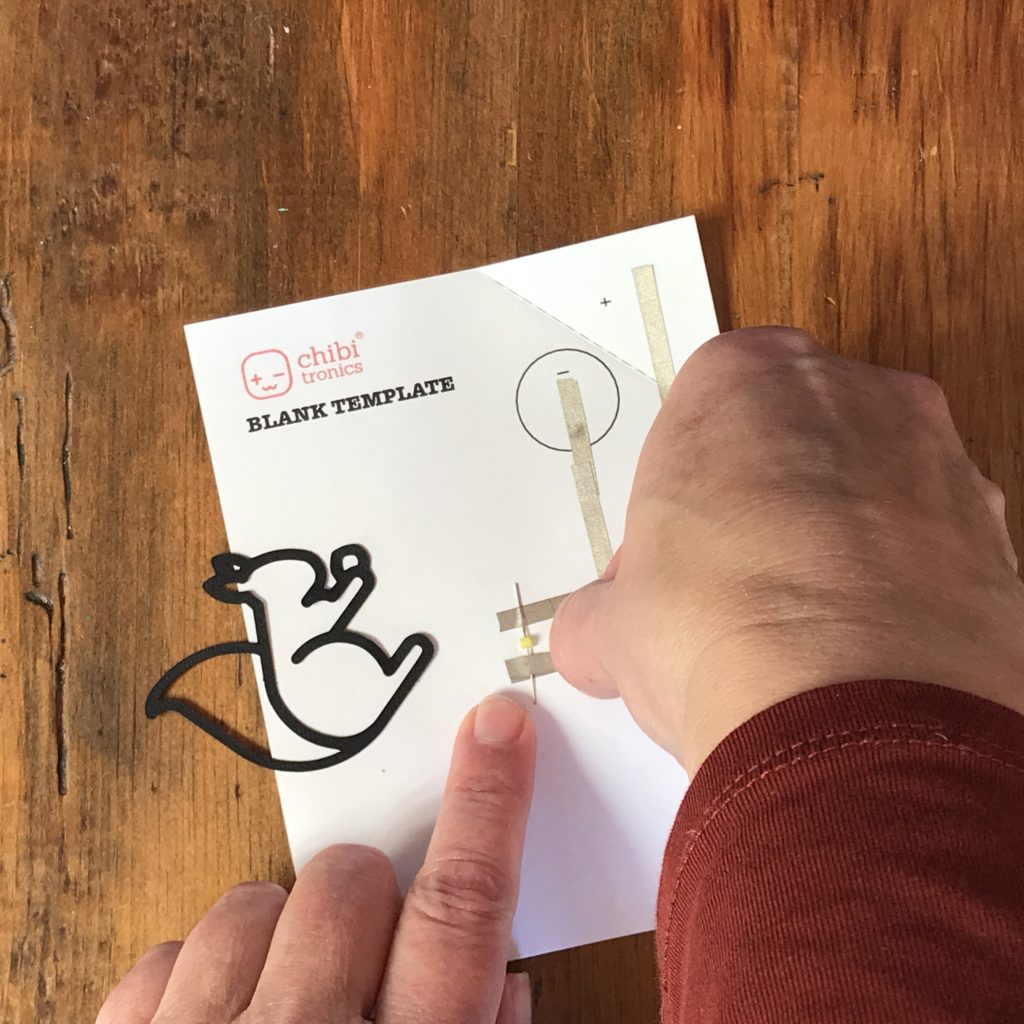
- 2 Blank Templates
Tools
- Scissors
- Washi or Scotch Tape
- Glue Stick
- Art supplies of your choice
Optional
- Double Stick Tape
- Japanese Screw Punch (Push Drill)
Directions
Brainstorm First? Or Dive Right In?
Because there are different ways to approach this project, I’m going to mention a couple that might help you get started.
One way is to begin is by brainstorming a concept or idea, imagining artistic elements that might match up with each paper circuit template, to help communicate a mood or illustrate a story. In my case, I knew from the start that I wanted my book to document my time in the woods.

Another way to approach this project is to construct the entire circuit layer, independent of any specific creative outcome, letting the functionality of each template stimulate ideas and inspire content. While some people prefer to start out with a fully formed idea, others may feel more excited about having the electronics completed first, allowing them to focus completely on the content.
No matter which entry point suits you best, the directions that follow will show you the basics of constructing an interactive accordion book that uses a single battery to power a series of paper circuit templates.
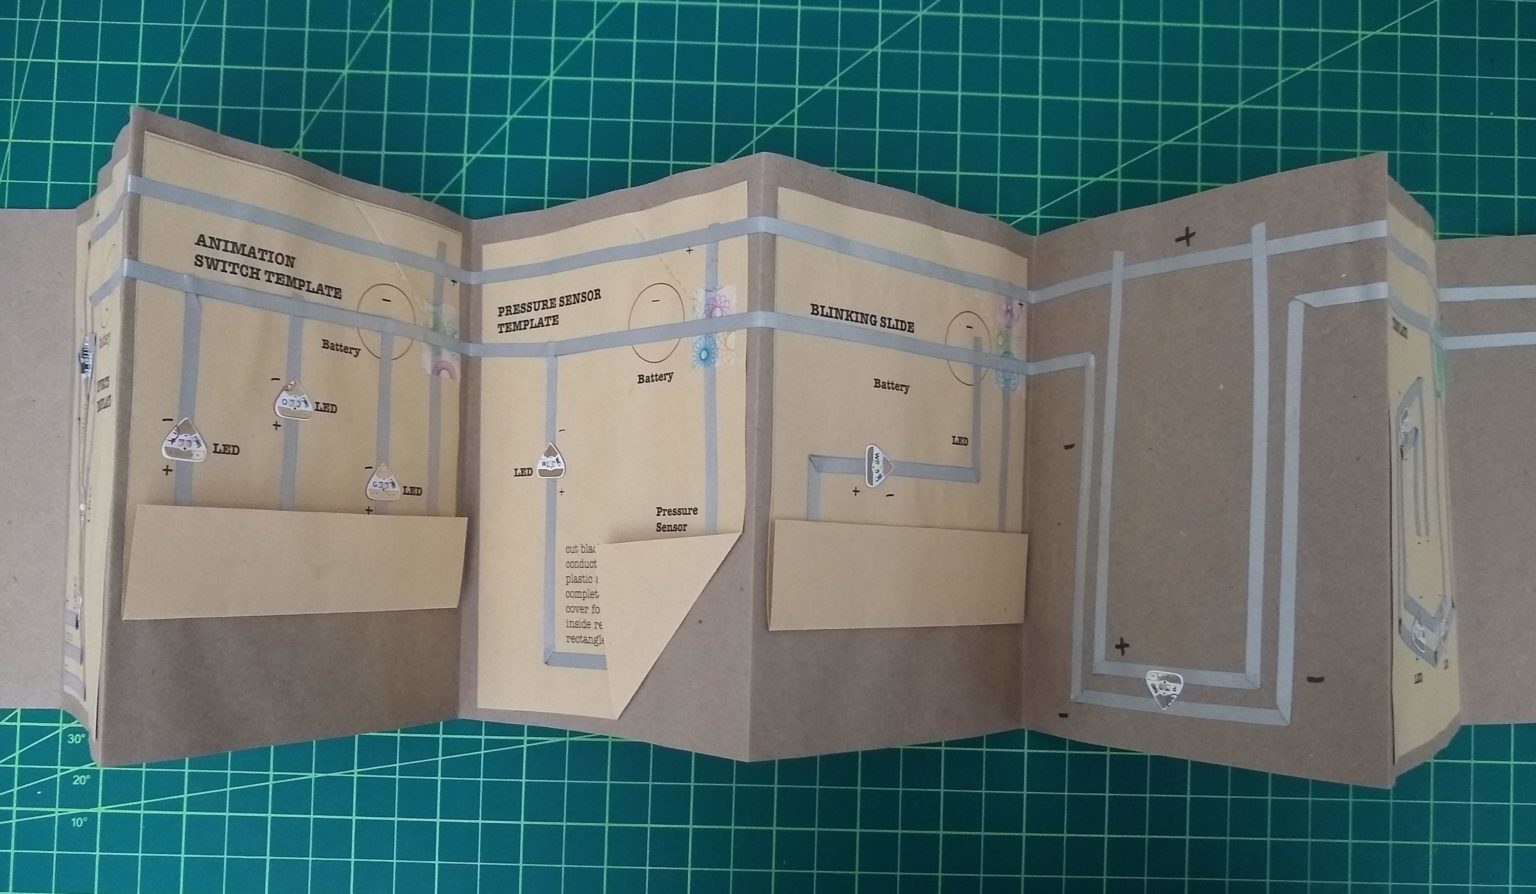
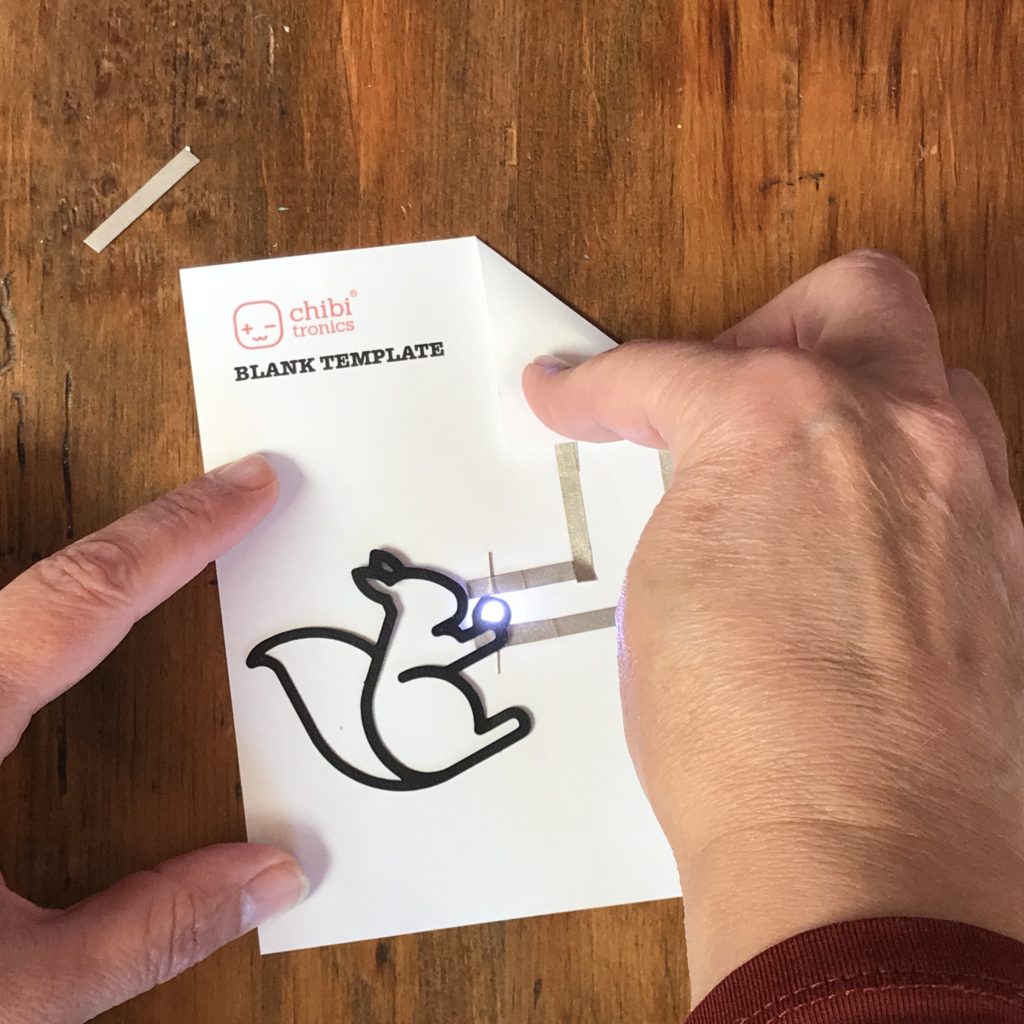
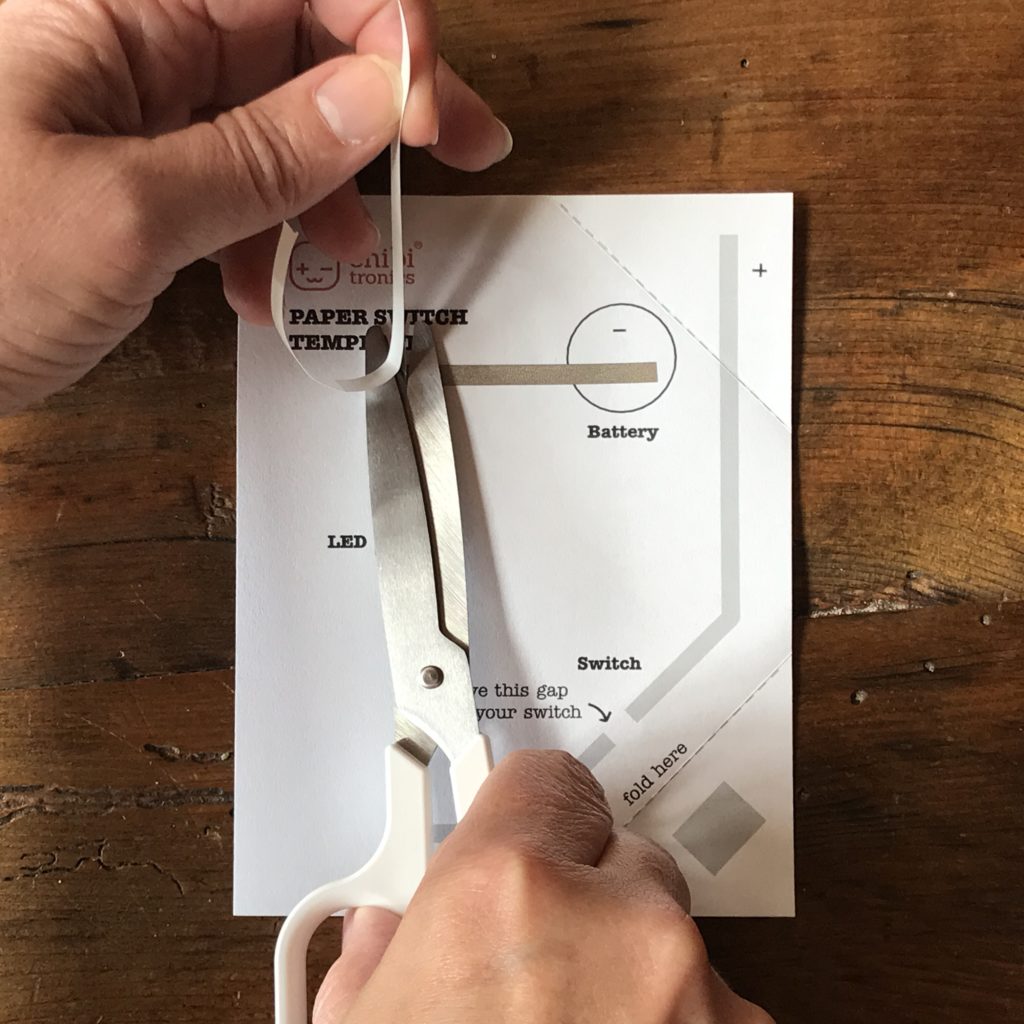
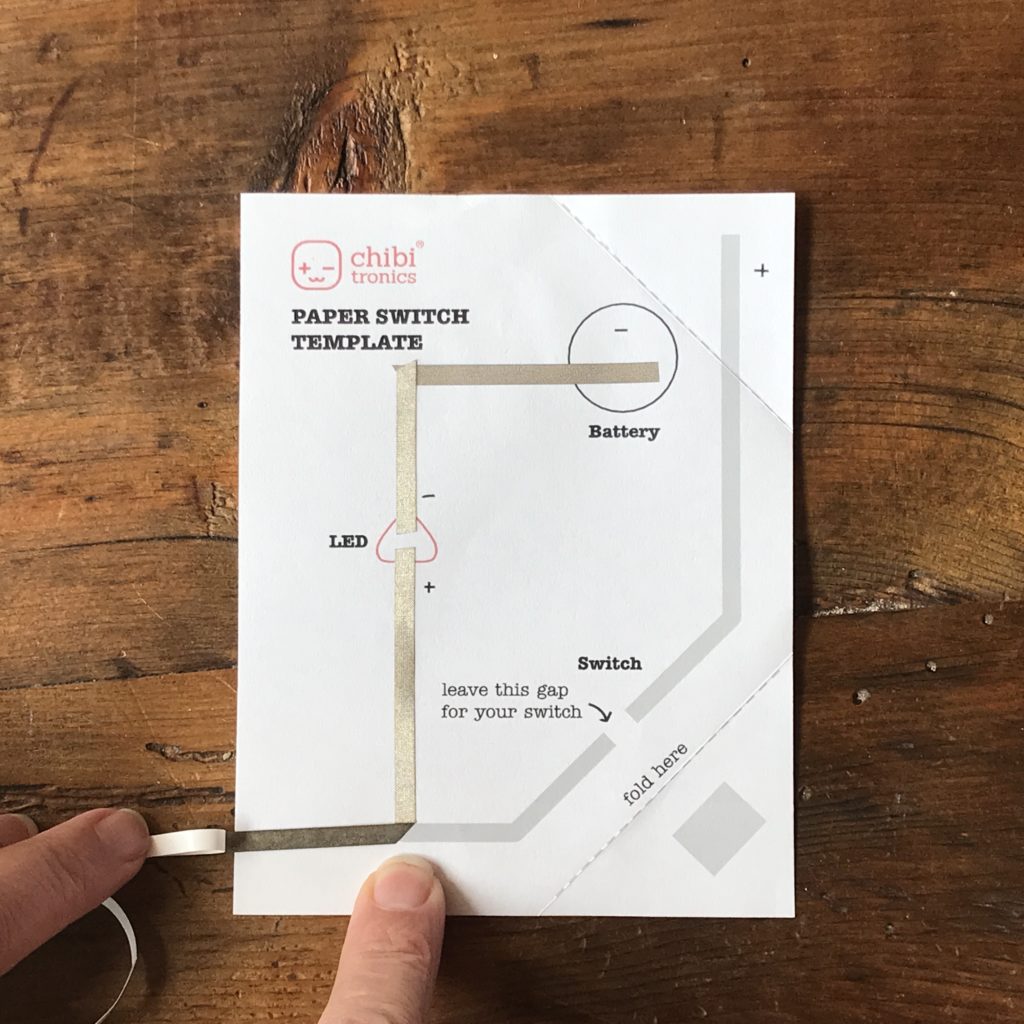
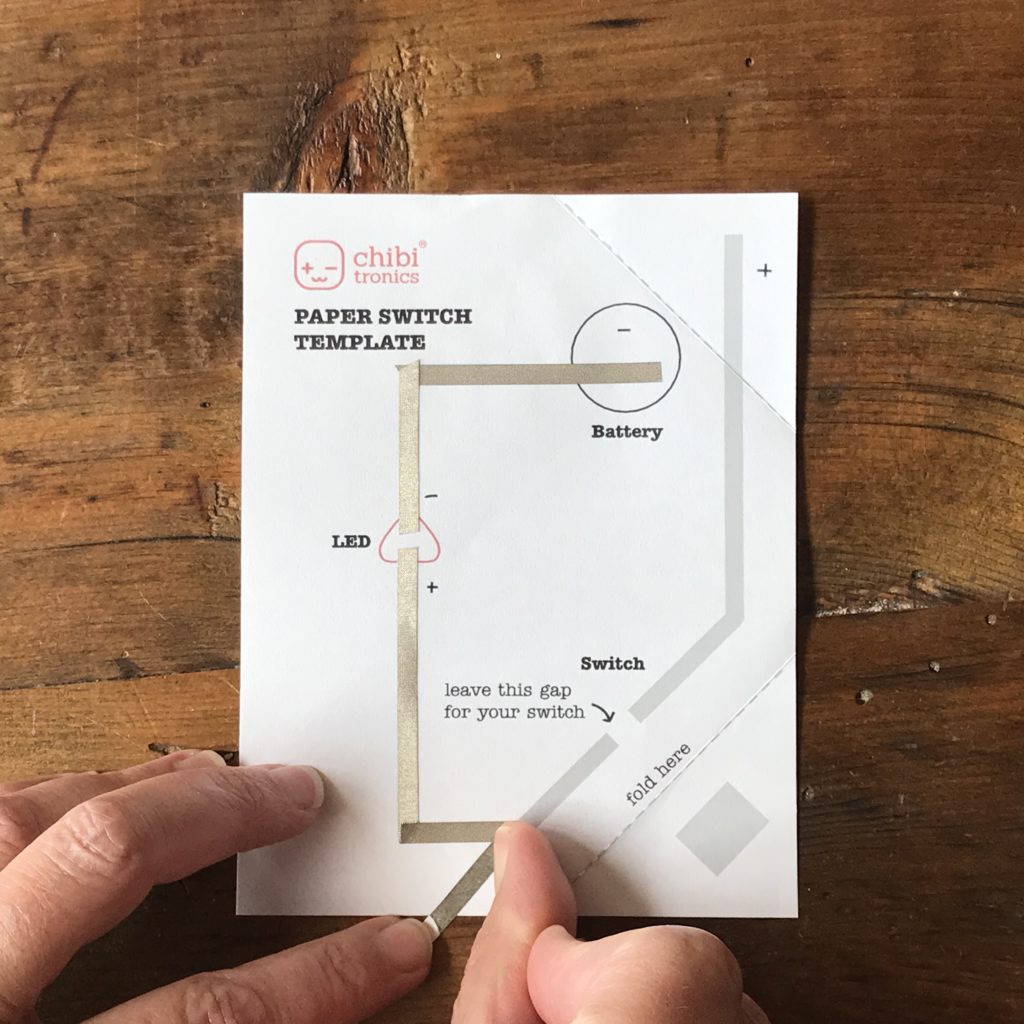
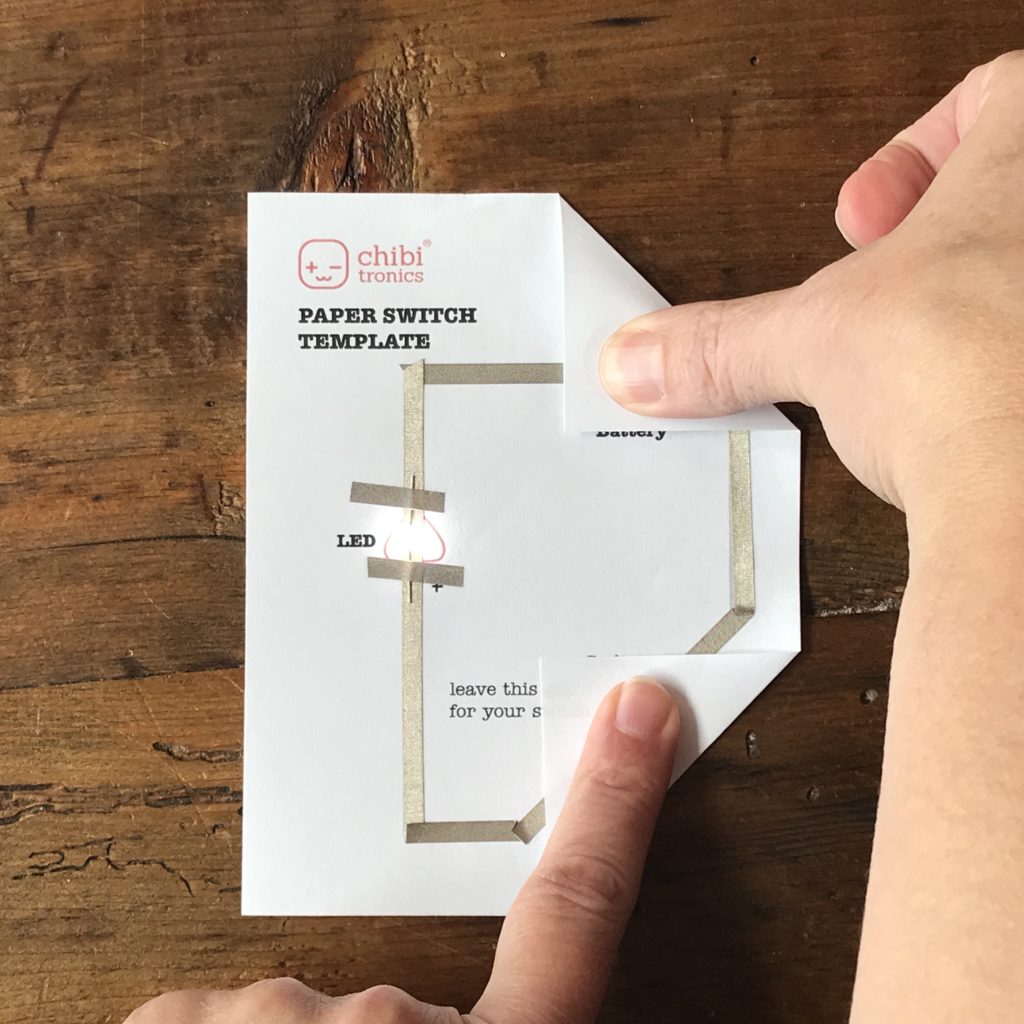
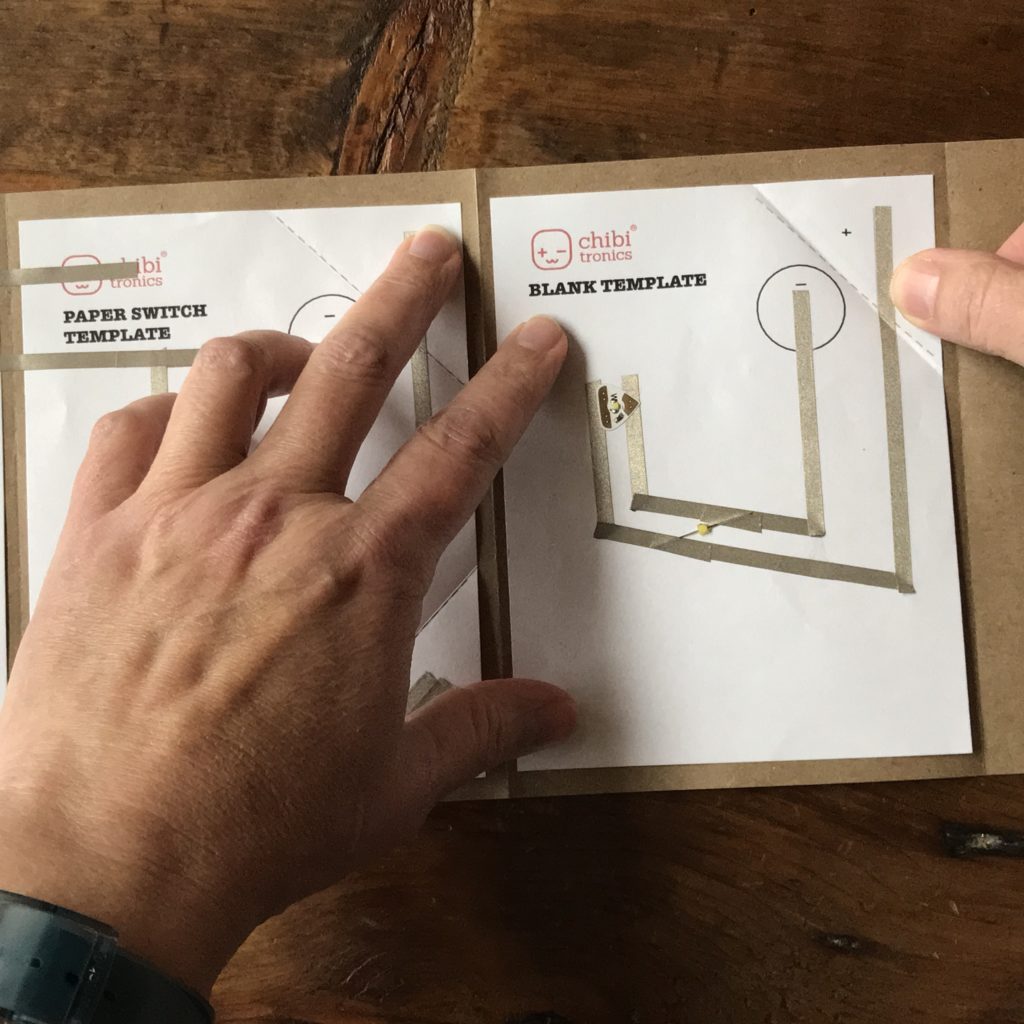
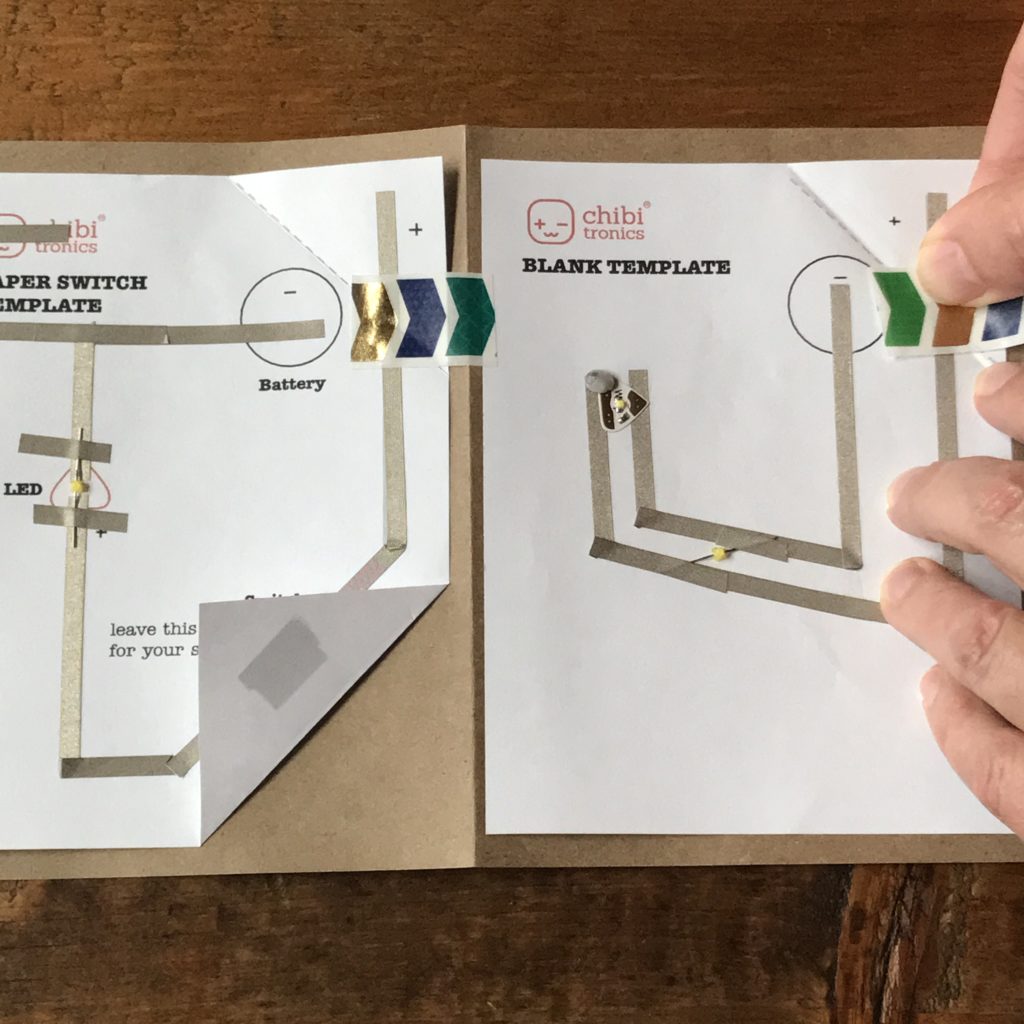
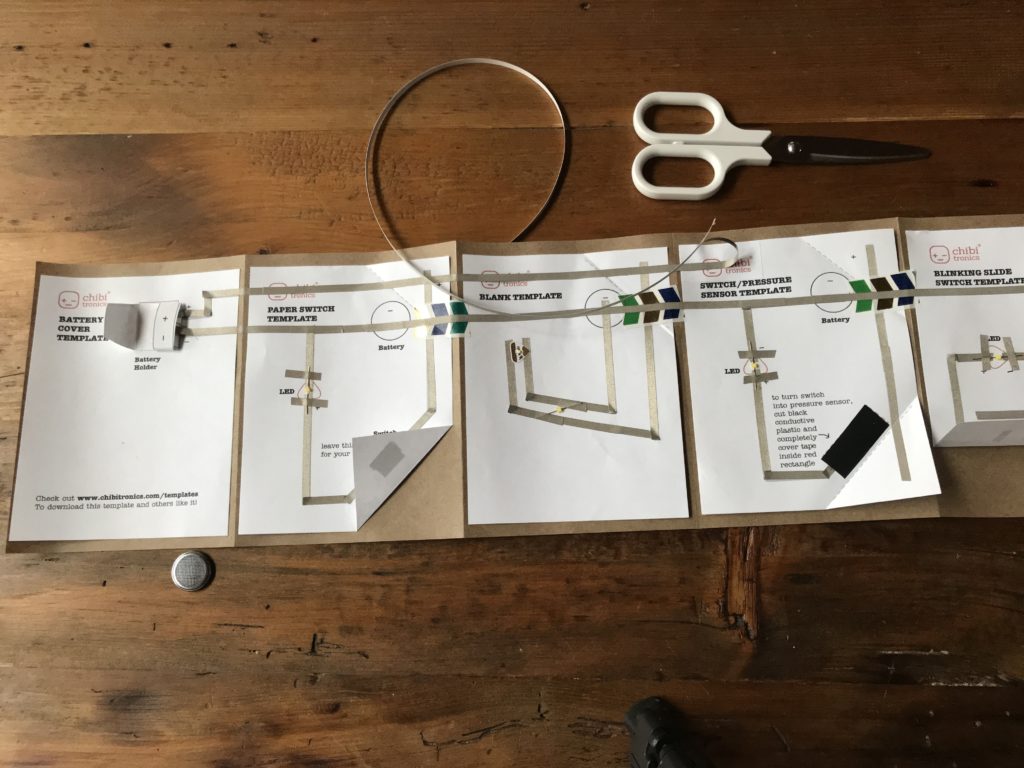
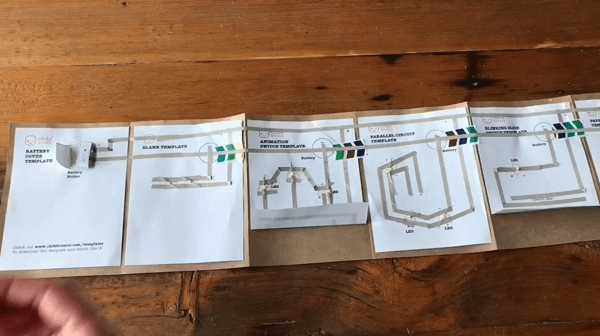
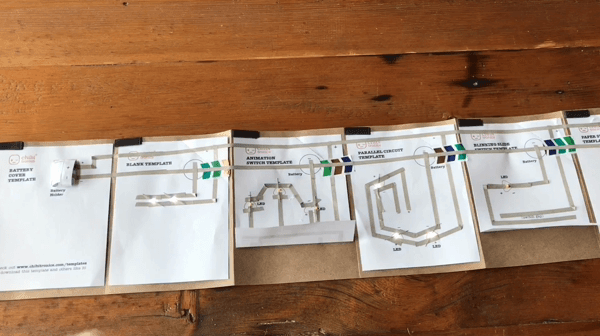
Step 1: Tape Templates
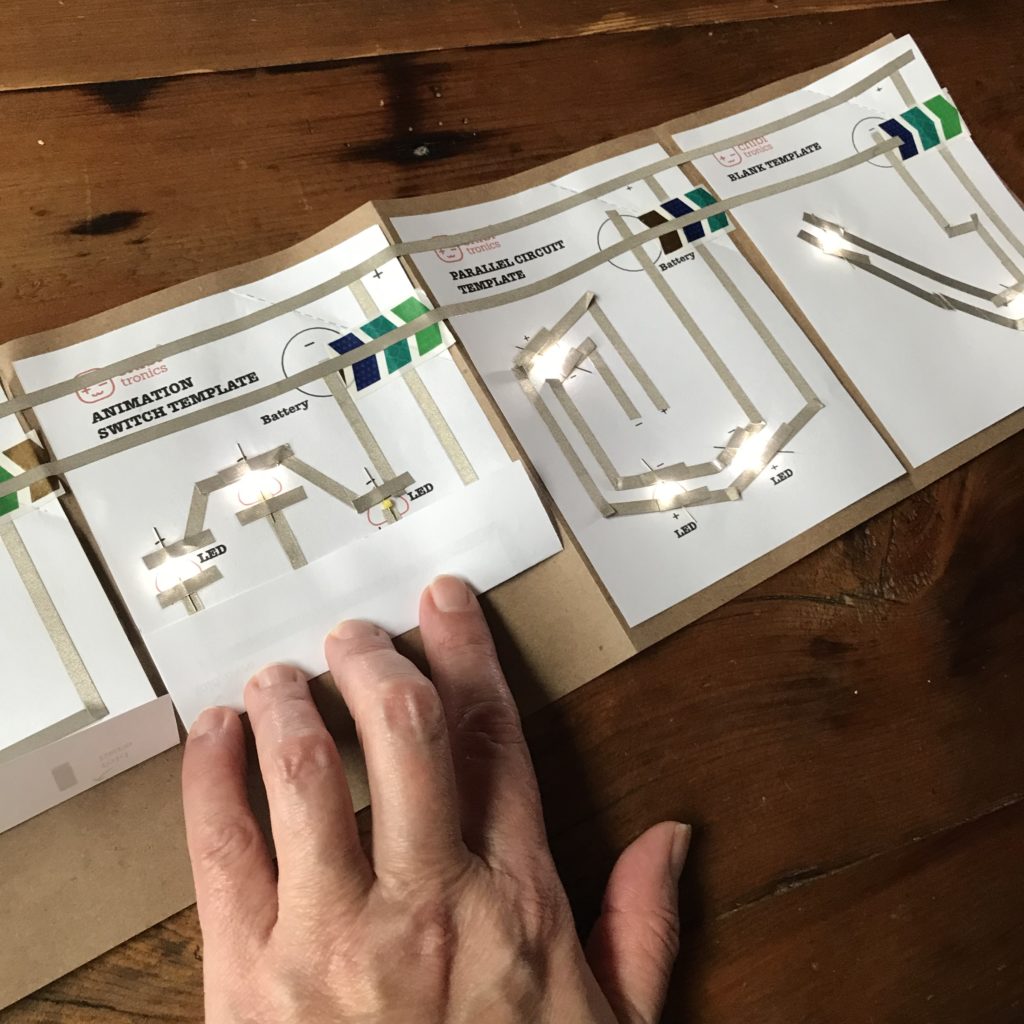
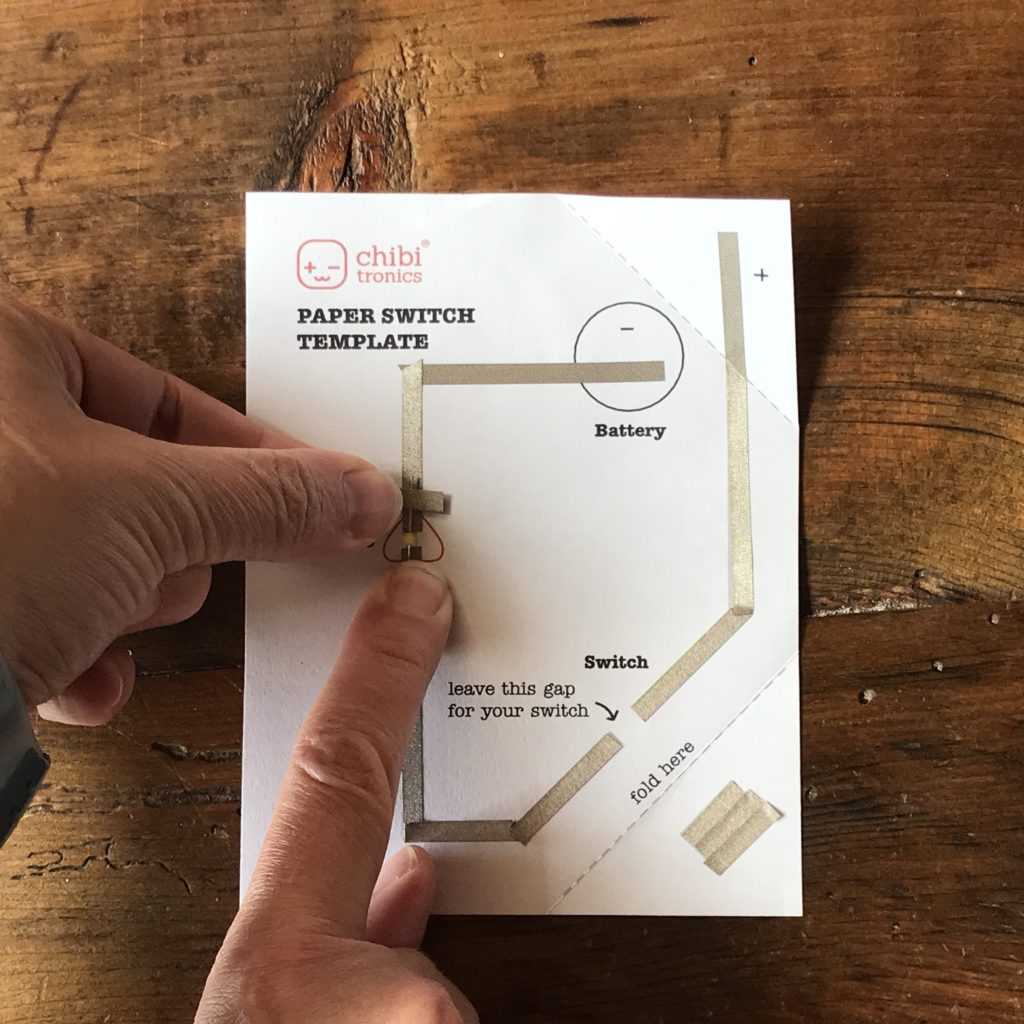
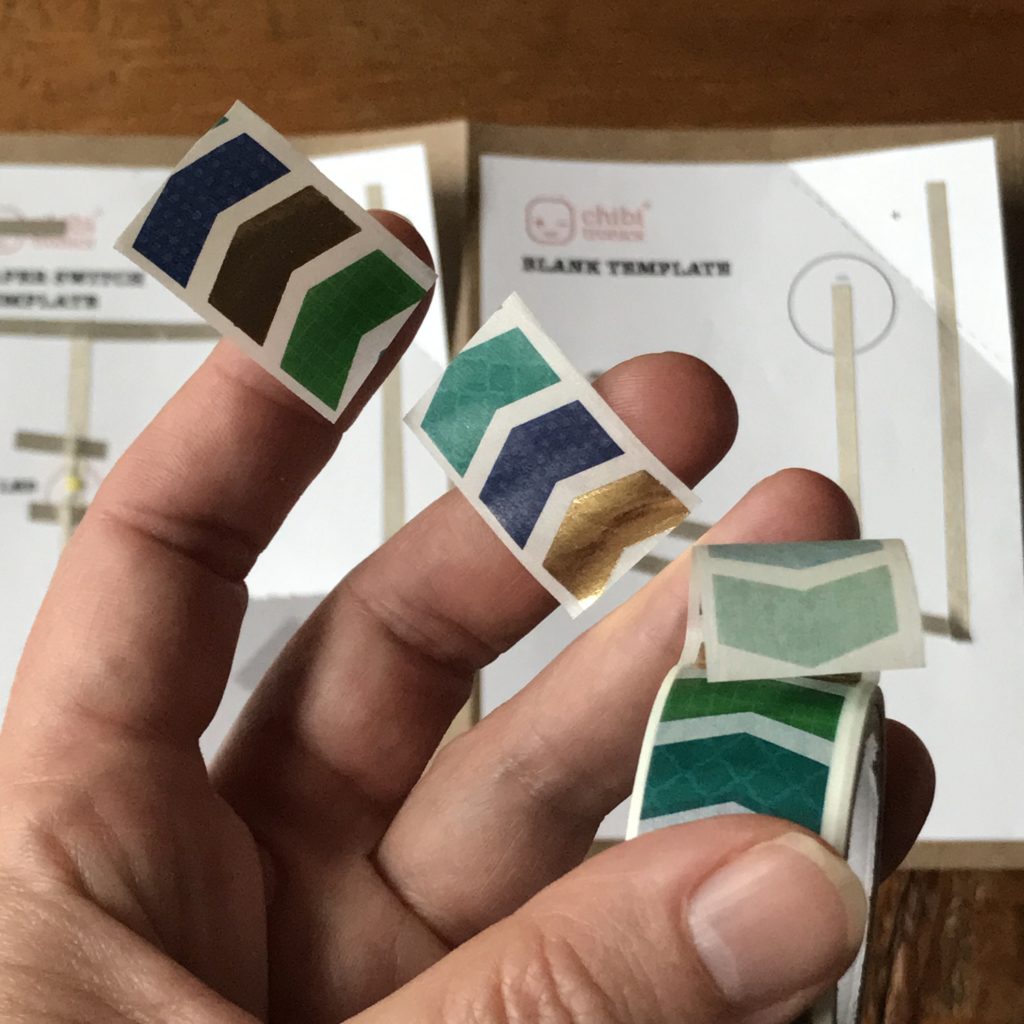
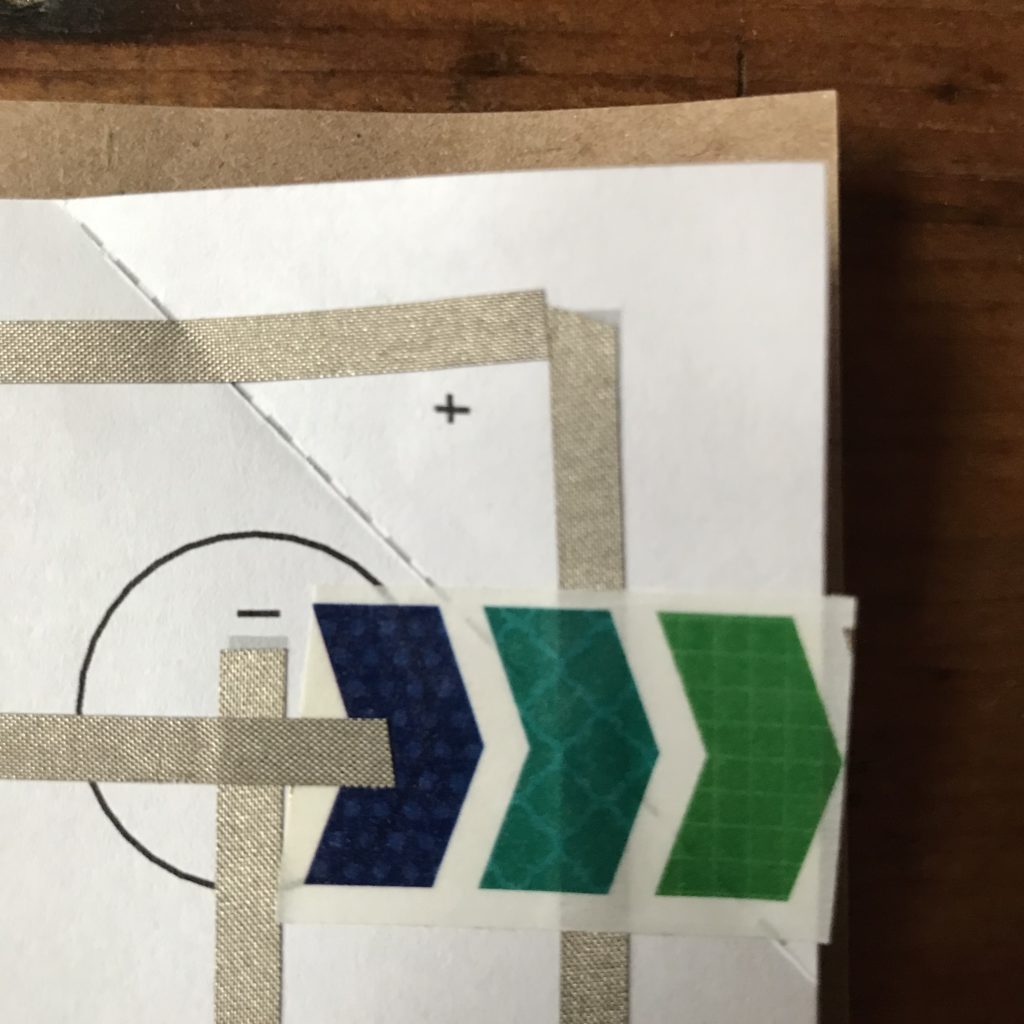
Because familiarizing yourself with each of the paper circuit templates can help stimulate ideas, I suggest starting with them. Set aside the Battery Cover Template; we’ll be coming back to it later in this tutorial. Next, start adding Conductive Fabric Tape to the gray areas of each template, noting that two have been left unfinished to allow you to customize your own circuit designs.
It’s Okay to Use Small Pieces
Because Conductive Fabric Tape is equally conductive on its adhesive side, you can use scissors to cut it, overlapping pieces on top of one another to ensure a solid physical and electrical connection.
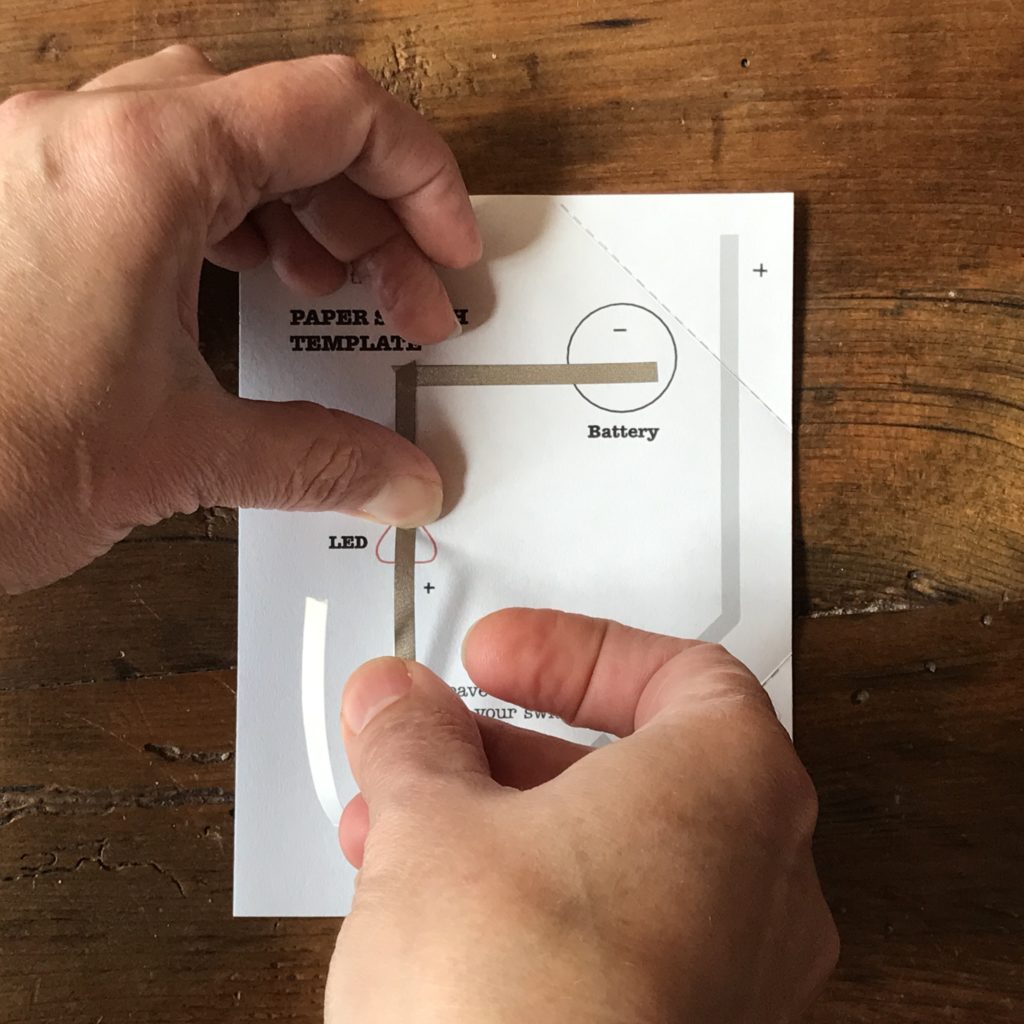
Or, You Can Use Longer Pieces
You may also use a continuous piece of Conductive Fabric Tape to make each of the traces, with folded corners, as you would with copper tape.

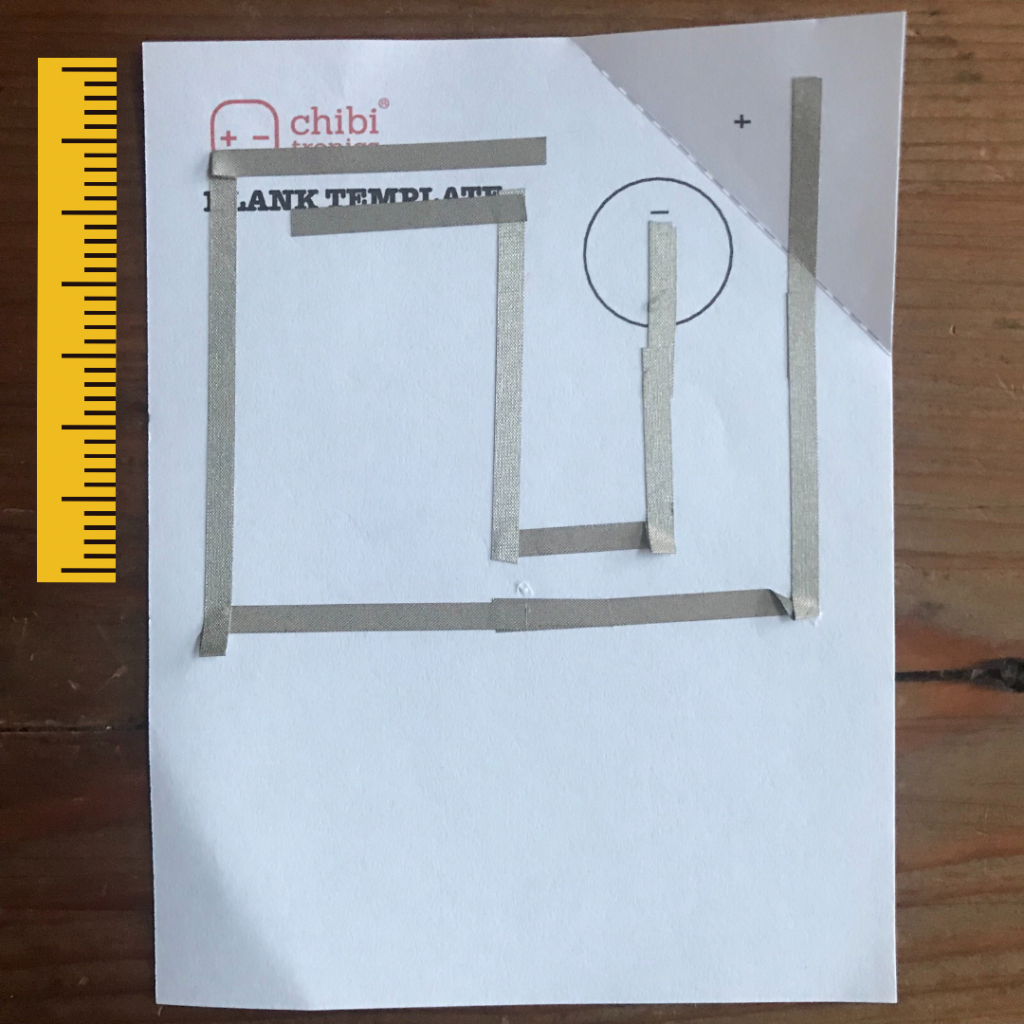
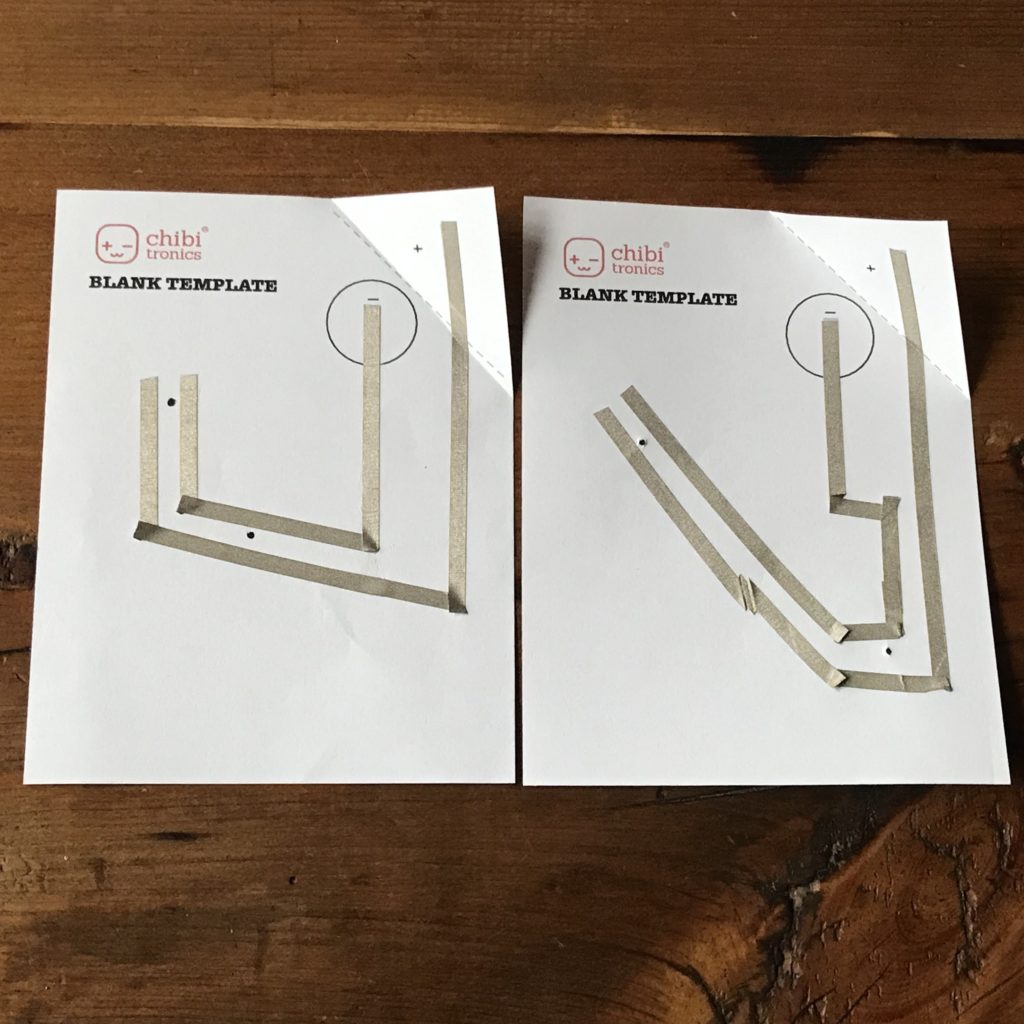
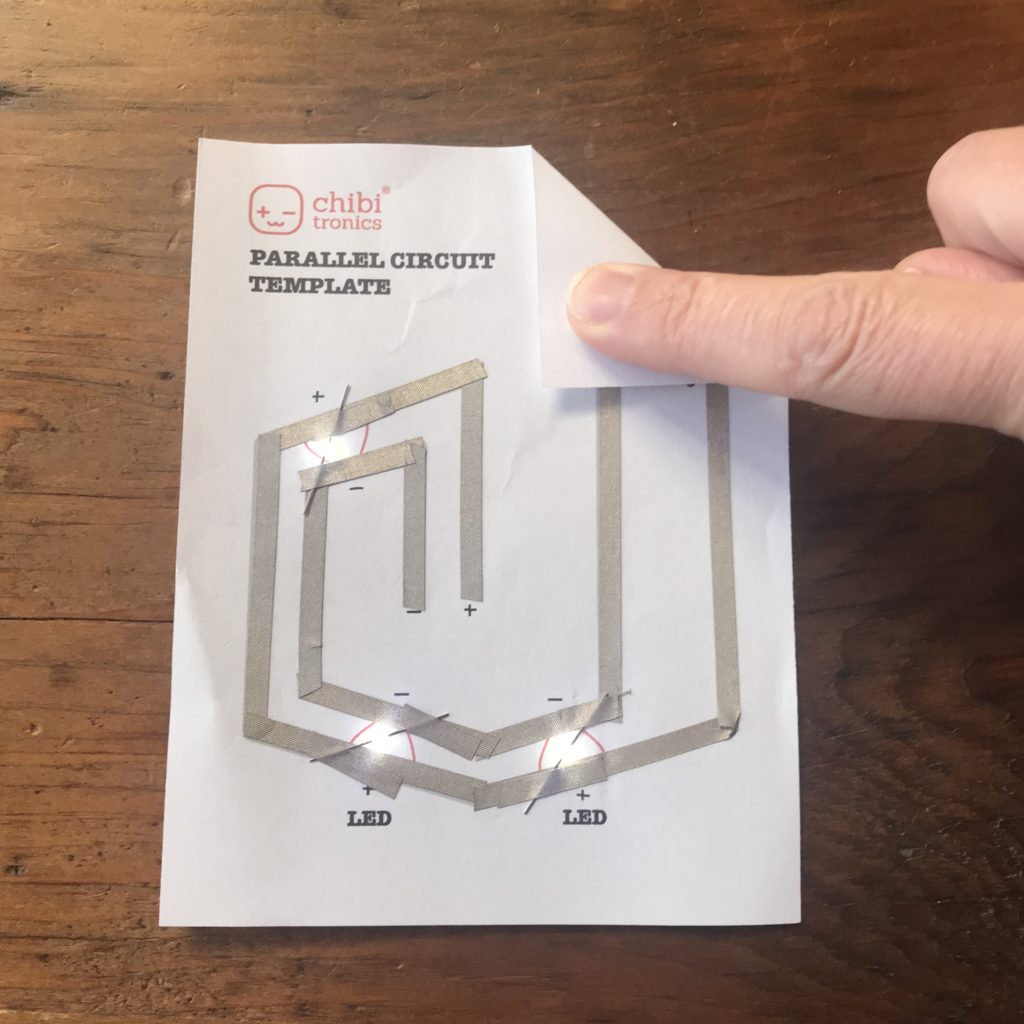
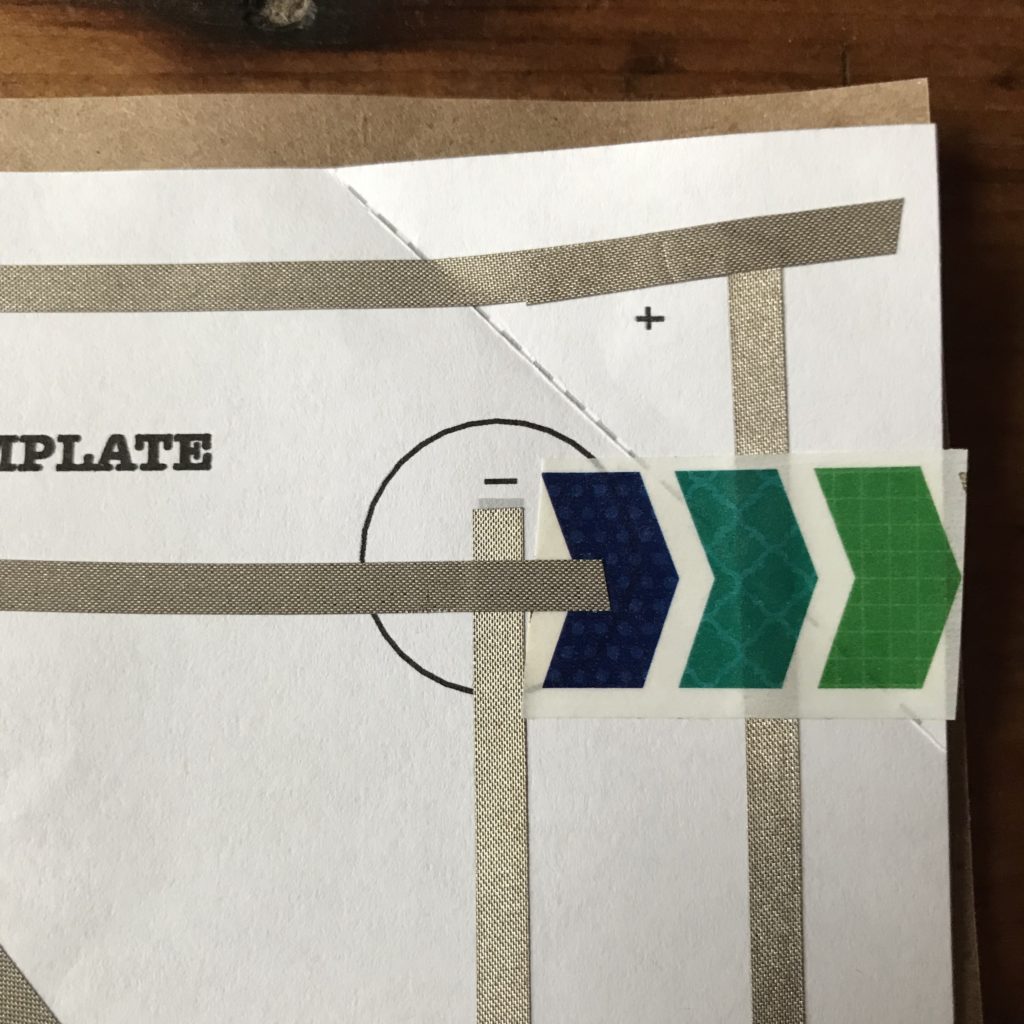
Can you spot the outlier?*
*The center template needs more tape in the top right corner, to match the others.
Tips, Tricks & Call-outs
When using a Blank Template, design your circuit below the circular battery outline. We suggest this, because the top two inches of each template will be used for adding power and ground lines that connect all of the templates together.
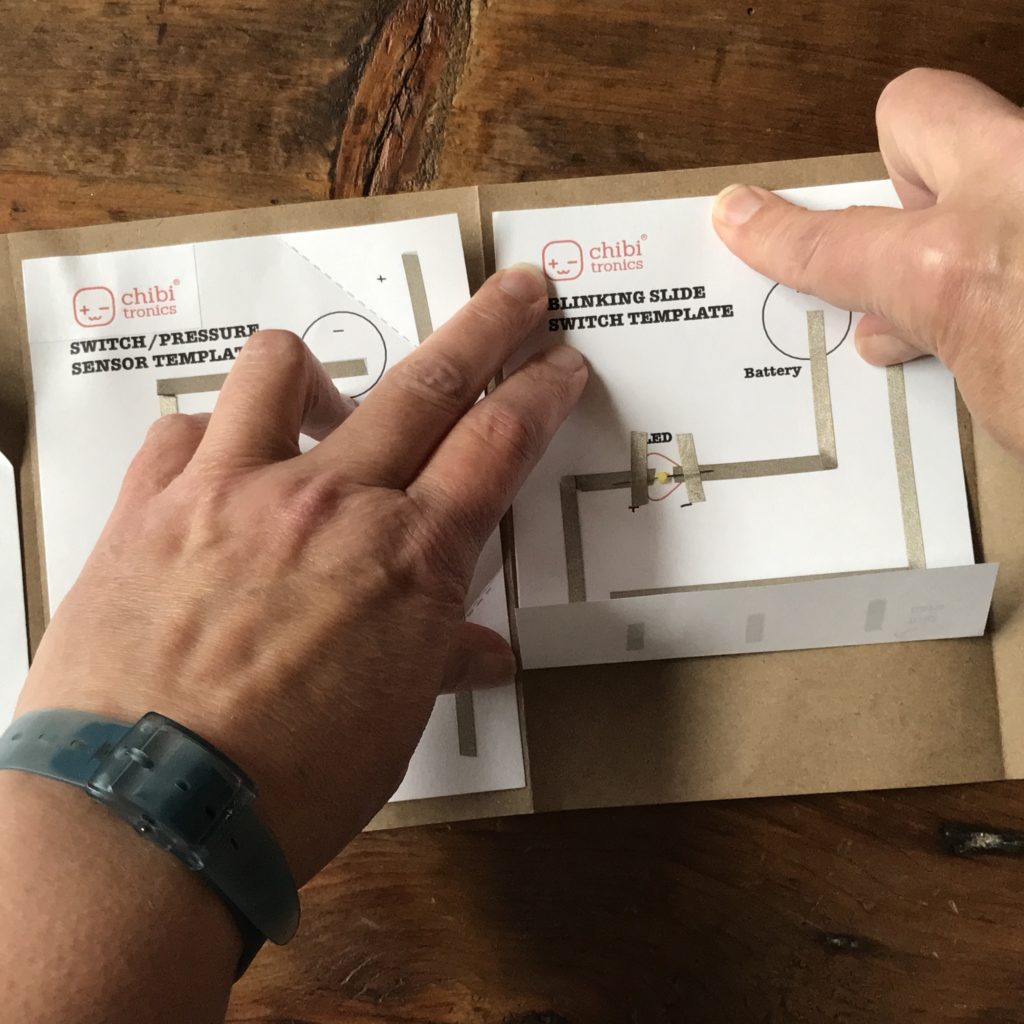
Step 2: Add Components
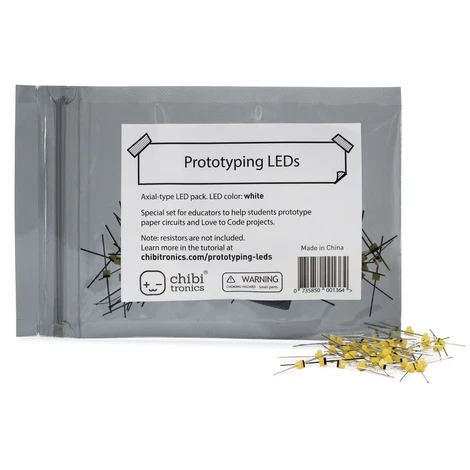
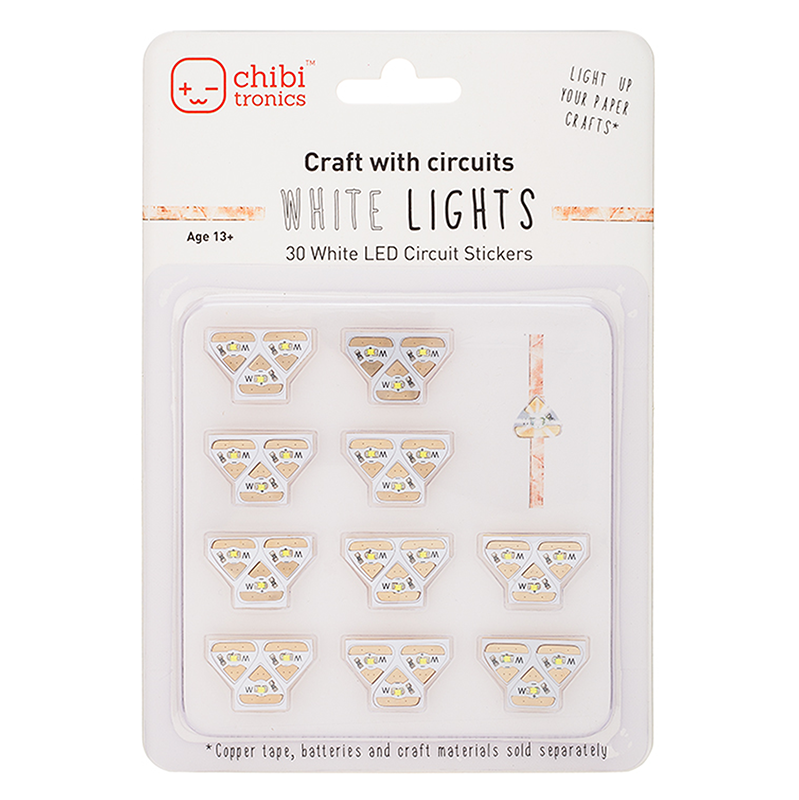
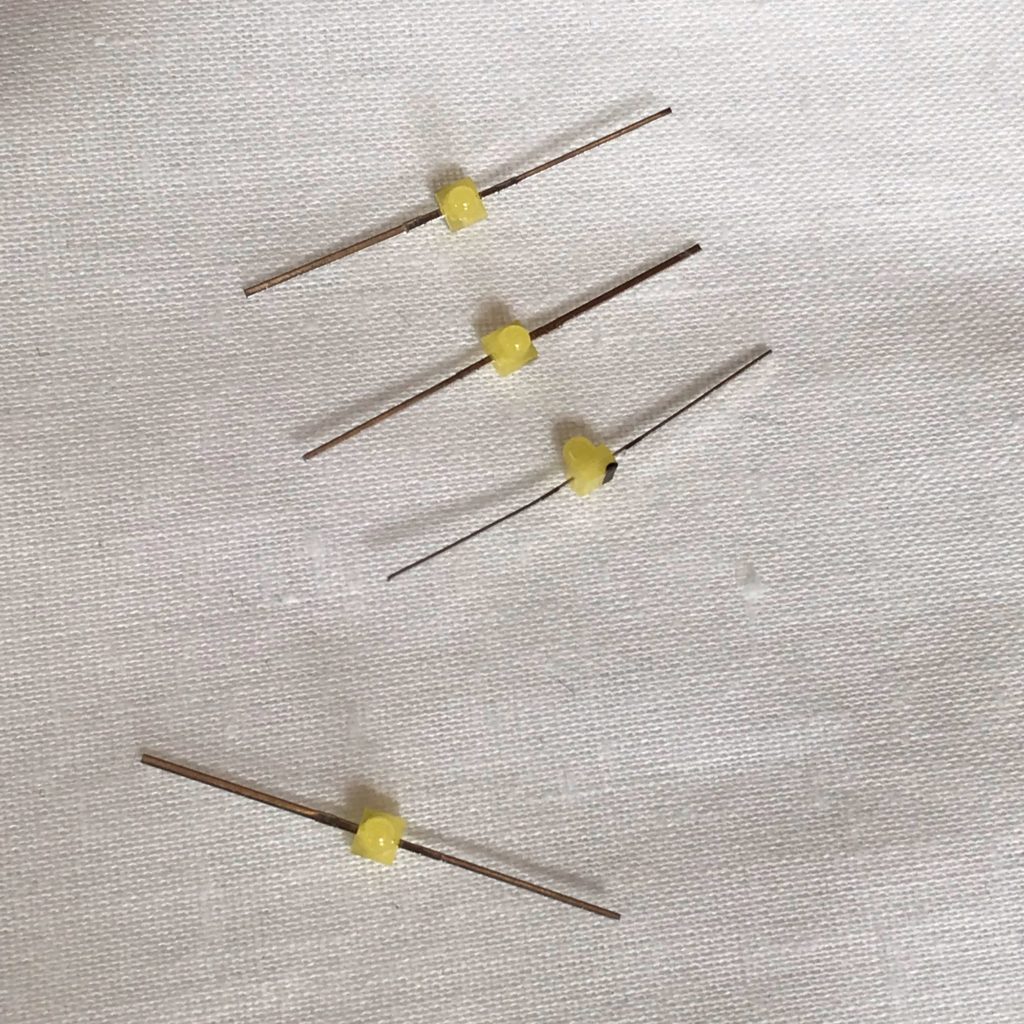
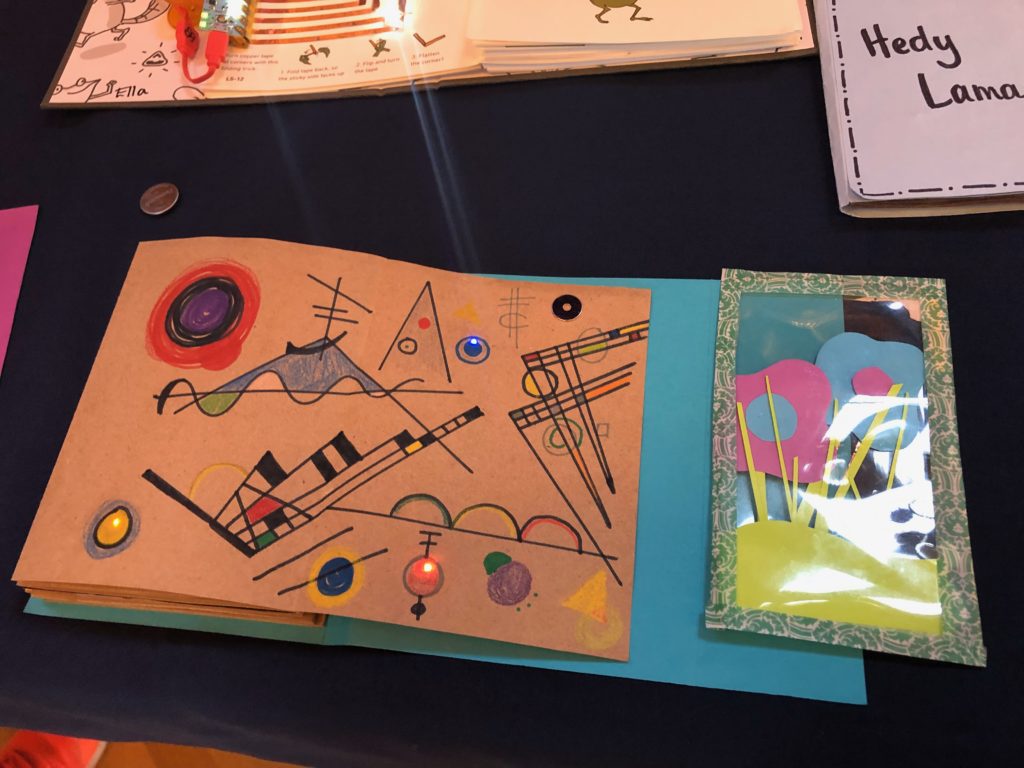
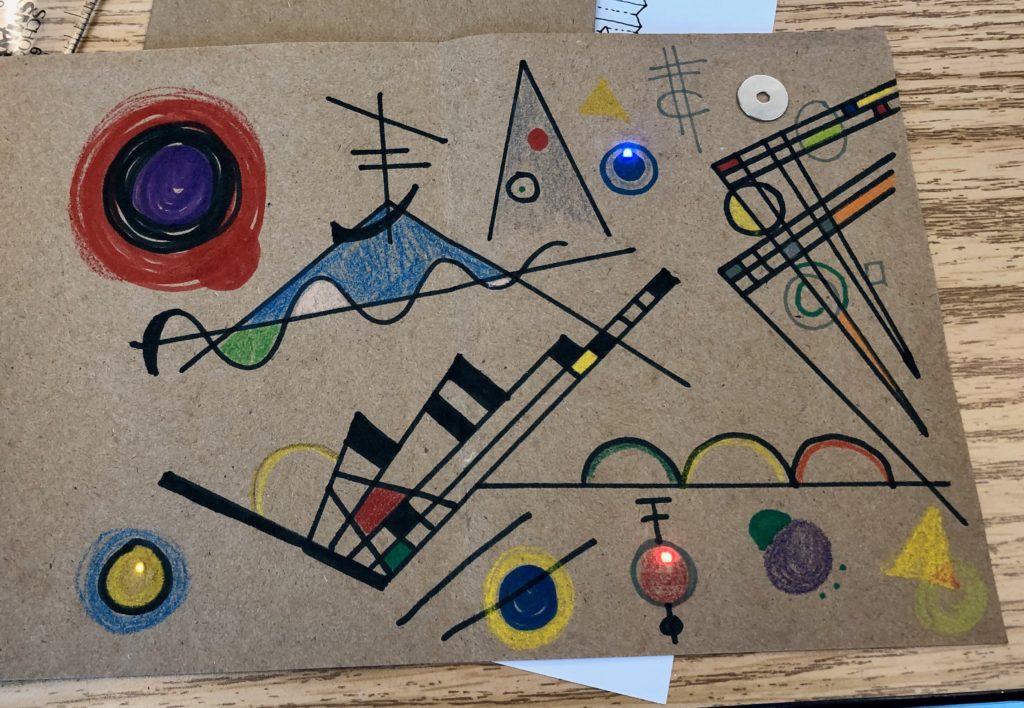
Once you’ve taped your templates, the next step is adding your LEDs and a piece of Pressure Sensitive Conductive Plastic. I’m using axial LEDs for this project, but you might choose to use LED Circuit Stickers (or a combination of axial LEDs and white Circuit Stickers).
LEDs
Like Circuit Stickers, axial LEDs are diodes, meaning that the direction in which they are taped down matters to the electrons trying to pass through them. While axial LEDs are not as flat as the Circuit Stickers, they have a slimmer profile than most through-hole LEDs. They are also more easily repositionable than Circuit Stickers, which is handy when you make a mistake.
Tips, Tricks, and Call-outs: Should you wish to mix and match axial LEDs with LED Circuit Stickers in this project, it is okay to do so. White LED Circuit Stickers pair well with white axial LEDs within the same circuit.
Use small pieces of Conductive Fabric Tape to secure the LEDs on top of the conductive traces you added to the templates in the last step. Doing so will ensure a more robust electrical connection than Scotch tape.
Before taping down an LED, check its polarity. The negative leg of a prototyping, or axial, LED is marked with small black line on its back side.
Once you know which leg of the LED is negative and which is positive, place it on top of the template, spanning the LED outline.
Because axial LEDs can roll around, I use one hand to hold the LED down and the other to tape it down.
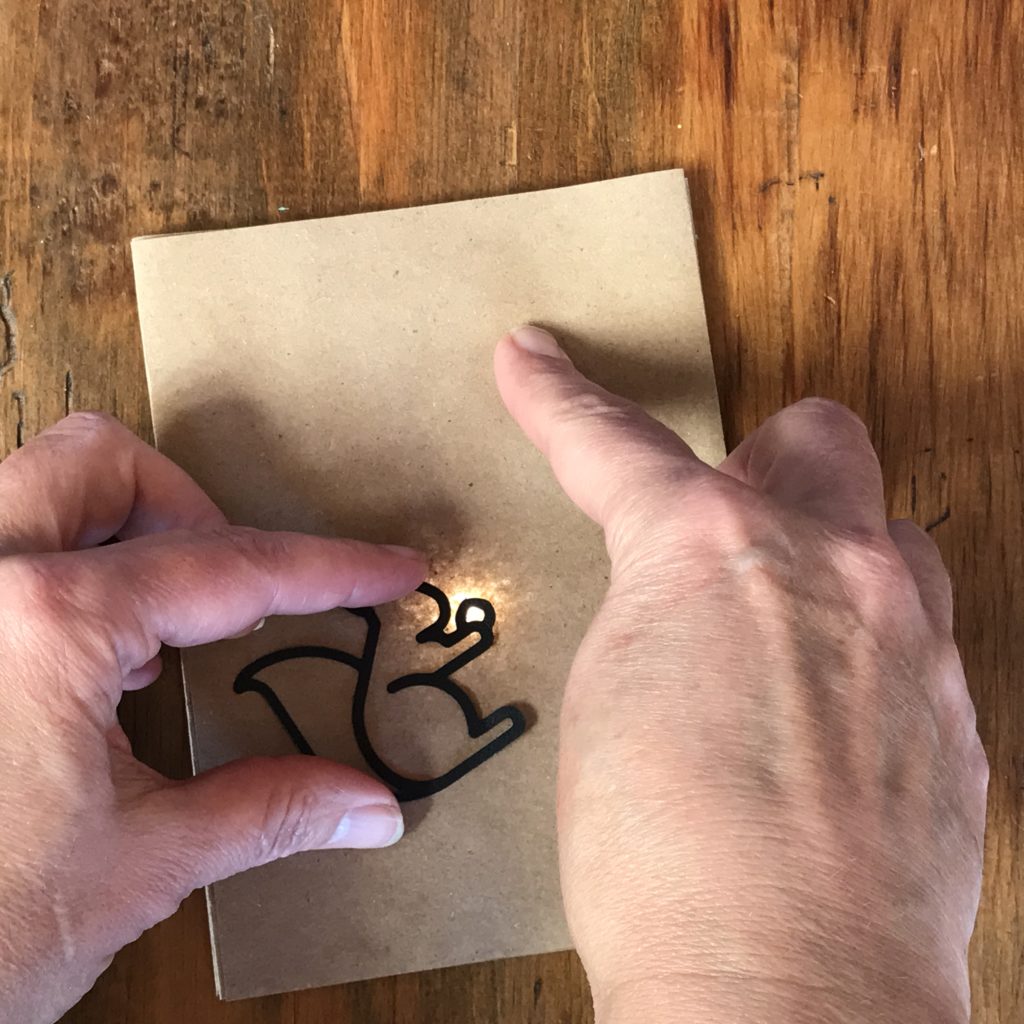
Then, after placing each LED, I insert my battery, press down the right-hand corner of the template, and test each circuit as I go. Doing so makes it easier to troubleshoot potential problems, one circuit at a time, rather than waiting until the end.
Tips, Tricks, and Call-outs: I like using small scraps of Conductive Fabric Tape that I’ve collected for taping down LEDs. If I don’t have scraps (or I’m in a hurry) I cut pieces off of a long strip with the backing already removed.
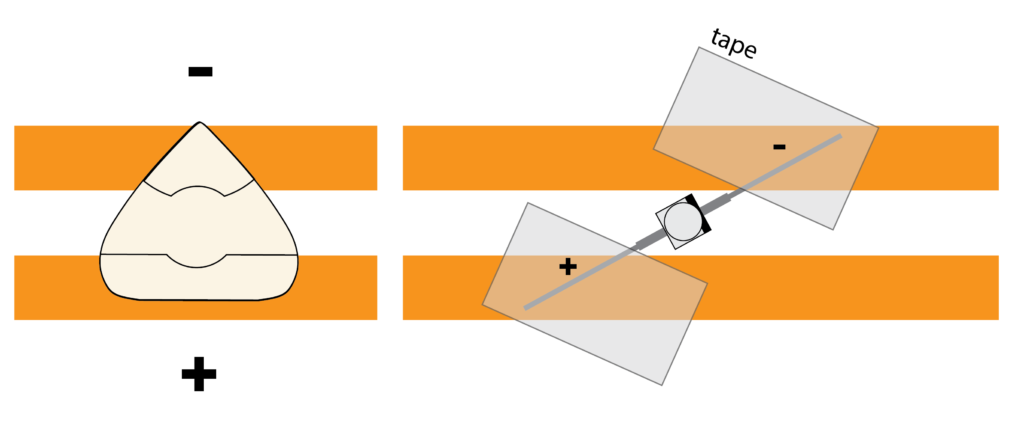
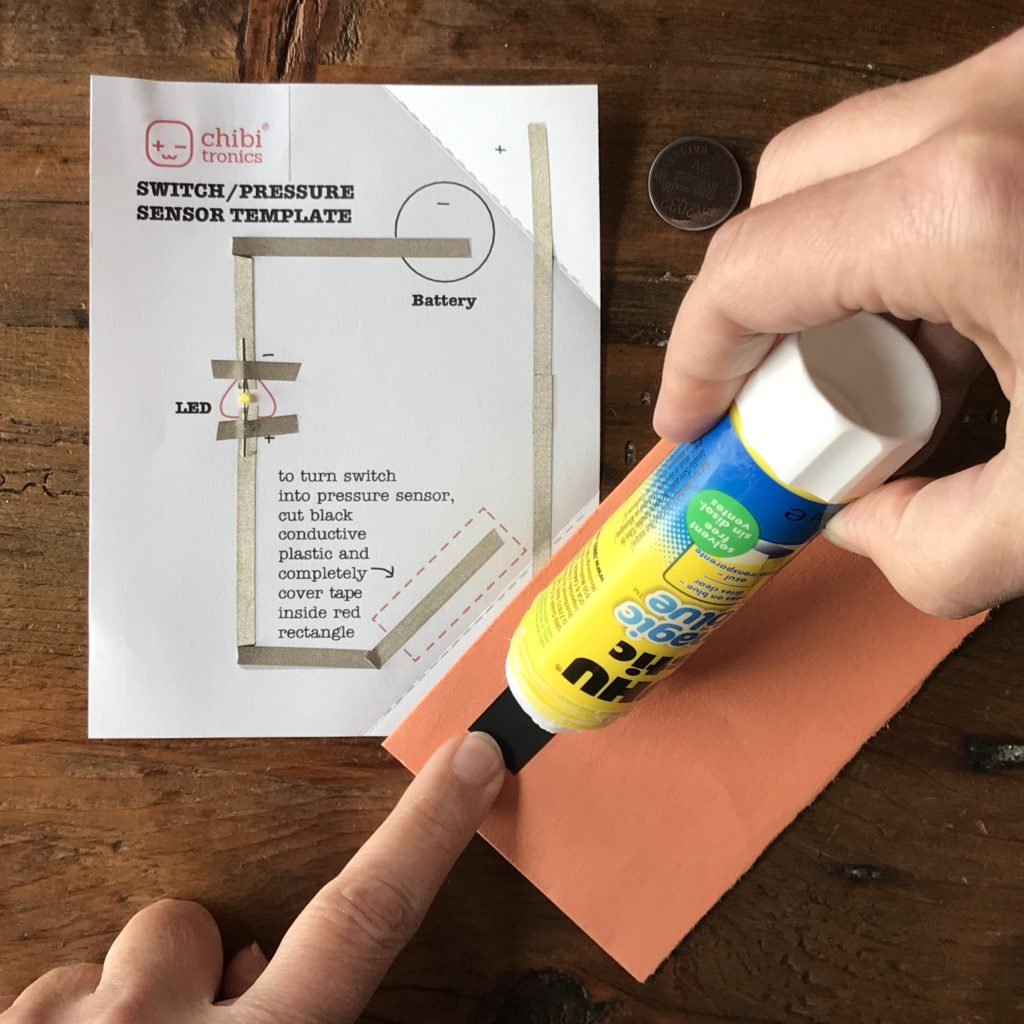
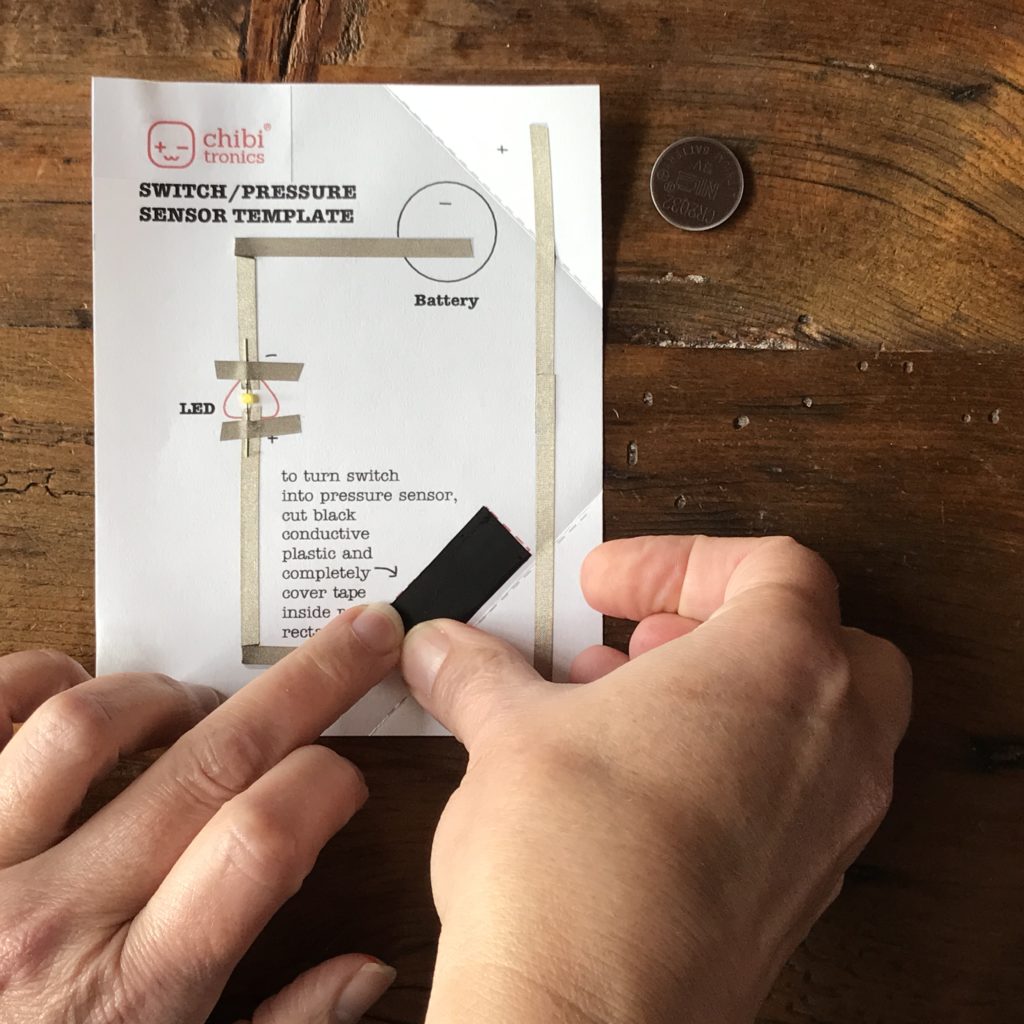
Pressure Sensitive Conductive Plastic
The last component you’ll be adding will result in a cool fading effect. The Switch/ Pressure Sensor Template has an outline for a piece of Pressure Sensitive Conductive Plastic. In order to secure it in place, use a glue stick on one side of the plastic and place it sticky side down on the template. When the switch containing the plastic is pressed over the plastic, the brightness of the LED will change in relationship to how hard or softly you push.

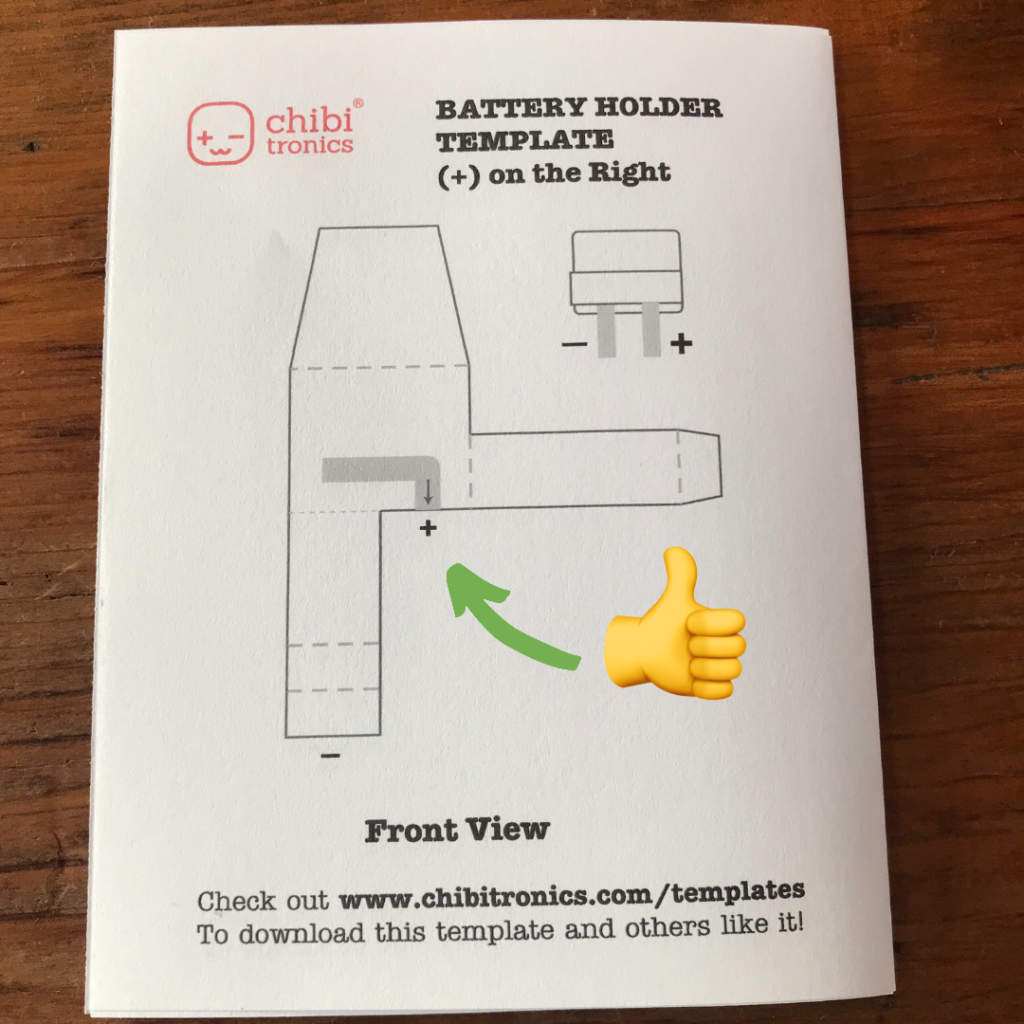
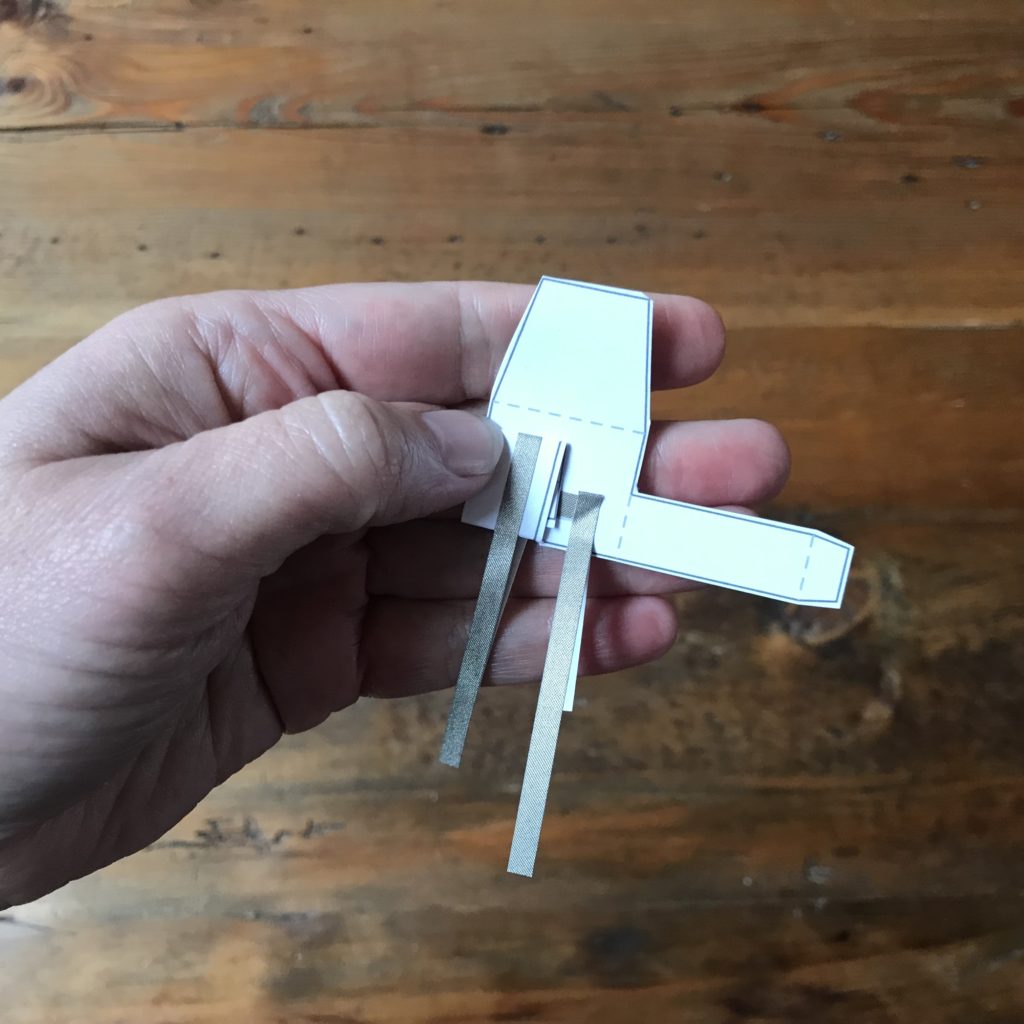
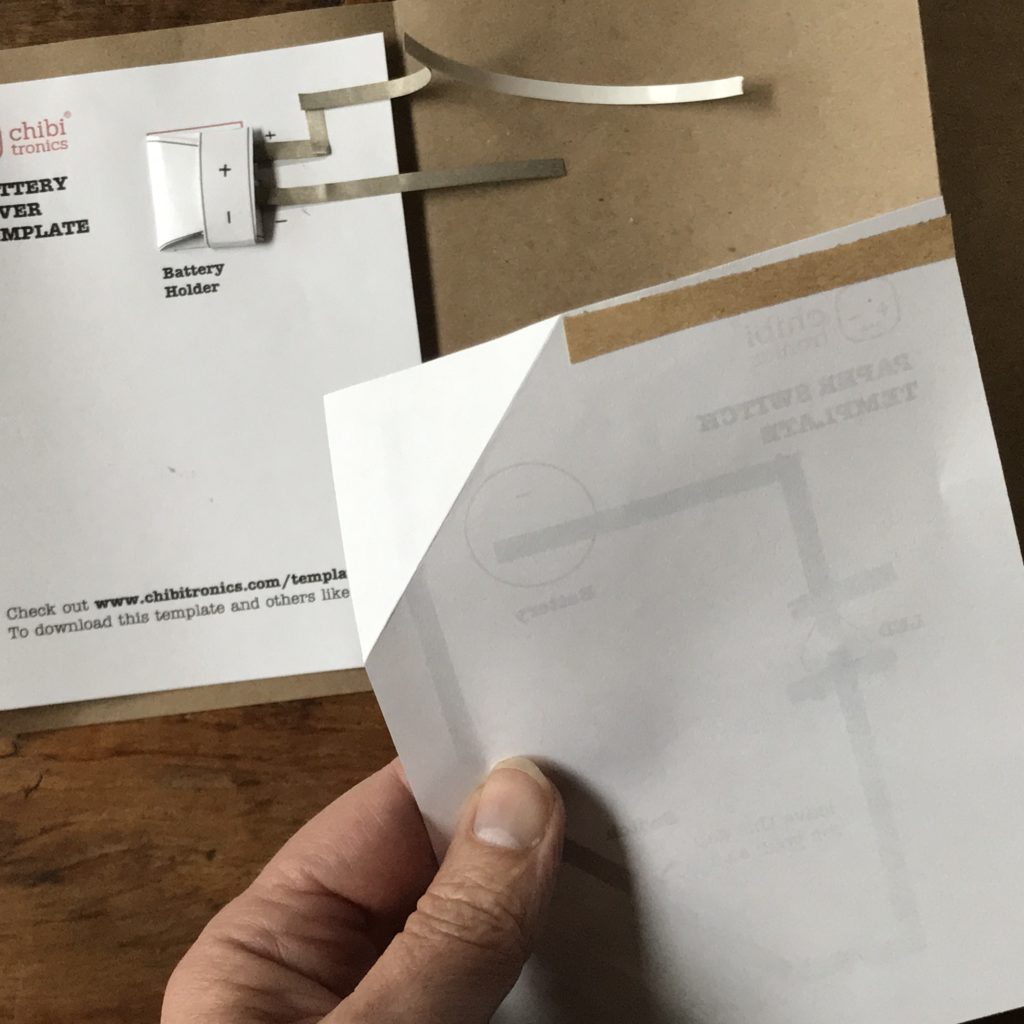
Step 3 : Battery Holder
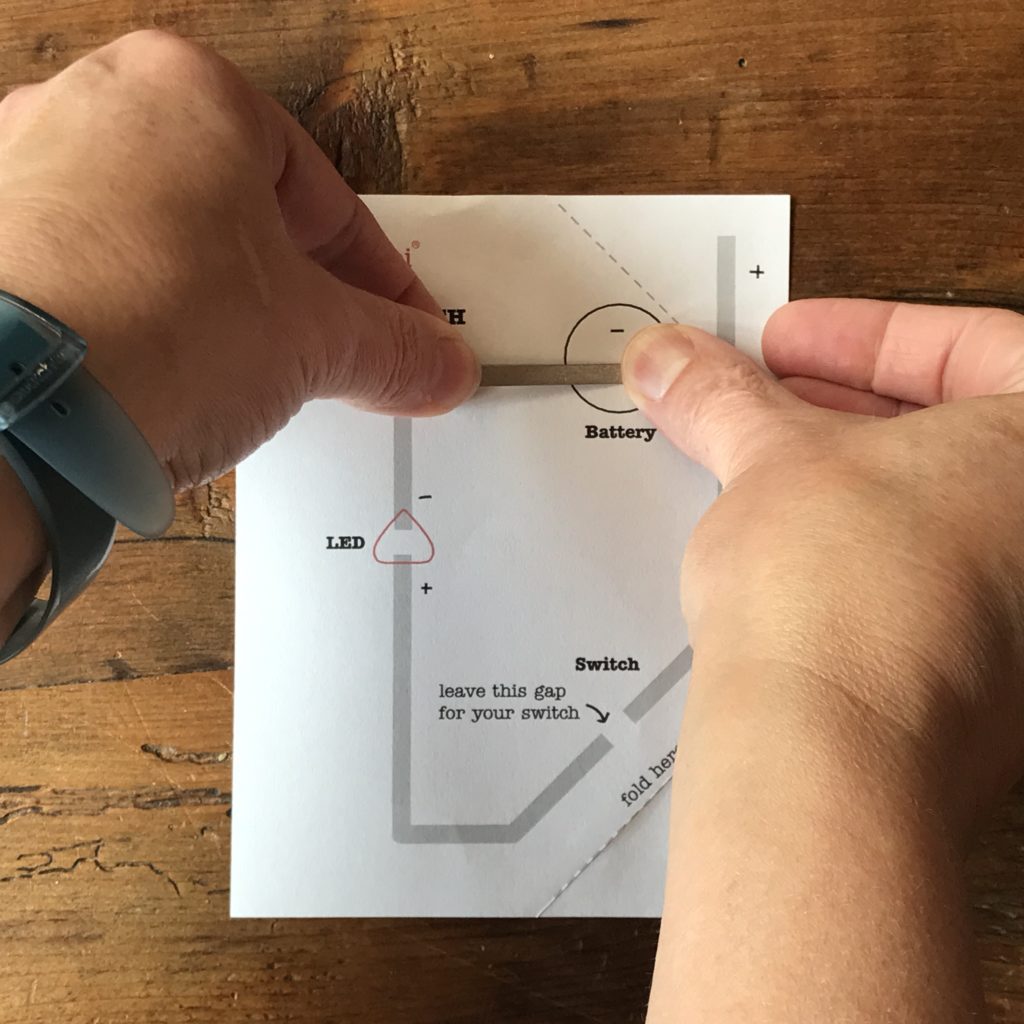
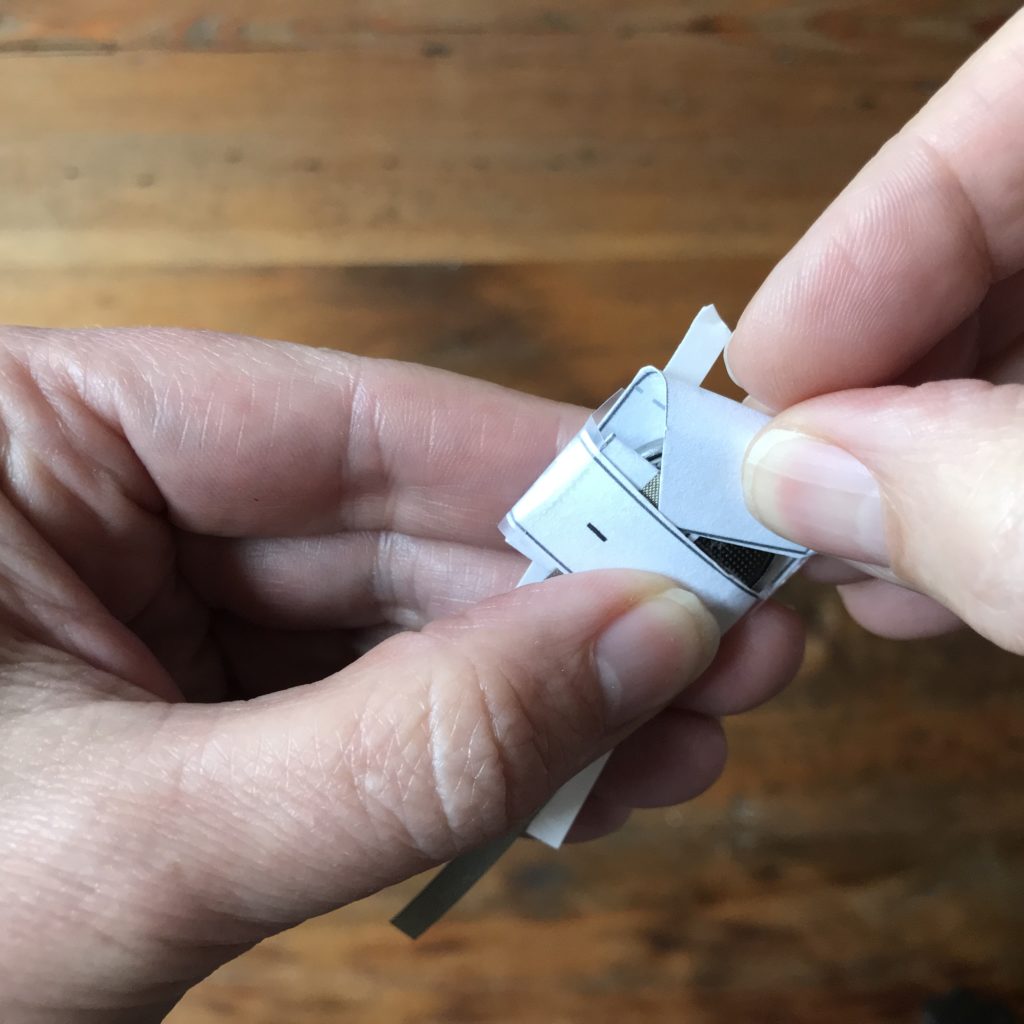
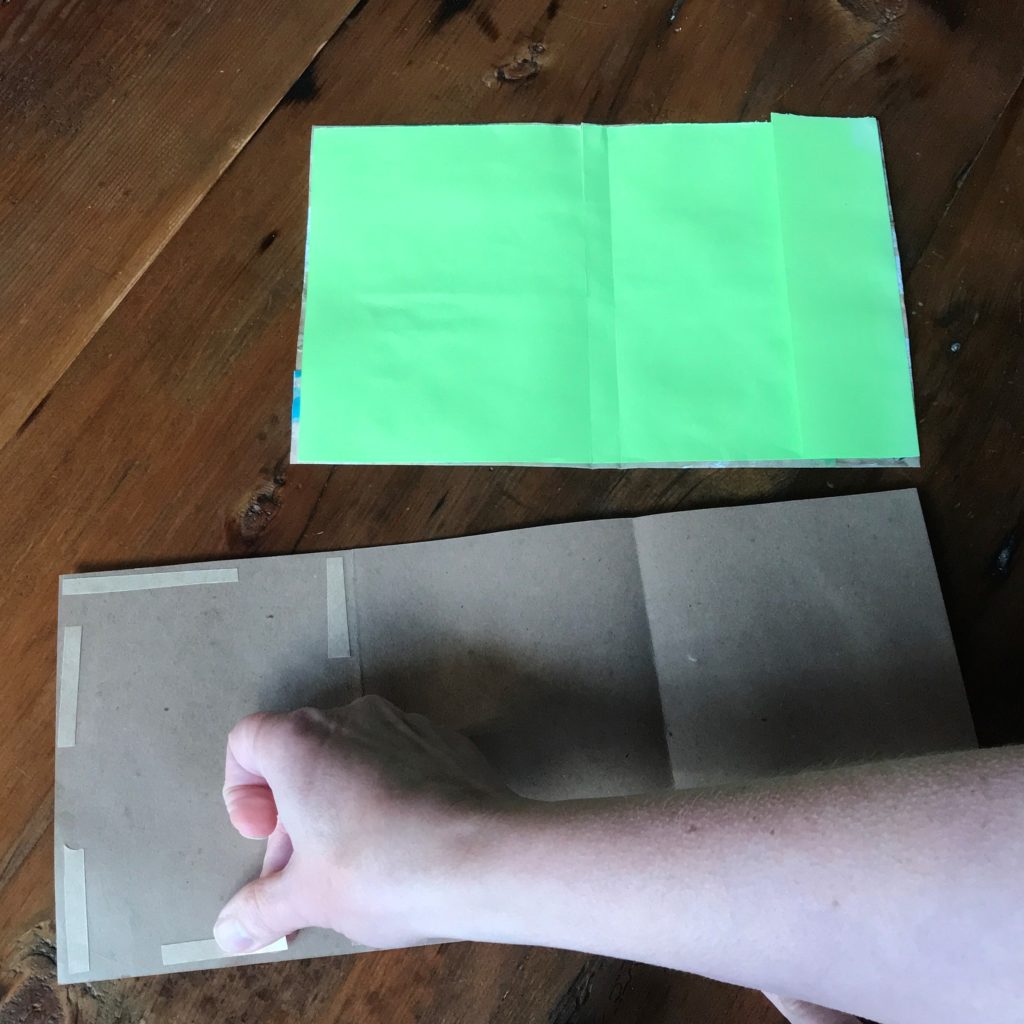
The next step is to fold and secure your battery holder. To get started, use scissors to cut out one of the cardstock copies to include in your accordion book and use the other as a visual reference.
New Design
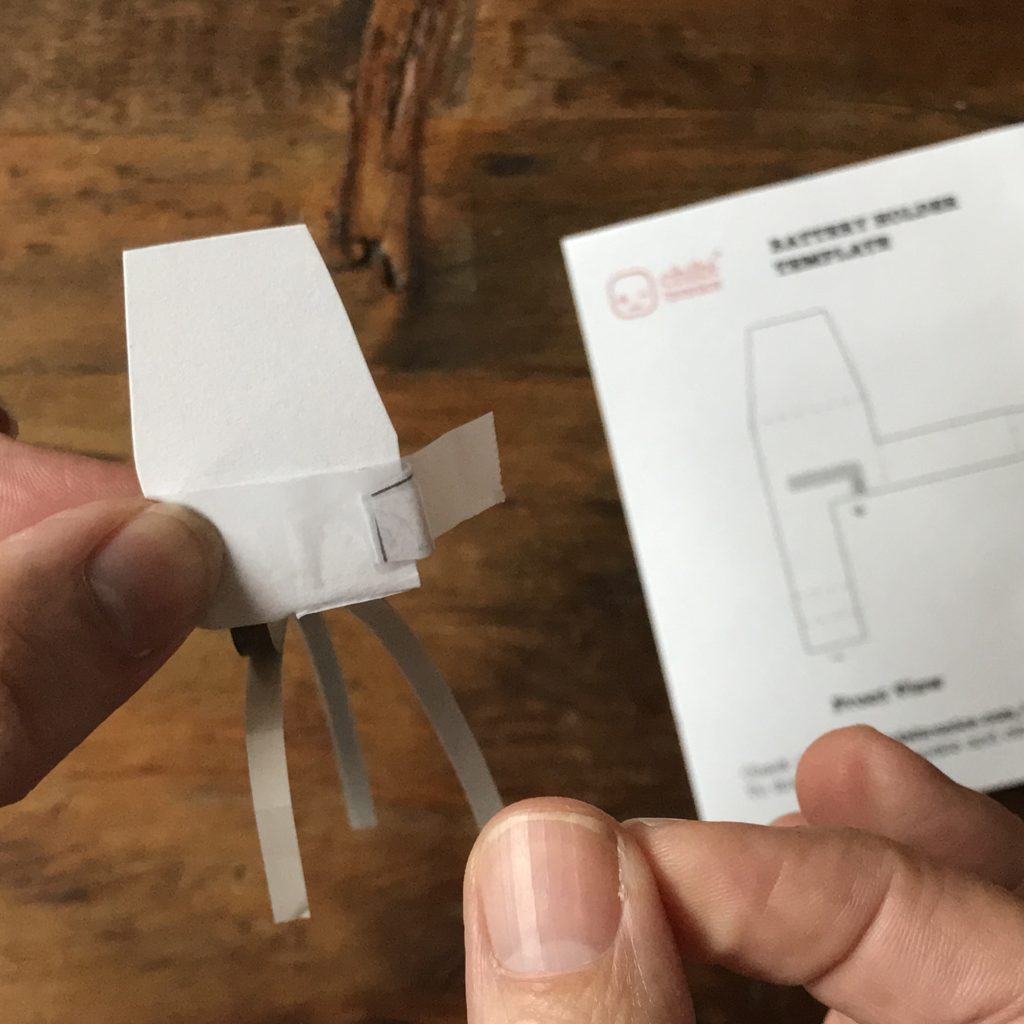
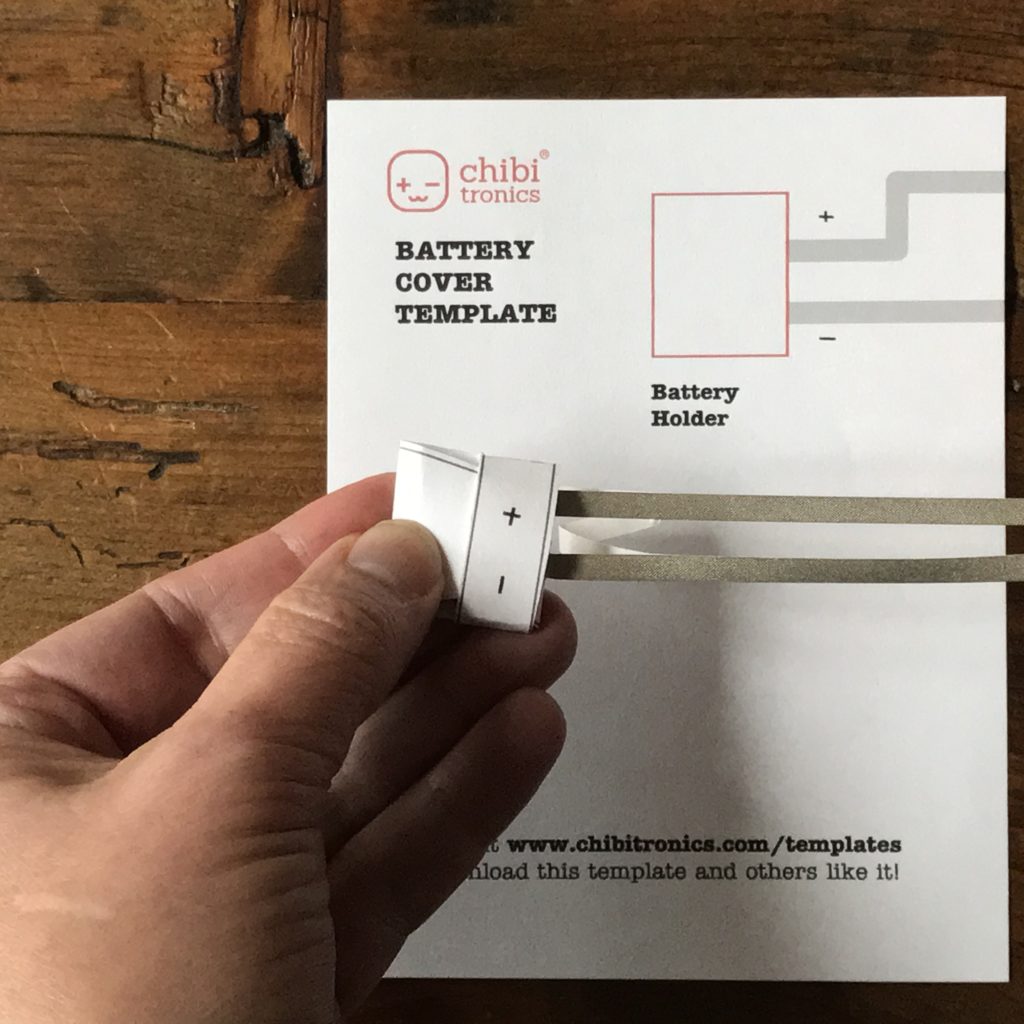
Please observe that the Battery Holder Template used in this project, with the positive (+) lead on the right, has been designed to match up with the positive and negative traces of the Battery Cover Template. This is important to note, because the Battery Holder Template used in this project has been modified from another design that you may have seen elsewhere on this site (such as this Paper Battery Holder Tutorial, using copper tape). In the original design, the negative (-) lead comes out on the right, which does not line up with the Battery Cover Template.
Double check to ensure that you are using the Battery Holder Template designed for this project, with the positive (+) trace on the right side.

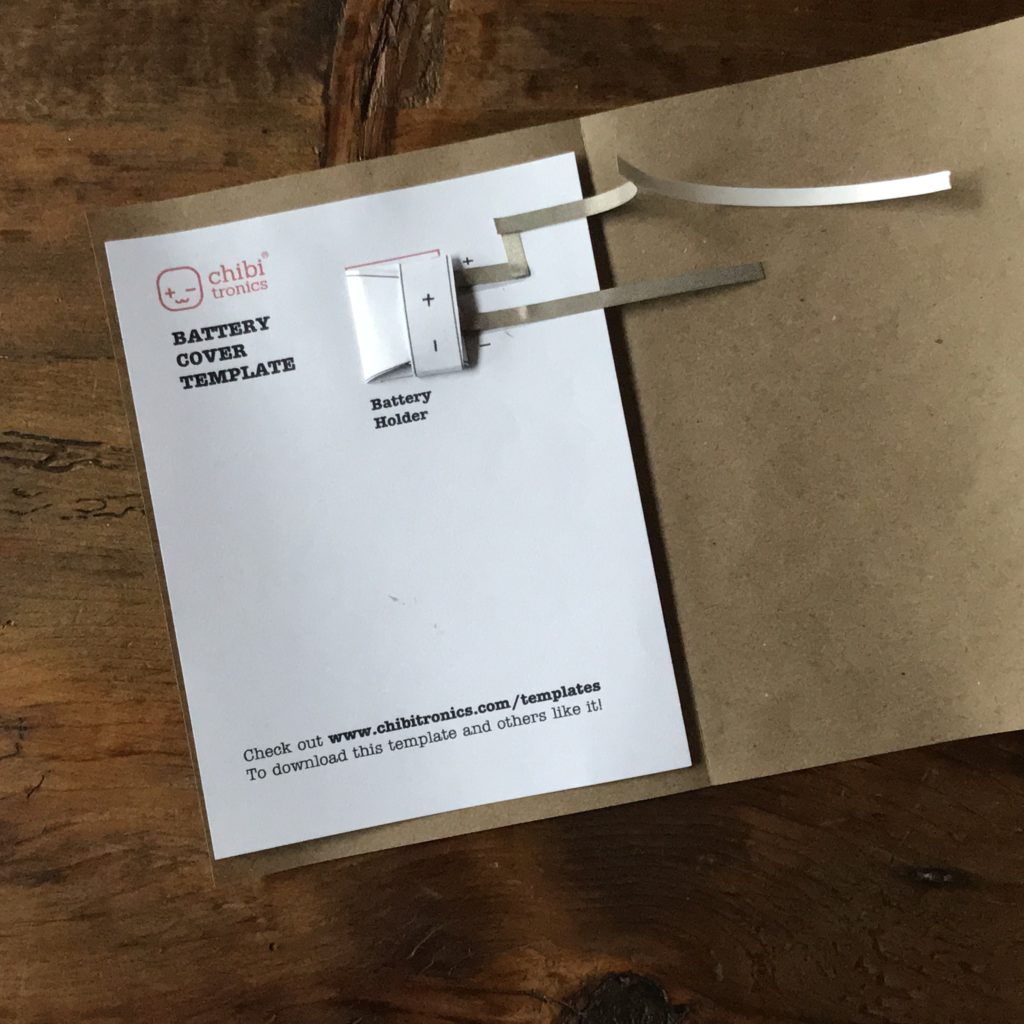
Putting It All Together
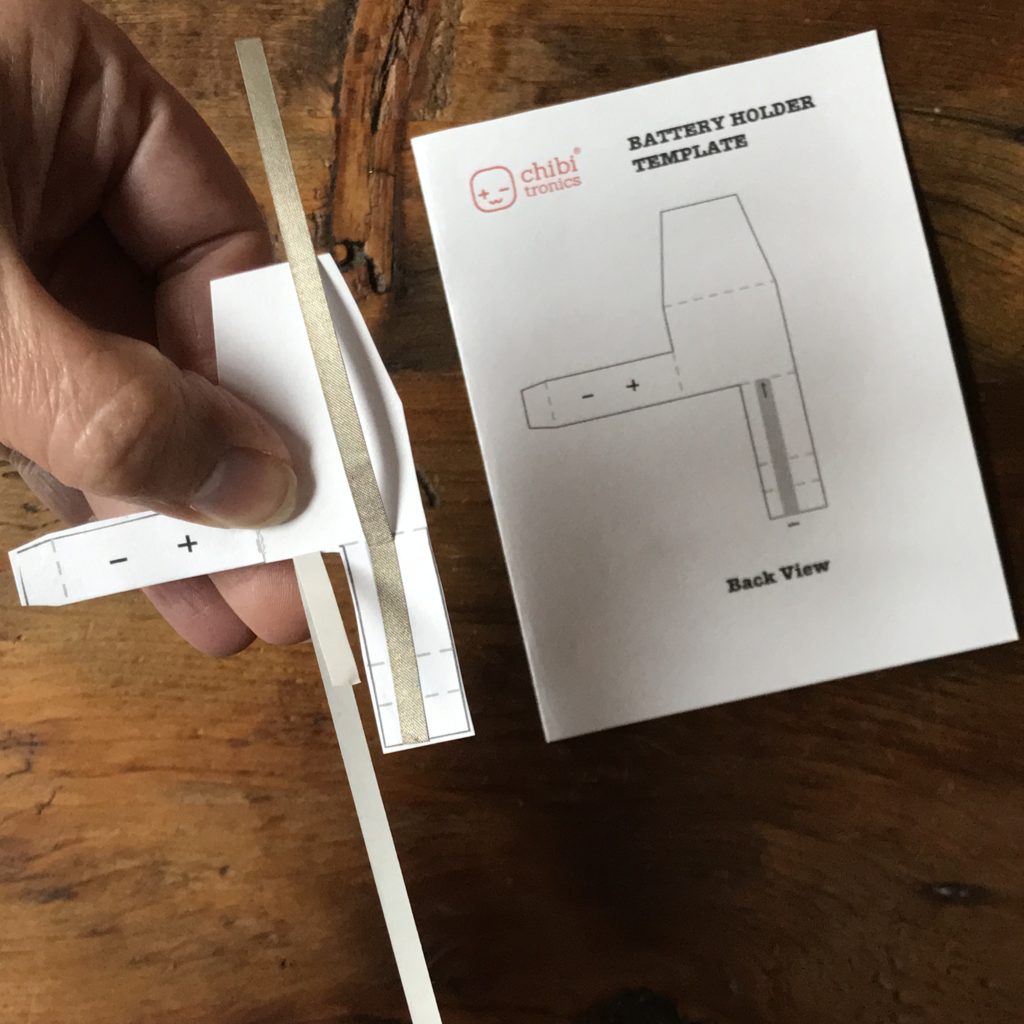
After you’ve cut the battery holder out, add Conductive Fabric Tape to the gray area on the front, letting any extra hang down.
Next, turn the holder over to the back side. Add another piece of tape, starting from the bottom edge, following the direction of the arrow, and stopping where the gray outline ends. Then, flip the holder upside down.

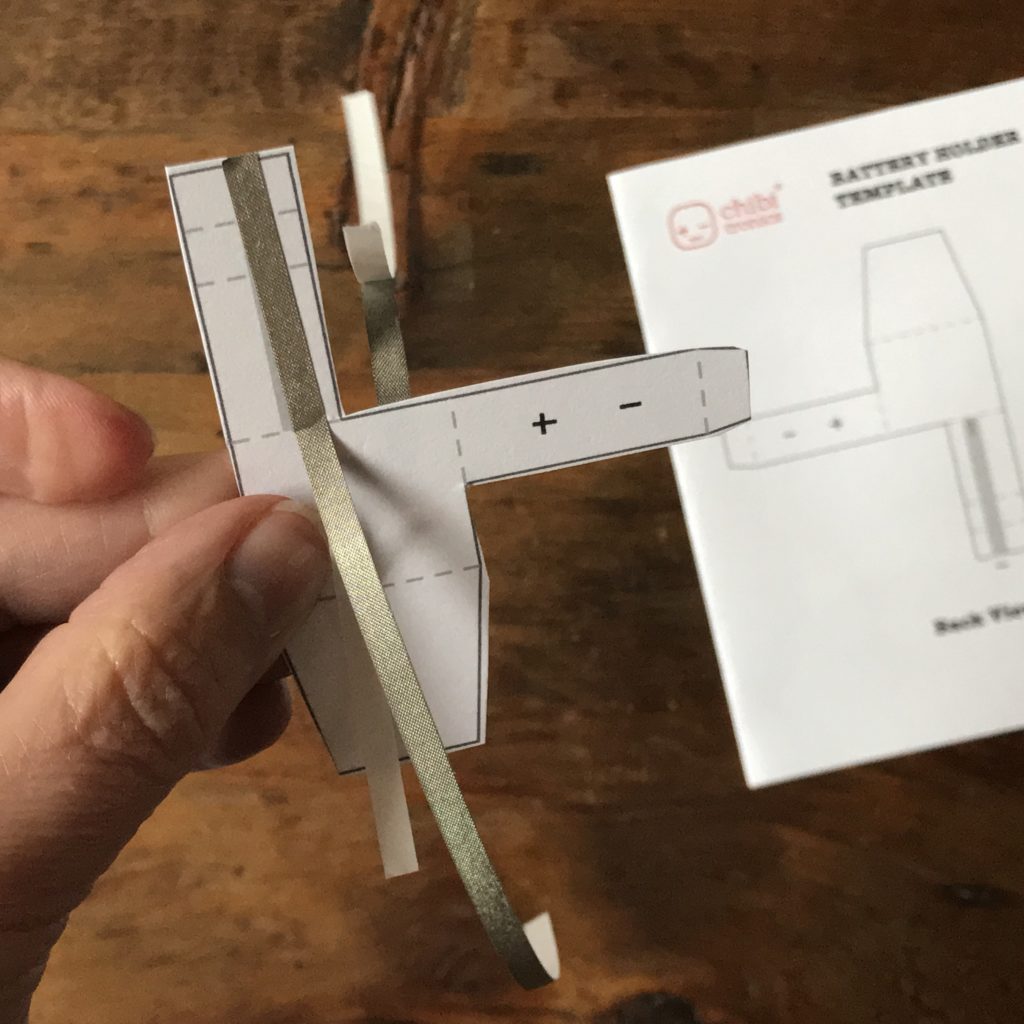
Keeping the holder in an upside down position, fold the leg of the holder along the dotted lines to create a tab that will come in contact with the battery. When you make the final fold, flip the holder upright and allow the conductive leads to hang down. Lastly, add the battery (negative side up).
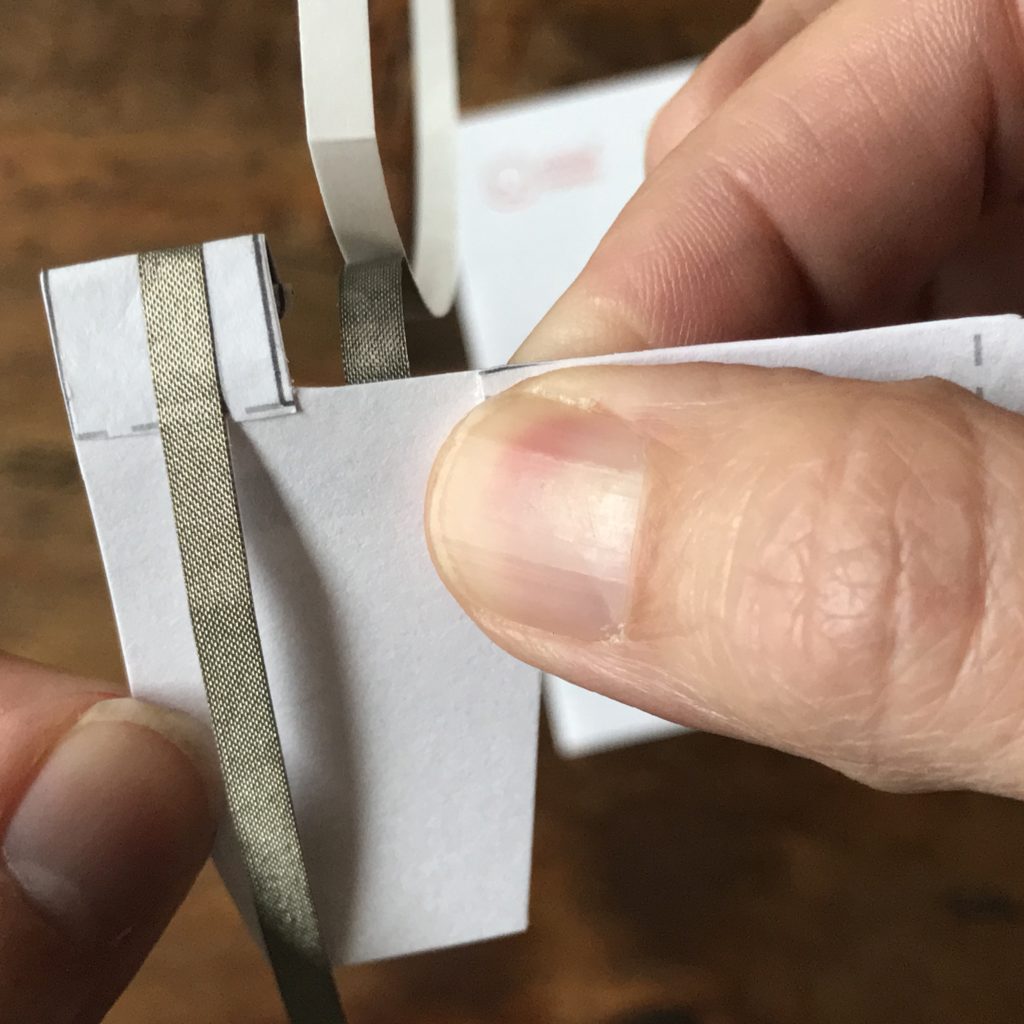
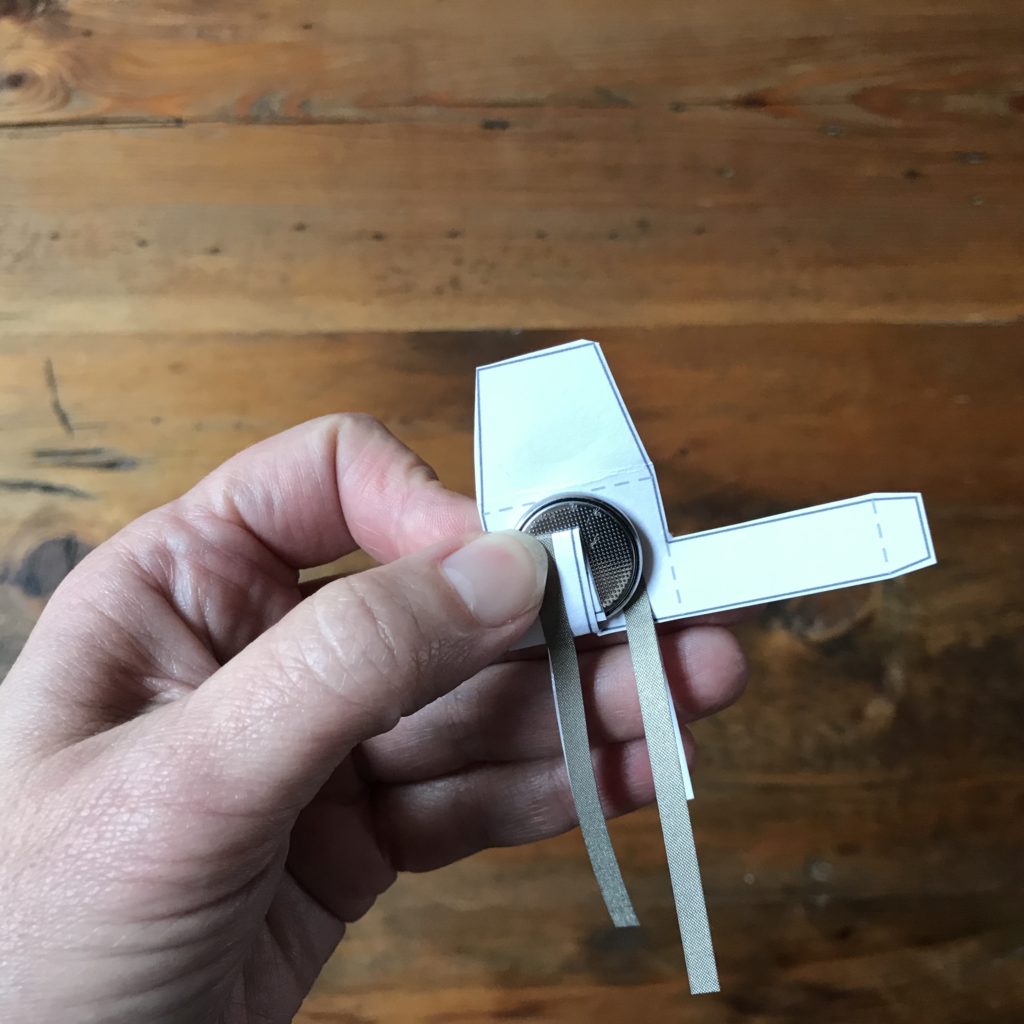
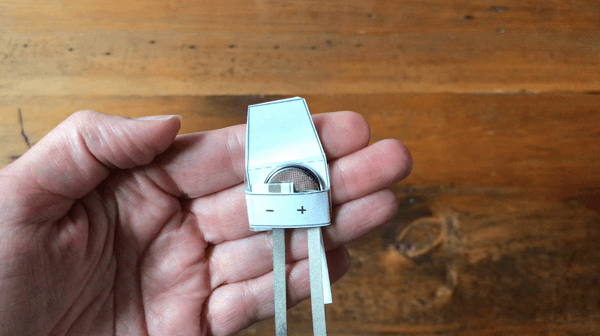
Leaving the battery in the holder, wrap the paper flap around to the back and secure it with tape. Verify that the battery is seated properly, between the back of the envelope and the little tab you folded. Tuck in the flap.
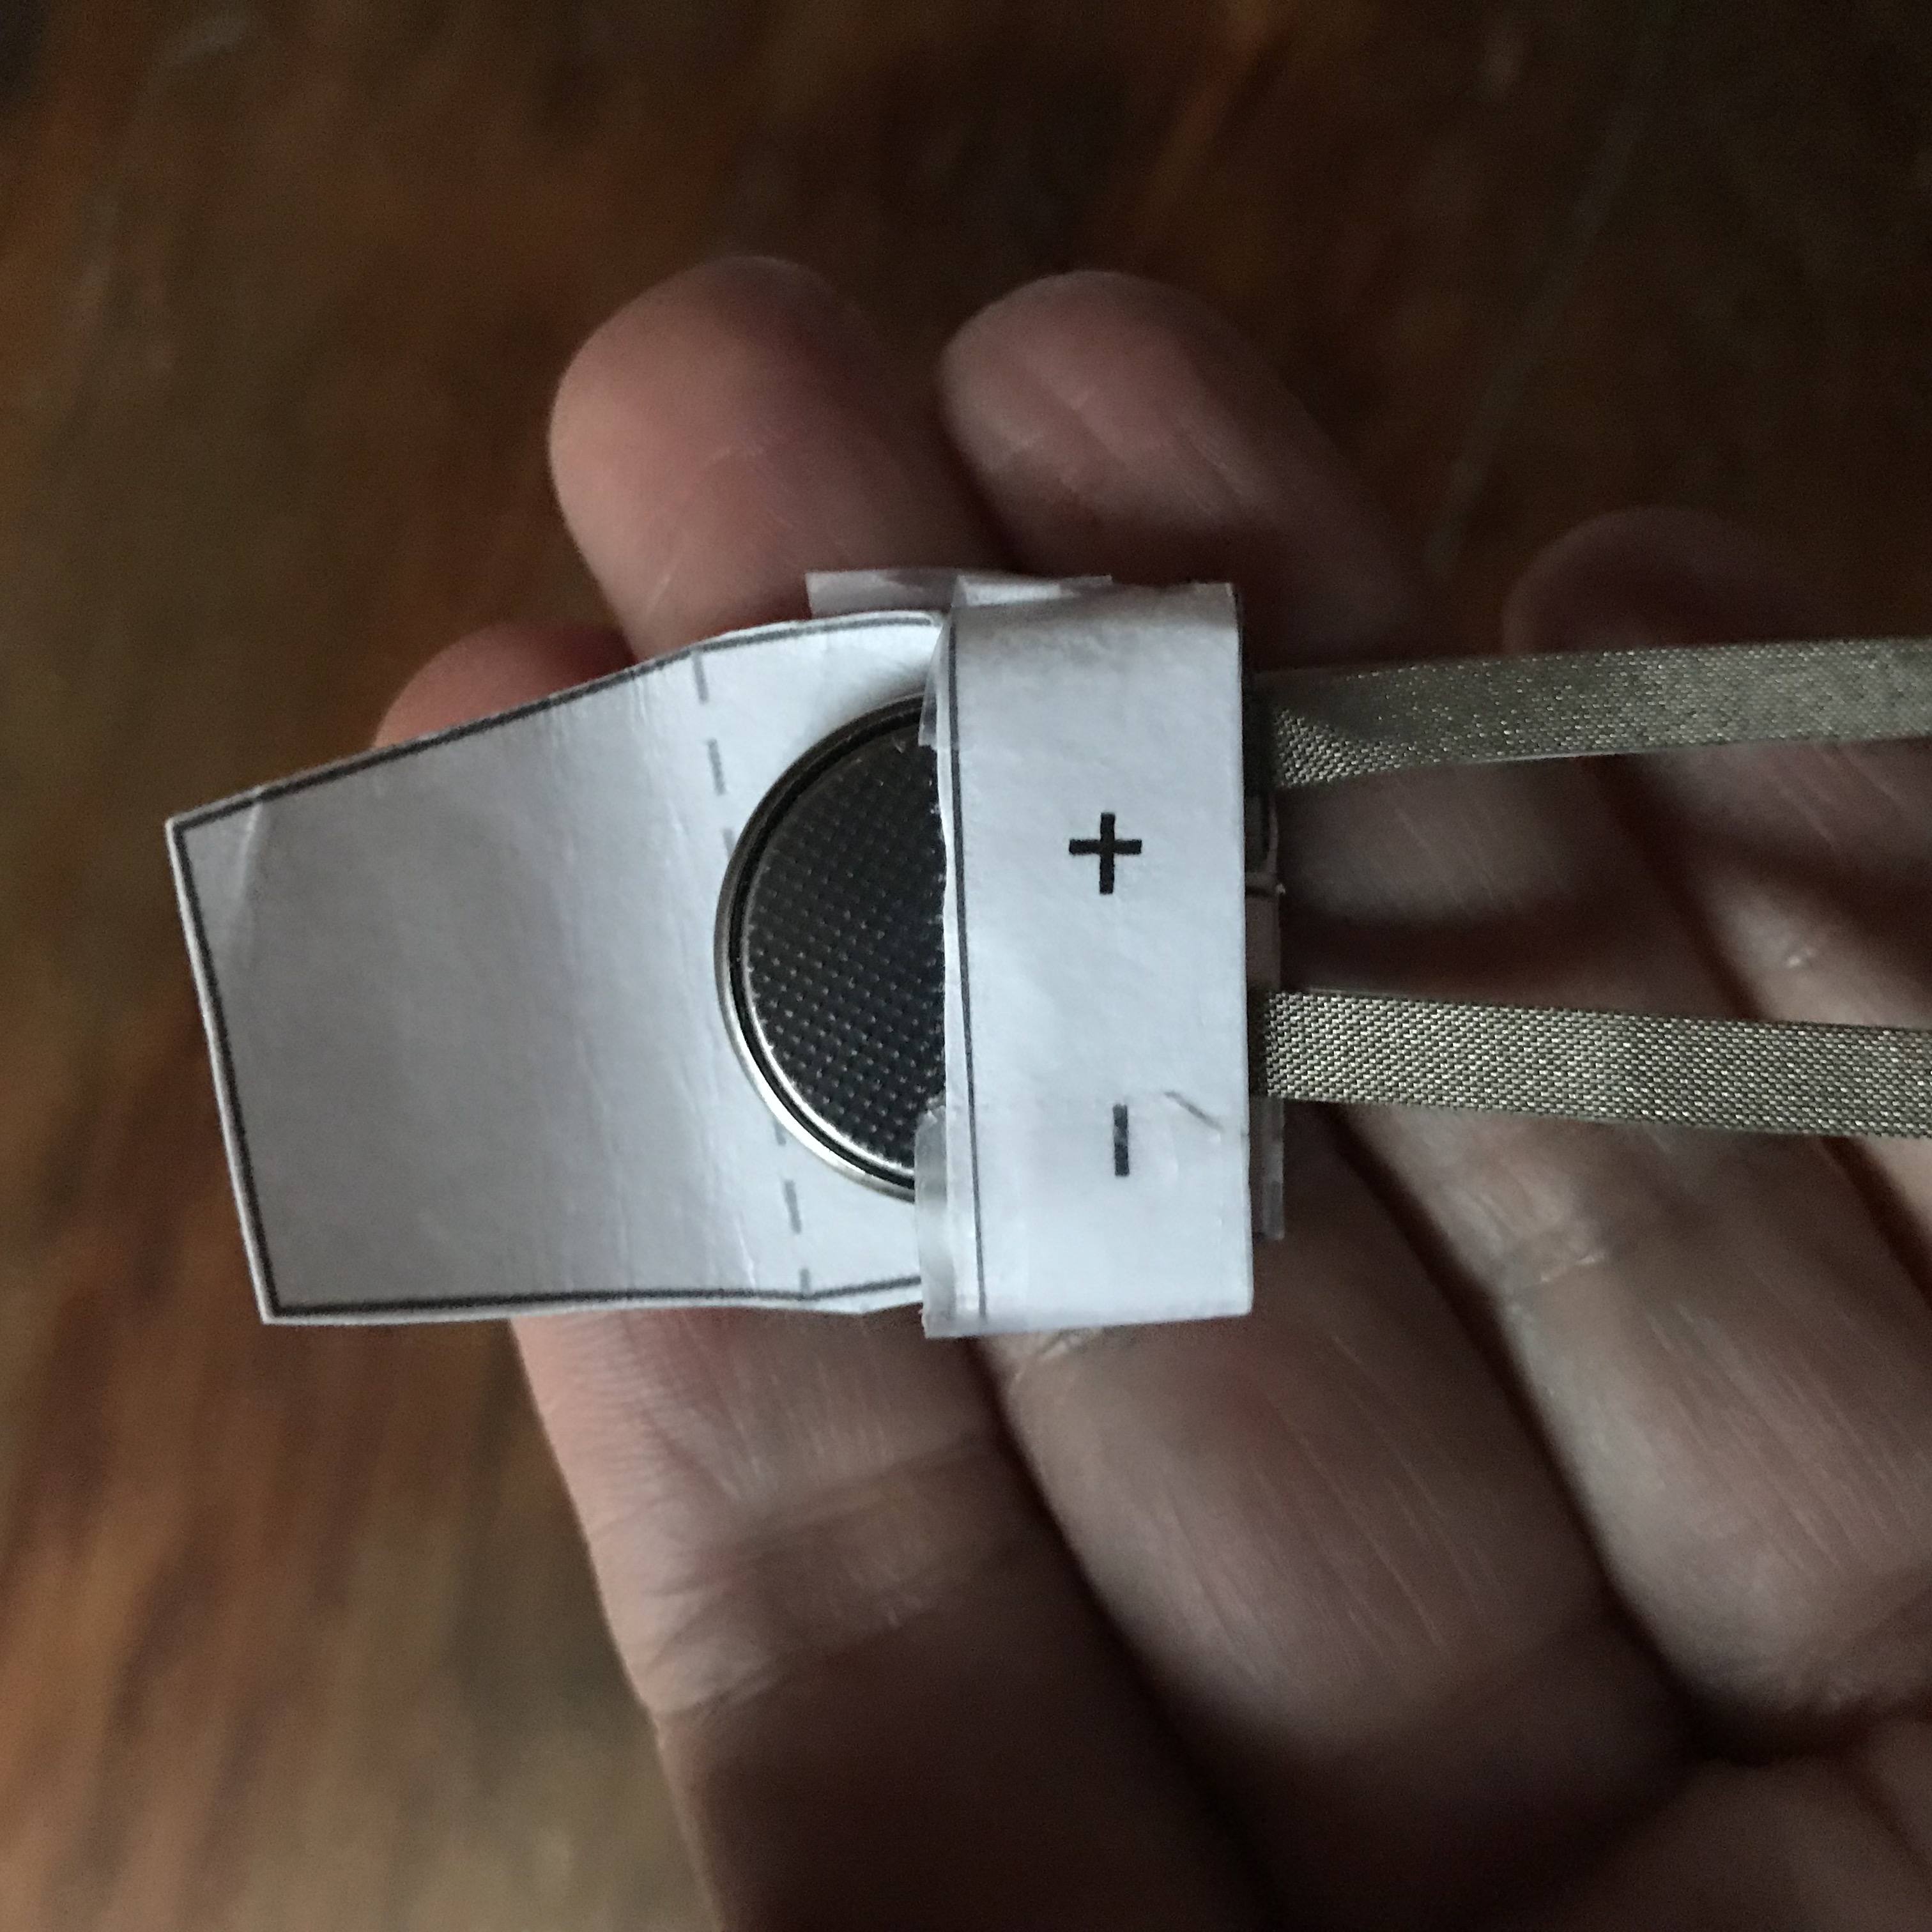
If you are soon planning to use the battery to power your circuit, tuck the flap around the outside of the conductive tab. If you are not ready to use the battery, tuck the flap between the battery and the conductive tab.
Tips, Tricks & Call-outs
When preparing to use your battery holder to power your circuit, be careful to avoid tucking the paper flap between the battery and the folded tab inside the holder. Otherwise, the battery will be insulated from the rest of the circuit and the LEDs will not turn on. While it may take a little practice, one of the benefits of using this type of battery holder is that you can switch the circuit off and on by simply repositioning the flap. Having the ability to switch the battery on or off with the flap is a great way to conserve the life of your battery!
Add Battery to Template
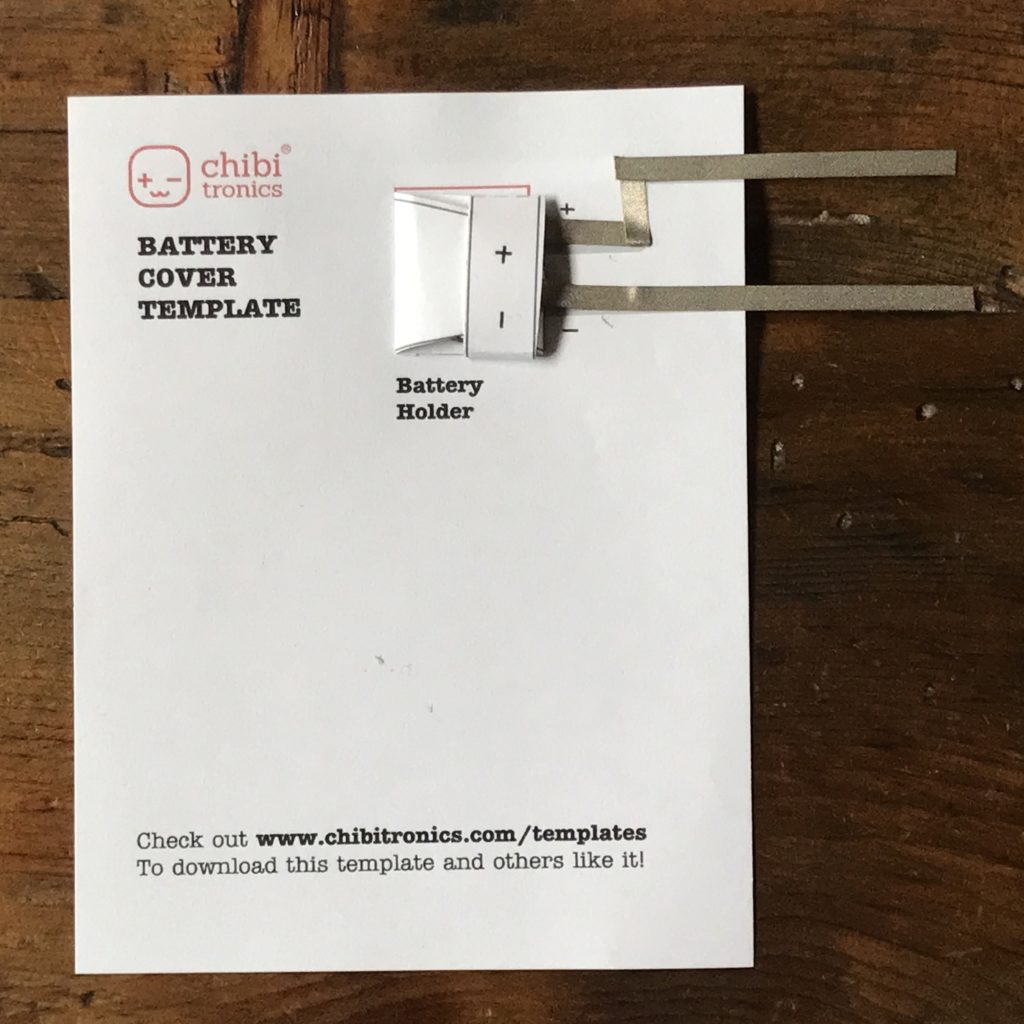
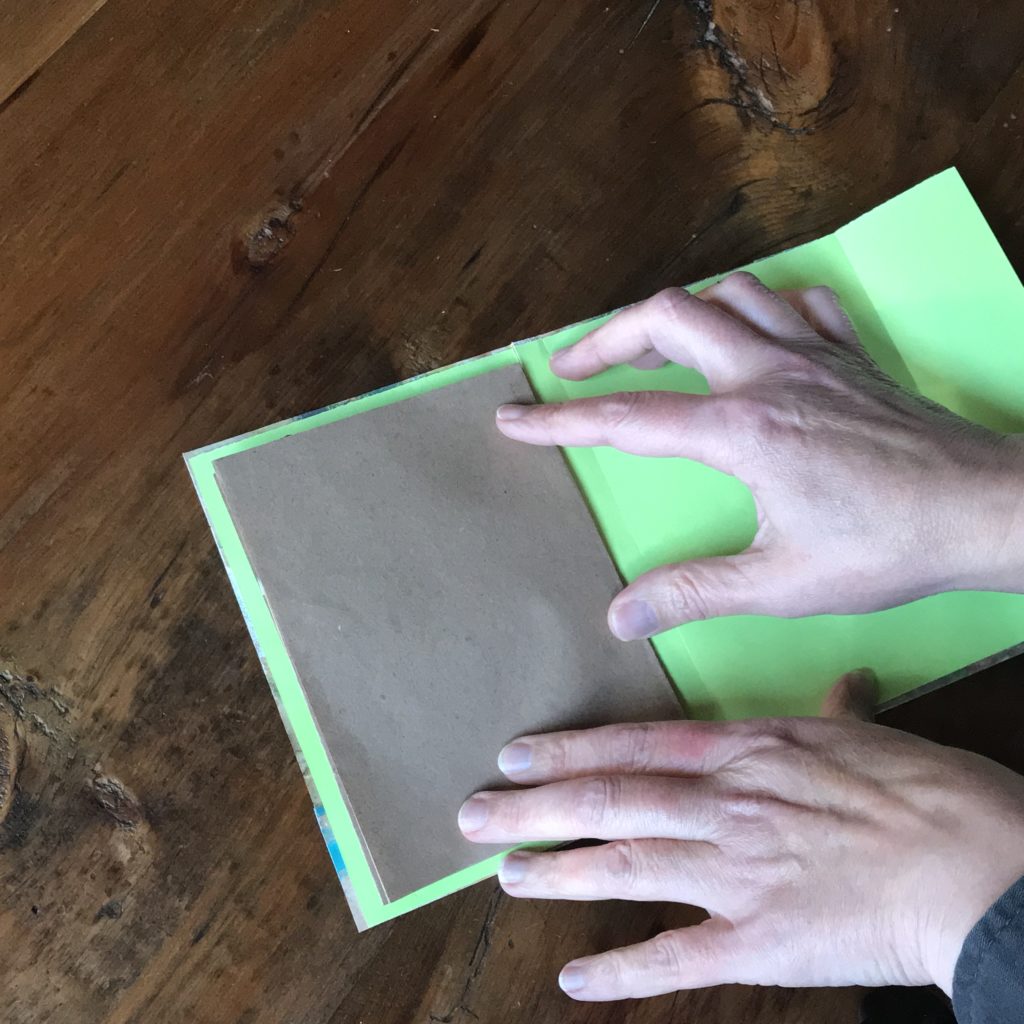
After you’ve made your battery holder, place it on the Battery Cover Template, securing the back of the little envelope with glue or tape so that it doesn’t flop around.
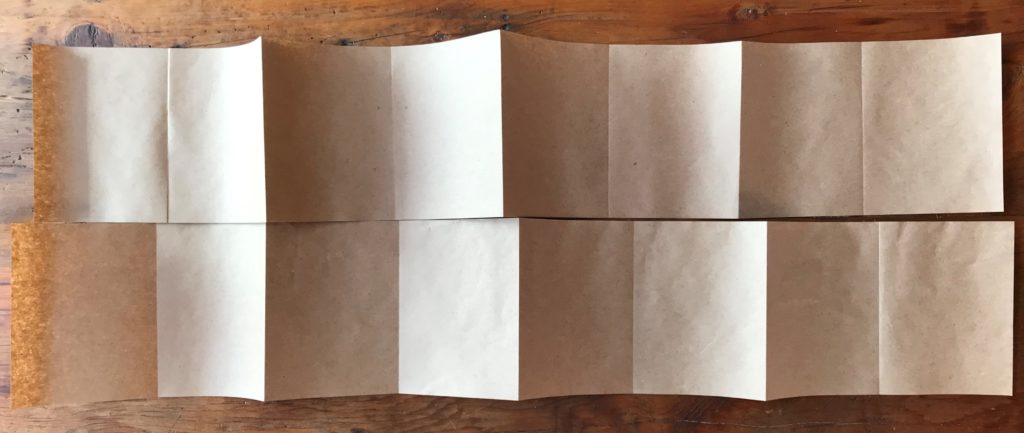
If you haven’t already done so, separate the folded accordion book pages and lay them on a flat surface. The top layer will hold the artwork and text, illuminated by the circuit layer below.
Adhere glue or a piece of double stick tape to the top back edge of the completed template, centering the template upon the first page of the circuit layer of your accordion book. Once adhered, there should be about ¼” of brown paper peeking out from under the top and bottom of the template. You’ll learn how to use this space to accommodate thin magnetic strips later in this tutorial.
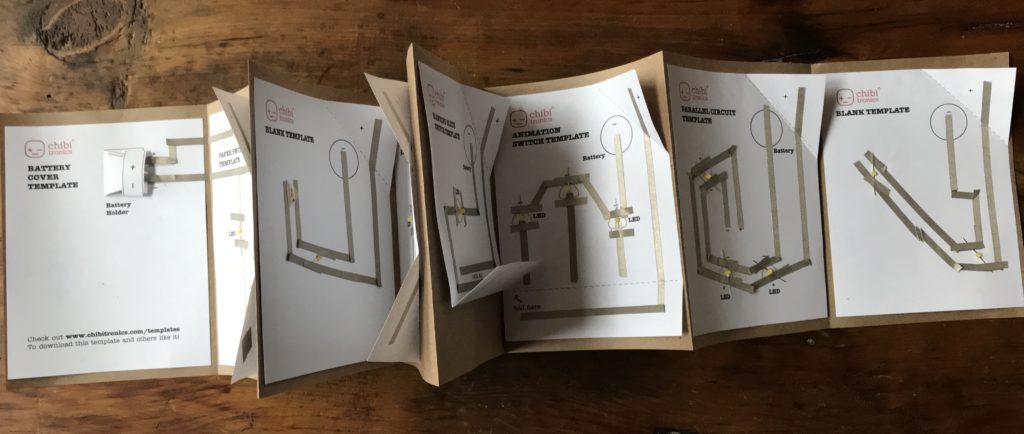
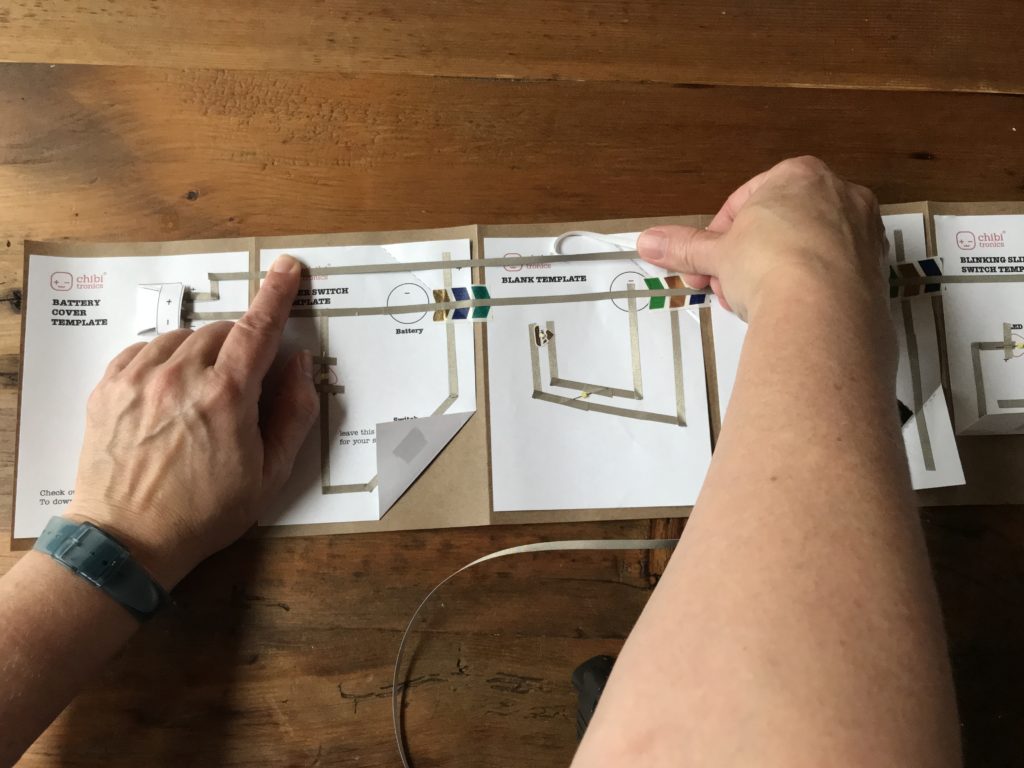
Step 4: Add Templates to Circuit Layer
Now that you’ve adhered the Battery Cover Template, the next step is adding the rest of your completed templates to the circuit layer page of your accordion book.
The order in which you place the remaining templates does not matter, in terms of how the circuit will function, although you may wish to alternate between switched templates and those without switches.
Tips, Tricks, and Call-Outs: While the circuit would still work electrically if the battery was placed on the last page, rather than the first, a benefit of placing it at the start of your book is that you may easily add more pages to the end of your accordion should you wish to.
When adding the next template, line up its top and bottom edges with the Battery Cover Template you’ve already tacked down.
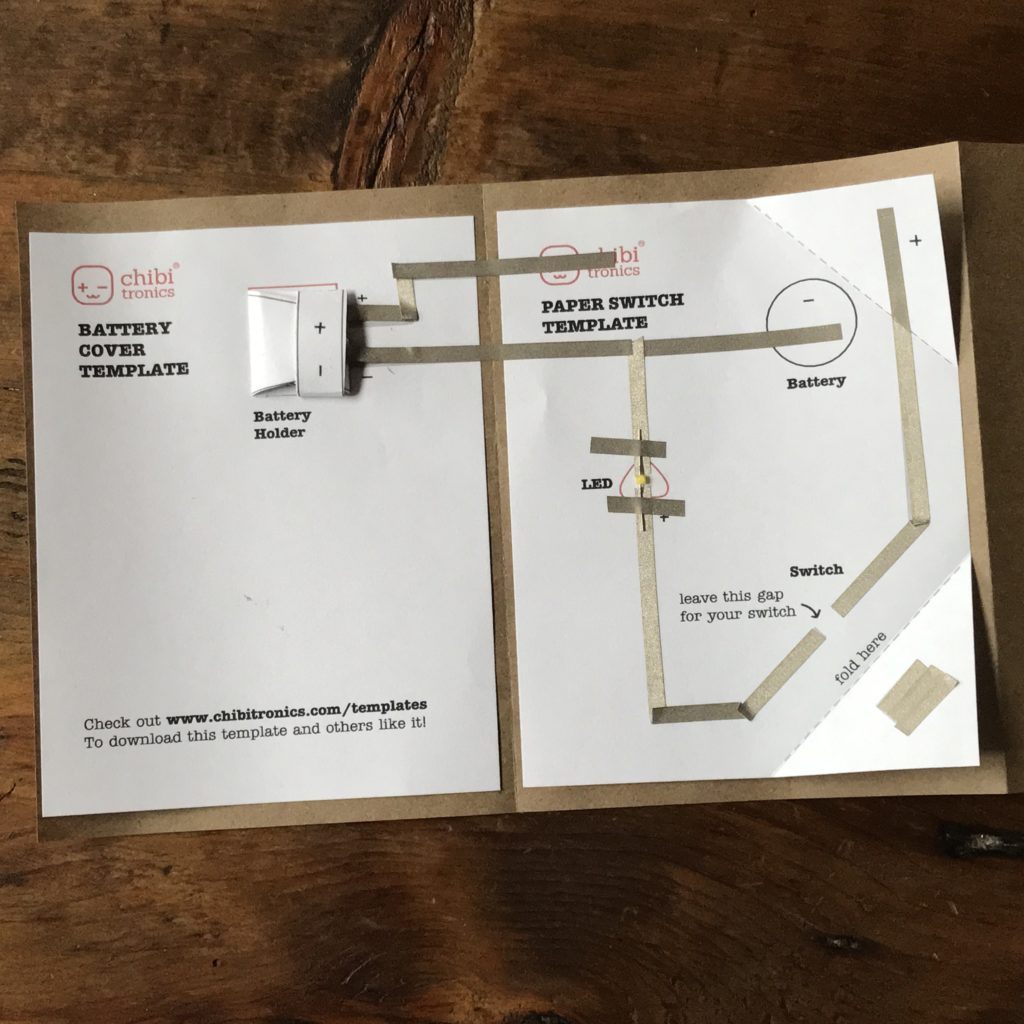
Carefully line up and add the next template, repeating this process until they are all placed. Adjust any templates that appear crooked.
Lastly, ensure that all of the templates are lined up neatly in the order that you want them.
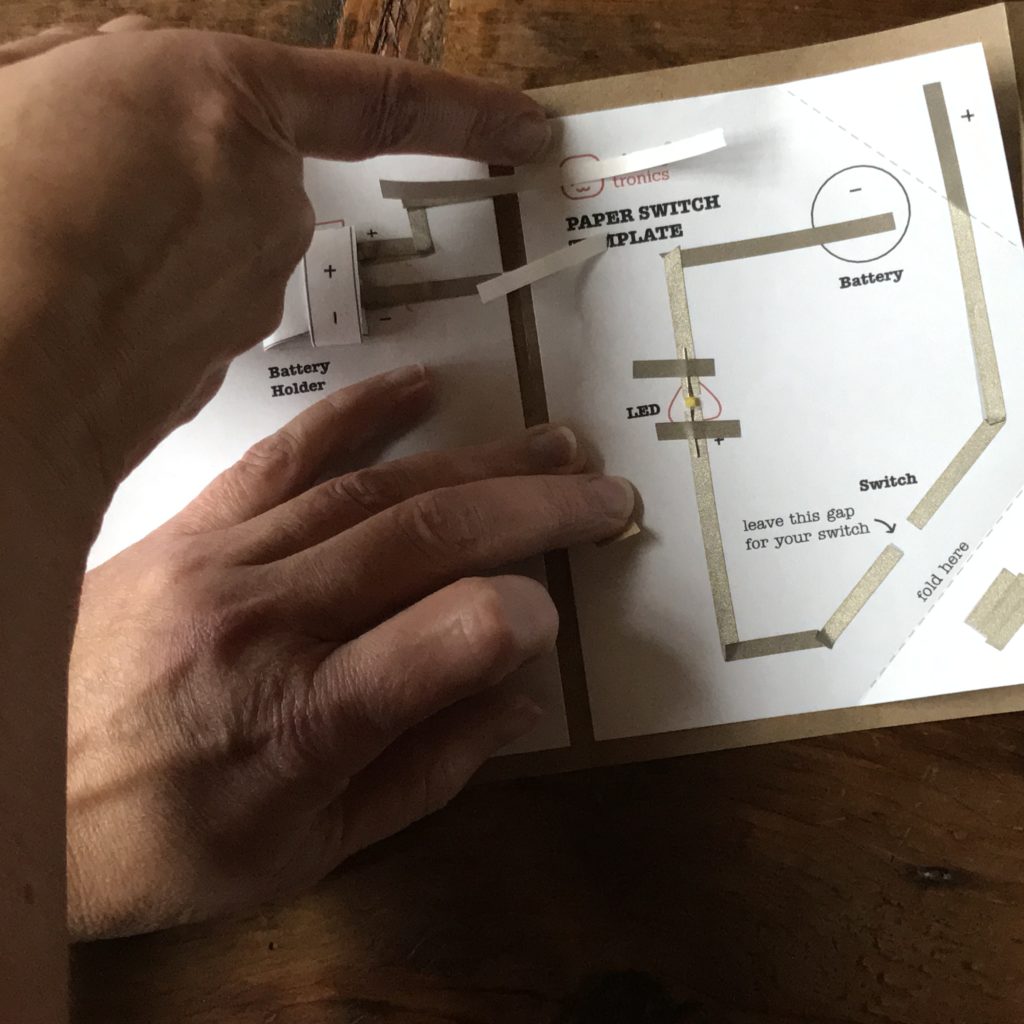
Step 5: Create Insulating Bridges
Before you can connect all of your templates together, you need to create some insulating bridges for the negative ground rail to cross over. Creating bridges to cover up the positive leads of the circuit will help you prevent a short circuit. To do so, simply cover the positive traces near each battery outline with a piece of washi or Scotch tape.
Step 6: Connect the Templates Together
The last step in constructing your circuit layer is to connect all of the templates together! In the process, you will be creating a very long parallel circuit!
Use Conductive Fabric Tape to connect the negative lead of the battery holder, crossing the bridges you constructed and connecting to each template by crossing over the positive battery outlines.
Repeat this process for the positive lead of the battery holder, by taping straight across the entire length of the circuit. As you work, press the tape down, ensuring that it is fully adhered to the paper and conductive tape that it is crossing over.
Avoiding Wonky Connections
Because you are adding Conductive Fabric Tape on top of itself, as you connect all of the templates together, it’s important to check your joints. If two pieces of conductive tape merely touch, rather than overlapping, you will end up with a wonky circuit. As a result your circuit might not turn on, or it might only turn on intermittently. To solve this problem, press down or add patches of conductive tape to areas with weak connections.
Step 7: Test Your Circuit
Finally, it’s time to verify that the LEDs in each of the connected templates are working. Place the battery in the holder, ensuring that the flap is not insulating the battery. When you press down the switches, do the LEDs light up? If not, check to see that each LED is well-taped, bridges are in place, and taped connections are overlapped and secure.
Step 8: Add Magnets
I found that adding some thin magnetic strips along the top edge of my circuit page was a good way to keep the art layer in place on top of the circuit layer.
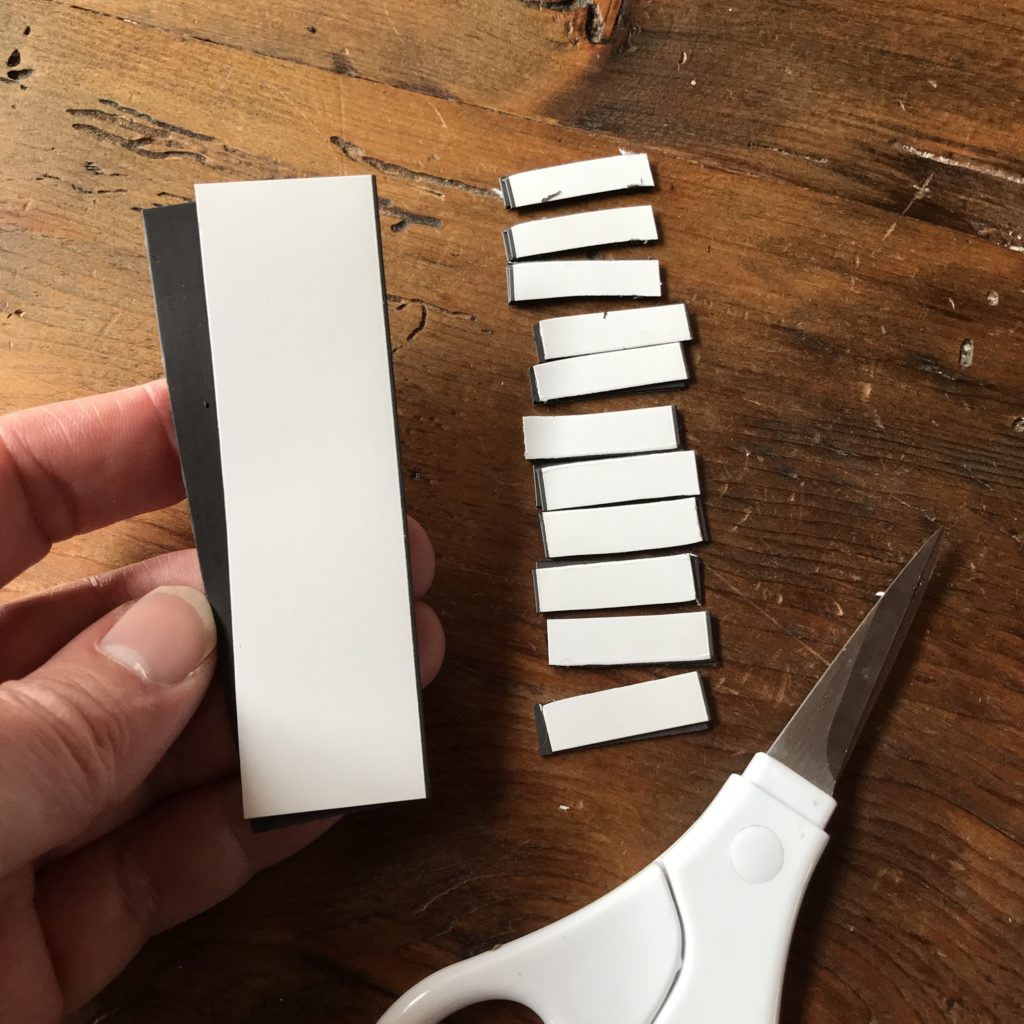
First, hold the magnet from a short end.
Next, cut it into halves; press the pieces together with the black sides facing inward.
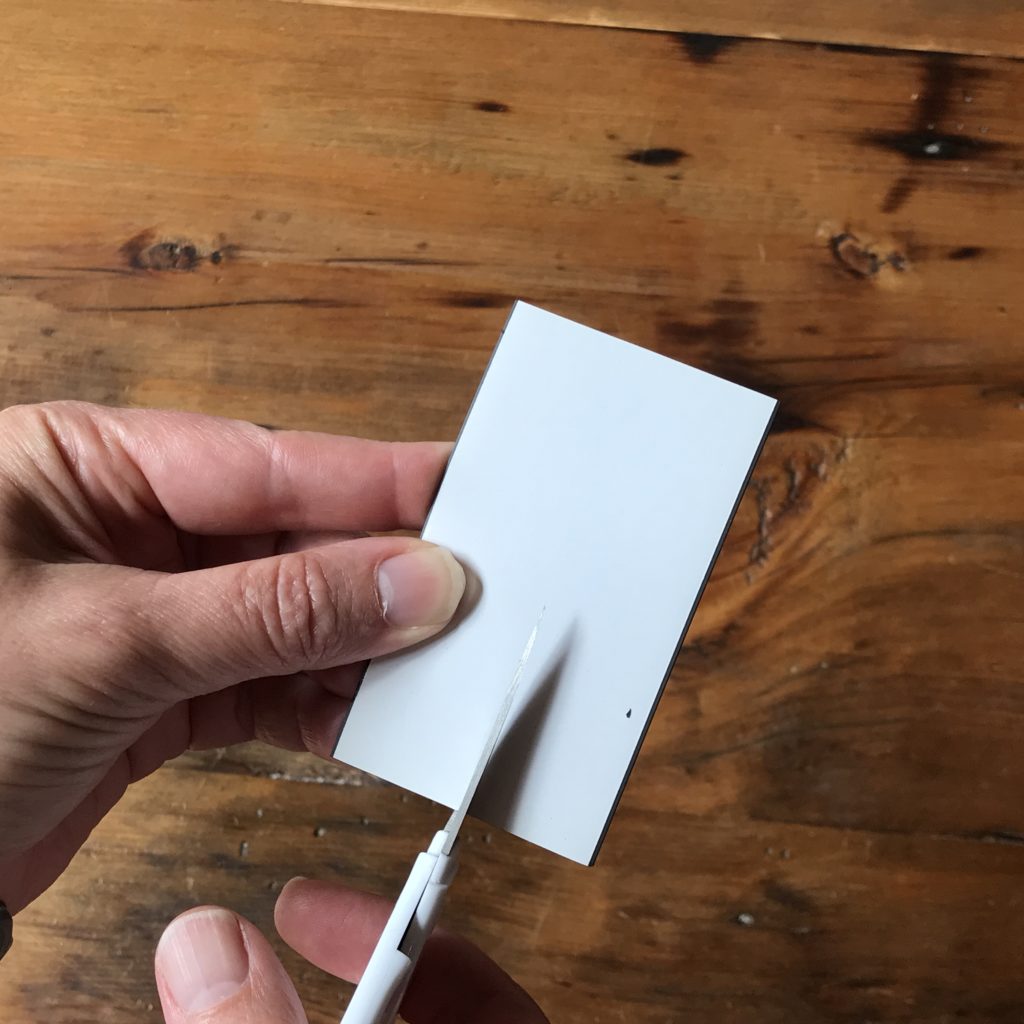
Then, cut several 1/4″ tall magnetic strip pairs from the joined halves.

Adhere the magnets along the top edge of the circuit layer page.
I usually add one per page, with two on the front and back covers.
Align the art layer page with the circuit layer page, pressing down upon the magnets as you go.
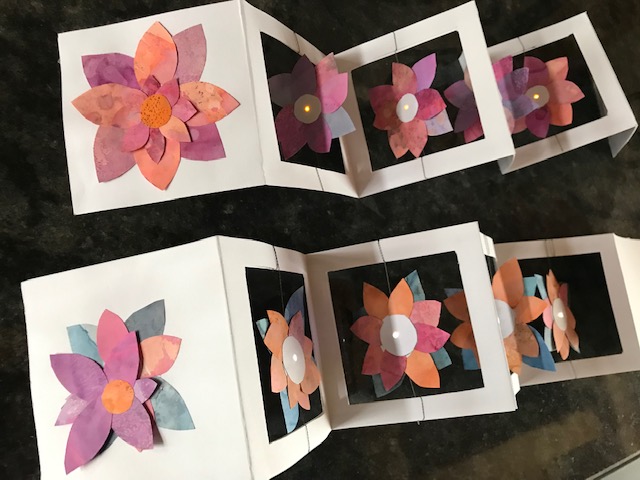
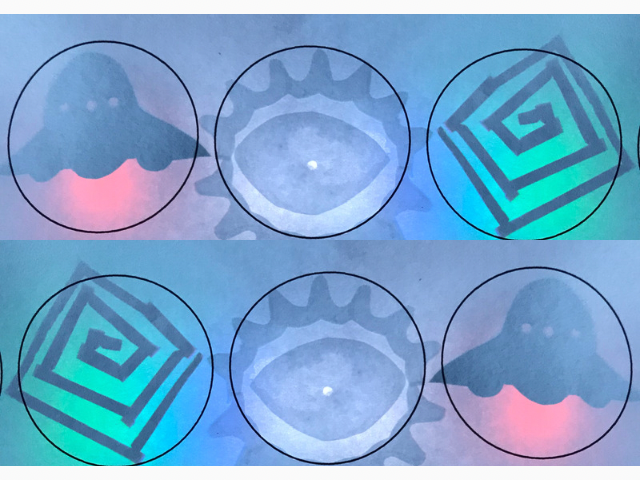
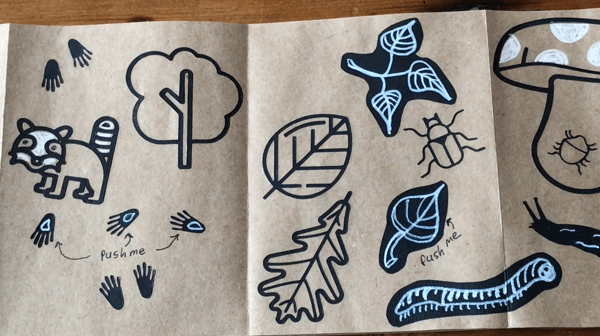
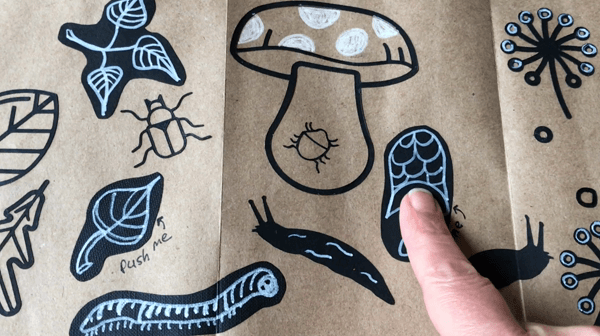
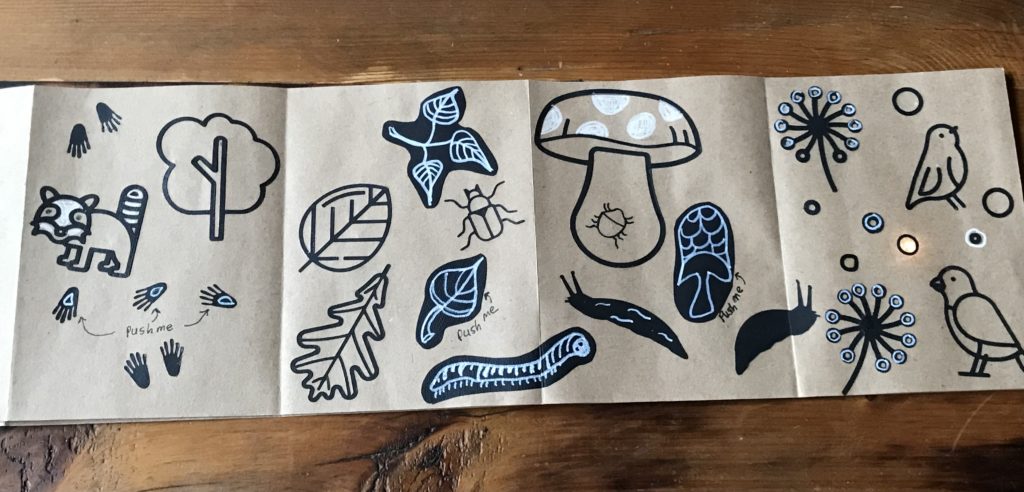
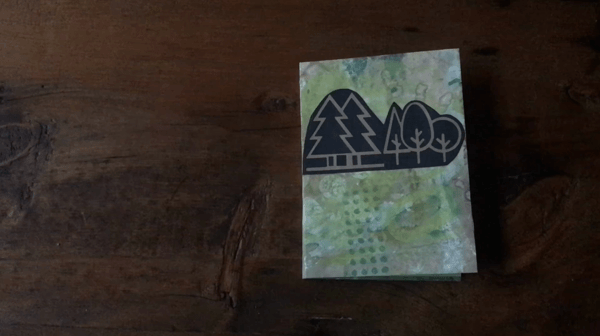
Step 9: Personalize Your Book
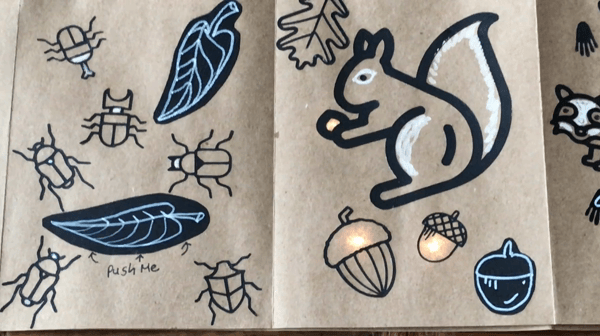
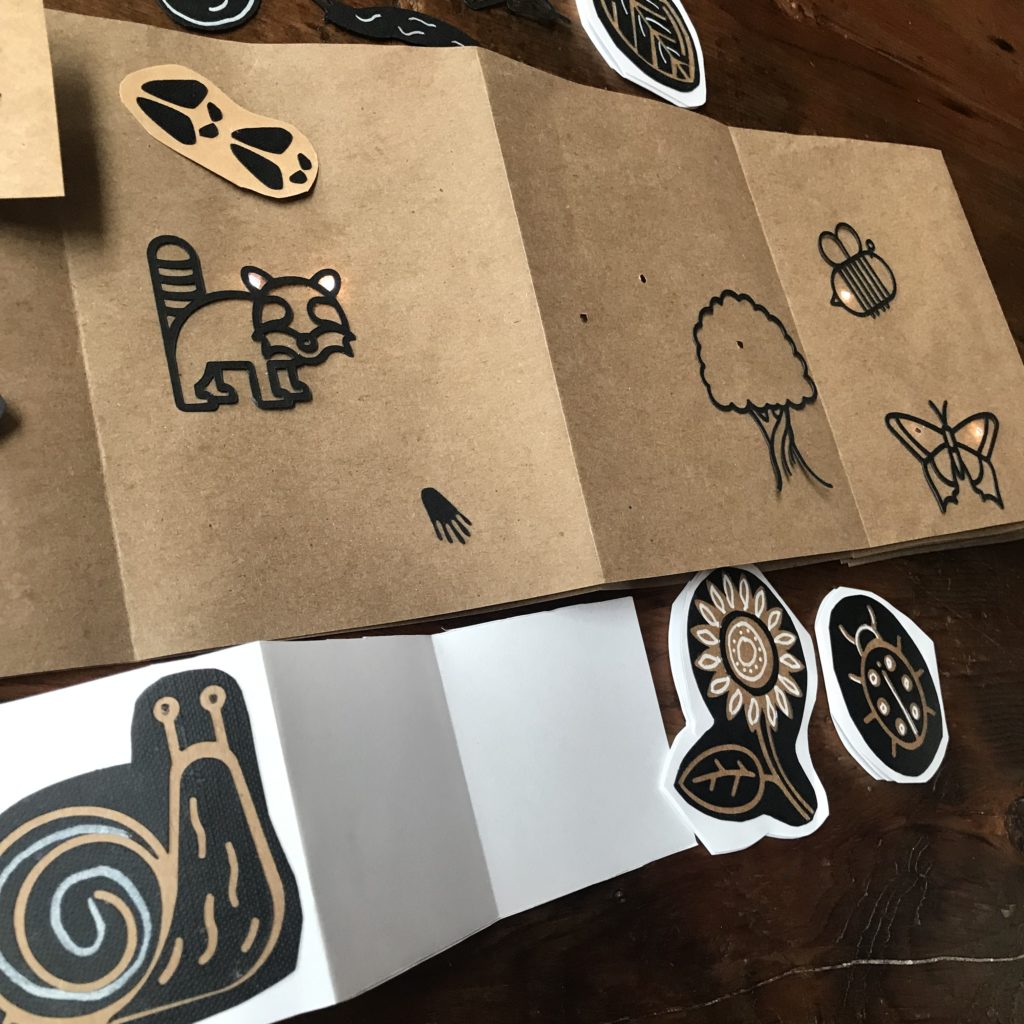
Now that you have a functioning circuit, you can add artwork and text. I used a combination of hand-drawn designs, made with a white paint pen on black paper, and paper outlines that I cut out using a Cricut machine.
While brainstorming, I found it helpful to position the pages so that the art layer and the circuit layer were stretched out parallel to one another.
If you are working on a small surface, it might be easier to keep most of the pages folded, focusing upon one or two at a time.
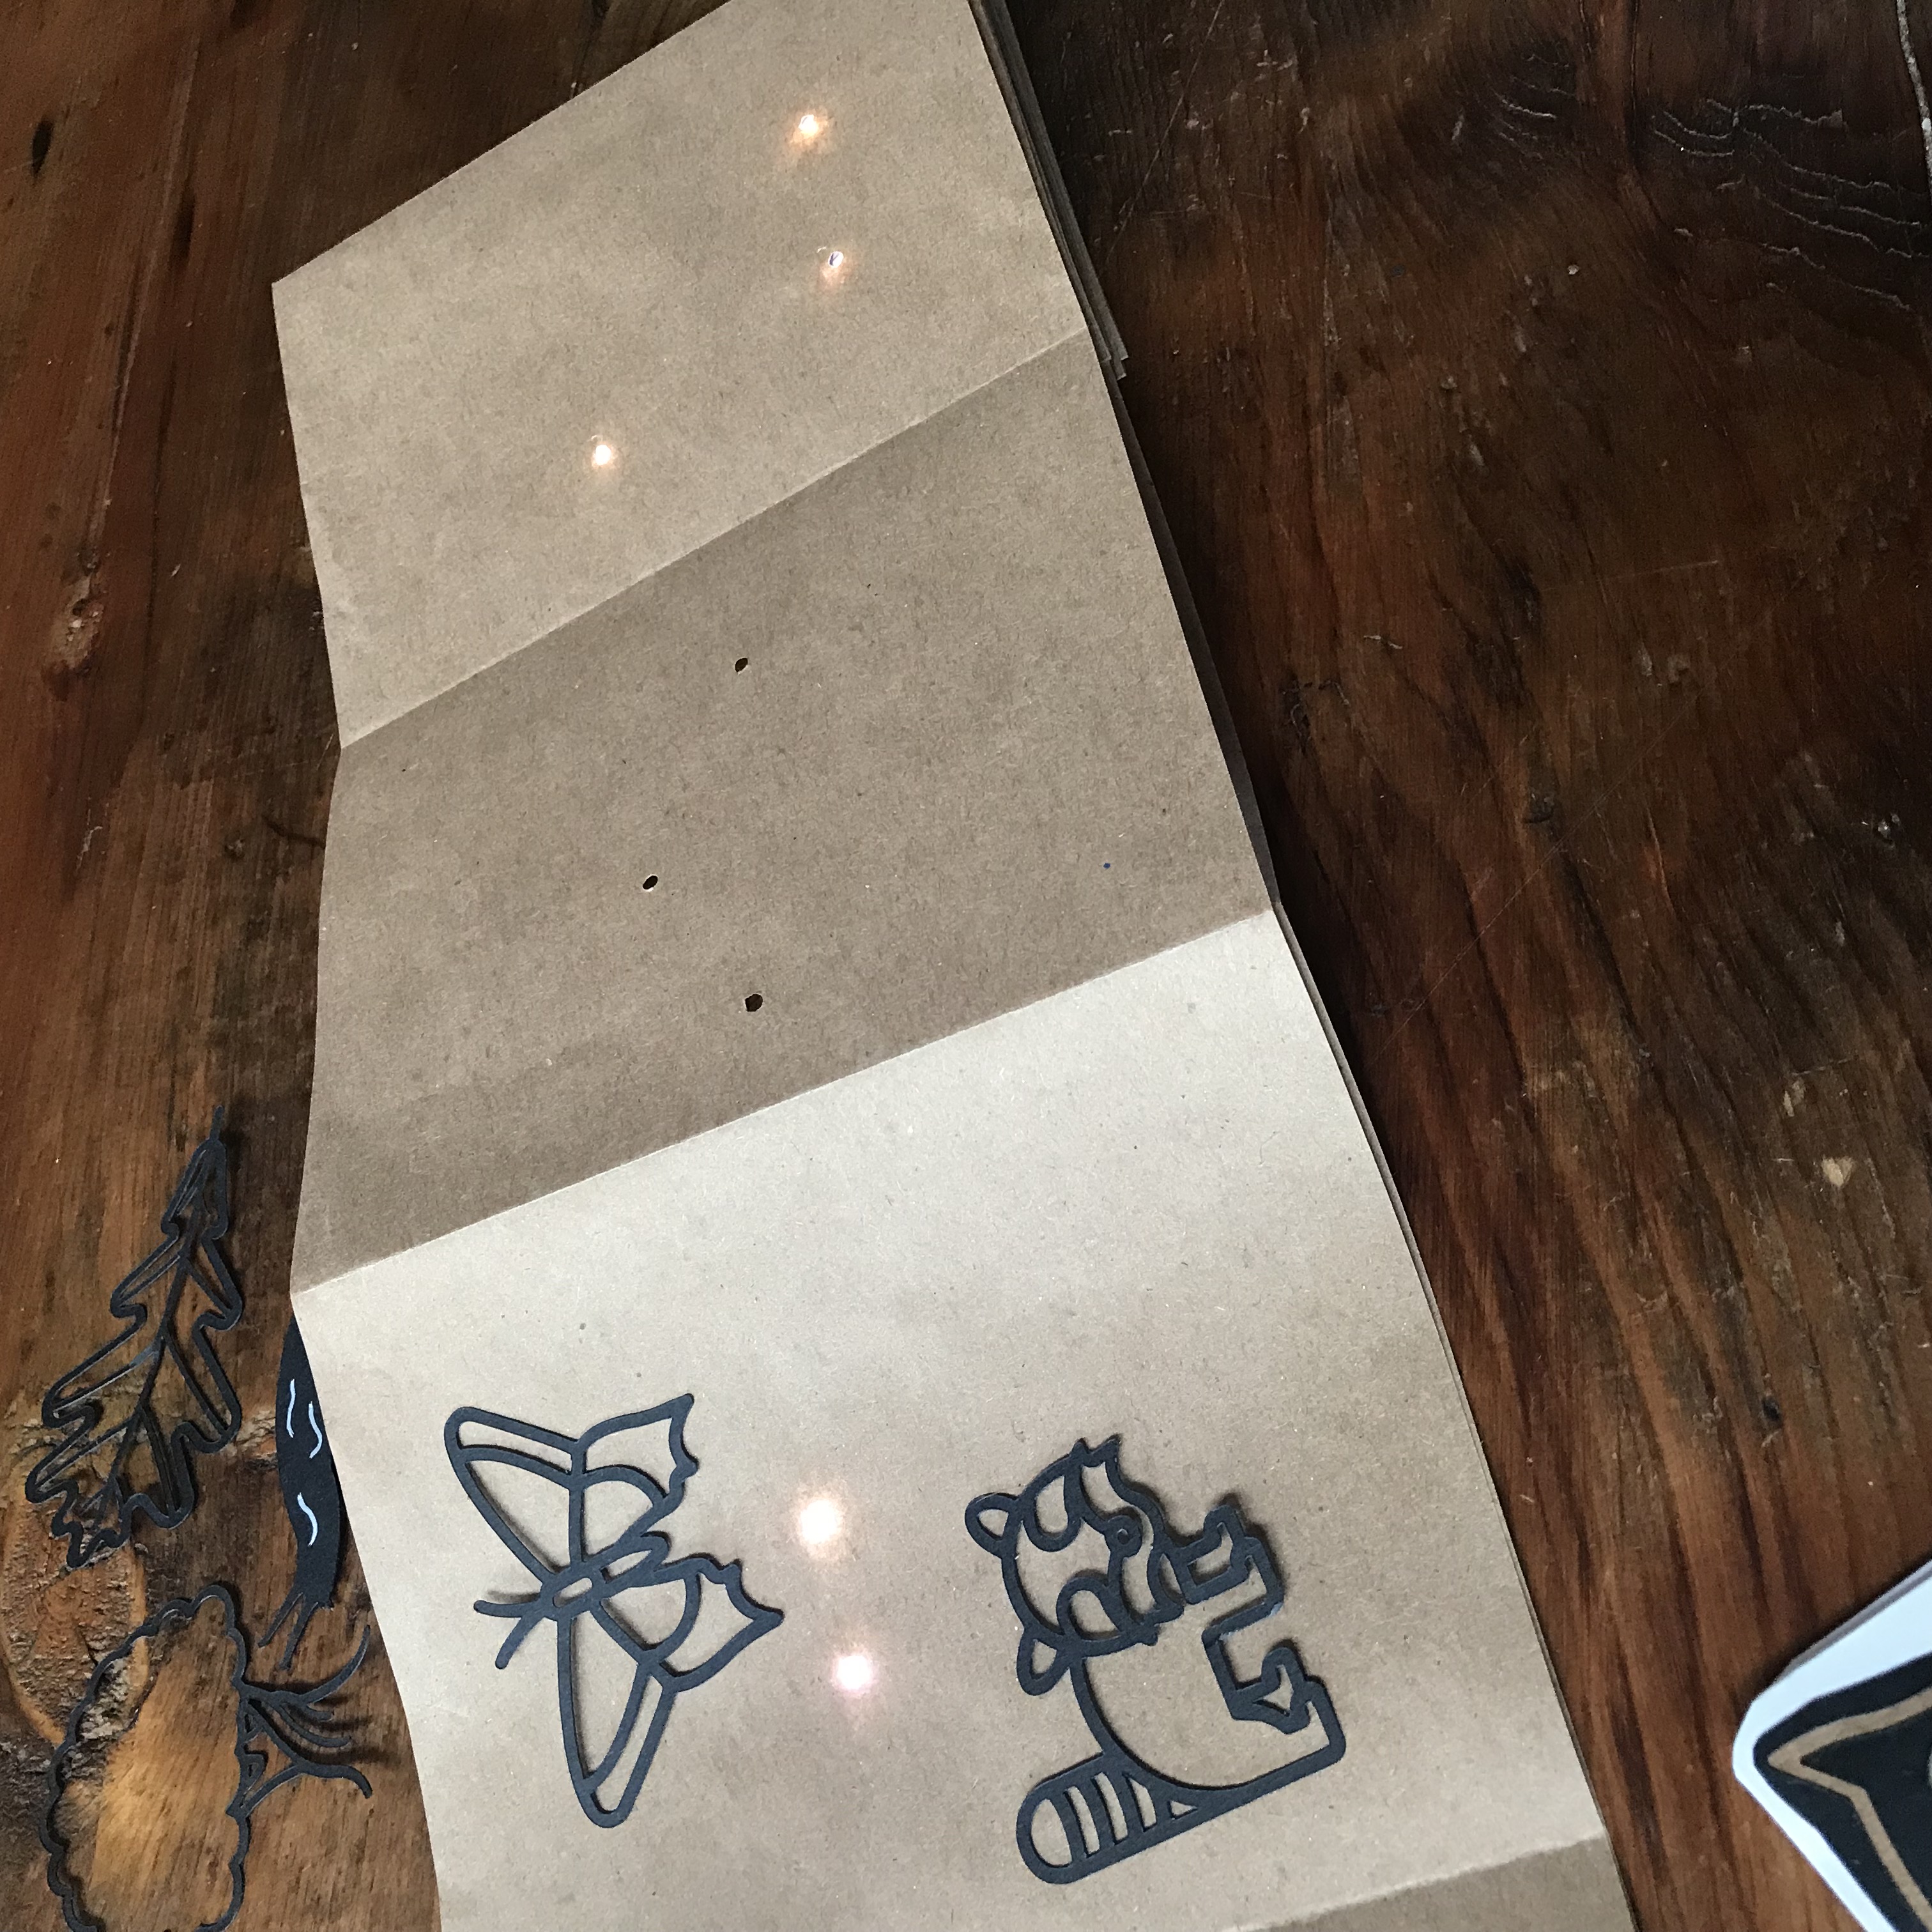
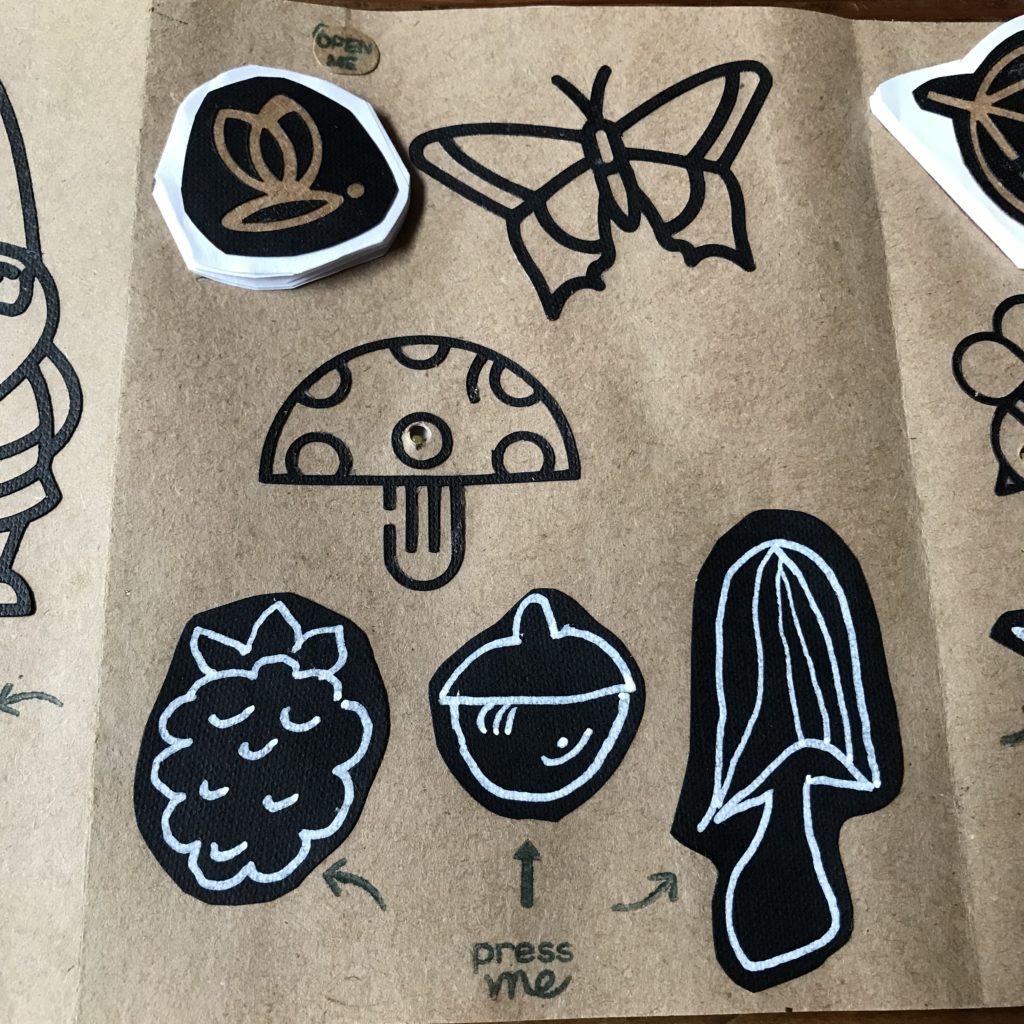
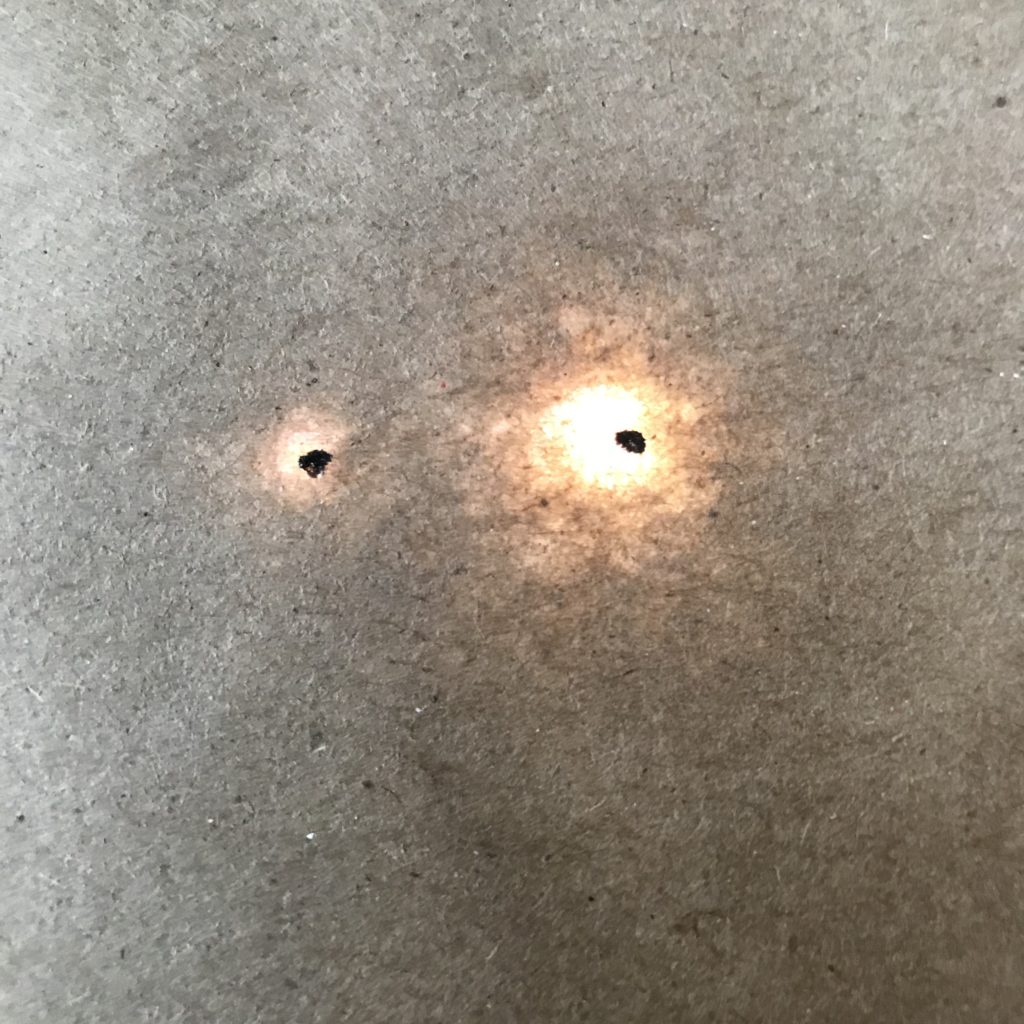
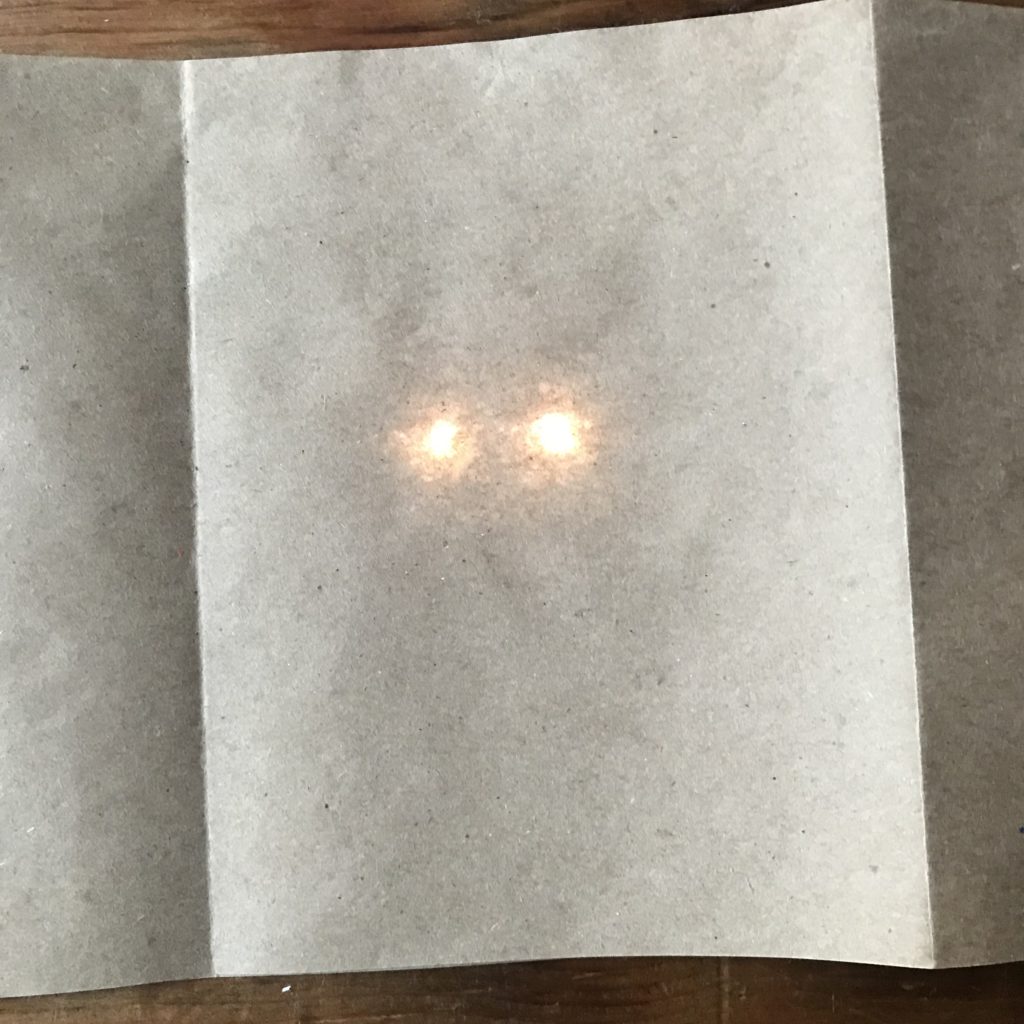
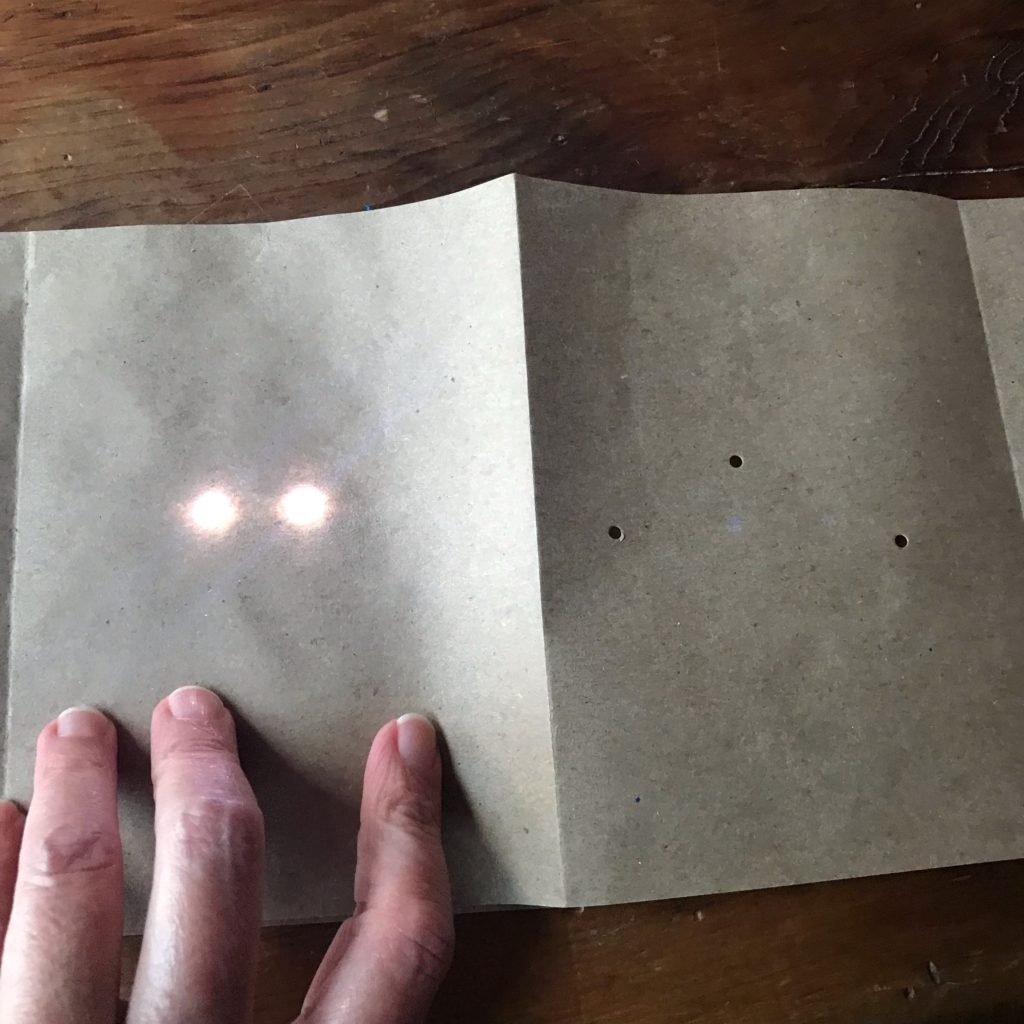
You may notice that I punched small holes in these pages, to allow more light to shine through. I’ll be explaining how to do this in the next step.
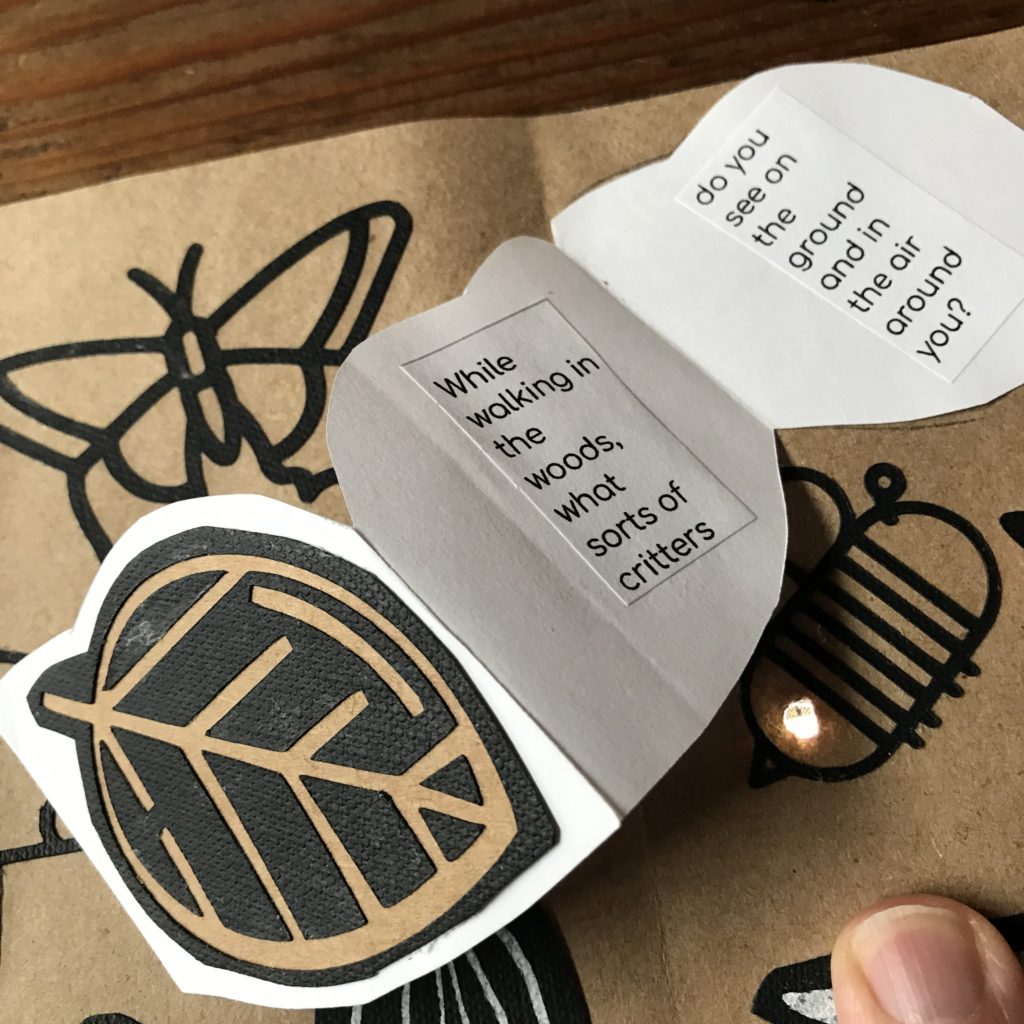
Since I have very large handwriting, I decided to glue typed text inside of little mini accordions that I made from printer paper.

Step 10: Finishing Touches
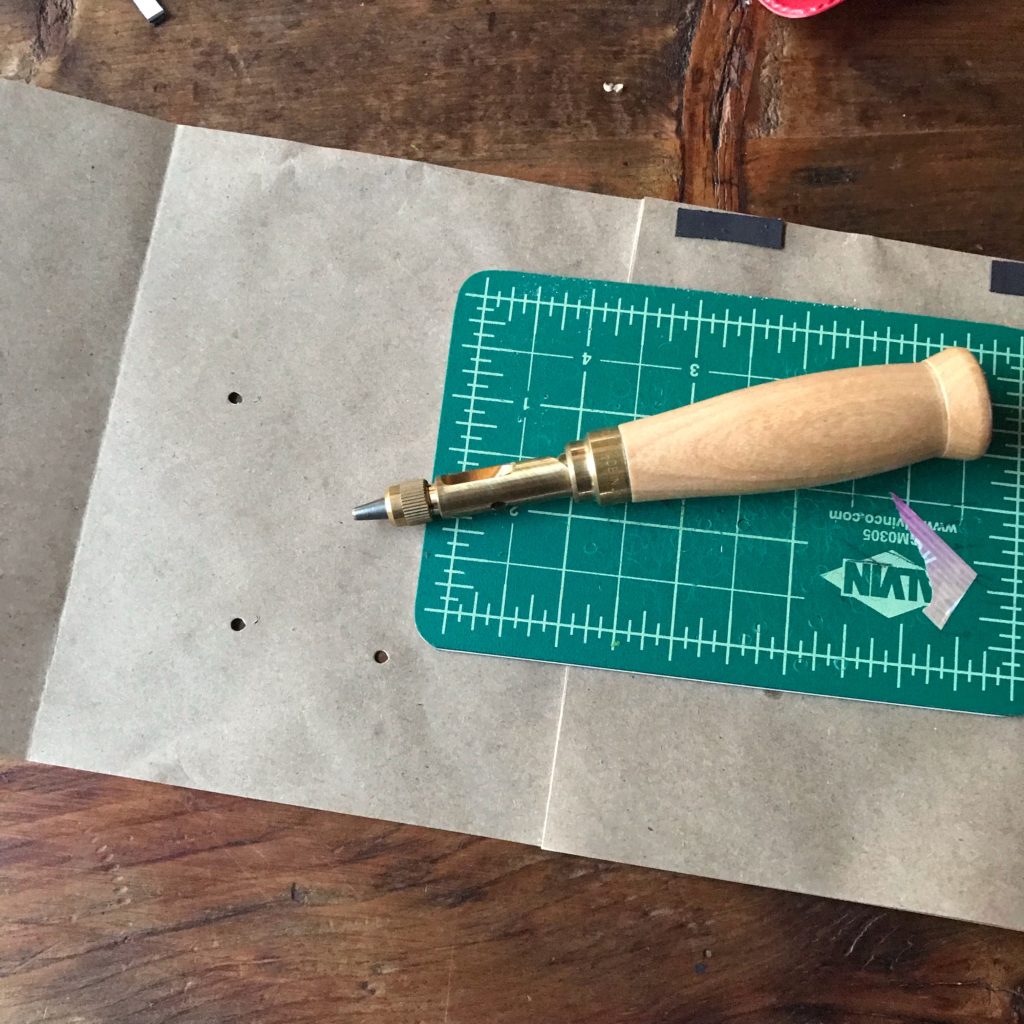
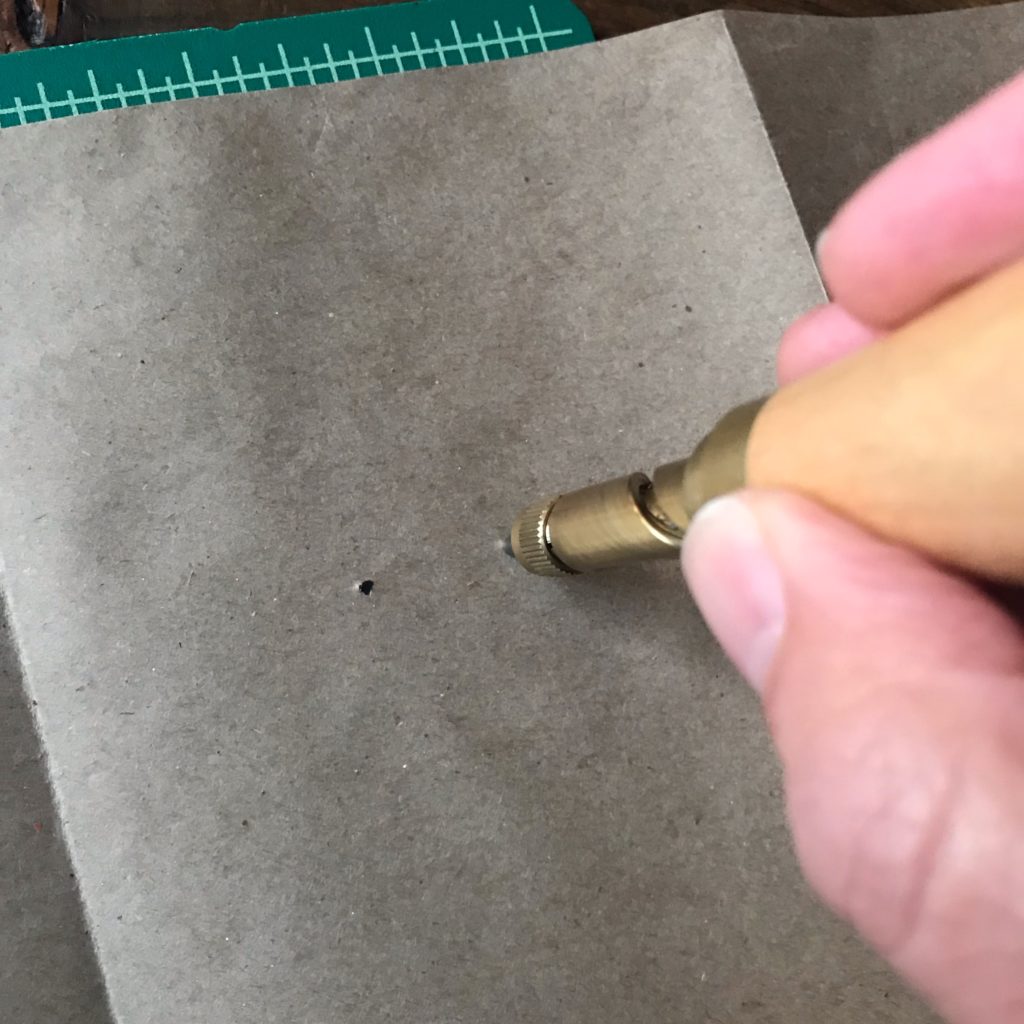
If you want more light to shine through the art layer of your accordion, consider using a Japanese Screw punch to make small, neat holes, precisely where you want them.
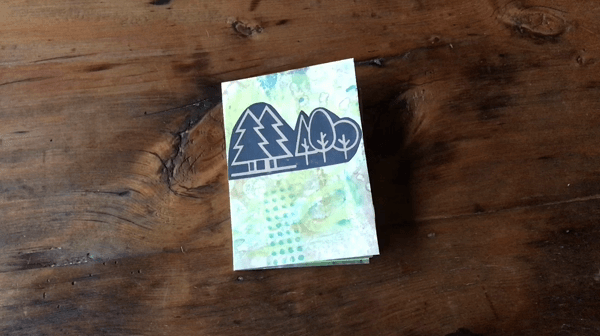
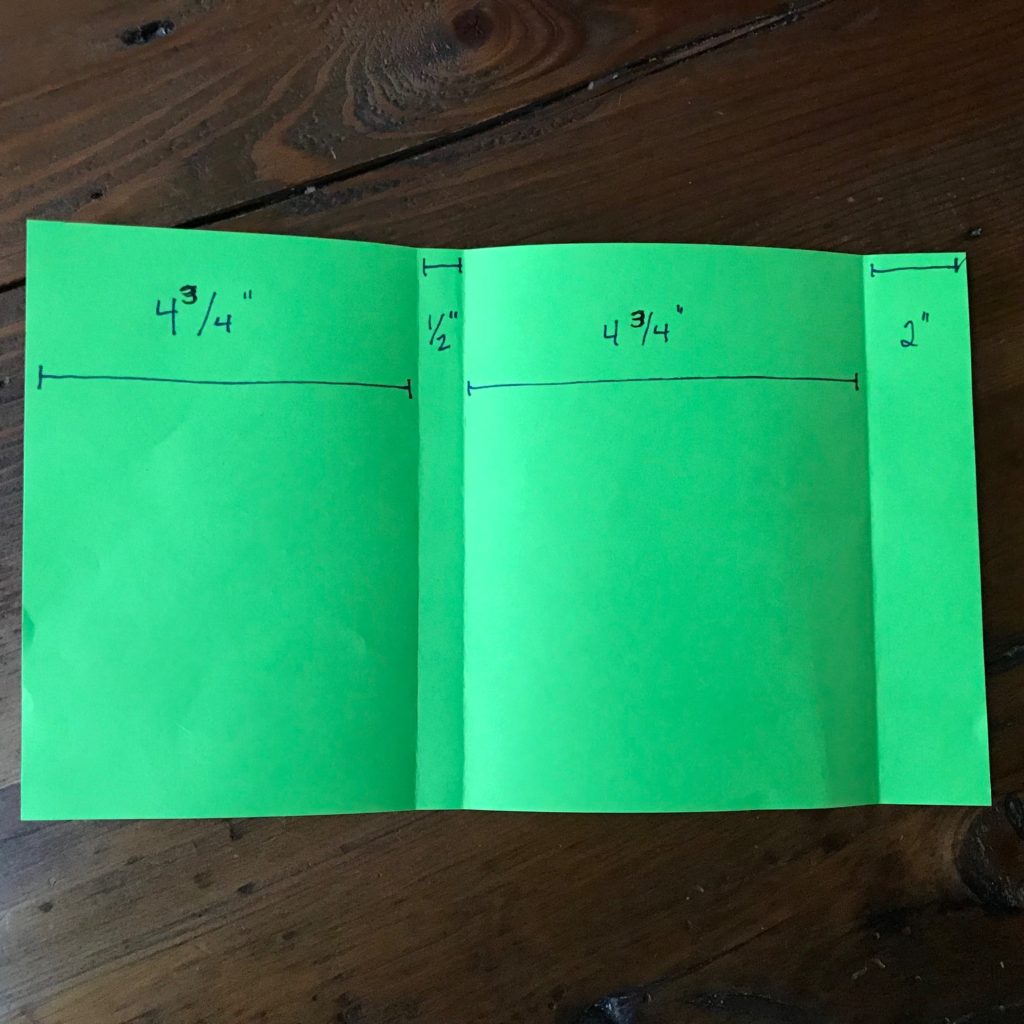
To make a book cover, fold the 6 ½” H X 12” W piece of colored paper so that it has a front cover, spine, back cover, and a flap. Since the accordion pages are 4 ½” W, the front and back covers need to be folded a little wider, at 4 ¾” W. If you fold the paper to accommodate a ½” W spine, the flap that will help keep your book closed (once it’s glued on) will be 2″ W.
If you’d like for your book’s cover to remain secure, you may tape or glue it on.
Do so by attaching the first page of the circuit layer down to the side of the colored paper cover without the flap. The flap, which should remain loose and unglued, was designed to wrap around the last page of the accordion, to keep if from flying open.

Gallery
Similar Posts You Might Enjoy