

I’m very excited to bring you my reindeer card featuring a multilayer Chibitronics circuit (which sounds way more complicated than it really is). The idea behind this card is to incorporate the LED circuit into a sliding card with the top side of the pole connected to the LED light circuit while the other end is connected to the slider tap.Thus giving me a card that will allow the LED lights to move. For the ease of reading the instructions for this card I will separate it into 3 parts: 1) Material Prep; 2) Light Circuit ; and 3) Slider Mechanism.
Part 1: Material Prep
- I stamp out one of the leaping reindeer from Mama Elephants Reindeer Games stamp set 3 times and color it with copic markers. I next cut them out with the coordinating dies along with 3 extra blank die cutouts. The poles are cut from both patterned and white cardstocks to 6” x 0.25” using my paper trimmer and 3 sets of each will be needed. To create the layers for the circuit I trim 2 pieces of white cardstocks to 6” x 0.5” and 6” x 1”.

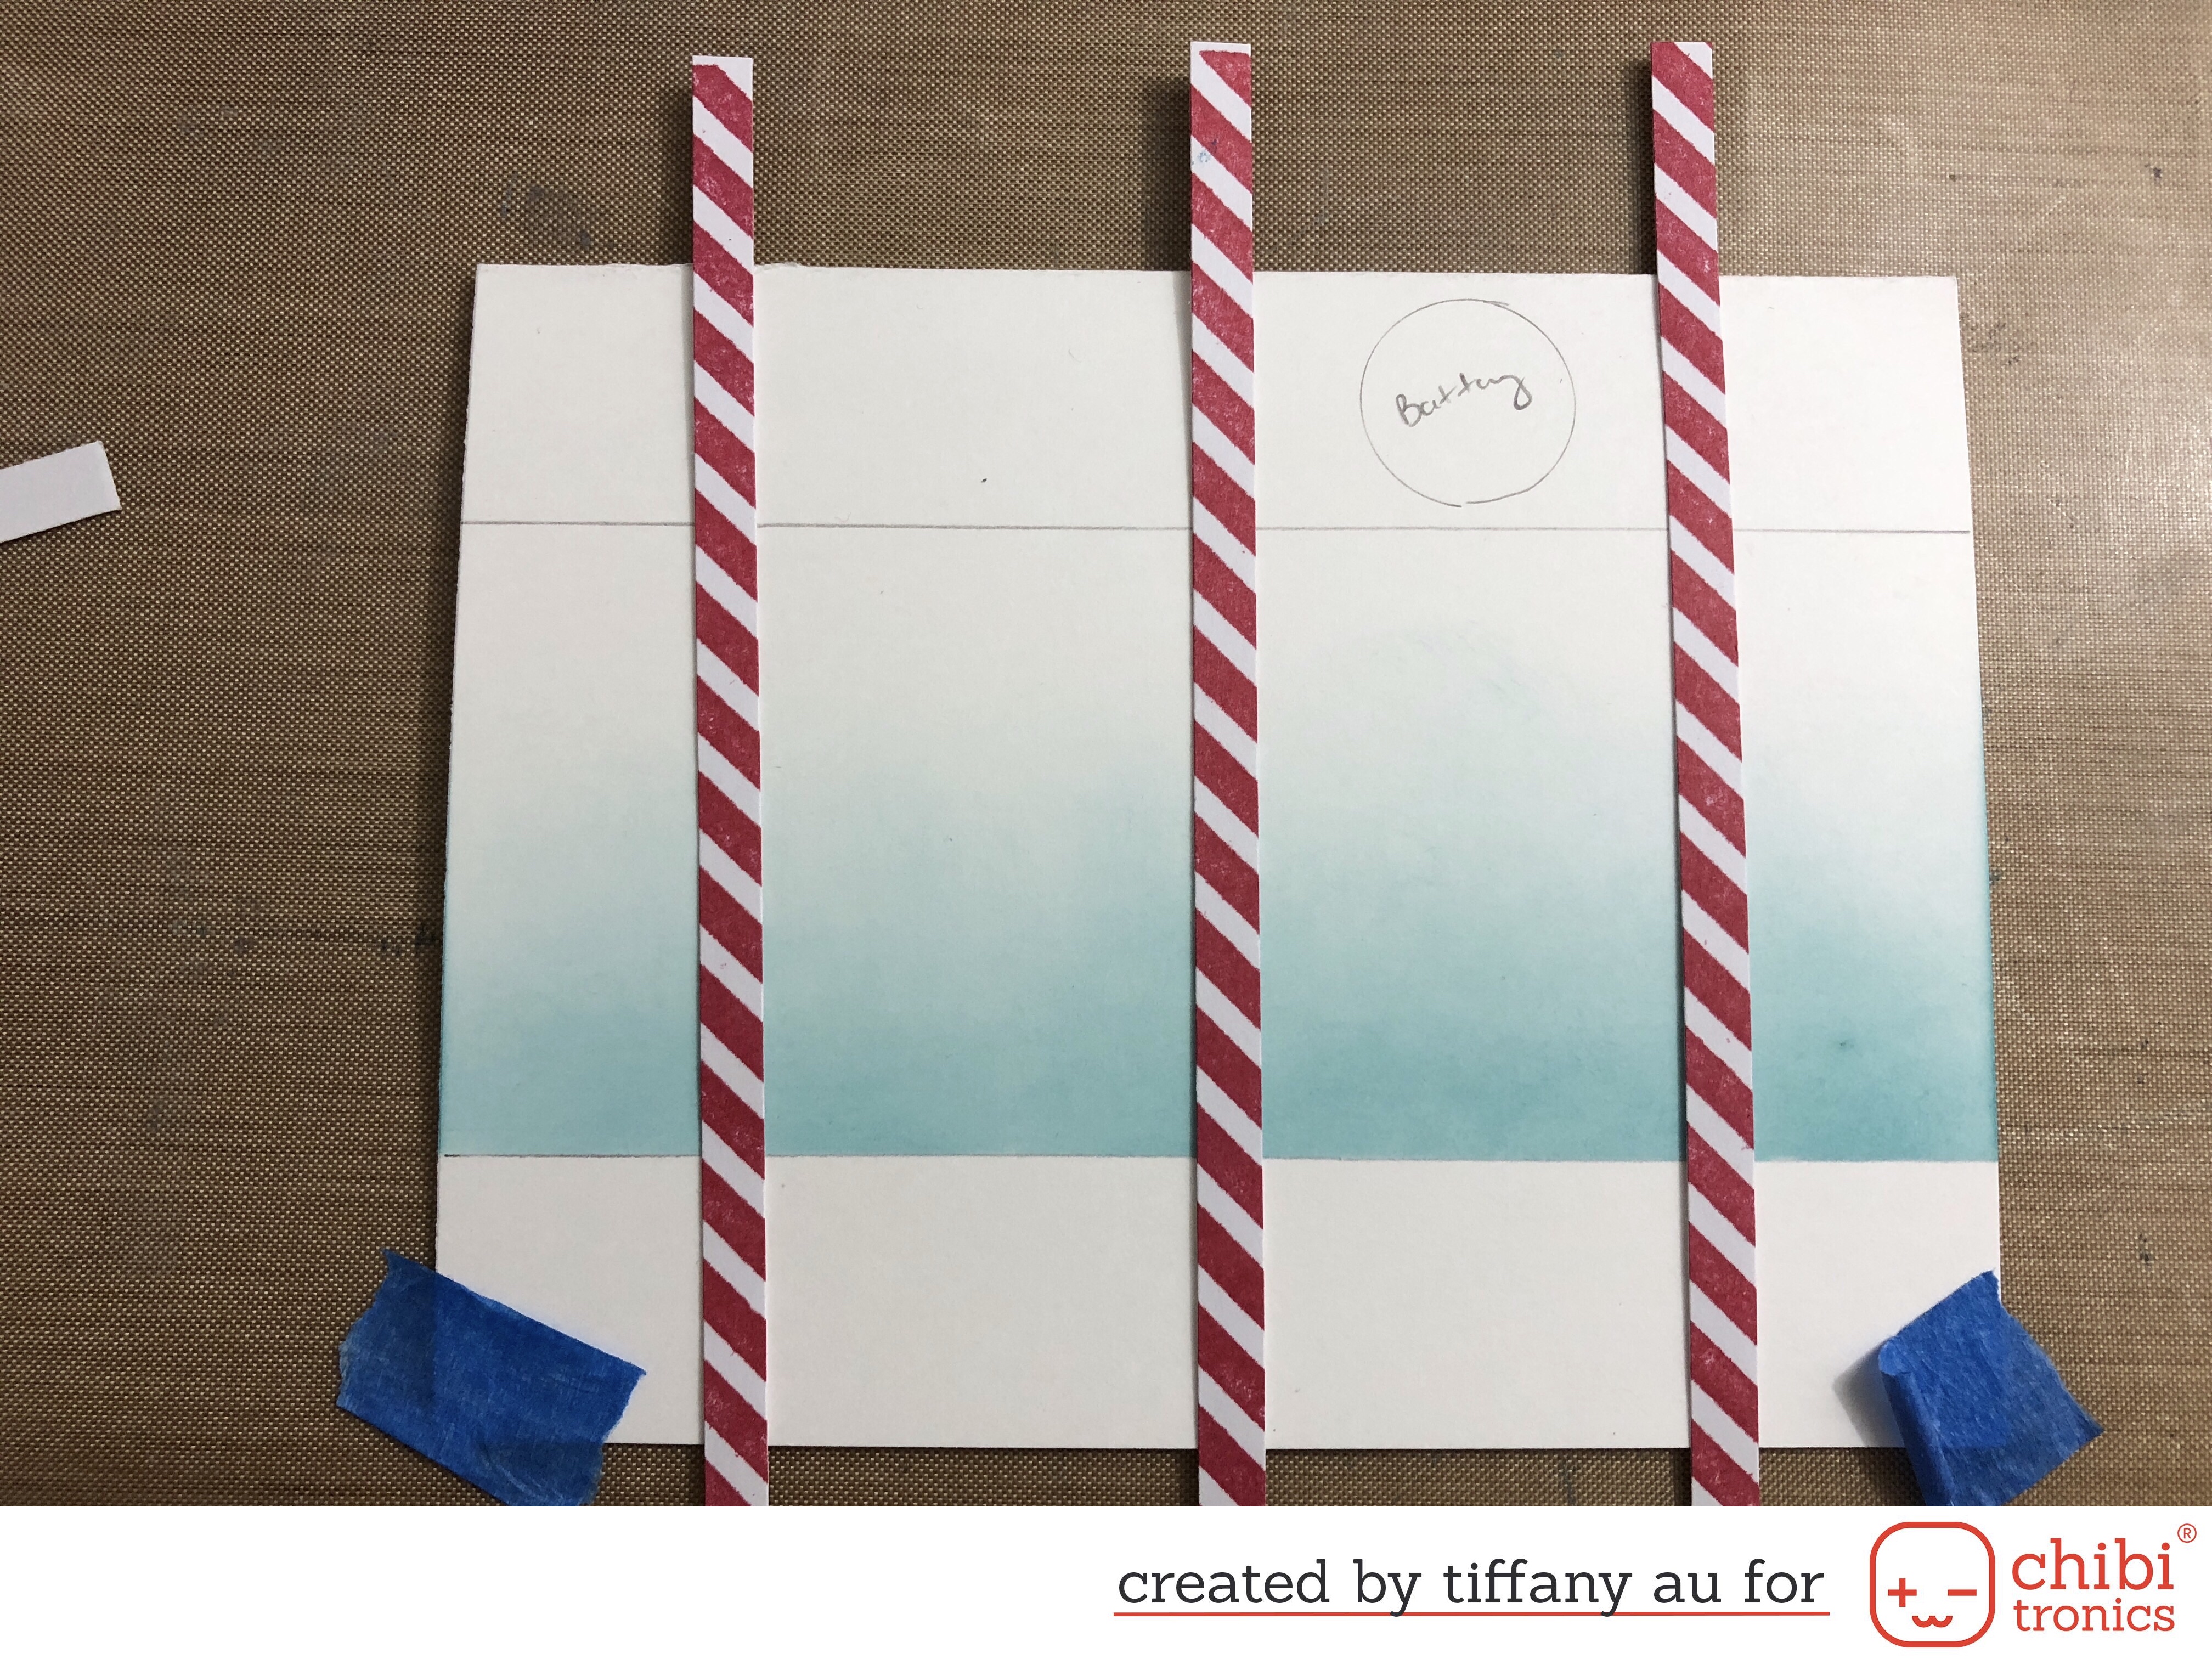
- My card base is the standard A2 size from 110 lbs white cardstock and I mark off 1’’ from the top and bottom of the card using a pencil which will provide me with 3 sections. Last, I ink blended Broken China distress oxide ink onto the middle section of my card base.
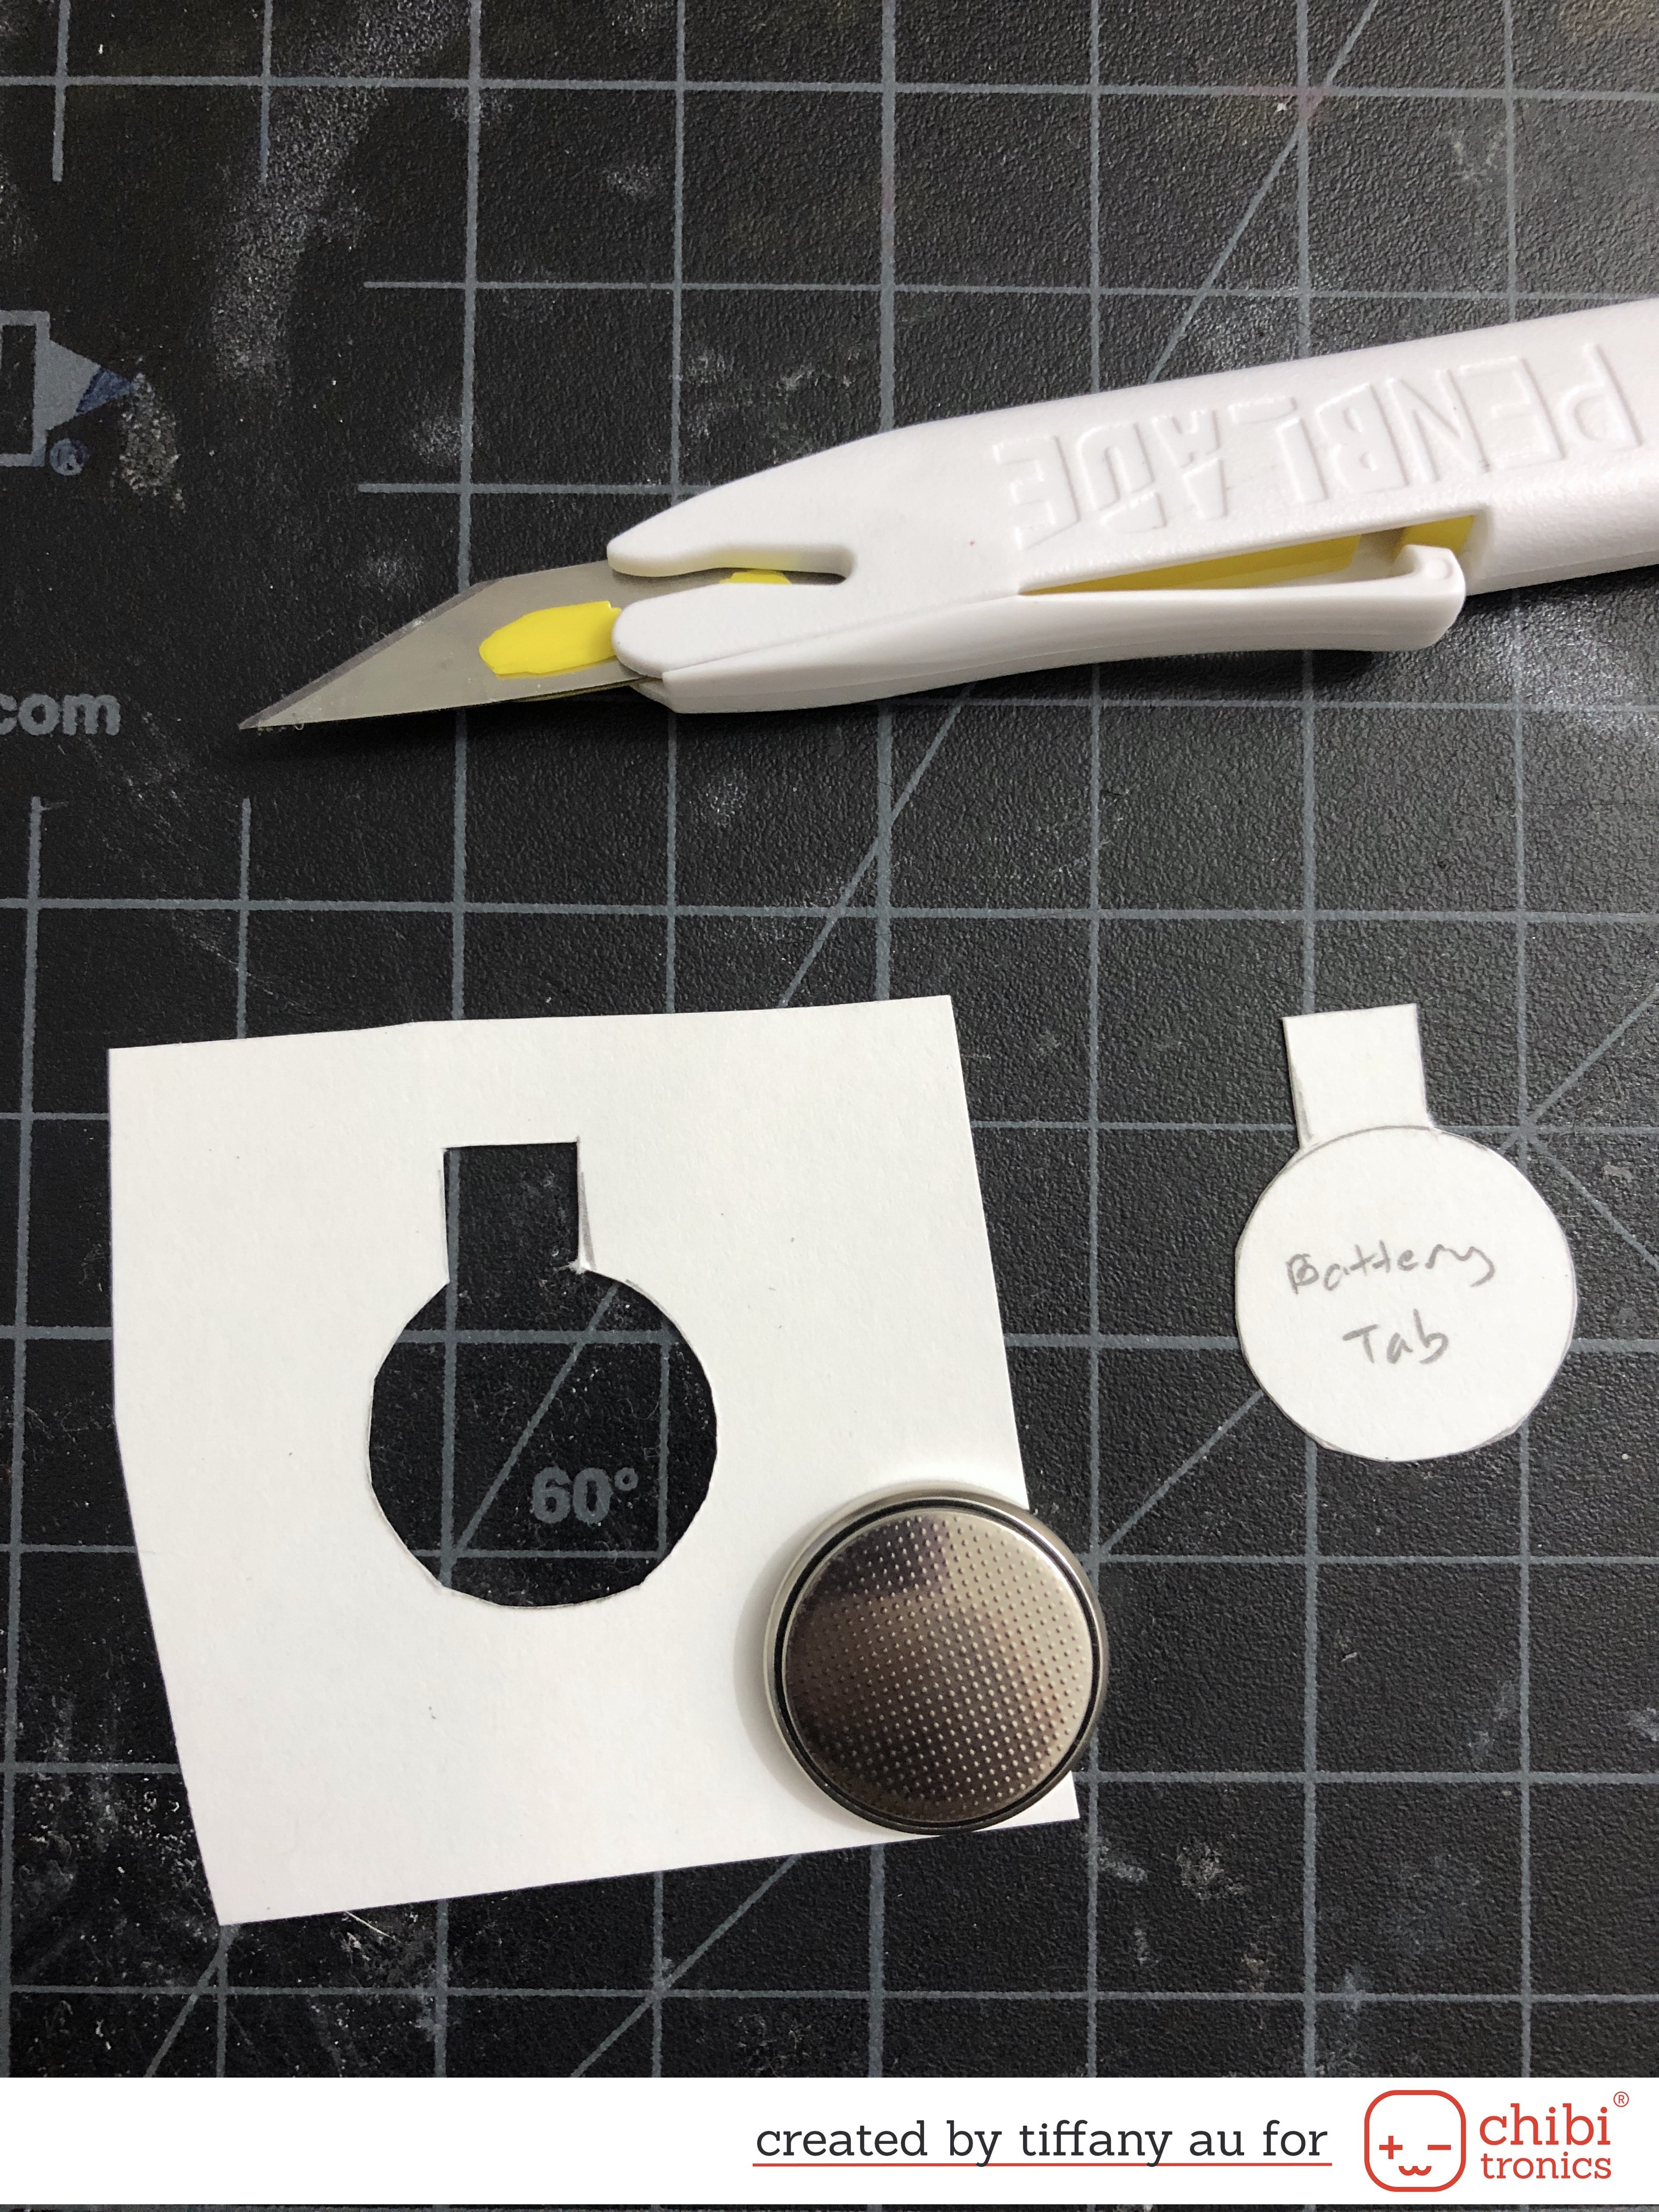
- I last create my battery tab from white cardstock by tracing the size of my coin battery and cutting it out (making sure to leave a tab at one end). This is use to stop the circuit from completing to save battery life.
Part 2: Light Circuit
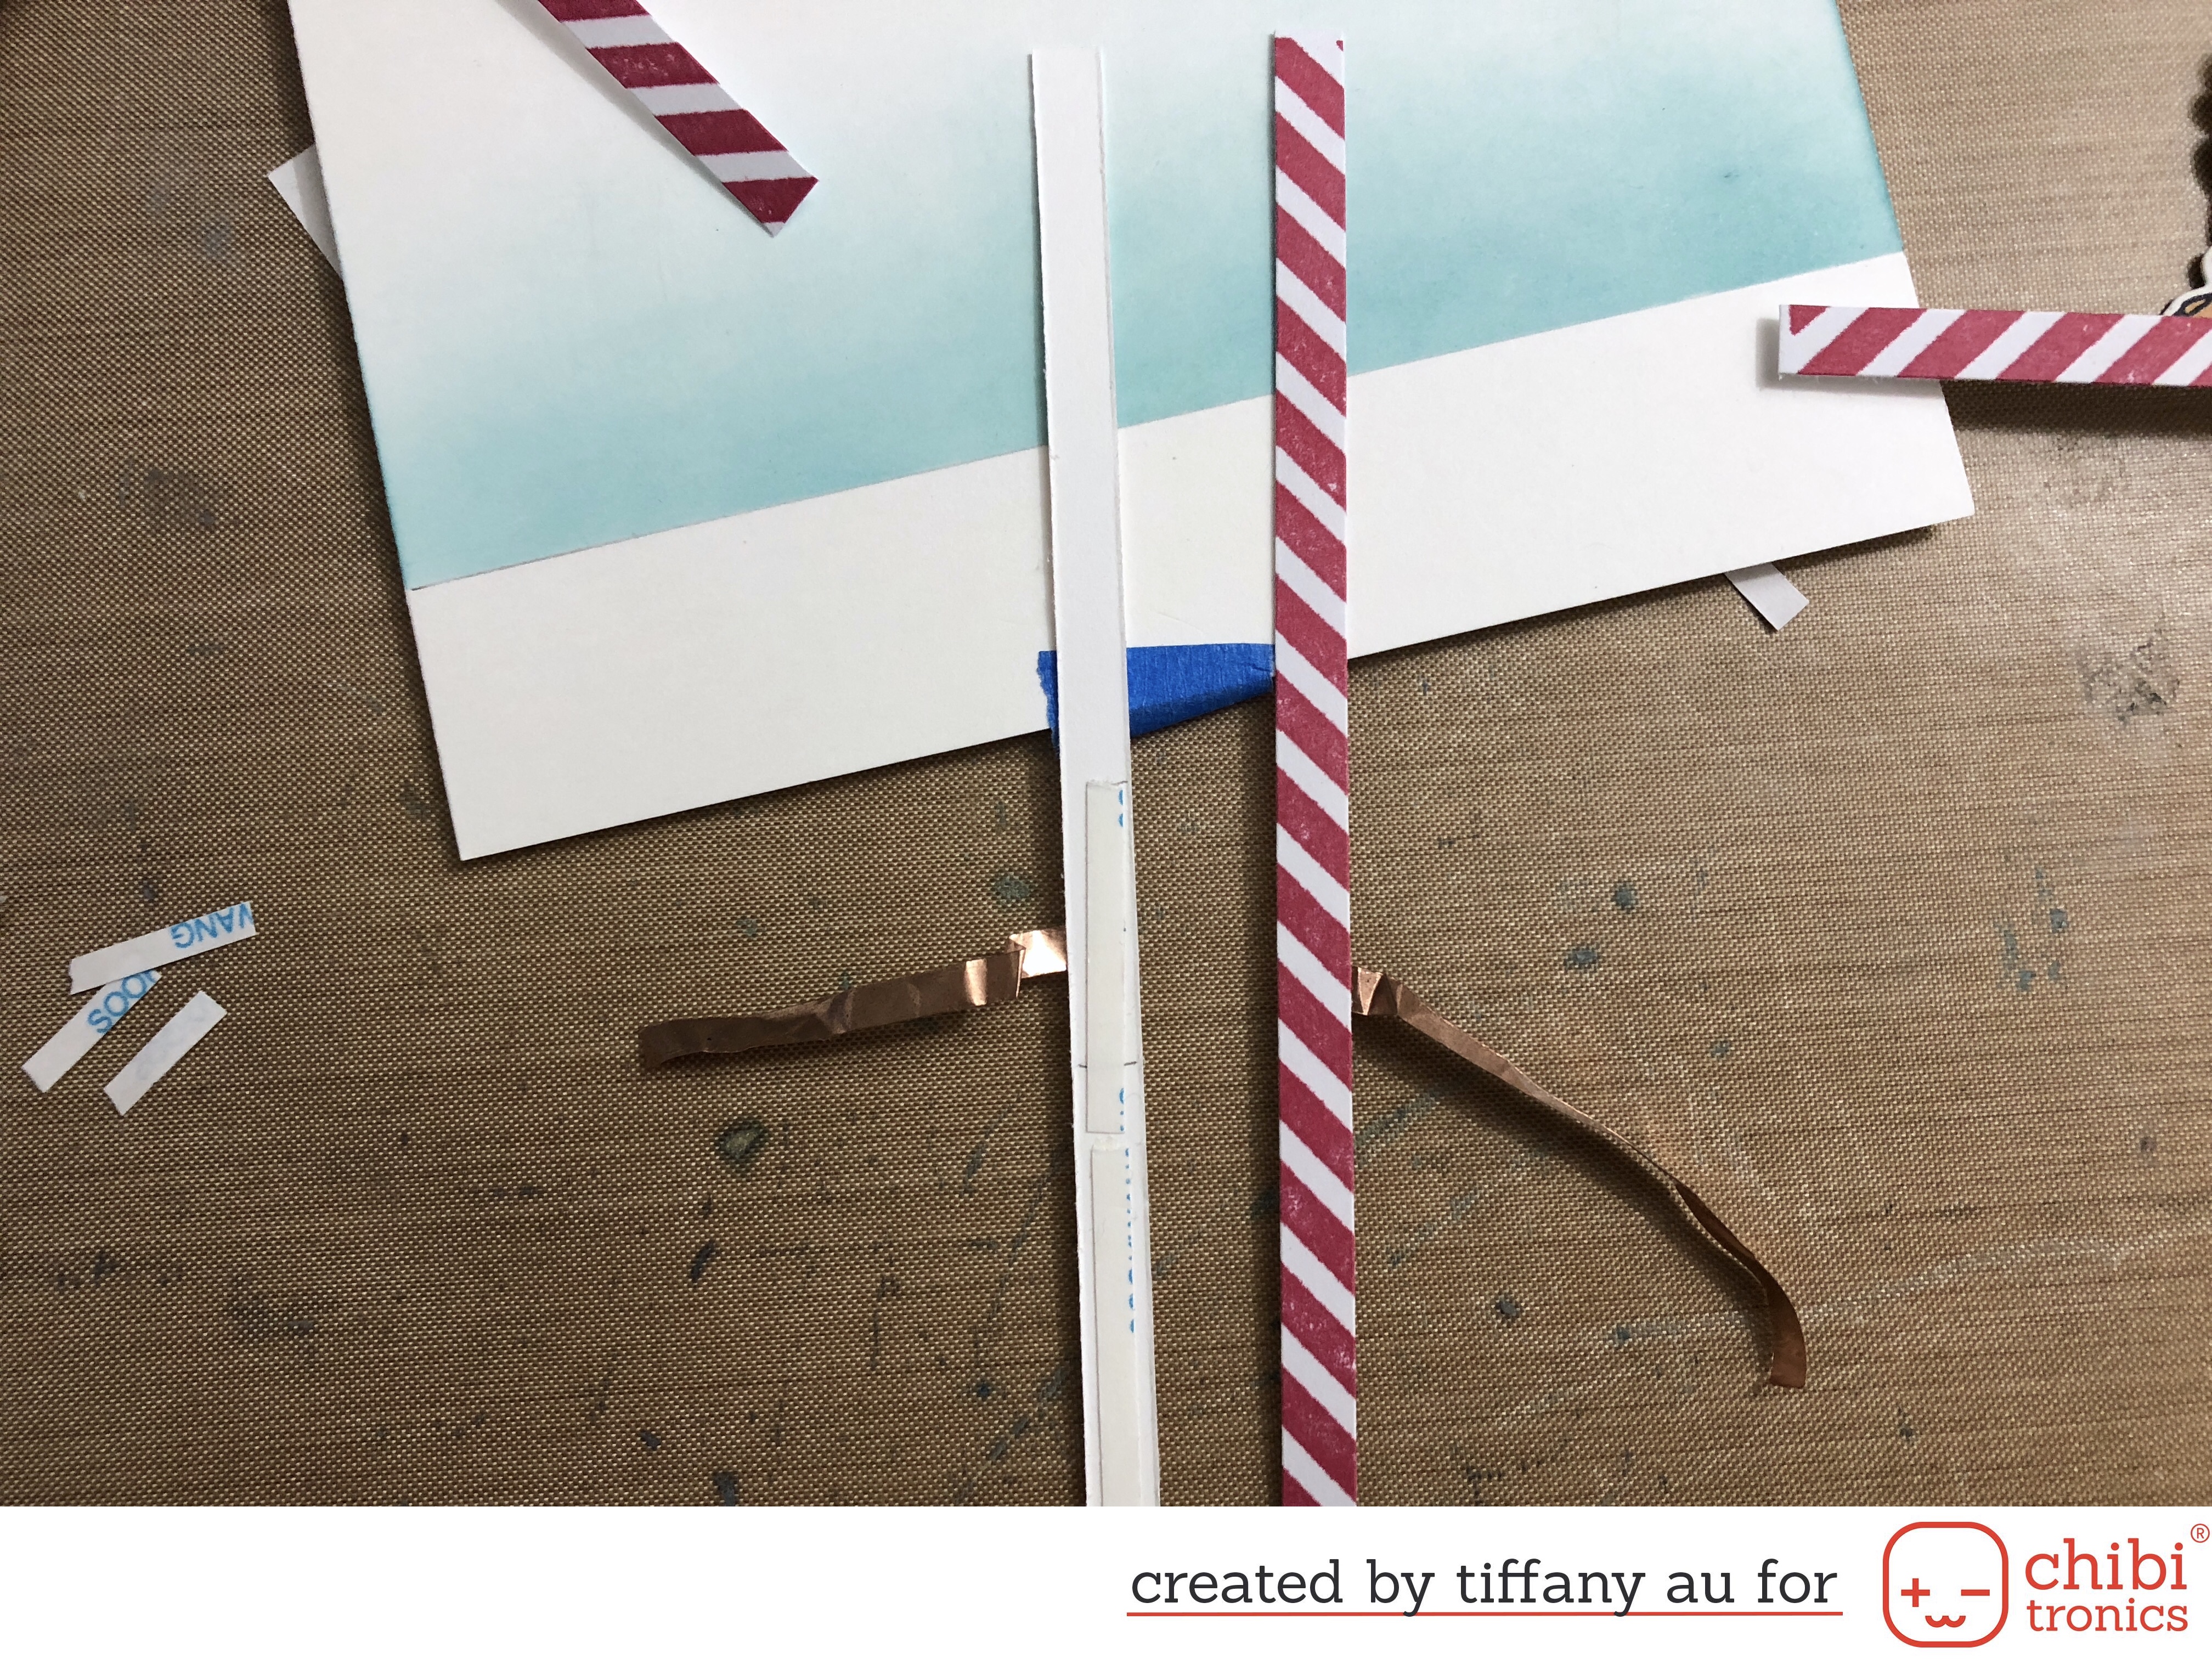
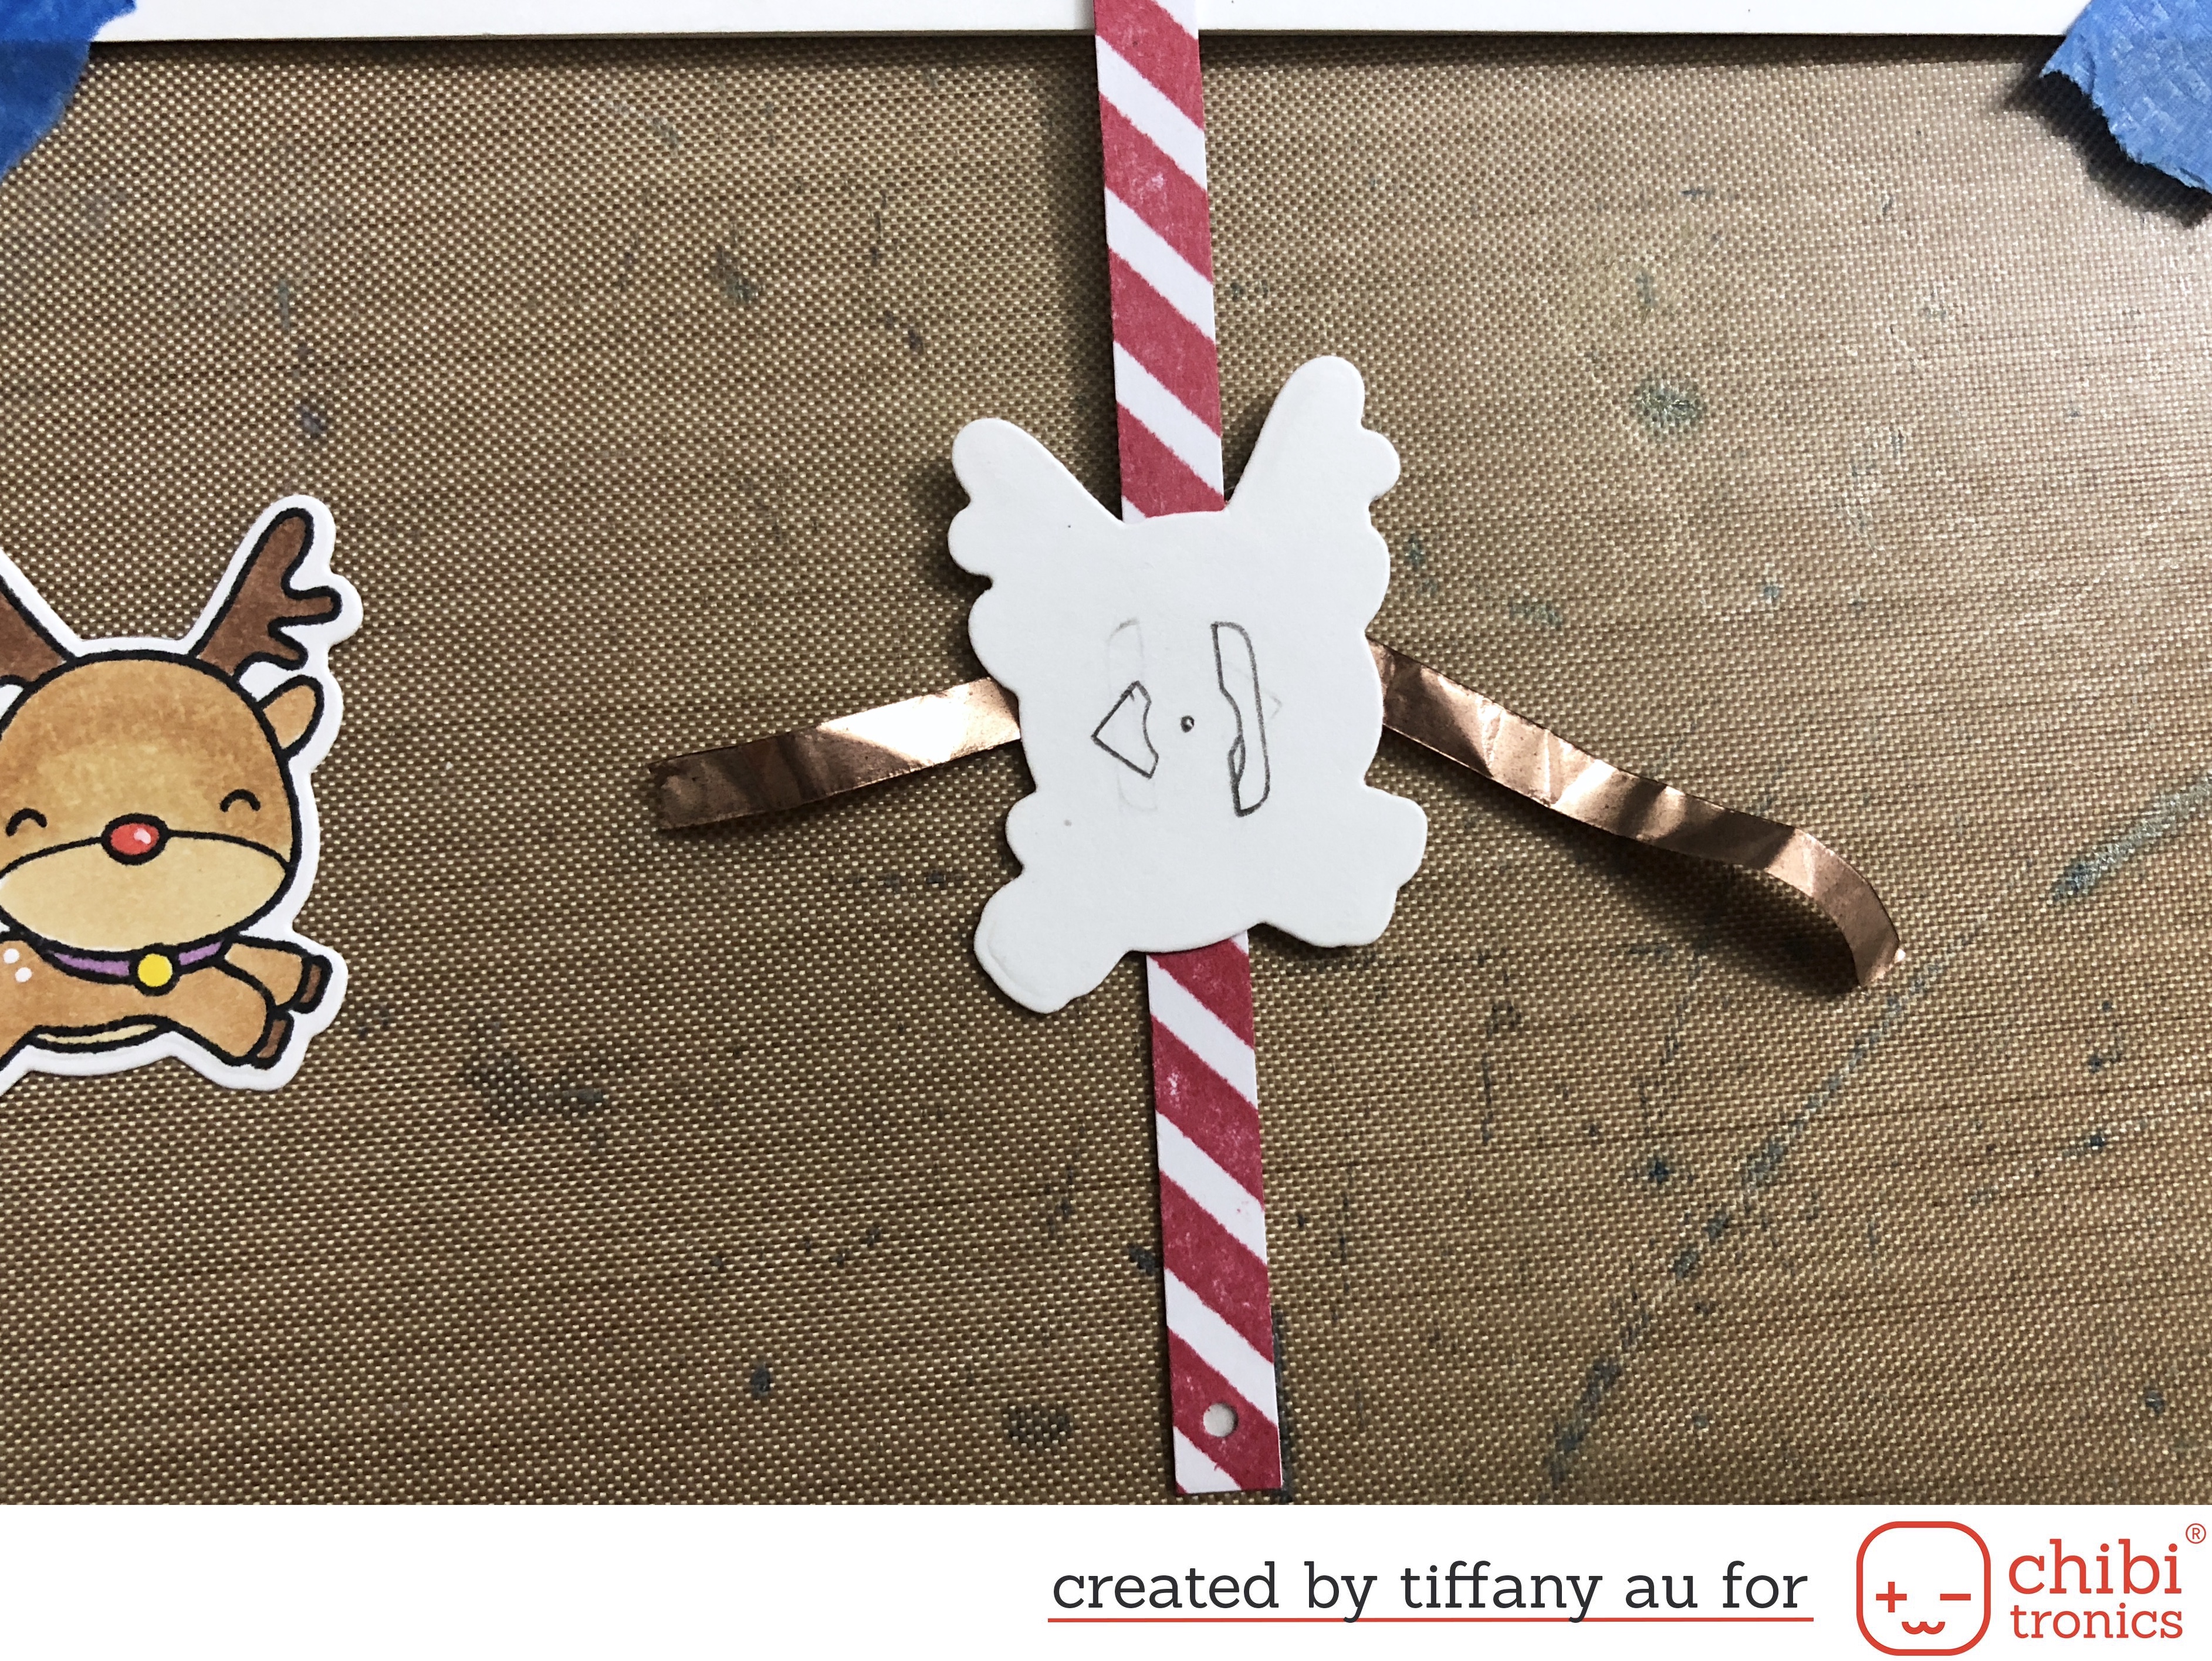
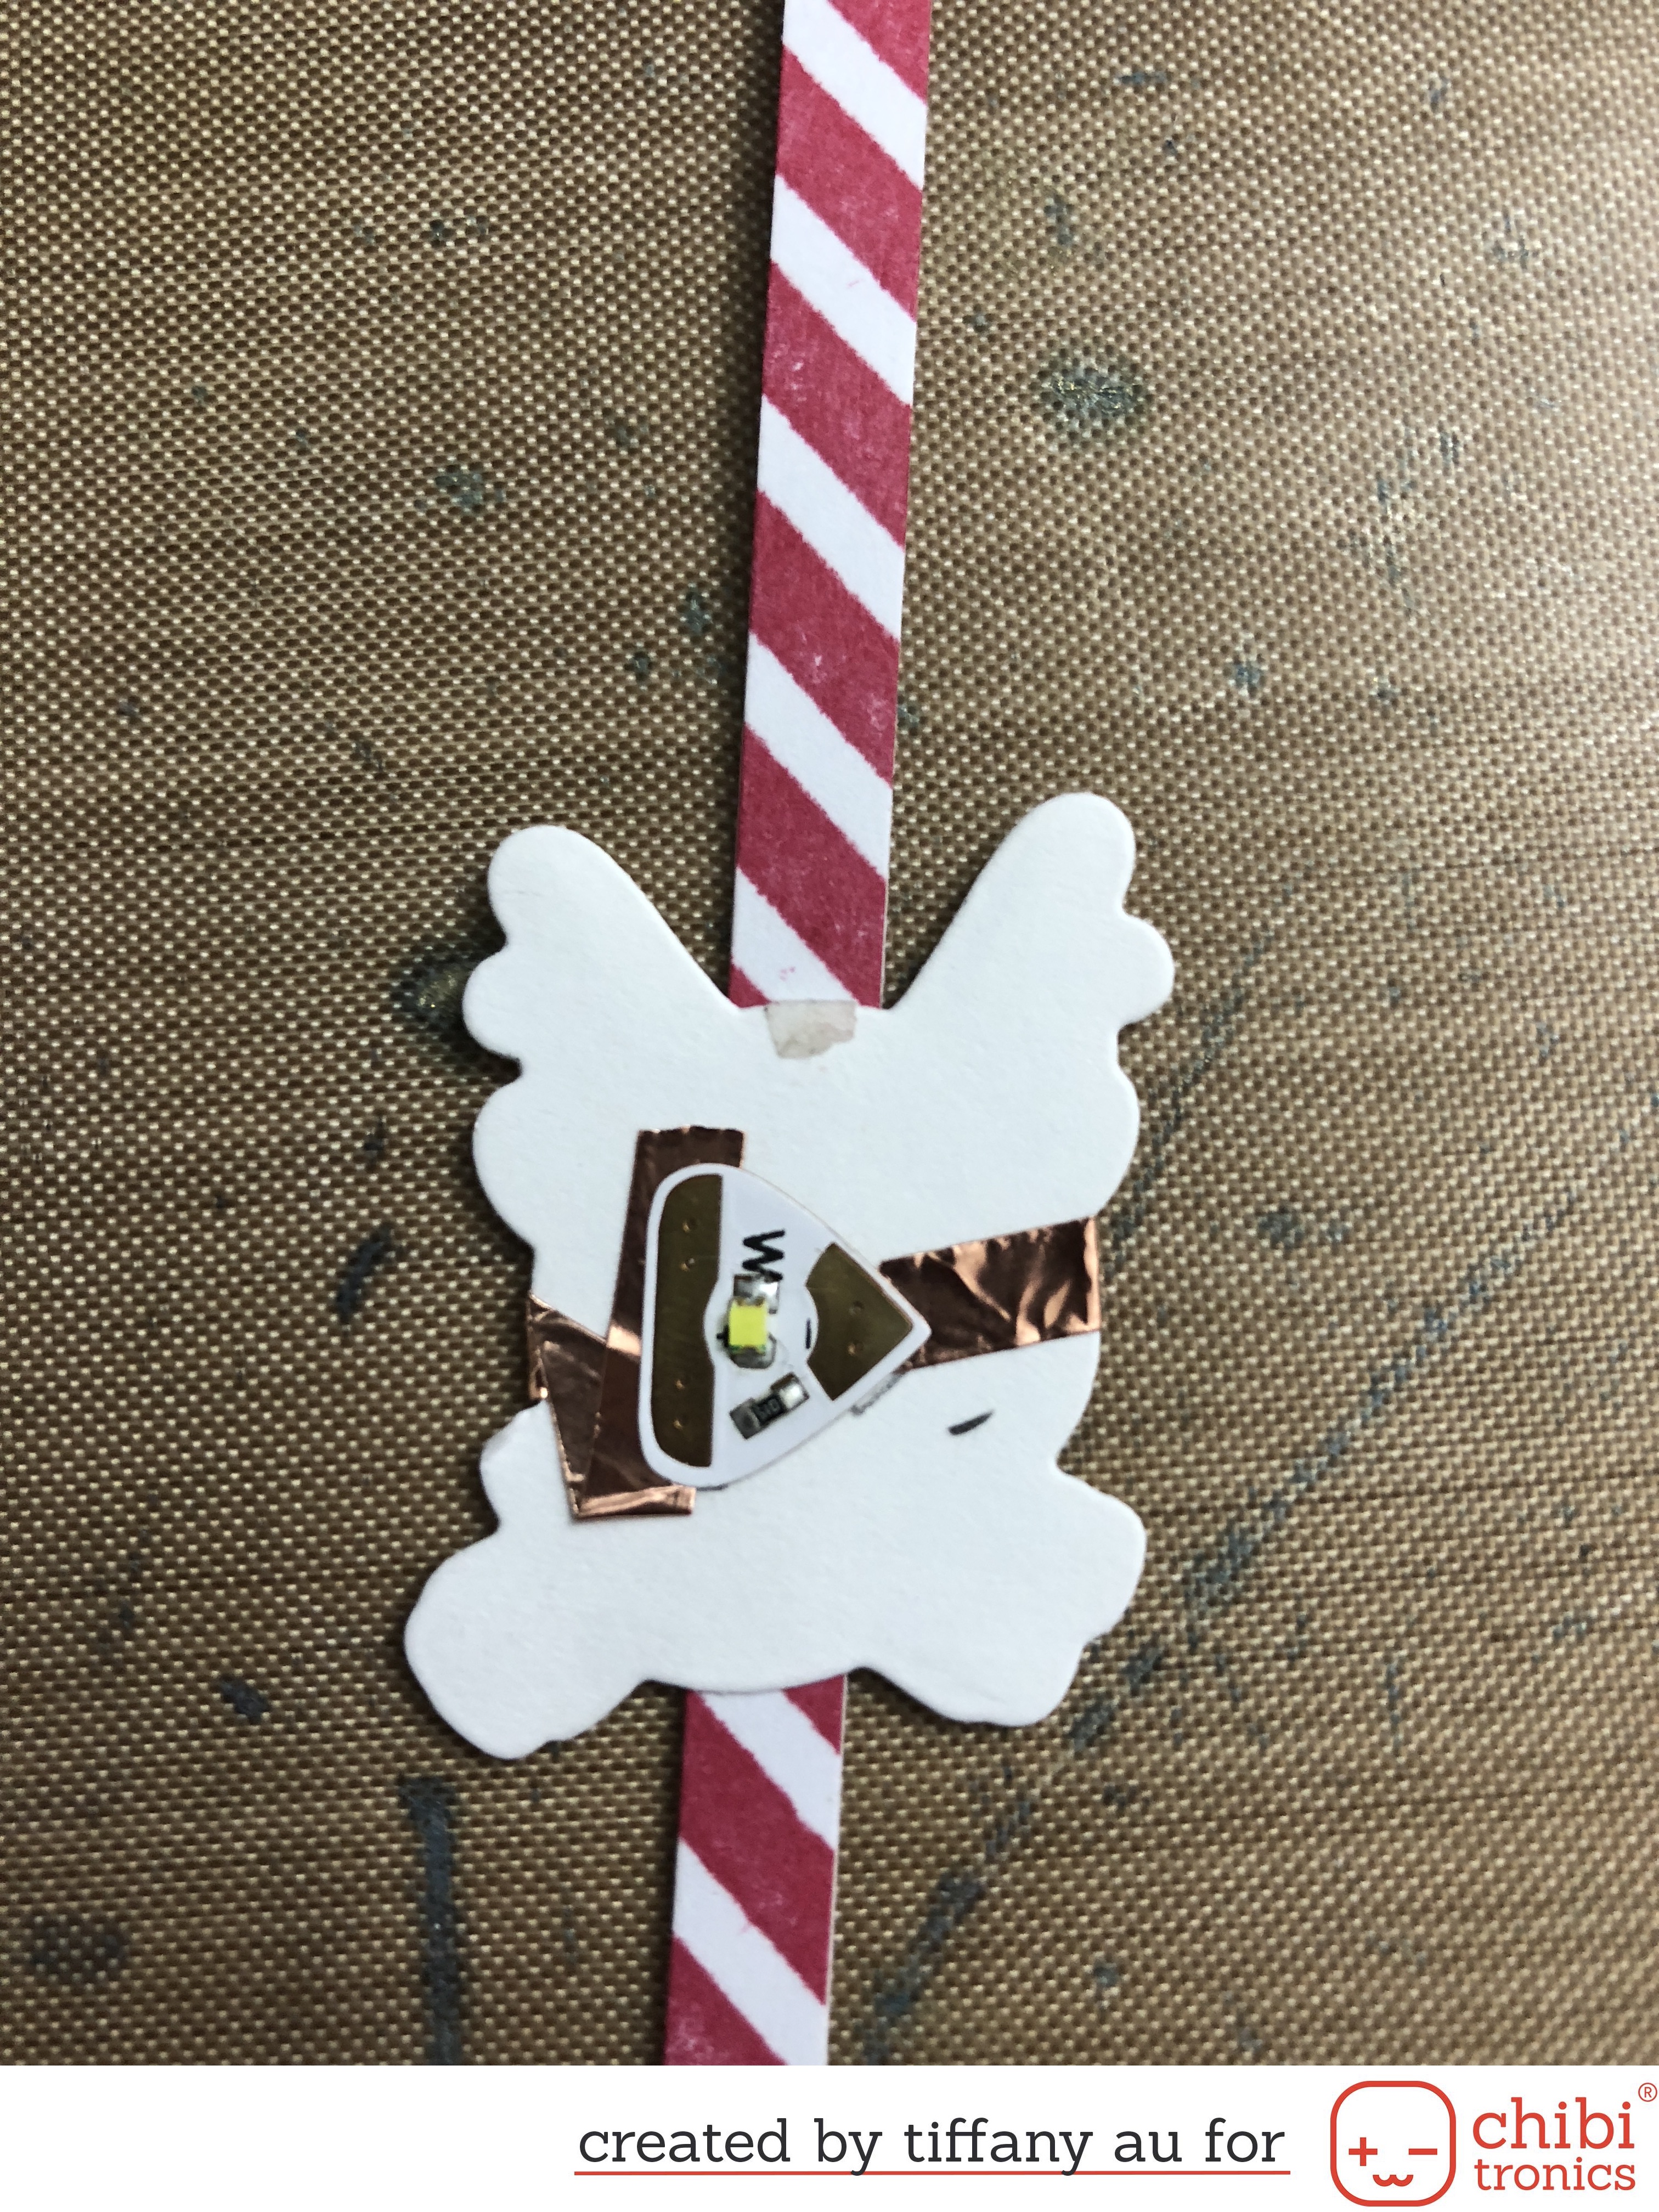
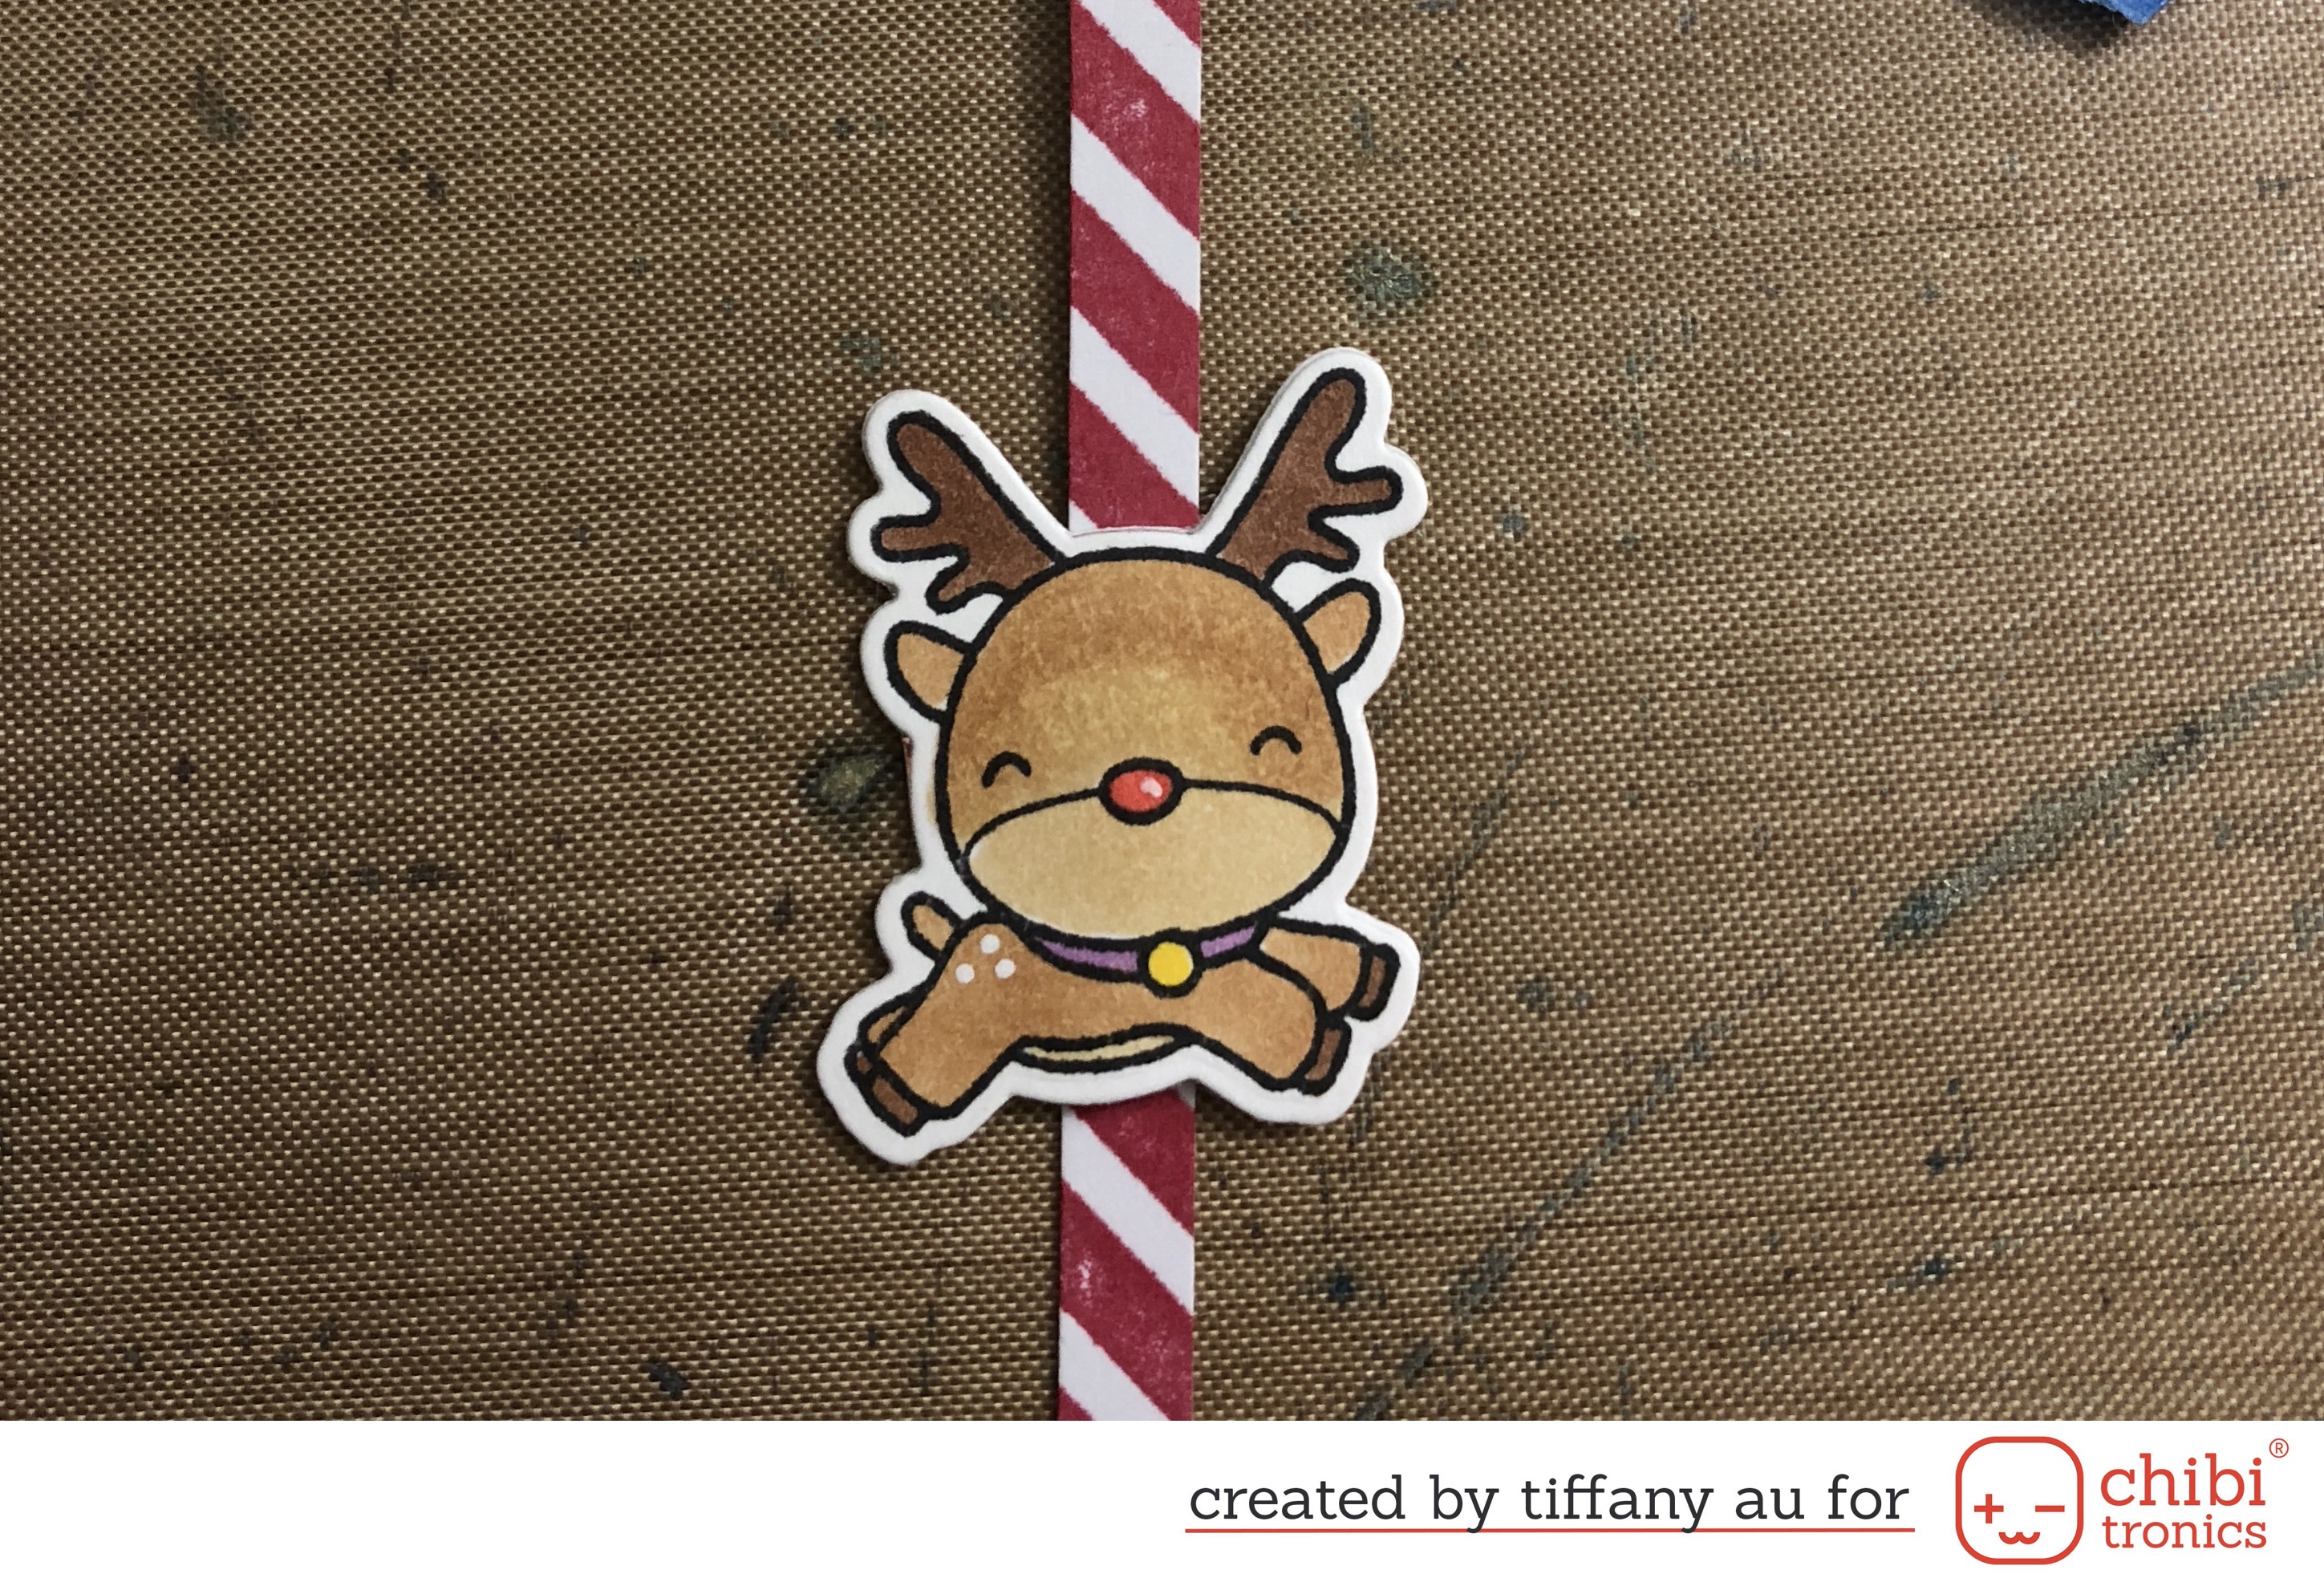
- To assemble the carousel poles I first lay down copper tape on the back of each of the patterned and white 6” x 0.25” strip of cardstocks. The copper tape runs from the top of each to the midpoint with extra copper tape hanging to the side (hang to the right for the white strip and left for the pattern strip). The copper side of each strip of paper will always face down. I lay down the white stip first (copper side down) and put adhesive on the bottom of the pole to where the copper tape hang out and tape down the patterned strip (copper side down). Next, I tape down the blank reindeer cut out in the middle of the pole and wrap the hanging copper tape around it. The side leading from the bottom will be the negative side and the copper tape from the middle will be the positive side and finish my pole circuit. Last I glue down the colored reindeer on top to complete it.

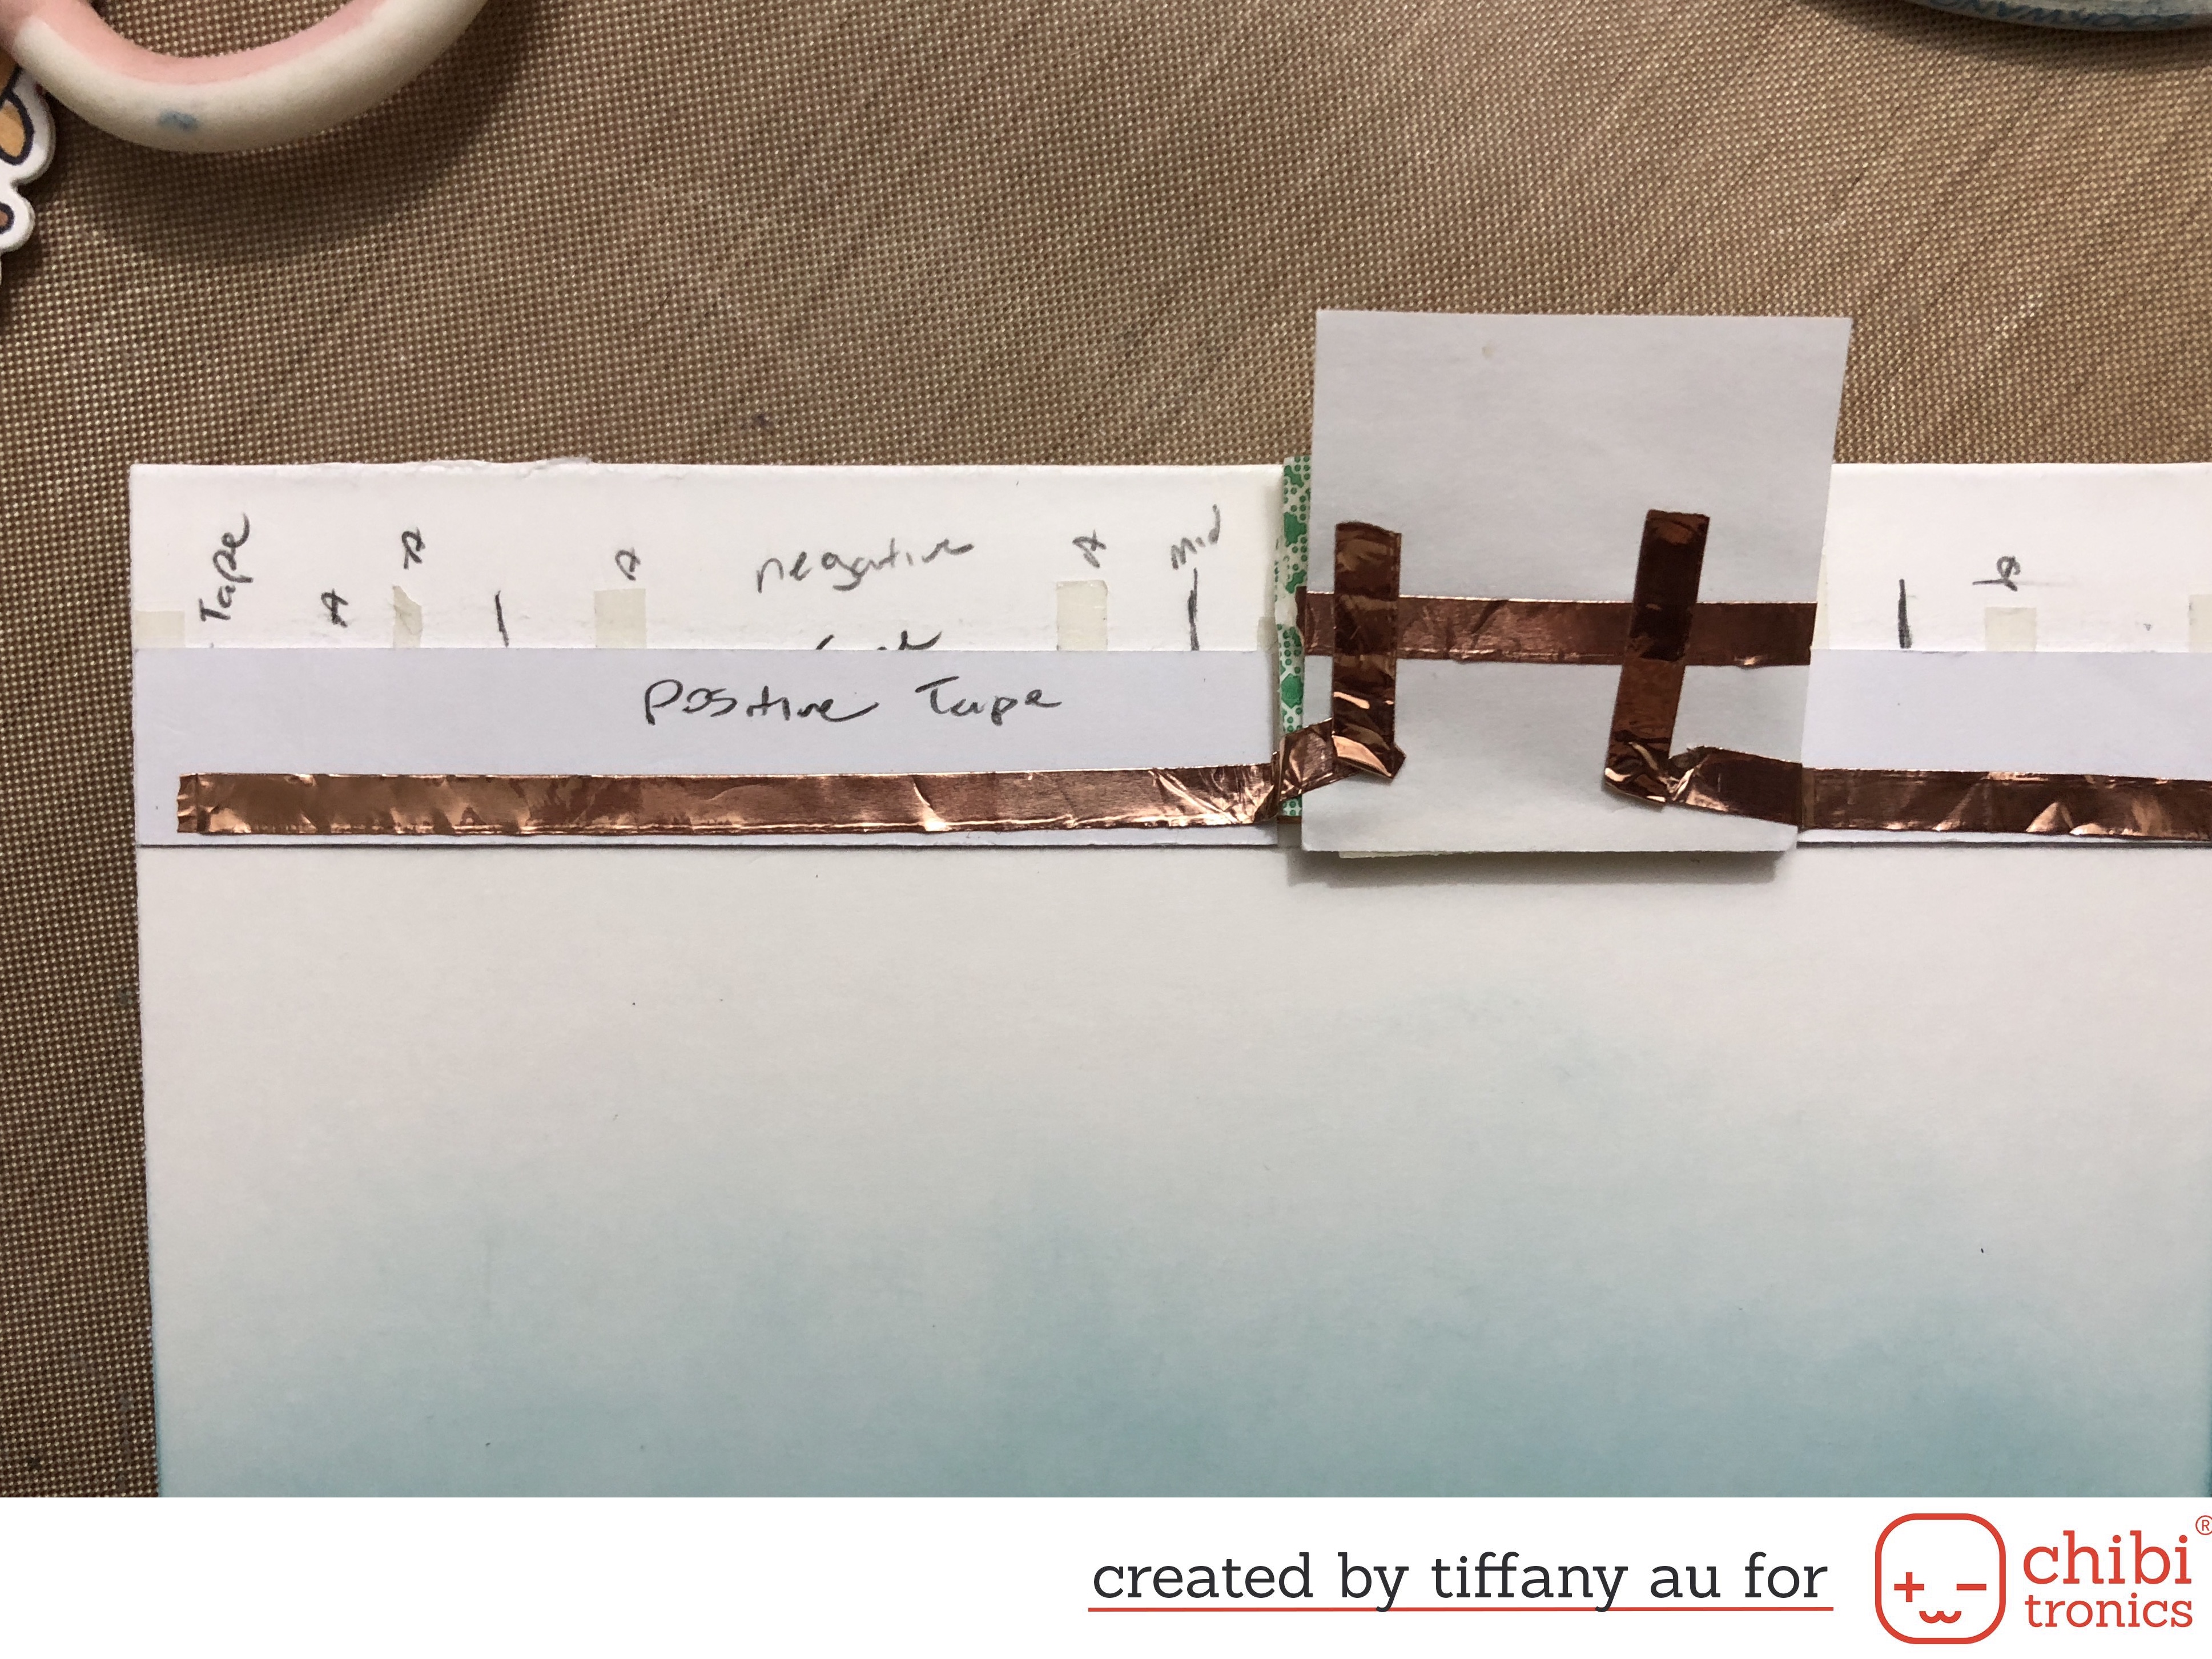
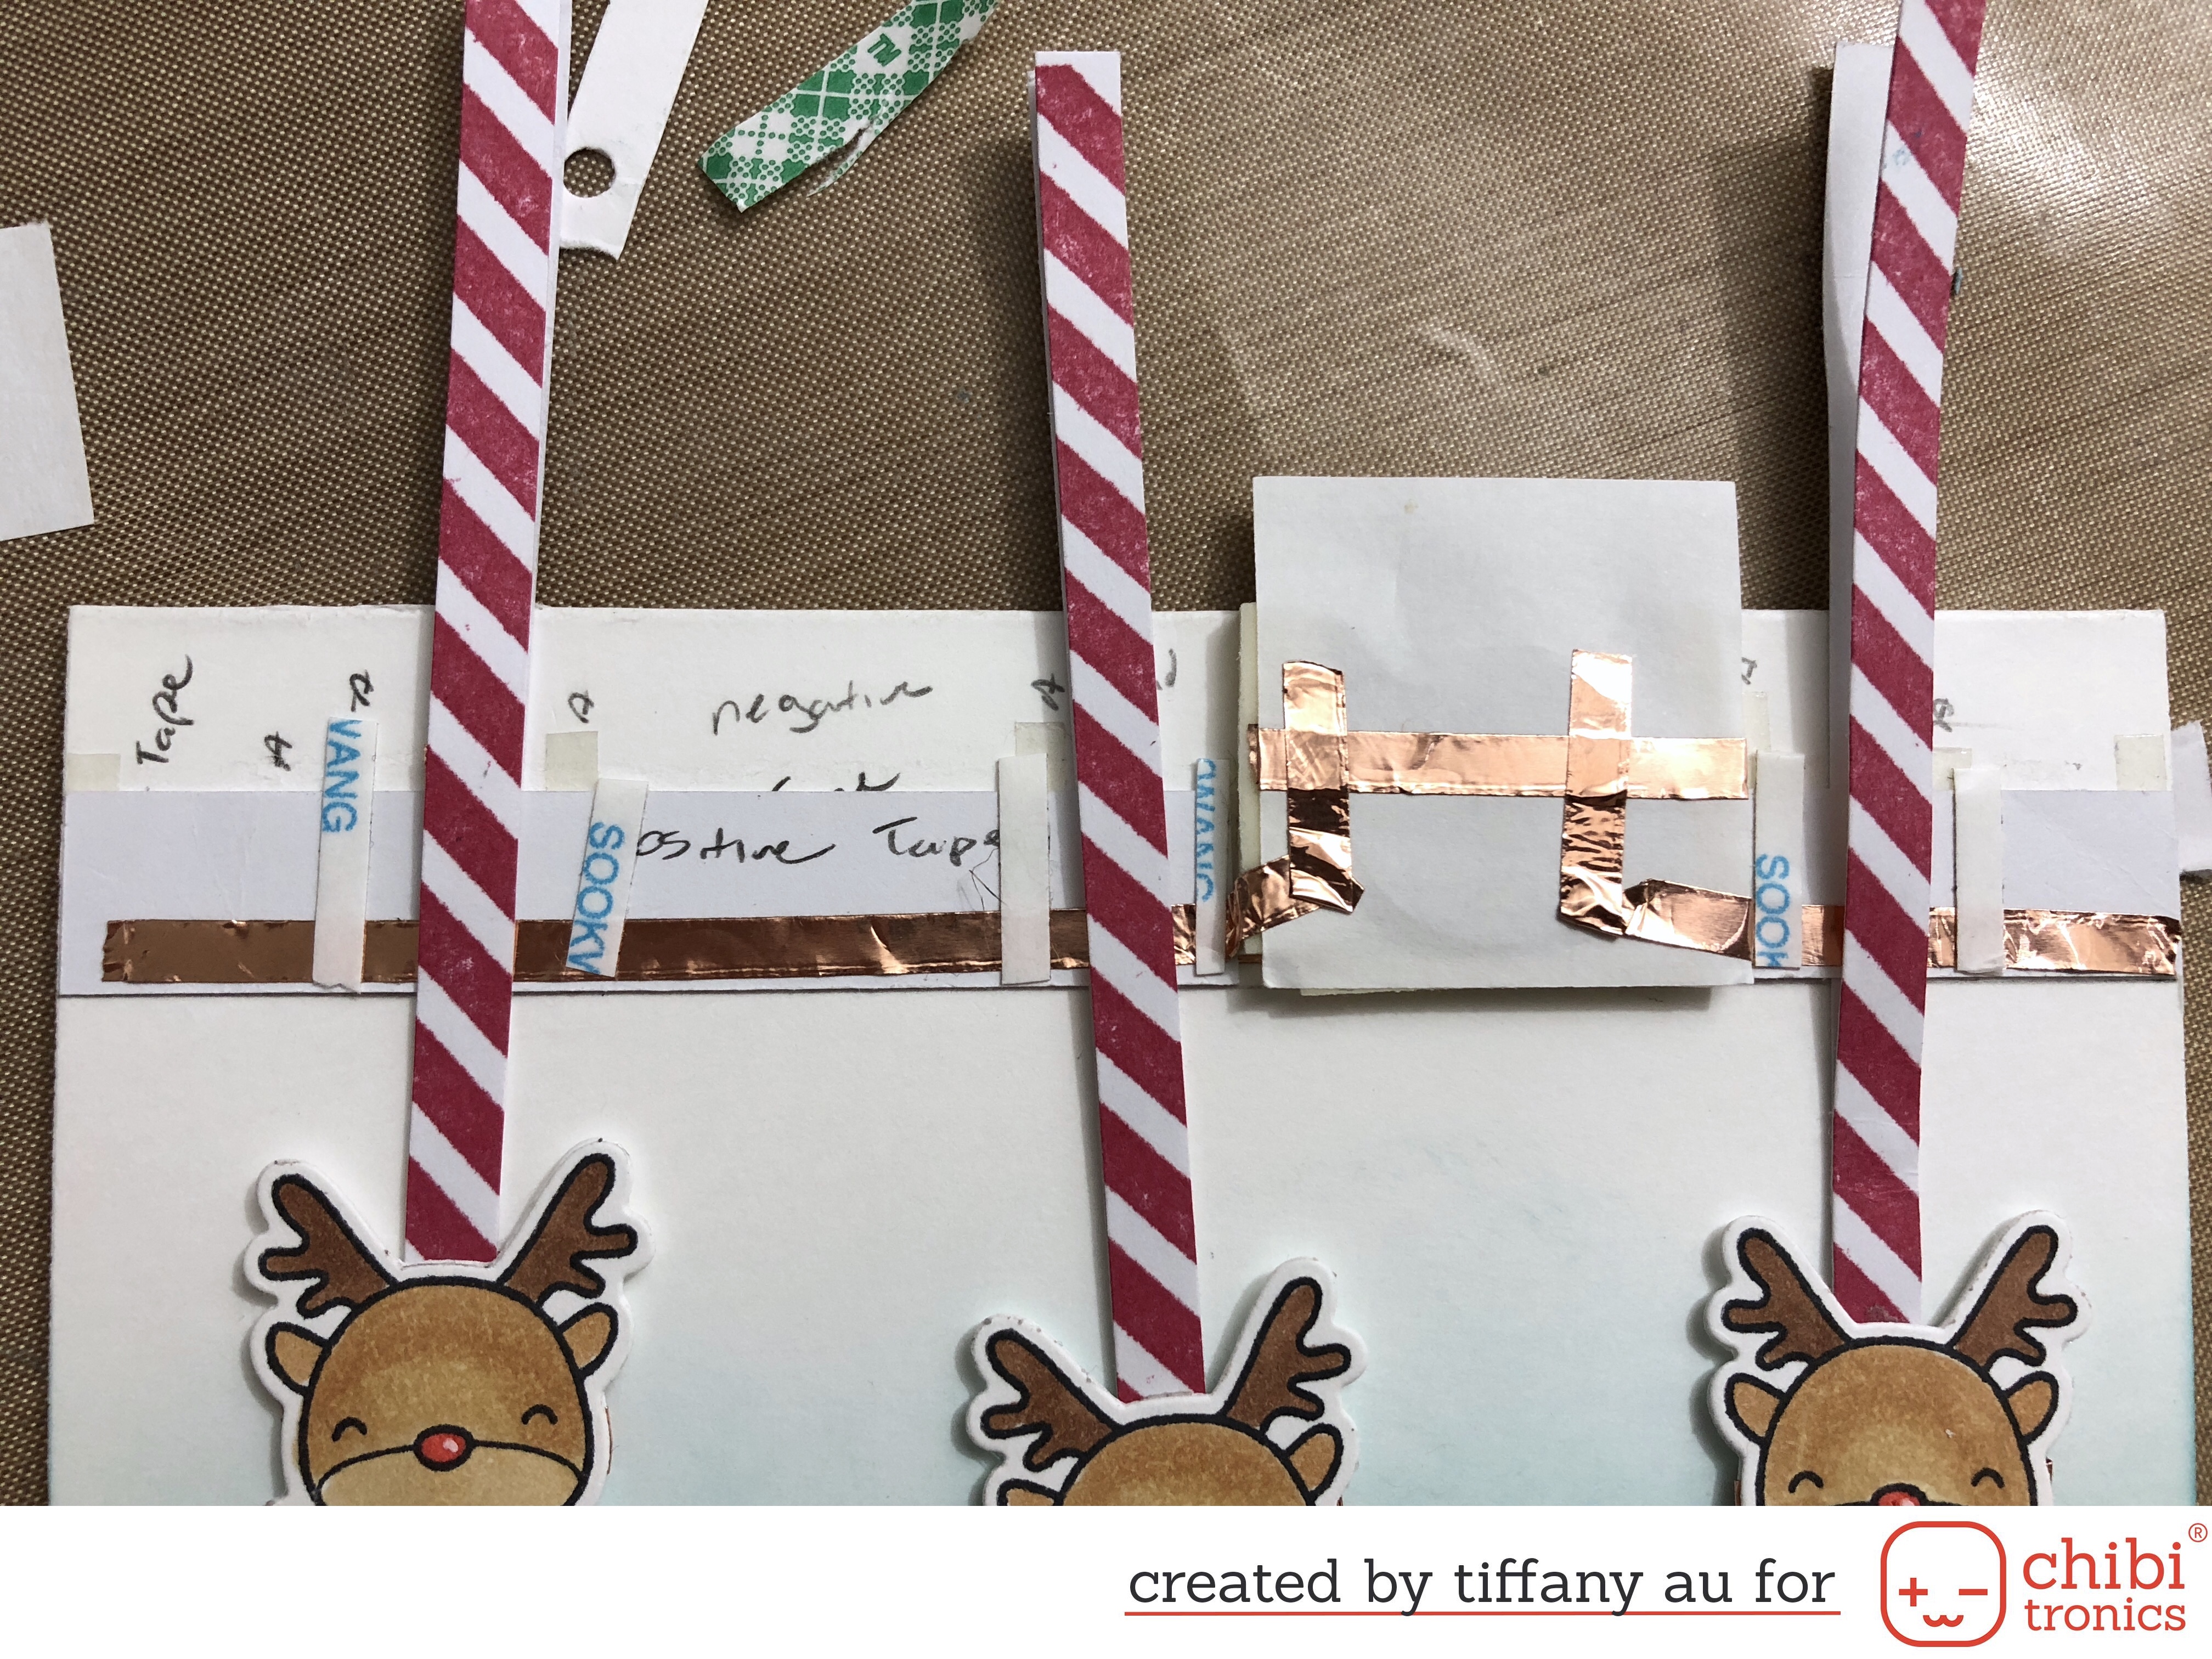
- To create the rest of the circuit on my card base I first mark down where each of my carousel poles and battery will go. Then tape down a strip of copper tape onto my cardstock for the negative side. This strip that will touch each pole is positioned towards the bottom but the part passing through the battery is position in the middle.

- To complete layer 1 of the circuit sandwich I placed strips of adhesive tape around where each pole will be, making sure not to put the tape too close to the pole. Remove the release paper and lay down the 6” x 1” strip (trimming as needed). Last, put down double layers of foam tape around the battery.
- For layer 2 of the circuit sandwich, I place a thin piece of paper over the battery and lay down the positive copper tape over where negative tape went and made sure to wrap a piece of copper tape of the battery cover before taping it down.

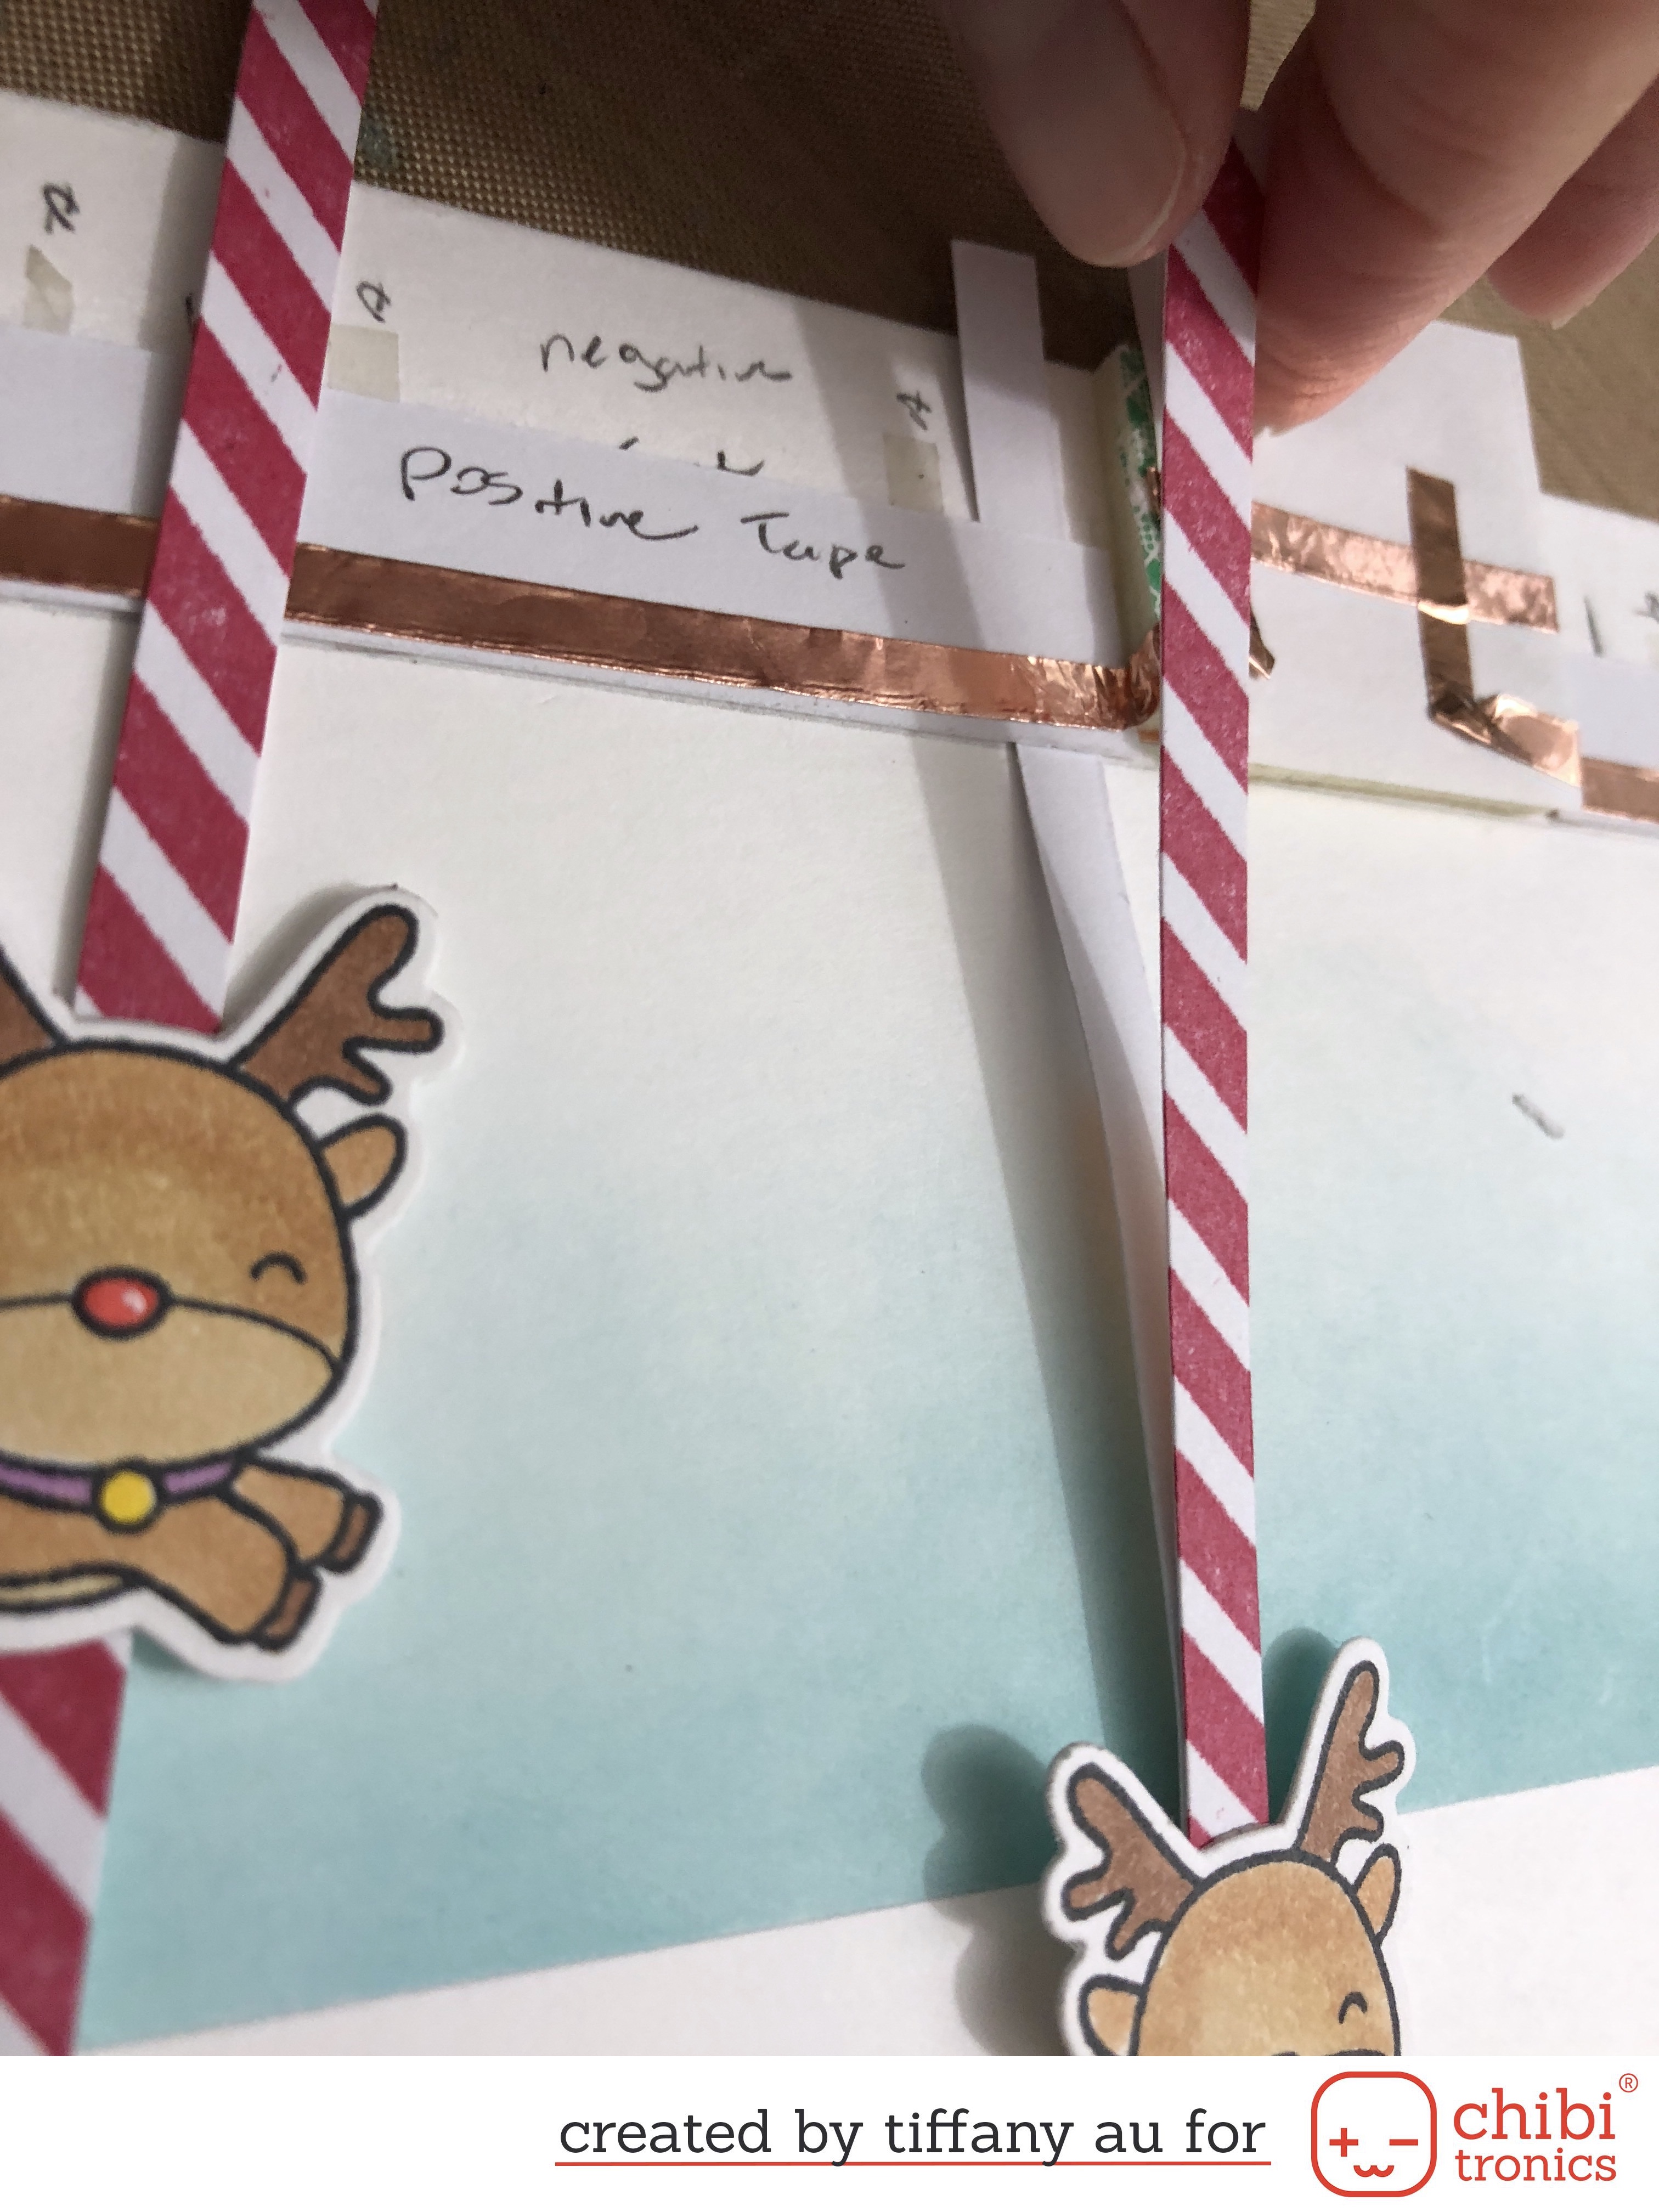
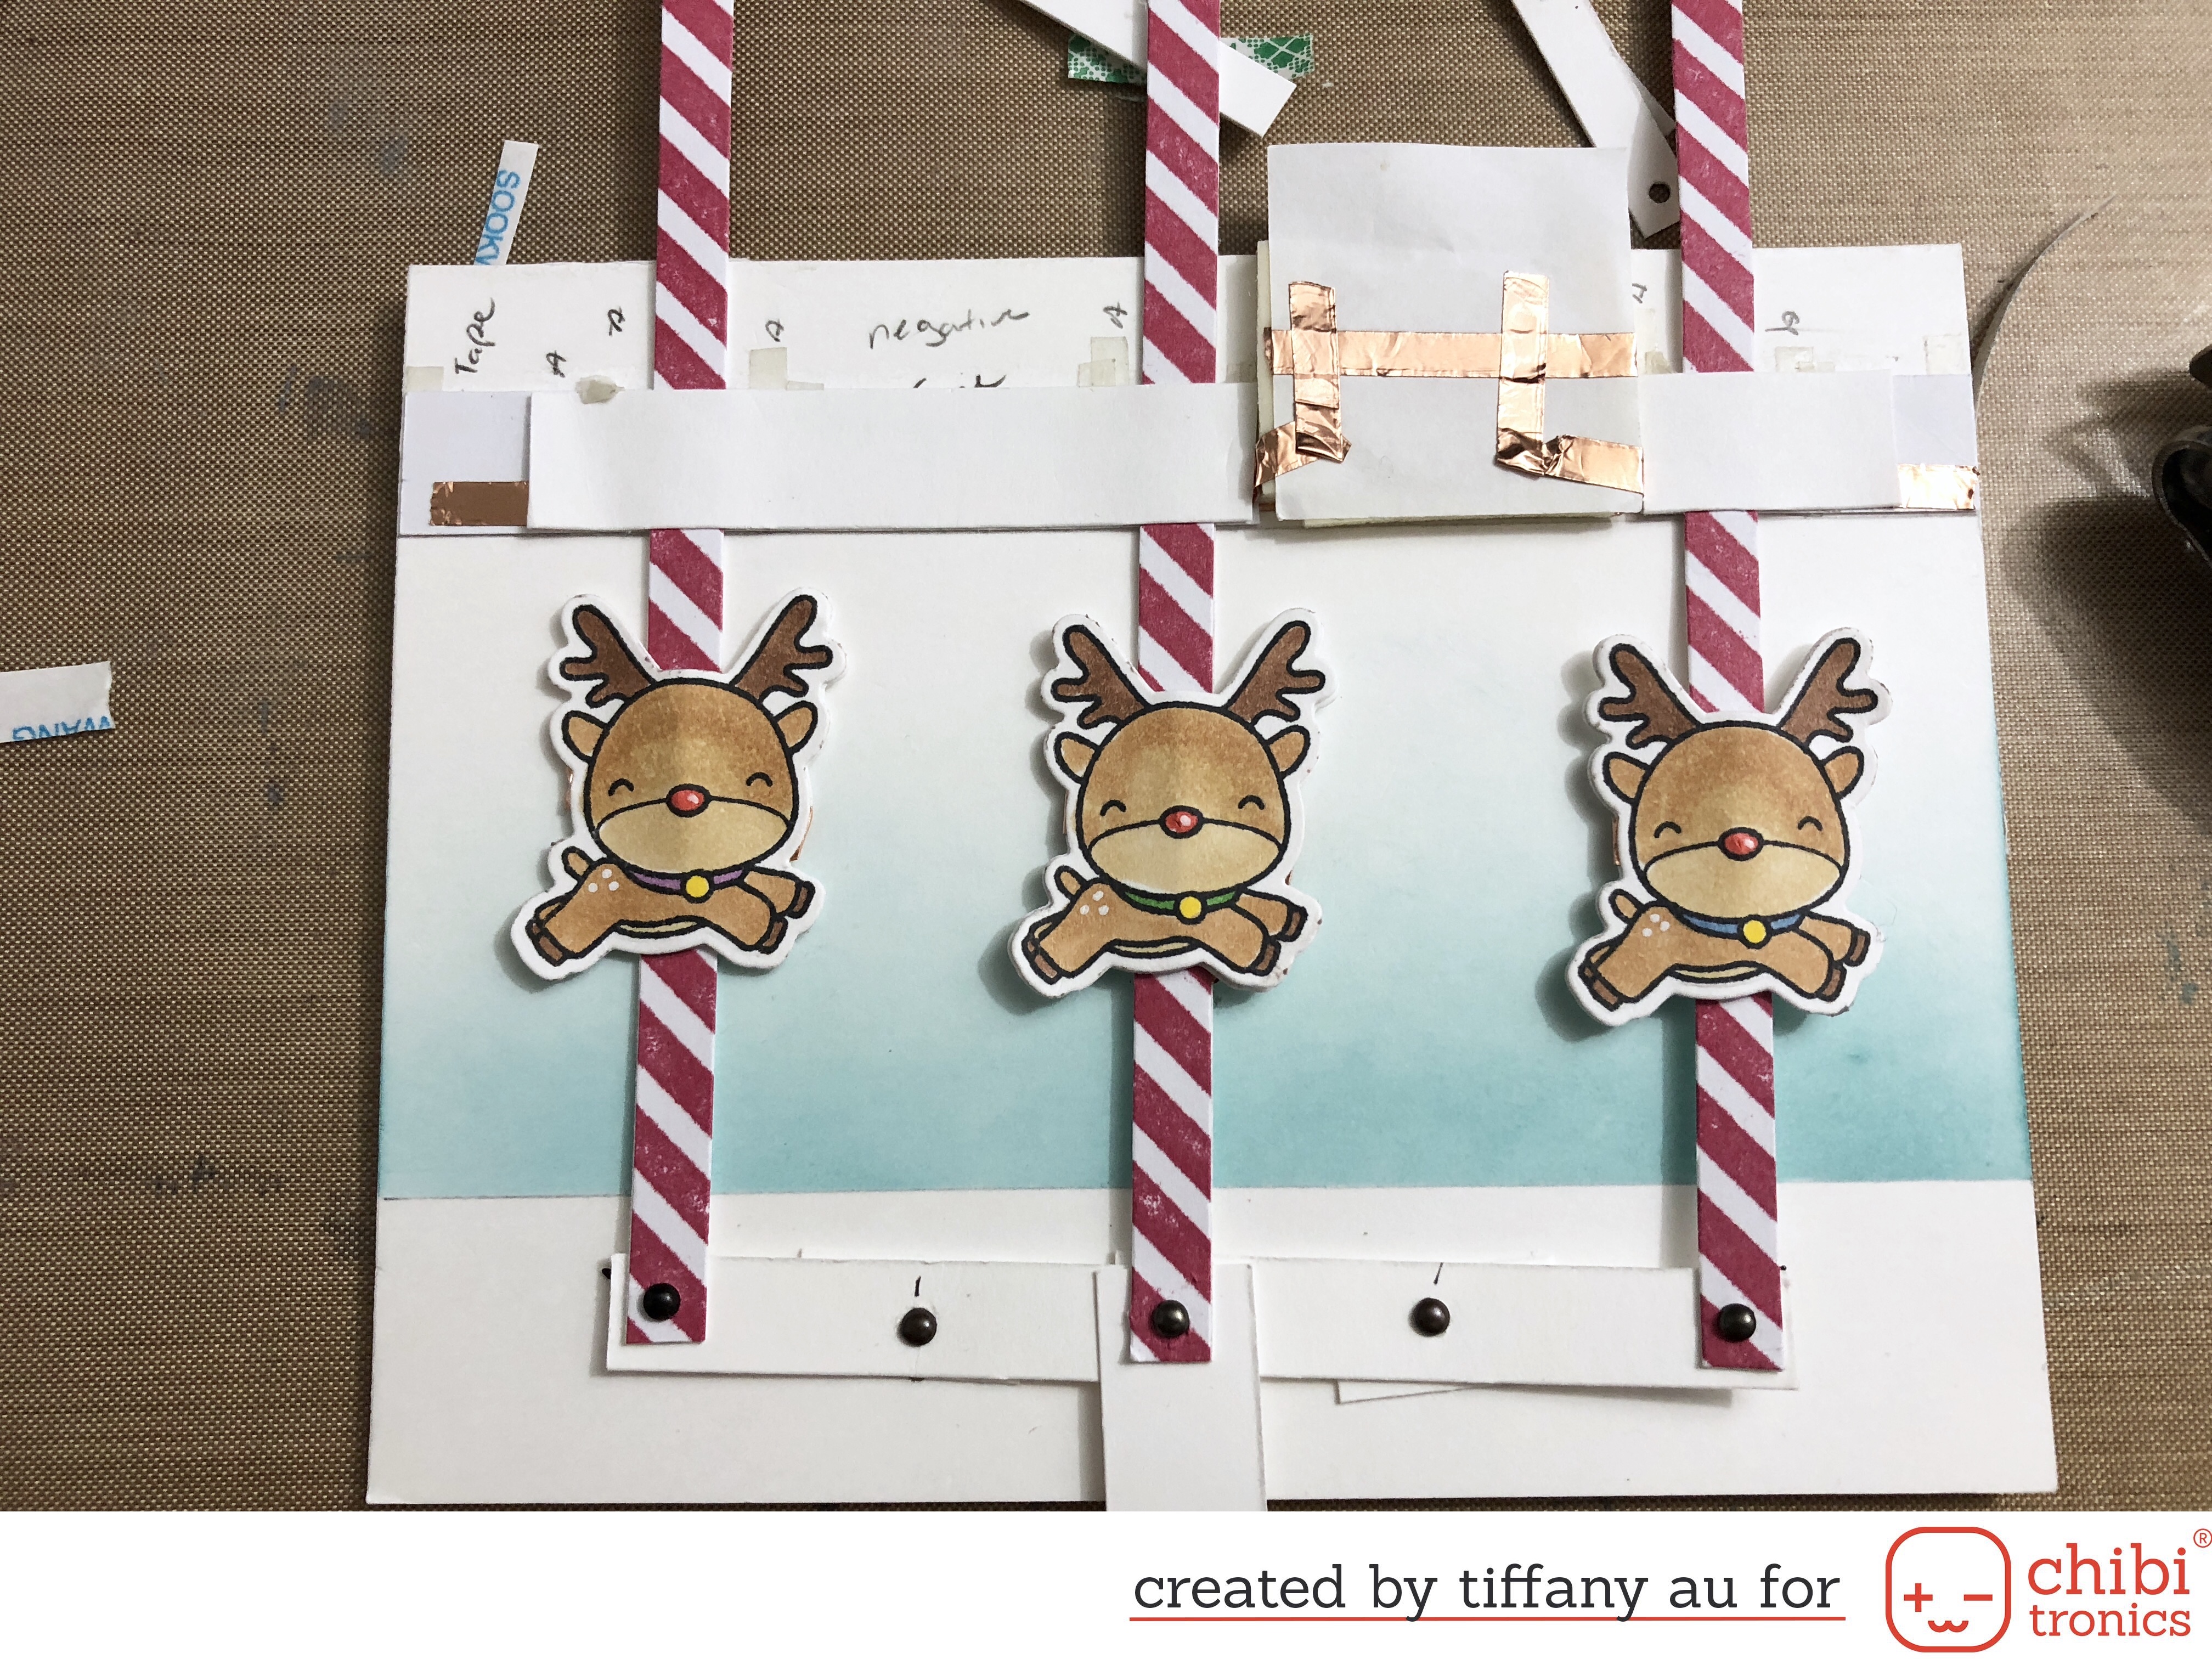
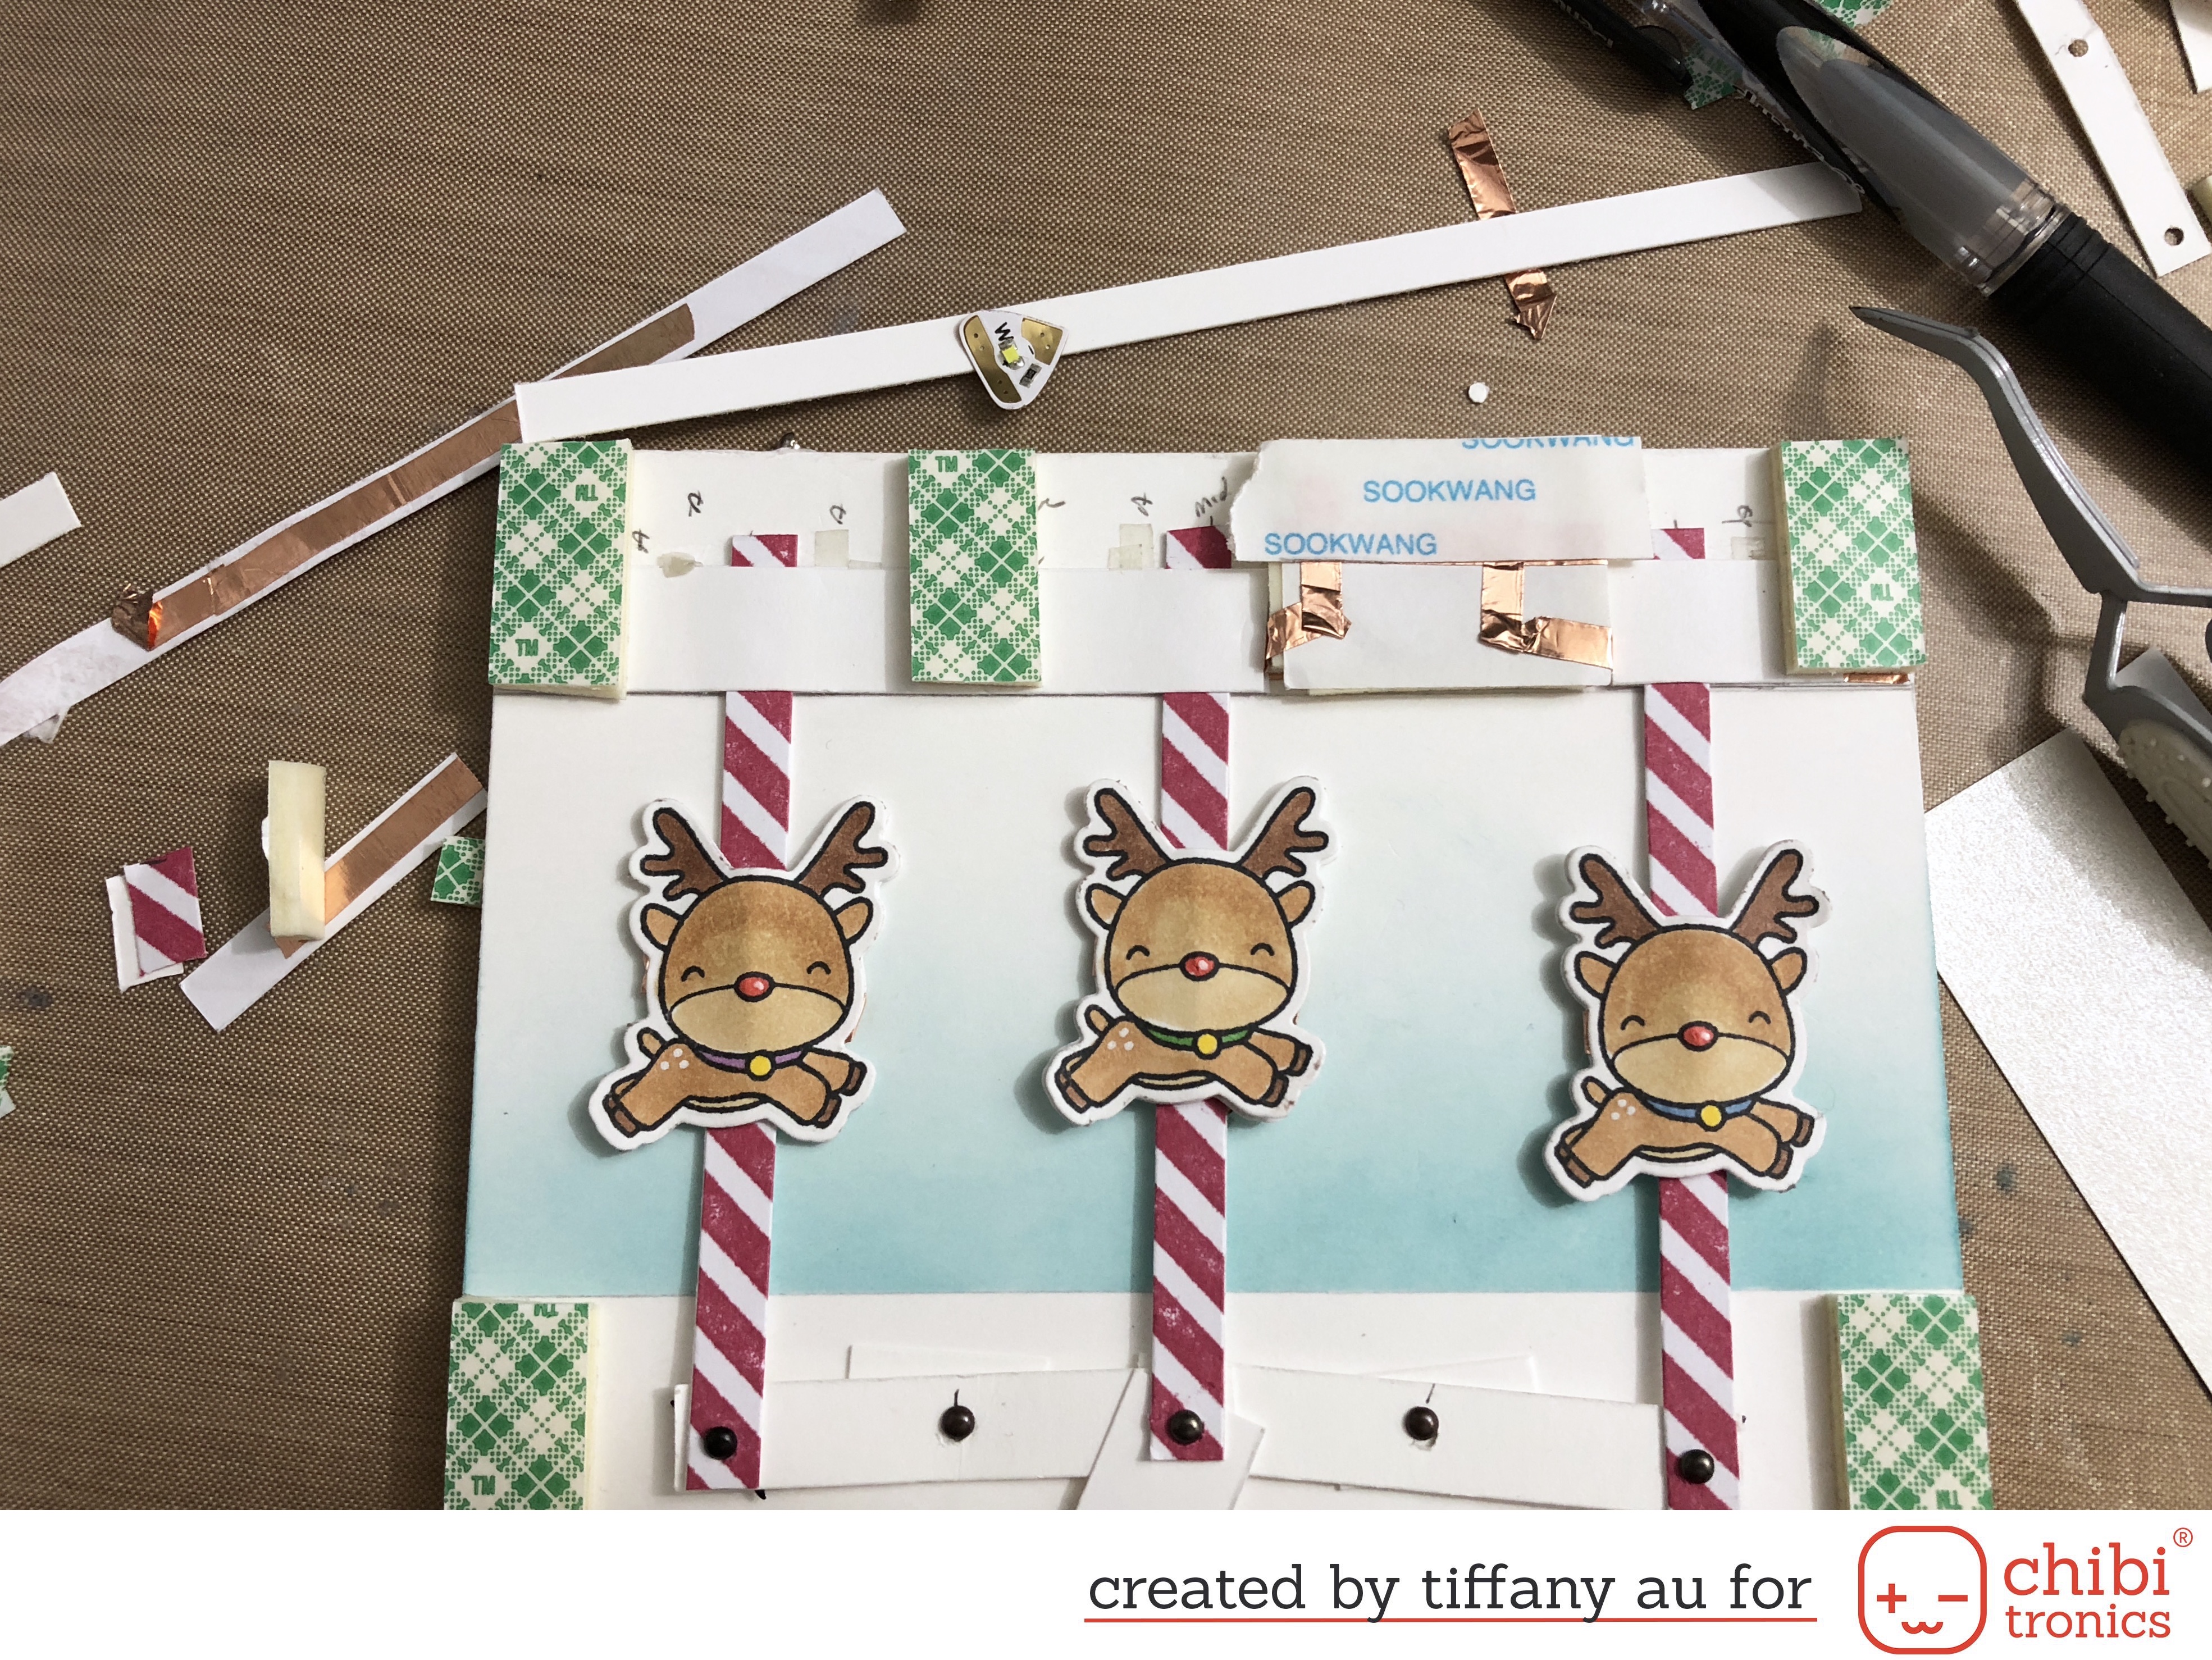
- I next thread the bottom piece of each carousel pole between layer 1 and 2 thus connecting the negative side of the pole to the negative copper tape on the card base. Lay down the positive side of the pole on top of the positive copper tape and place adhesive strips around it. And last, place my 6” x 0.5’ strip over it which will finish my LED circuit. Each pole should be able to move up and down without any snag.

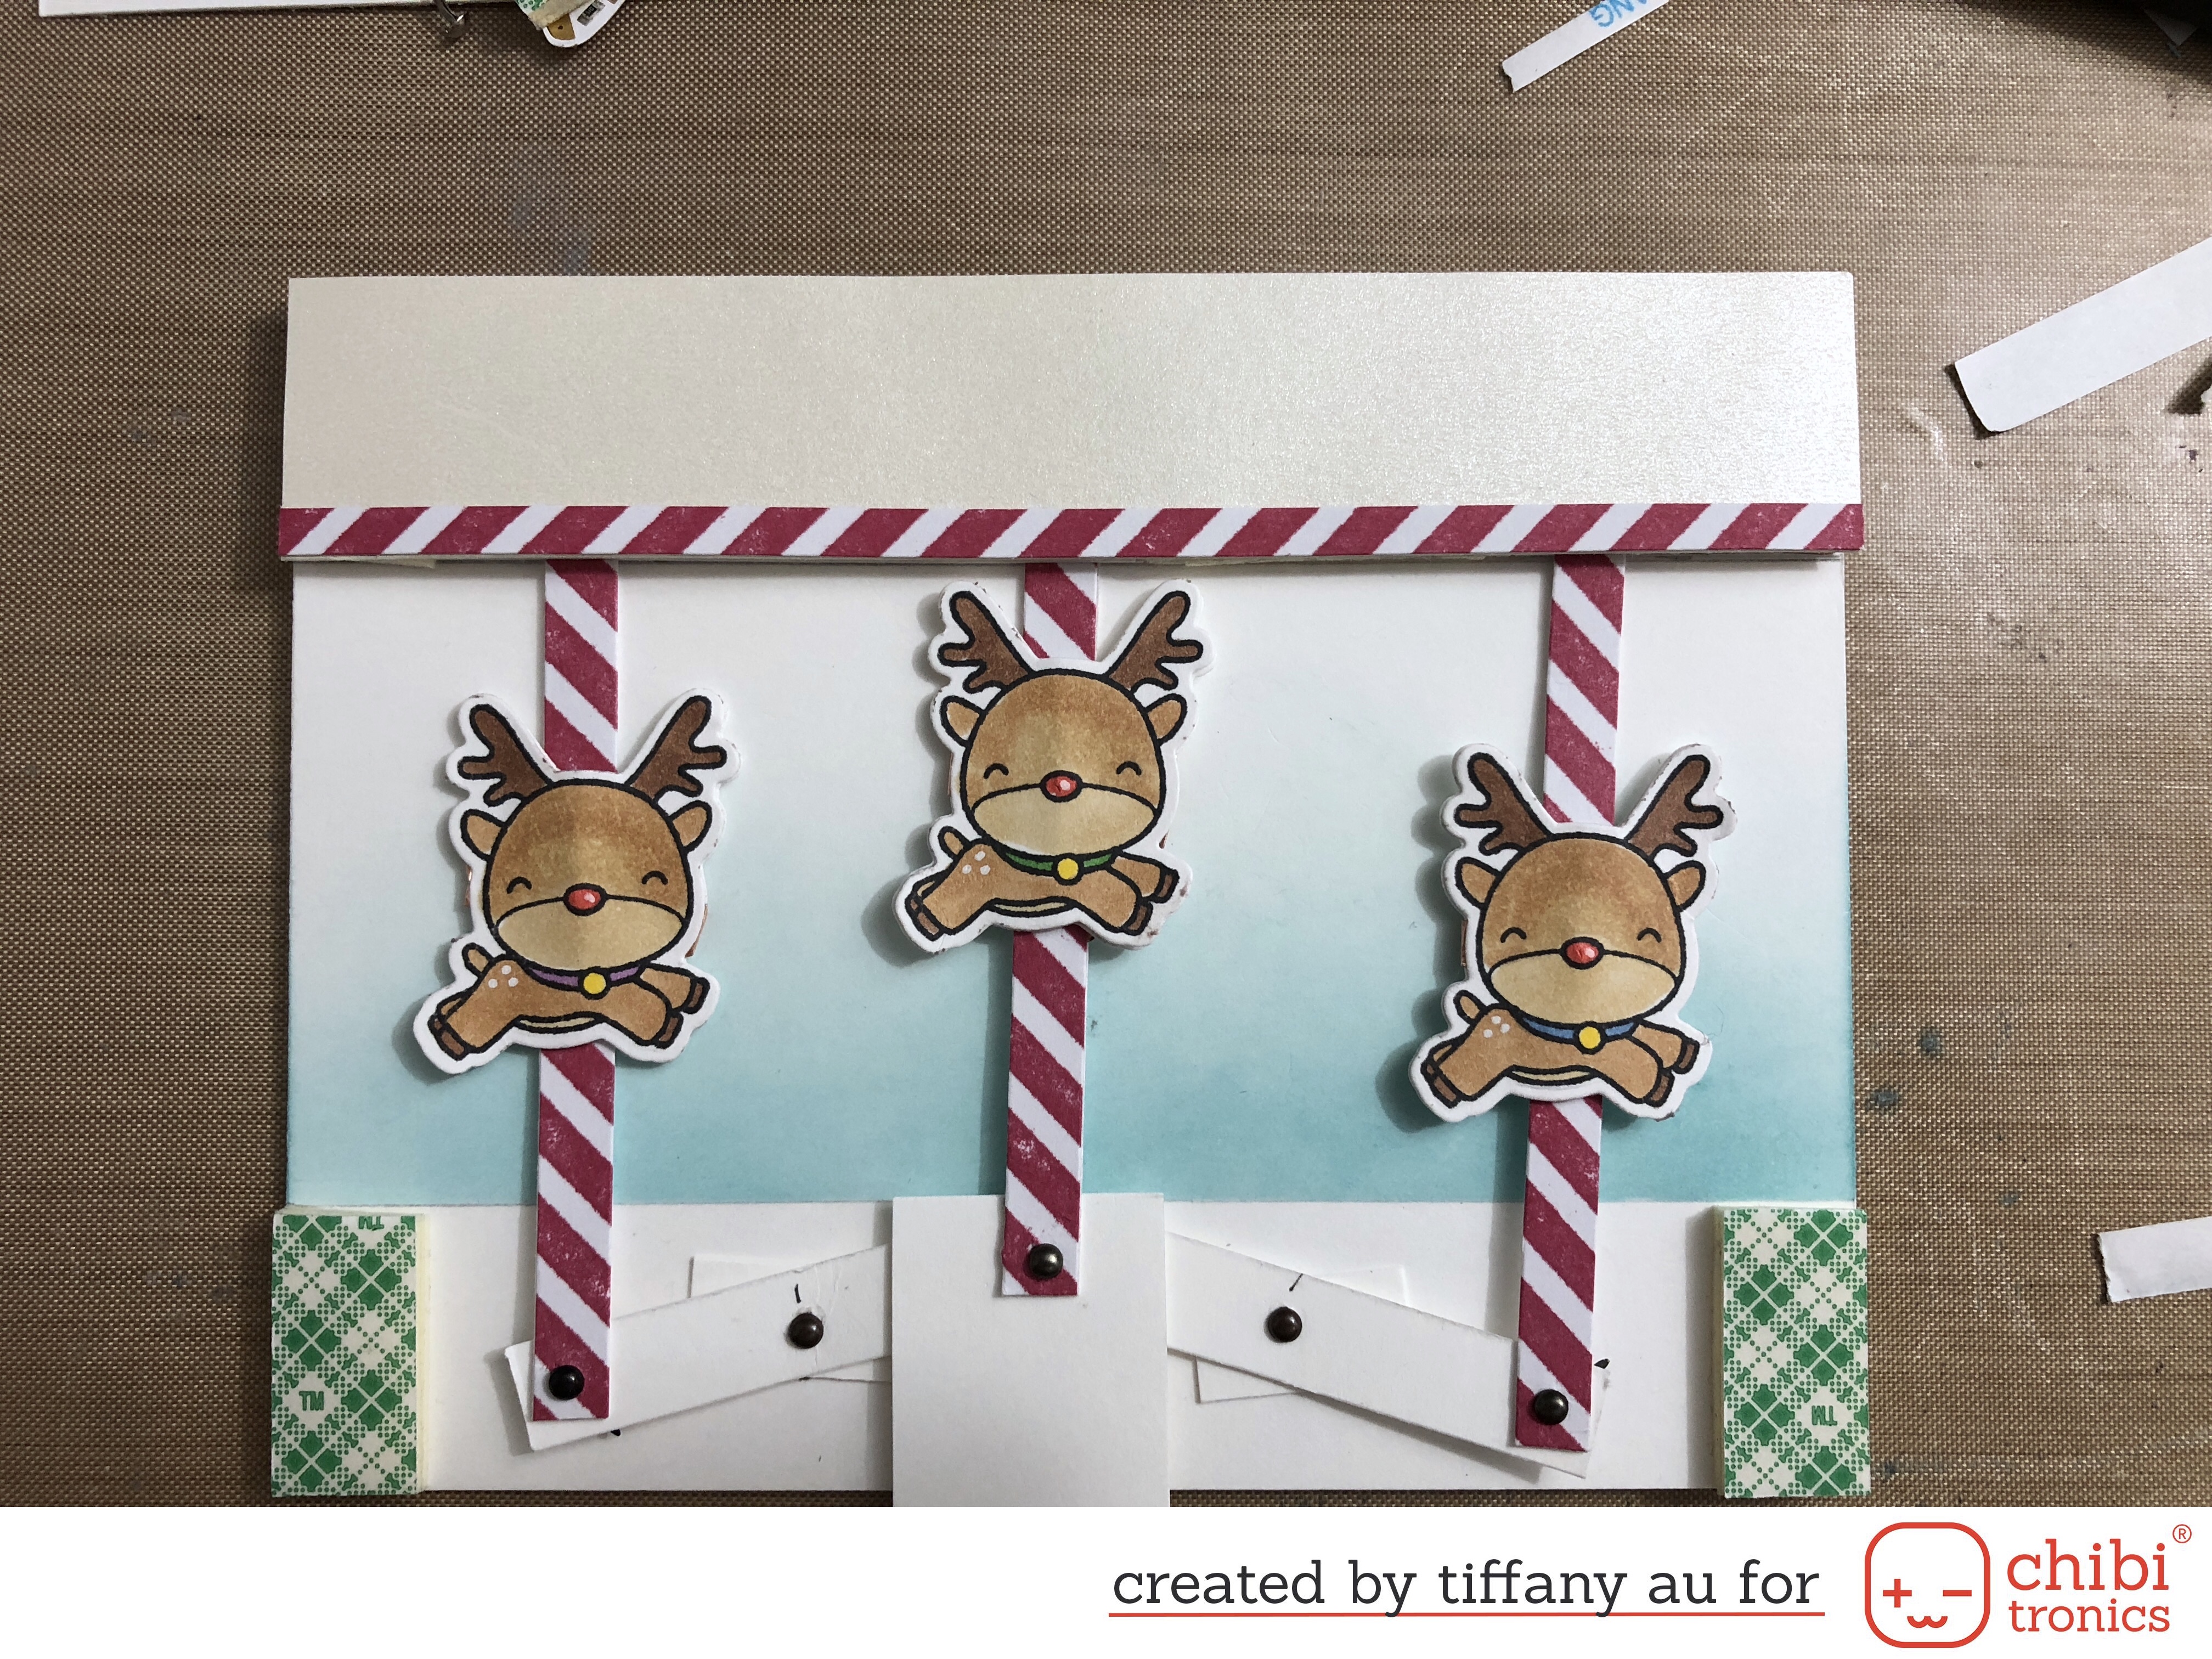
Part 3: Slider Mechanism
- The mechanics of this card is based on a see-saw (one side goes up and the other goes down). After positioning where each reindeer will stop I trim off the excess pole and punch a tiny hole on the bottom of each. From heavy cardstock I cut out 2 strips 2”x 0.5” and 1 strip of paper 1” wide. From the 2 strips of paper, I punch out a hole on each side and in the middle. From the 1 wide strip I punch out 1 hole at the end. I then connect the ends together using tiny brads.
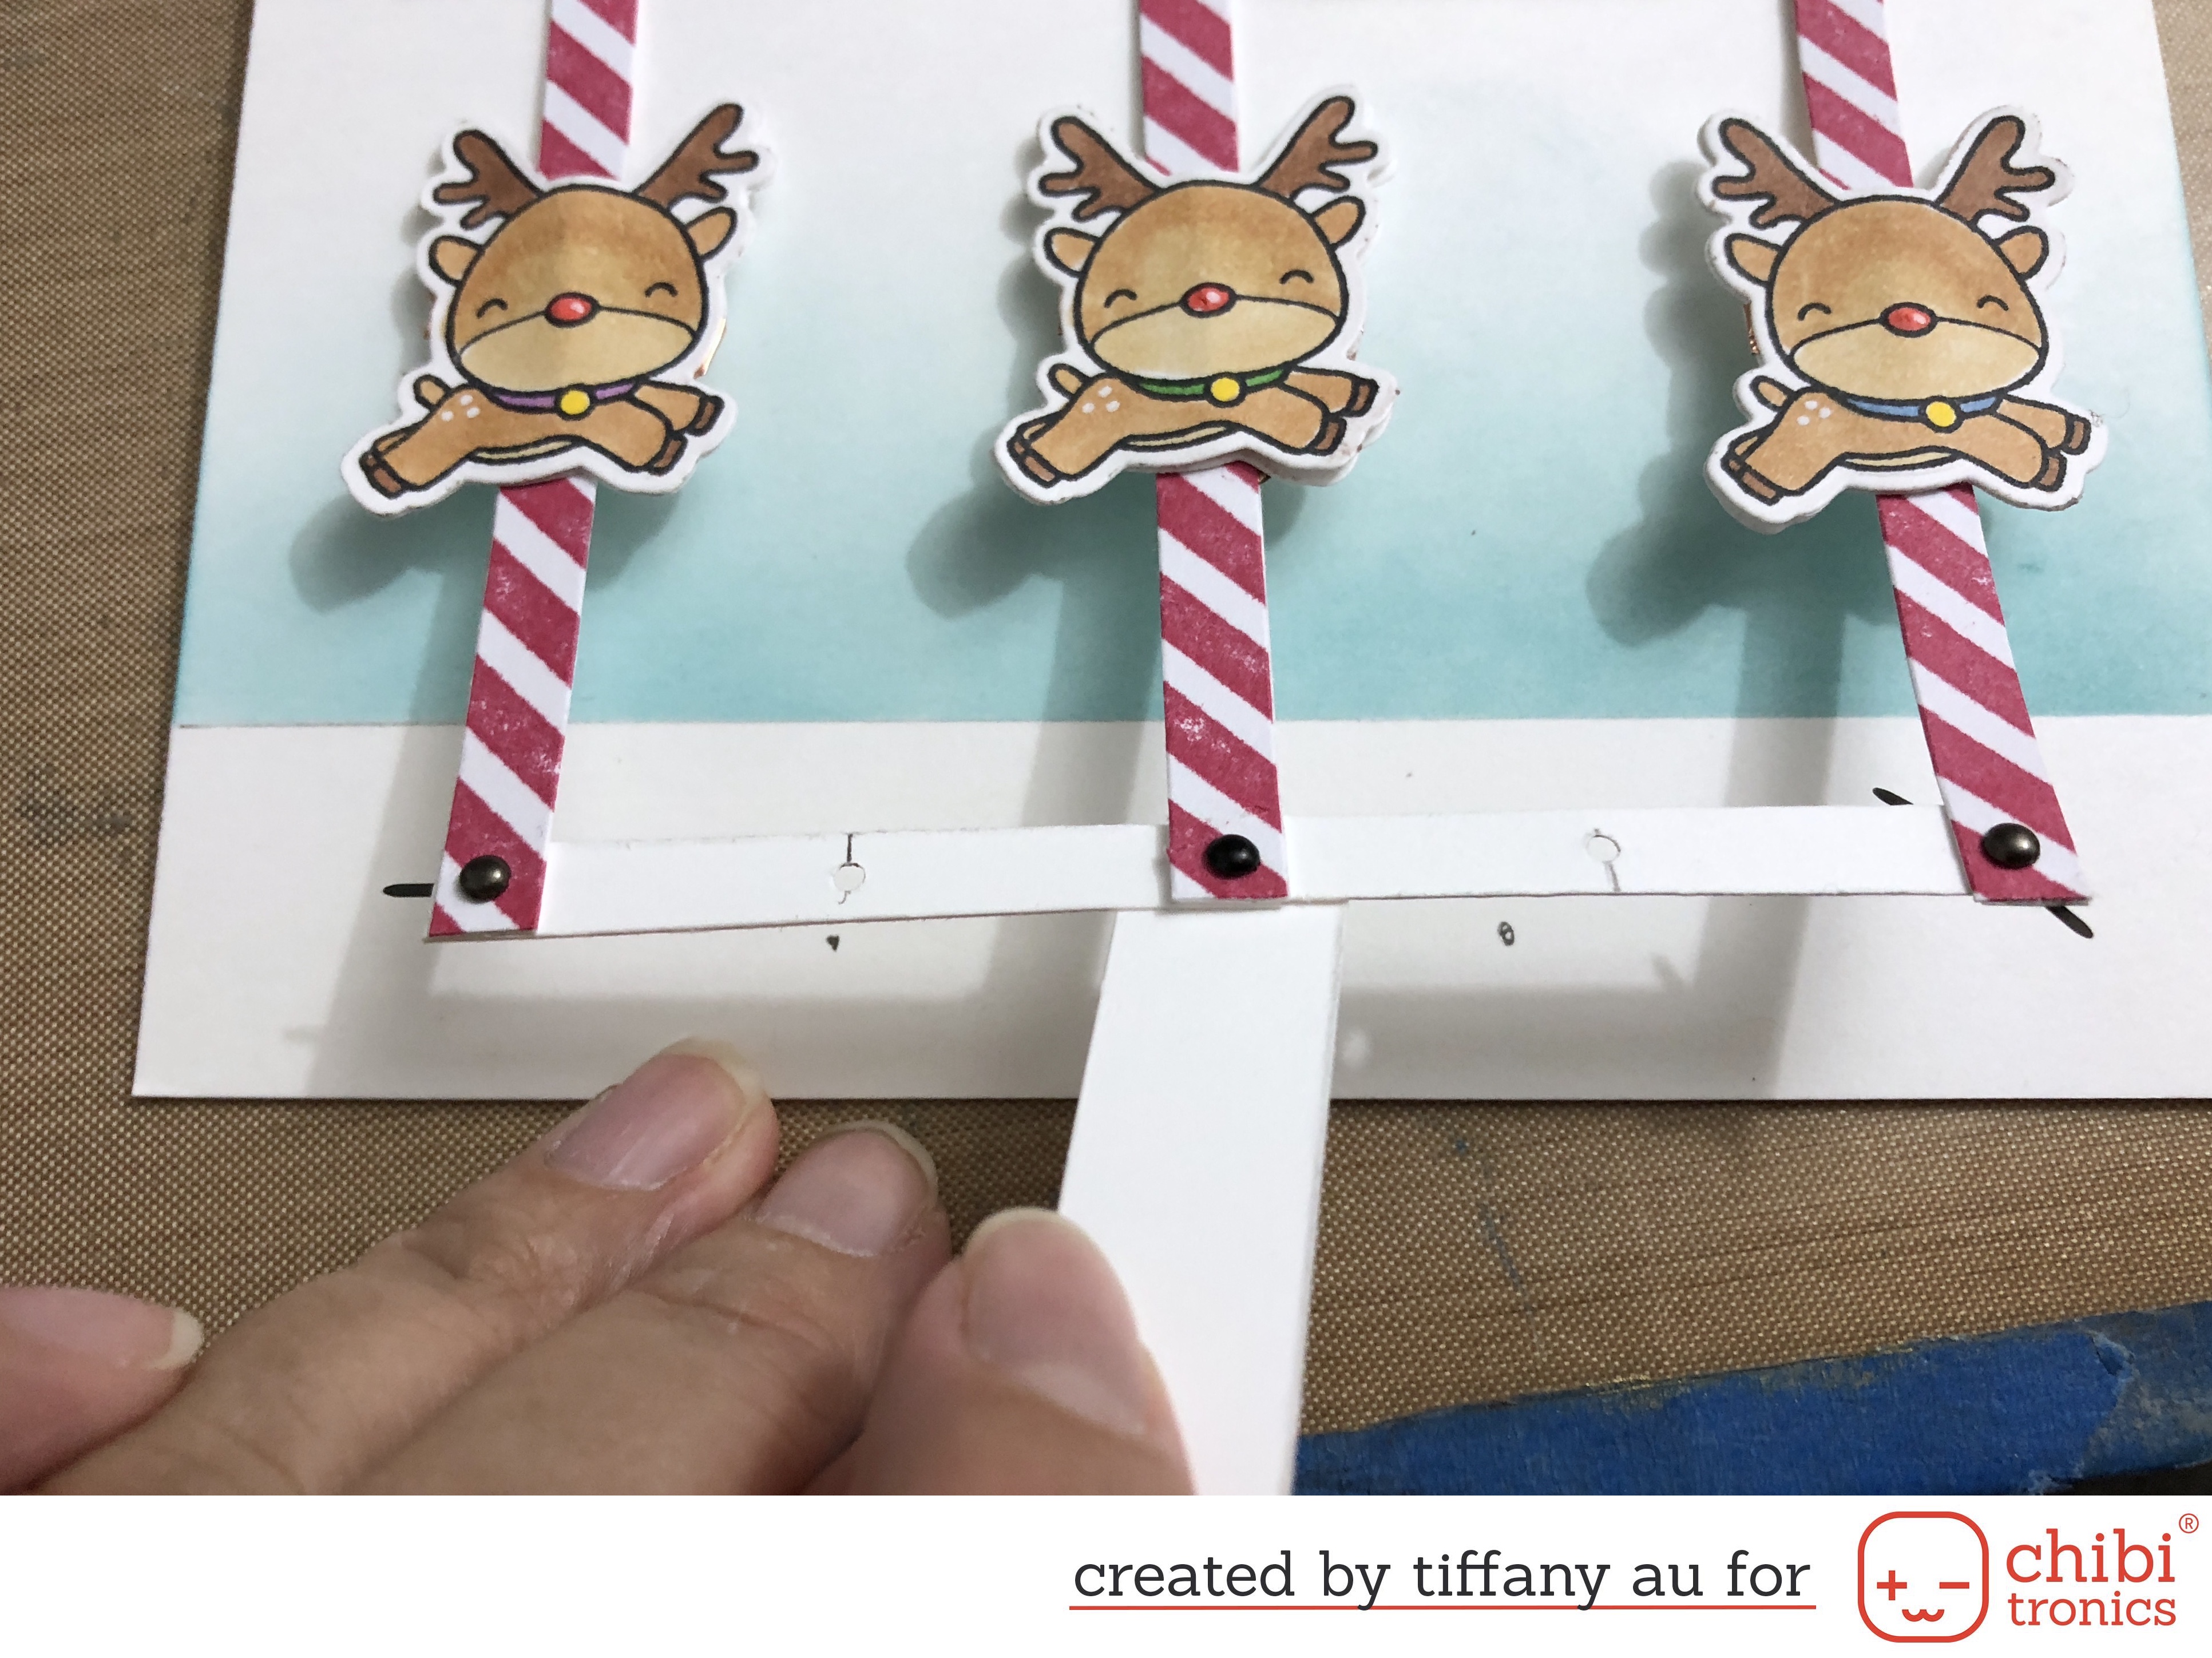
- Secure the middle hole to the card base with a tiny brad.
- The wide strip is the handle to move your reindeer and if its too loose you can glue down the middle pole to it with a tiny adhesive.
Last step is put down 2 layers of foam tape around the card making sure to NOT cover the opening for the battery. Note: that is done on purpose so the battery can be replaced and can be taken out with tweezers. Decorate the front with gold cardstock with a slim strip of red and white strip of paper for the edge and add my sentiment in dark green ink.

Supplies Used:
- Chibitronics White LED Lights
- Chibitronics Copper Tape
- 3v Coin Battery
- Mama Elephant’s Reindeer Games Stamp and Dies
- Copic Markers
- Broken China Distress Oxide Ink & Ink Blender
- 3M Foam Tape
- Paper Trimmer
- Tiny Brads (from Michaels)
- Hole Punch
- White Cardstock
- Red and White Striped Cardstock (from Michaels)
- Gold Cardstock (from Michaels)