How To > Projects > Tutorial > Paper Circuit Techniques
Dissolve Card: Light-up Picture Switcher
Project Design & Tutorial by: Jill Dawson
Dazzling Dissolve
In this tutorial, I’ll show you how to make a light-up version of a Victorian Era mechanism known as a dissolve, or dissolve card.
This paper mechanics project combines a trick of the eye (and pictures that flip) with a little electronic trickery of our own — Circuit Sticker LEDs and a sliding switch!
Video
Related
Categories
Introduction
During the Victorian Era (1837-1901), well before radio, television, and the Internet became major forms of communication, people wrote letters and invested in interactive, mechanical cards that they’d send to people they loved or wanted to impress.
Some cards featured intricately cut paper cages, flat surfaces that transformed into domes when lifted, revealing hidden images or messages. Others had pull tabs that resulted in items popping up or sliding in or out of view. Still others featured pictures that would shift, disappear, or dissolve into another image, whenever a lever or string was pulled! Picture changing mechanisms, with varying levels of complexity, are commonly referred to as dissolves or dissolve cards.

This paper mechanics tutorial adds a modern spin to a vintage concept, combining an optical illusion (and pictures that flip) with a little electronic trickery — Circuit Sticker LEDs and a sliding switch.
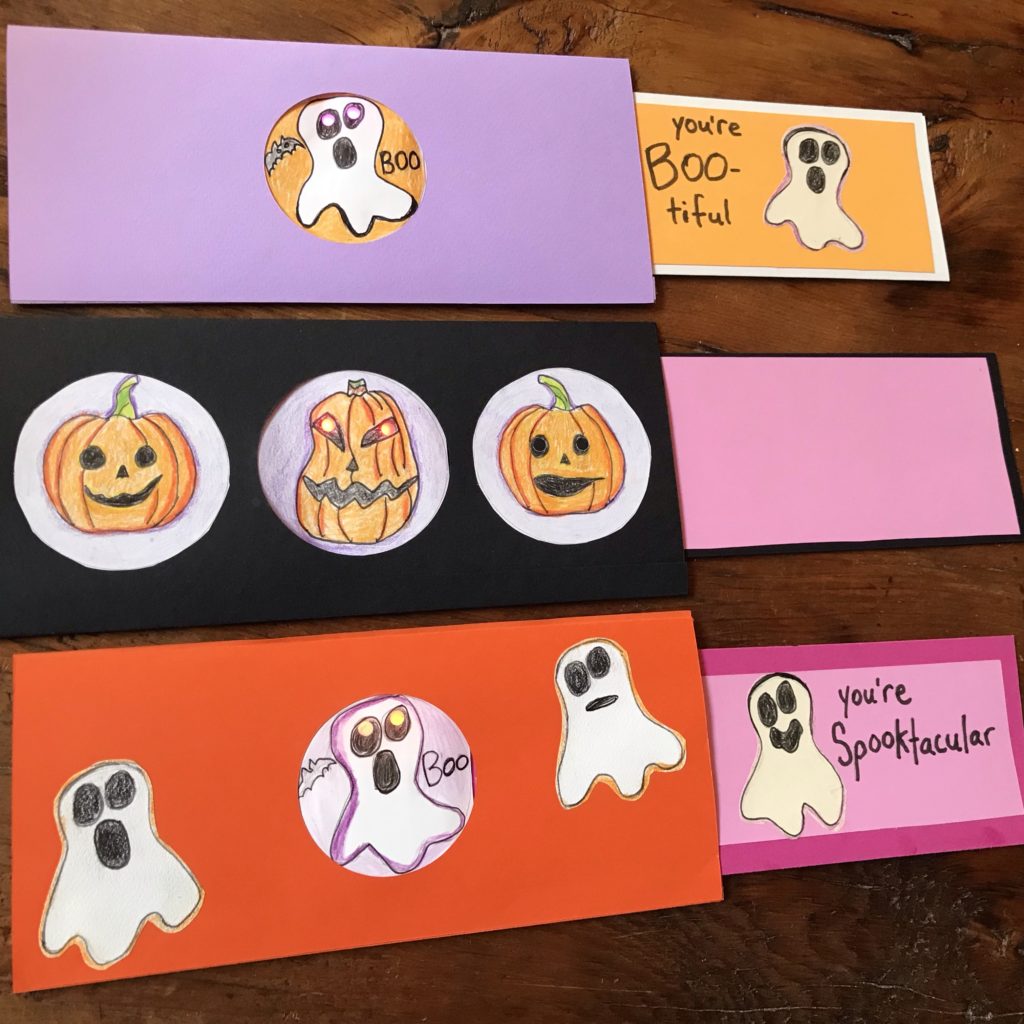
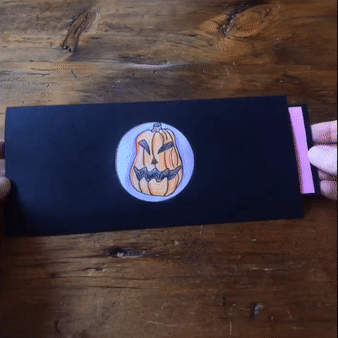
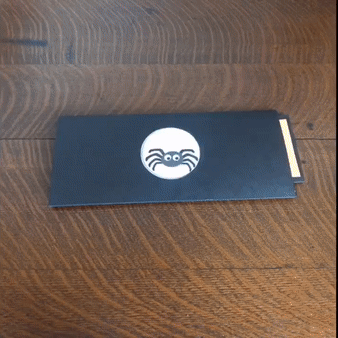
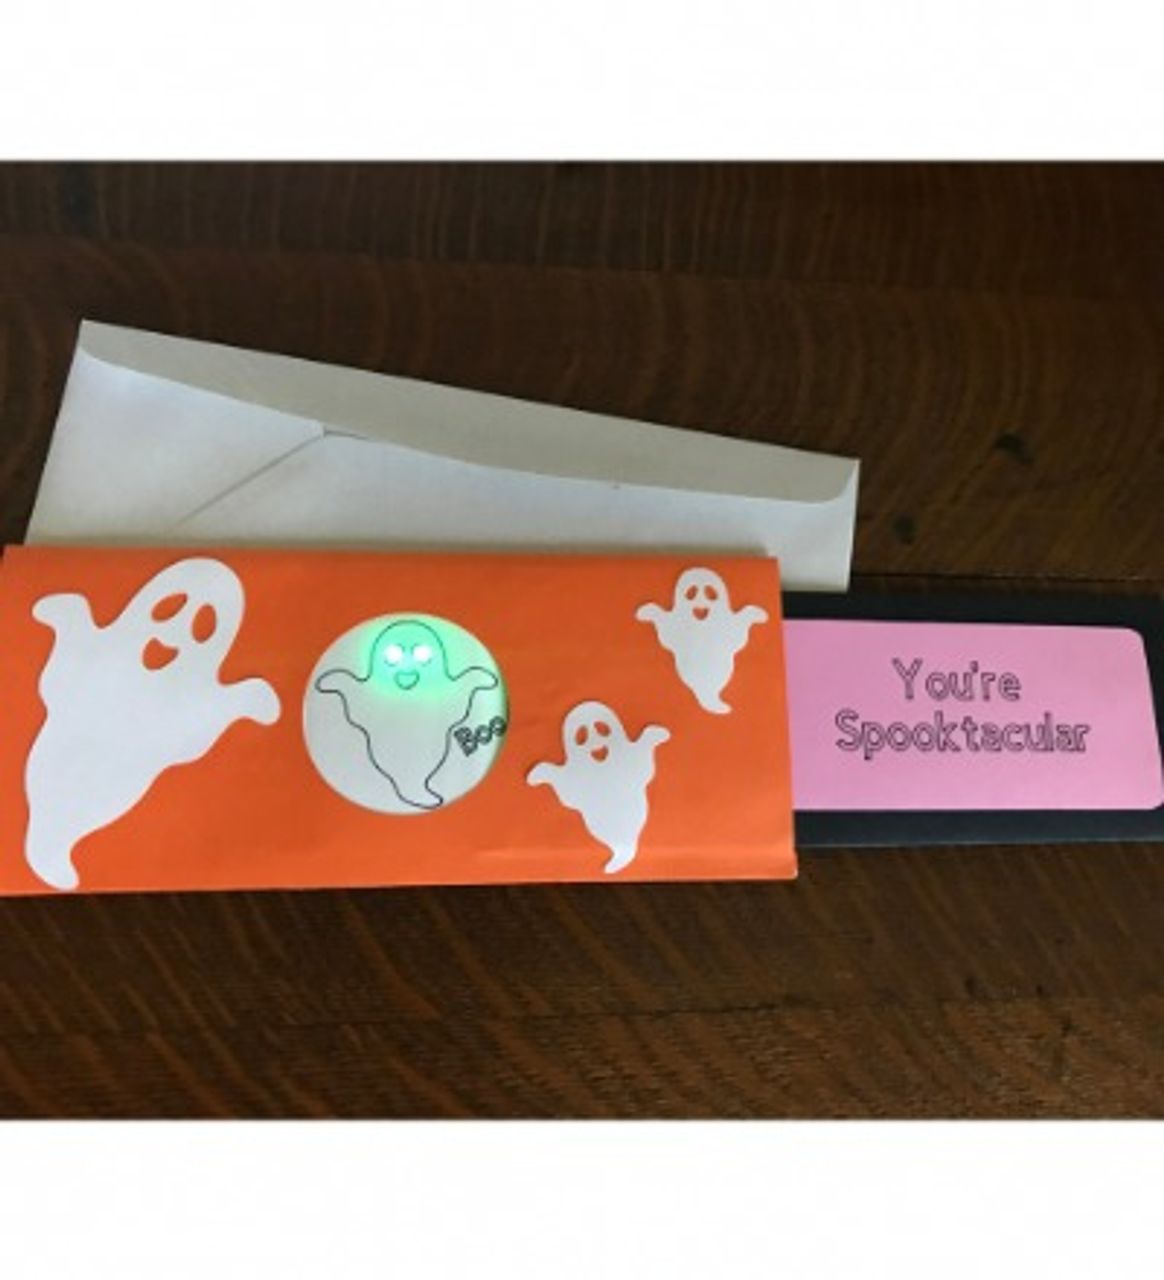
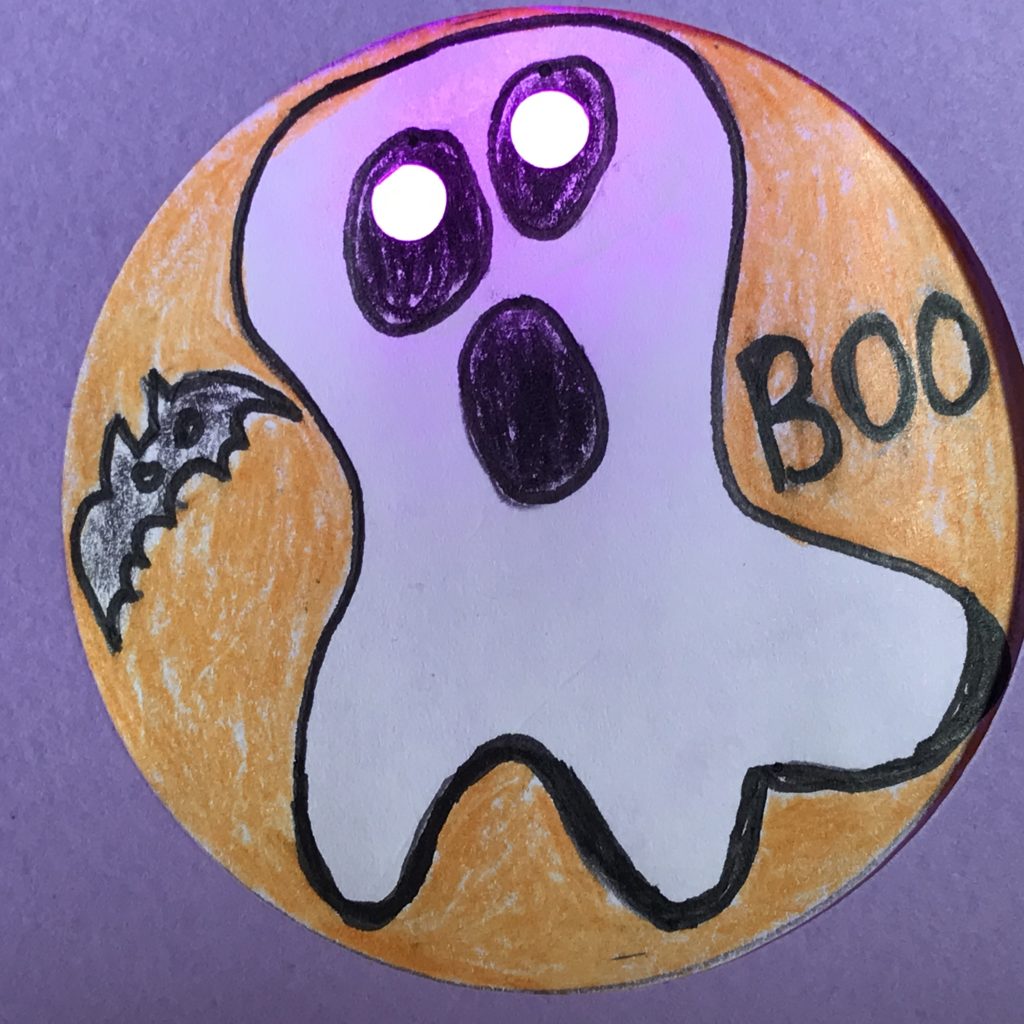
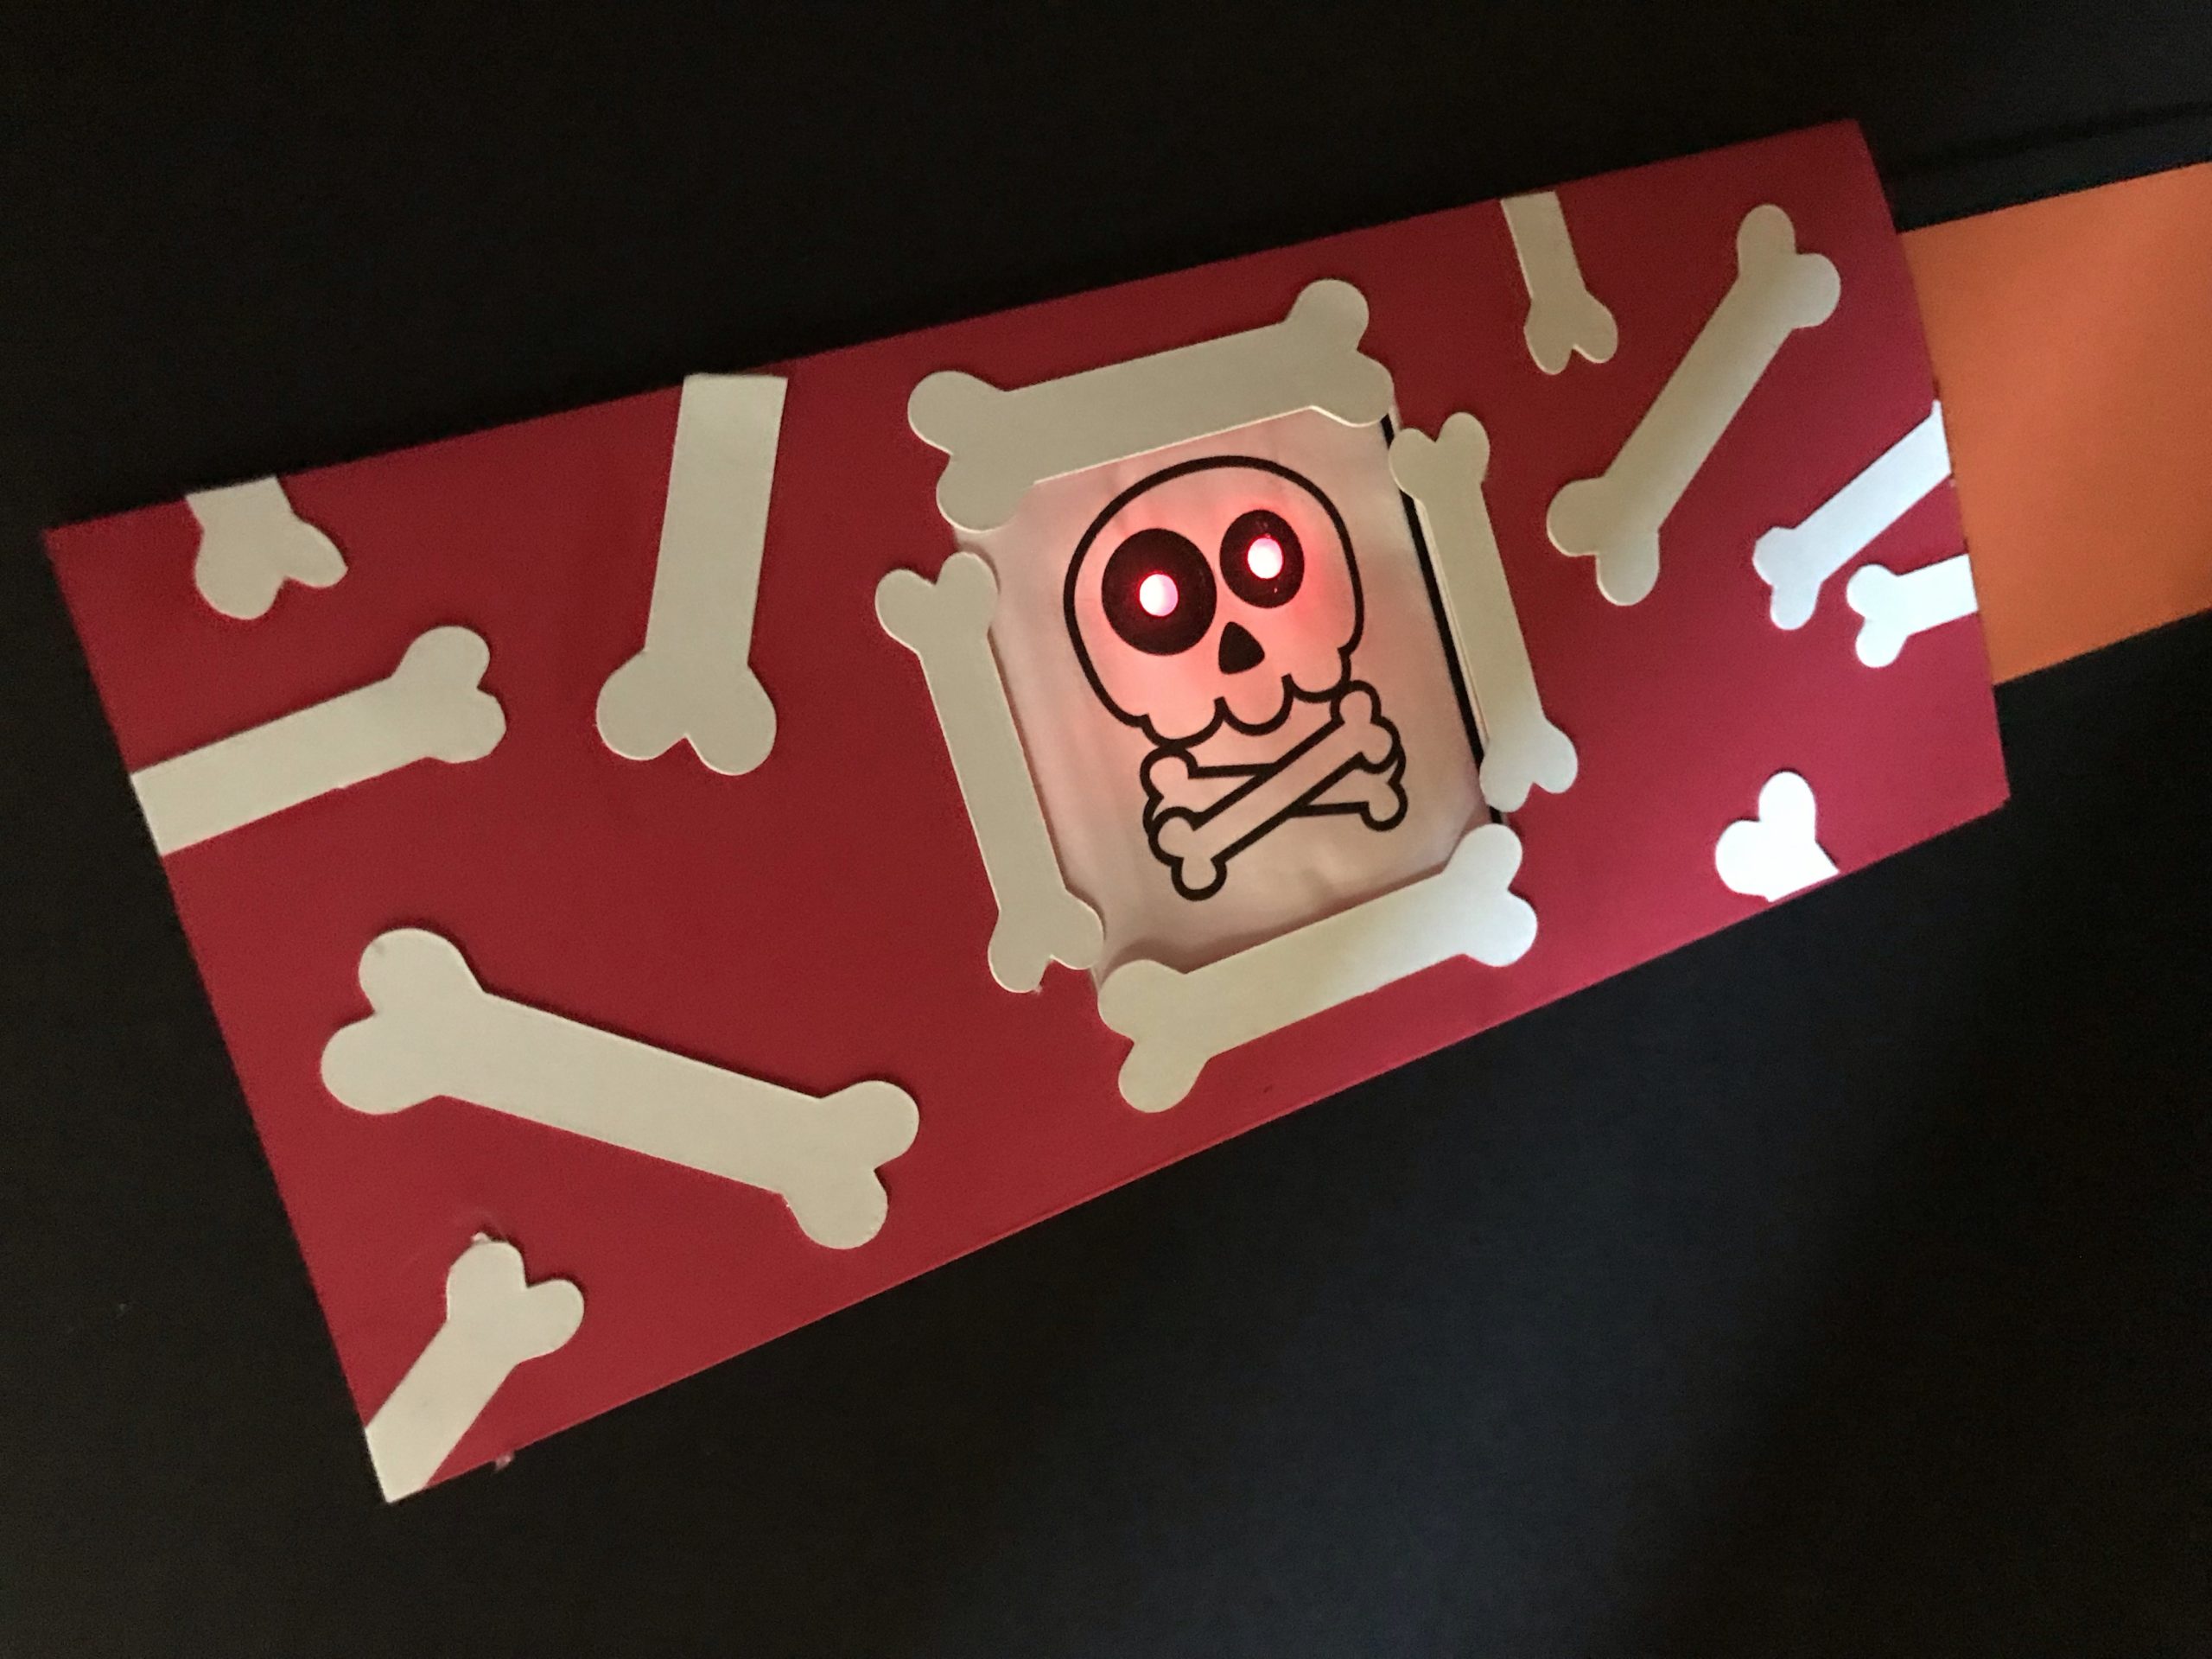
While the subject matter of your Light Up Dissolve Card can be anything of your choice, we’ve decided to make ours with a Halloween theme.
What Do You Want to Make?
What sort of project might you want to make?
A funny one? A scary one?
Will the dissolving image be part of a larger drawing, such as the face of a monster that changes expression?
Or will it be something that can stand on its own, such as a glowing jack-o-lantern or jumping spider?
How Does the Mechanism Work?
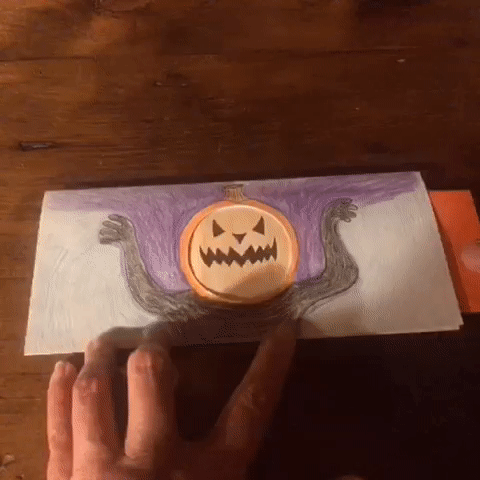
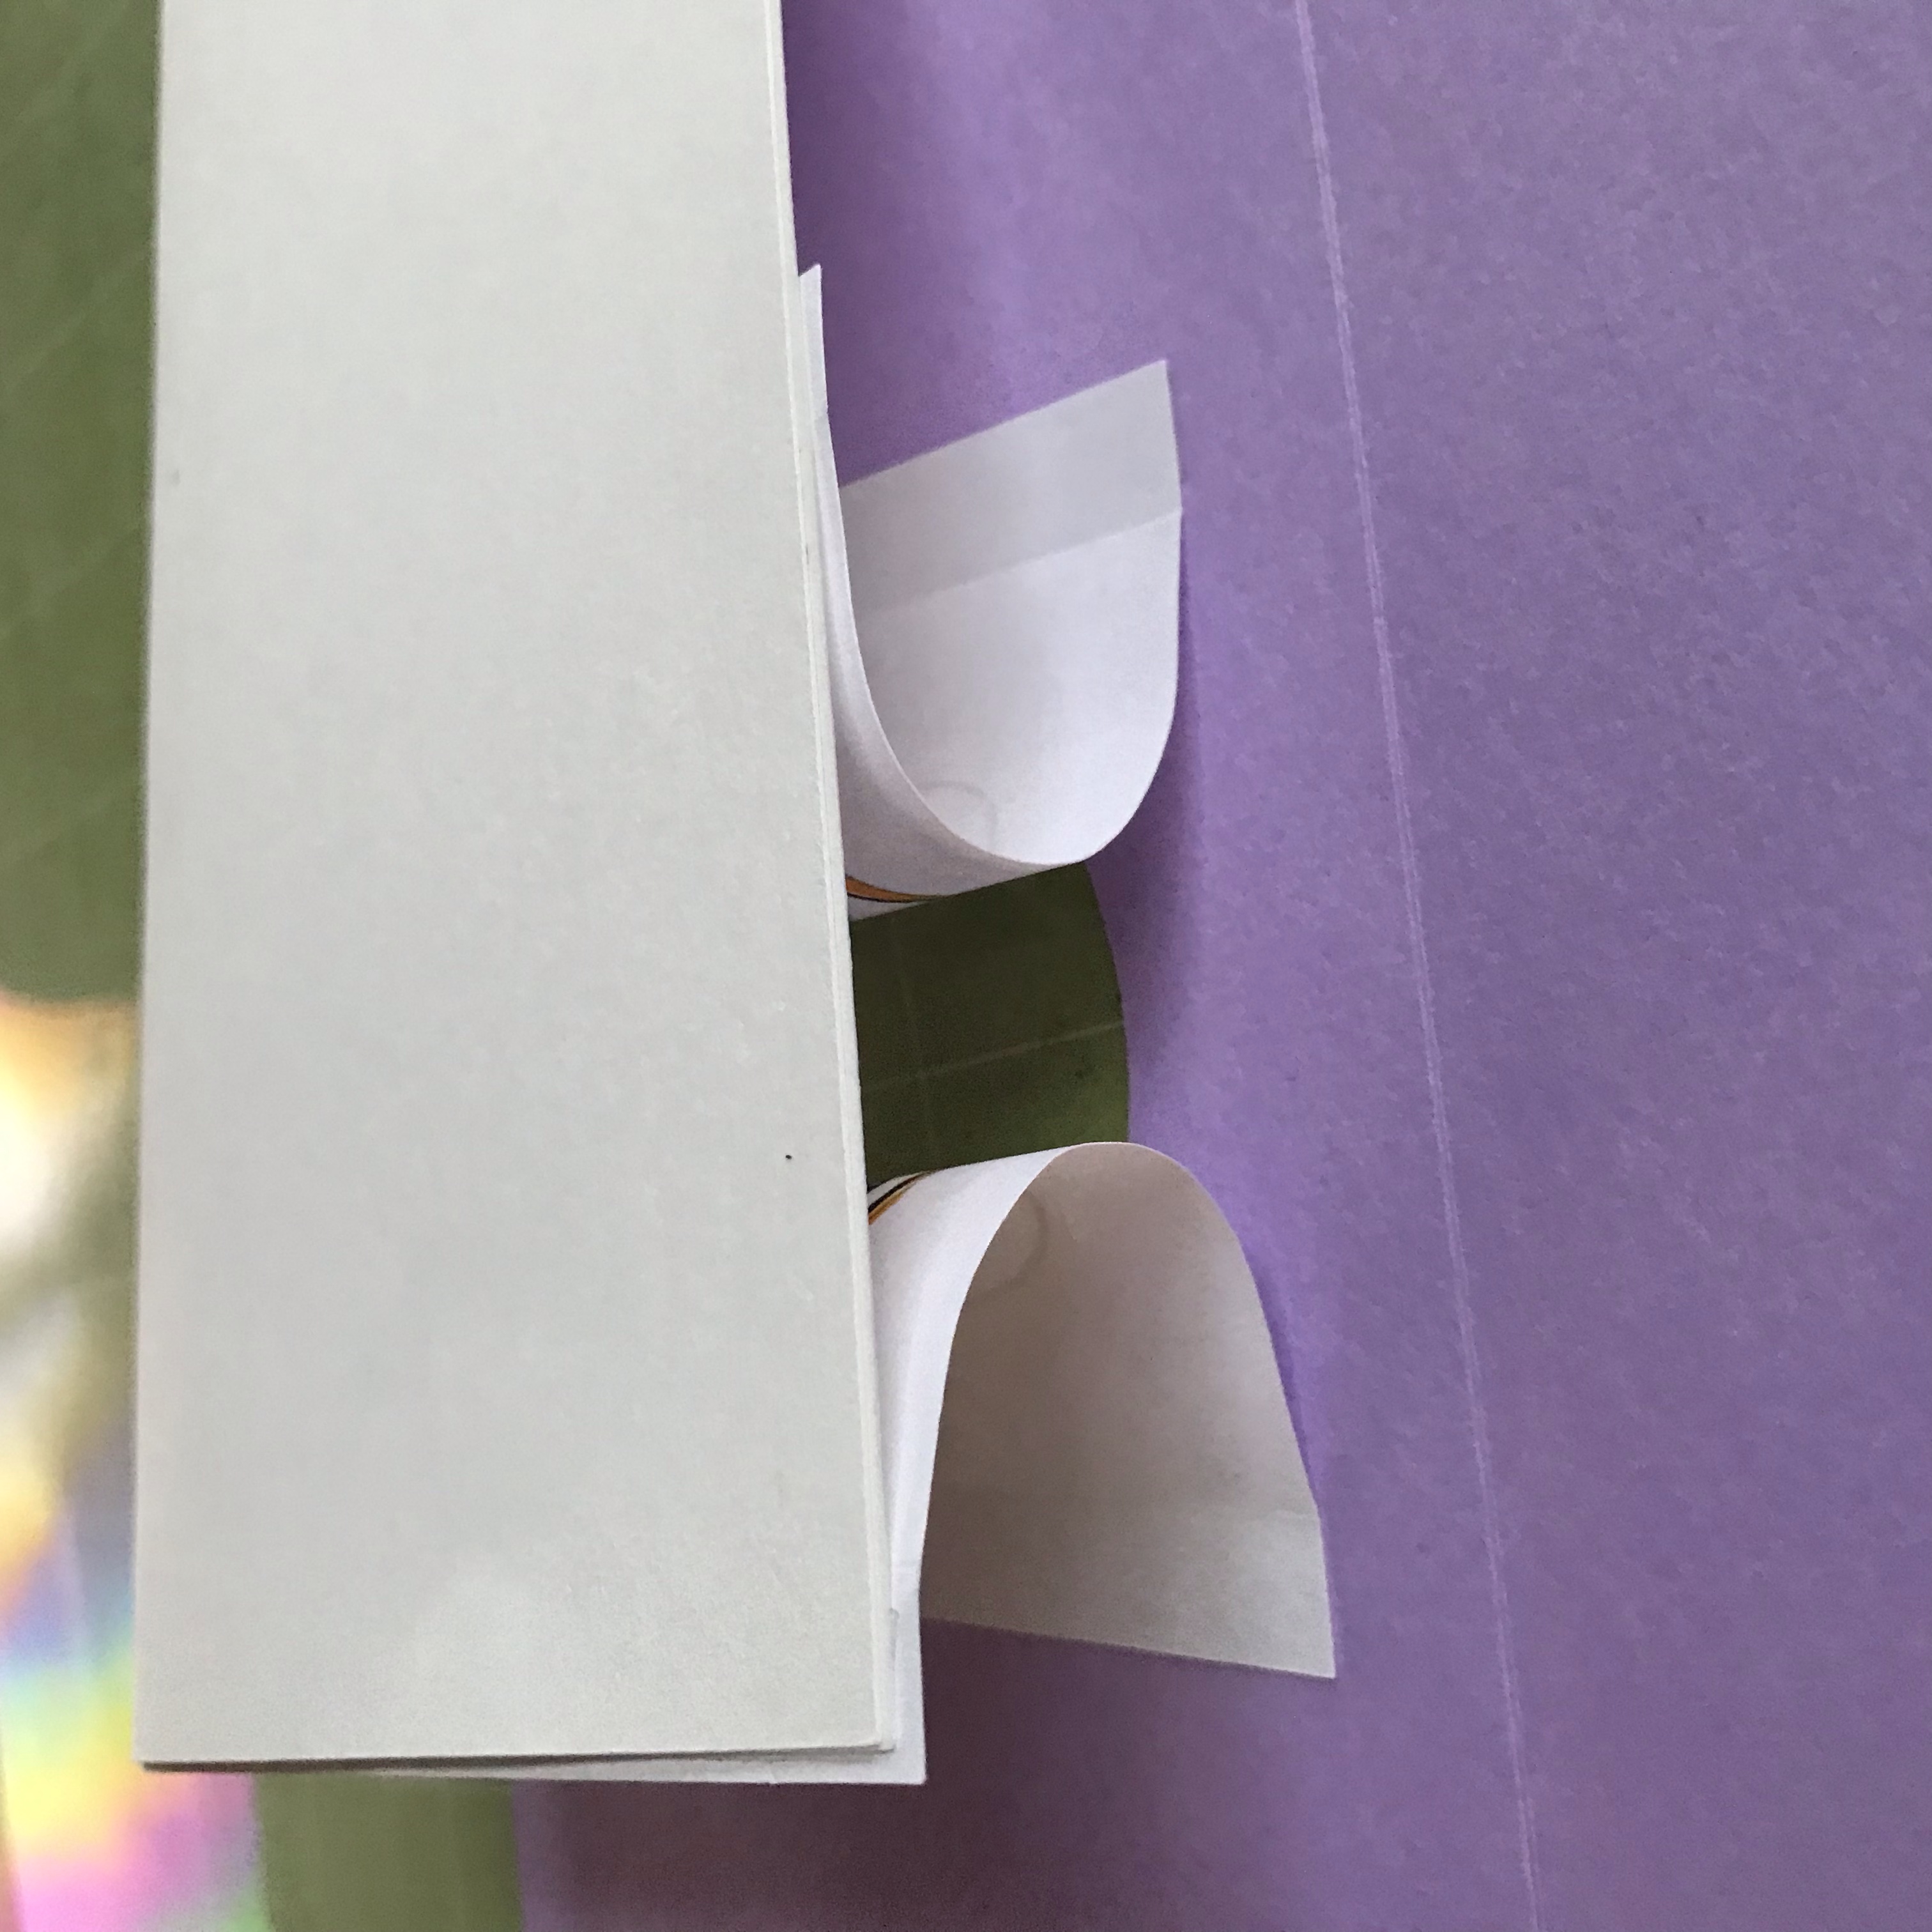
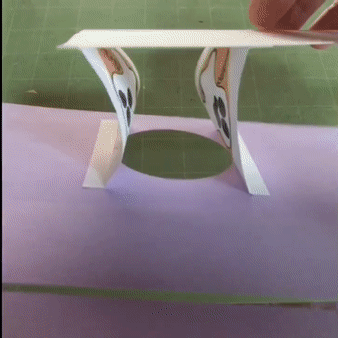
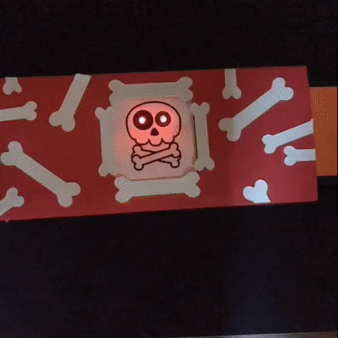
The way that this Light-Up Dissolve Card works is that there are two equally sized illustrations attached to different parts of a pull tab of similar height. The pull tab and illustrations are housed within a tube. When the pull tab is pushed inside of the card, one image rolls into place. When the pull tab is pulled out of the card, the second image rolls into place

How Does the Circuit Work?
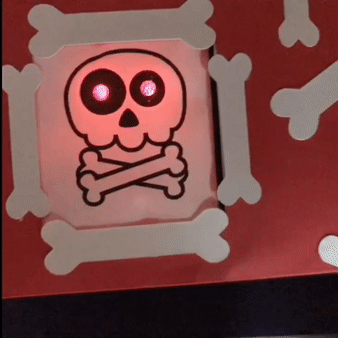
As you may have guessed, the pull tab in the Light Up Dissolve Card is doing more than making the pictures roll from side to side. It is also being used to propel a small paper switch inside of a slot in the card base.

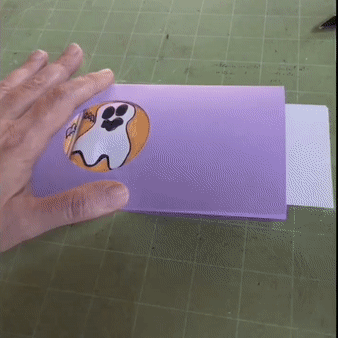
When the pull tab is pulled out of the tube, the switch is pulled into position to close a gap in a concealed circuit. This causes Circuit Sticker LEDs hidden underneath one of the pieces of artwork to turn on! When the pull tab is pushed back in, the switch is pushed to the left within the slot to open the gap in the circuit again, causing the LEDs to turn off.
What’s So Special About the Switch?
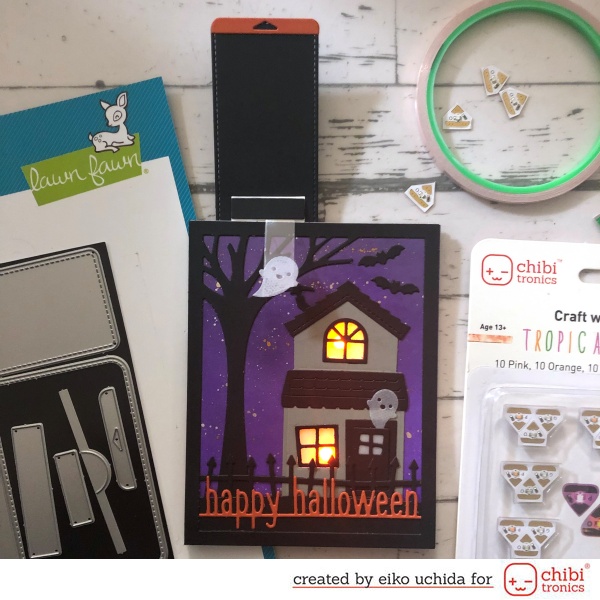
This particular switch design is one that members of the Chibitronics Design Team routinely integrate into their stunning creations; it has evolved over the years and been used in a variety of original projects. To see more examples of how this type of switch may be used in your paper circuit projects, be sure to check out the innovative work of Eiko Uchida, Jooyeon Lee, WeiWei Wang, and Yukiko Unami, who’ve been sharing their engineering breakthroughs on the Chibitronics blog.
How Do I Get the Pieces?
You can make the pieces for this project in one of three ways.
- You can download and print the PDF Templates at 100% scale and cut out the pieces with scissors.
- You can draft your own parts by hand, using the measurements provided.
- Or, you may use a craft cutting tool, such as a Cricut or Silhouette.
If cutting by hand, it may be easier to cut out a 2.25” X 2.25” square viewing window rather than a round one.
If using a home fabrication tool to make the cuts, download the Dissolve Card SVG and import it into your software. Bring it to scale, using the 1” guide in the top left corner. While setting up your file in your software, mark dashed lines as score lines and straight lines as cut lines. Hide or change text into guides. Keep the circular cut-out from the card base to assist with the placement of your illustrations.
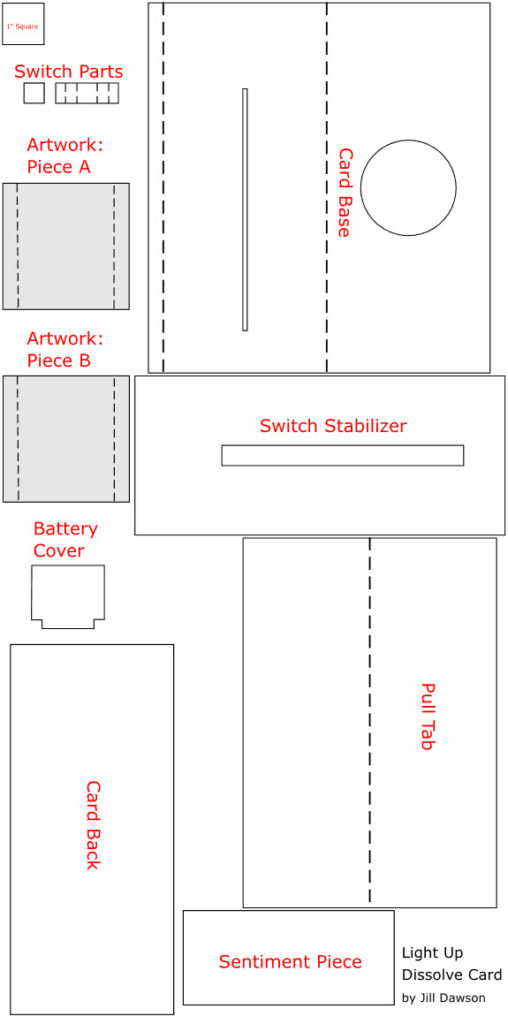
Dissolve Card Templates

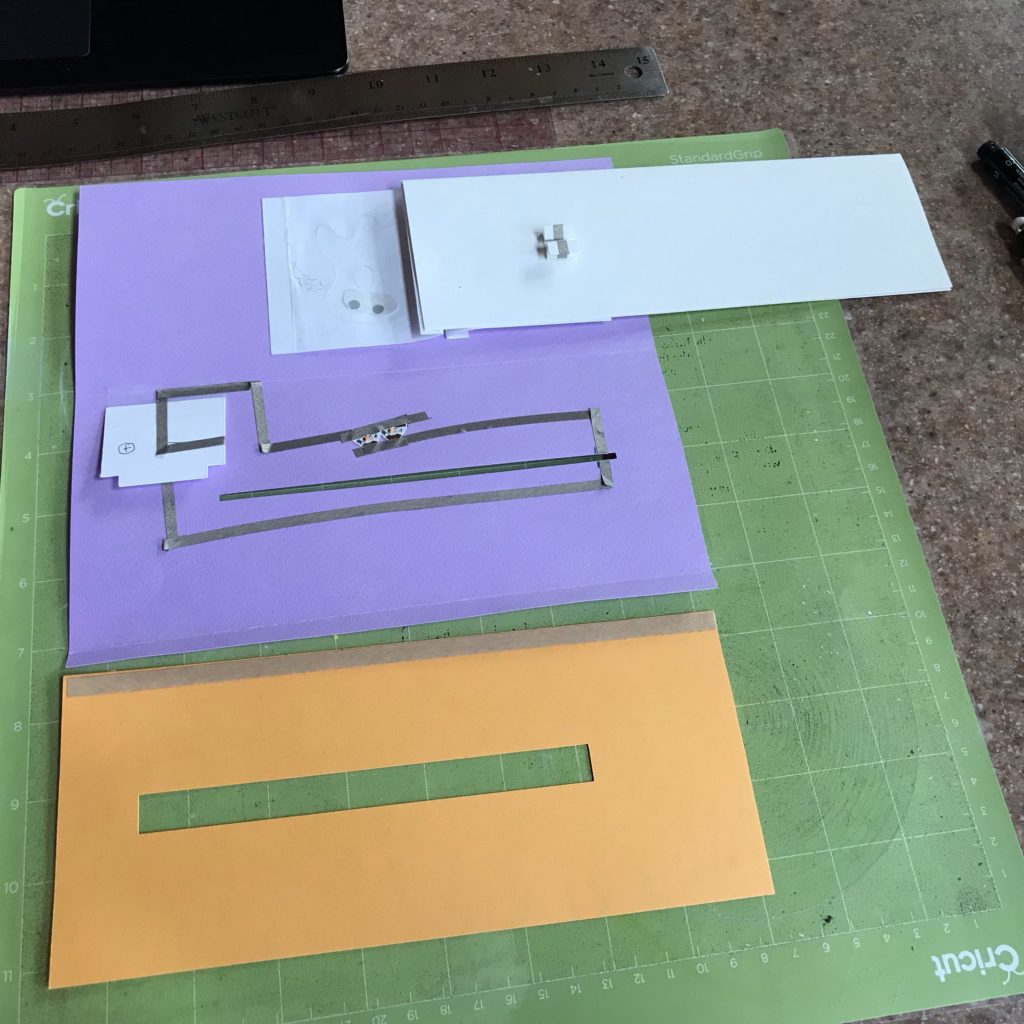
Card Parts & Measurements (If Making By Hand)
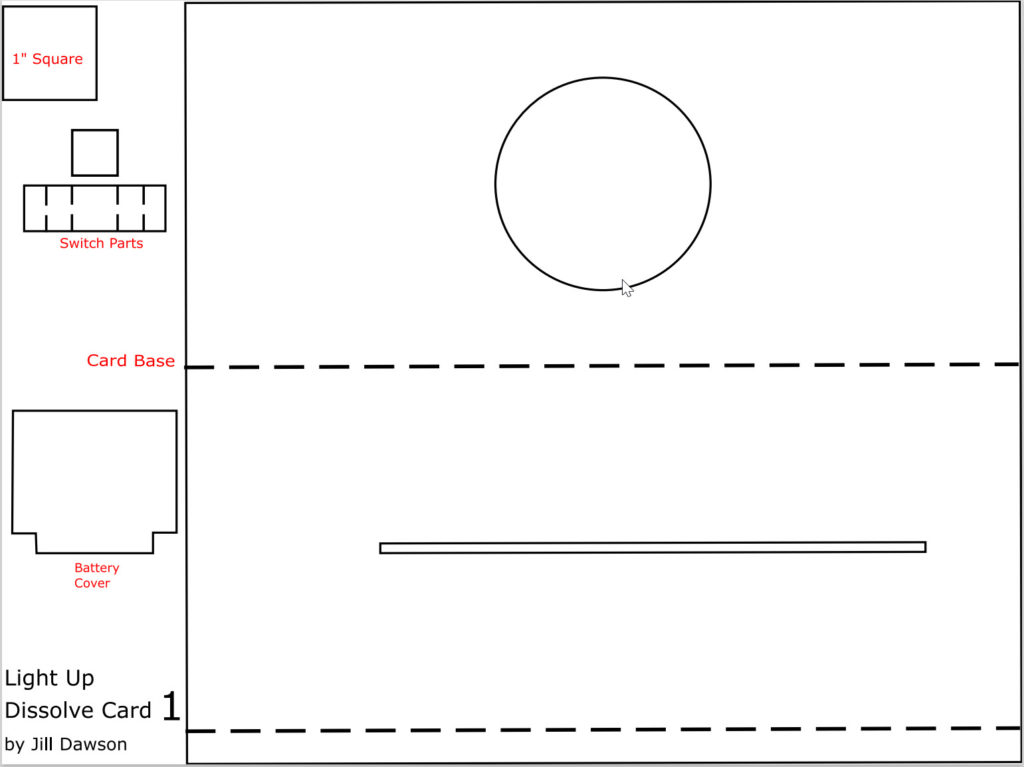
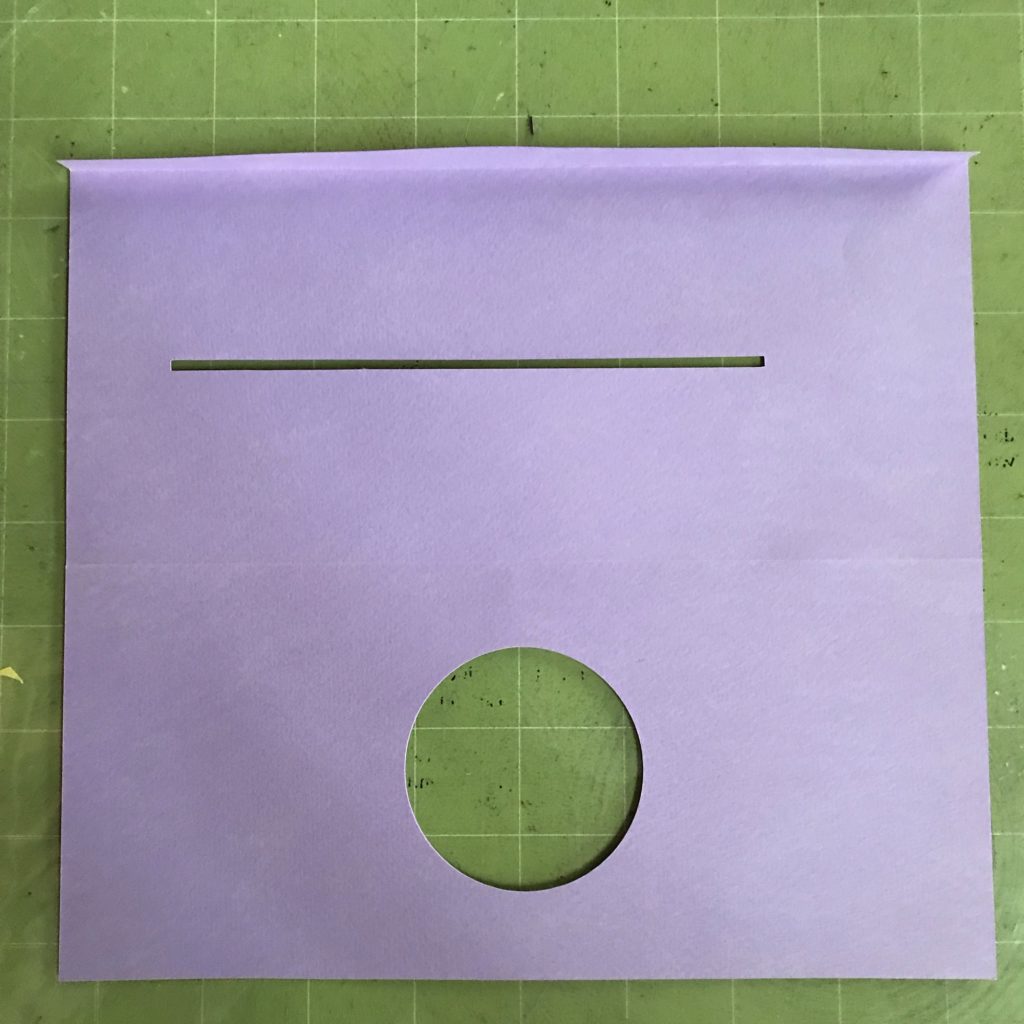
1 X Card Base (8” H X 8 ¾” W, scored from the bottom at ⅜” and 4 ¼”) with a ⅛” H X 5 ¾” W slot running parallel to the score marks, centered horizontally, offset 2” from the left and 1” from the right. A 2.25” diameter circle viewing window is centered on the top section.
1 Pull Tab (6” H X 8 ¾” W, scored along the grain at 3”)
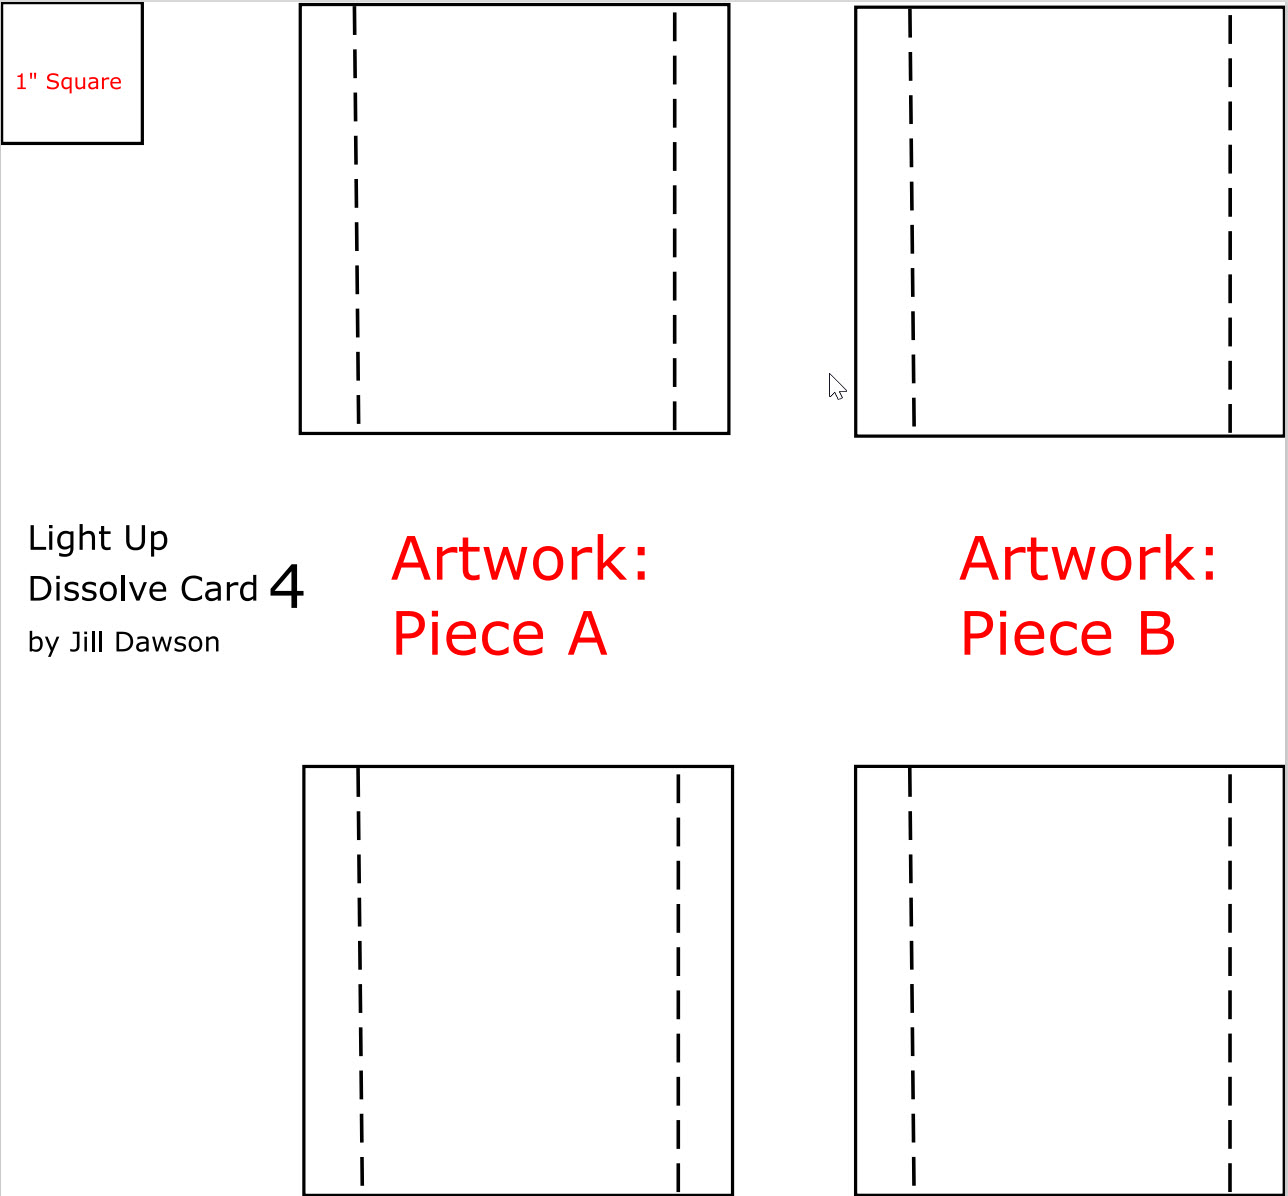
Artwork: Piece A (3” H X 3” W, scored along the grain at ⅜” and 2 ⅝”)
Artwork: Piece B (3” H X 3” W, scored along the grain at ⅜” and 2 ⅝”)
Battery Cover (approx. 1 ¾” H X 1 ¾” W)
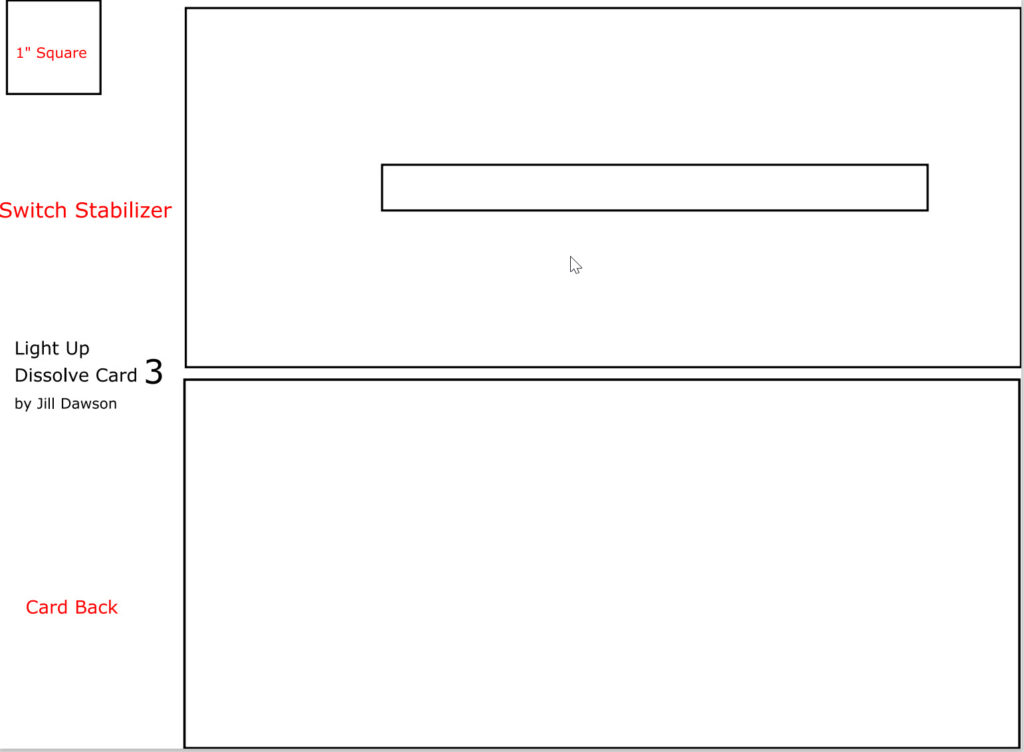
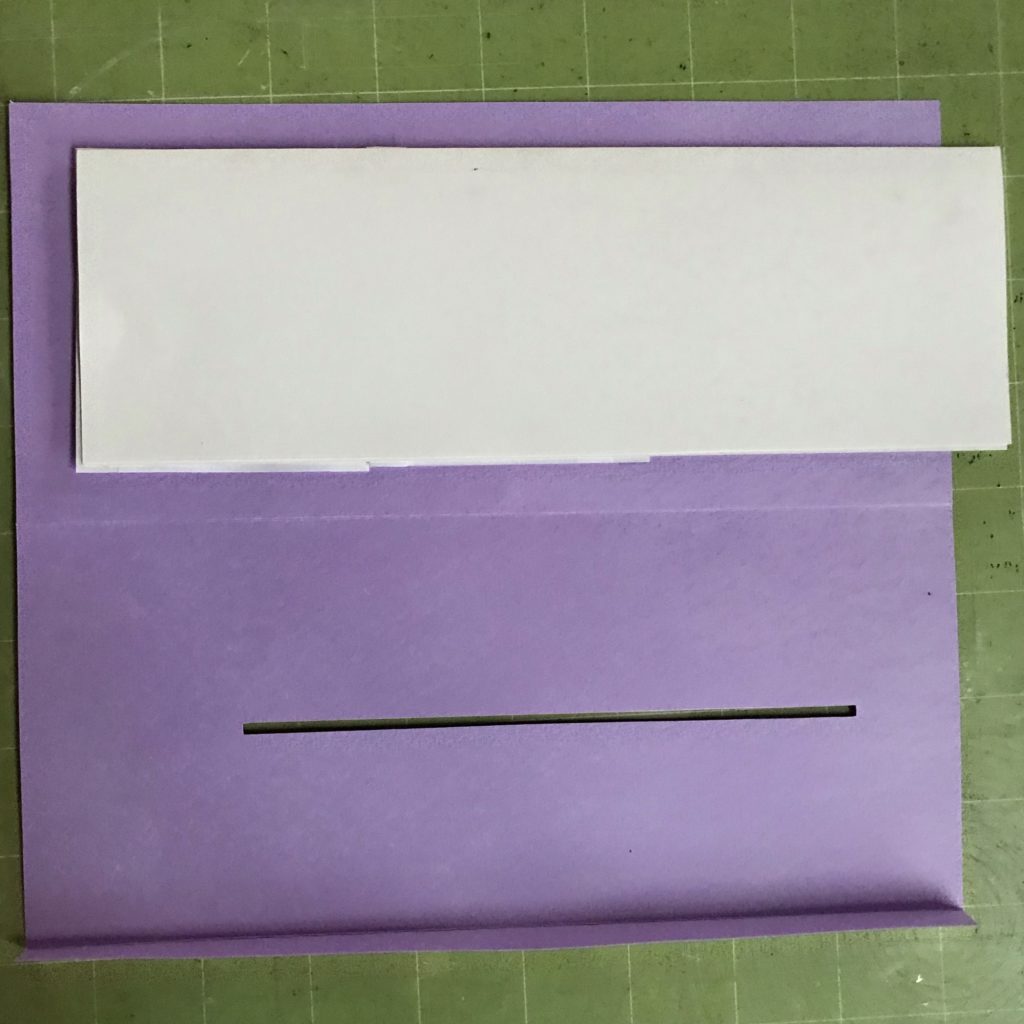
Switch Stabilizer (3 ⅞” H X 8 ¾” W) with a ½” H X 5 ¾” W slot running parallel to the length, centered horizontally, offset 2” from the left and 1” from the right.
Sentiment Strip (2 ¼” H X 5 ½” W )
Switch parts (one ½” X ½” square and one ½” H X 1½” W X rectangular strip, scored along the grain at ¼”, ½”, 1”, 1 ¼”)
Card Back (3 ⅞” H X 8 ¾” W)
Cut File
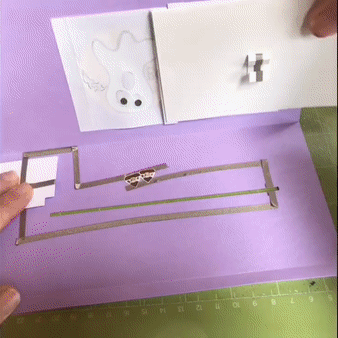
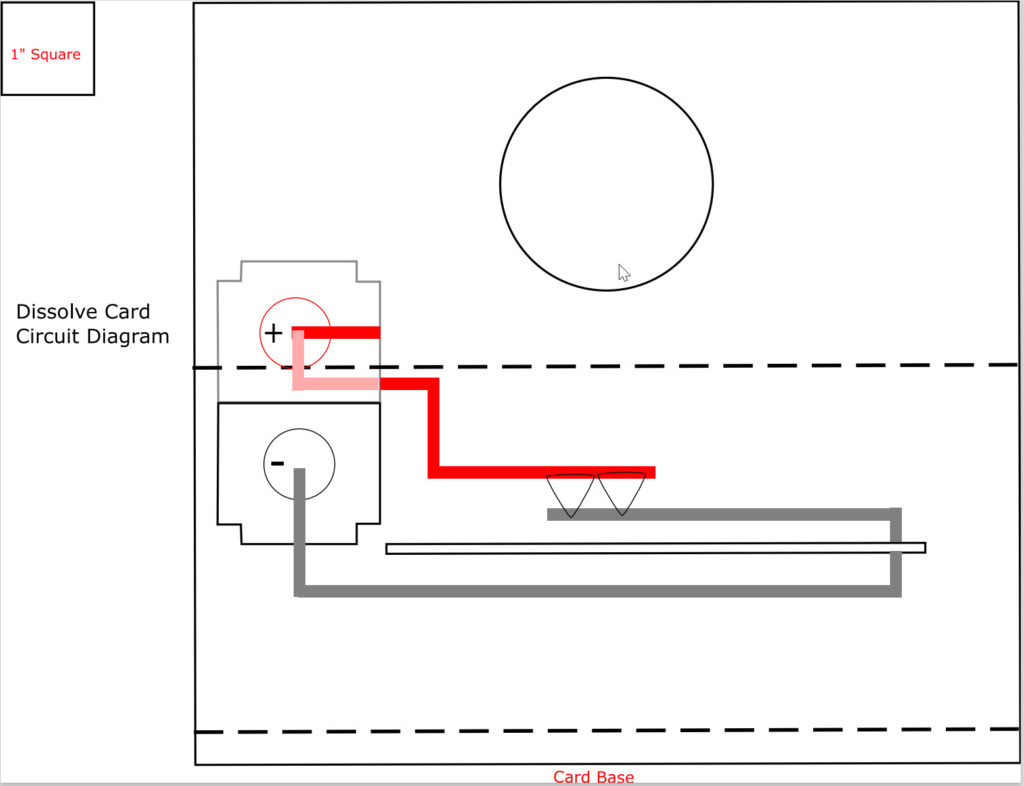
Circuit Diagram
Use the Circuit Diagram as a guide, while designing your project.
Materials & Tools


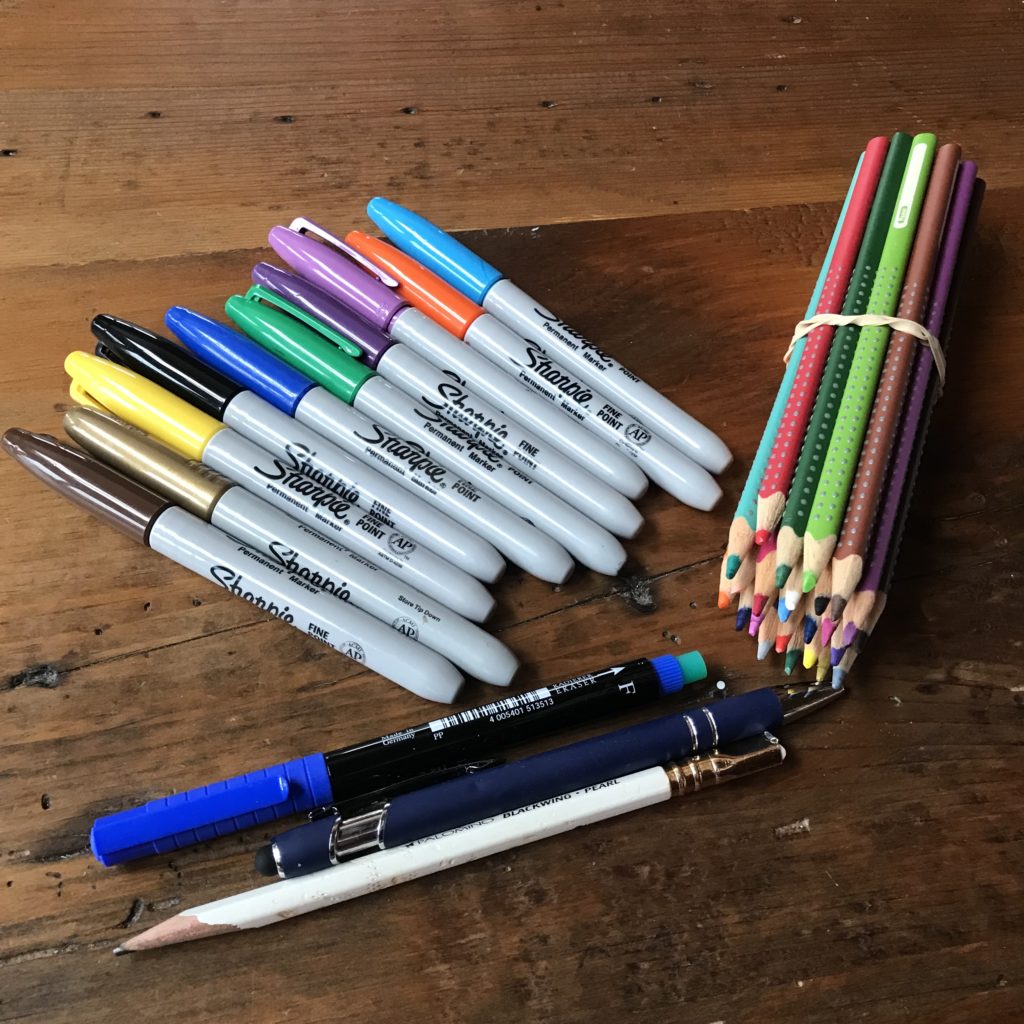
- Craft cutting tool (such as a Cricut or Silhouette)
- Printer
Directions
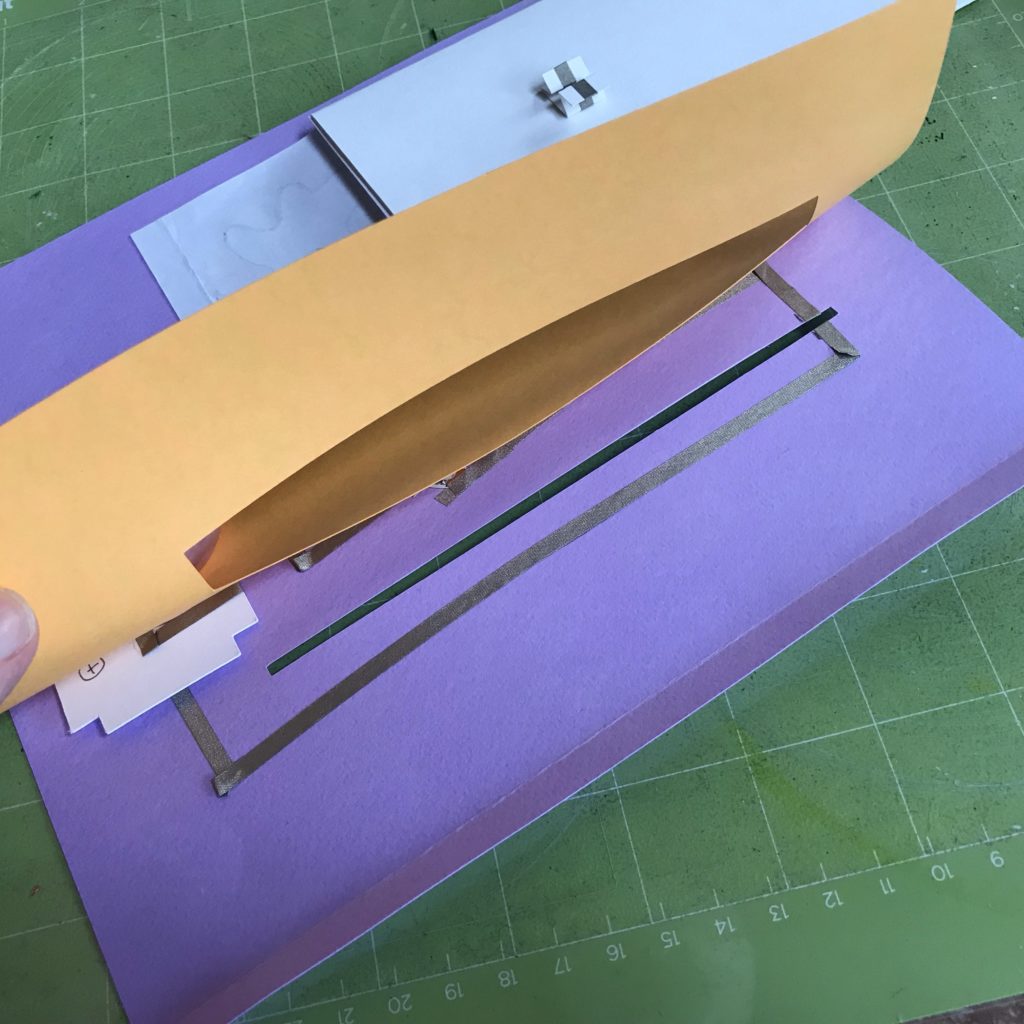
Step 1: Gather Supplies & Cut Out Pieces
Cut out the pieces for the project, using text weight paper for the illustrations and card stock for the others.
Step 2: Create Your Artwork
Tips for Getting Started
- Use a text weight paper for Artwork Pieces A & B, not cardstock, as it will roll more easily.
- Pay attention to the grain of the paper. Paper often bends and folds more easily in one direction than the other. The orientation in which paper most easily folds is known as the paper’s grain. Before cutting out the pieces for your illustrations, ensure that the grain of your paper runs up and down, parallel with the score marks, so that the illustrations will move more smoothly inside of the sliding mechanism.
- Consider the location of your LEDs when crafting your illustrations. The LEDs will need to be placed within the top or bottom thirds of your artwork, so that they do not impede the movement of the switch. Placing your LEDs too close to the center of your artwork will not allow enough room for you to lay down the conductive traces required for your circuit to work properly, because the switch will be moving along the center of the card.
- When creating your illustrations, think about ways to add drama to your scene. Try to change the artwork slightly from frame to frame to show movement.
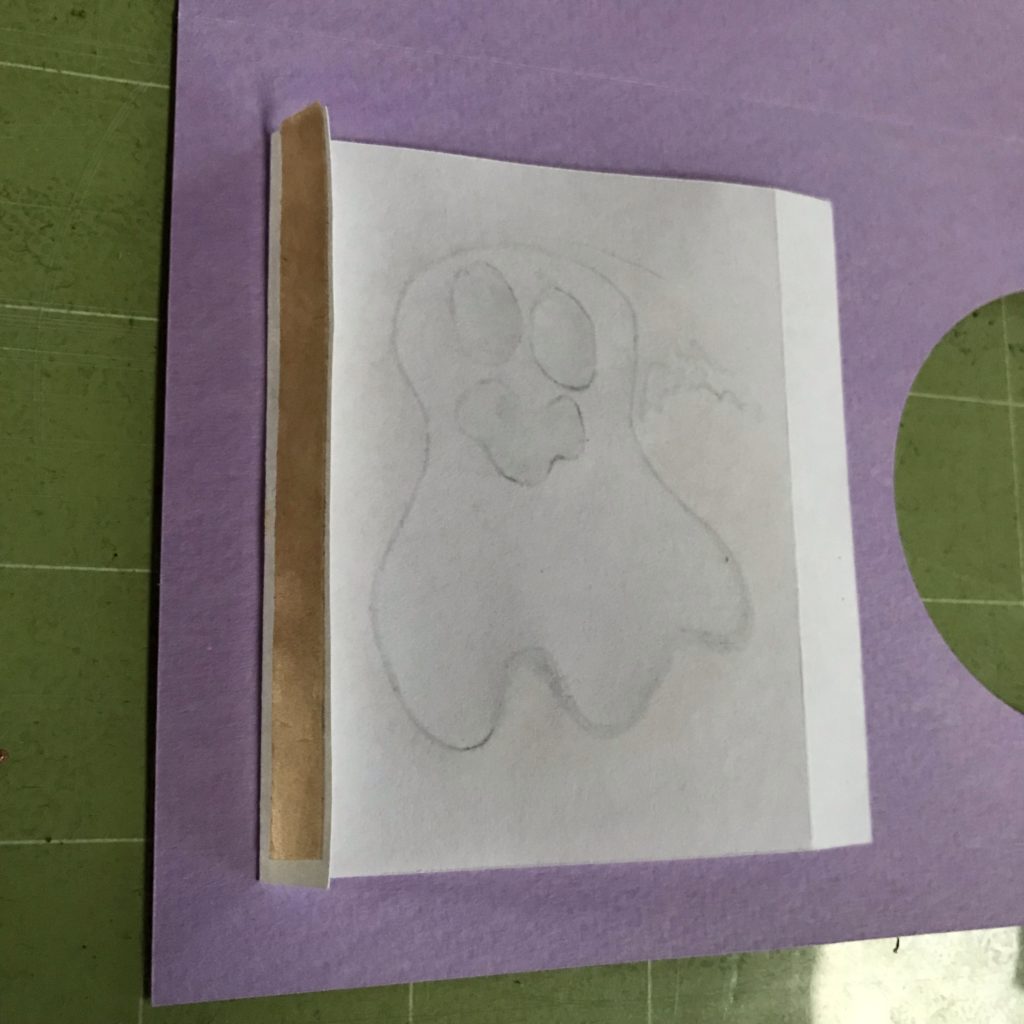
Sketch
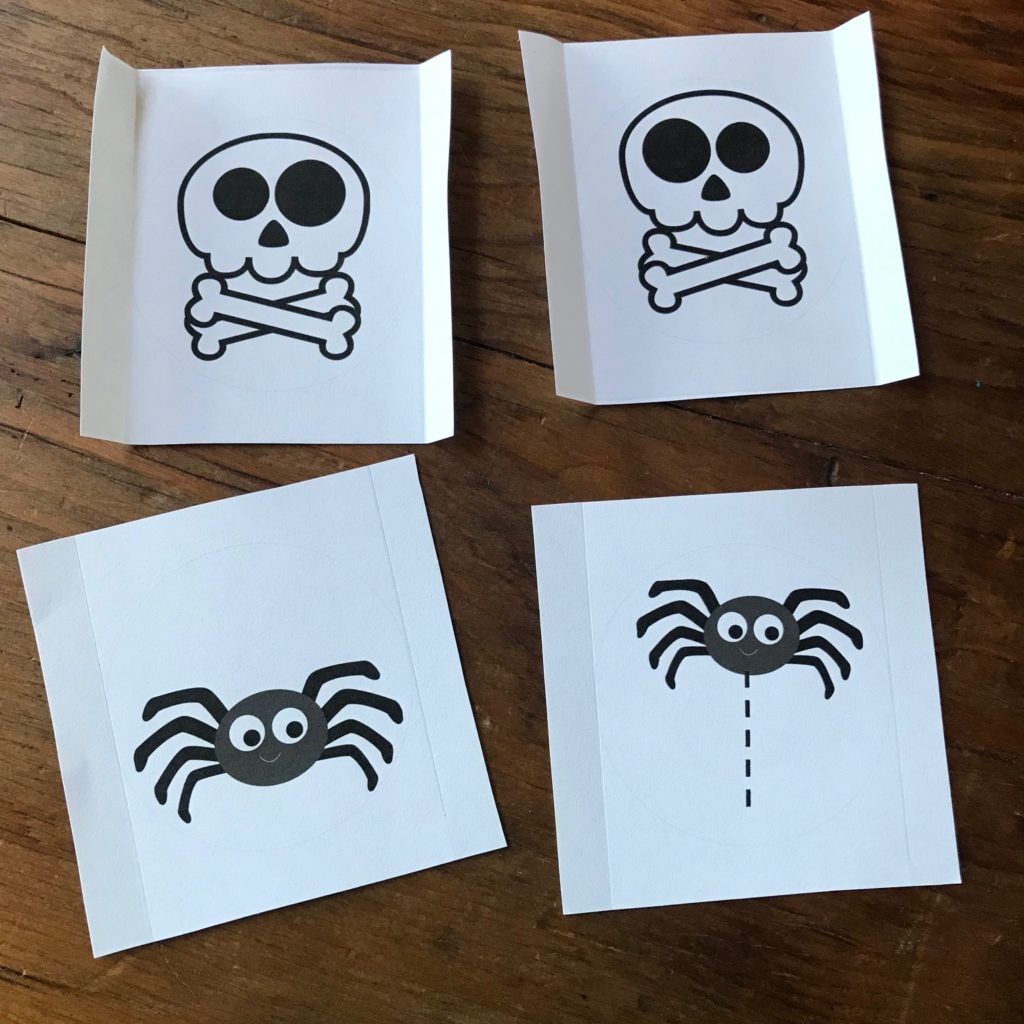
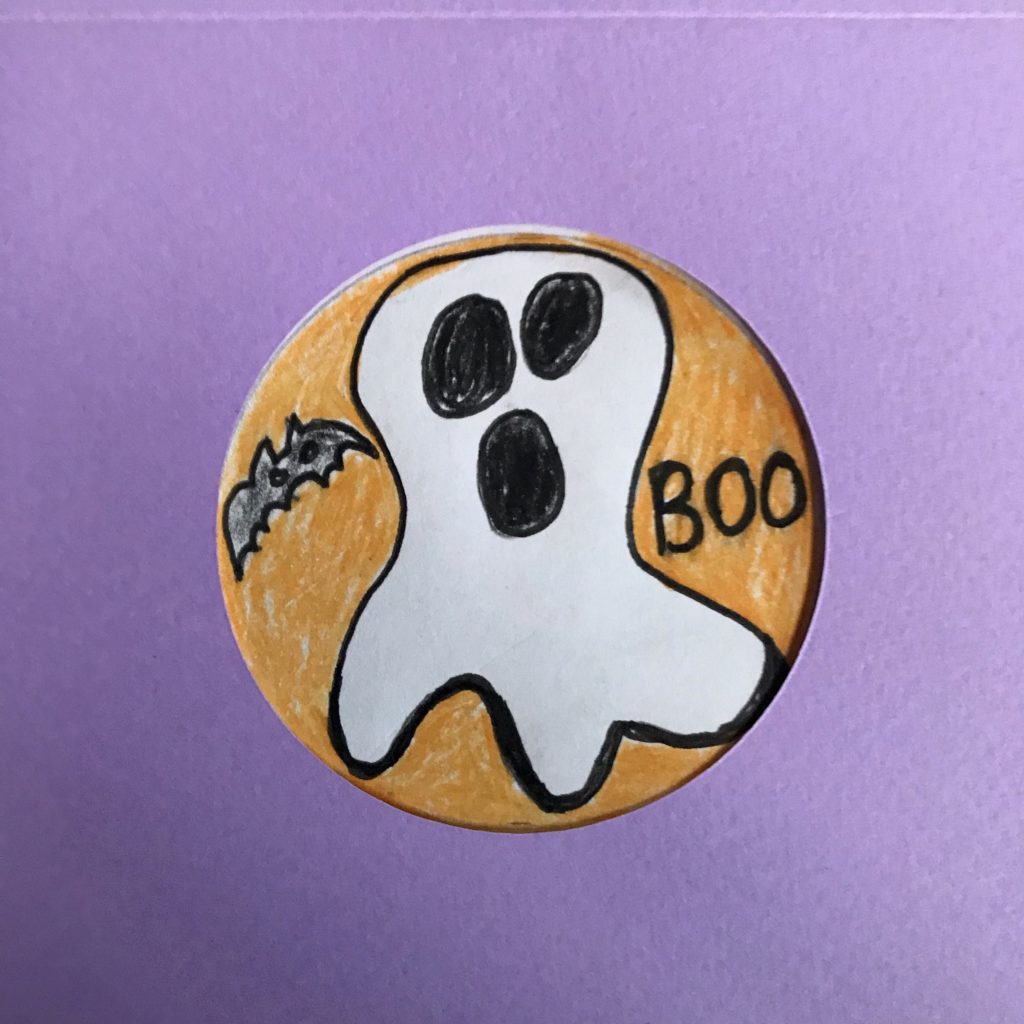
Use the circular cut out to draw a centered 2.25” diameter circle between the score lines on Pieces A and B. There should be ⅜” of white space at the top and bottom of the circle.
Sketch out the designs that you wish to see appearing through the viewing window of your card. Remember that the LEDs will need to be placed in either the top or bottom thirds of the circle.
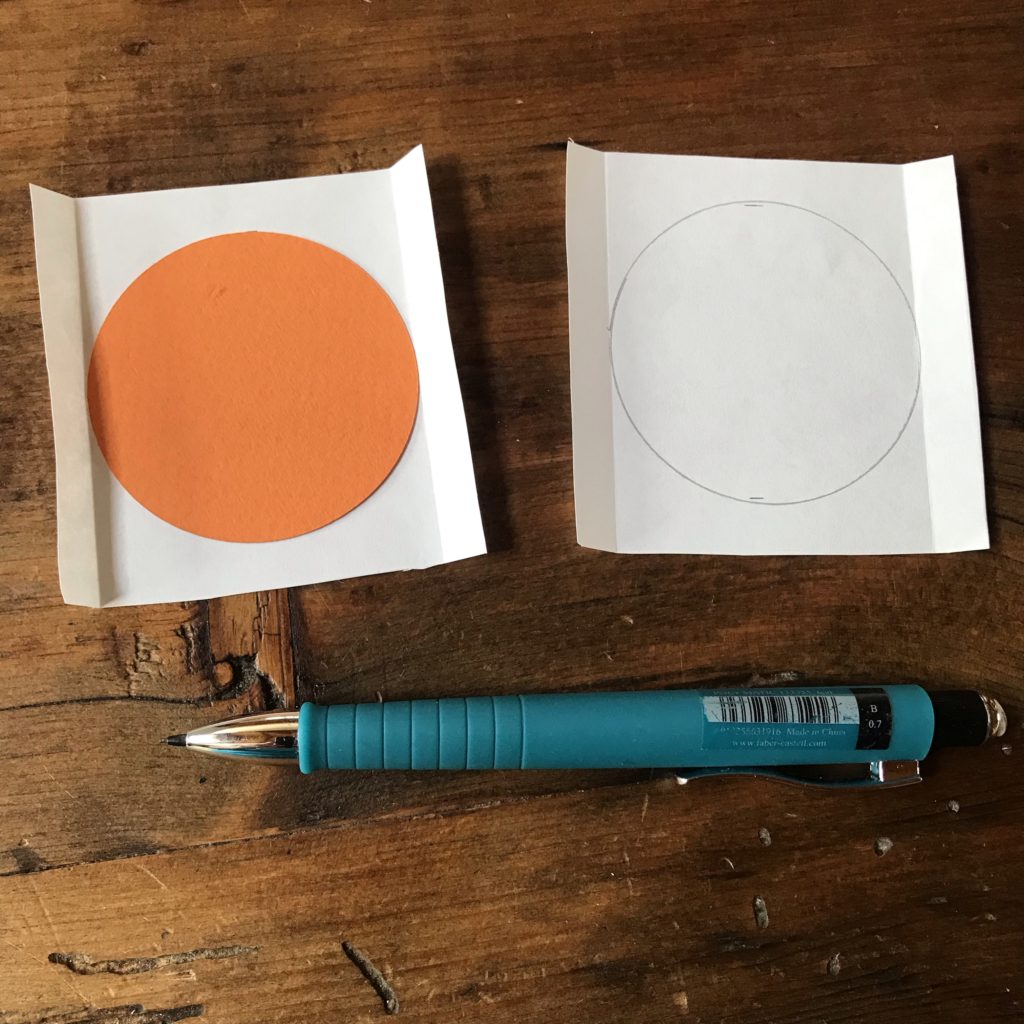
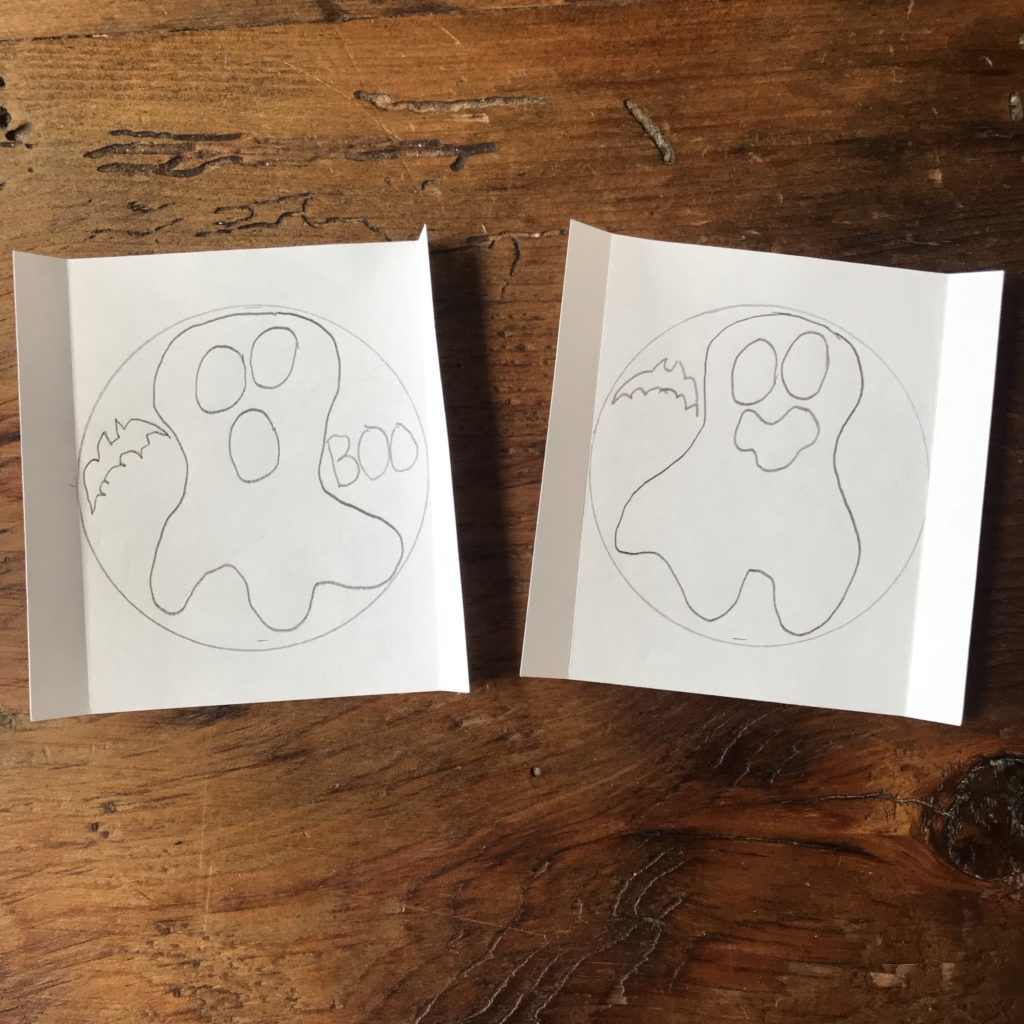
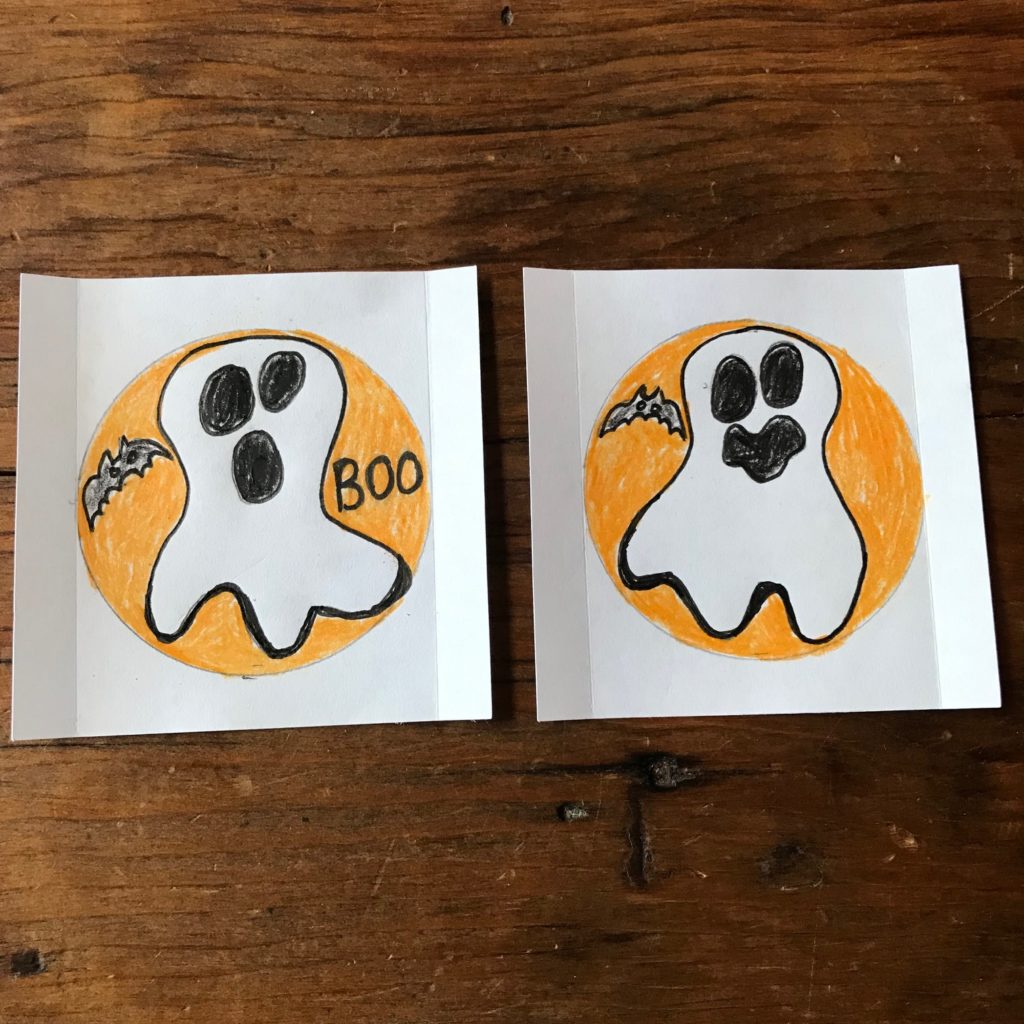
Use colored pencils or art supplies of your choice to complete your illustrations, before adding them to the Card Base.
Alternatively, you might design your artwork on a computer, using copyright friendly clip art.
Step 3: Add Art to Card Base
To add the artwork to your project, lay the Card Base upon your work surface with the round viewing window close to you and the slotted side with the flap positioned away from you. There should be two inches of space between the slot and the right edge of the card and one inch of space between the slot and left edge of the card.
Position the pieces of artwork so that the one that will have light showing through it when the card is in the open configuration (Piece A) is on your right and the one that will be viewed through the window in the closed configuration is on your left (Piece B).

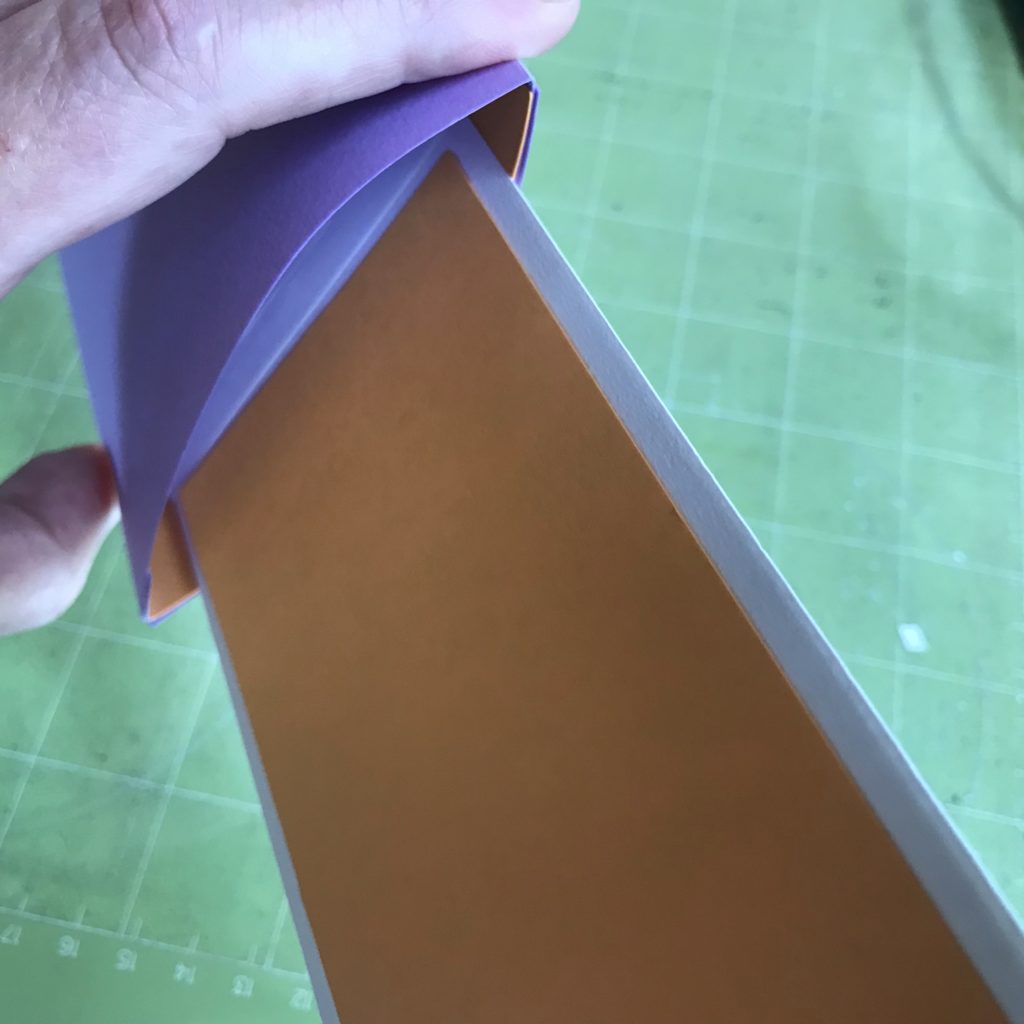
Starting with Piece A, fold the left flap along the score line to the blank side and flip the artwork face side down with the flap oriented to your right. Add a piece of double sided tape to the flap.
Remove the protective backing from the tape, flip the artwork back to the front side, and adhere the piece so that it abuts the right-most edge of the circular viewing window. Keep the piece parallel with the edges of the card. It’s okay to sketch a parallel line ⅜” above the viewing window to assist you with this.

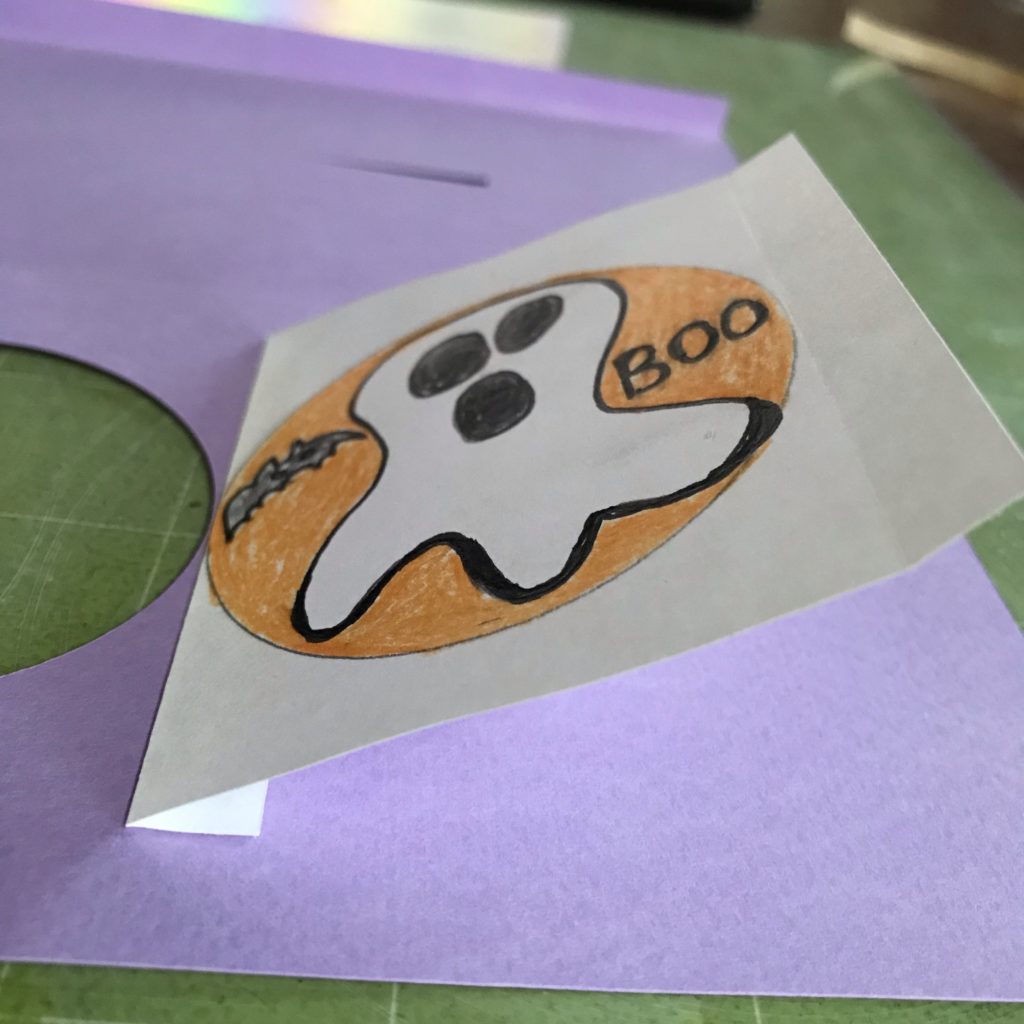
Once it’s taped down, flip the artwork and the card so that artwork is viewable from the front side to ensure that you like the way it looks from the front. If necessary, make adjustments.
Next, take Piece B and fold the right flap along the score line to the blank side and flip the artwork face side down with the flap oriented to your left. Add a piece of double sided tape to the flap.
Remove the protective backing on the tape and adhere the piece so that it abuts the left-most edge of the circular viewing window. Keep the piece parallel with the edges of the card and with Piece A.
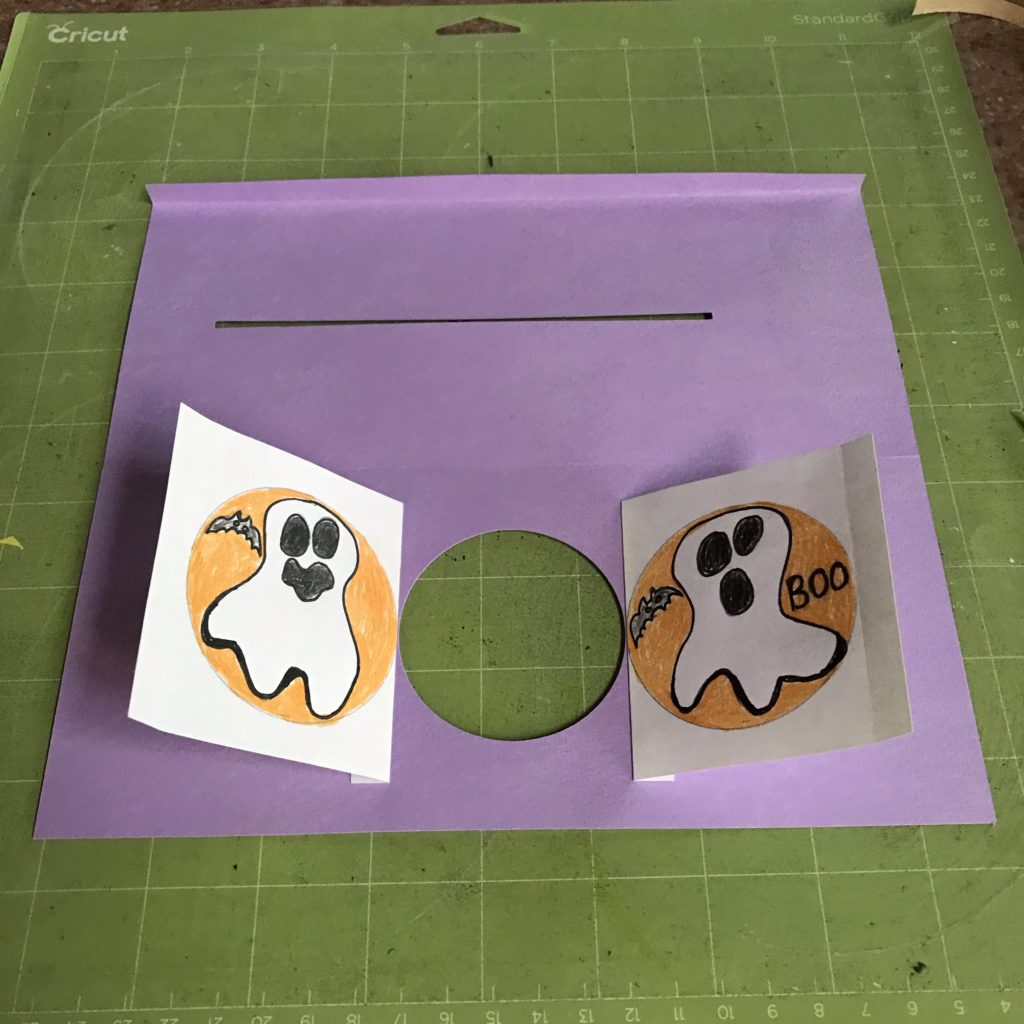
As you did for Piece A, flip the artwork and the card so that the artwork for Piece B is viewable from the front, to ensure that you like the way it looks. If necessary, make adjustments.
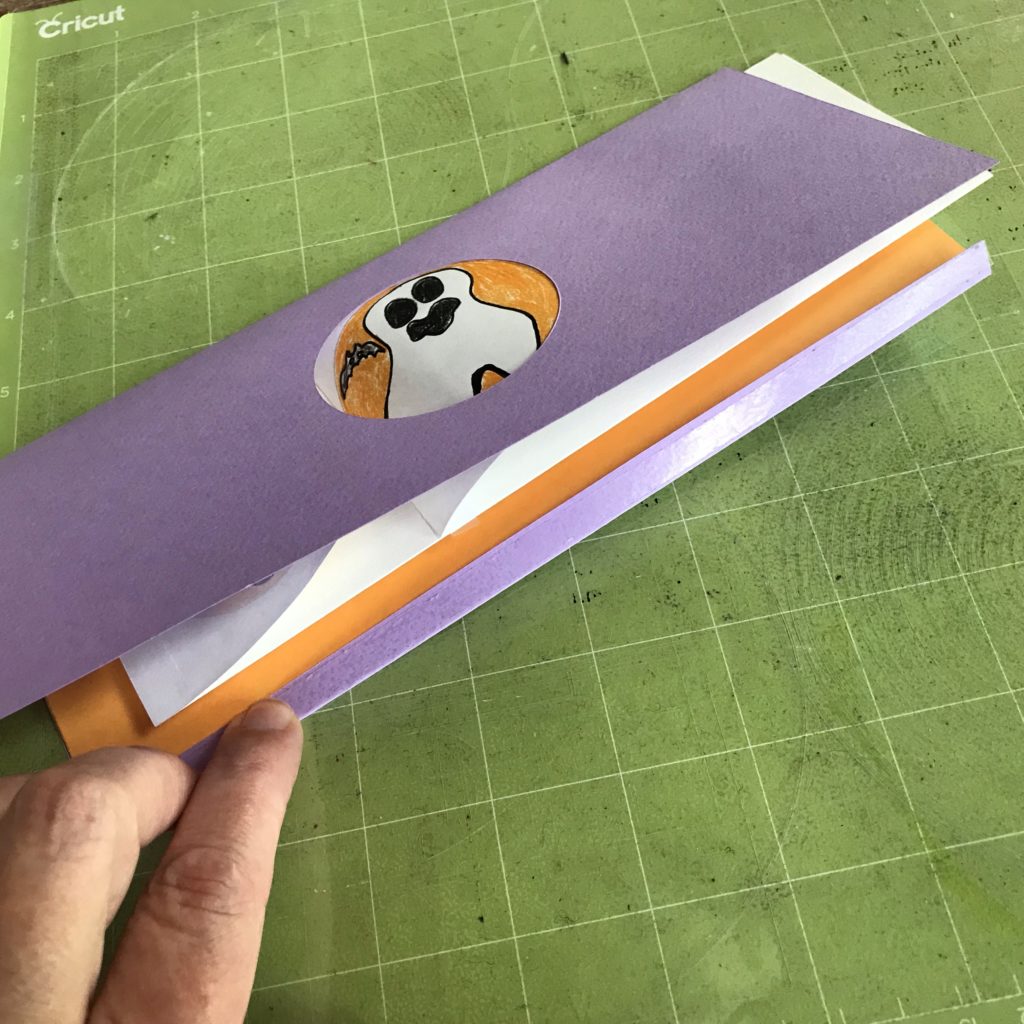
Step 4: Add Pull Tab
Next, you’ll be adding the Pull Tab. Before you do so, fold the Pull Tab in half along its score mark. Use a piece of double sided tape to hold the halves together.
To add the artwork to your project, lay the Card Base upon your work surface with the round viewing window close to you and the slotted side with the flap positioned away from you. There should be two inches of space between the slot and the right edge of the card and one inch of space between the slot and left edge of the card.
Position the card so that the artwork is away from you, facing up, and the slotted side with the flap is facing toward you. If the card is in the correct position the artwork should appear upside down.
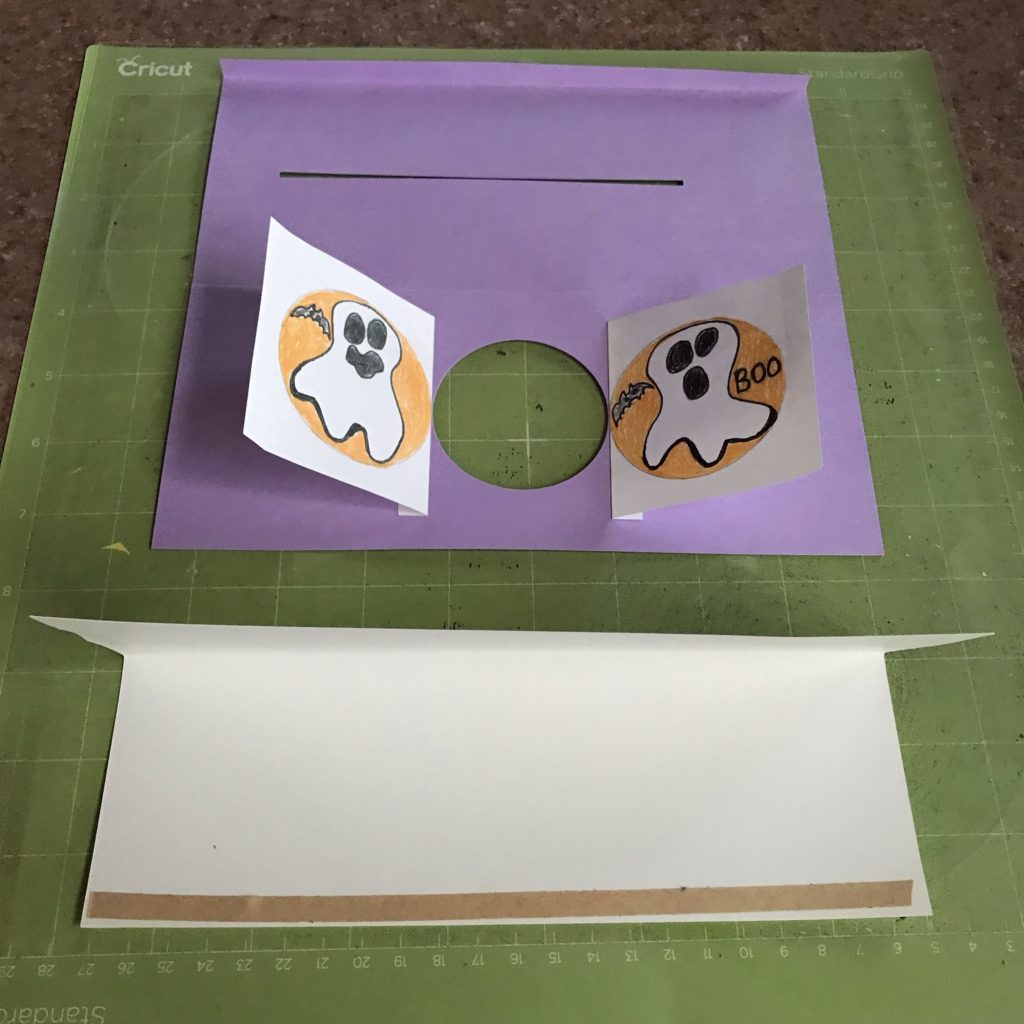
Fold Piece A (which will appear on your left side) along the score line and add a piece of double sided tape to the top side of the tab (the same side as the artwork).
Flip Piece B (which will be on your right side) so that you can only see the back side of it. Fold Piece B along the score line and flip the tab over to the blank side. The tab of Piece B may slightly overlap Piece A. Add a piece of double sided tape to the folded tab.
Remove the protective backing from the tape. Then, line up the left, short edge of the Pull Tab with the taped tab of Piece A. Press the Pull Tab down so that it is parallel with the artwork pieces and the rest of the card.
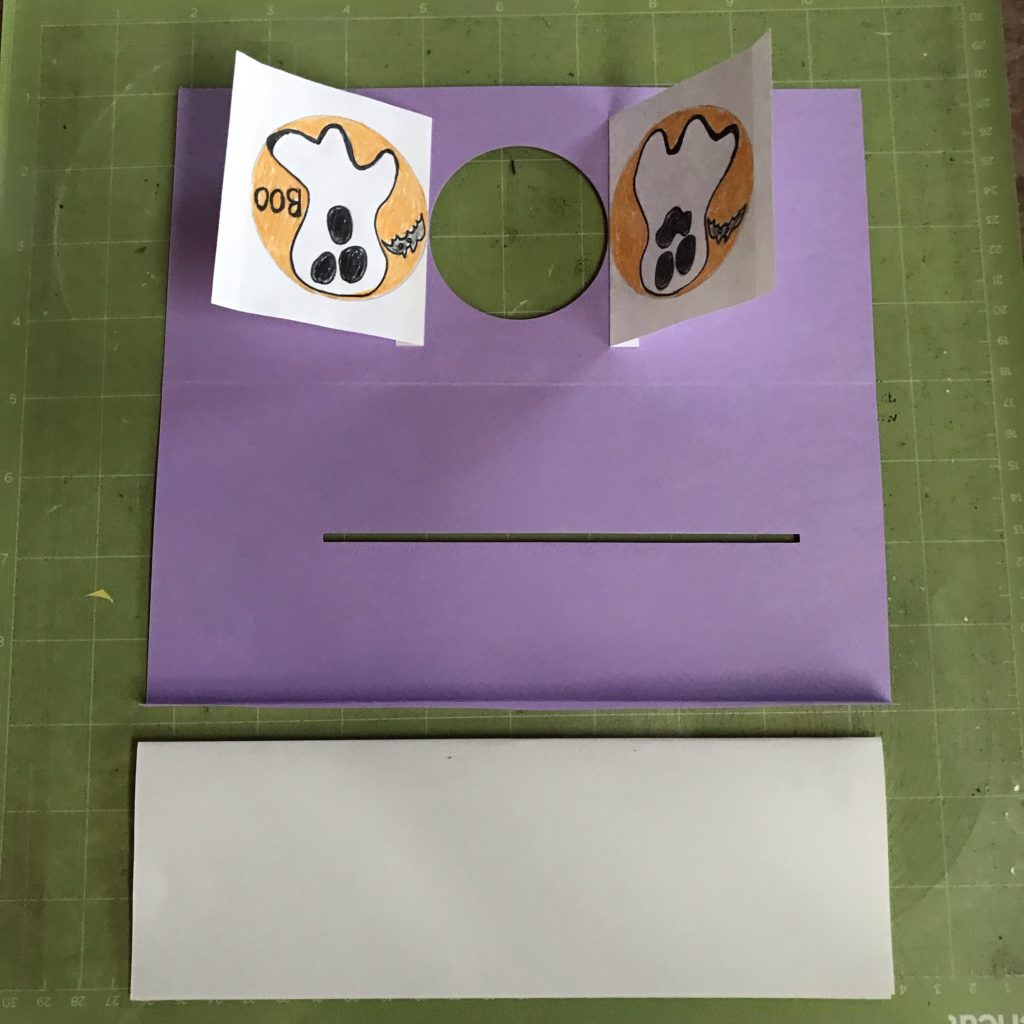
Step 4: Guide the Roll
Once inside of the slider mechanism, the artwork should sort of roll, flipping from one image to the next and back again. You may need to guide this rolling action a bit with your fingers before closing the card, to help train the paper.
If you can’t get your artwork to roll, check the following:
- Did you use text weight paper for your artwork?
- Did you ensure that your artwork pieces are oriented with the grain of the paper running up and down, in the same direction that the paper will be rolling?
- Are the taped down tabs on the artwork pieces parallel to one another and to the card?
- If you cut your pieces by hand, are your measurements correct and equal on both pieces?
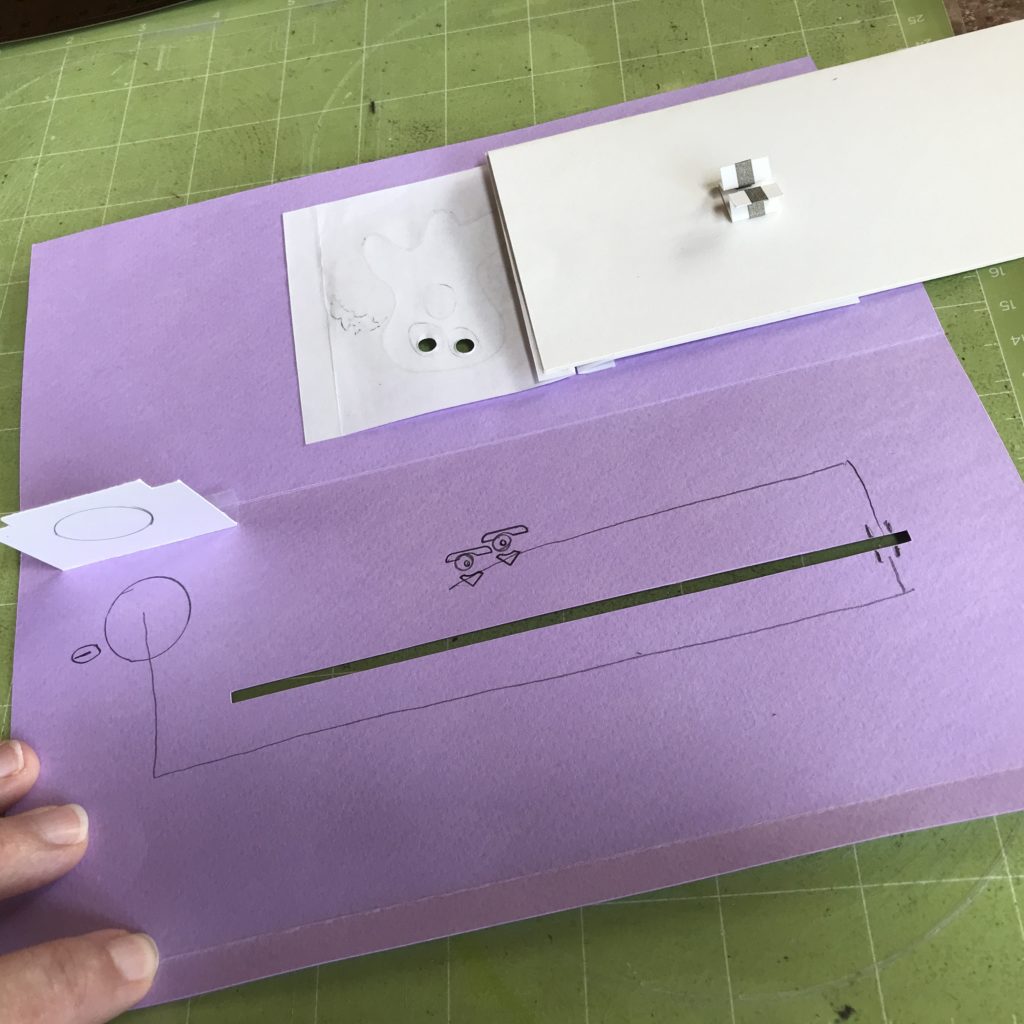
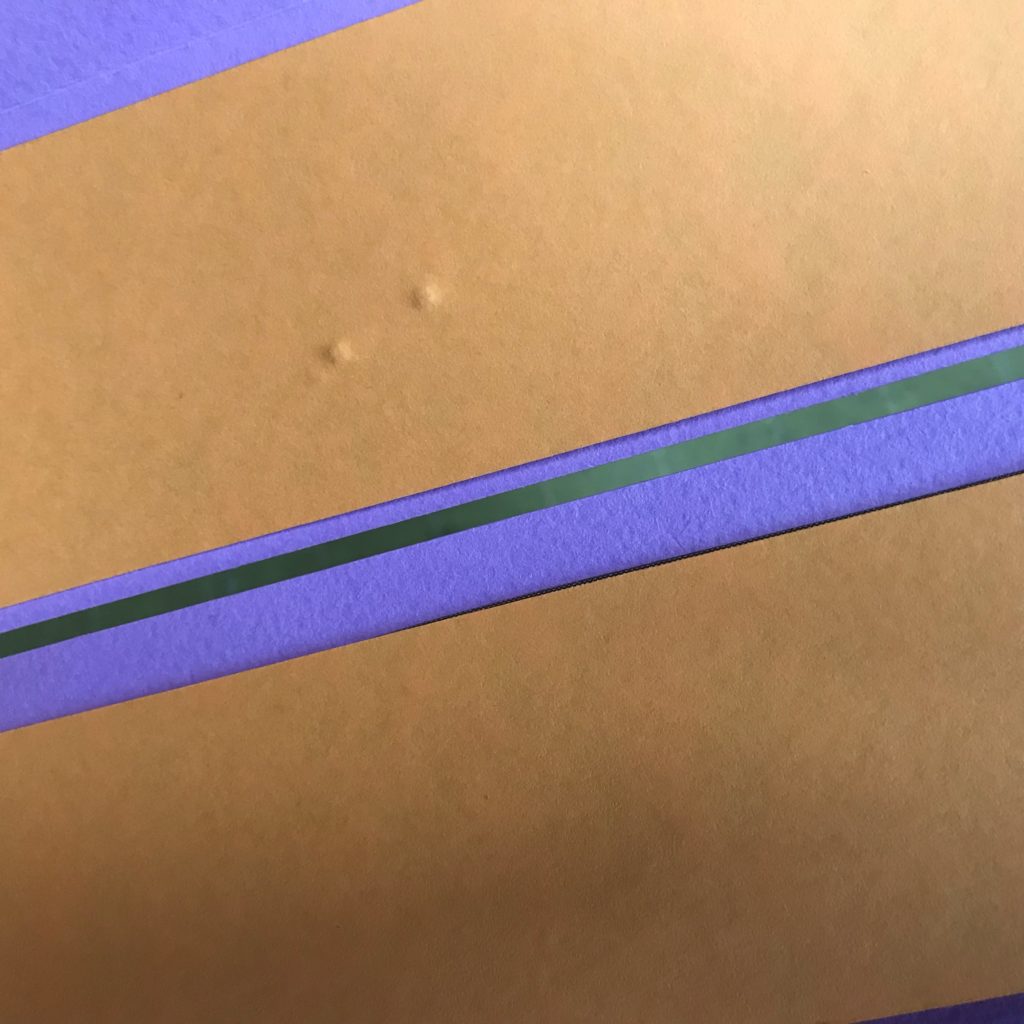
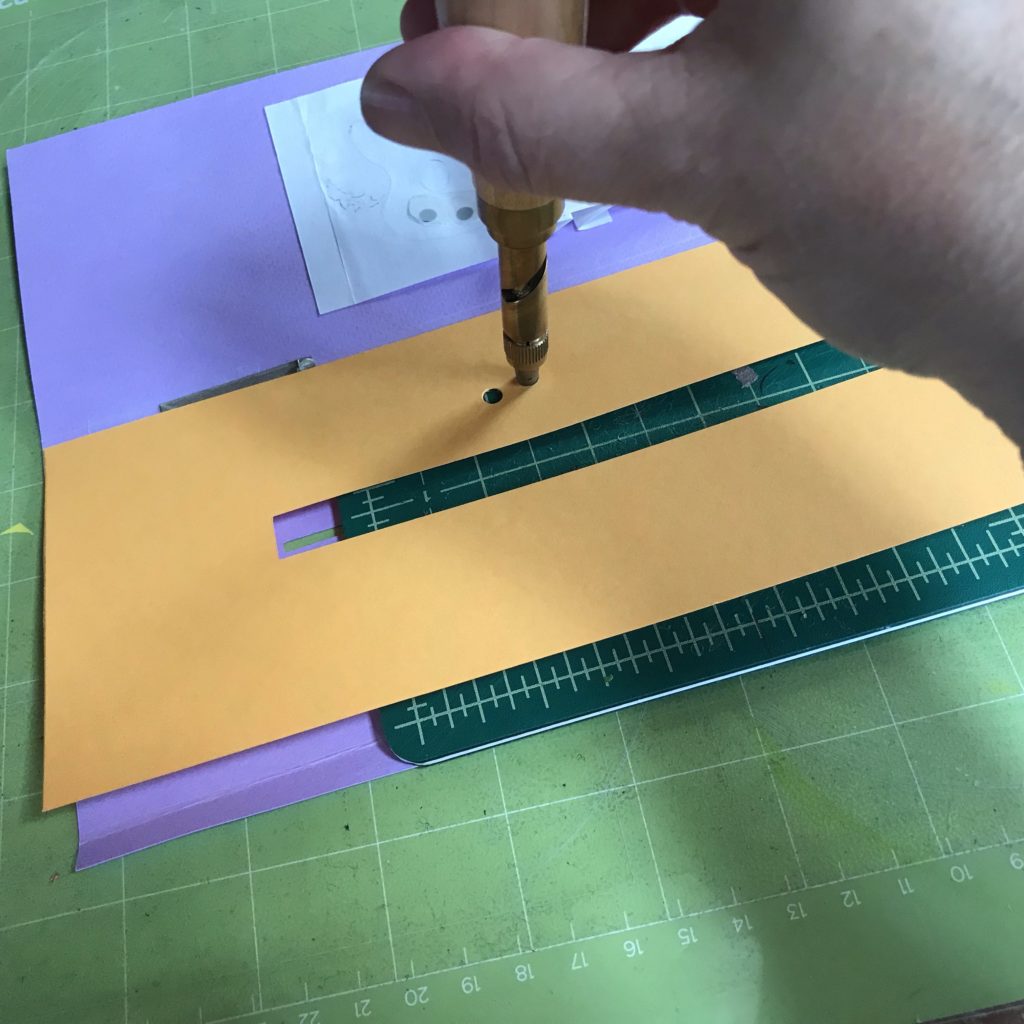
Step 5: Poke Holes
Once your artwork pieces have been adhered to the Pull Tab, and appear to be rolling correctly, open up the card and shift the Pull Tab to the extended, “Open” position, so that the image that will be illuminated (Part A) is visible through the viewing window and the slotted part of the card is open.
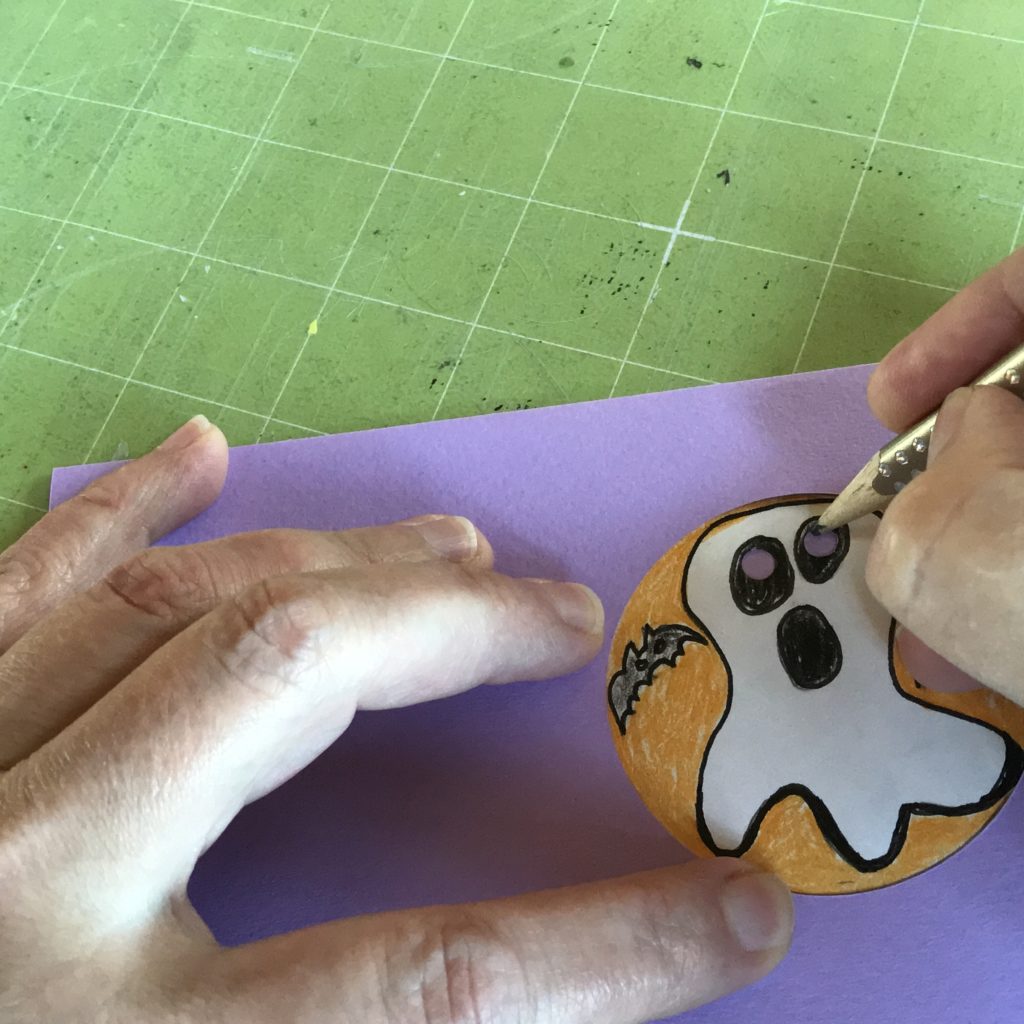
Place part of a self-sealing mat or a piece of heavy cardboard under the artwork and use a Japanese Screw Punch to poke holes in it where you want the LEDs to shine through.
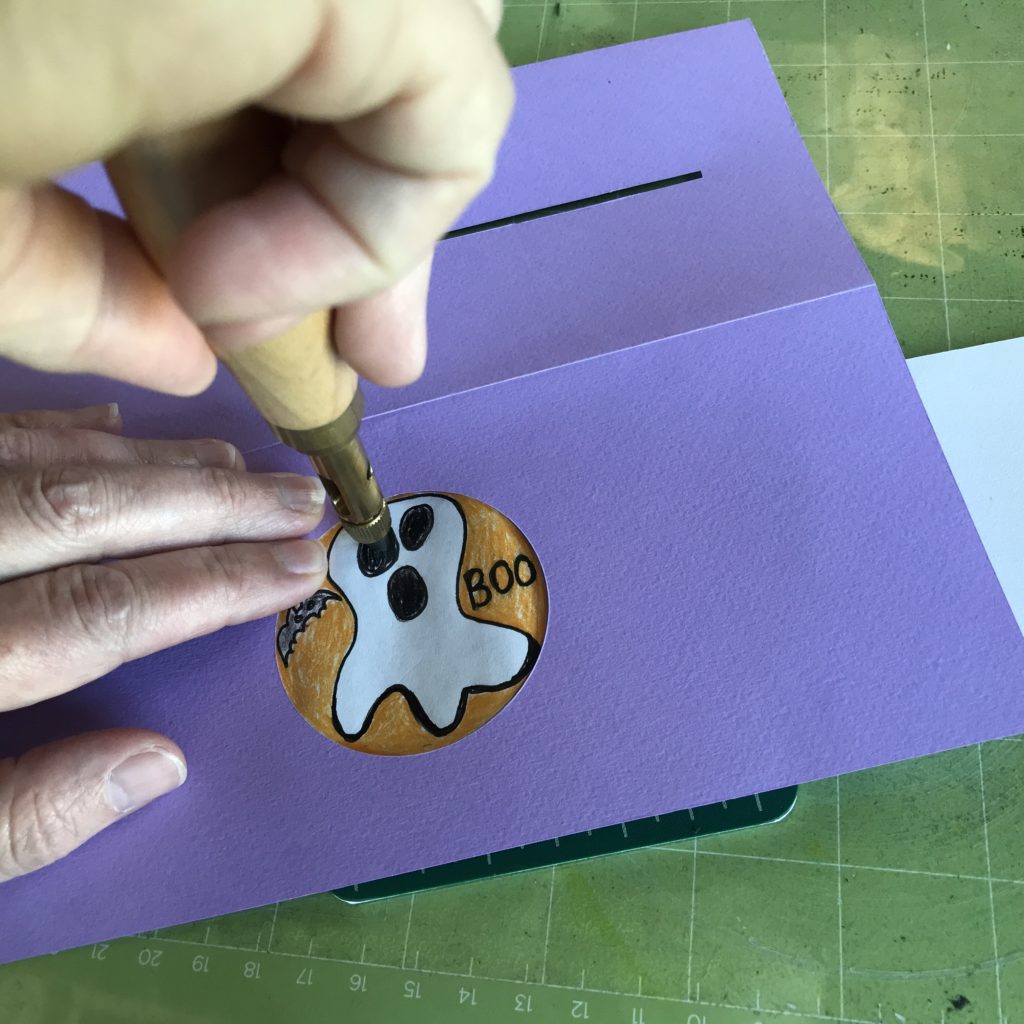
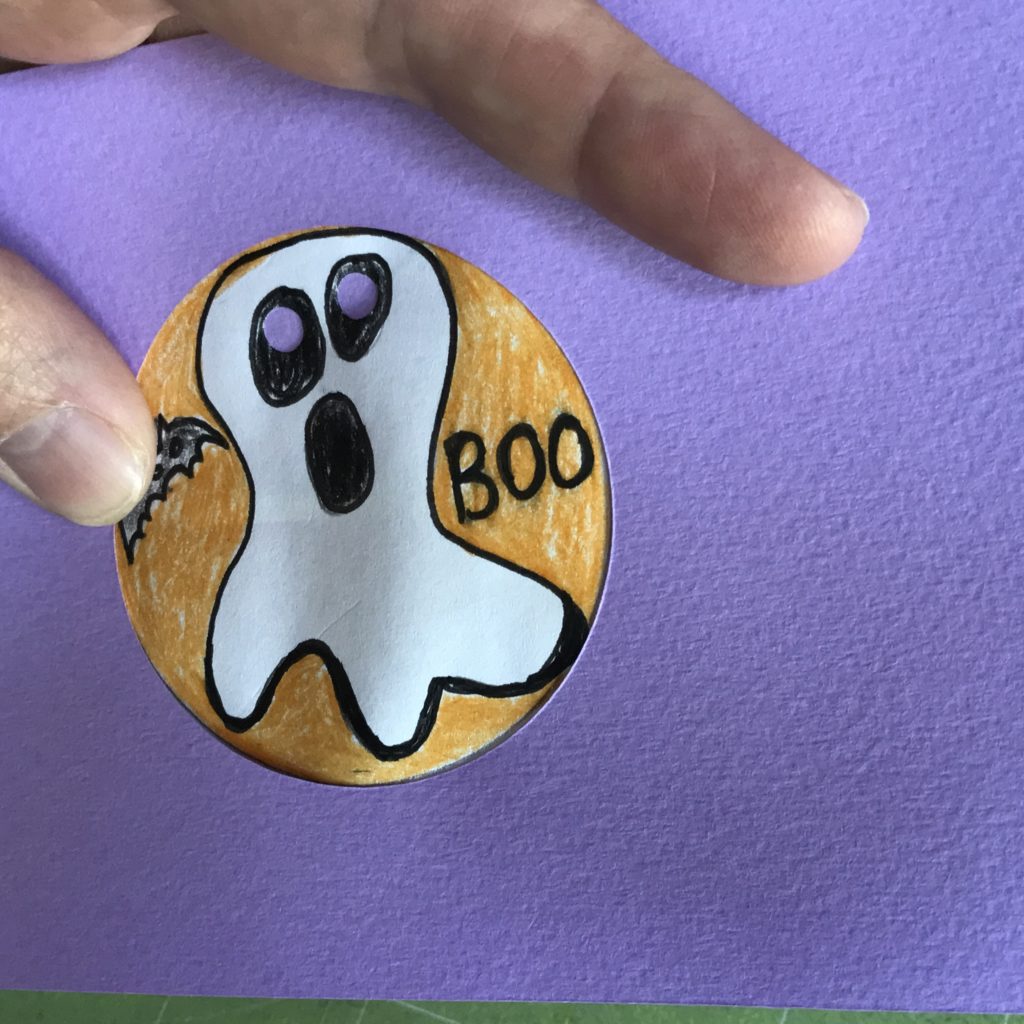
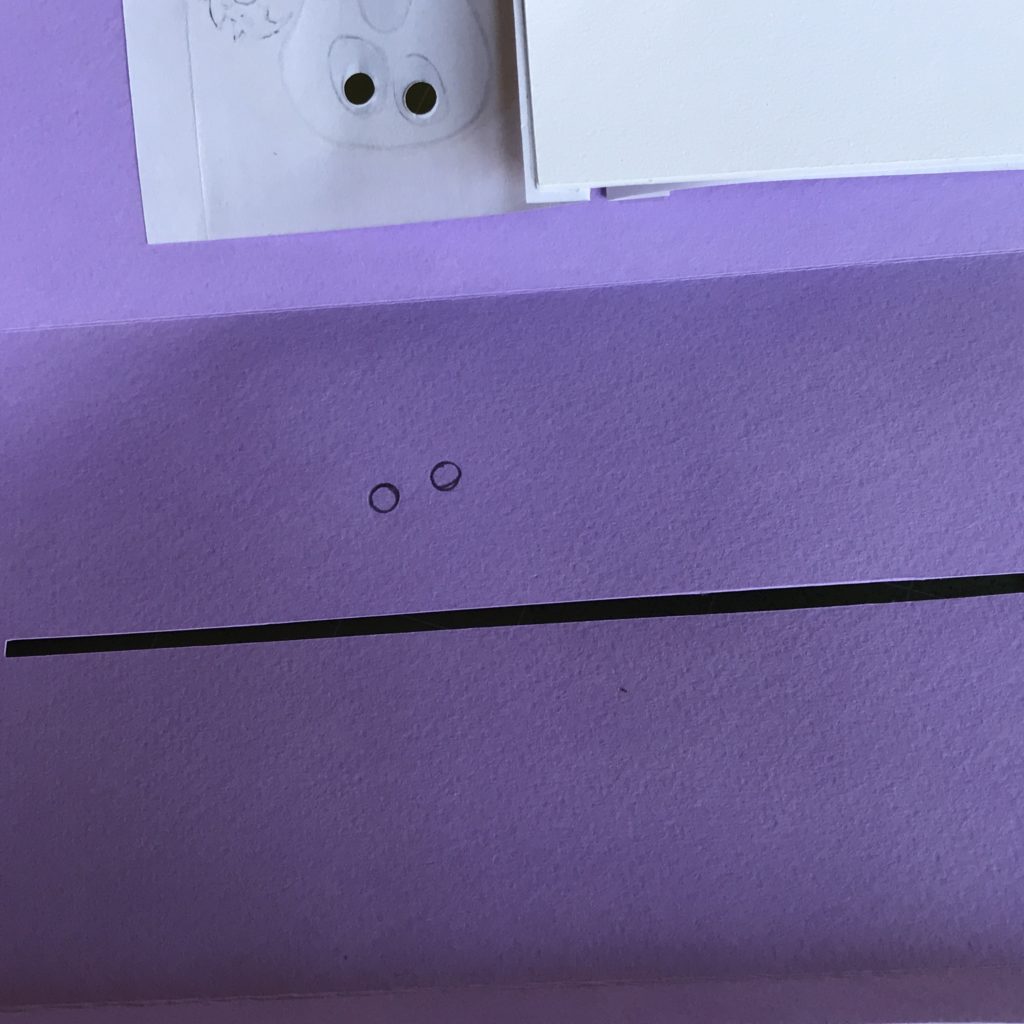
Remove the mat and use a pencil to mark the location of the holes upon the slotted part of the card.
Open the card to inspect the marks you just made. Ensure that the marks are not too close to the center of your card. LEDs should not be placed too close to the slot, or they may impede the sliding switch.
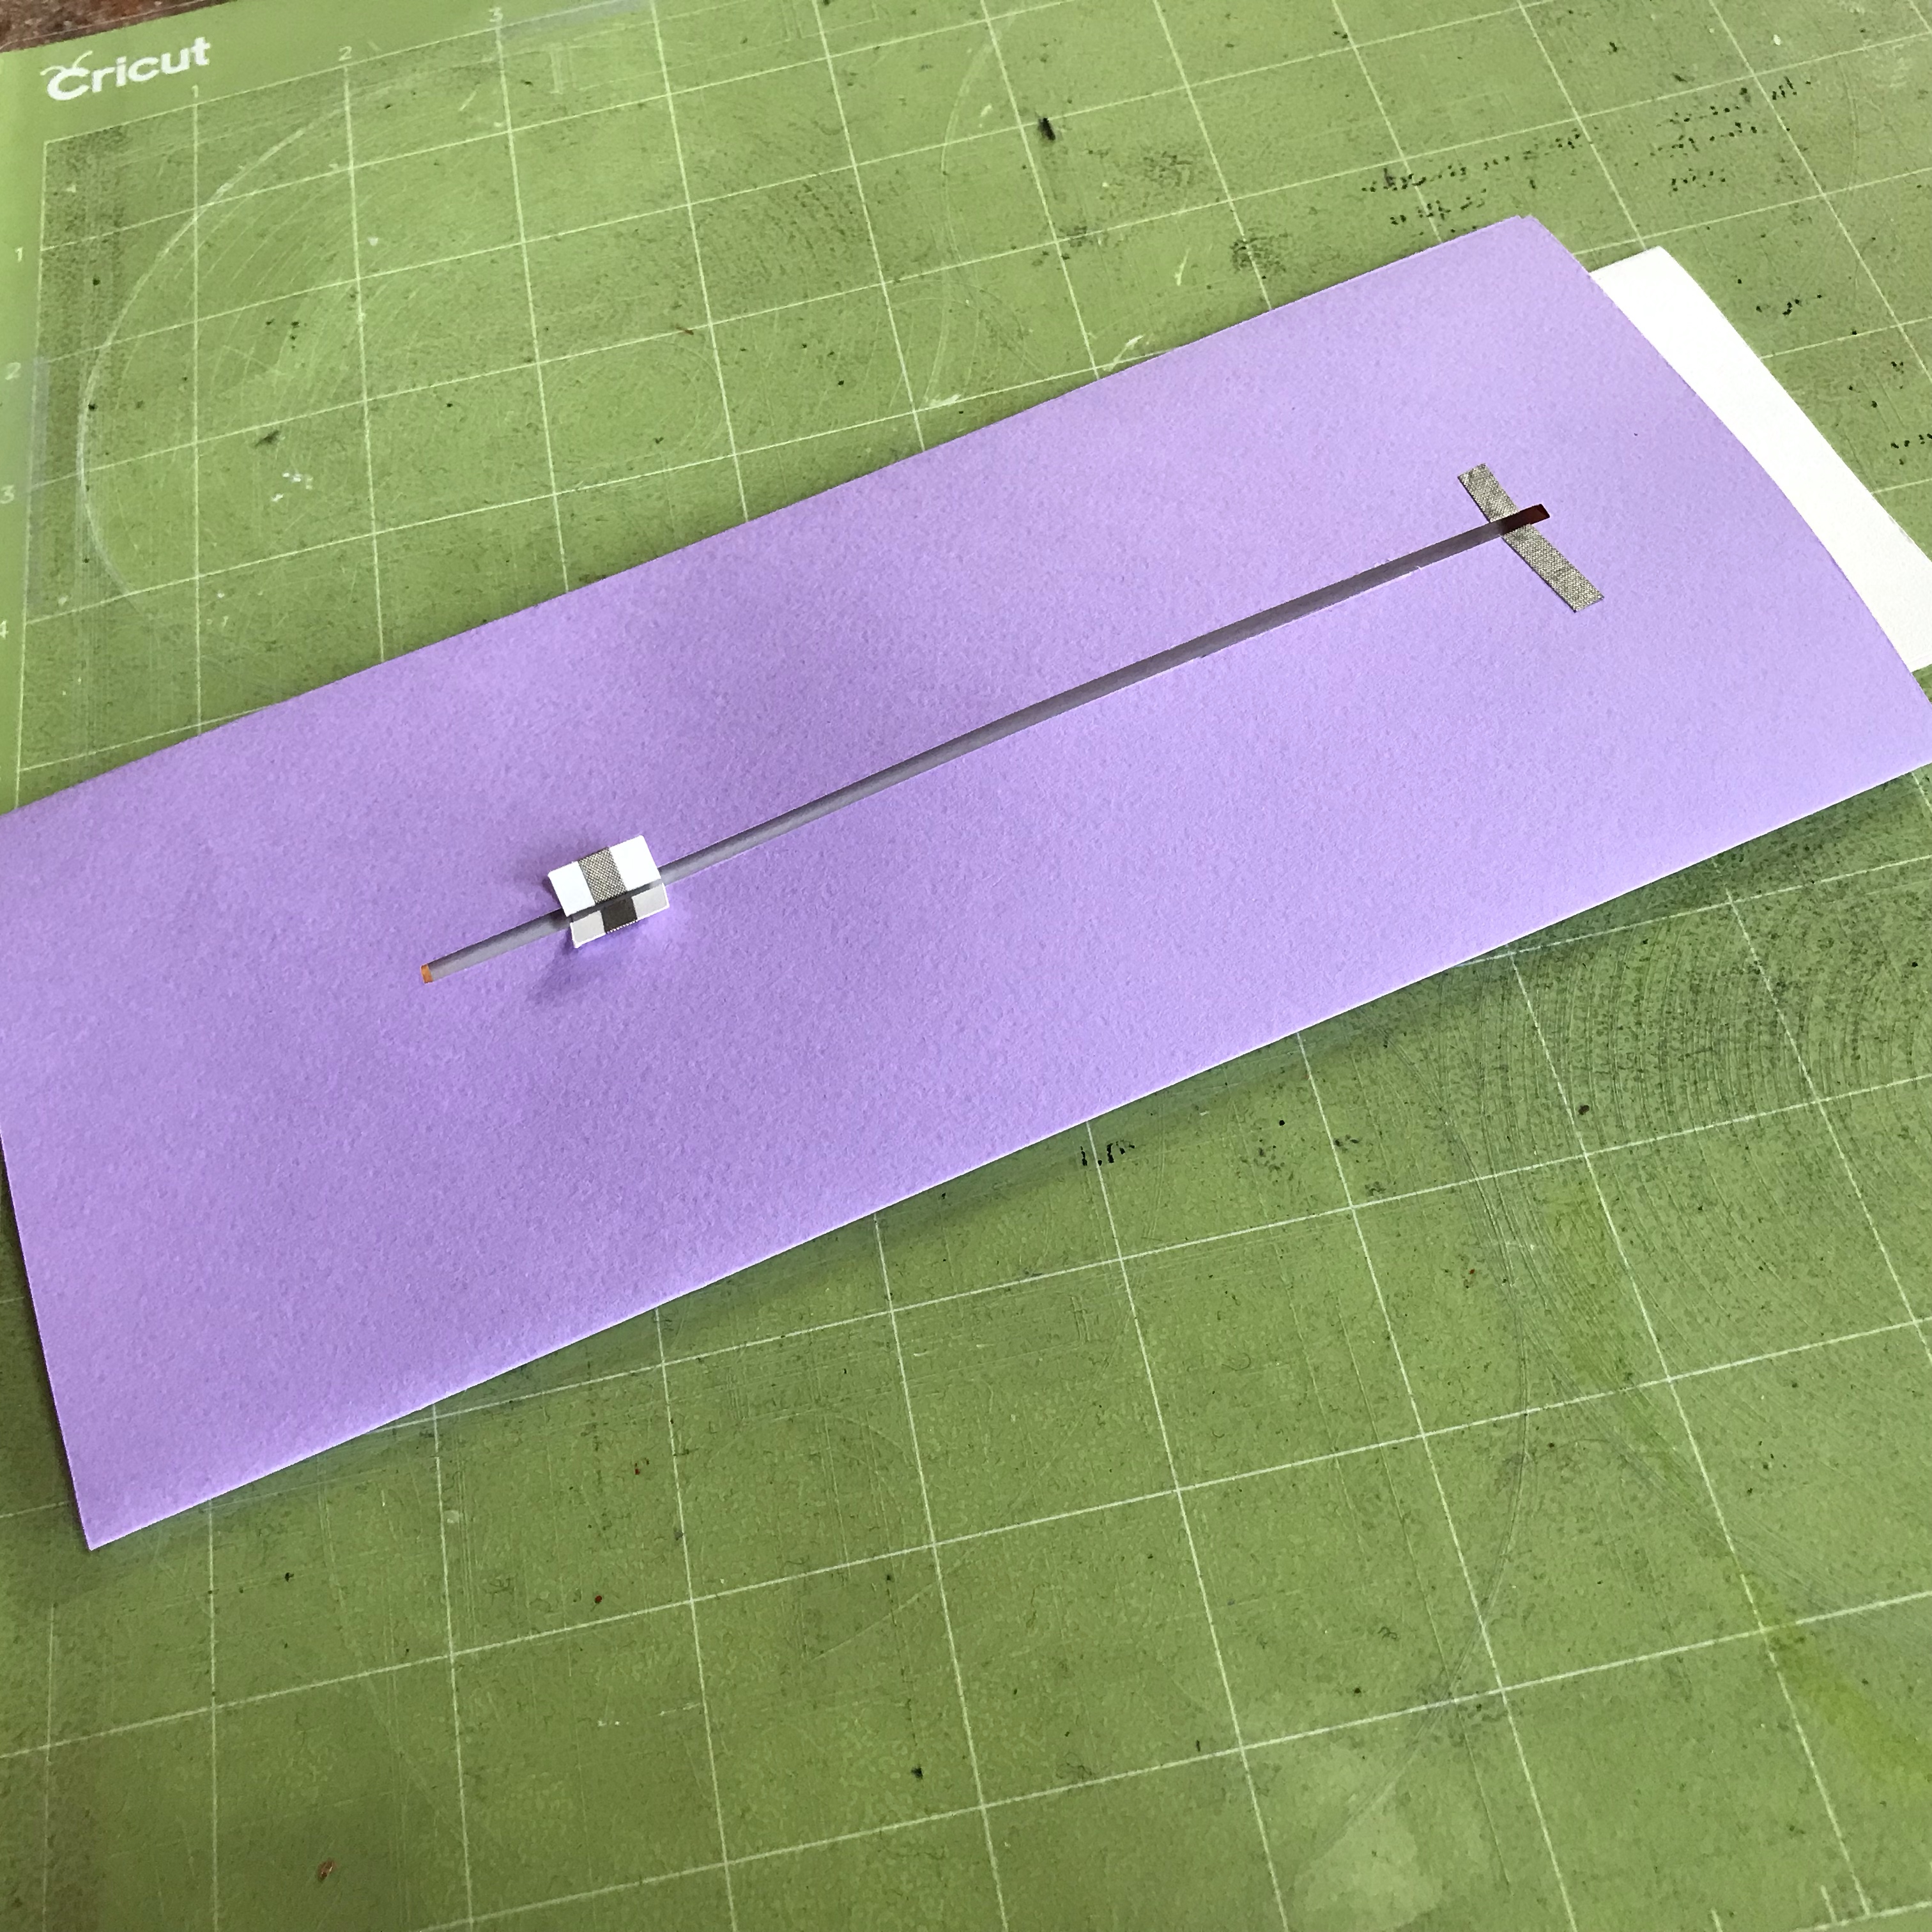
Step 6: Prep Battery Holder & Switch
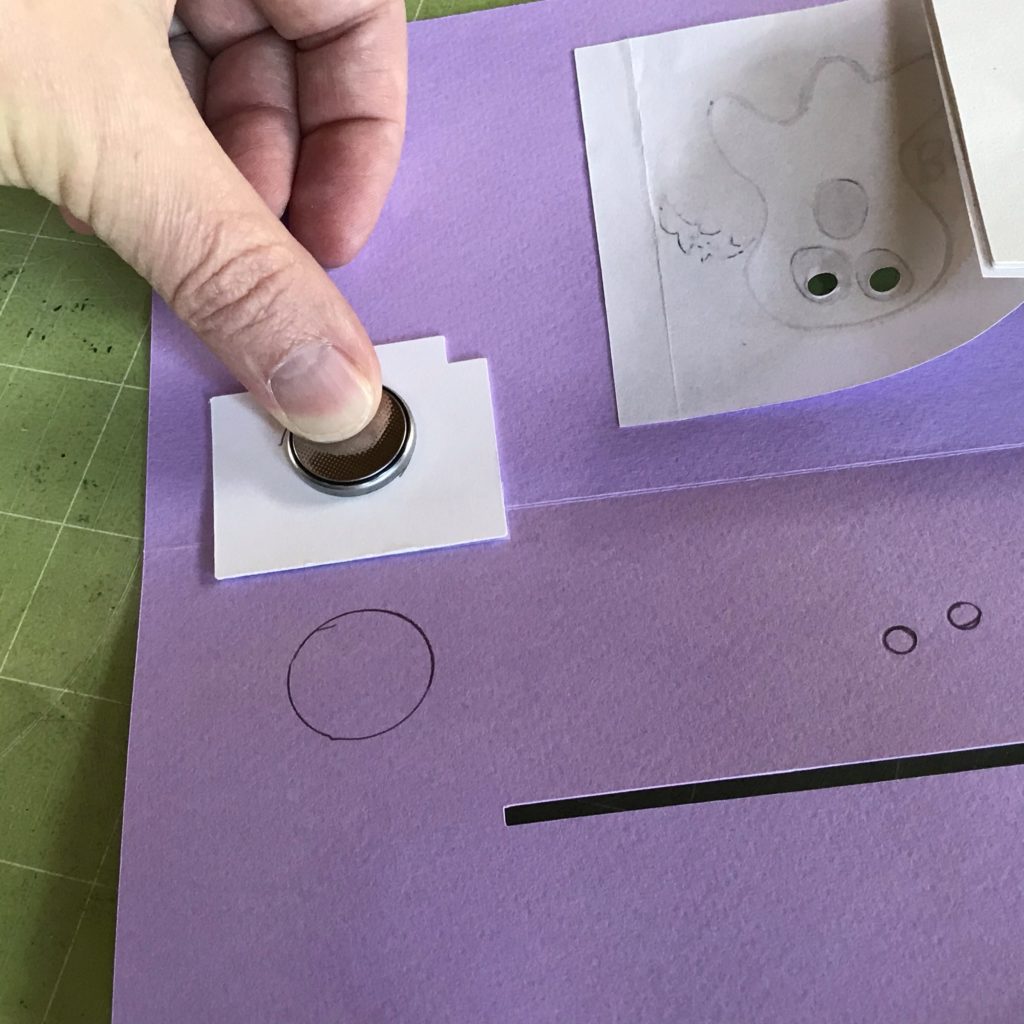
Your battery flap is going to be placed in the center of the area to the left of the slot.
Tape the top edge of the battery flap into place and mark the location for the battery with a pencil.
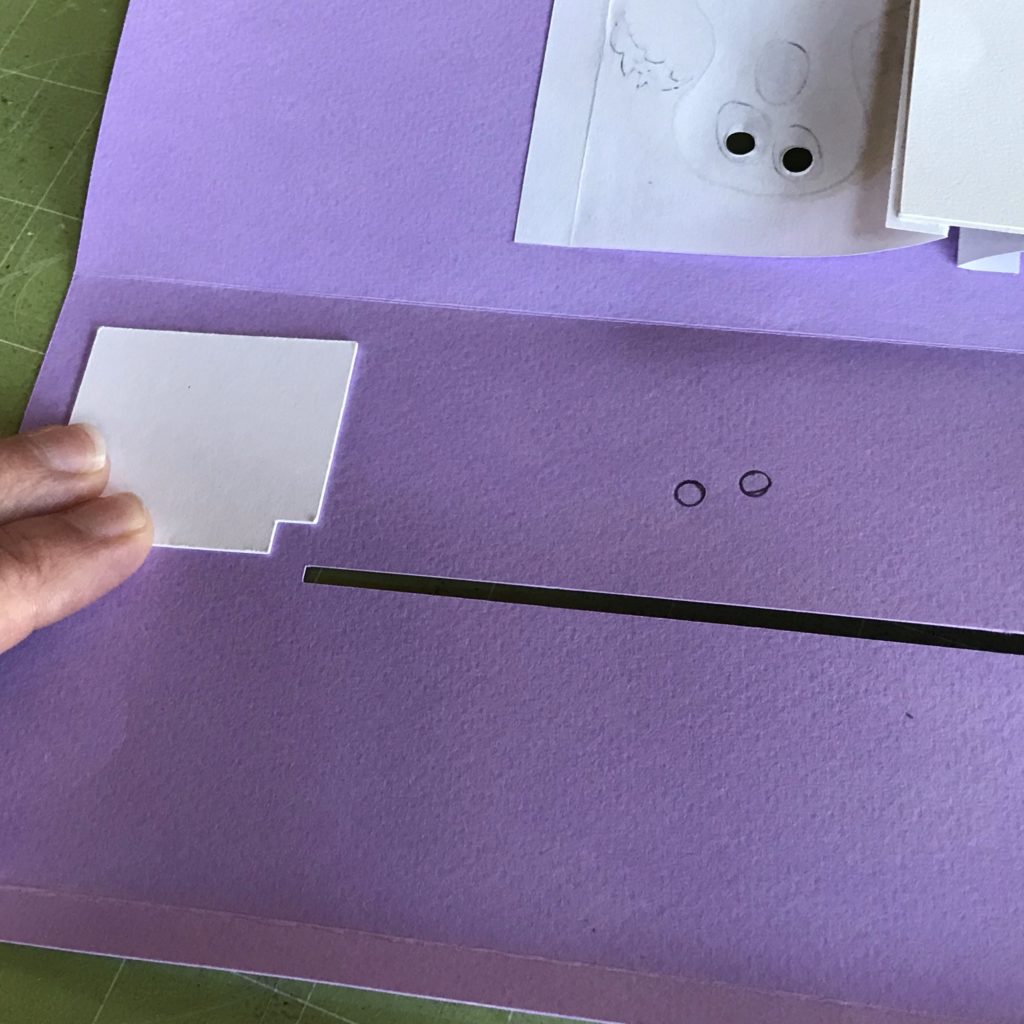
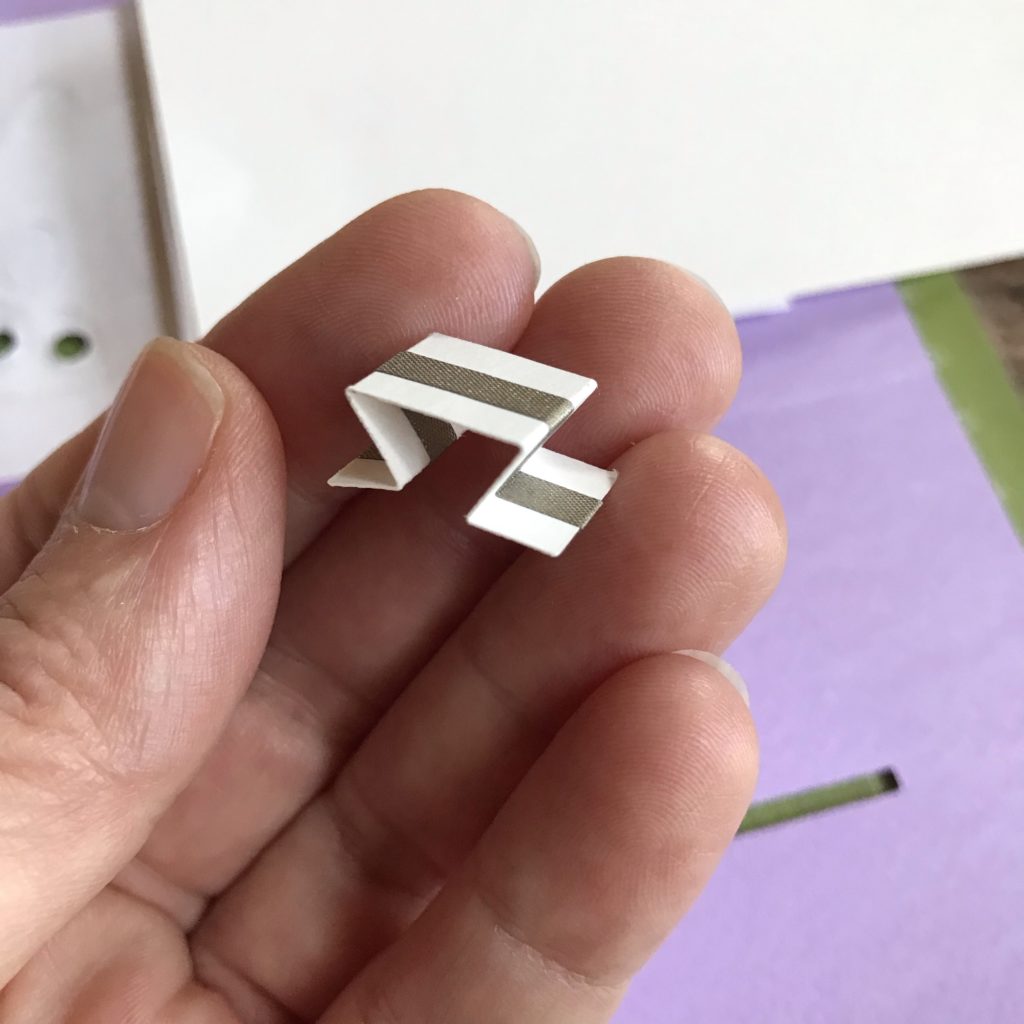
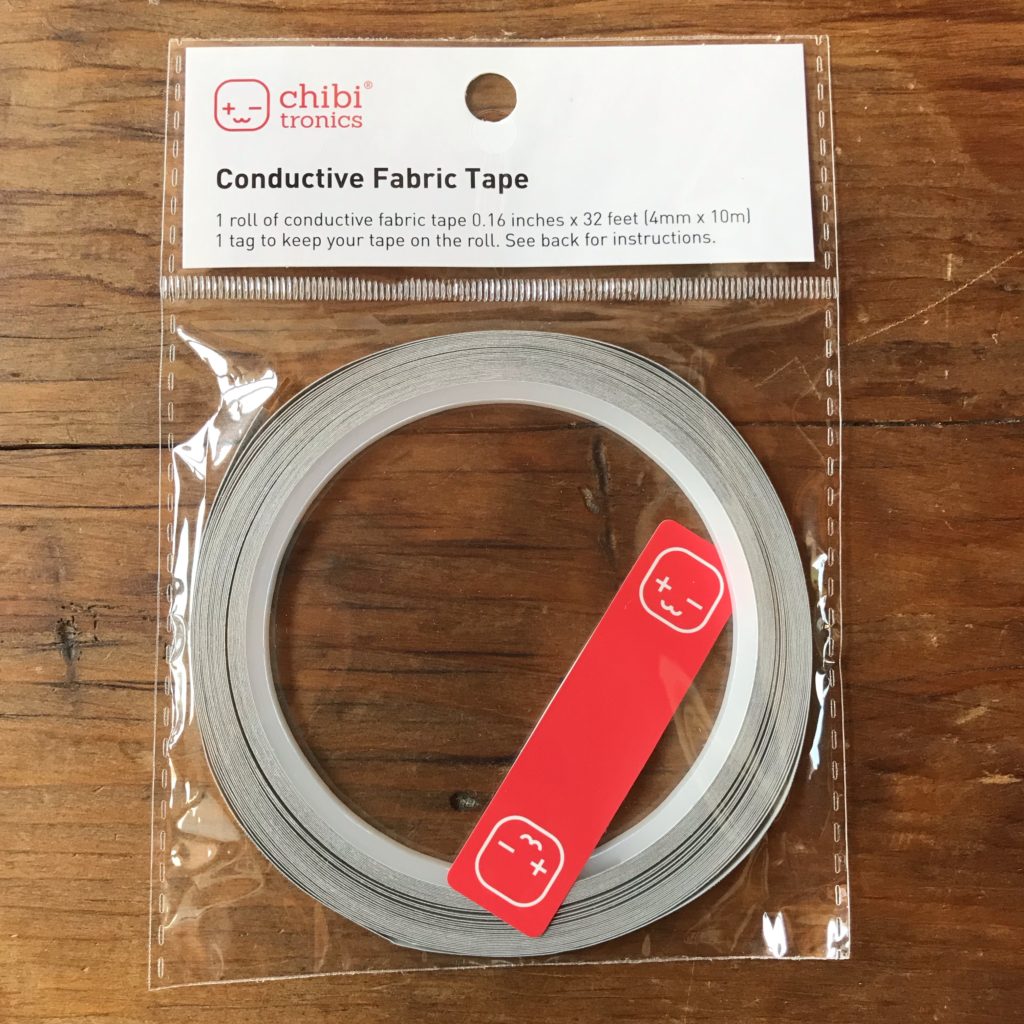
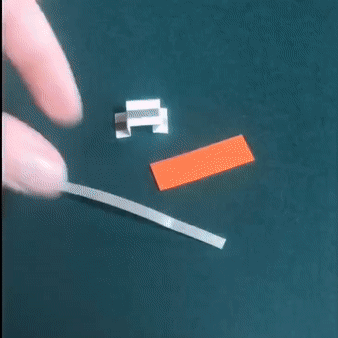
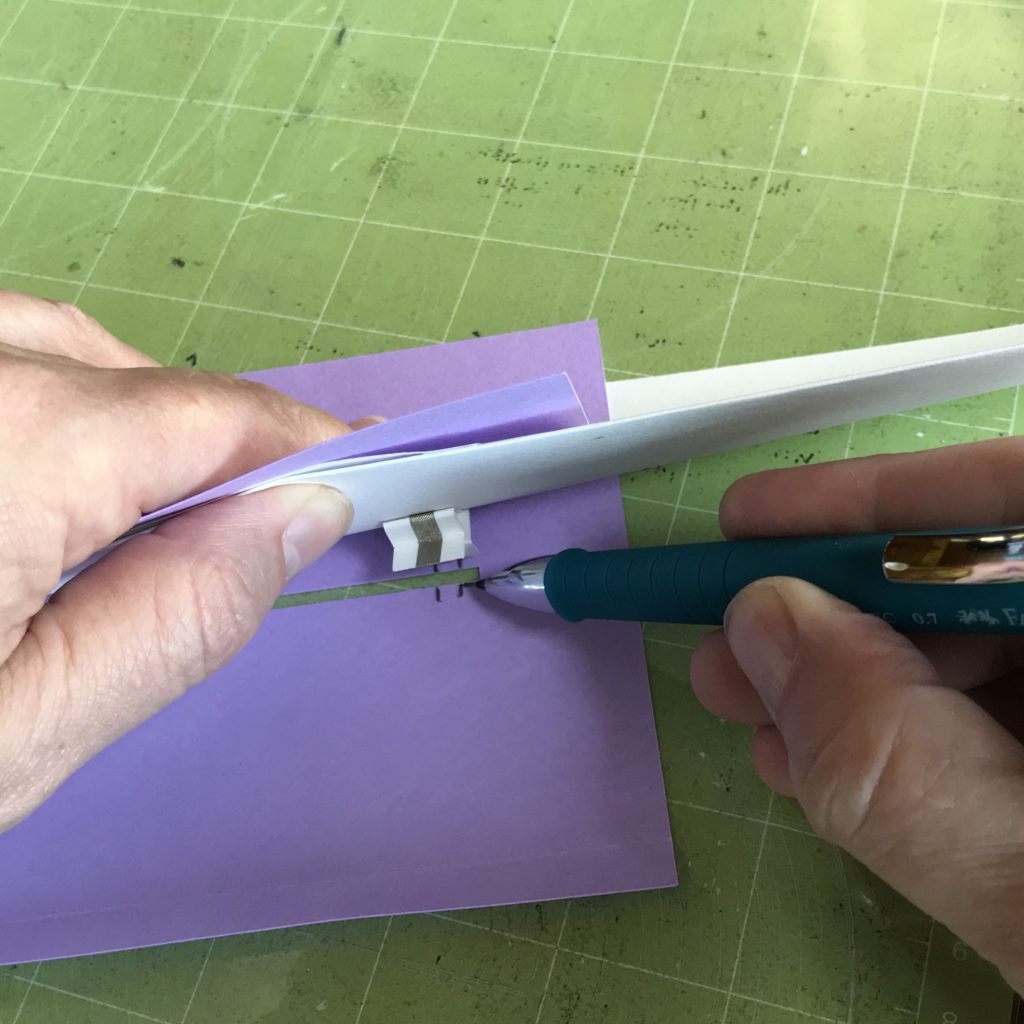
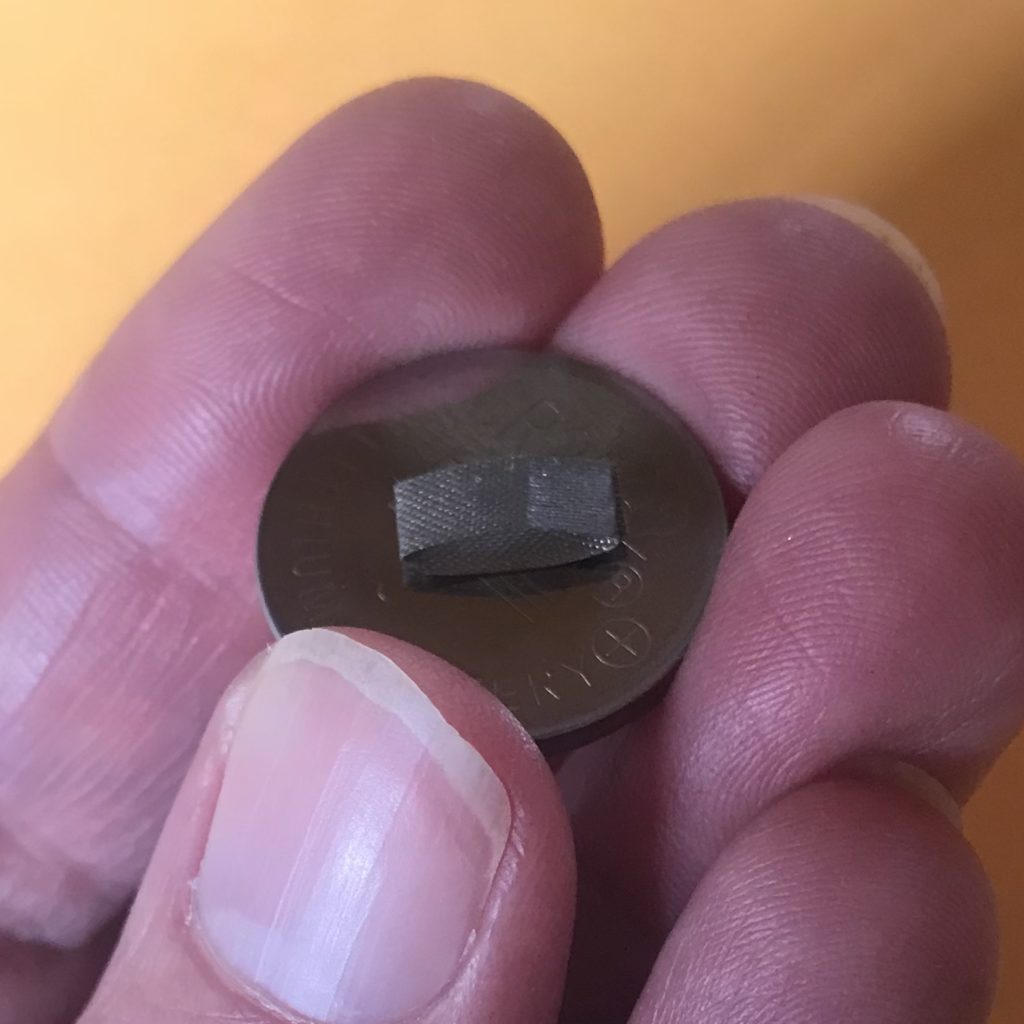
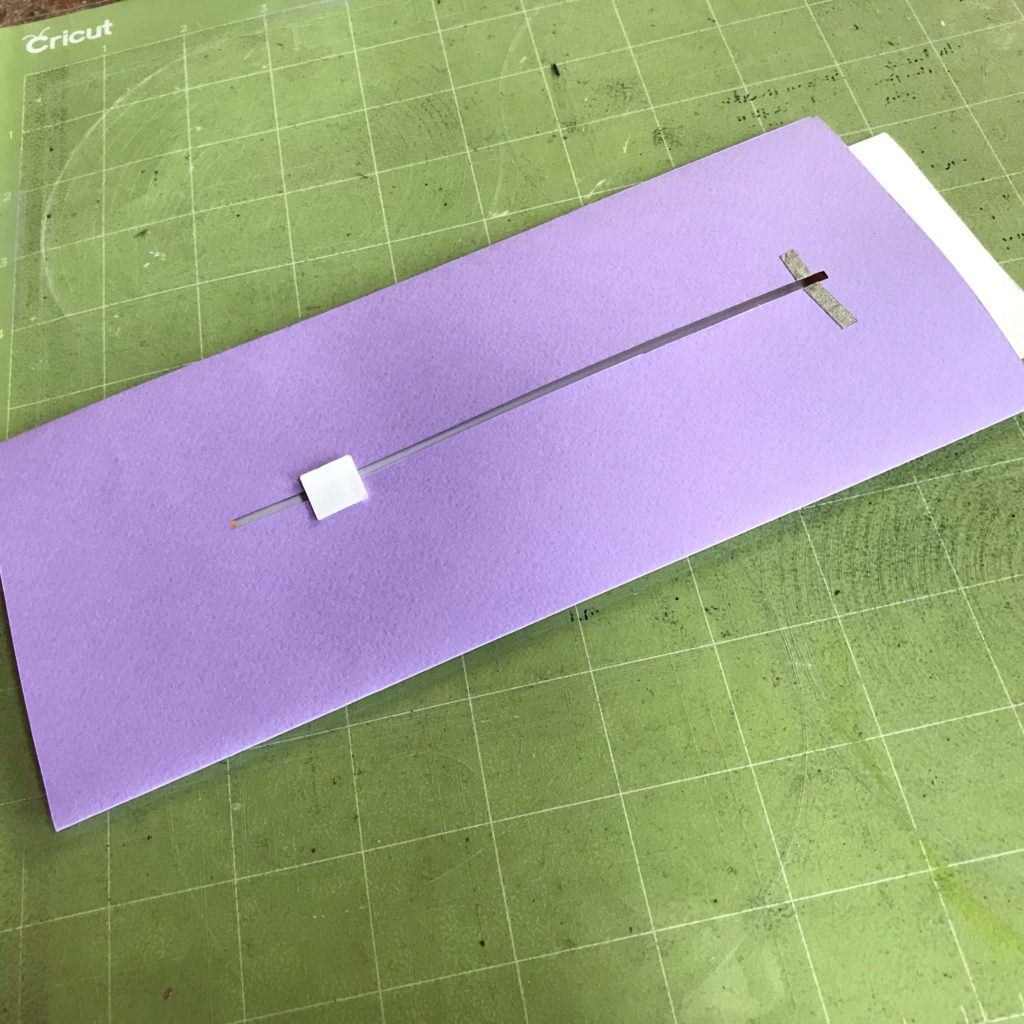
Create your switch by adding Conductive Fabric Tape to the ½” H X 1.5” W piece and folding it along the four score lines.
Then, with the card in the OPEN position, thread the open side of the switch through the slot toward the back of the card. Add a piece of double sided tape to the closed side.

Bring the Pull Tab down over the taped switch to get the switch into the correct position.
With the switch positioned above the slot, mark its location with a pencil.
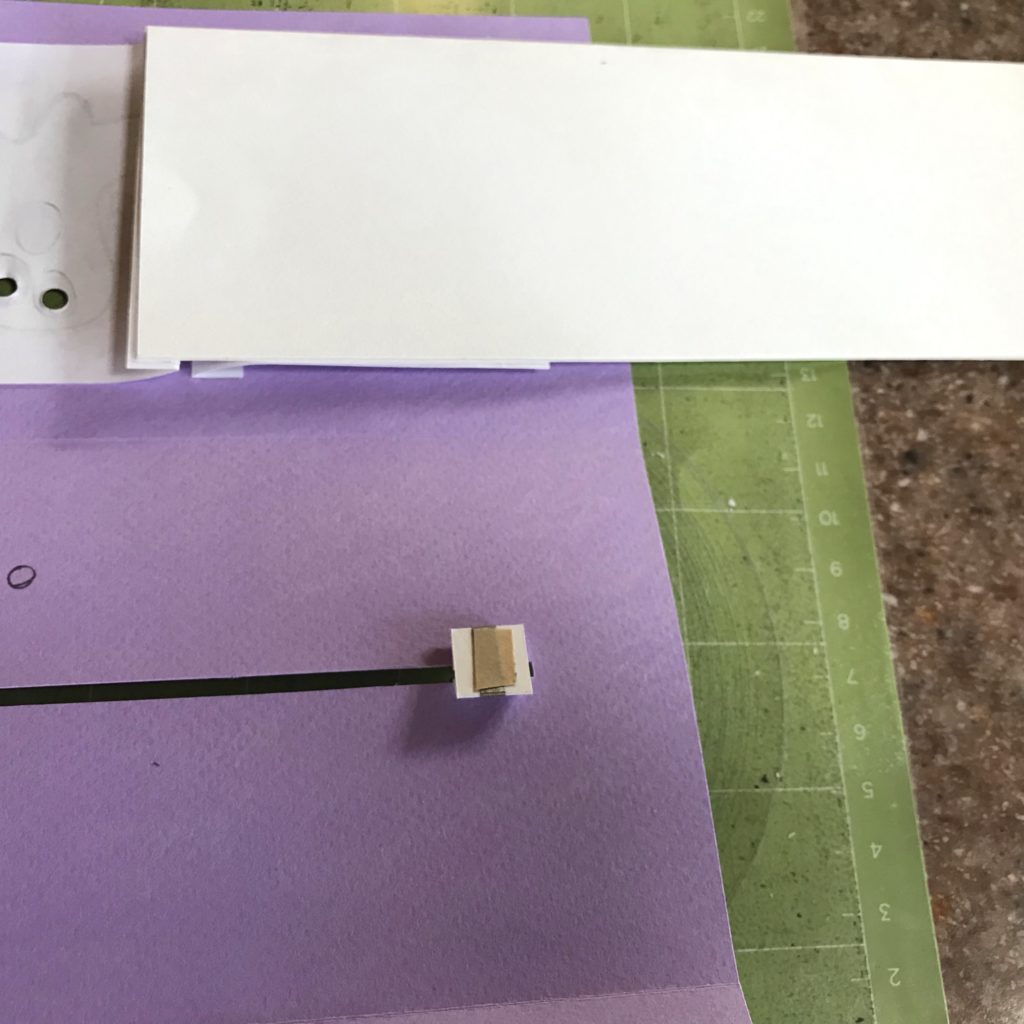
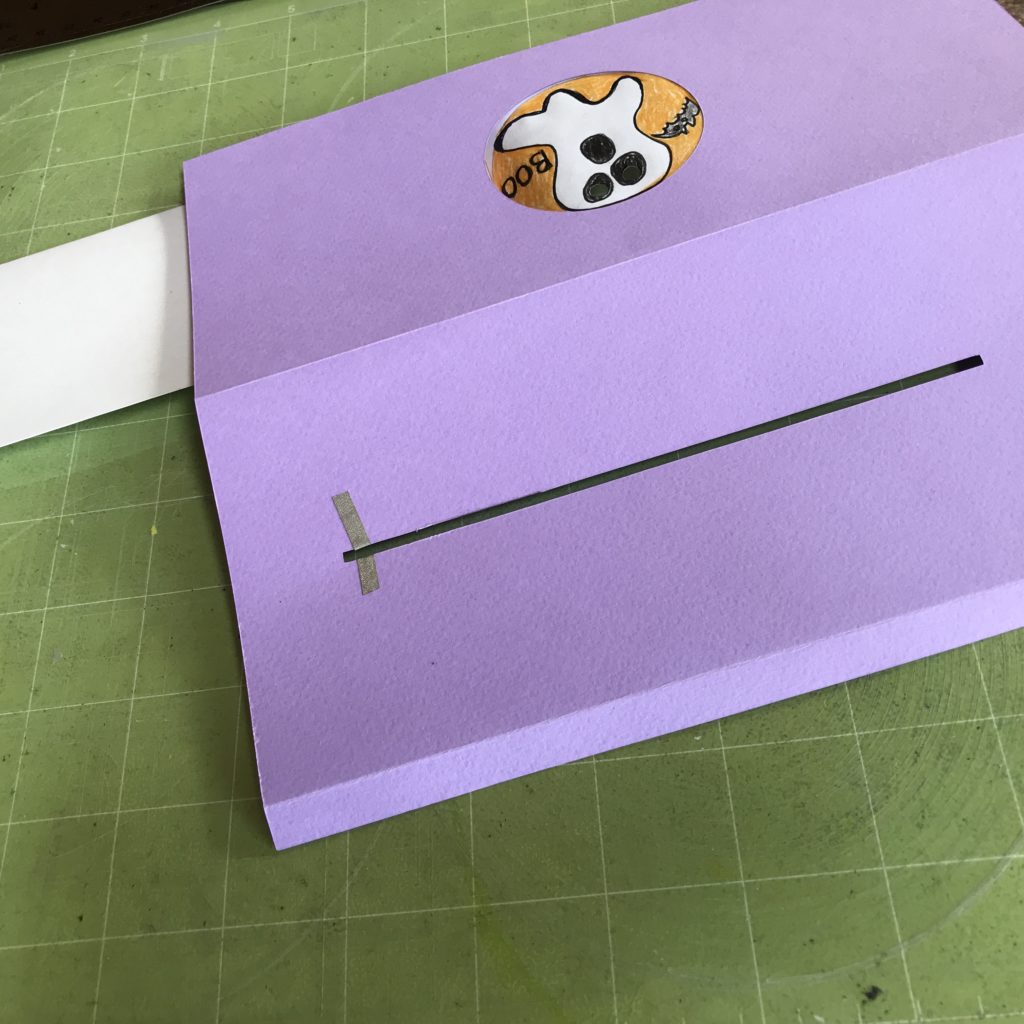
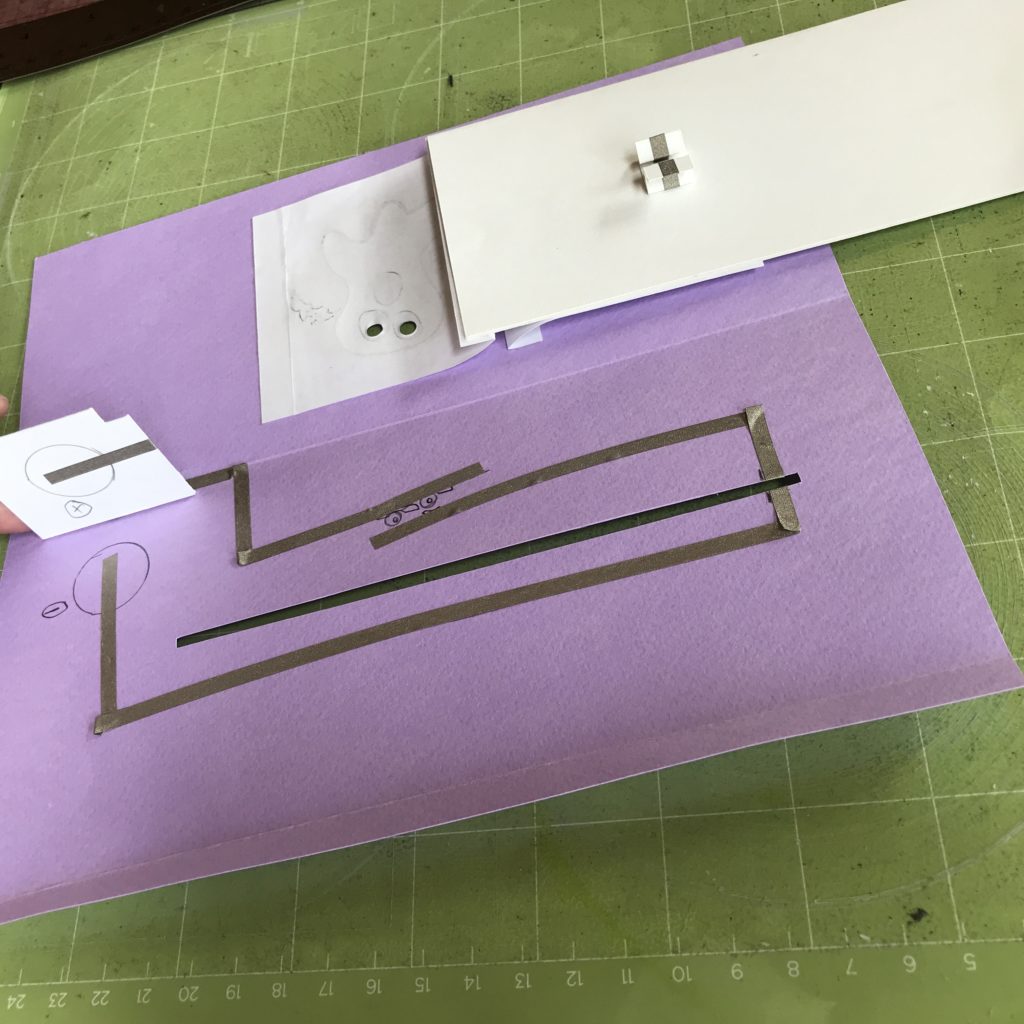
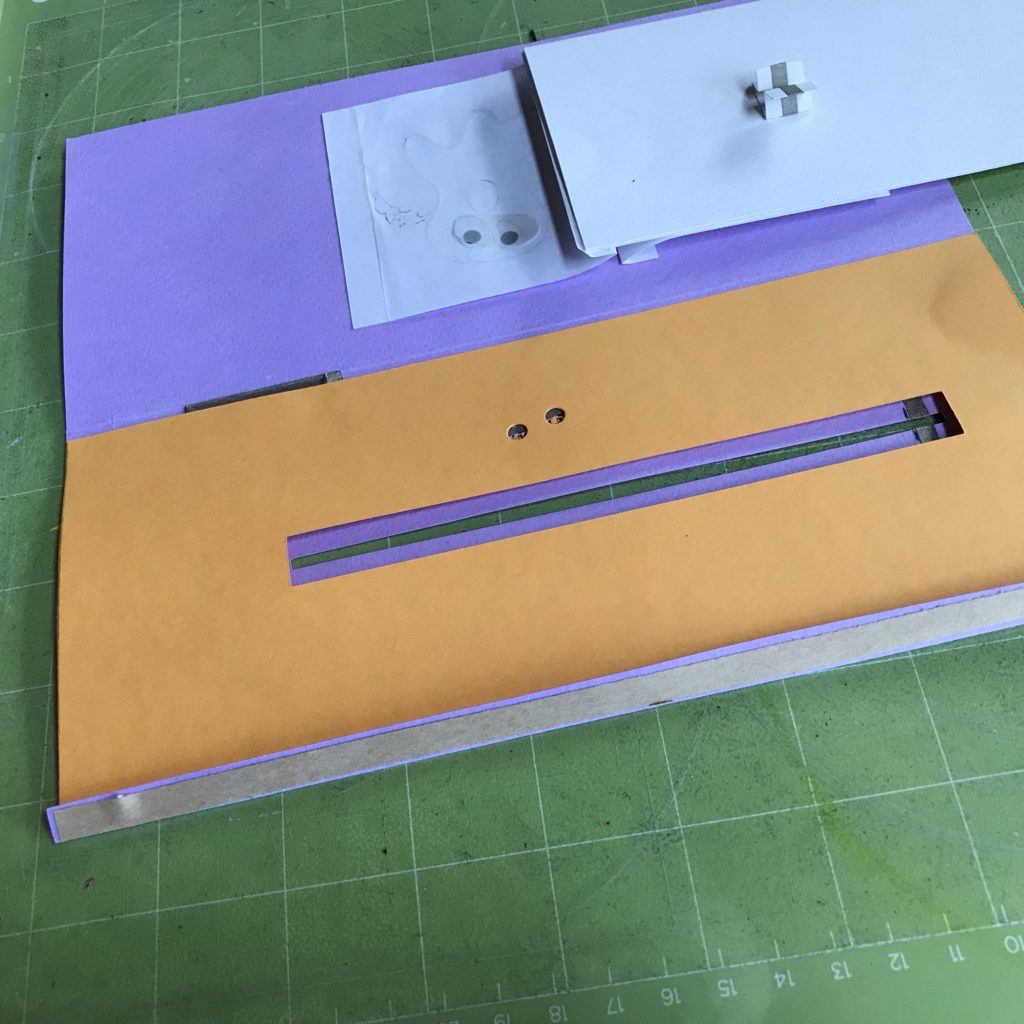
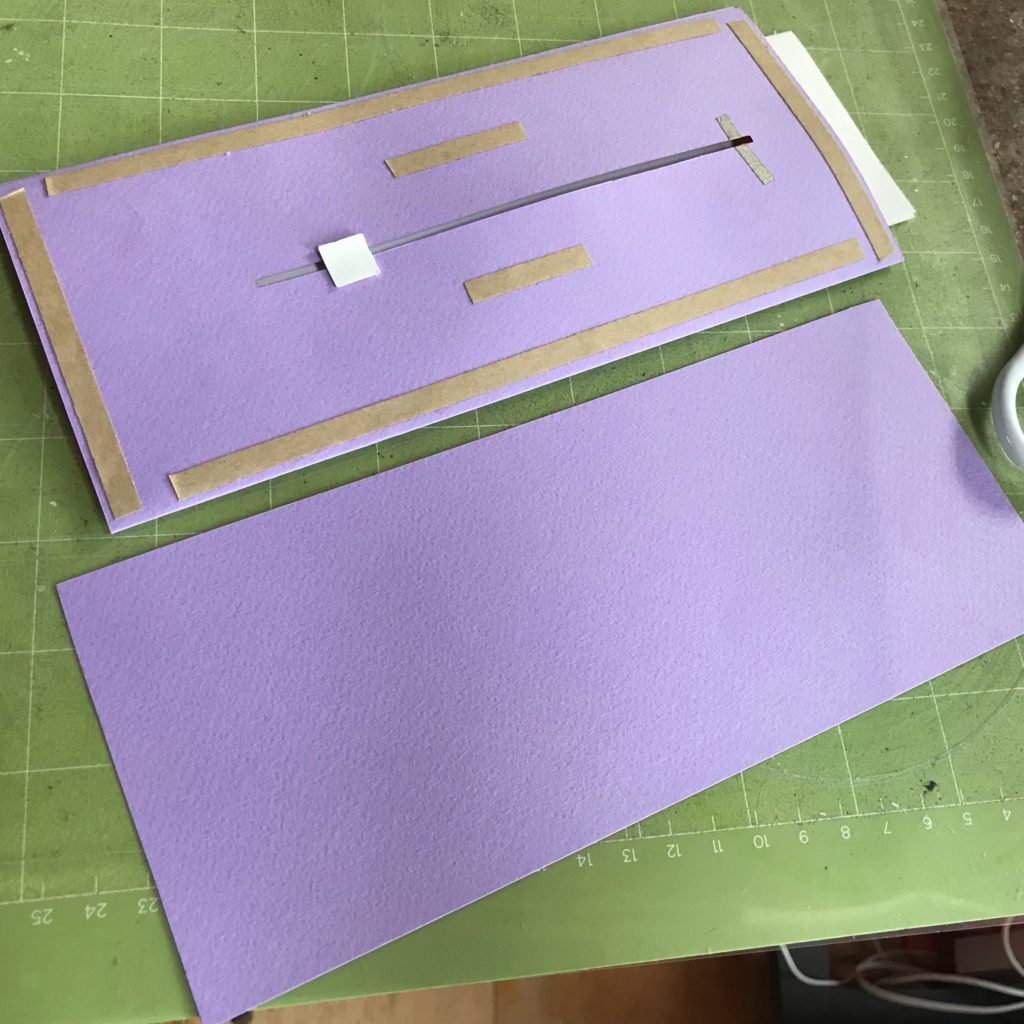
Step 7: Lay Down the Circuit
Use the circuit diagram as a guide to lay down your circuit, starting with the negative trace. Use Conductive Fabric Tape to form your traces.
The negative trace will start under the battery flap and will continue around both sides of the slot to the negative side of the LEDs.
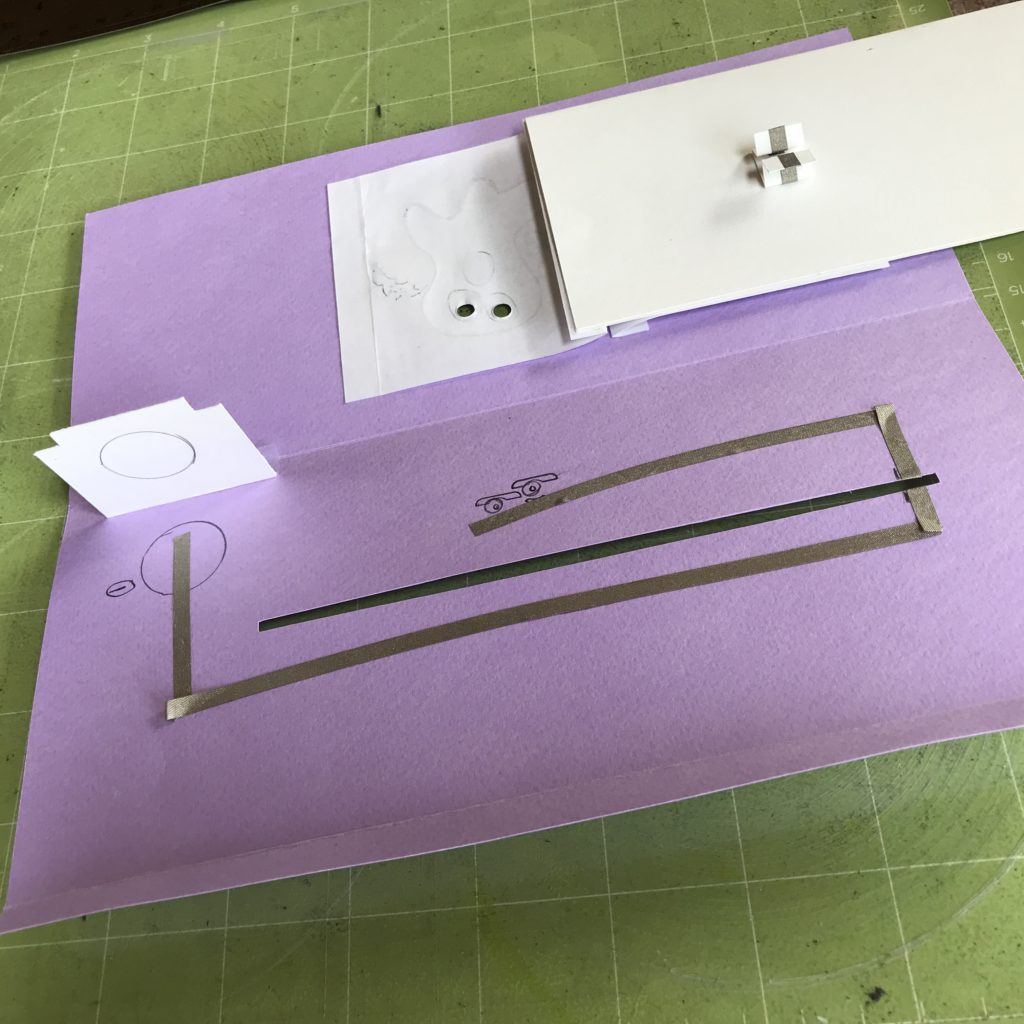
The negative trace will be cut to form the switch gap, which wraps around to the back side of the slot.
The positive trace will start on the inside of the battery flap, wrapping around and over its top edge, toward the positive side of the LEDs.
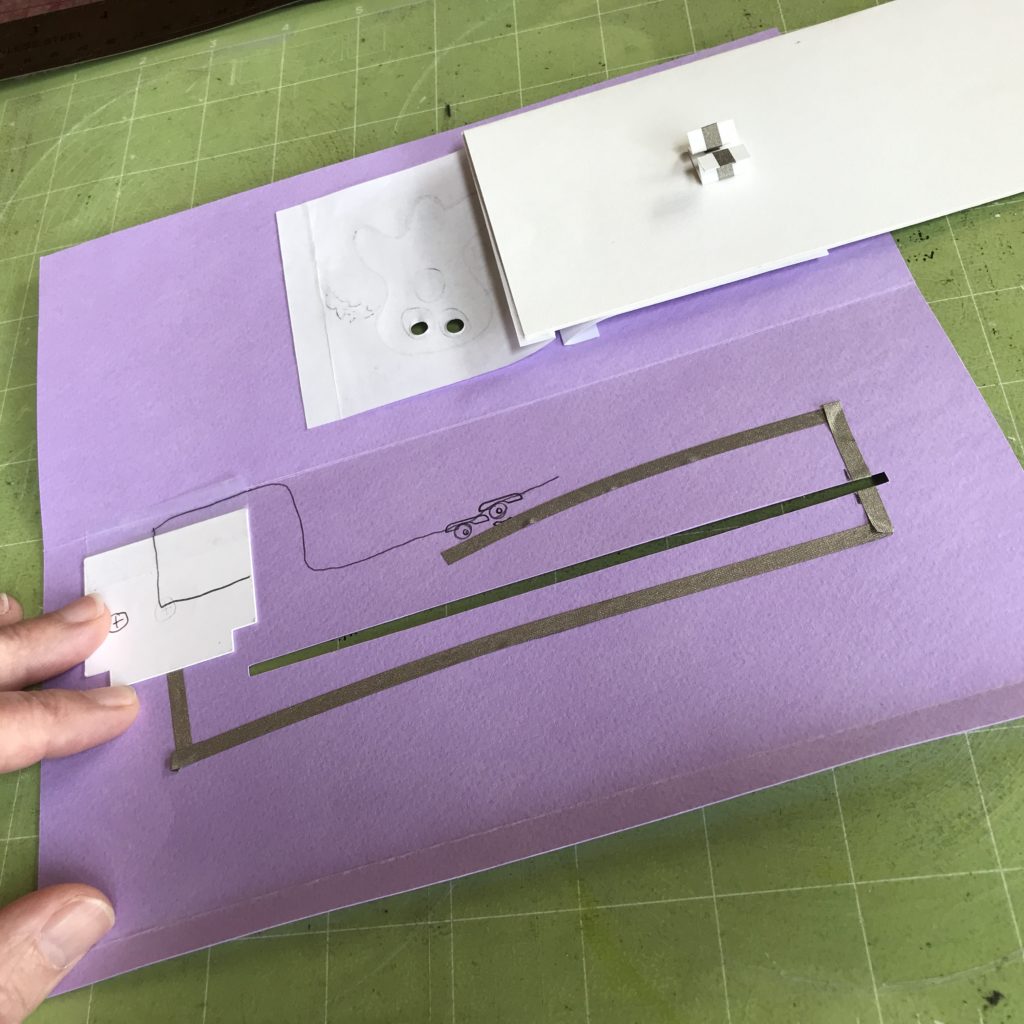
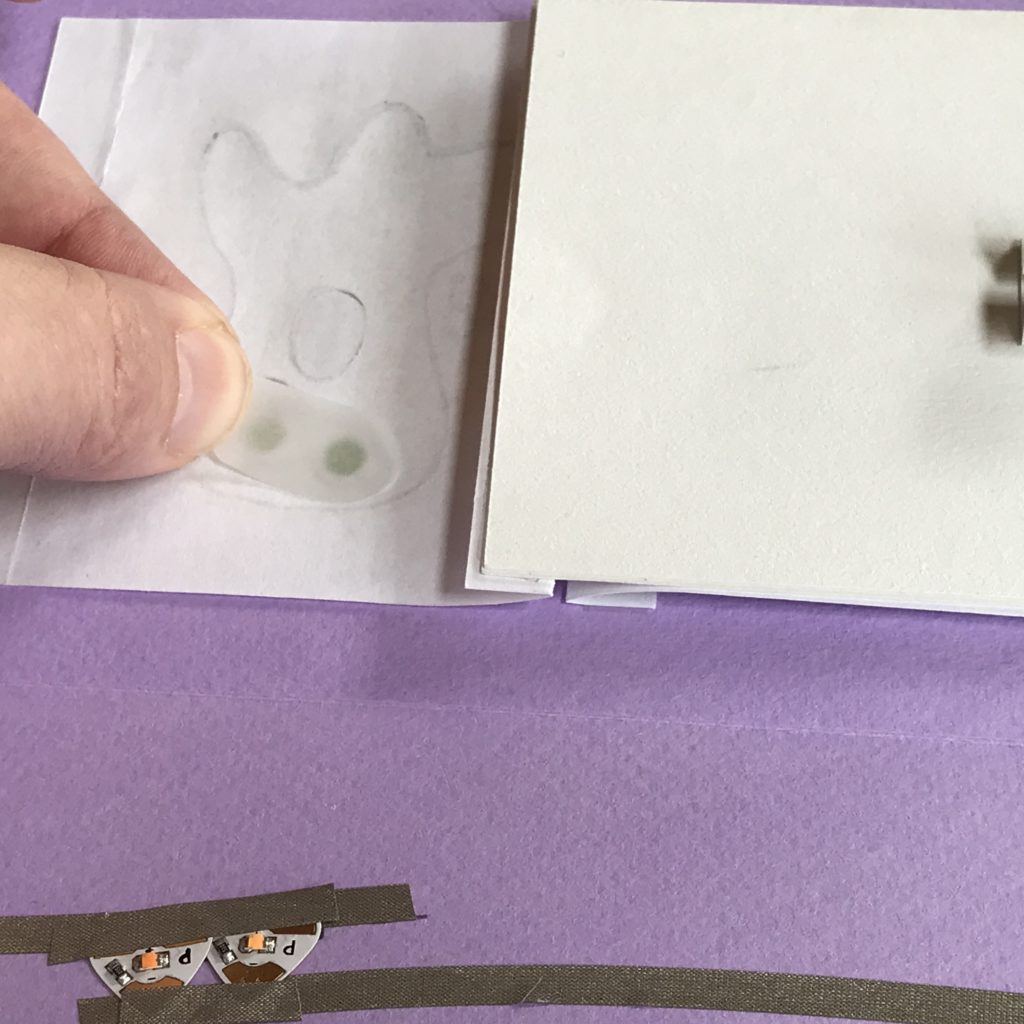
Place your Circuit Sticker LEDs, test the circuit by closing the card and verify that the LEDs are where you want them, and then reinforce them with Conductive Fabric Tape.
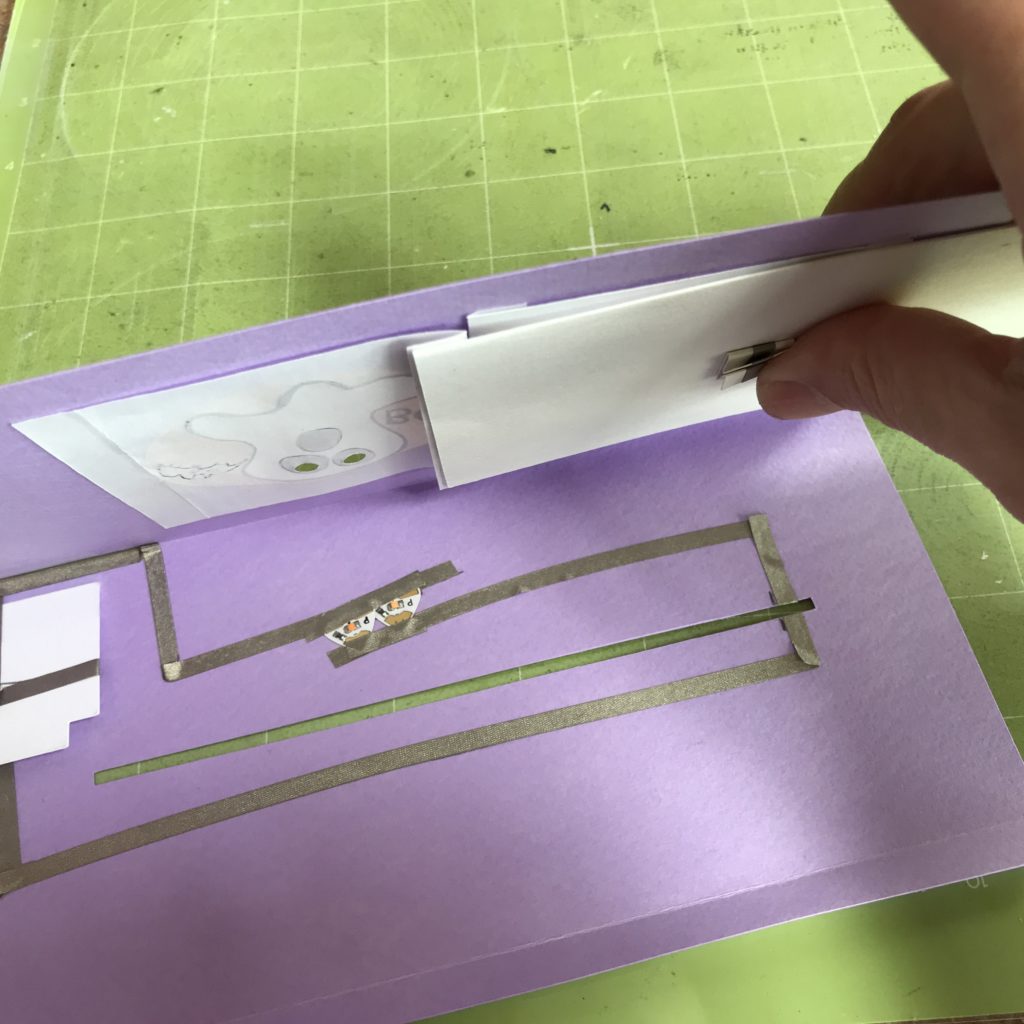
If desired, tape or glue a small scrap of vellum to the back side of Piece A to cover the holes and help diffuse the light.
Ensure that the vellum is well secured, without any loose edges, or else it could later impede the smooth rolling of the images inside of your card.
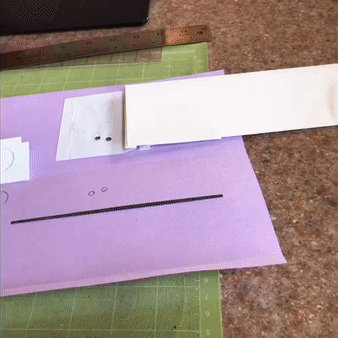
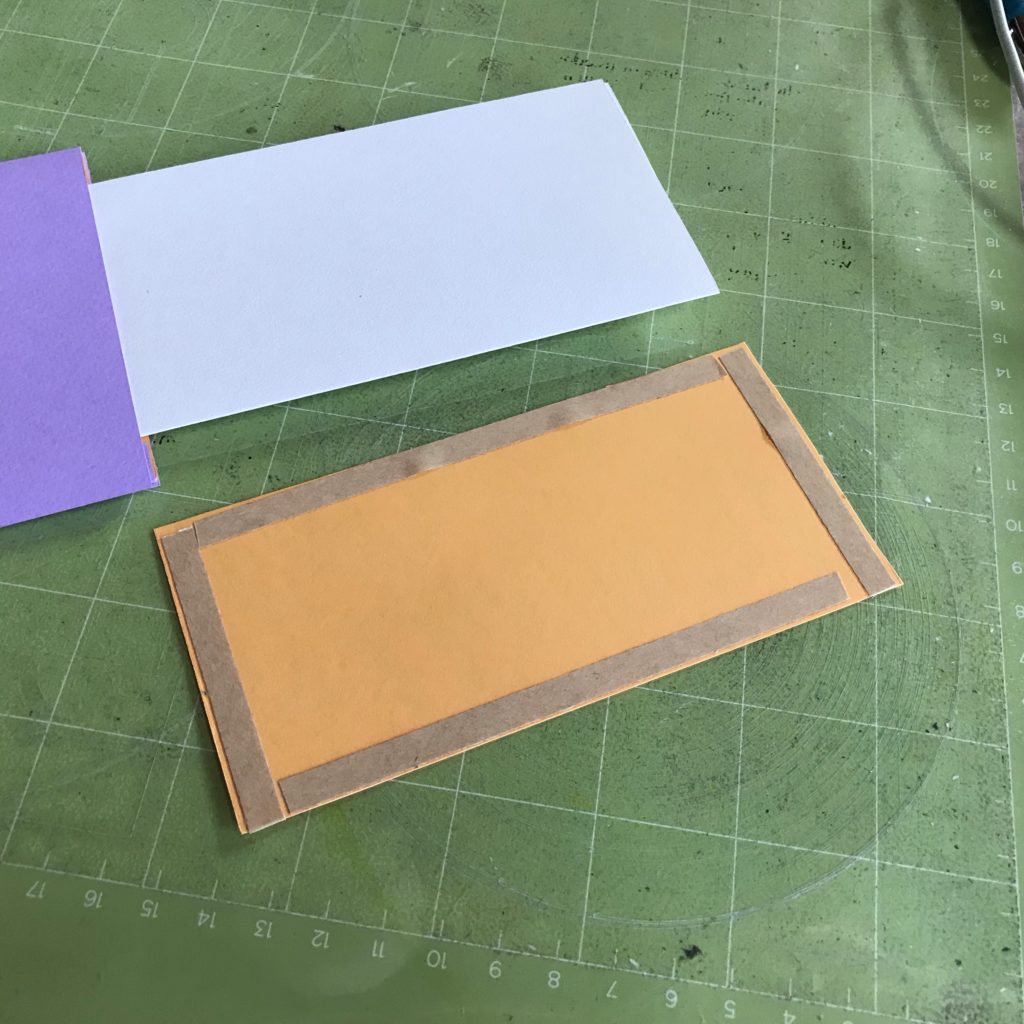
Step 8: Cover Circuit with Switch Stabilizer
To keep the battery from shifting, it’s helpful to add small balls of Conductive Fabric Tape to both sides of the battery before closing the flap. Once the battery has been placed, tape the Battery Flap down.
Add a strip of double sided tape to the back, top edge of the Switch Stabilizer.
Center the Switch Stabilizer over the slotted section of the Card Base and adhere it along the top edge. Ensure that closure flap is not impeded. The Switch Stabilizer will prevent the switch from bumping up against the Battery Flap, allowing it to move unimpeded along its slot.

Once it’s taped into place along the top edge, press down upon the Switch Stabilizer in the area covering the LEDs to make an impression in the paper.
Place a self healing mat or piece of heavy cardboard underneath the impressions and use a screw punch to poke holes in their place, through the Switch Stabilizer only. This will allow the light to shine through the Switch Stabilizer, when the Pull Tab shifts to the “open” position. Fold the closure flap of the Card Base toward the inside of the card and apply double sided tape on top of it.
Thread the switch through the slot to the underside of the card. Then press the top of the Card Base down over the taped flap to close the card.
Flip the card over to the back side and adhere the ½” by ½” square of paper on top of the open part of the switch.
Add double sided tape to the Card Back (avoid the area where the switch will be moving) and adhere the Card Back to complete the card.
If desired, tape the Sentiment Strip to the Pull Tab. In addition to strengthening the Pull Tab, this is a good place to write a note or hide a secret message!
Be sure that the left edge of the Sentiment Strip is placed under the body of the card before taping it down, so that it doesn’t interfere with the smooth movement of the card.
Tips, Tricks & Call-outs
Inspiration for making a Dissolving Picture type mechanical card came in part from the book Making Mechanical Cards: 25 Paper Engineered Designs by Sheila Sturrock.
Gallery

Similar Posts You Might Enjoy
Light Up Slider
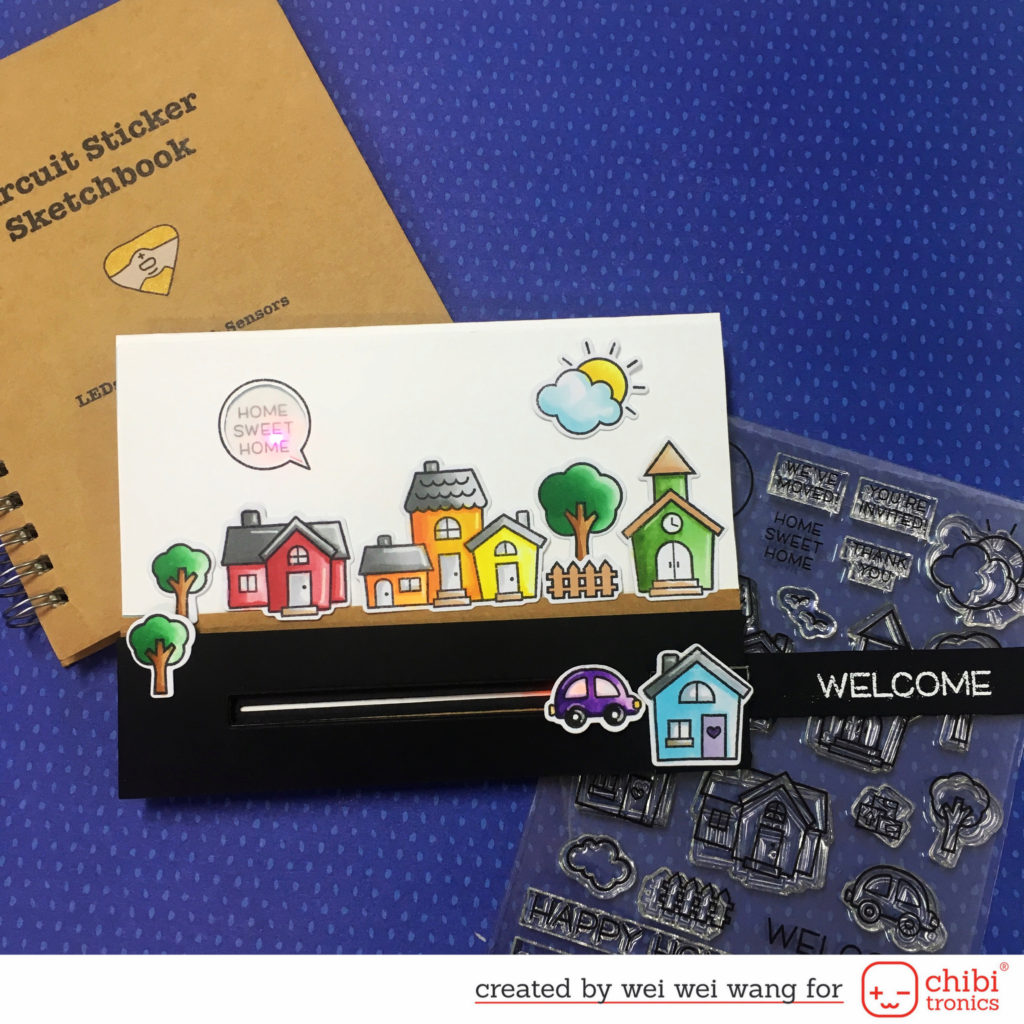
WeiWei Wang uses a sliding switch to animate a movable car in this cute slider card.
Peek a Boo
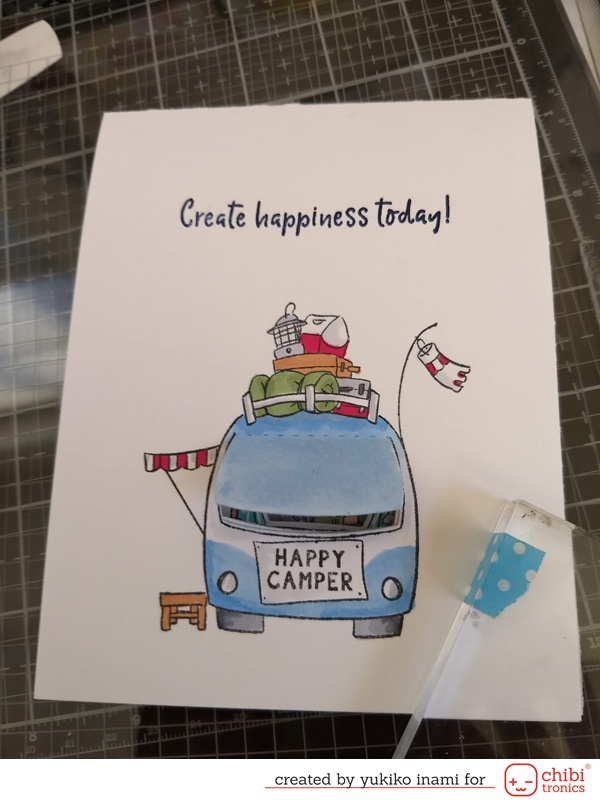
In lighting up the contents of a van’s trunk, Yukiko Inami uses a “split switch” to trigger different parts of a circuit.