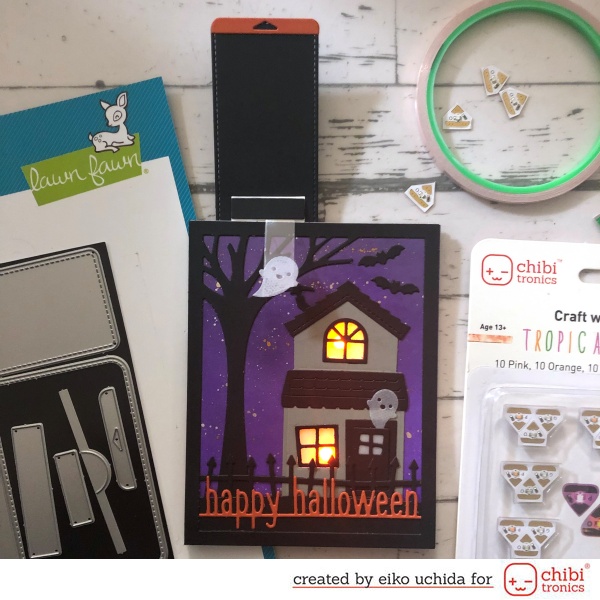
Hi, crafty friends!
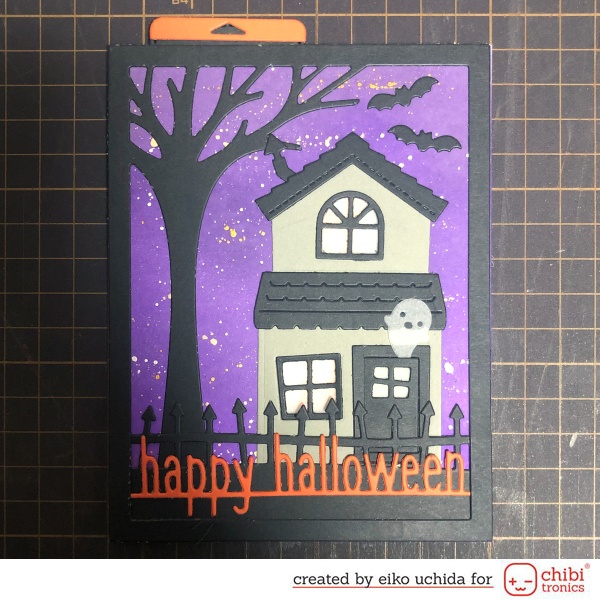
This is Eiko. I make light up flippy flappy card using Chibitronics and Lawn Fawn stamps and dies.
When you pull the tab, a ghost appears and the window glows.
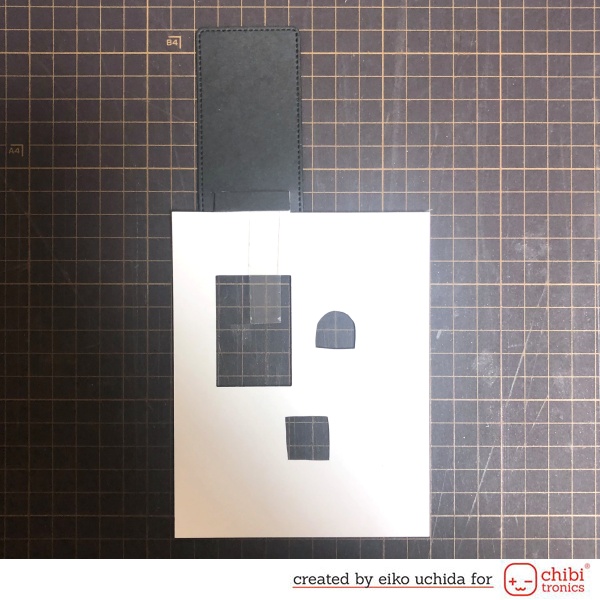
I will make the parts referring to the picture below.
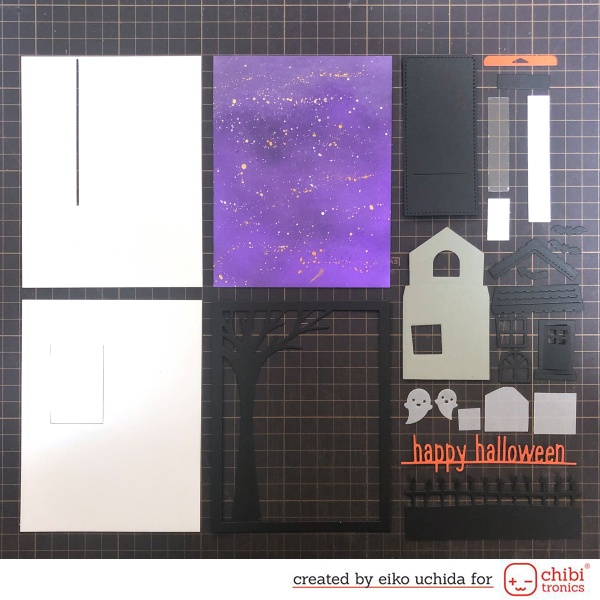
- 4 1/4 x 5 1/2 inches white cardstock. Make a slit 1 5/16 inches from the left and 1/16 inches from the top to a length of 3 1/2 inches.
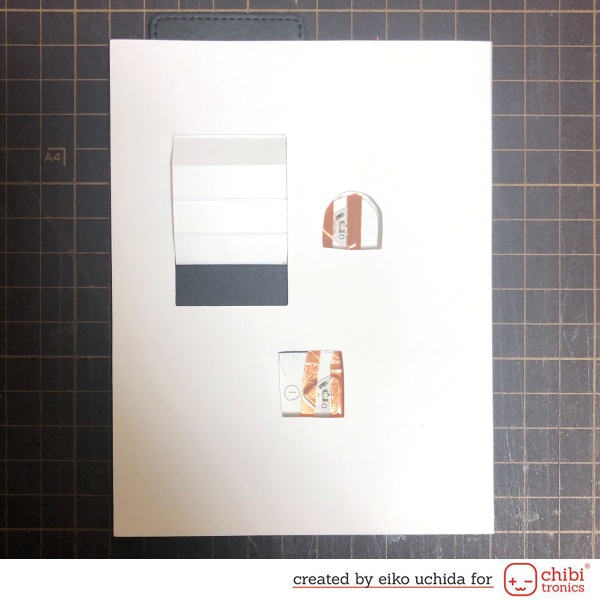
- 4 1/4 x 5 1/2 inches white cardstock. Die cut using mechanism creator die.
- 4 1/4 x 5 1/2 inches Distress White Heavystock. Color with wilted violet and dusty concord distress ink. Splash the silver and gold water-based pigments.
- Die cut black cardstock with leafy tree backdrop portrait die.
- Die cut black cardstock with pull tab die and cover up piece die.
- Die cut orange cardstock with decorative pull tab piece die.
- Die cut acetate with acetate piece die.
- 1/2 x 3 inches and 1/2 x 1 inches white cardstock for switch parts.
- Die cut gray cardstock with house die.
- Die cut black cardstock with roof, chimney, vats, windows, door and spooky fence border die.
- Die cut vellum paper with ghost die.
- Little vellum pieces for the windows.
- Die cut orange cardstock with Happy Halloween line border die.
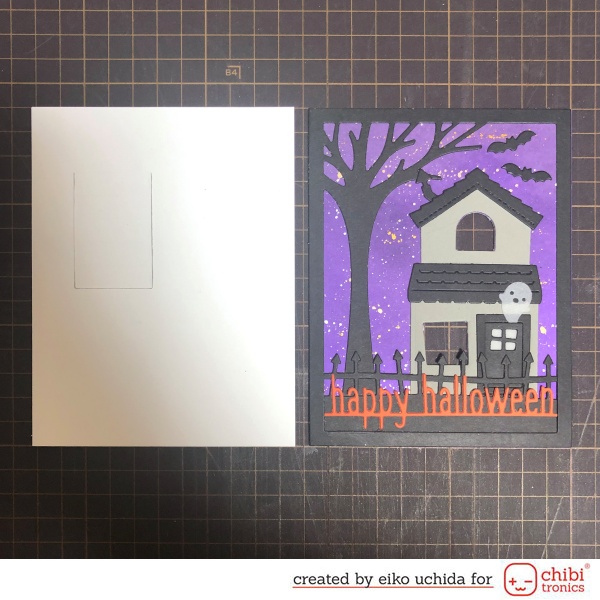
Assemble the cover panel referring to the picture and cut out the windows with craft knife.
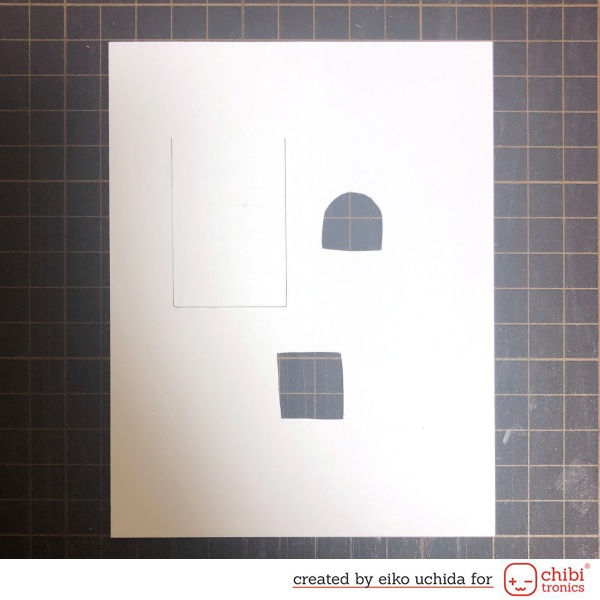
Put the cover panel on the mechanism creator panel and cut out the windows with craft knife.
Assemble the pull tab mechanism.
Please refer to here for how to assemble the pull tab.
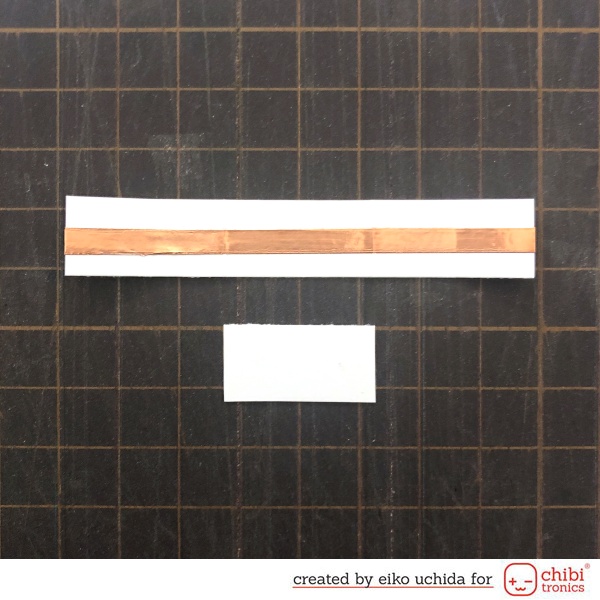
Make a swith.
Put copper tape in the center of the 1/2 X 3 inches part.
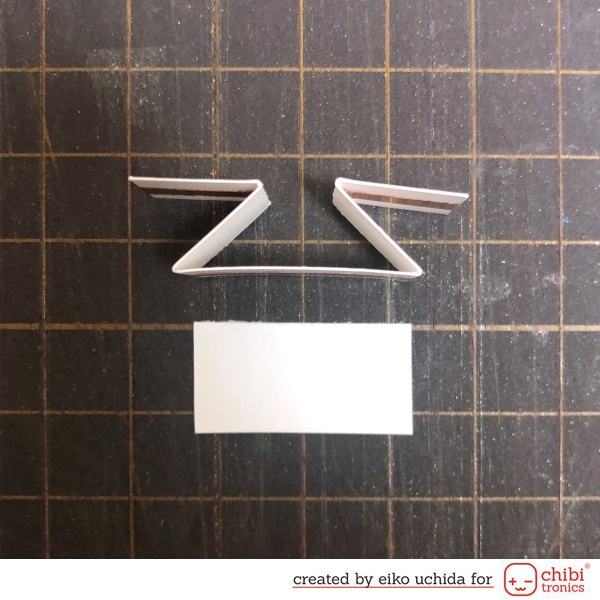
Fold the switch part referring to the picture.
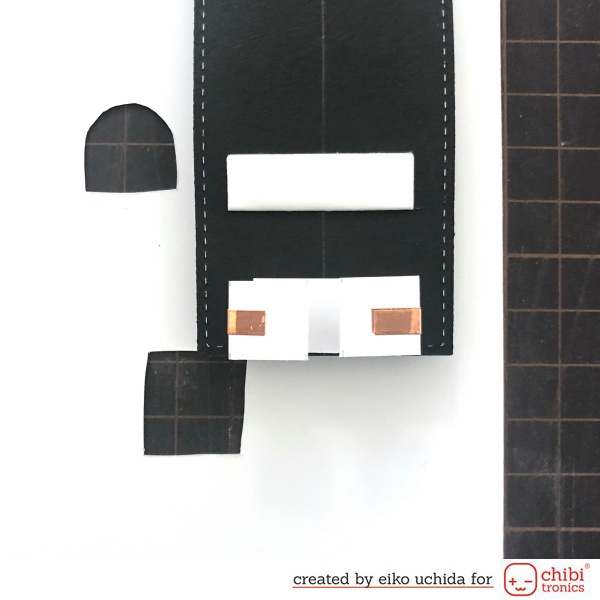
Put the switch part on the bottom edge of the back of the pull tab.
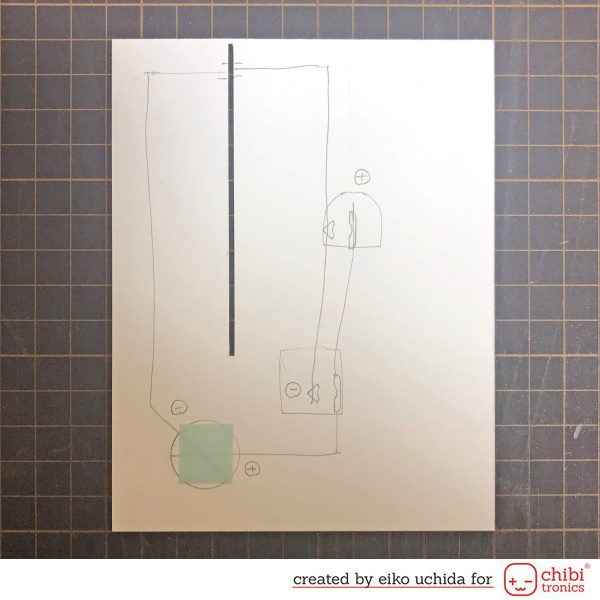
- Make the circuit on the card base.
- Mark the position of the Chibitronics and the battery.
- Draw the circuit with a pencil.
- Apply the double-sided tape on the battery place.
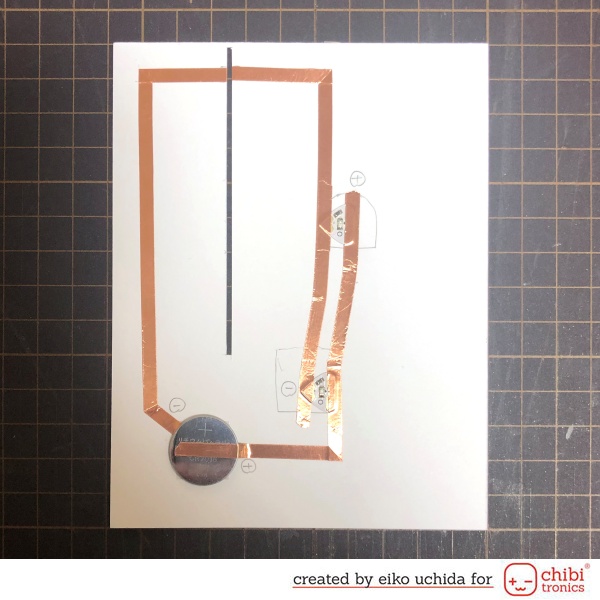
- Stick the copper tape on the pre-drawn path.
- At the battery place, peel off the release paper, stick the negative side copper tape, fold it back and cut it.
- Stick the positive side copper tape.
- At the position of the battery leave the positive side copper tape about 1 inch and cut it.
- Place the battery on the copper tape with positive side facing up and stick the positive side copper tape on the battery.
- Put the orange LED to the copper tape, over the outline.
- Stick short copper tape on the edges of the LED to reinforce.
- Assemble the card.
- Put foam tape to both sides and bottom edge of the circuit card base.
- Put the mechanism creator panel on the circuit card base.
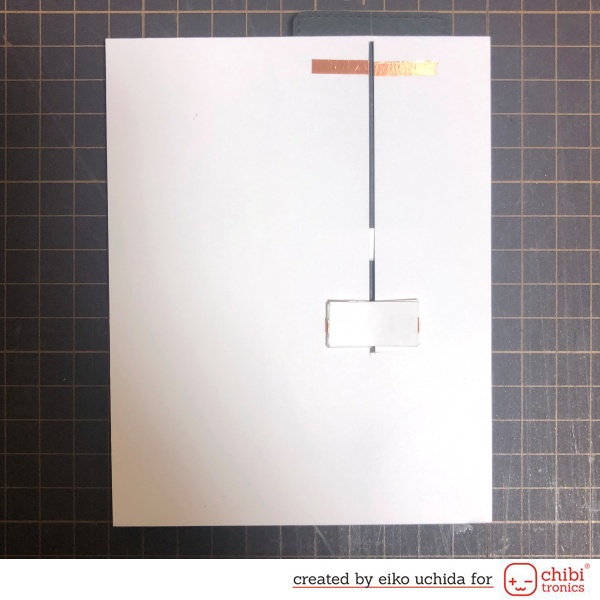
Pass the switch parts through the slit. Put 1/2 x 1 inches part on the switch part.
- Put the cover panel on the card base.
- Put the card on the folded black cardstock.
I finished it!
When you pull the tab, a ghost appears and the window glows.
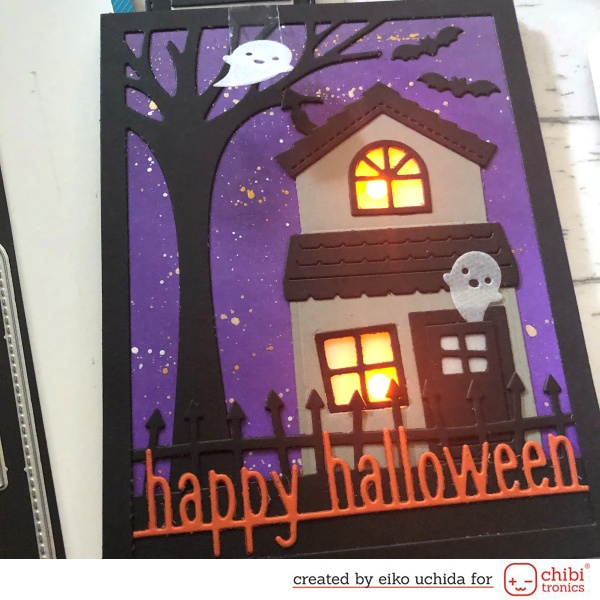
Thank you for stopping by!
Eiko Uchida
~Supplies List~
- Chibitronics Pink, Orange, and Green LED Sticker Pack
- 3V coin cell battery (CR2016)
- Copper tape
- Lawn Fawn flippy flappy lawn cuts
- Lawn Fawn leafy tree backdrop portrait lawn cuts
- Lawn Fawn build-a-house lawn cuts
- Lawn Fawn build-a-house Halloween add-on lawn cuts
- Lawn Fawn Happy Halloween line border lawn cuts
- Lawn Fawn spooky fence border lawn cuts
- Lawn Fawn narwhal cardstock
- Lawn Fawn black licorice cardstock
- Lawn Fawn canned pumpkin cardstock
- Lawn Fawn 80lb white cardstock
- Lawn Fawn vellum
- Lawn Fawn clear acetate
- Ranger distress white heavystock
- Tim Holtz distress ink wilted violet
- Tim Holtz distress ink dusty concord
- ZIG Gansai Tambi starry colors set