For Grades: 5+
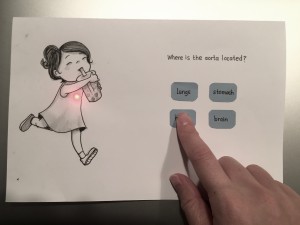
These interactive flashcards are a fun and unique way for students to review topics learned in class. Each student can create a unique flashcard to contribute to a class compilation of review questions. The example shown here is an example for a 6th grade science lesson on the human body. But this idea can be used for any subject! When the correct answer button is pressed, part of the accompanying picture will light up!
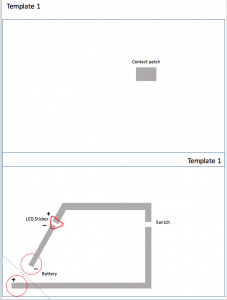
There are four templates to choose from. Each template corresponds to a different answer button for the cover page. Use the top portion of the cover template as a guide for the cover of the flashcard. You can cut out the bottom portion and use it as a template for the cover.
Materials:
- Templates
- Colored paper (optional)
- Glue
- Binder clip
- Coin battery
- Copper tape
- LED sticker
A quick single page lesson summary: Download here
Four templates and a cover sheet: Download Templates here
TIPS FOR FOR YOUR CLASSROOM
- Have each student create their own review card. When everyone is finished, leave each card on the table and have students walk around to review all the other questions. (Think:Review gallery or table group rotation)
- Review questions can be pre-assigned.
- If using pictures instead of word answers for the buttons, a set of pictures can be provided for students.
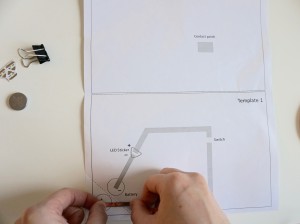
Step 1: First, select the template you would like to use. For this tutorial, we are using template 1. Fold the paper in half and open it back up to show the template. Peel off some copper tape and follow the template lines.
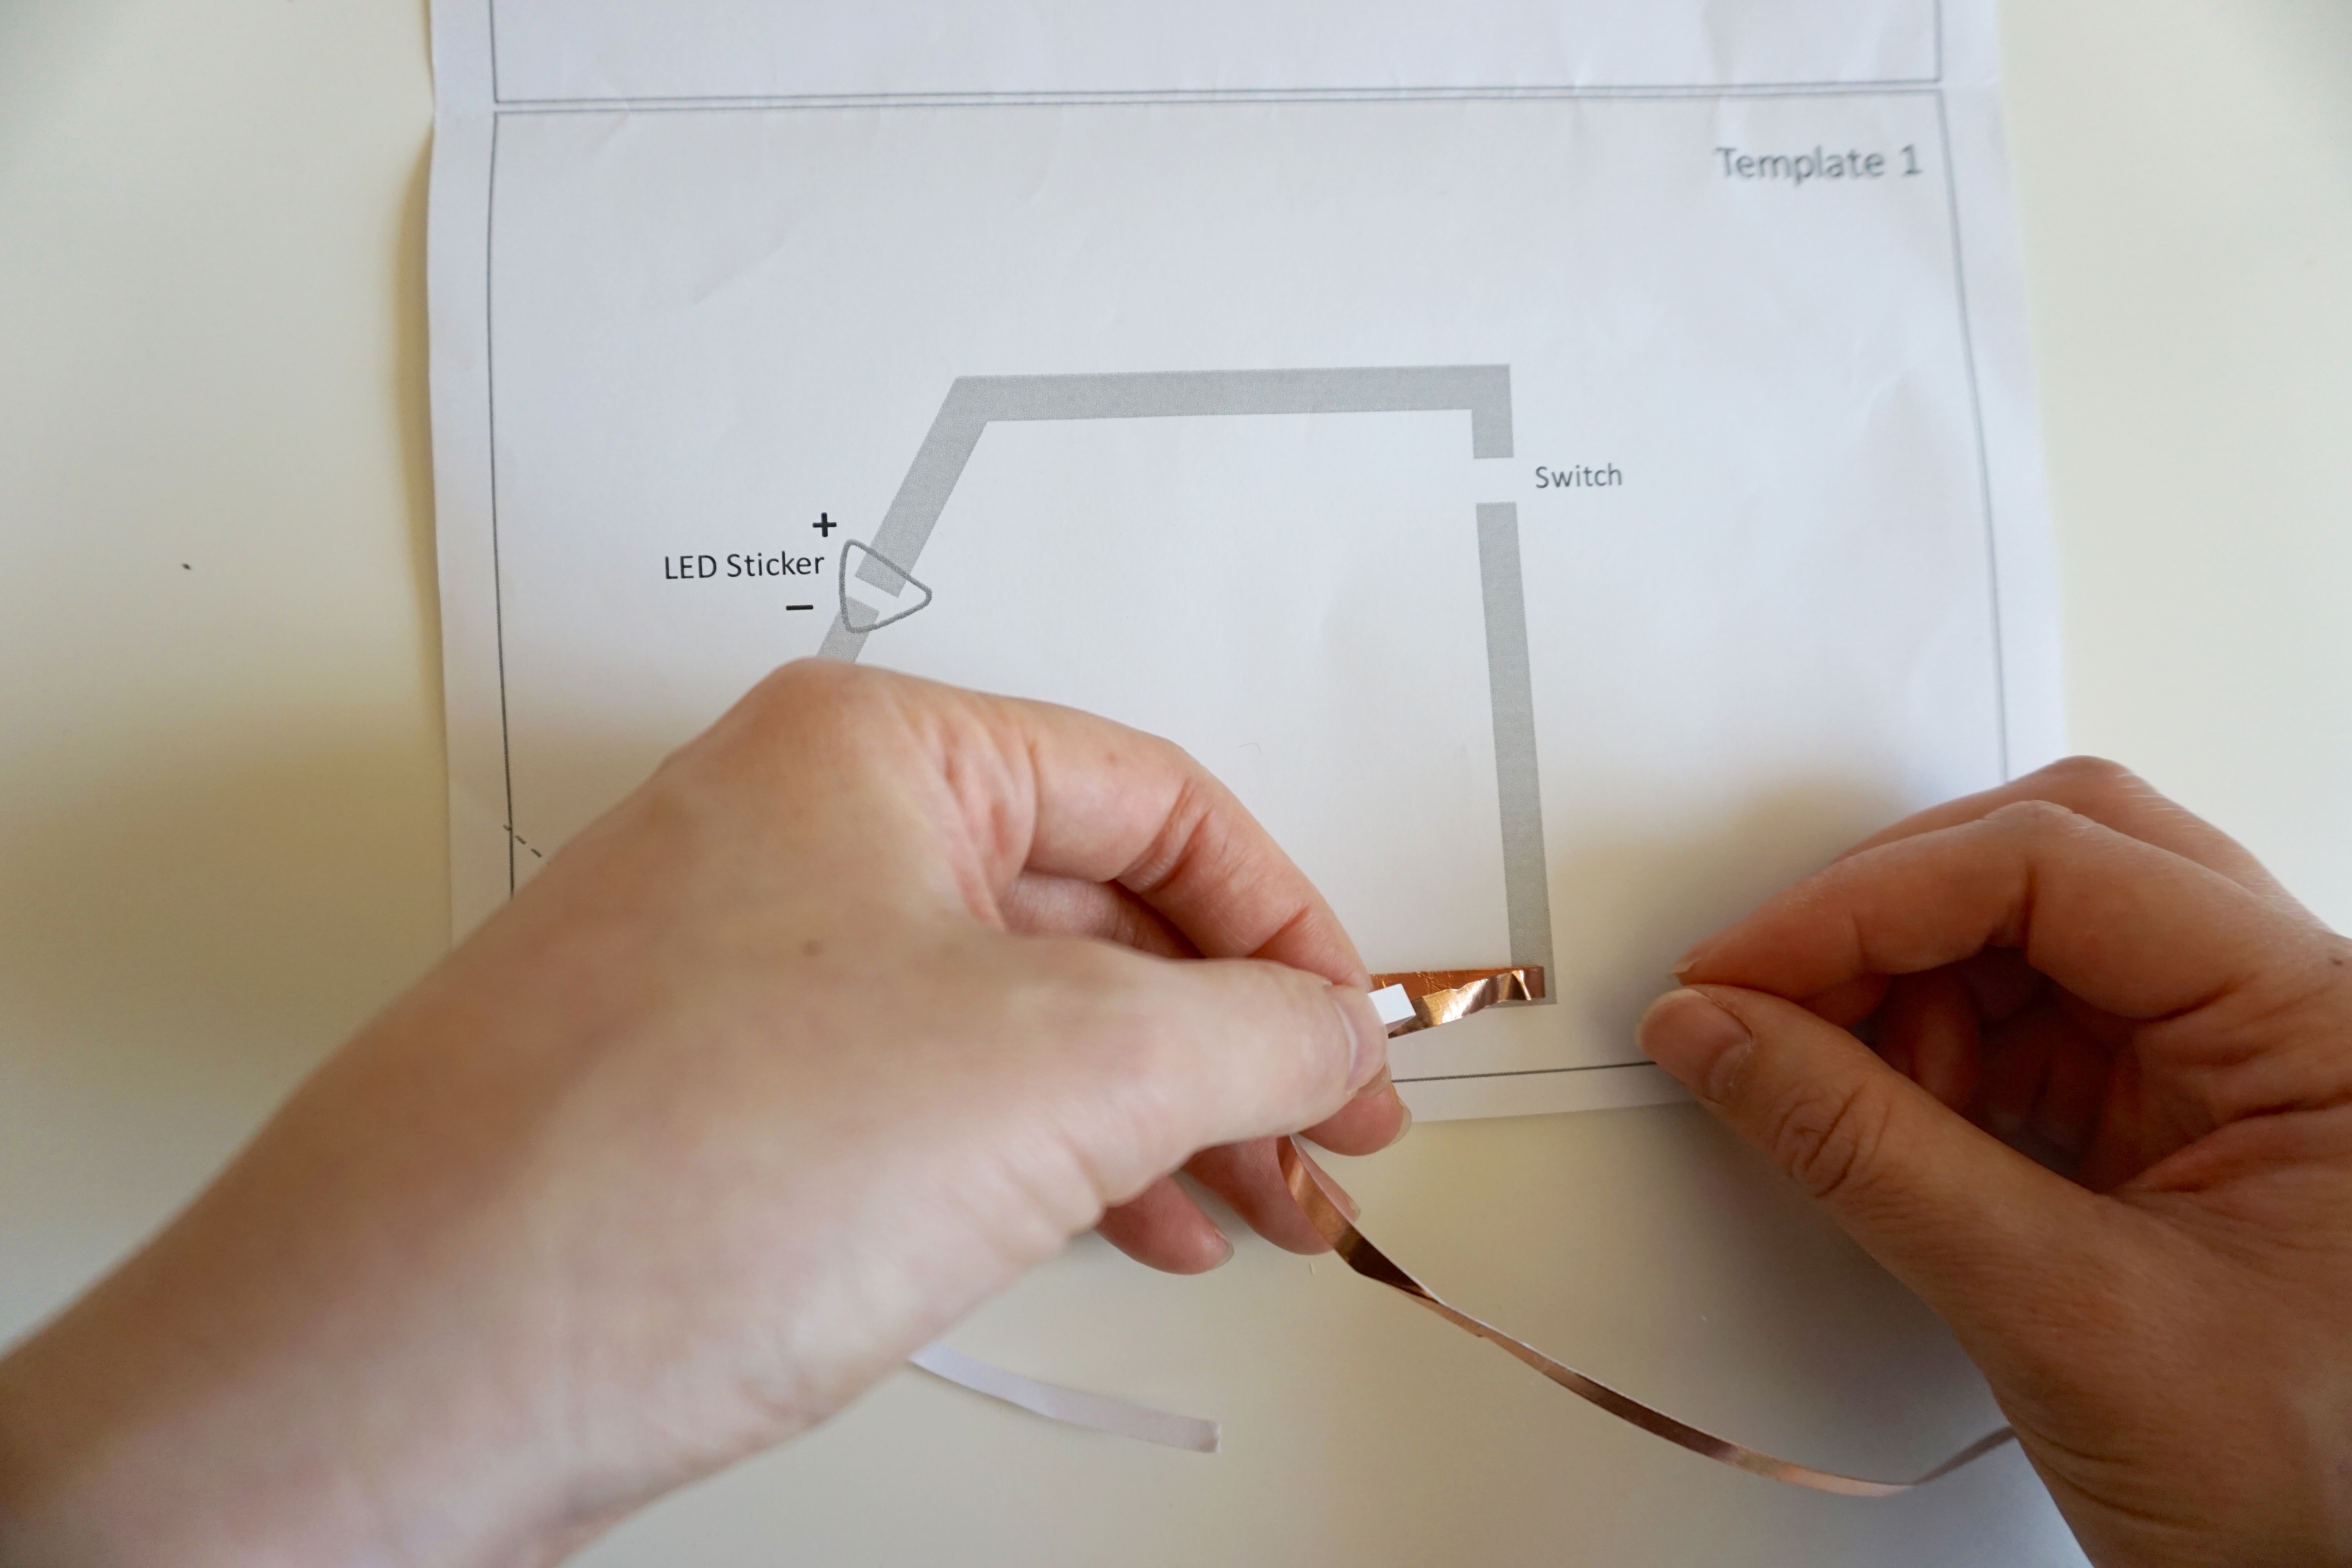

Step 2: At the corner, pull the tape back and fold down towards the new direction.

Step 3: When you are finished taping down the copper tape, fold along the dotted line to create a flap. Then, add the LED sticker, making sure the + and – of the sticker is on the correct side. Use your nail to rub the sticker to reinforce its connection to the copper tape.
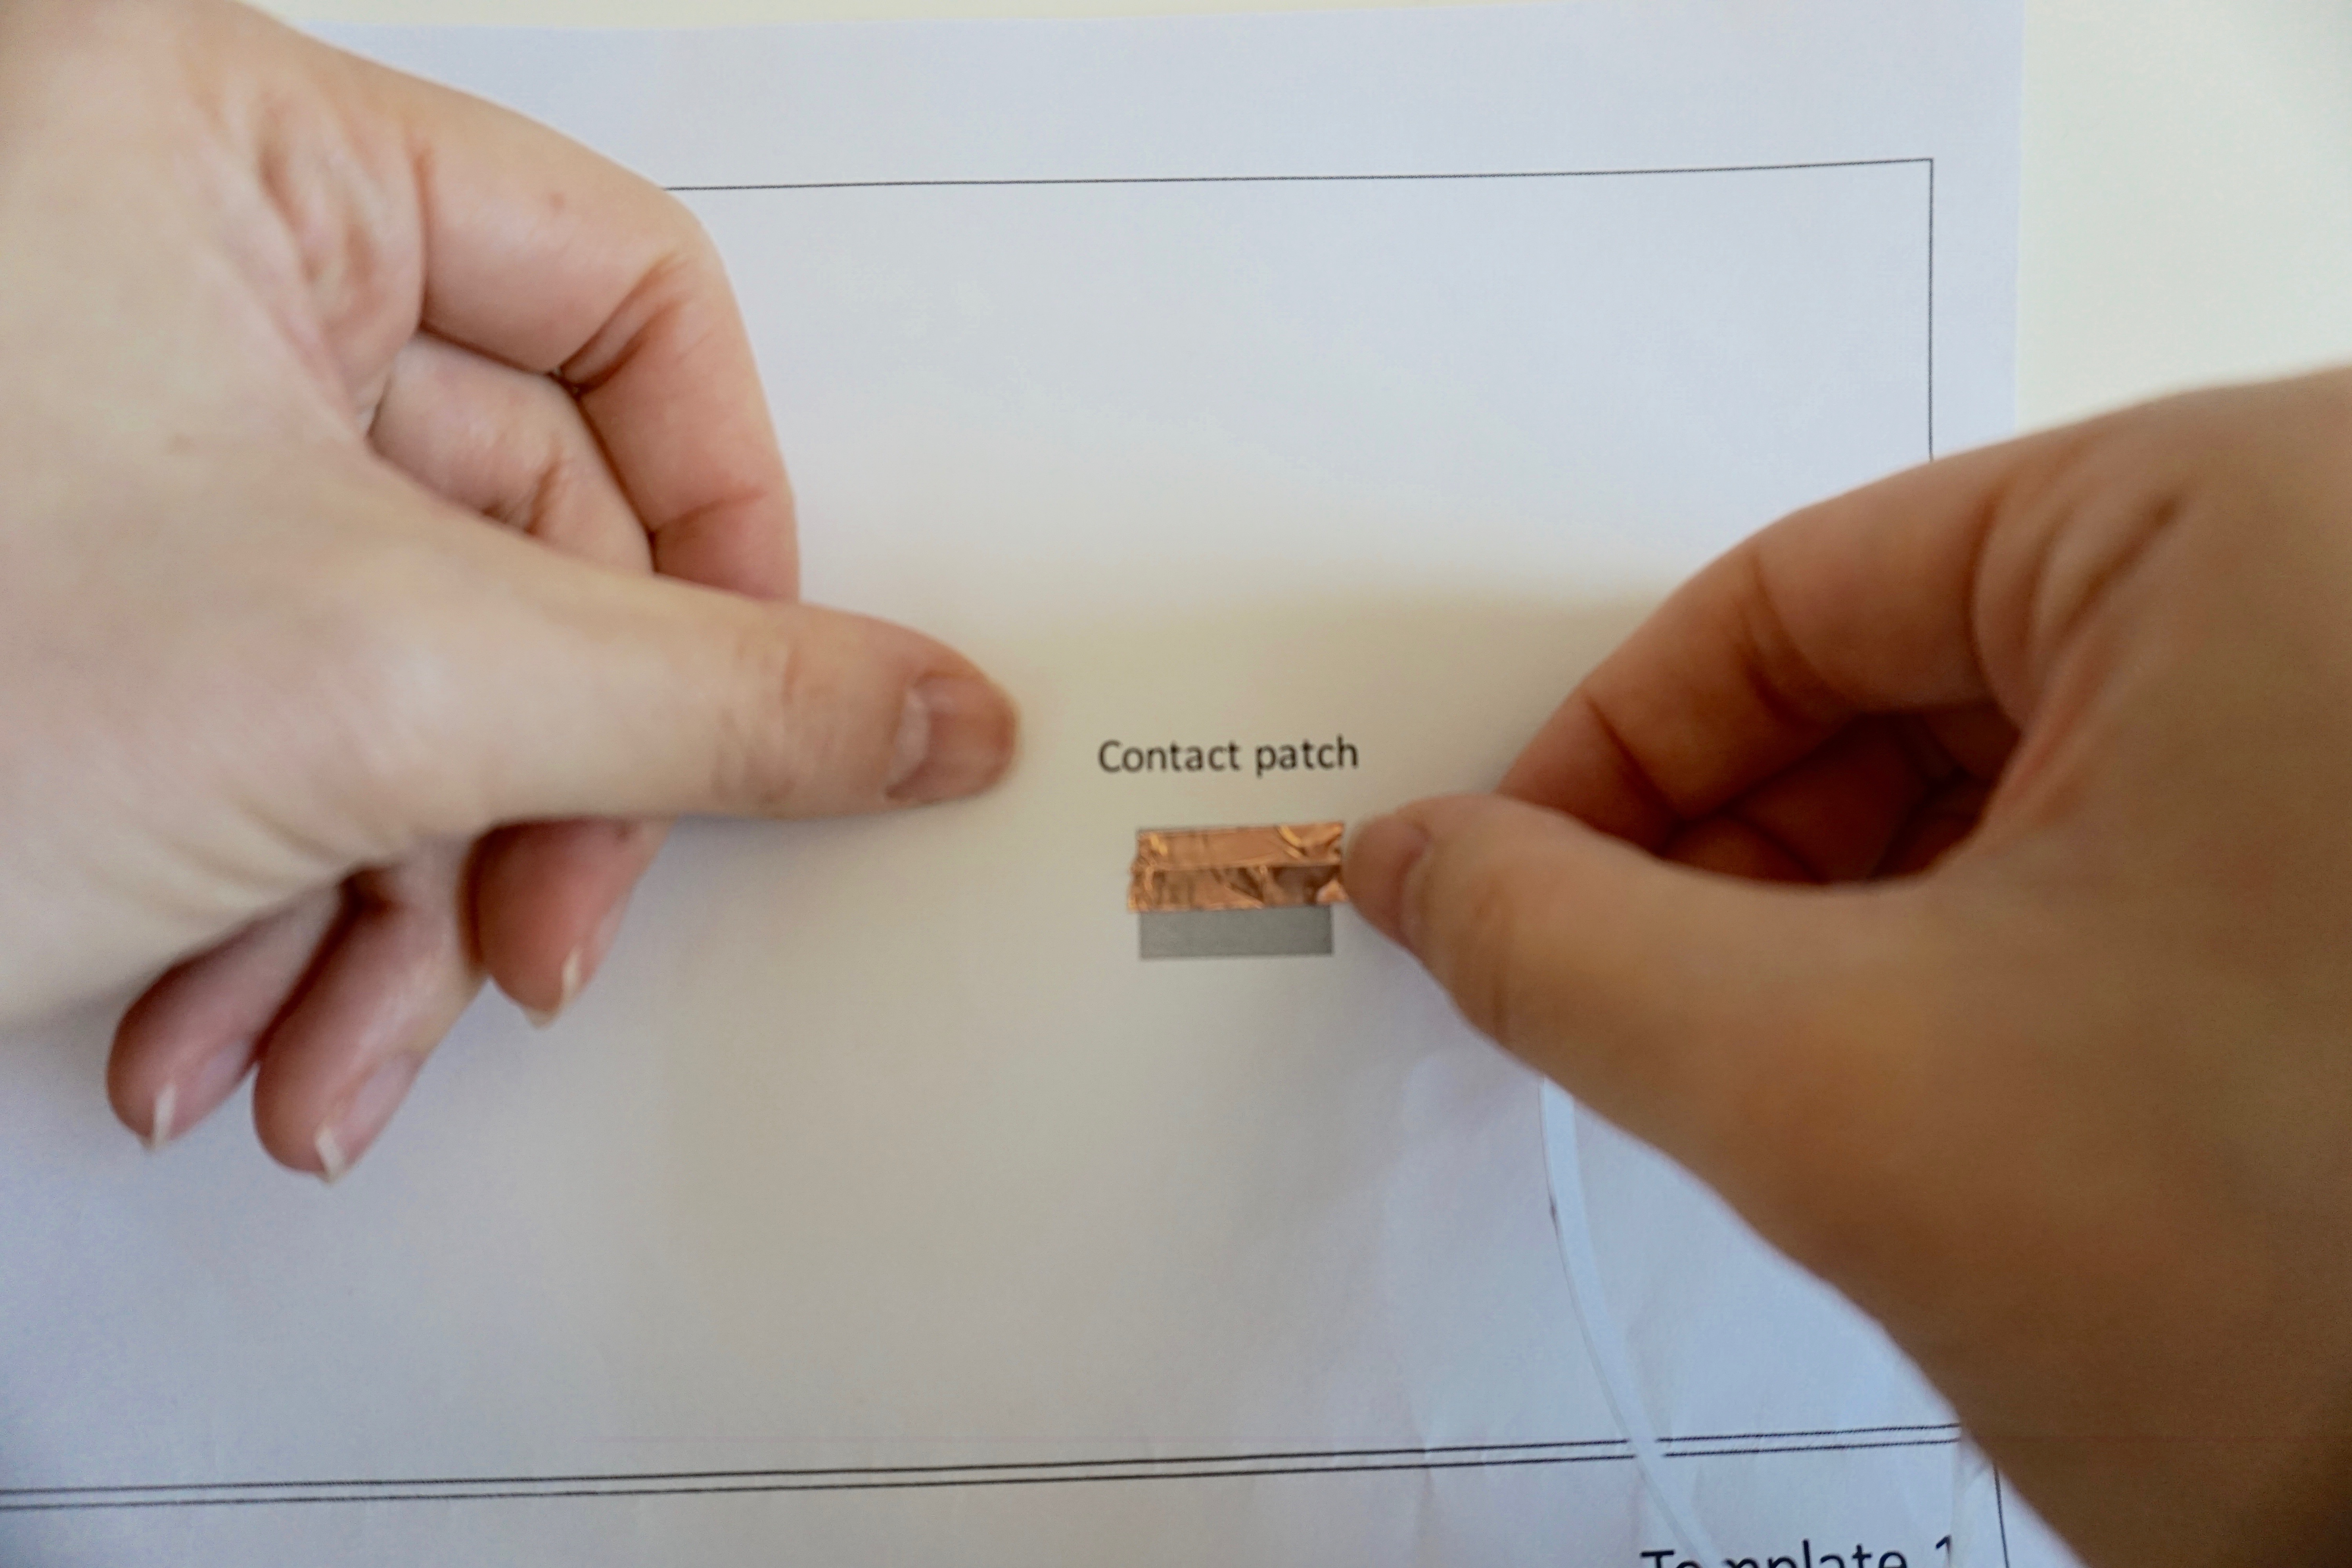
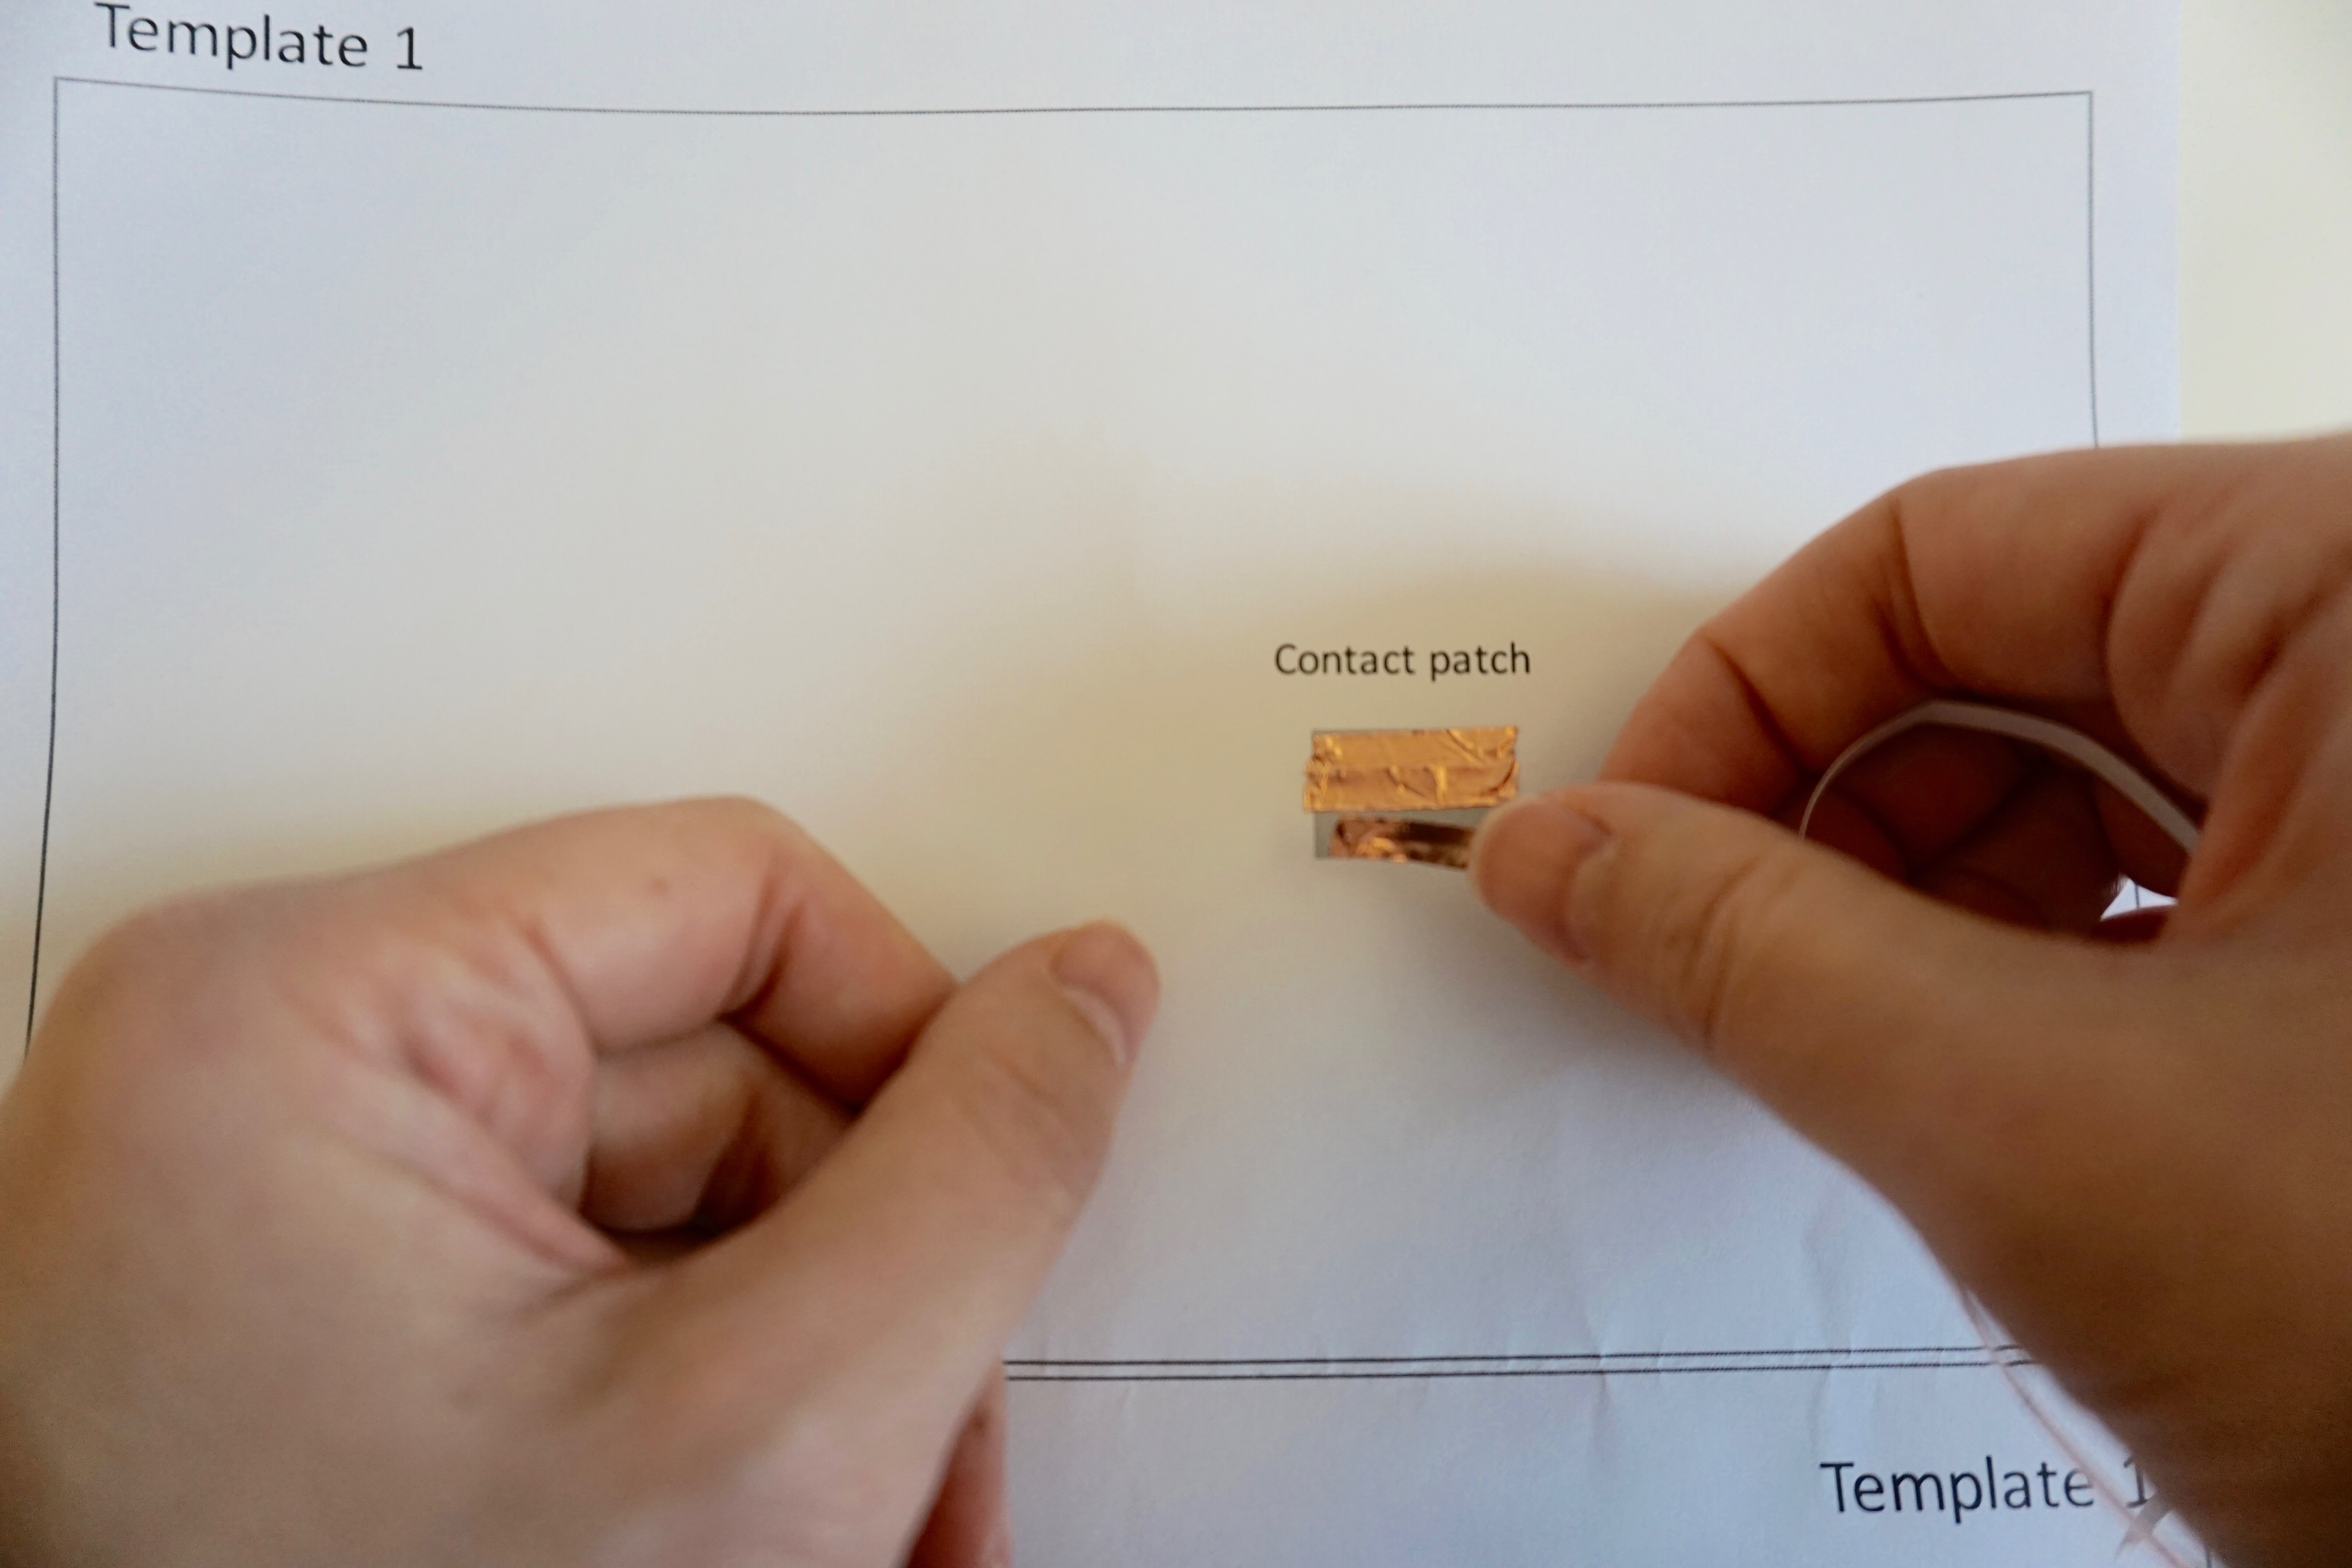
Step 4: Next, create the contact patch for the button and to complete the circuit using several short pieces of copper tape.
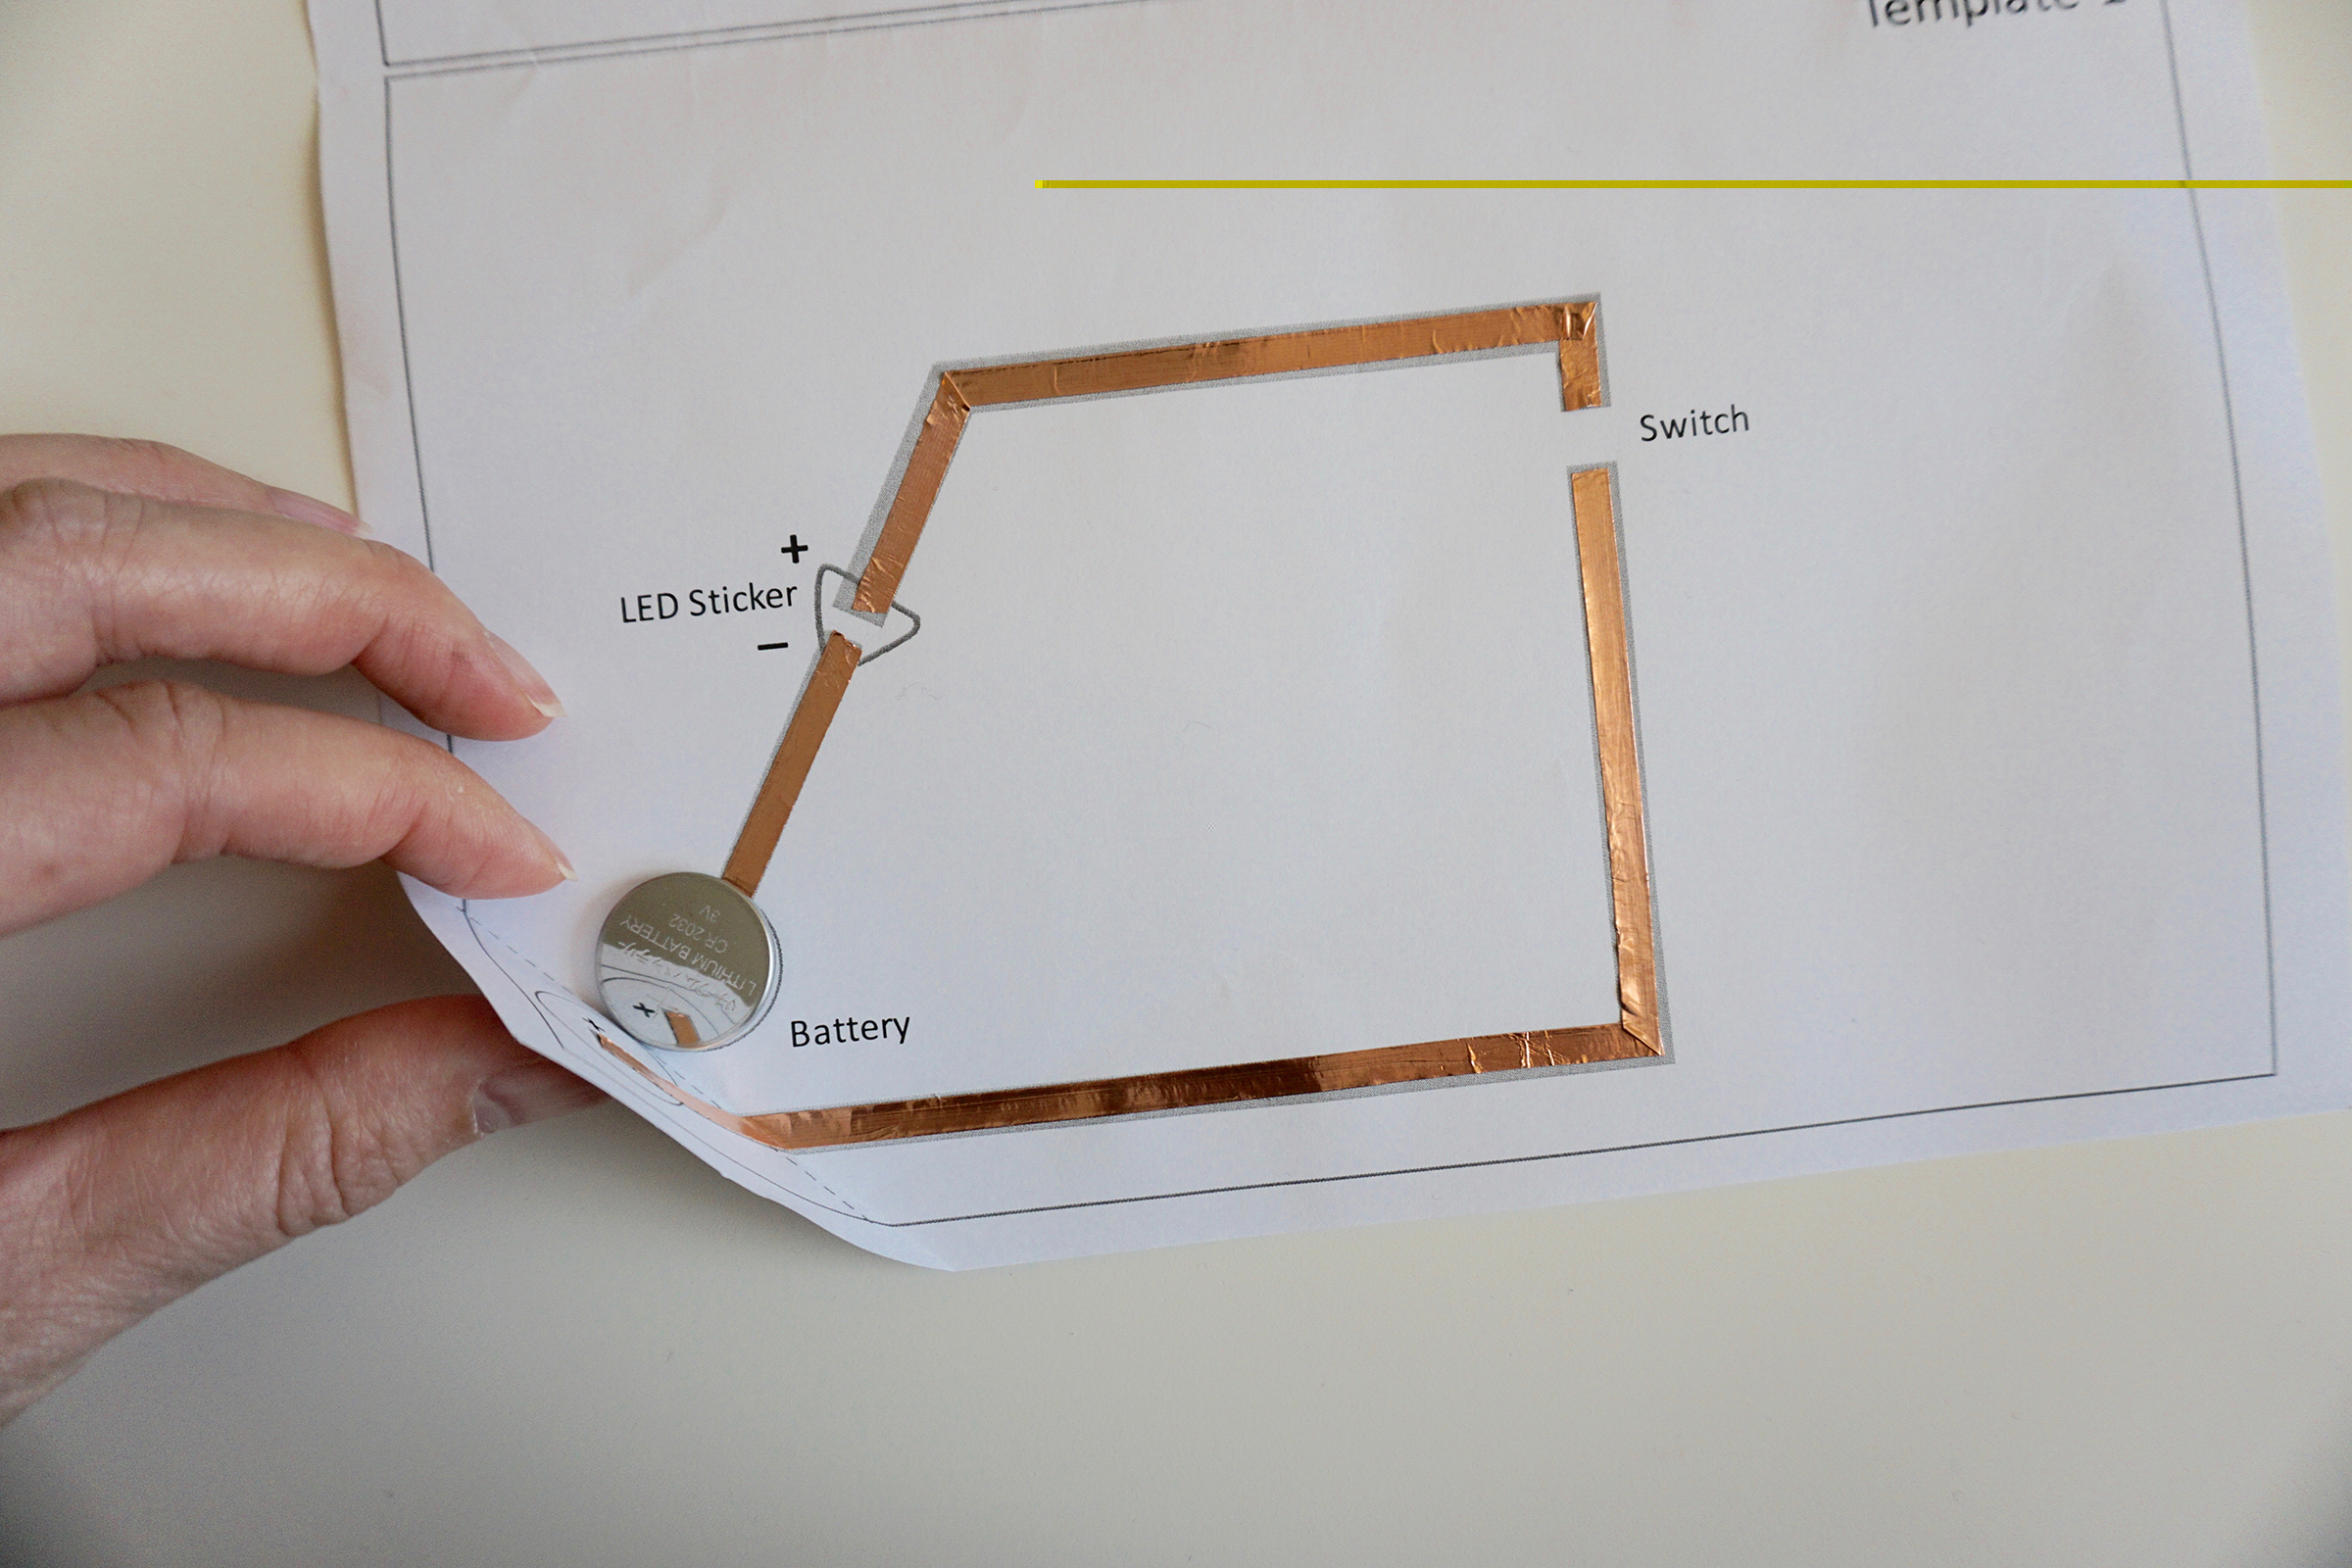
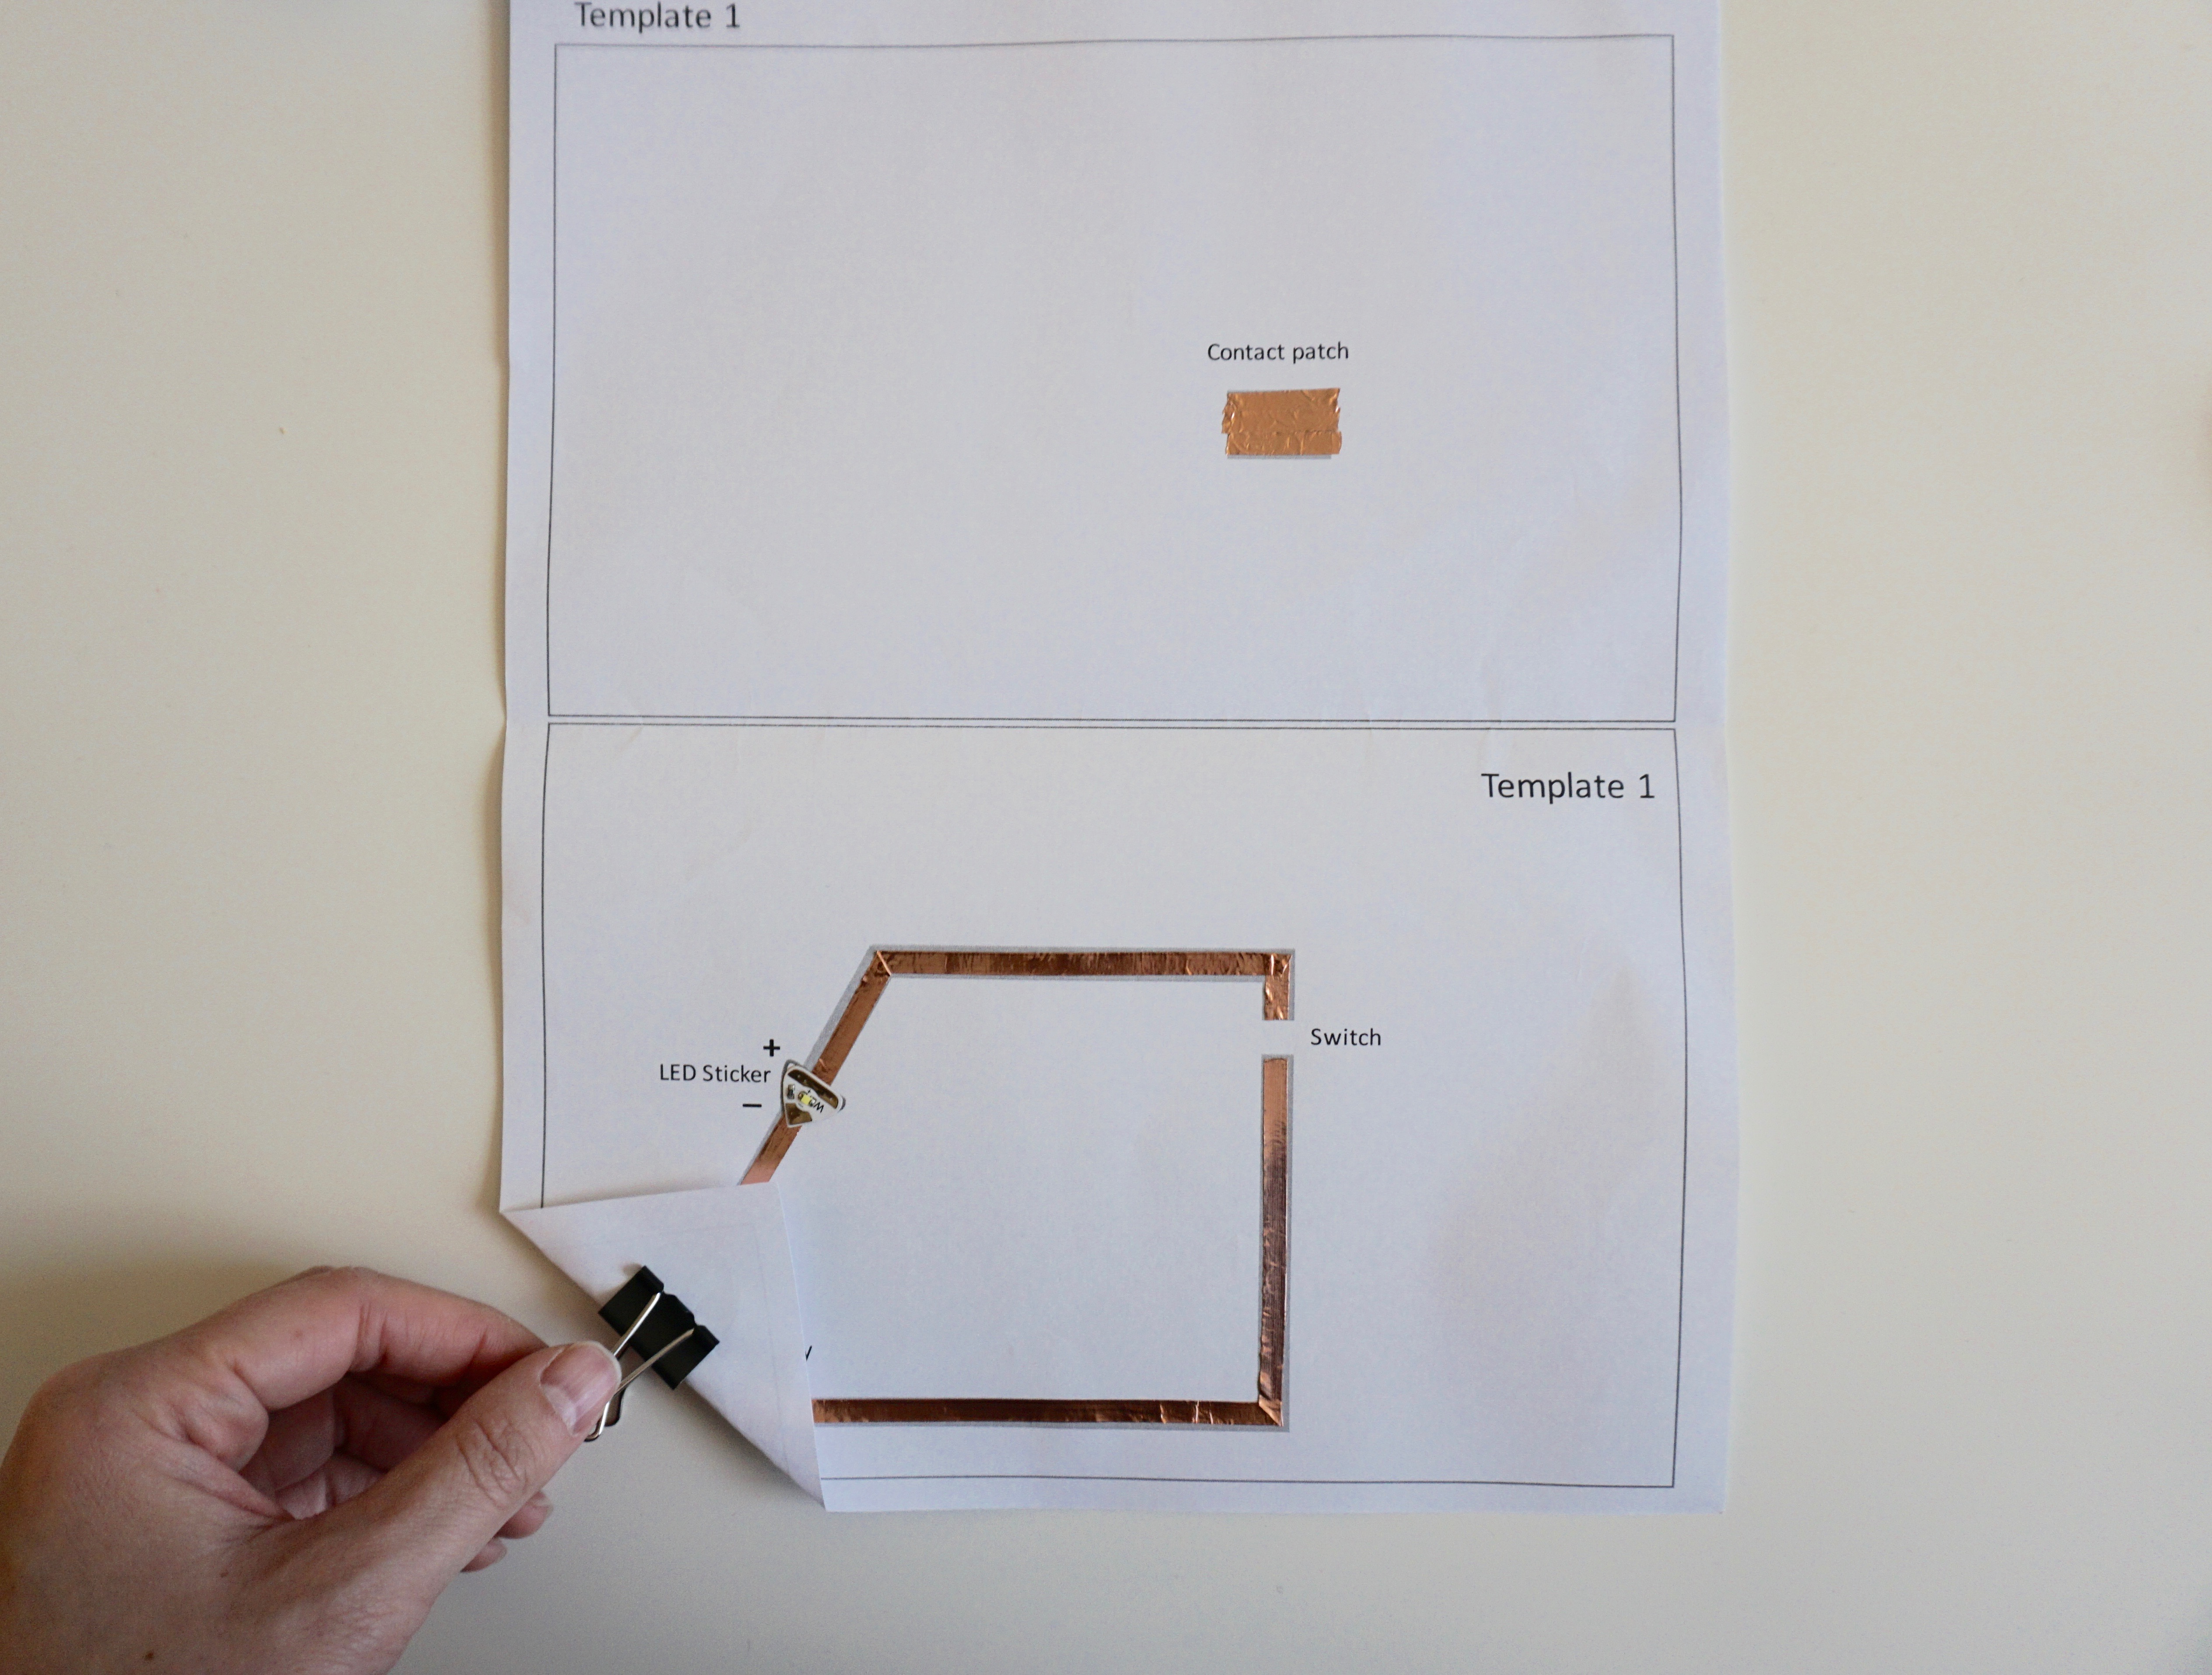
Step 5: Place the battery on the template, making sure the + side is facing up. Fold the corner with the battery in place and use a binder clip to clip the battery into place.

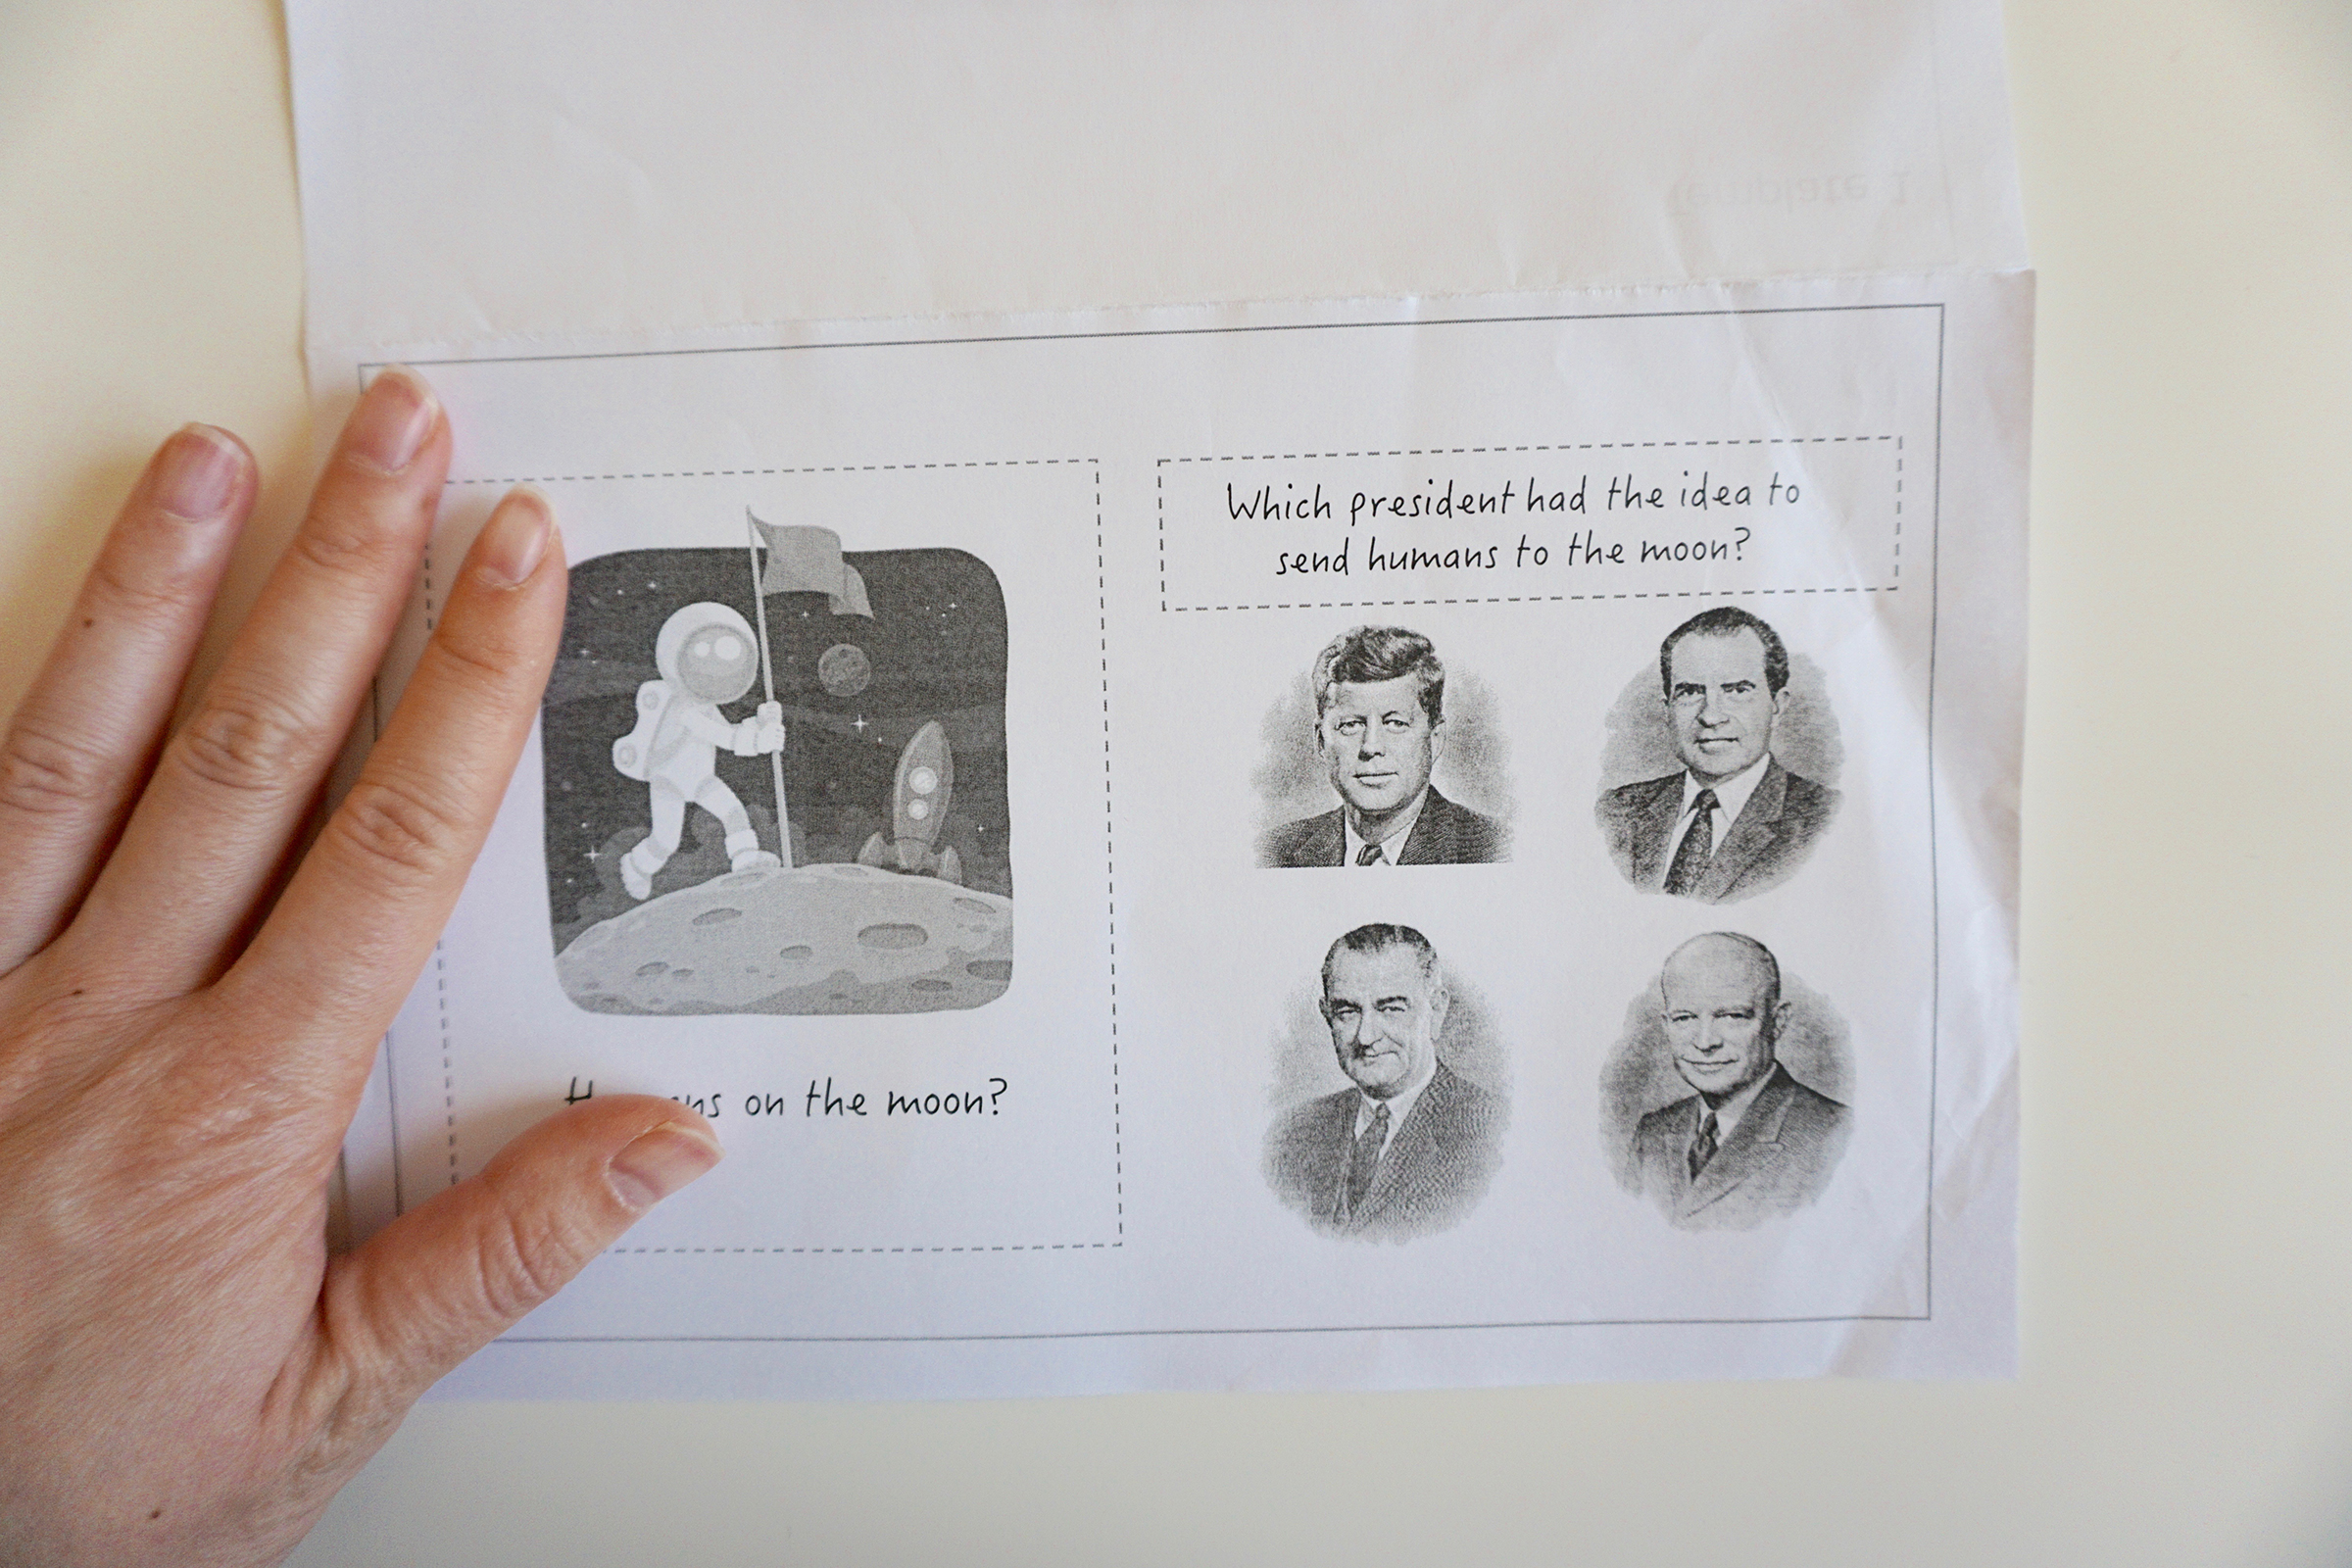
Step 6: Make the cover. For this example, a pre-made template was printed out. The answer buttons are pictures instead of words. So, which president had the idea to send humans to the moon?
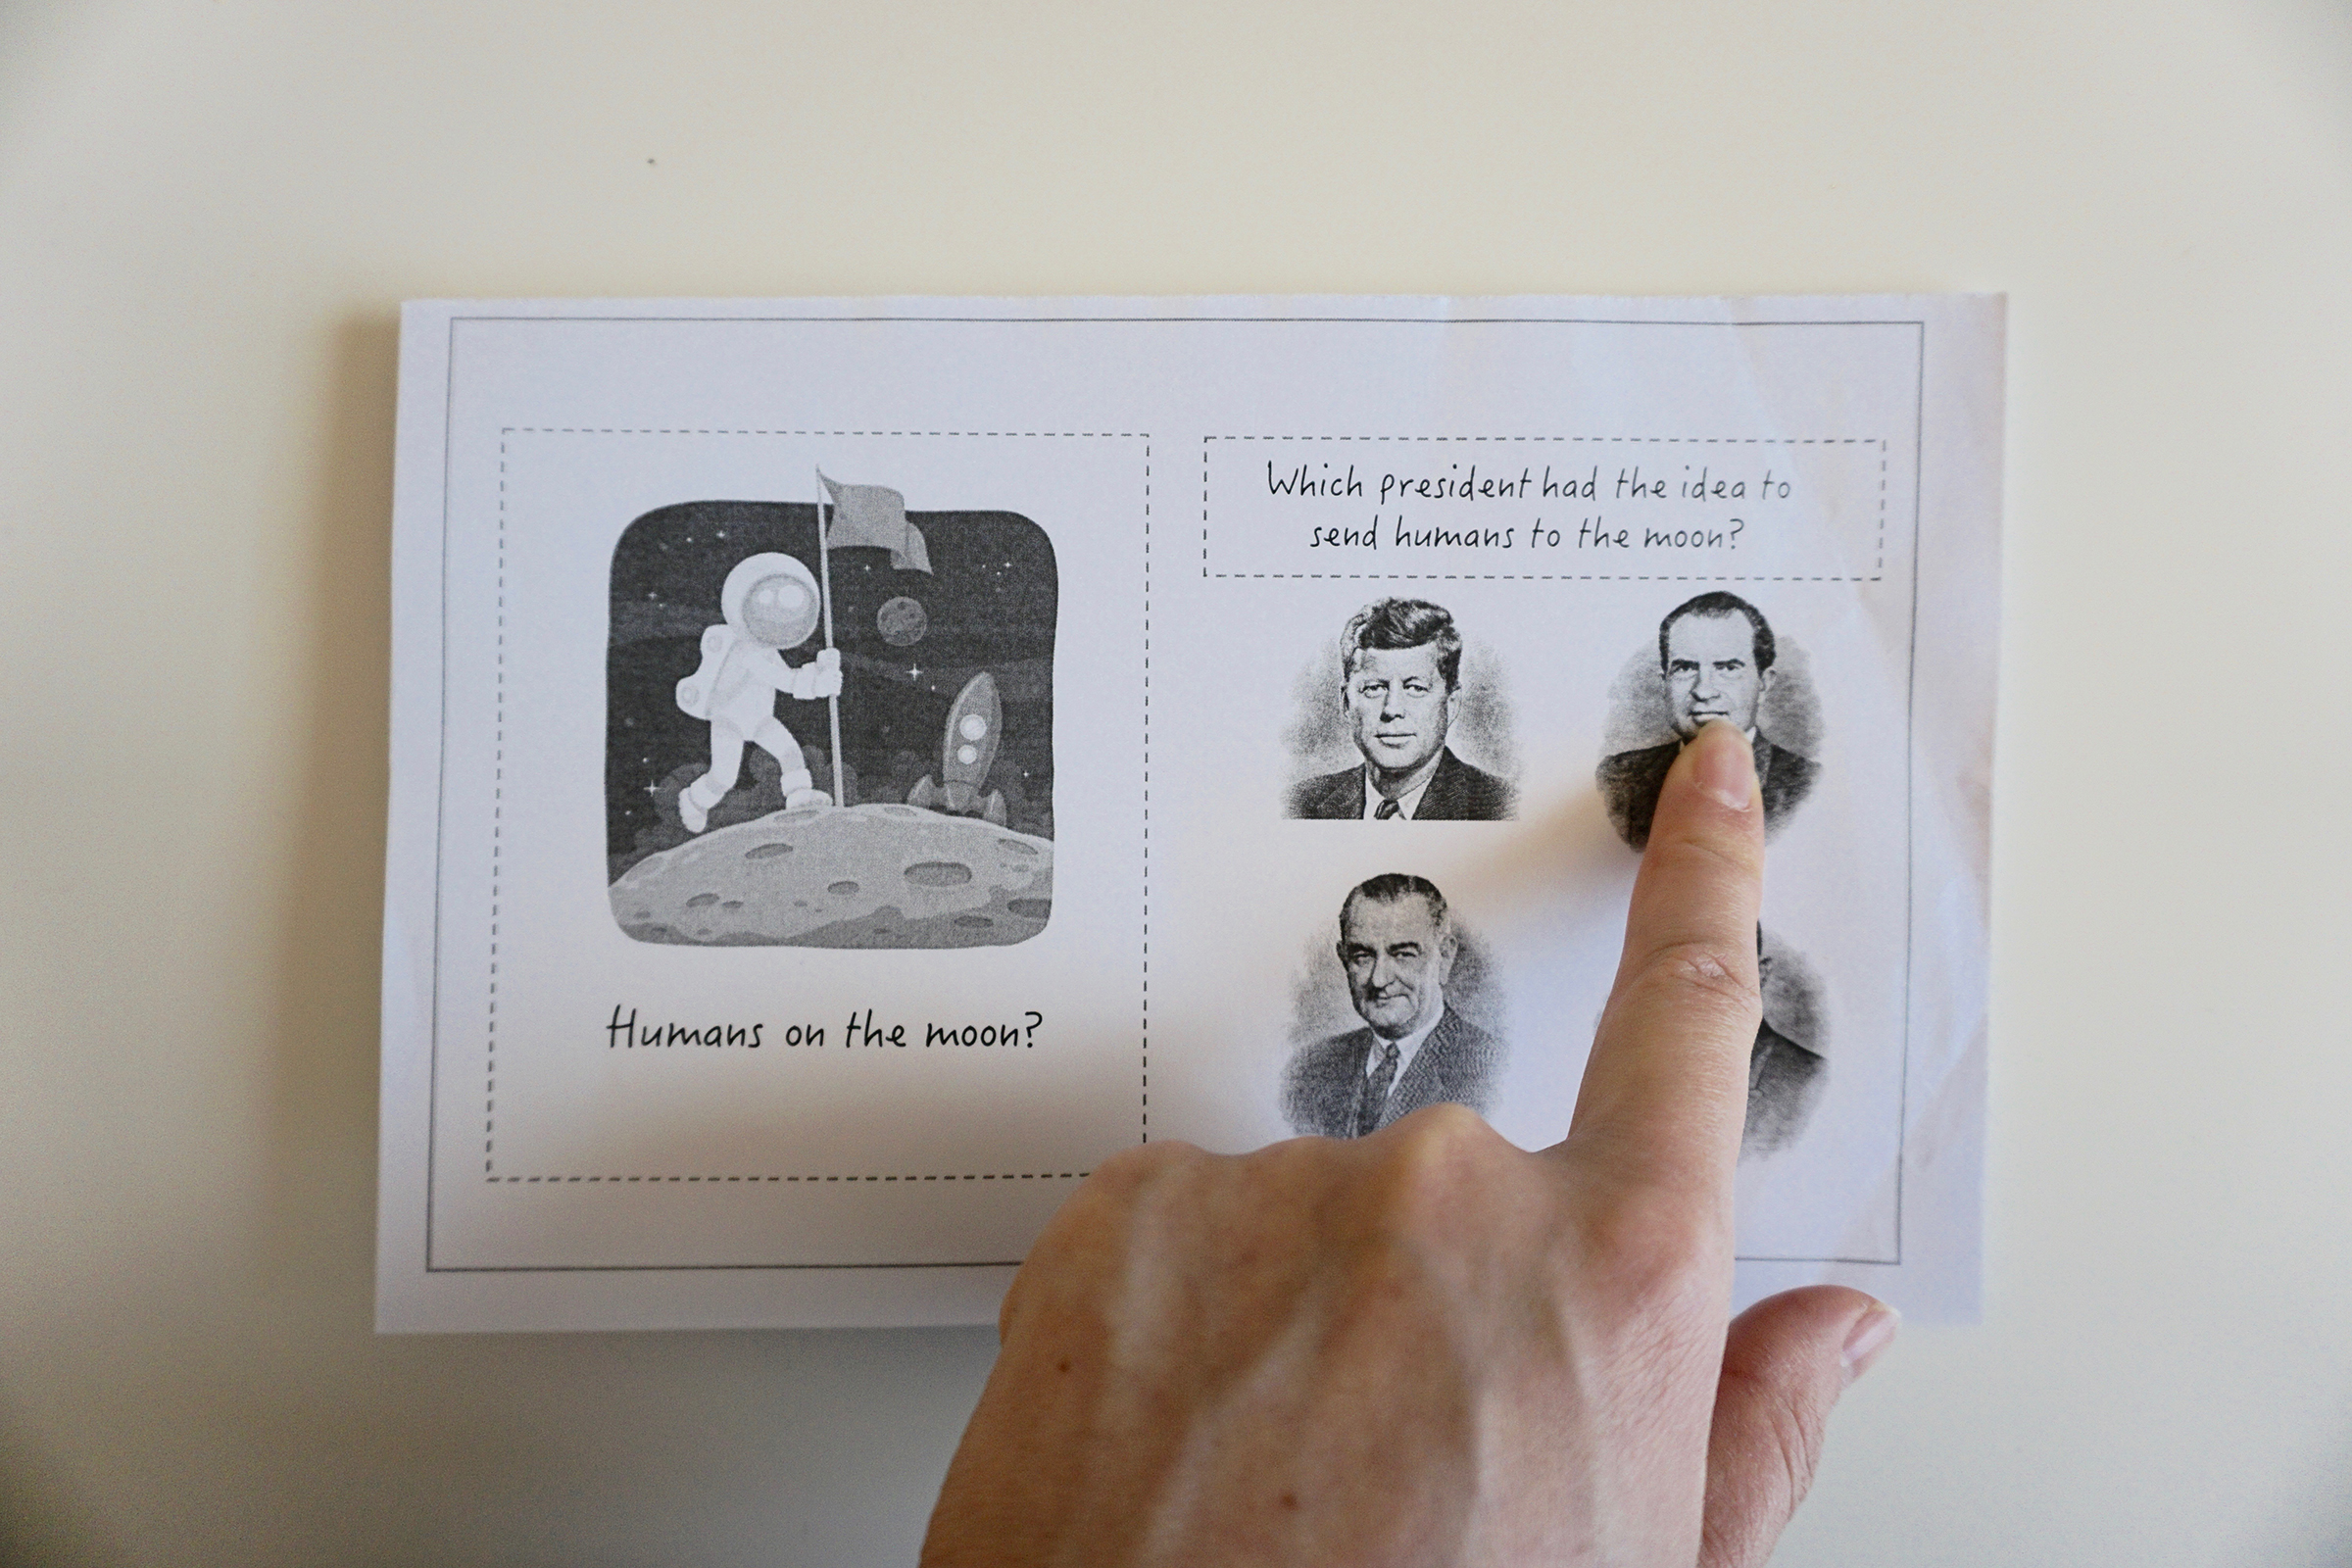
When you select an incorrect answer nothing happens.

When the correct answer is pressed, (President John F. Kennedy) the picture will light up!
Standards:
NGSS
Science and Engineering Practices 1. Asking Questions and Defining Problems 2. Developing and Using Models 3. Planning and Carrying Out Investigations 4. Analyzing and Interpreting Data 5. Using Mathematics and Computational Thinking 6. Constructing Explanations and Designing Solutions 7. Engaging in Argument from Evidence 8. Obtaining, Evaluating, and Communicating Information (Next Generation Science Standards /// Middle School /// Science and Engineering Practices)
3-PS2-3: Ask questions to determine cause and effect relationships of electric or magnetic interactions between two objects not in contact with each other.
4-PS3-2: Make observations to provide evidence that energy can be transferred from place to place by sound, light, heat, and electric currents.
4-PS3-4: Apply scientific ideas to design, test, and refine a device that converts energy from one form to another.
HS-PS3-3: Design, build, and refine a device that works within given constraints to convert one form of energy into another form of energy.