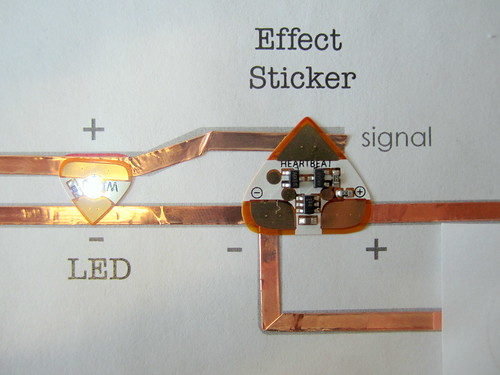
Use the effect stickers to make your LEDs shine different patterns, depending on which sticker you choose: blink on and off, fade in and out, pulse in a heartbeat and twinkle like a star.

The effect sticker has three pads: + and – for power and a signal pad that generates the pattern.
The signal pad is pre-programmed to switch between + and -, which causes the lights connected to it to turn on and off automatically. Varying the amount of time spent on and off creates the
different light patterns.
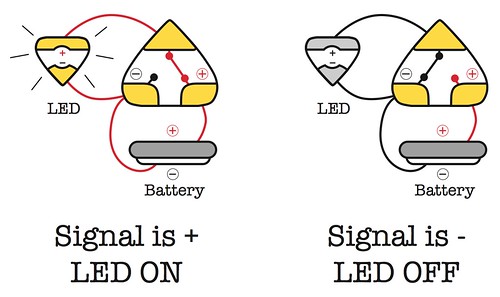
To use the effect sticker, first you need to connect the + and – pads of the effect sticker to the + and – of the battery, respectively. This provides power to the effect sticker.
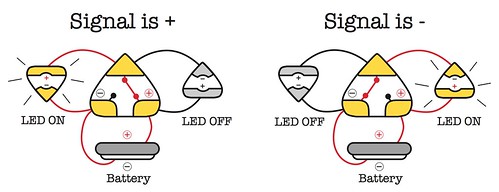
Then you can control your LEDs by connecting them between the effects signal pad and “-” or “+” of the battery. For example, connecting the “+” of the LED to the signal and “-” of the LED to – of the battery will cause the light to turn on when the signal is + like in this circuit:
Follow the tutorial below to create a test circuit for your effect stickers.
TOOLS AND MATERIALS
- Effects sticker
- LED stickers
- copper foil tape
- coin cell battery
- binder clip
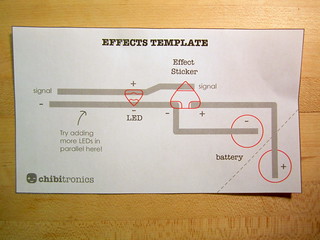
STEP 1: Download and print the effects sticker intro printout:
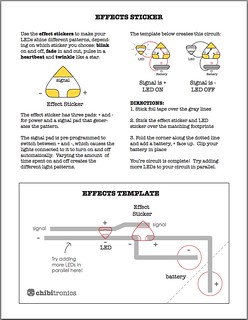
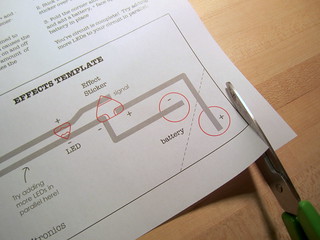
Then cut out the template on the bottom of the printout.
 |
 |
STEP 2: Stick copper tape over the gray lines
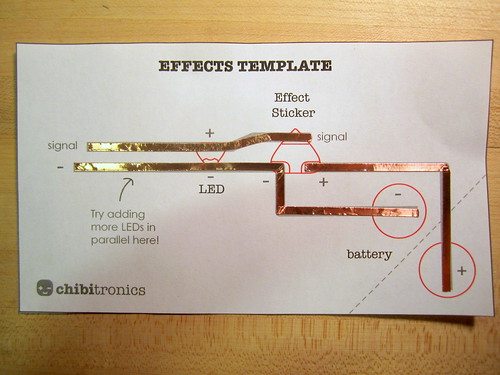
STEP 3: Stick the Effect and LED stickers over the red footprints
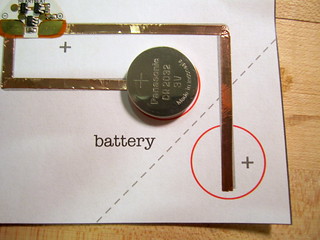
STEP 4: Add the battery
 |
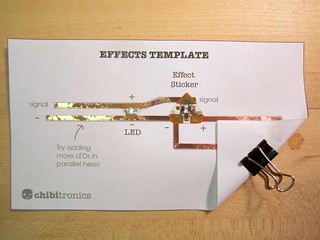 |
You’re done! The LED should light up with the pattern of your effect sticker.
Below is a video showing the various effects: fade, blink, heartbeat and twinkle.
TRY THIS: add more LEDs to your circuit in parallel!
You can also create alternating effects with a single effect sticker. In this circuit, some LEDs are connected to “+” and signal. These LEDs turn on when the signal is “-” and off when the signal is “+.” Other LEDs are connected to signal and “-.” These LEDs turn on when the signal is “+,” and off when the signal is “-.” The result is that the LEDs light alternate lighting up.
Use the test circuit template below to create alternating light patterns.

One thought on “Effects Sticker Tutorial”
Comments are closed.