This tutorial shows you how to use the SOUND sensor circuit sticker to make an LED turn on – in this case, blowing on a secret symbol in the treasure map reveals the location of the treasure!
How does it work?
The SOUND sensor sticker has a tiny microphone on it. When you make a sound that the microphone can hear, for example when you blow or tap on it, it sends a signal to the LED to turn it on.
Materials and Tools:
2 pieces of paper
Pencils/Pens/Markers
Thumbtack or sewing needle
Scotch Tape
Scissors
Binder Clip
Copper Tape
1 SOUND sensor circuit sticker
1 LED circuit sticker
3V coin cell BATTERY
Step 1: Draw your map.
Draw a treasure map.

Include a spot which will be your secret symbol: Windy mountains? A whale spout? In this case I made it the northeast wind in the corner.

Add lots of fun details to fill the empty spaces of your map in, and pick a spot where your treasure will be hidden. Remember that on this map, a light will mark the spot, not an X!

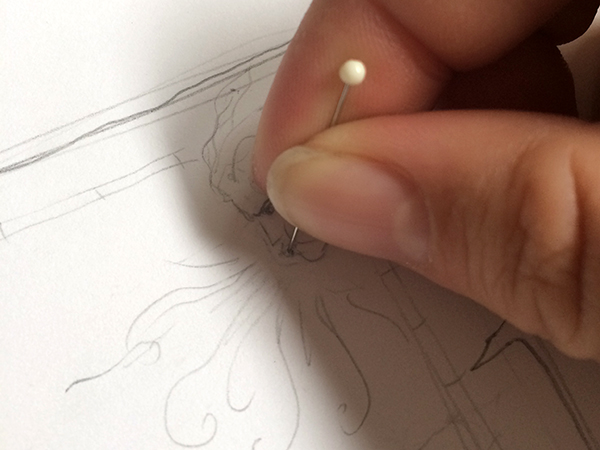
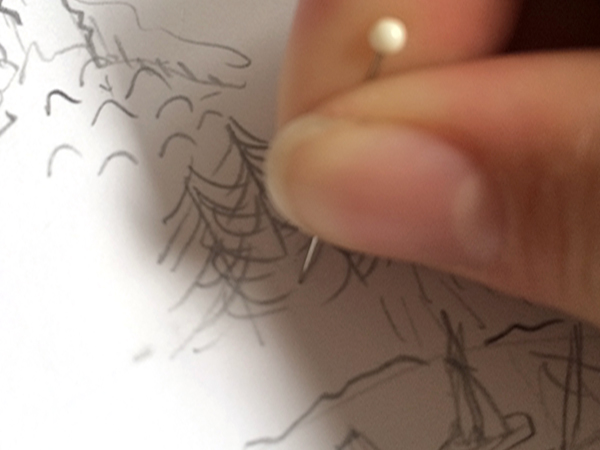
Step 2: Mark the positions for your stickers on the other piece of paper.
After you have finished your map, line it up on top of another piece of paper.

Take your thumbtack or sewing needle and prick two little holes: one where the secret symbol is, and one where the treasure will be.
 |
 |
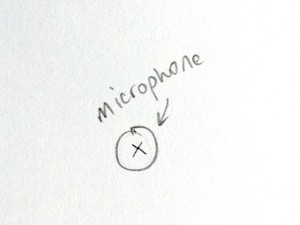
Step 3: Make notes for yourself about where your LED and SOUND stickers are going to go.
Set the piece of paper with the map aside for now. Take the second piece of paper and circle the pin pricks you just made, then label which is which.
 |
 |
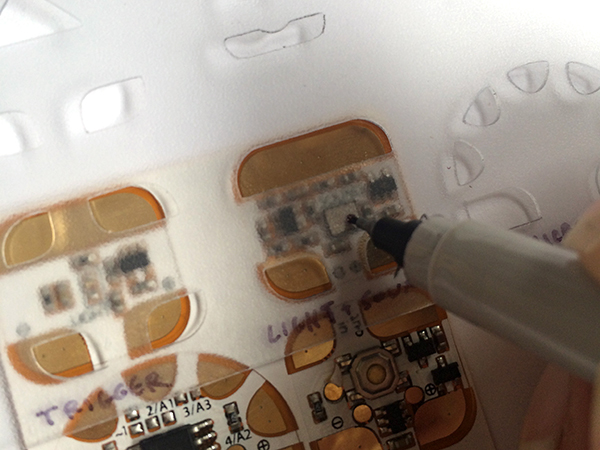
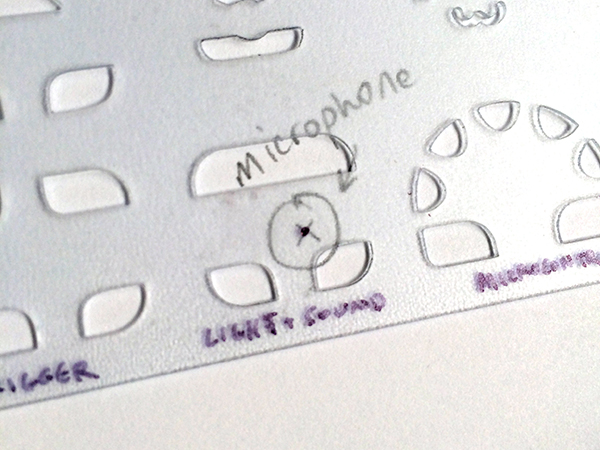
If you have a stencil, you may want to go a step further and mark the exact footprints for your stickers.
Note: If you want to exactly position the microphone of your SOUND sticker, you can lay the stencil on top of the sticker itself and make a mark on the template just over the microphone.
 |
 |
Next, line that the marked stencil up where you want the microphone to go and draw the footprint of the sticker. When you put the sticker on that footprint, the microphone will be positioned just where you want it!
Step 4: Mark the position for your BATTERY.
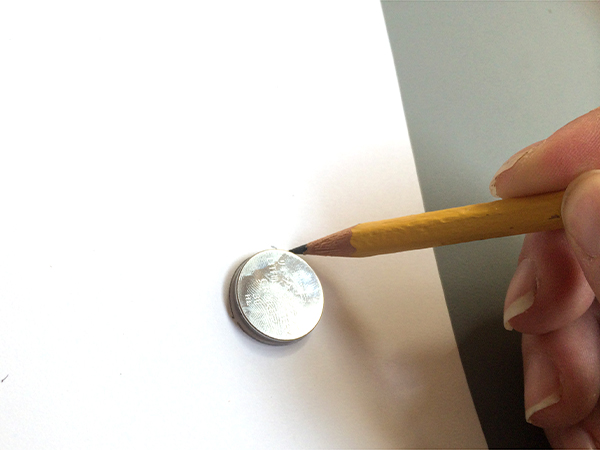
You will need to draw two circles for your BATTERY: one for the positive(+) side and one for the negative(-) side.
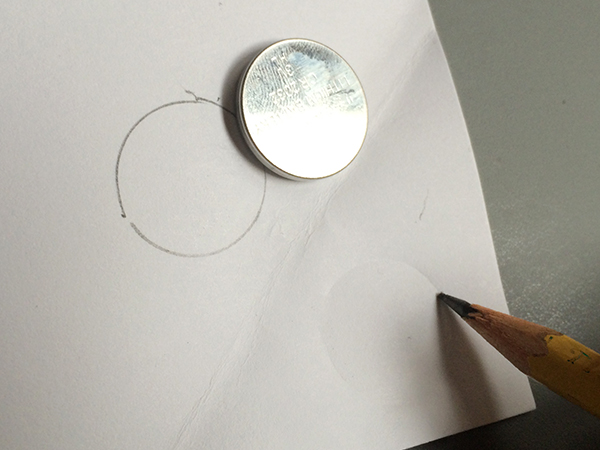
To do this, place your BATTERY on the corner of your paper and trace a circle around it.
 |
 |
Then, making sure that the BATTERY stays in place, fold up the corner of the paper to cover the BATTERY.
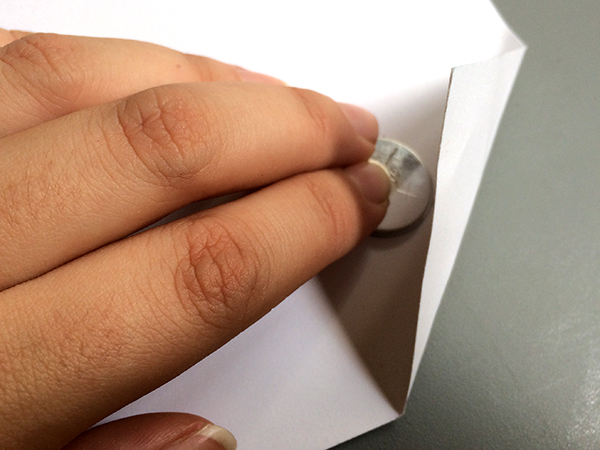
Press down on the paper over the BATTERY to make an indentation in the paper…
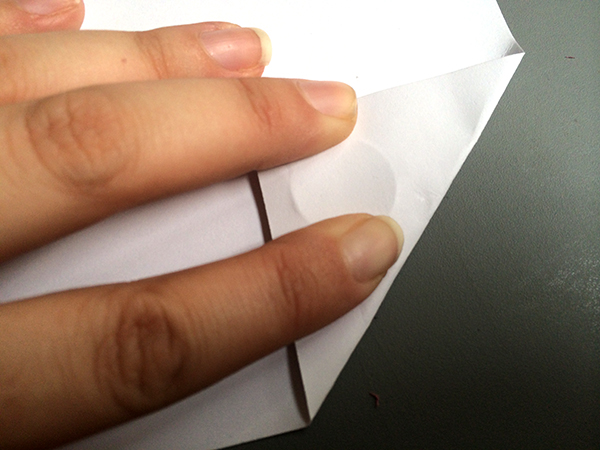
…then unfold the corner and trace around the indentation.
 |
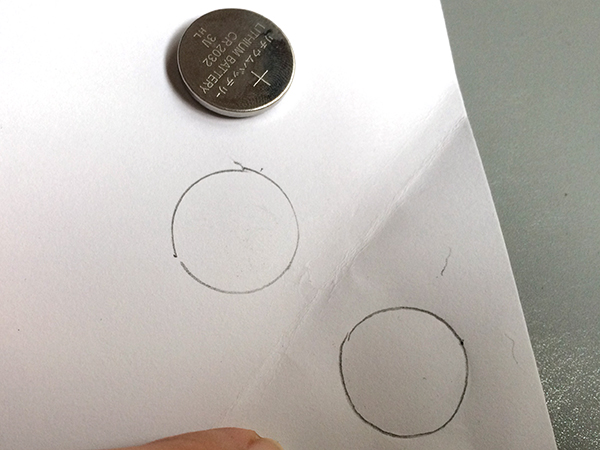 |
Mark the circles positive(+) and negative(-).

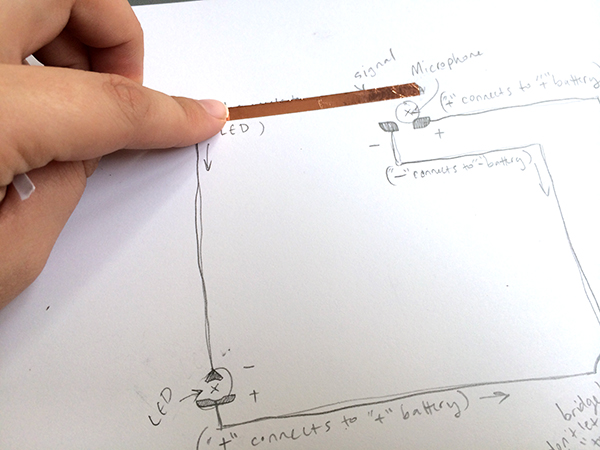
Step 5: Draw where your copper tape needs to go.
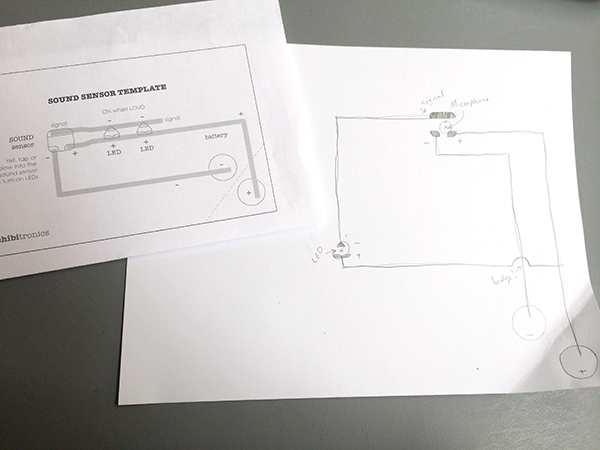
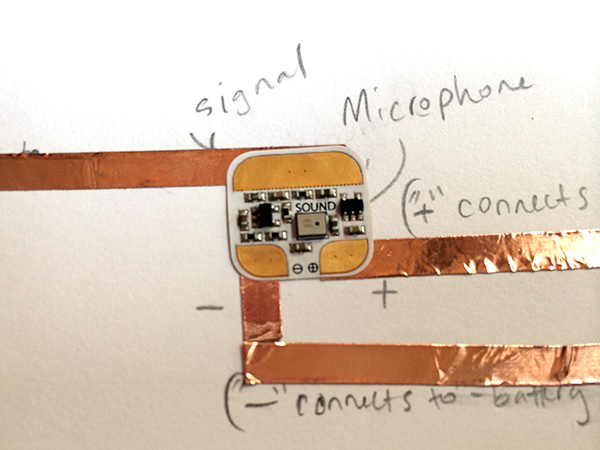
Compare the Sound Sensor template to the circuit that I hooked up and see if you can trace how they have the same connections.
- The signal pad (the long one at the top) of the SOUND circuit sticker connects to the negative(-) pad (the pointy top) of the LED sticker.
- The positive(+) pad of the SOUND sticker (on the bottom right, marked with a “+”) connects to the positive(+) side of the BATTERY.
- The negative(-) pad of the SOUND sticker (on the bottom left, marked with a “-”) connects to the negative(-) side of the BATTERY.
- The positive(+) pad (the wide bottom) of the LED sticker connects to the positive(+) side of the BATTERY.
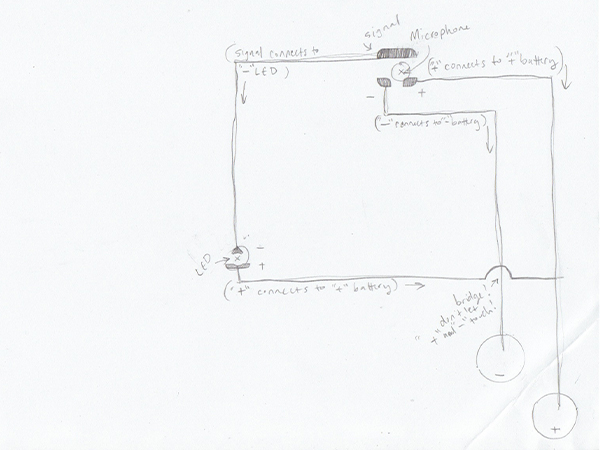
Note: In my example, note that I had to mark a bridge so that the positive(+) copper tape can cross to the other side of the negative(-) tape without making a connection. See Step 6 for how I made the bridge.
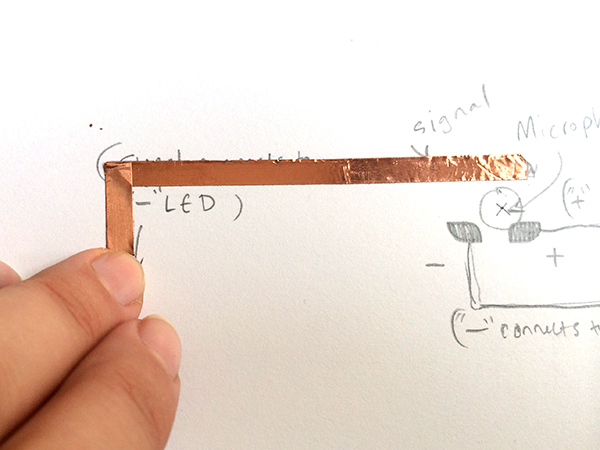
Step 6: Start wiring things up!
When you encounter a turn, fold your tape up diagonally, AWAY from the direction that you want it to go, so that the sticky side faces up…

Then fold it down in the direction you want to go, making a neatly folded corner.
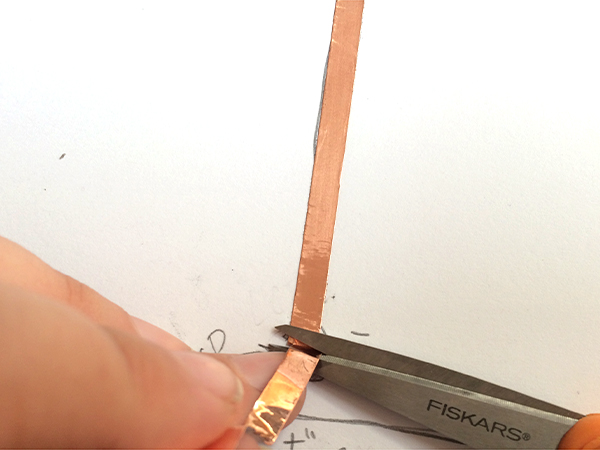
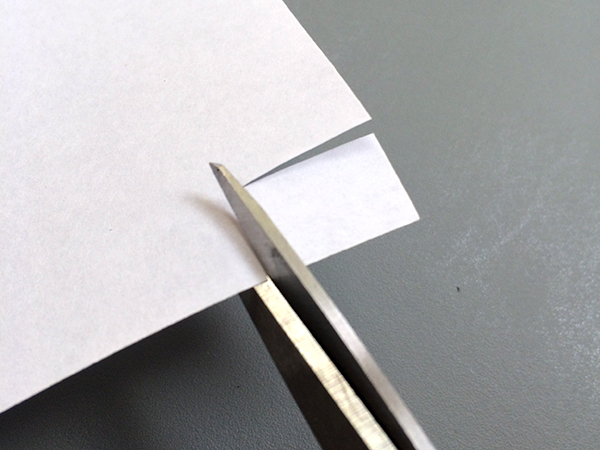
Use scissors to cut the tape when you reach the end of a line.
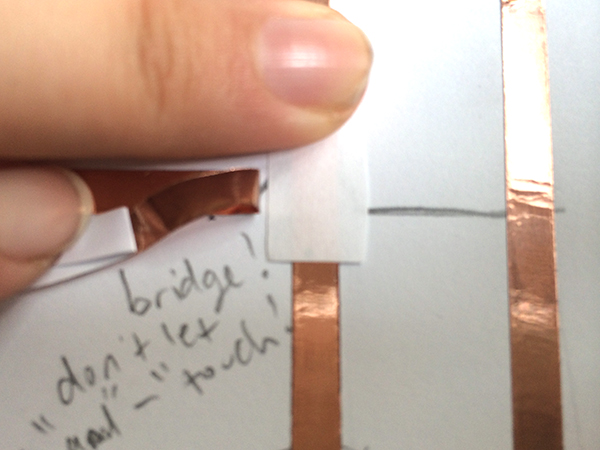
In my example, I had to make a little bridge so that the copper tape coming from the positive(+) pad of the LED sticker didn’t touch the tape going to the negative(-) side of the BATTERY.
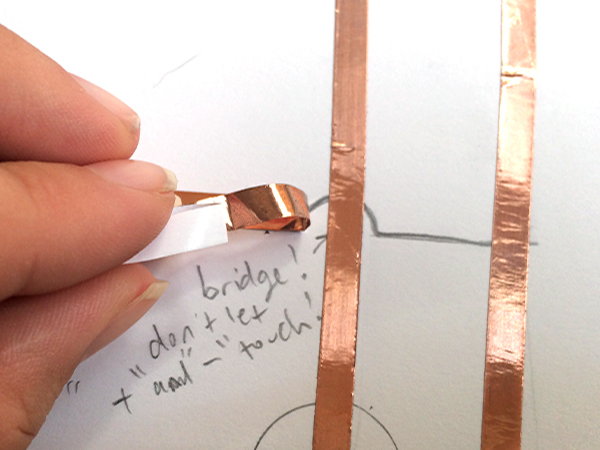
I made mine out of a little rectangle of paper, but scotch tape works too.
 |
 |
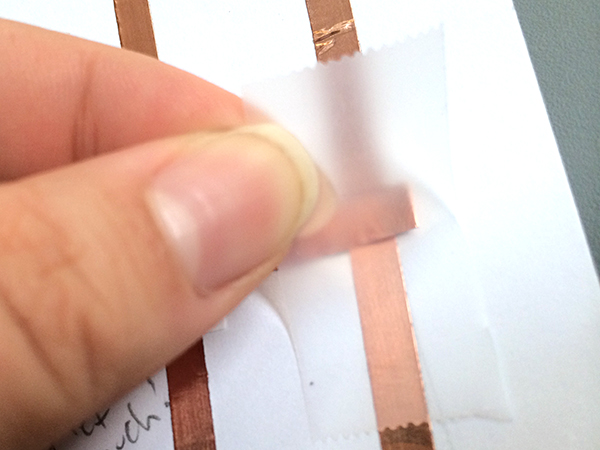
I also had a spot where I wanted to connect two separate pieces of copper tape together. Copper tape’s top, shiny layer works best for connections – sometimes even tape with conductive adhesive can be unreliable, so when I need to make two pieces connect, I use the following method:
Cut the end of your tape with some extra room to spare…

Then fold the end of one piece around so that the shiny side can face down and touch the tape it is connecting to.

Cover the connection with scotch tape to make sure the contact is strong.
 |
 |
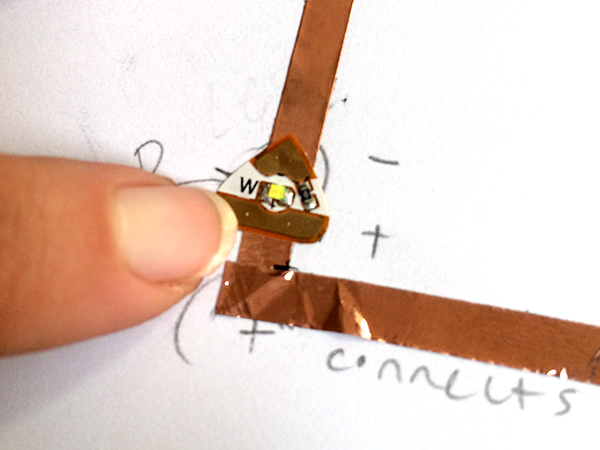
Step 7: Add the stickers!
Make sure you attach the LED in the direction that you’ve planned it to go in your circuit. The pointy end of the LED sticker is the negative (-) contact.
Now add your SOUND sensor sticker to the footprint you have planned out.
Step 8: Add power and go!
Place your BATTERY with the positive (+) side facing up, fold the corner over it to make contact, then use a binder clip to hold it in place. Test your circuit by making some noise and checking to see if the light comes on!

Your final step is to line your map up over the circuit you just made. You may want to tape or glue them together to hold them in place. Now you can blow on the secret spot to find your treasure’s location!