Hi, crafty friends!
This is Eiko and I make light up Peek-A-Boo card using Chibitronics and Heffy Doodle stamps and dies.
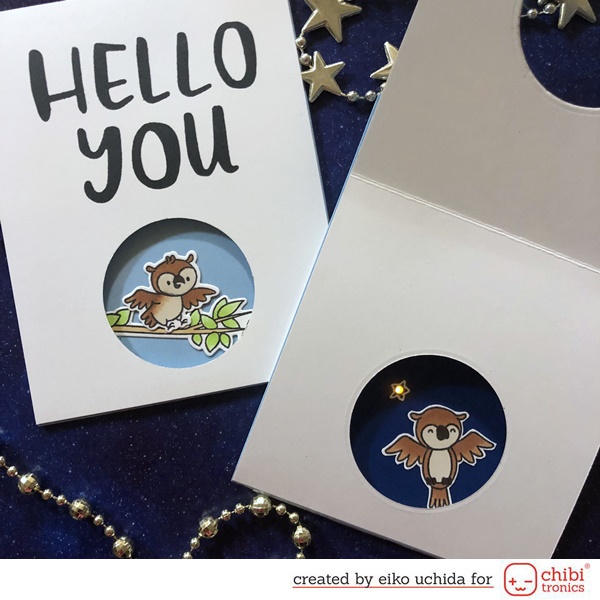
When you open the card, the image changes and the star glows.

I will make the parts referring to the picture below.
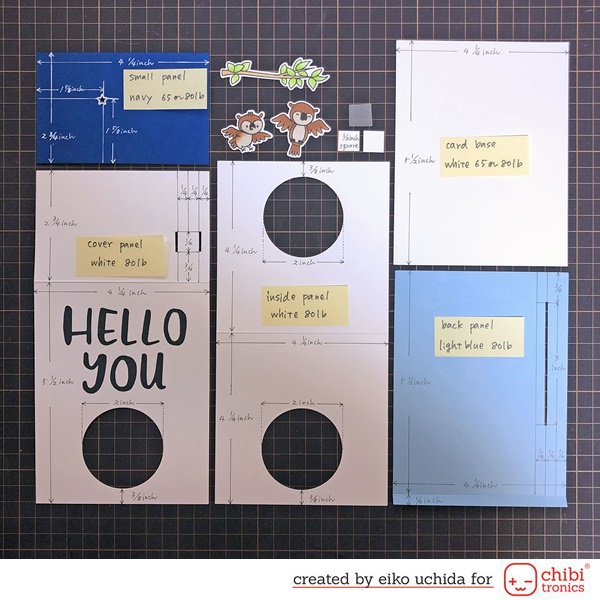
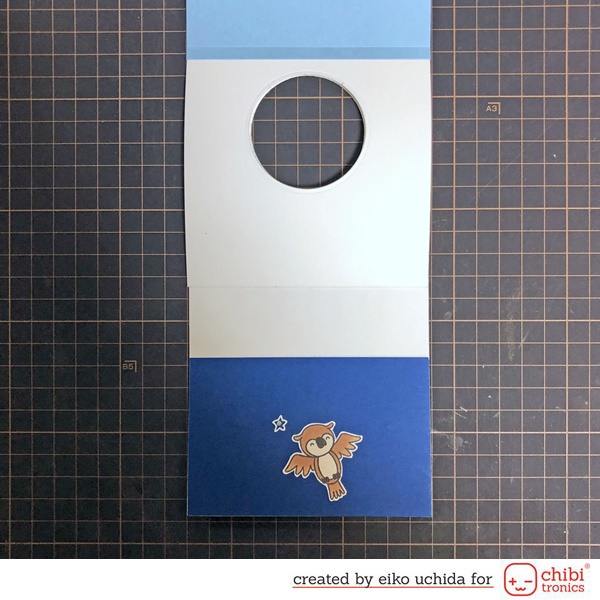
- Small navy panel, size 4 1/4 x 2 3/4 inches. Stamp the star and heat emboss with white embossing powder. Make a hole in the center of the star.
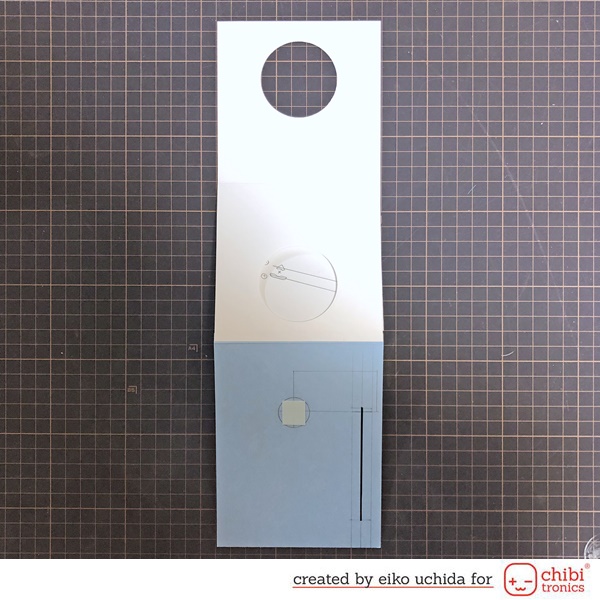
- Cover panel, size 4 1/4 x 8 1/4 inches, score at 2 3/4 inches. Die cut 3/8 inch from the end with 2 inches circle die. Stamp the sentiment using black ink.
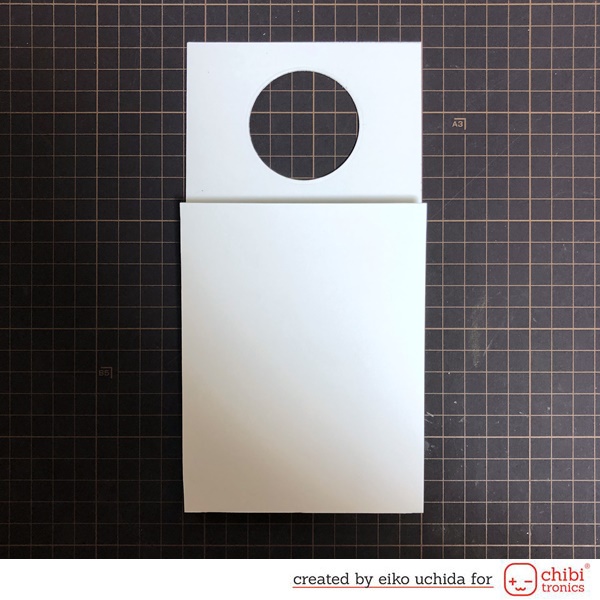
- Inside panel, size 4 1/4 x 8 1/2 inches, score in the middle. Die cut 3/8 inch from the end with 2 inches circle die.
- Back panel, size 4 1/4 x 5 3/4 inches, score at 1/4 inches.
- Card base, size 4 1/4 x 5 1/2 inches.
- Small white vellum, size 1/2 inch square.
- Two 1/2 inch square switch parts.
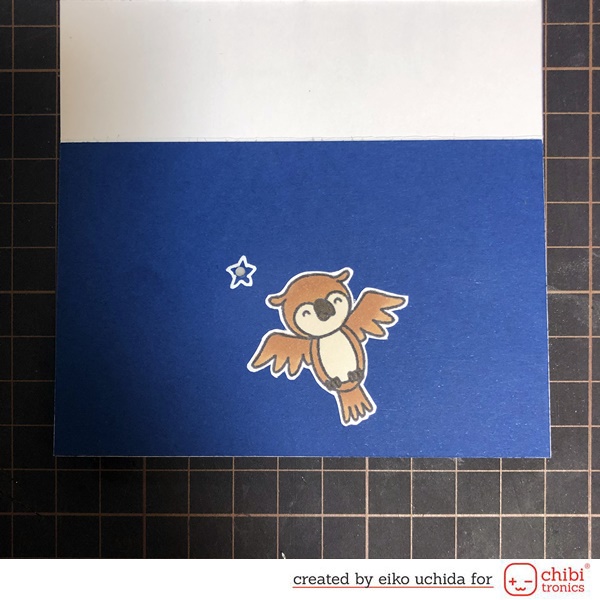
- Stamp two owls and the branch onto white cardstock and color with Copic markers.
Make the slit of the cover panel.
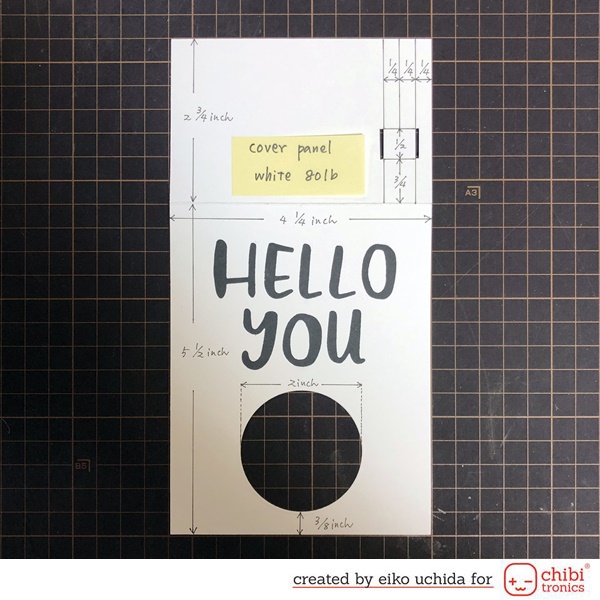
- Draw the line 1/4 inch from the right end of the outside of the cover panel.
- Draw three lines at 1/4 inches intervals.
- Mark 3/4 inch from the score line.
- Mark 1/2 inch from the line you just drew.
- Make 1 mm width slits on both sides of the mark.

- Fold square parts in half and put the double-sided tape.
- Adhere the switch part on the outside of the cover panel.
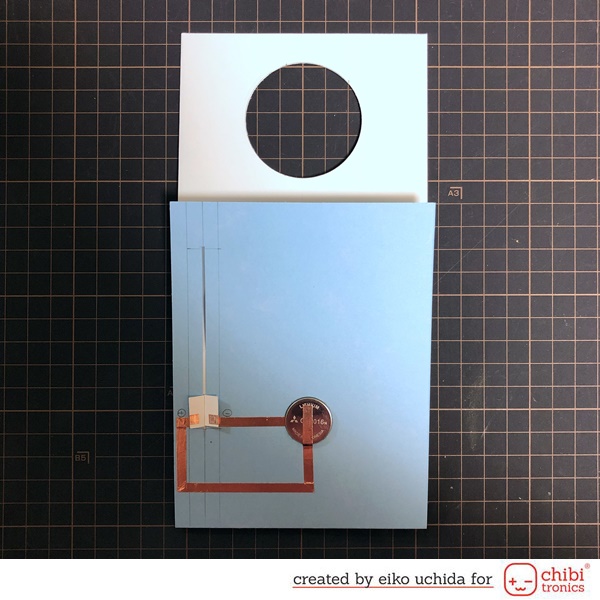
Make the circuit of the cover panel.
- Put the small panel and owl part on the cover panel, mark the position of the light.
- Mark the position of the Chibitronics.
- Draw a circuit connecting the Chibitronics to the left and right slits.
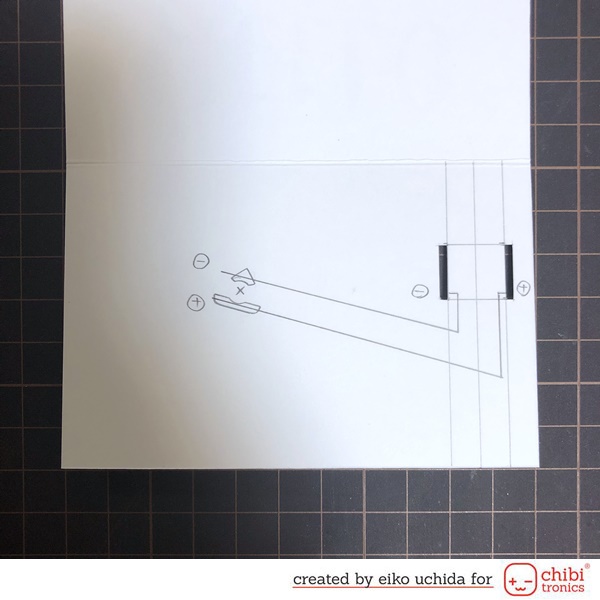
Make the slit of the back panel.
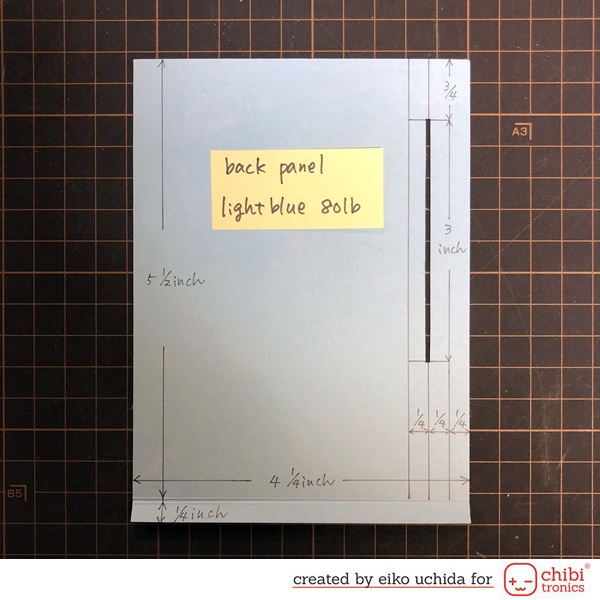
- Draw the line 1/4 inch from the right end of the inside of the back panel.
- Draw three lines at 1/4 inches intervals.
- Mark 3/4 and 3 3/4 inch from the top of the card.
- Make 1 mm width slit between the two marks you drew now.
Make the circuit of the back panel.

- Draw a circuit on the backside of the back panel.
- Mark the position of the battery.
- Put the double-sided tape on the position of the battery.
Assemble the card.

- Put the glue tape to the upper half of the inside panel.
- Adhere the inside panel on the cover panel.
- Put the double-sided tape on the crease of the back panel and adhere the back panel on the inside panel.

- Insert the switch part into the slit and open the cover panel.
- Confirm that the switch and back panel circuit are connected.
- If not connected, correct the circuit.
Adhere the copper tape on the drawing path of the cover panel.
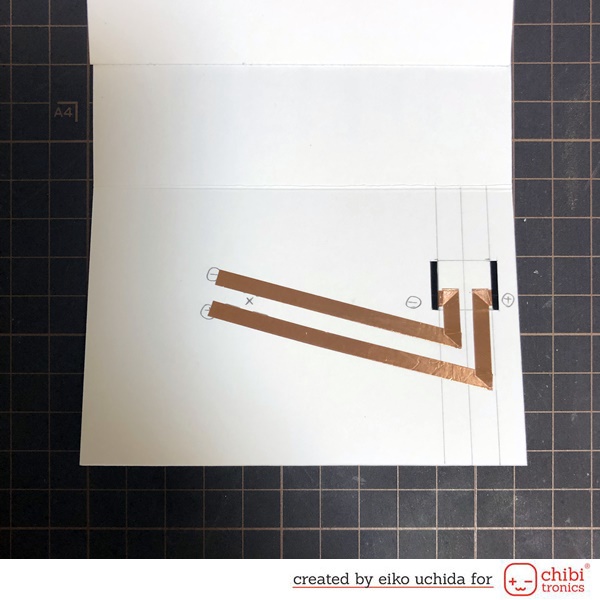
- Adhere the copper tape from Chibitronics to slit.
- After adhering to the slit, pass the copper tape through the slit and adhere the copper tape on the switch part.
- Cut the two copper tapes so that they do not touch.
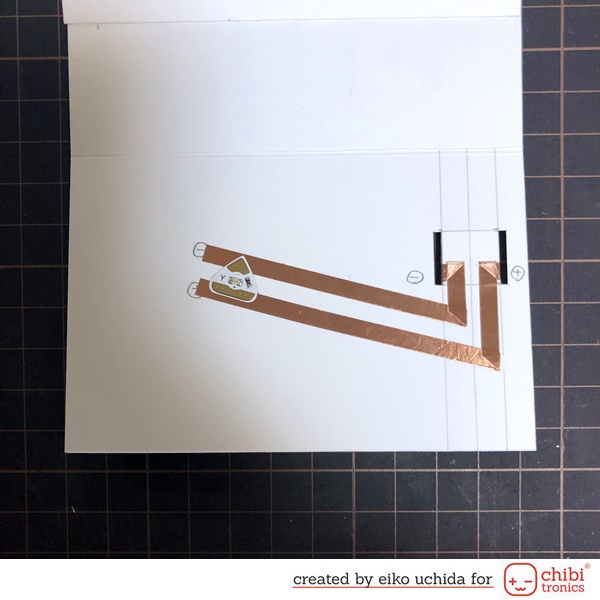
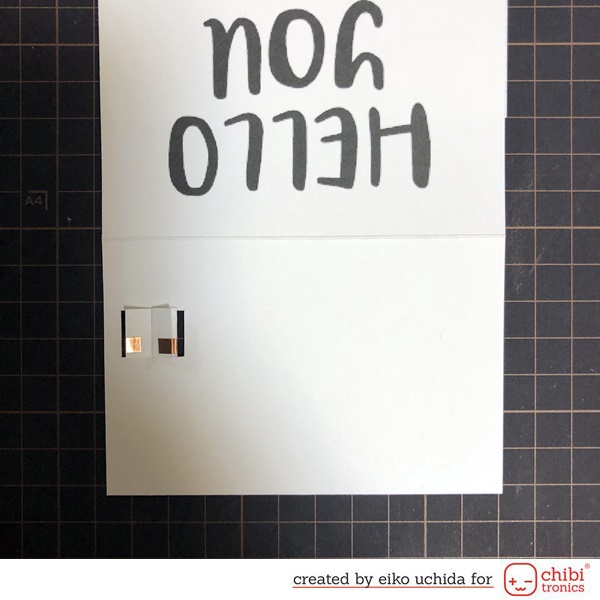
- Adhere the Chibitronics on the mark.

- Adhere copper tape on the Chibitronics to reinforce.
Adhere the copper tape on the drawing path of the back panel.
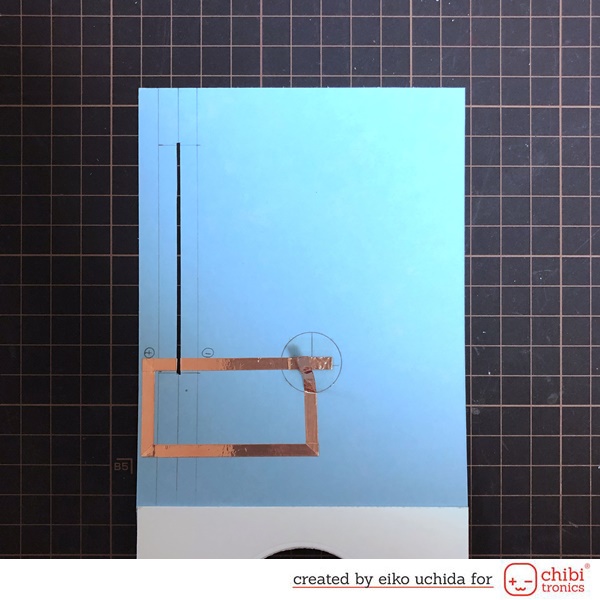
- At the position of the battery, peel off the release paper, adhere the negative side copper tape, turn it back and cut it.
- At the position of the battery leave about 1 inch of positive side copper tape and cut it.
The inside is like this.
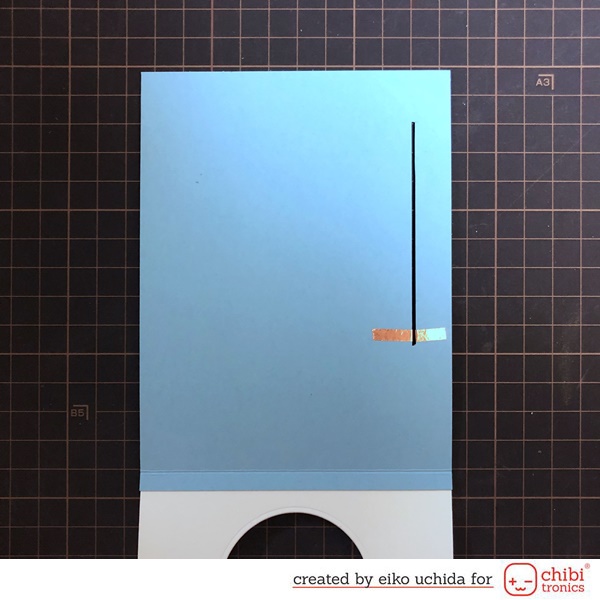

- Place the battery on the copper tape with the positive side up and adhere the positive side copper tape on the battery.
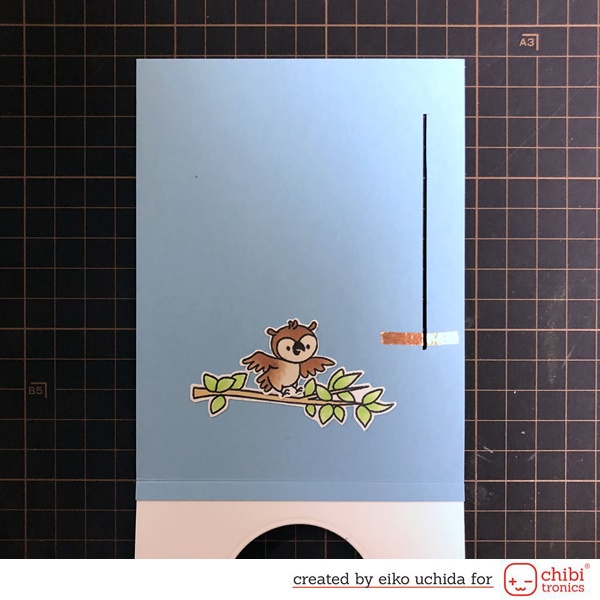
Put the owl and branch parts on the back panel.
Put the small panel and owl part on the cover panel.
Insert the switch part into the slit and open the cover panel, confirm that the star glows.

The backside is like this.
Put the foam tape on the card base.
Adhere the card base on the back panel.
I finished it!

When you open the card, the image changes and the star glows.
Be sure to check out the whole video tutorial for more details.
Thank you for stopping by!
Eiko Uchida
~Supplies list~
- Chibitronics Red, Yellow, and Blue LED Sticker Pack
- 3V coin cell battery (CR2016)
- 5mm wide Copper tape
- Heffy Doodle Hootiful clear stamp set
- Heffy Doodle Hootiful dies
- Heffy Doodle Big Bold Words clear stamp set
- Hero Arts nesting circle dies
- Hero Arts white embossing powder
- Lawn Fawn cardstock in moonstone
- Lawn Fawn cardstock in blue jay
- White cardstock
- White vellum