Hello my crafty friends,
today I’m going to show you an almost die cutted card. For me it was going out of my comfort zone. It was hard work, but I wanted to create this card as I wanted to create a card matching a birthday theme.
 With this card I want to encourage you just simply to try making the card idea you have in your mind. I also created a video for you, so you can enjoy watching:
- Have the idea in your mind and then think how you could manage it
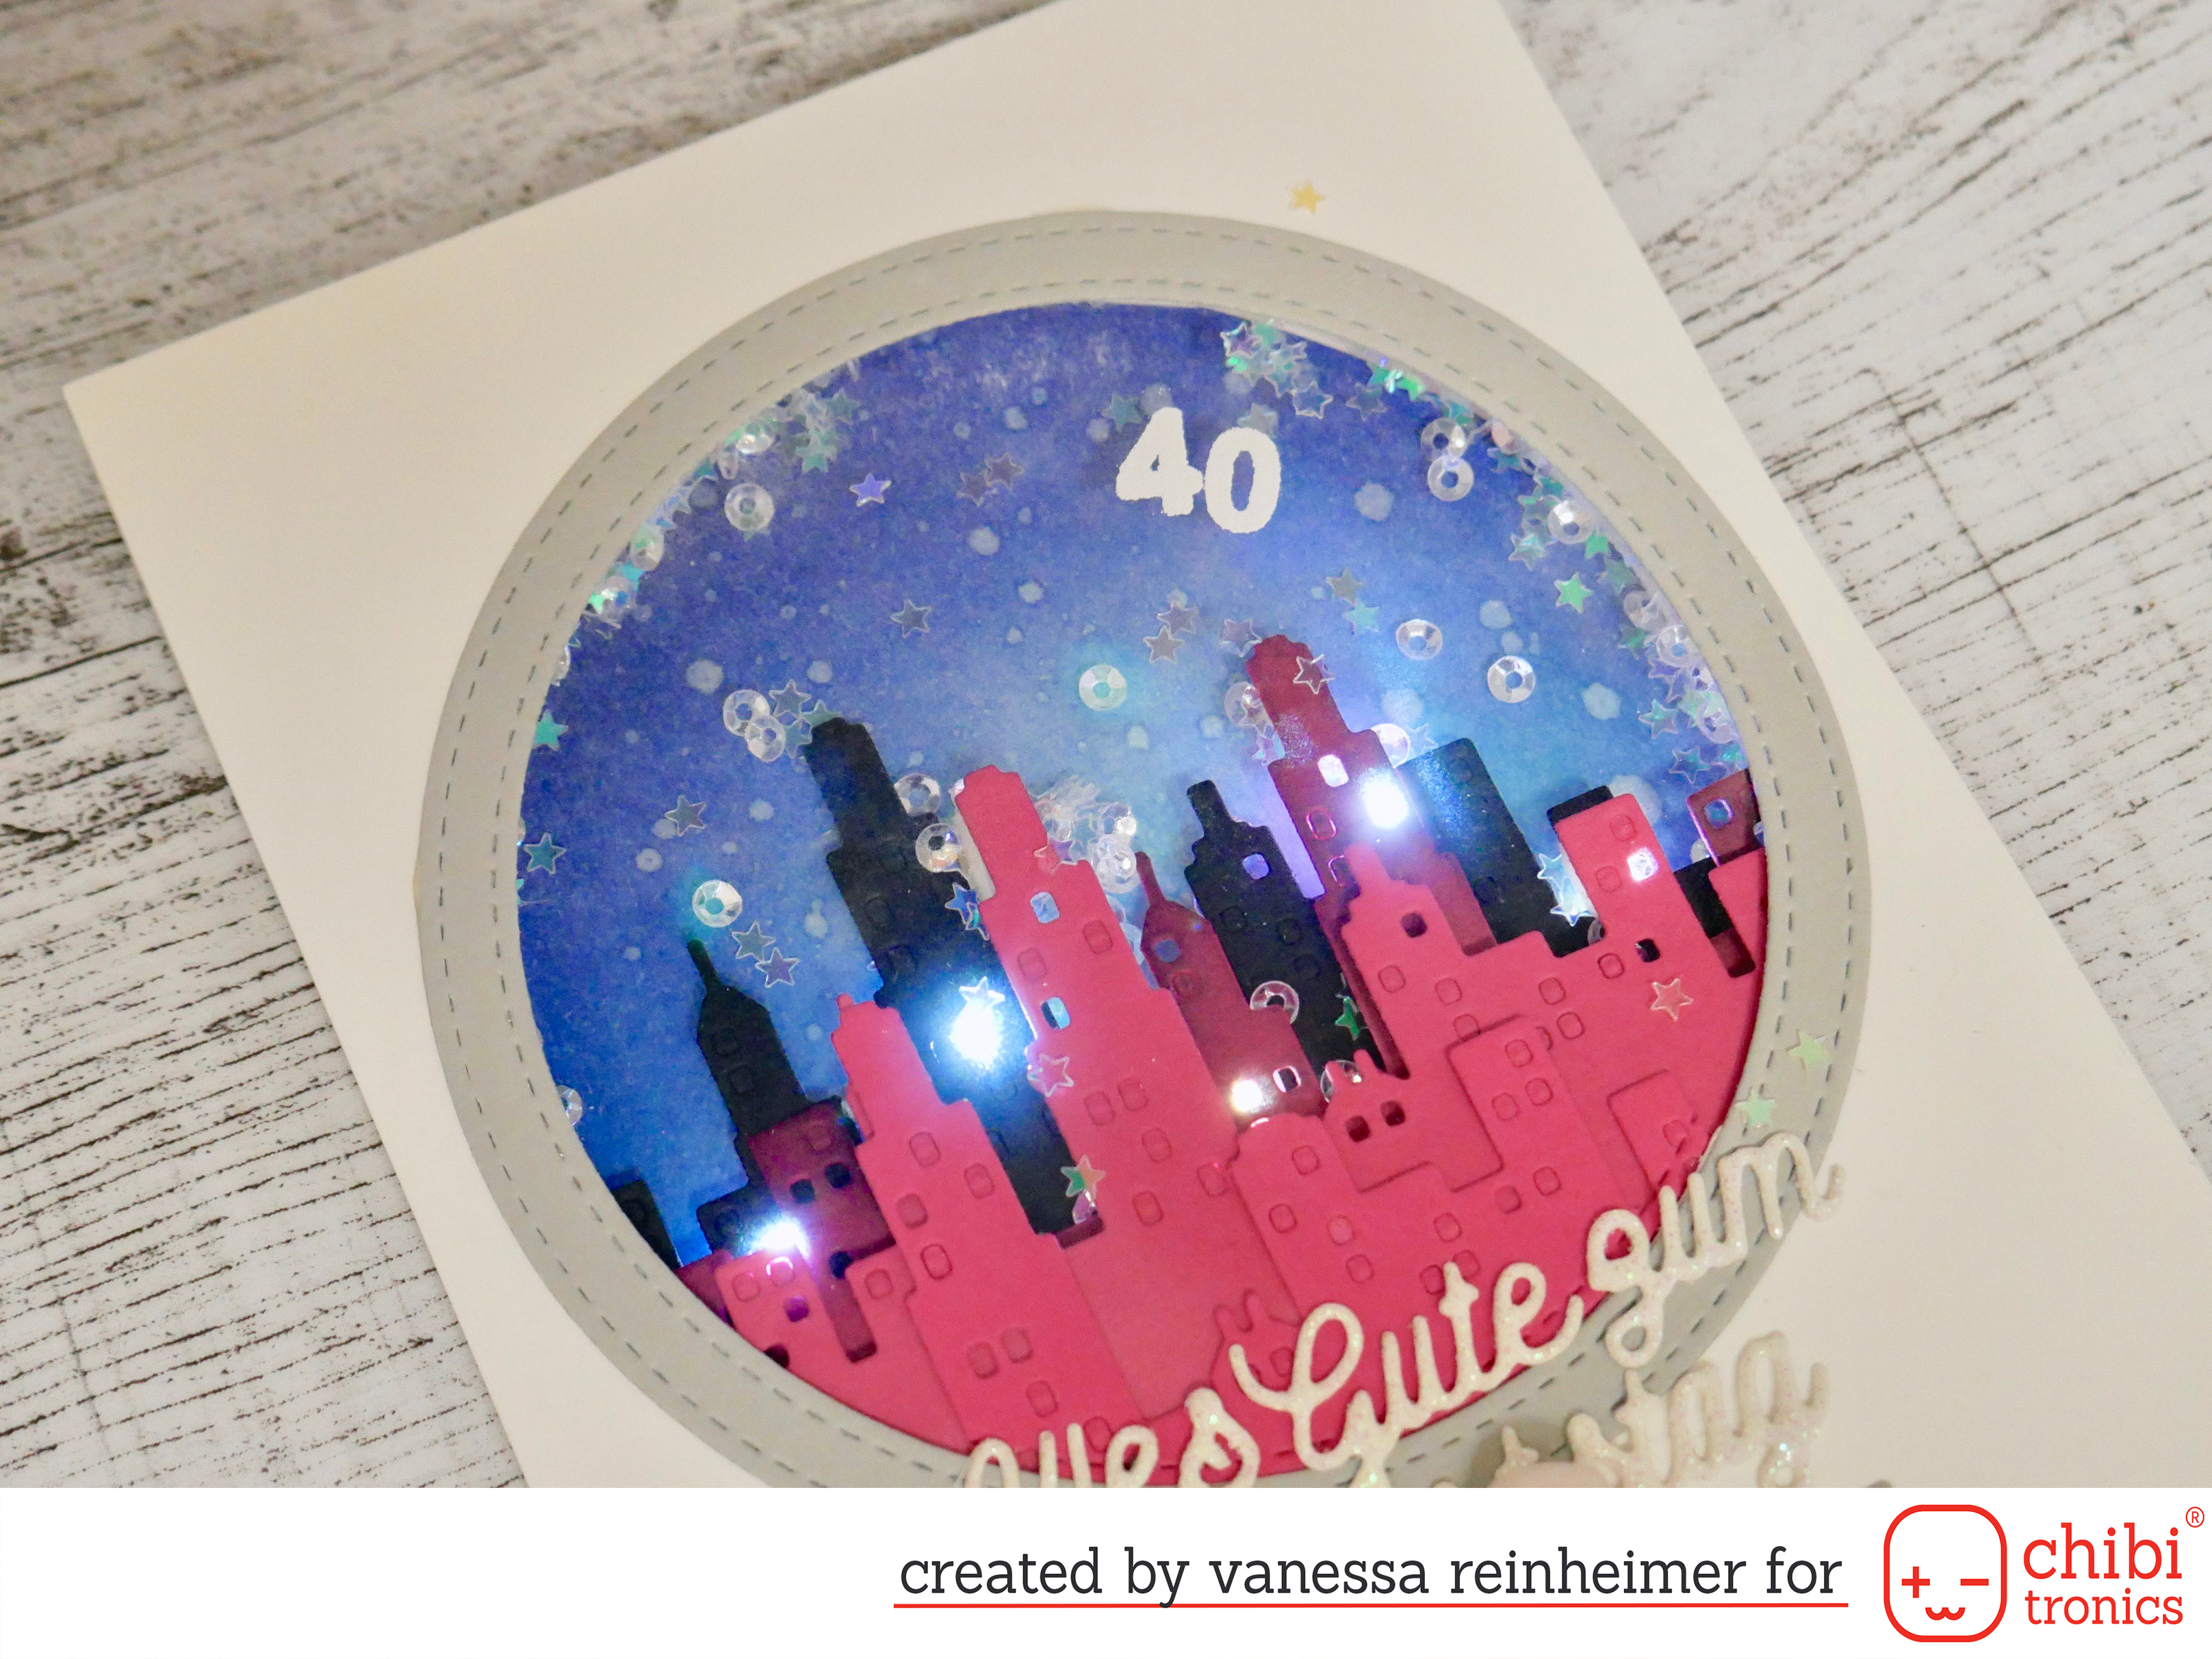
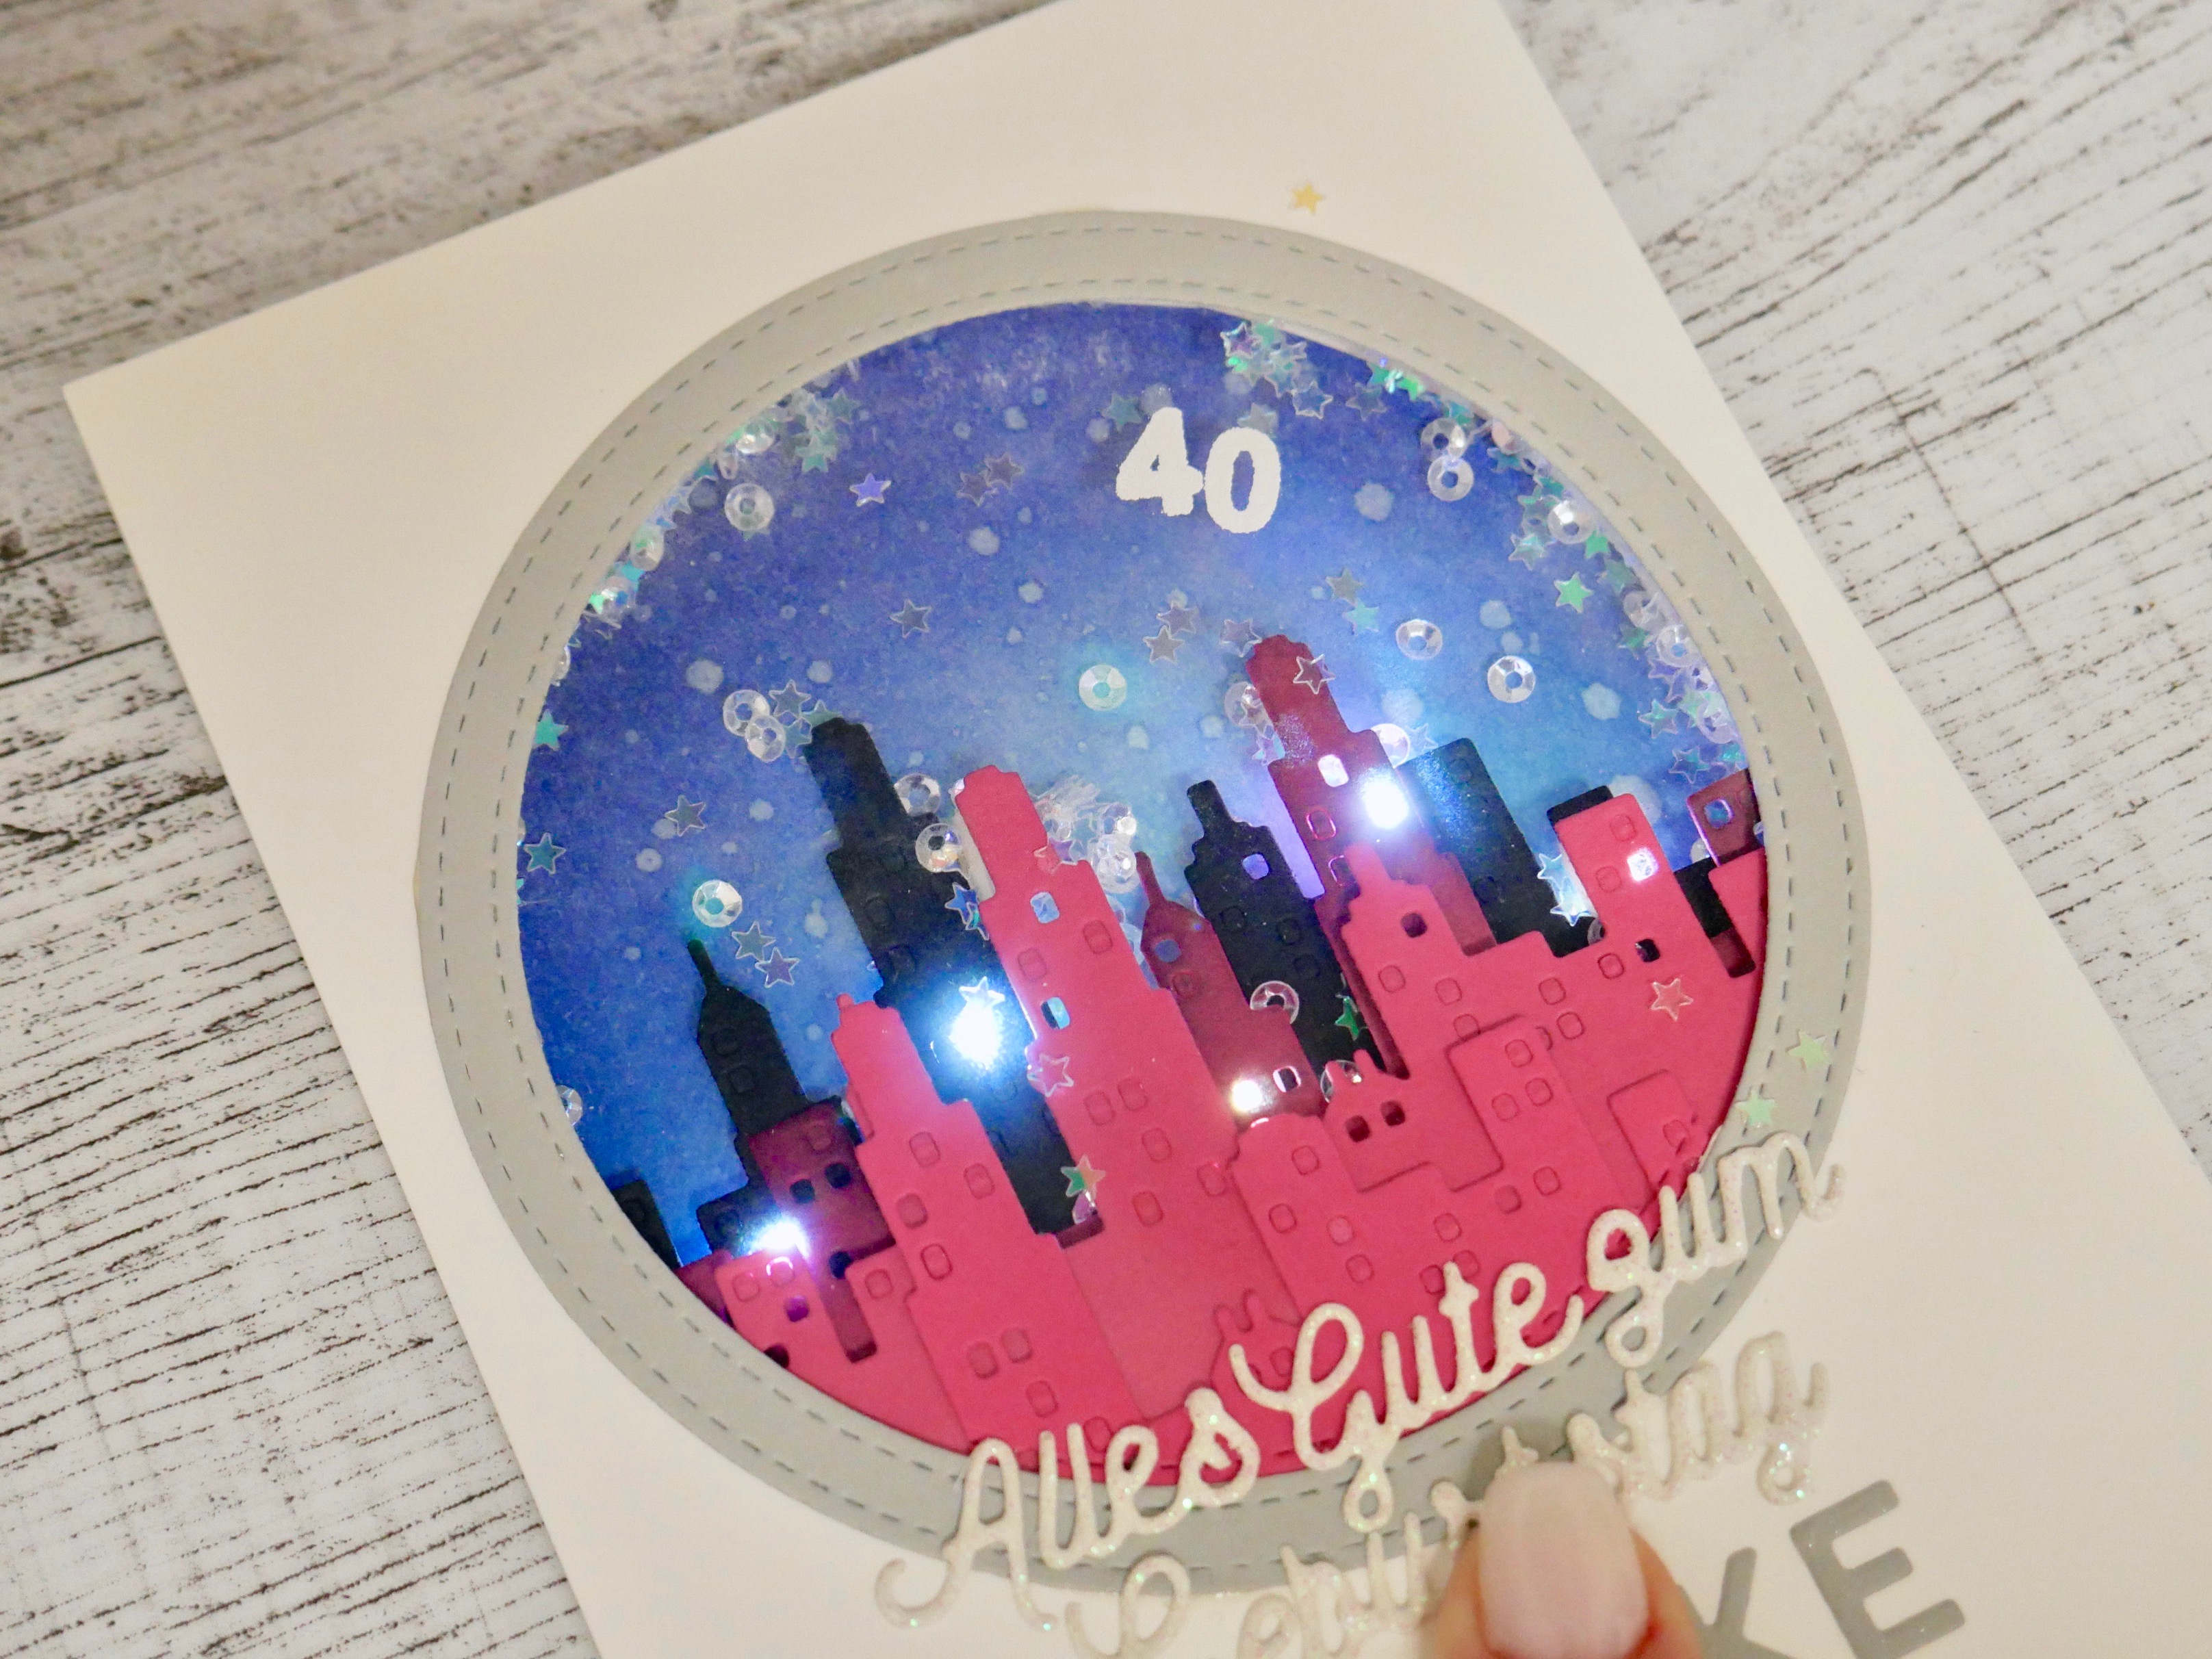
- Die cut all the images you need for the card. And just in case some more 😉
- Ink blend the background using Distress Inks: Tumbled Glass, Broken China and Chipped Sapphire
- Lay the die cuts like you want them and then draw the lights in. Use a scissor or a knife or better if you have a whole punch to create the whole for the lights to shine trough
- draw in the lights and create the circuit. I would suggest to draw the whole circuit first and the use the copper tape to create the scene. Don’t forget to add the LEDs and the battery
- Then start creating the scene using lots of foam tape with a total of 3 layers. This is how I’ve got the dimension
- Cover the whole card with foam tape, now I would suggest to fill the shaker with what ever you’d like and then glue the Acetate. In case you want to heat emboss on the acetate do it before. Then add the card panel
- For my sentiments I’ve used die cuts from Create a Smile and My Favorite Things Stamps. But you could use stamps or stickers as well
- Then add the finishing touches
I hope you enjoyed my tutorial for today. I hope to see you back soon.
Vanessa
Supplies used:
Chibitronics: Cuppertape, LEDs
Dies: Create a Smile, Clearly Besotted Stamps, My Favorite Things Stamps
Embelishments: Lucys Little Things
Only Die Cut LED Card
What a great card!I want to make a layered one like this some time.