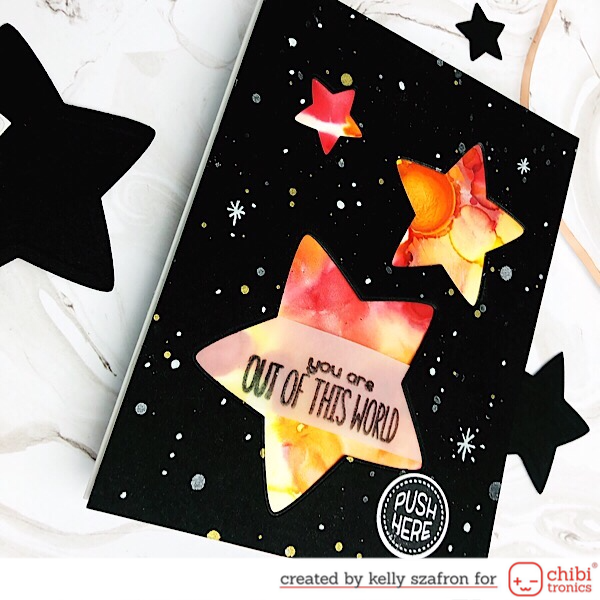
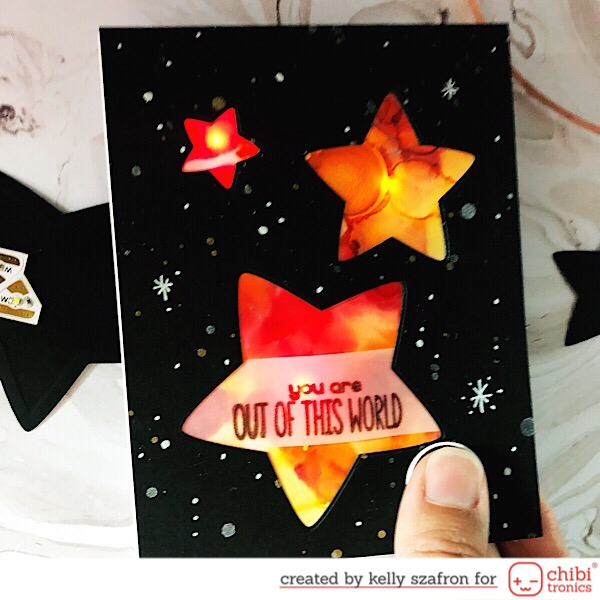
Hello everyone! Kelly Szafron here with one of my favorite ways to use Chibitronic LED’s. I really like how the lights glow through translucent Yupo paper.

The Card Components
I Started out by creating the background. On a piece of Yupo paper I added a puddle of Alcohol blending solution the I added three different vibrant colors of Rangers Alcohol Pearls inks. I set this aside to dry and worked on the card front. For the card front I used Puffy Star dies to cut stars from a piece of black card stock (sized 4.25 ‘ x 5.5 ‘). I then splattered the black die cut piece with shimmery white and gold sprays. When the splatters dried I added some stars and dot with a white gel pen. I then die cut the stars again this time from a piece of fun foam.
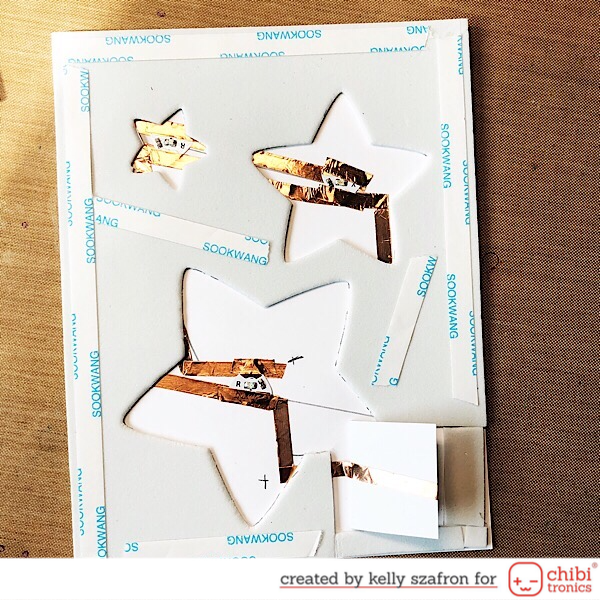
The Circuit
I used the die cut black card stock to mark on piece of white card stock where I wanted the circuit. The next step for me in creating a circuit is to draw it out on the paper I am using to make it on. Once it is all planned out I create the circuit. I always test that the connections work well and the lights are strong before adhering the card together. I decided to use fun foam on this card to make it look nice and neat from the side and so I go through less foam tape. I used a push flap to create the activation switch for the lights. When the card front is pushed on in the designated spot the circuit connect with the battery and turns on the lights.

Finishing the Card
The final steps were to adhere the layers together. I stamped and heat embossed the sentiment on a piece of velum and taped the strip of velum to the back of the black card stock. The Yupo paper was adhered over the circuit then the black die cut piece on front. I stamped and die cut the Push Here button from Lawn Fawn stamps and dies. The Chibitronics in this card makes it extra special.

Thanks for stopping by, I hope you are inspired to use Yupo and Chibitronics together.
Chibitronic Supplies used (affiliate links used at no extra cost to you):
