Hi, crafty friends!
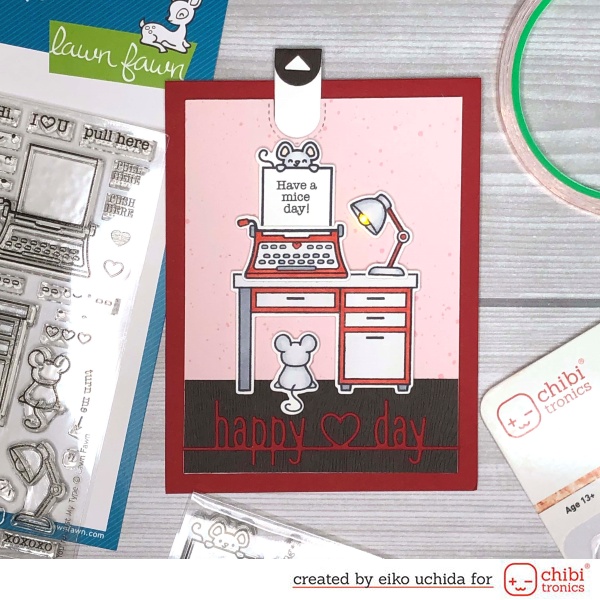
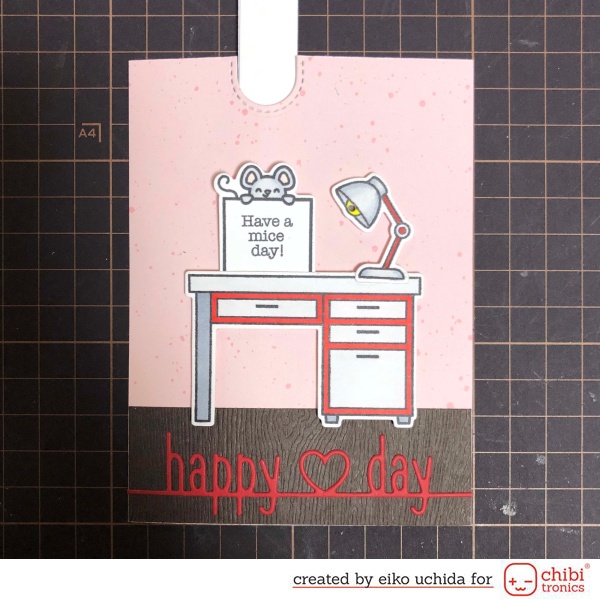
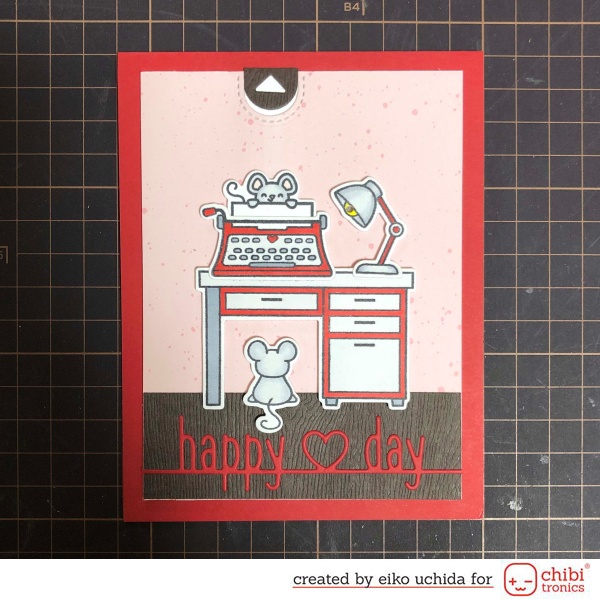
This is Eiko and I make light up popping out toast card using Chibitronics and Lawn Fawn stamps and dies.
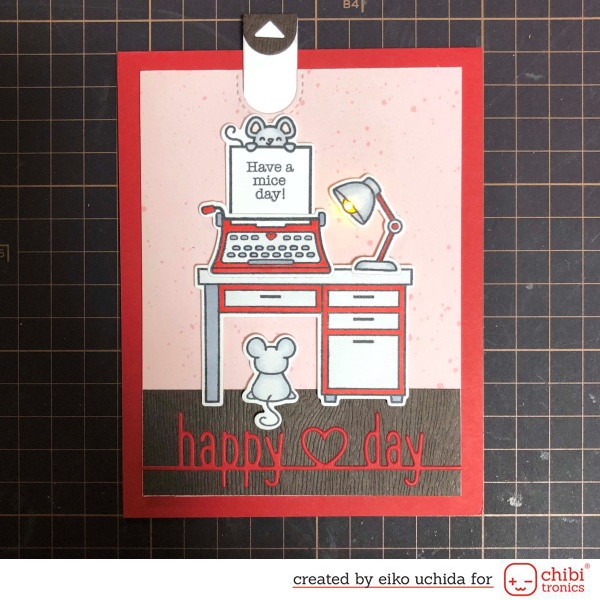
When you pull the tab, the message pops out of the typewriter and the lamp glows.
I will make the parts referring to the picture below.
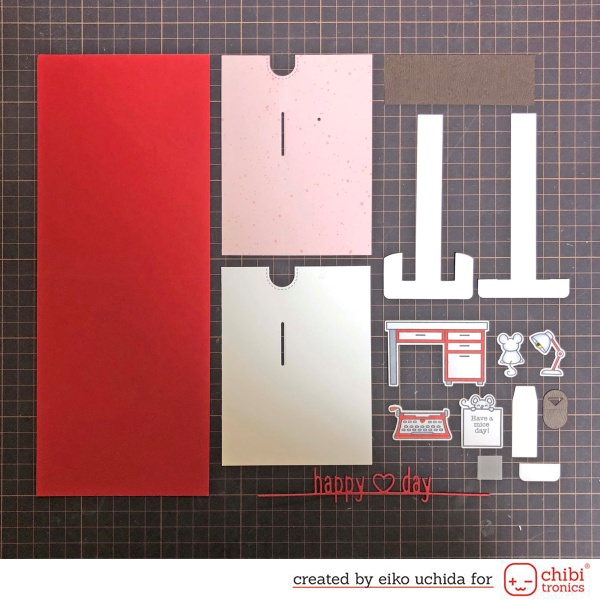
- 4 1/4 x 11 inches chili pepper cardstock.
- 3 3/4 x 5 inches pattern paper and white cardstock. Die cut these papers using notch and straight slit dies.
- 3 3/4 x 1 1/4 inches woodgrain cardstock.
- Two pull tab parts.
- Stamp the desk, typewriter, mice, lamp and message onto white cardstock. Color the parts with Copic markers and die cut with coordinating die.
- Die cut the paper with small tab and sleeve dies.
- Die cut chili pepper cardstock with happy heart day line border die.
- Small white vellum part.
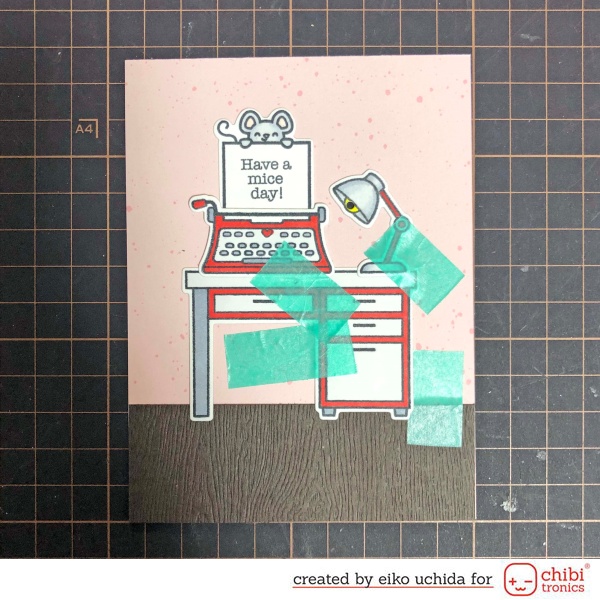
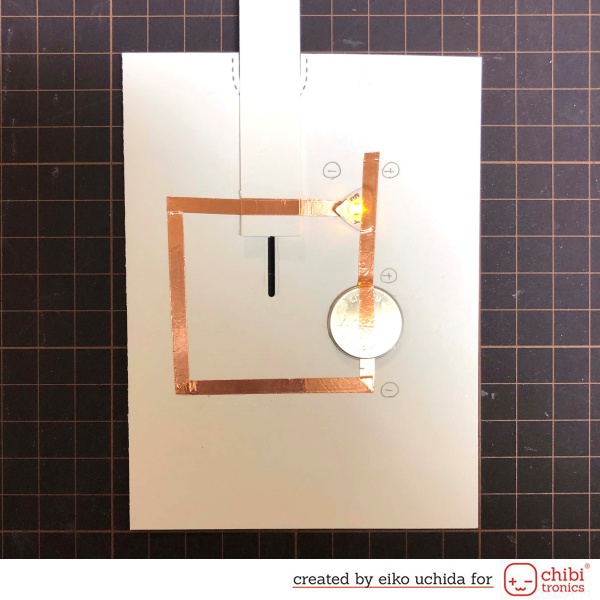
Place the parts on the pattern paper, make a hole at the light position.
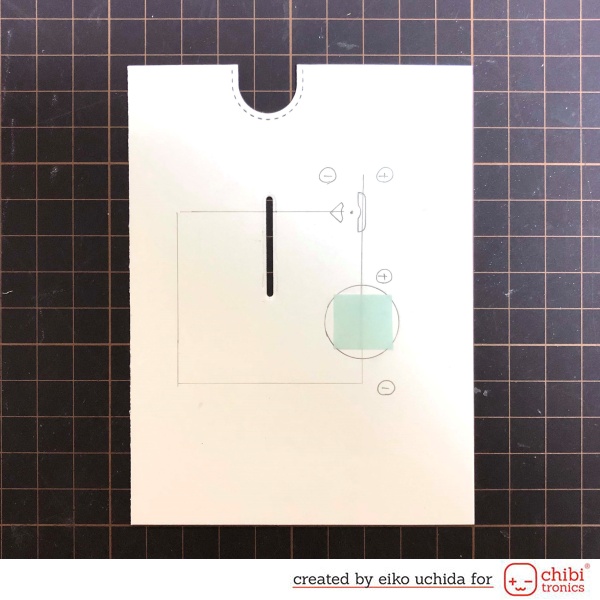
- Put the cover panel on white cardstock and mark the lights with a pencil.
- Mark the position of the Chibitronics and the battery.
- Draw the circuit with a pencil.
- Apply the double-sided tape on the battery place.
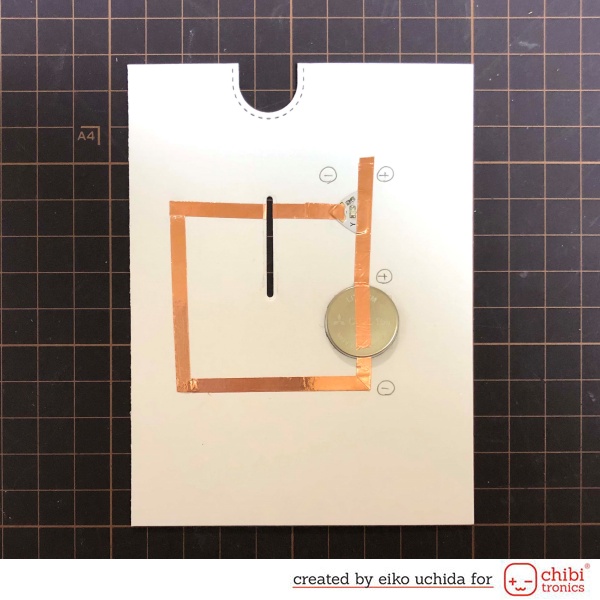
- Stick the copper tape on the pre-drawn path.
- At the battery place, peel off the release paper, stick the negative side copper tape, fold it back and cut it.
- Stick the positive side copper tape.
- At the position of the battery leave the positive side copper tape about 1 inch and cut it.
- Place the battery on the copper tape with positive side facing up and stick the positive side copper tape on the battery.
- Attach the red LED to the copper tape, over the outline.
- Stick short copper tape on the edges of the LED to reinforce.
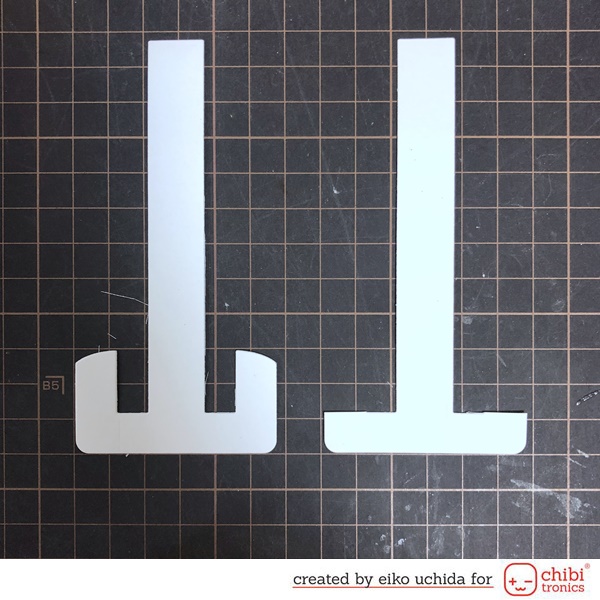
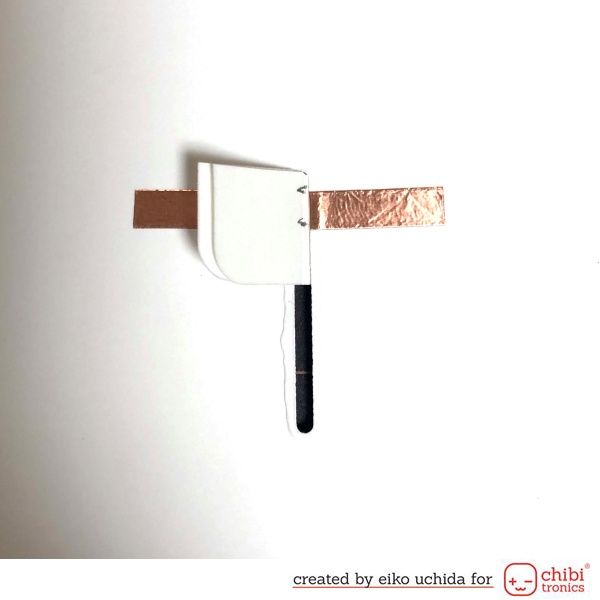
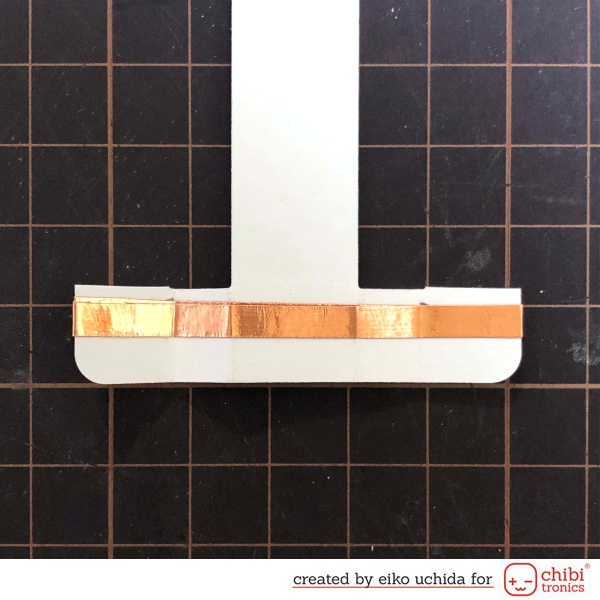
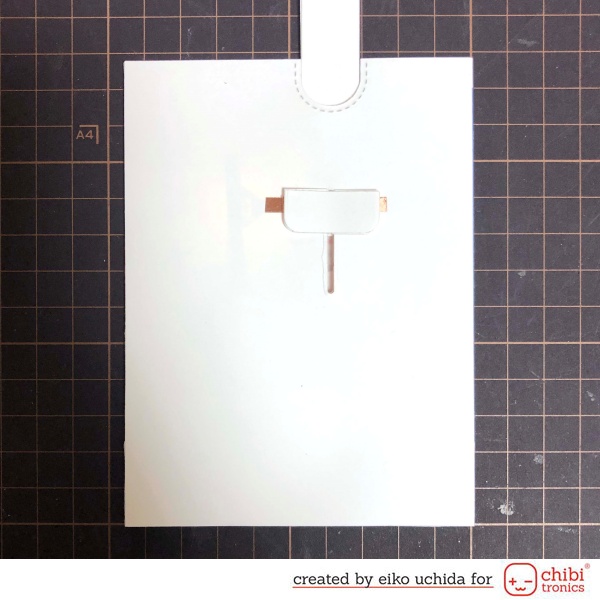
- Cut off the flap one of the pull tab parts and make it T-shape.
- Make a switch with T-shaped pull tab part.
- Fold the flap along the crease.
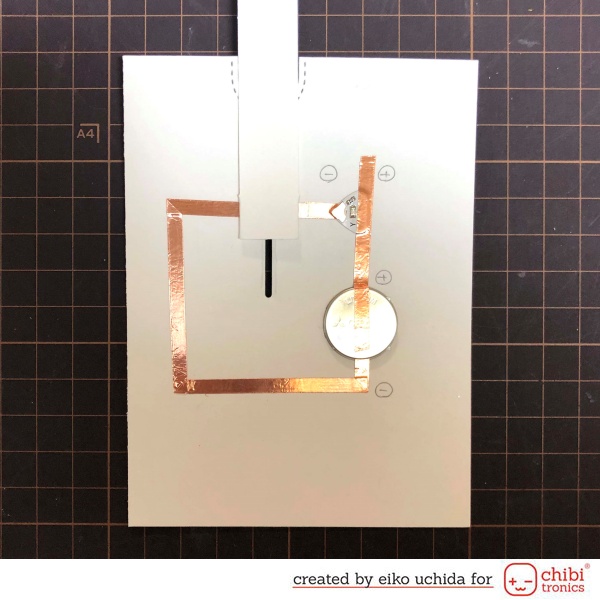
Insert the flap into the slit and place the switch at the top end of the slit.
Mark the position of the copper tape.
- Remove the switch part from the slit and stick the copper tape on the mark.
- Fold the flap along the crease.
Re-insert the switch part into the slit and test the LEDs turn on.
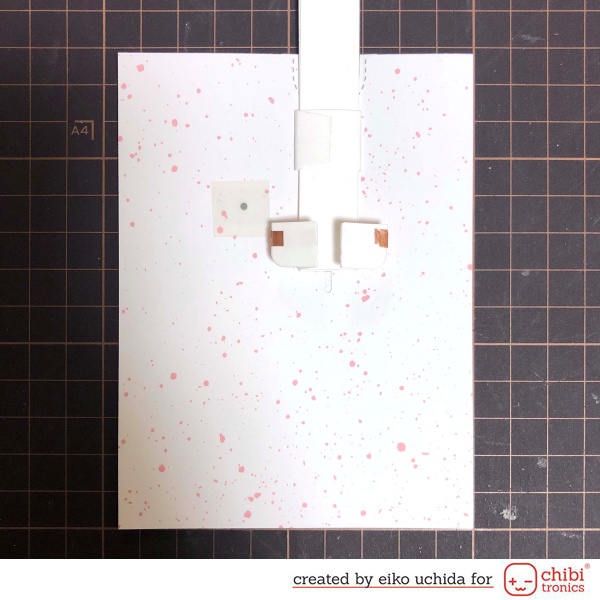
- Make the cover panel.
- Stick vellum paper on the back of the cover panel.
- Stick the woodgrain cardstock on the cover panel.
- Stick the sentiment part on the woodgrain cardstock.
- Insert the switch part from the back of the slit of the cover panel.
- Stick the message part on the flap.
- Apply the foam tape to the back side of the desk and lamp part.
- Stick the desk and lamp part on the cover panel.
- Assemble the sleeve.
- Fold the sleeve along the crease.
- Attach tape glue to the center of the back side of the sleeve.
- Pass the sleeve through the back side of the pull tab and stick it on the cover panel.
- Attach tape glue to another pull tab part.
- Stick two pull tab parts together.
- Attach the tape glue inside the tab of the sleeve.
- Stick them together so as to wrap around the pull tab.
- Stick the foam tape around the entire edge of the back side of the cover panel.
- Insert the switch part into the slit of the card base.
- Stick the cover panel to the card base.
- Stick small rectangular part on the flap.
- Put the double-sided tape on the back of the card base.
- Stick the cover panel on the folded chili pepper cardstock.
- Place the pull tab on the bottom of the slit and trim off any of the excess.
- Stick the small part on top of the pull tab.
I finished it!
When you pull the tab, the message pops out of the typewriter and the lamp glows.
Thank you for stopping by!
Eiko Uchida
~Supplies list~
- Chibitronics Red, Yellow, and Blue LED Sticker Pack
- 3V coin cell battery (CR2016)
- 5mm wide Copper tape
- Lawn Fawn let’s toast pull tab add-on
- Lawn Fawn you’re just my type
- Lawn Fawn you’re just my type lawn cuts
- Lawn Fawn love poems
- Lawn Fawn love poems lawn cuts
- Lawn Fawn happy heart day line border lawn cuts
- Lawn Fawn strawberry frosting paper
- Lawn Fawn chili pepper cardstock
- Lawn Fawn woodgrain cardstock
- White cardstock
- White vellum
How to make light up mouse office card.
This is so cute! It is as if Lawn Fawn had you in mind when they made this set.