Hi crafty friends! It’s Nicorin today. The spring air is blowing. I feel the pollen…
Do you have hayfever? In Japan, so many people have a pollen allergy.
Spring is a very beautiful season and snoozy too.
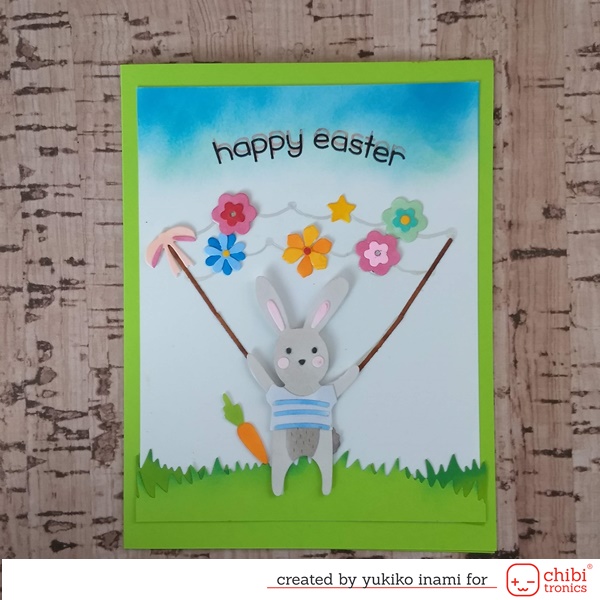
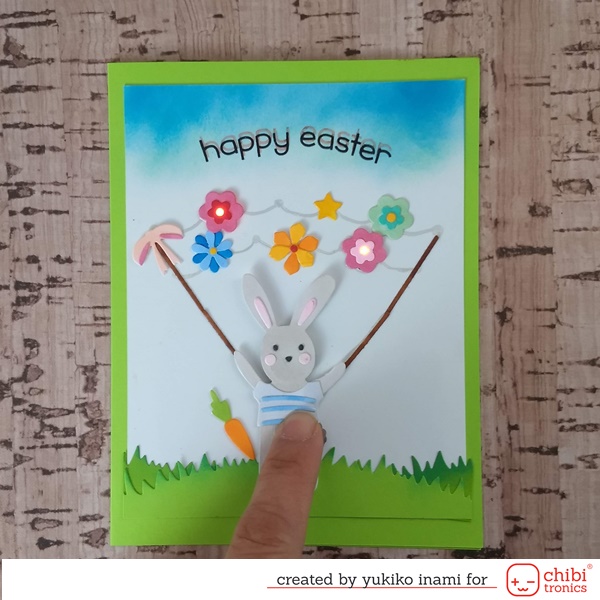
I have a project for sharing with you. Today’s one is the spring card. An adorable bunny shows a flower banner. And some flowers are lit-up! And the silver line of the banner is drawn with the conductive ink pen. The line is the picture design and a circuit too!! Is it cool?
Supplies
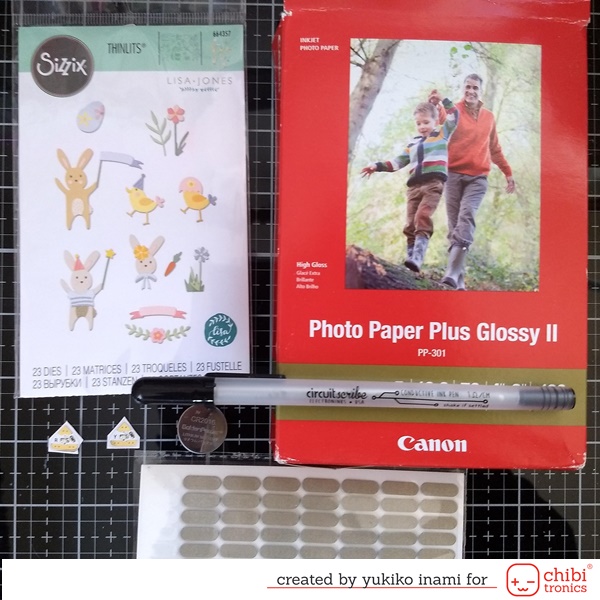
・Circuit Scribe Conductive Ink Pen; this is the conductive ink pen, roller ball type pen. It is easy to draw a thin line. The conductivity greatly depends on the surface of the paper and the thickness of the line.
・Glossy Photo Paper; This is a very important material for this project. The conductivity of the line drawn with ink greatly depends on the paper. Glossy photo paper can bring the best performance of the ink. The ink can dry quickly and keep the behavior of conductive ink well on this paper.
If you use this ink on the plain paper, you need to use a power supply to make light he LED around 9V. Because the resistance of the circuit itself is much. The cell battery has 3V power, so we need to keep good conductive in our circuit.
・Red, Yellow, Blue MegaPack (30 stickers); LED sticker
・Conductive Fabric Tape Patches; for making a secure connection the battery and circuit
・Cell battery 3V ; CR1216(Sorry, the battery in the photo is CR2016)
・Sizzix Thinlits – Easter Celebration
・Lawn Fawn mushroom border
Making the Parts
・Die cut the bunny and the flower banner parts with the white paper and color these parts with Copic markers.
・Assemble these parts
・Die cut the glass border part with a green paper
Drawing the Circuit
TIPS; To make skipping of ink… make the low resistance circuit.
Shake the pen if settled
Make clean up the tip of the pen before starting to draw
Slow speed drawing if the line is scratchy
・Set the place of battery the under of the bunny’s head
・Make a secure connection of the battery and circuit with sticking directly the conductive fabric patch on the surface the battery
・Make the small gap for switch on the way the circuit
・Make a switch with the fabric patch on the backside of the bunny
・Set on the LED sticker in the circuit
・Test the circuit if it works well
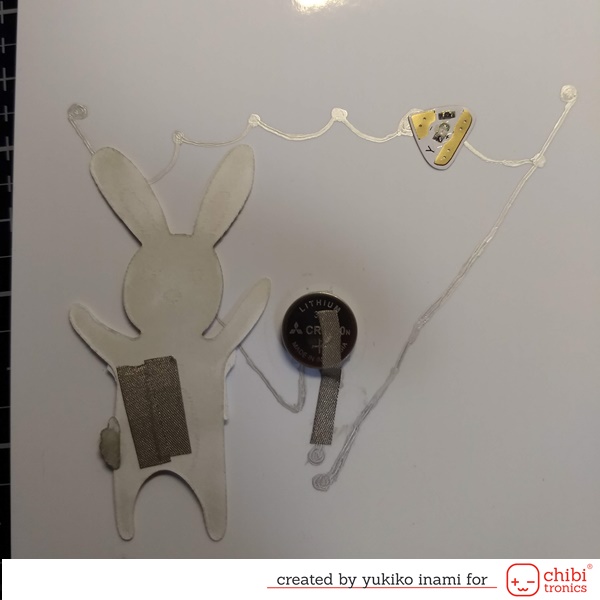
I share a movie, I extended the circuit the banner line one more.
Assembly
・Stick the foam strips on the edge of the bunny’s backside
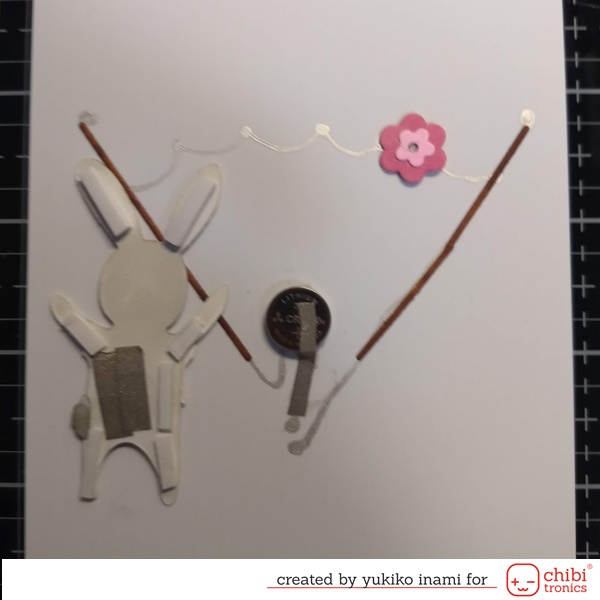
・Set all parts on the circuit paper
・Color the sky with blue ink
・Stamp the sentiment
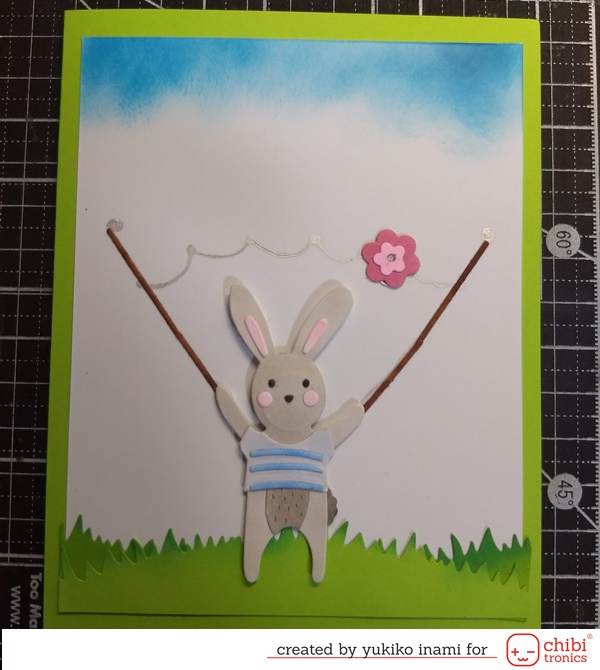
Done!
You can use this ink for designing the circuit both of the design and function.
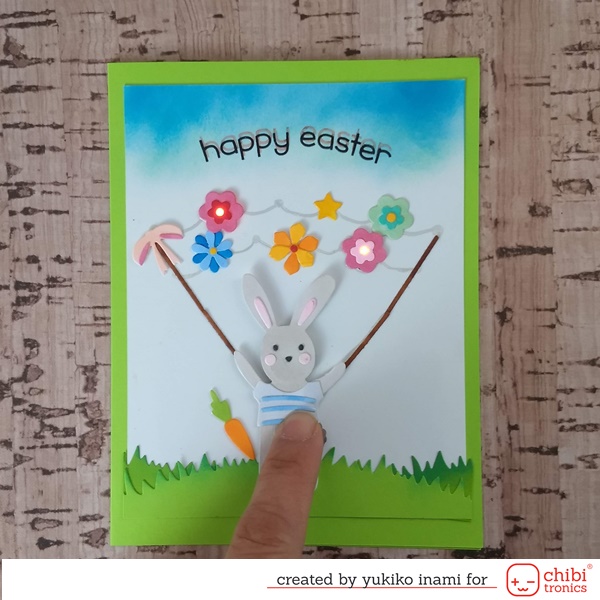
We use the copper tape for the circuit usually. And the copper tape is so easy to use, thin, and it has very good conductive. These are very big advantages with the paper circuit and the papercraft.
On the other hand, there are many conductive materials. I show some materials here for you.
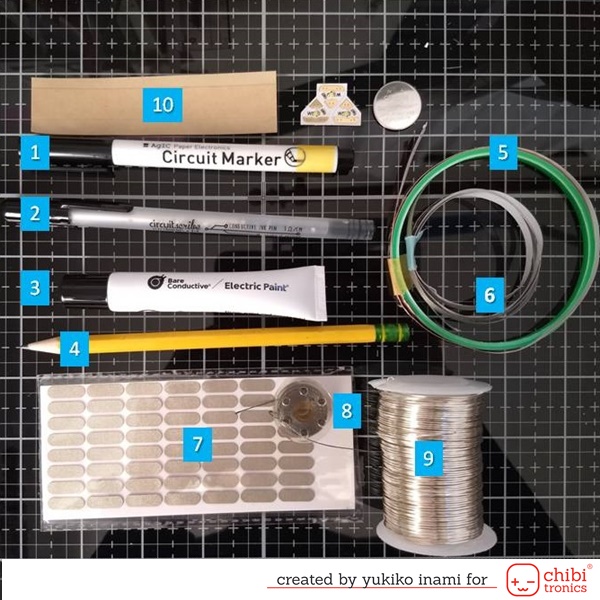
1: Circuit Marker; Ag IC
2; Circuit Scribe ; Circuit Scribe
3; Electric Paint ; Bare Conductive
4; Pencil; the lead of pencil contains graphite. It is conductive!
5; Copper Tape; As you know it is my usual tool.
6; Aluminium Tape, Conductive fabric tape
7; Conductive Fabric Patch; Some conductive material is woven in these clothes, silver, stainless, etc..
8; Conductive thread
9; Wire made of Aluminium, Stainless, Copper, etc….
10: Foil Paper; from your kitchen!
You can find more in your house or classroom! Look for the conductive material and try out!
Thank you for stopping by.
Have a nice weekend!!
Yukiko.I (Nicorin)
