Hi, crafty friends! It’s Nicorin.
I made one more pop up card for this month’s project. And this card has a switch different from last month’s popup card.
In this type of switch system, you can set the pop-up angle as you like because this switch doesn’t need the slit.

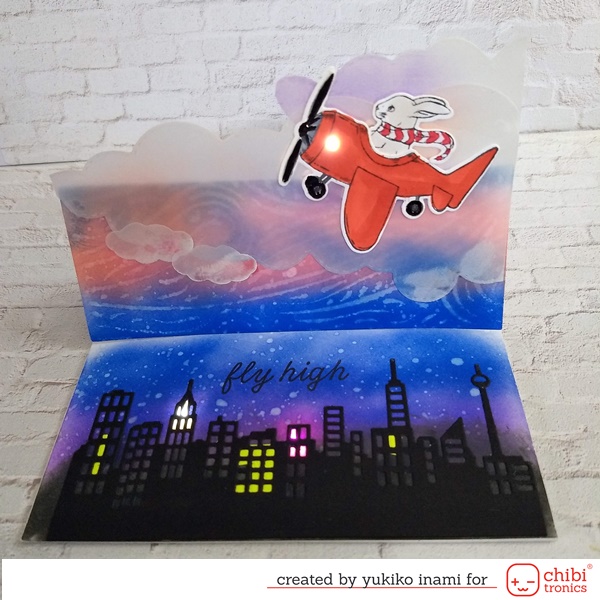
Vroom…. Takeoff! Have a great flight!
Where would you want to go? Where do you like to visit?

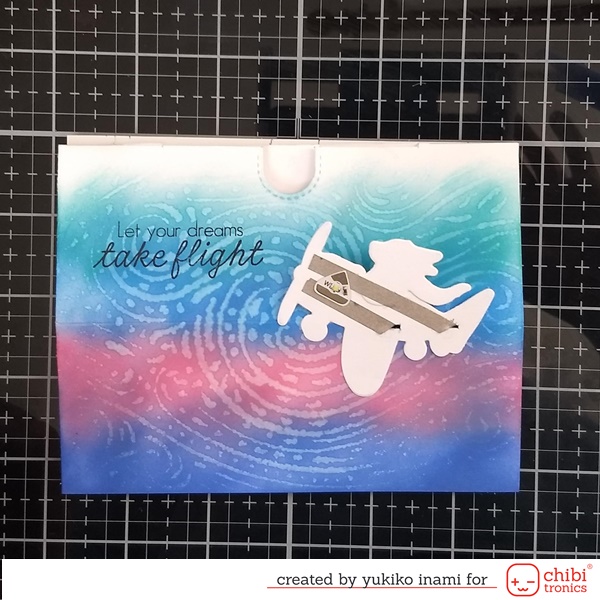
When you slide the tab, the plane pops up into the sky.
The scene turns to a beautiful shining night cityscape.
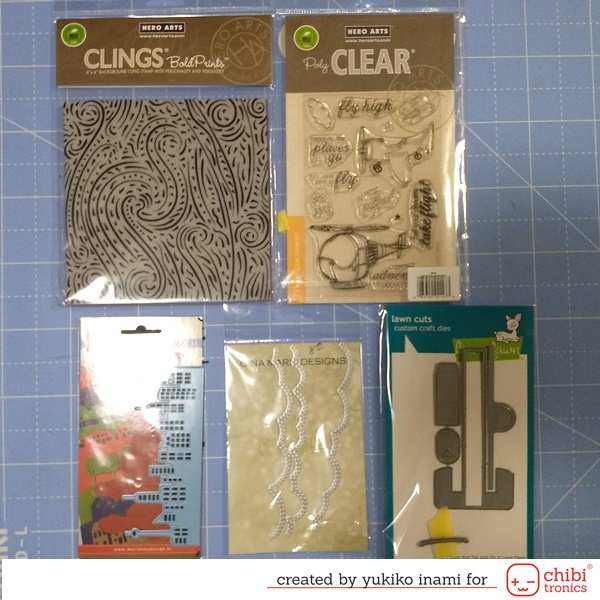
1.Supplies
Fly High Animals: Hero Arts
Starry Night Brushstroke Bold Prints: Hero Arts
Let’s Toast Pull Tab Add-on: LawnFawn
Stitched Cloud Border Dies: GINA MARIE DESIGNS
Horizon Big City: Marianne Design (discontinued)
White LEDs MegaPack (30 stickers): Chibitronics
Pink, Orange, Green MegaPack (30 stickers): Chibitronics
Copper tape: Chibitronics
conductive fabric tape
3V coin cell battery CR2016
polystyrene sheet; thickness 1mm
vellum sheets
I prepare the parts as shown below.
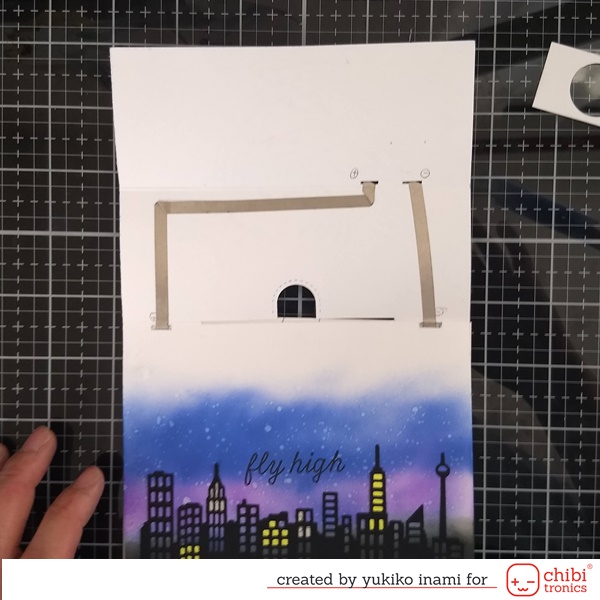
・The folding panel; 11×5.5 inch; fold at the center
make a horizontal slit for the sliding tab; length; 3.25inch
make a thumb hole for the tab with die
score at the center of the front panel after you’ve colored the sky
・styrene board; thickness 1mm; 4.25×5.5inch
・The Base circuit panel; 4.25×5.5inch
・The cover for the backside of the popup;
make the thumb hole for the tab with die
・cut the pull tab: size 3 x 4.5 inch
score 1/4inch from the short edge for the margin to paste
・die cut a black paper with the die of the cityscape
・die cut the vellum paper to some clouds shape
・stamp and cut out the animal and airplane
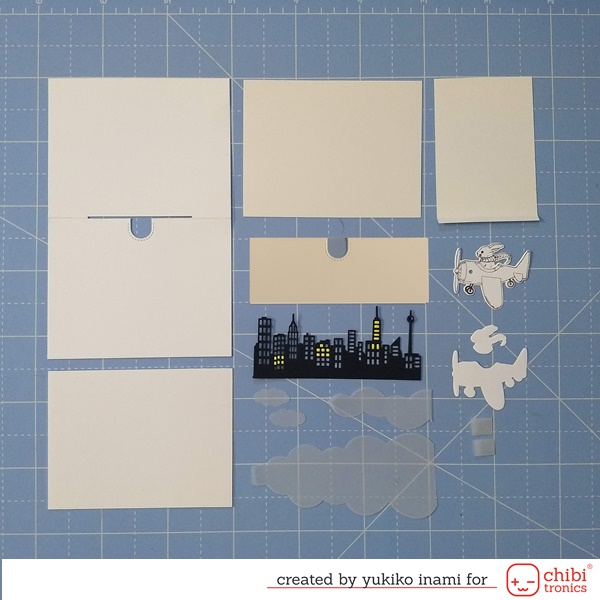
Color the parts and the skyscraper!
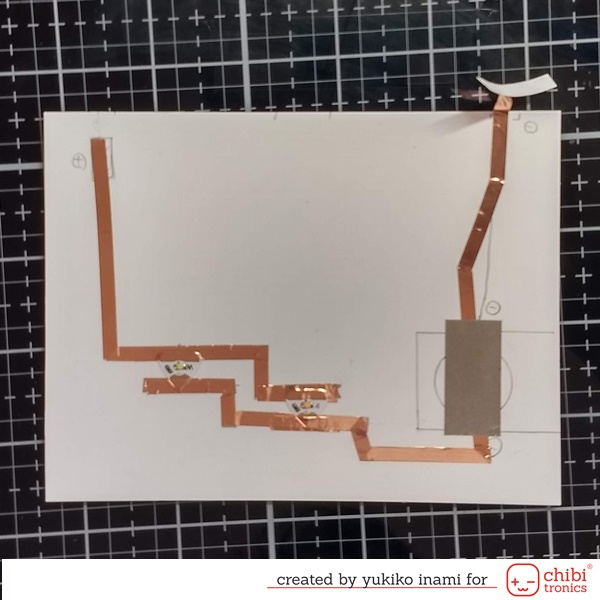
2.Circuit
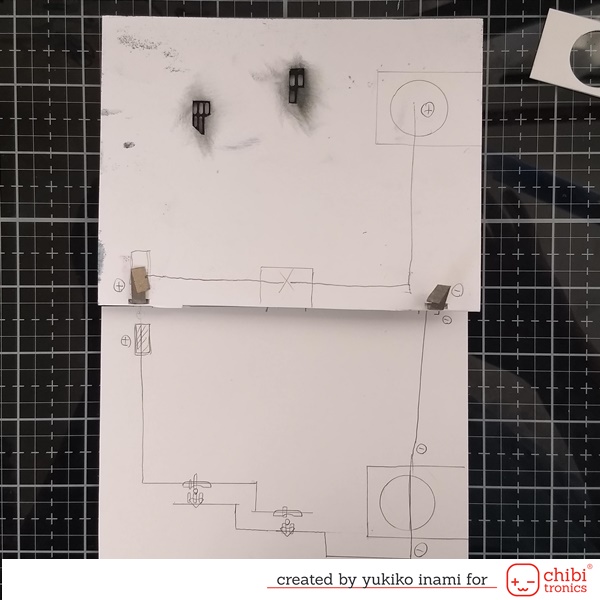
There are 3 parts of the circuit. I show them separately.
1) Base circuit panel; the bottom layer
It contains the battery and lights of the cityscape.
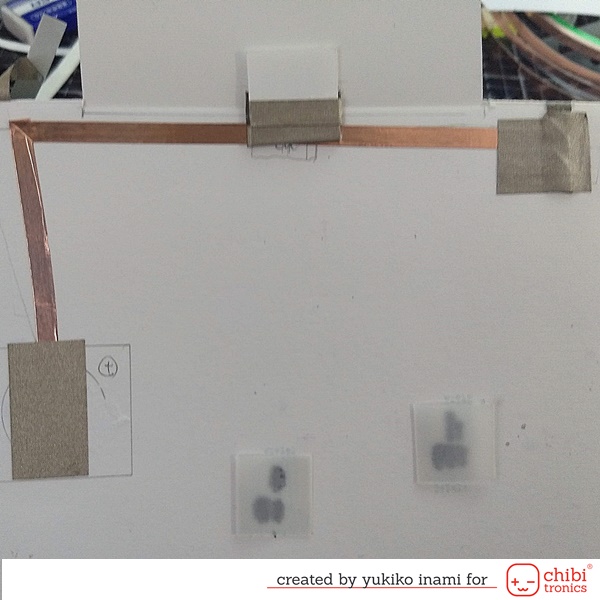
2) The backside of the folding panel
It has a switching point. When the switch parts on the popup pull tab come here, the circuit is completed and the lights turn on.
3) The popup airplane
I’d like to add the light on the popup airplane. Therefore I extended the circuit to the popup parts through the backside of the popup panel.
The styrene sheet is used to make the space for the battery and switch.
I stick on the upside of the base circuit and the backside of the folding panel. Cut out the holes and parts as shown below.

3. Assembly
From the bottom to the top, stick them together with the base circuit panel, the styrene sheet, the fording panel. At the connection point, make a sure connection of the circuit using the fabric tape.
Thank you for stopping by.
I hope you have a beautiful summer day!
Yukiko I.