Hi, Chibitronics friends! It’s Yukiko I. here!
The holiday season has started. And it is a brilliant season for using lights, right?
I am showing here my monthly project. This is a magnet book. The parts have some lights!
When you put the parts the point of the switch, the parts get light up! You can change the parts, as you like.
It may be a fun card for kids. Have a great Halloween time!

1.Supplies
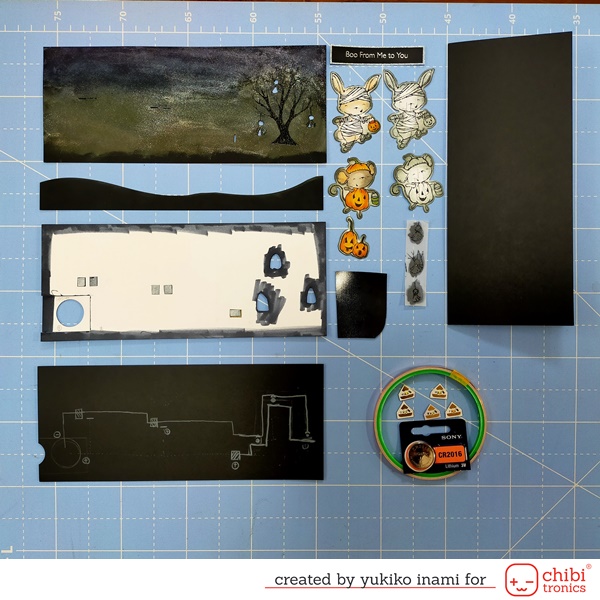
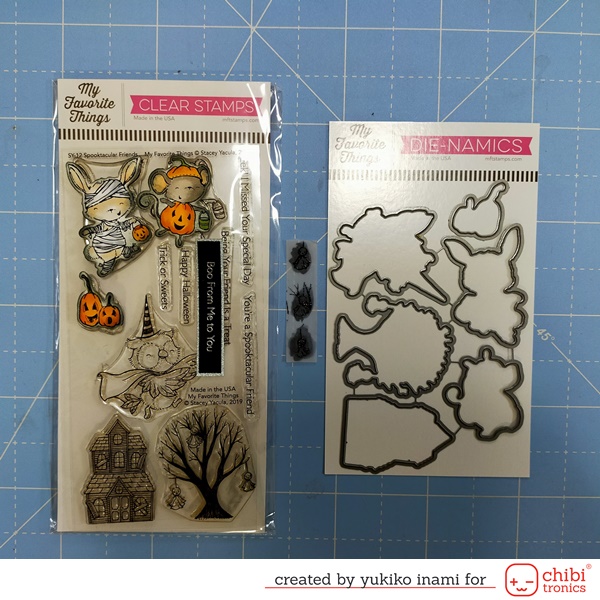
・SY Spooktacular Friends stamp and die; My Favorite Things
・Cover and circuit panel; 3.5 x 8 1/8″ ; 3 sheets and cut out the hill shape from one sheet
・Card base; 7x 8 1/8″ score 3.5″ to the slimline shape
・Vellum sheet; for the cover the light holes
・Styrene board; thickness 1mm 3.5x 8 1/8″
・Magnet sheet; it can cut easily with the scissor
・LED stickers
・Copper tape
・Cell battery 3V; CR2016
I blended the ink on the black cover sheet. And sprayed some water with the glossy powder.
I stamped the tree stamp and heat embossed with clear embossing powder.
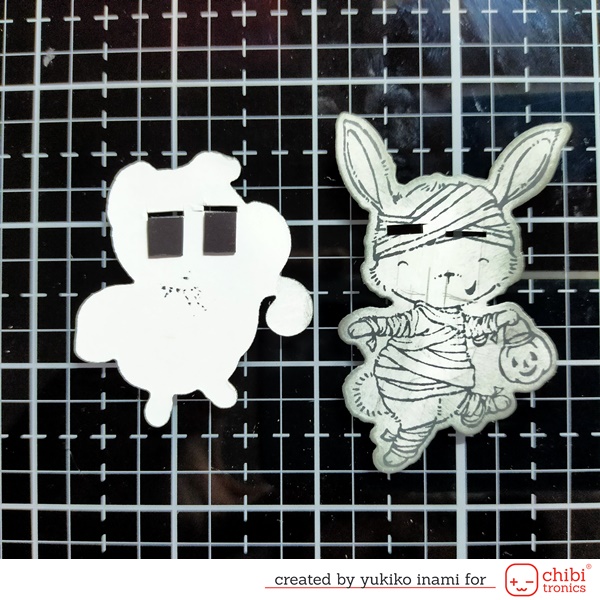
I cut out the doll shapes for the light window.
I stamped the rabbit, mouse, pumpkins, and house shapes each two and colored them. Then cut out them with the dies.
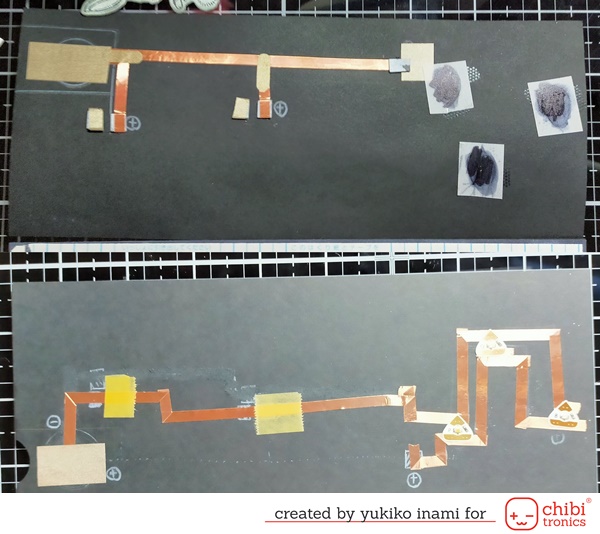
2. Circuit
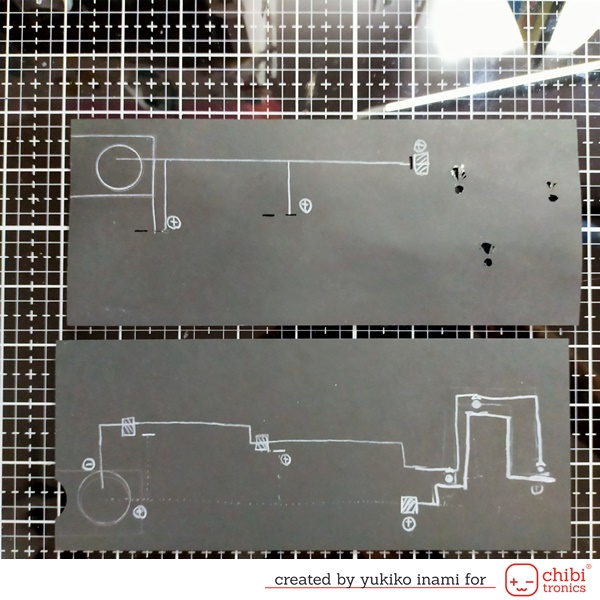
First, I marked the place of the battery holder and battery, the light places, and the magnet point for the parts on the circuit sheet and the backside of the cover sheet.
Then draw the circuit. At the battery holder, the negative side of the battery touches the circuit sheet surface. And the positive side of the battery touches the backside of the cover sheet. Make some slit on the cover sheet for the copper tape going through to the front side.
I need the three connection points on the circuit. I showed them the white square in the above Pic.
Before I stuck the copper tape, I put the pieces of the magnet on the connection point, backside of the cover sheet, and the backside of the parts.
Then stick the copper tape on the drawing circuit as showing below.
I use the conductive fabric tape to make the secure connections of the circuit.
I put the tape for the insulation avoided making a short circuit.
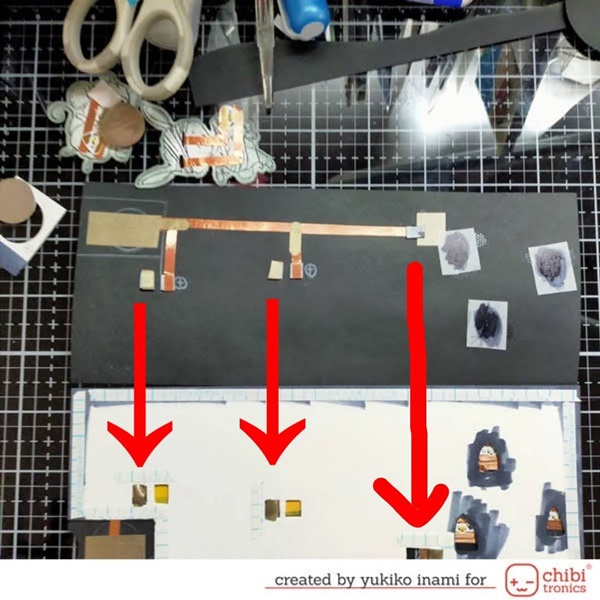
3. Assembly
Firstly, I assembled the circuit sheet and the styrene board. Make sure to make the secure contact the battery and circuit, and the connection of the circuit.
So I put the double-sided tape around the battery holder and the hole for connecting the circuit from the circuit sheet to the backside of the cover sheet.
Then I put the conductive fabric tape on the point of connection and connect the circuit panel and the backside of the cover sheet at the three points, as shown with the red arrows in the below photo.
After I stick the cover panel on the styrene board, the card gets in the shape showing the below photo.
It has the tree point to connect the parts.
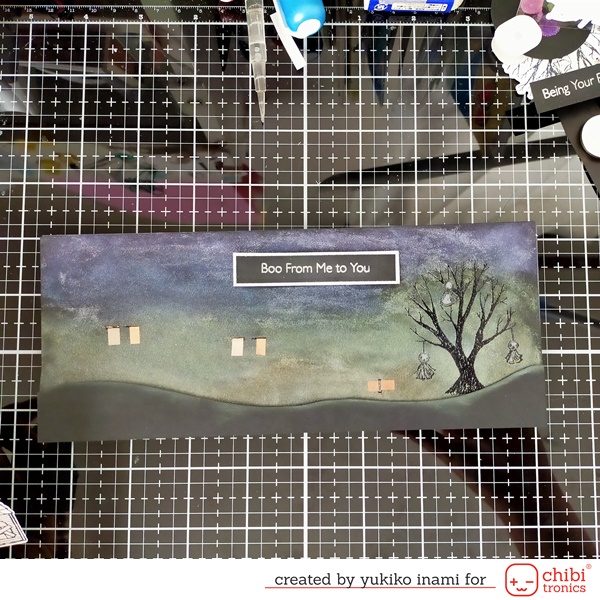
Done!
This card is not completed, actually. 😉
The person who receives this card can make her or his scene playing with this!
That’s all for today. Thank you for stopping by!
Have a nice week and stay well!
Yukiko I. (Nicorin)