Hi, crafty friends!
Nicorin is coming here again! I am happy to share a tiny project here today.
This is a so easy circuit. You can make it in just 5 min if you have the supplies.
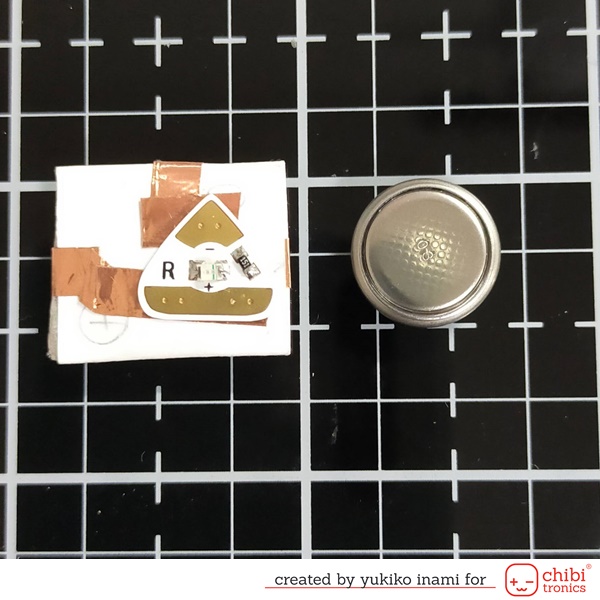
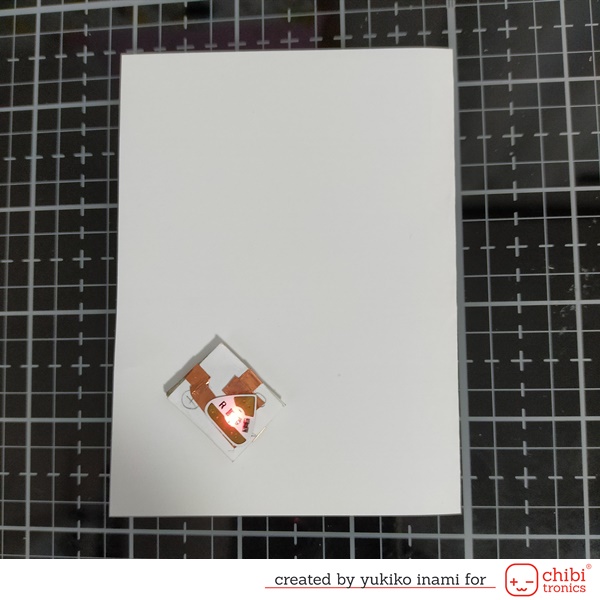
The tiny envelope holder has a battery, a light, and a switch gap!
You can complete the circuit by attaching some conductive material and use it for tiny embellishments very simply.
And I use the magnet with this battery holder. Then we can attach the embellishments anywhere!
I show you some examples. I hope you enjoy this post!
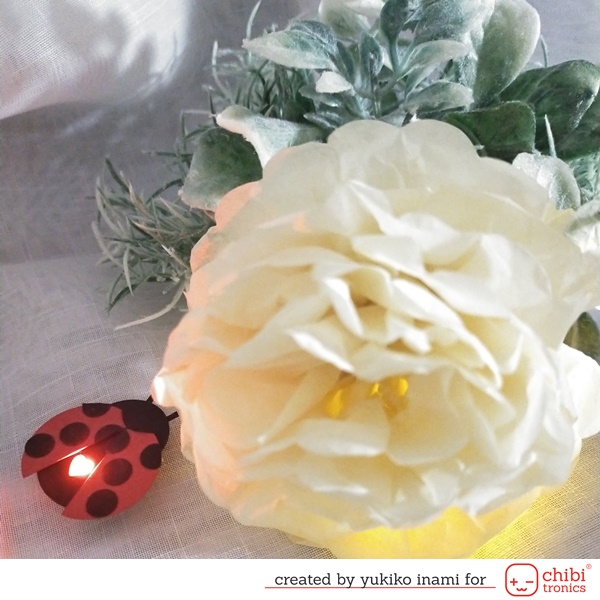
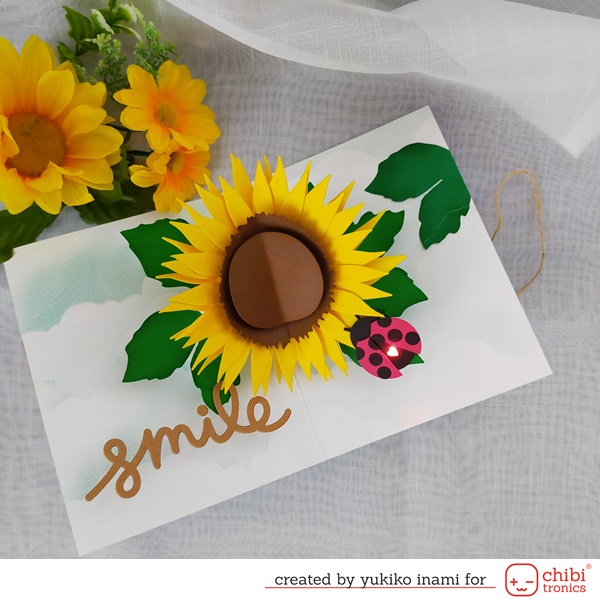
<A ladybug on the sunflower leaf in the pop-up card>
You can see the movie of pop-up motion last part of this post.

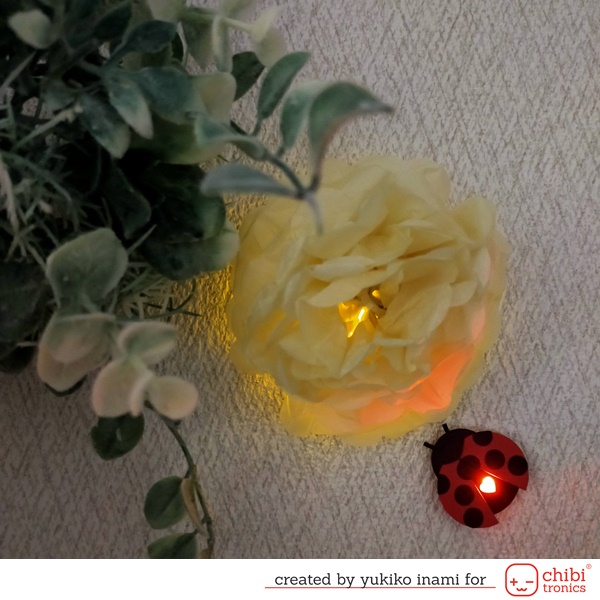
<For the table centerpiece. The ladybug and flower have light>
<For the wall decoration>
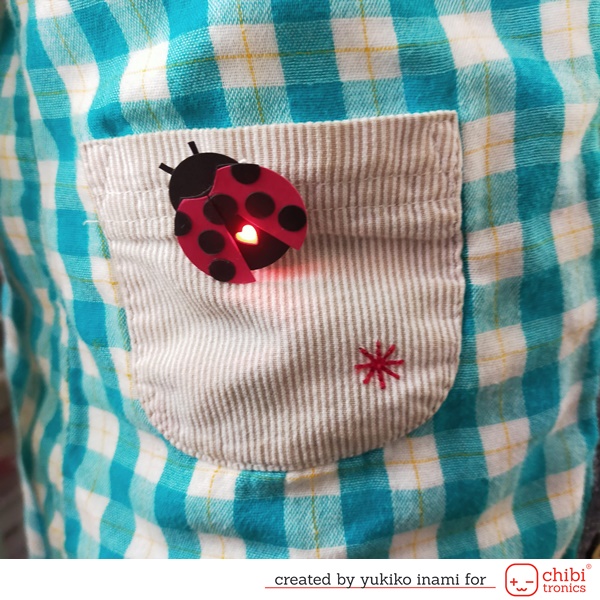
<For the wearable embellishments>
My daughter used it as an adorable brooch. She loved this bug so much!
Would you like to make your fun things?
I am sharing how to make the tiny envelope battery holder and the ways to attach it to something in the below movie.
1. Supplies
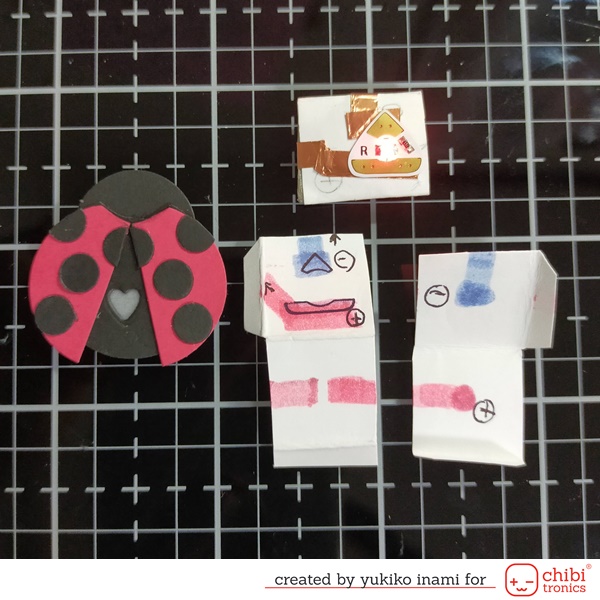
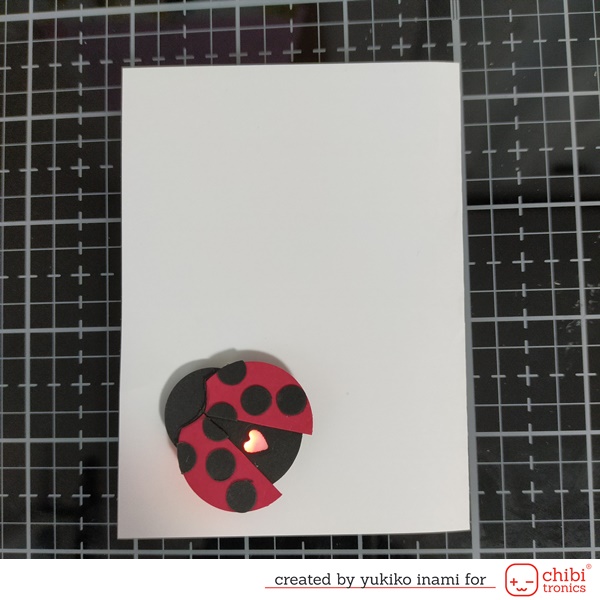
・Some embellishment ; I made ladybug using circle punches and hand cutting.
I made a hole for the light on the back of the bug.
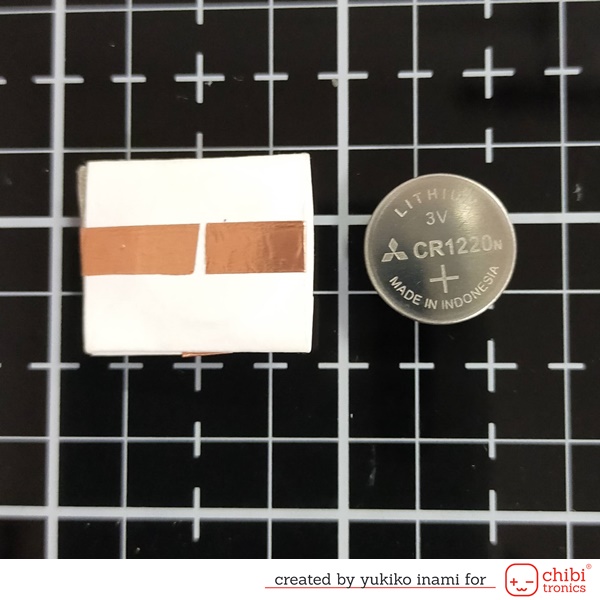
・Cell battery; CR1220 or 1216 These batteries ‘ diameter is 12mm. It is good for small embellishments.
if you made the big embellishment, you can use a bigger size battery.
The bigger diameter cell battery has longer-lasting power.
By the way, a CR battery has 3V power regardless of its diameter.
・LED sticker
・Copper tape
・Conductive fabric tape patch; this helps to make the secure contact of the battery and the circuit.・Paper for the envelope; I recommend use paper whose thickness is under 80lbs. Too thick paper is not easy to make a tiny envelope.
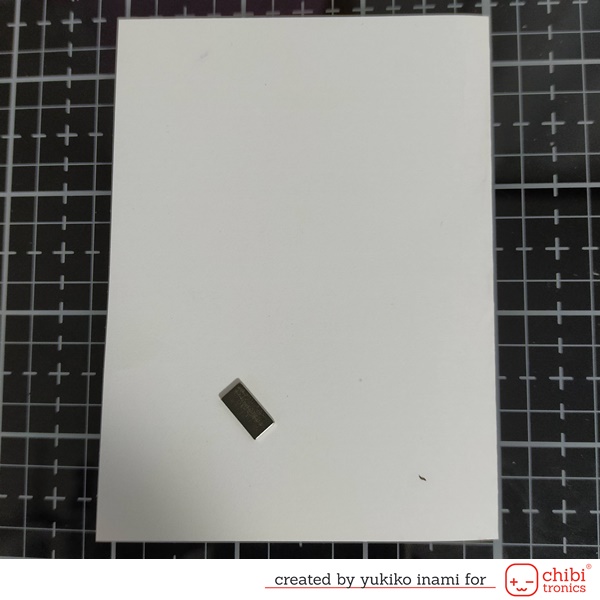
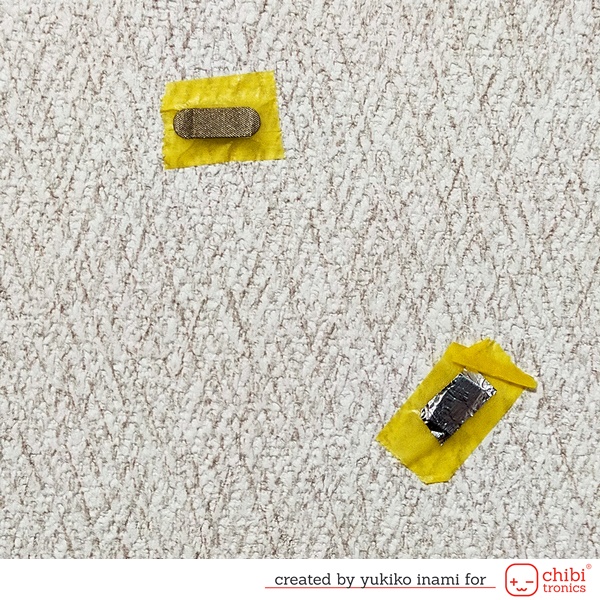
・Some conductive material; for example; copper tape, conductive fabric tape, aluminum foil, metal paper clip, neodymium magnet are conductive.
・Neodymium magnet
Supplementary Information;
Ladybug; circle punches; 1, 7/8, 1/8 inch small heart die, vellum paper
Pop-up sunflower card; Pop-Up Sunflower Dies by The Ton Stamps; Their website has a nice movie showing how to assemble the pop-up card using this die set too.
Scripty smile by Lawn Fawn die cut 4 smile parts and stuck those in the layer and stuck the leaf using the acetate piece.
2. Circuit
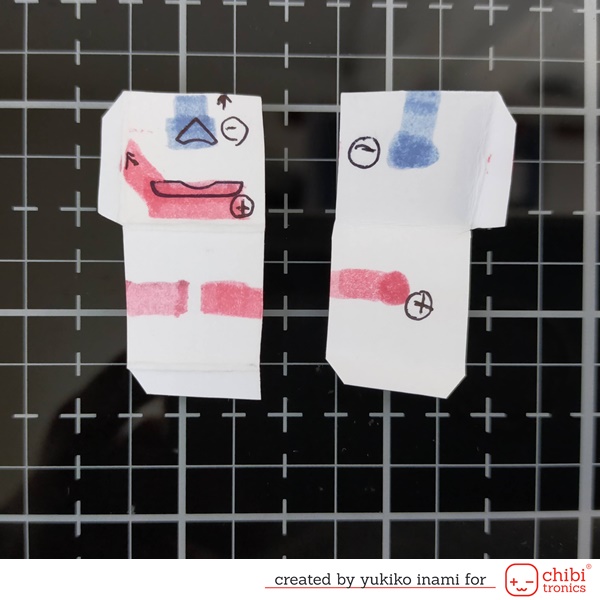
It’s so simple. The inside of the envelope has connections to the battery. And the outside has the light on the front side and the switch gap on the backside.
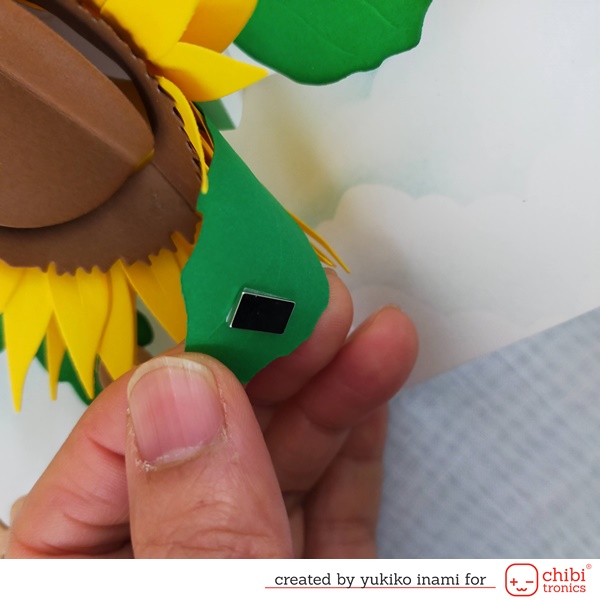
3. Assembly
I stuck the embellishment on the envelope battery holder. A foam tape is helpful for making light diffusion space.
4. Attachment
<For the wall decoration>
I stuck the magnet on the wall with washi tape and add some conductive material on the surface.
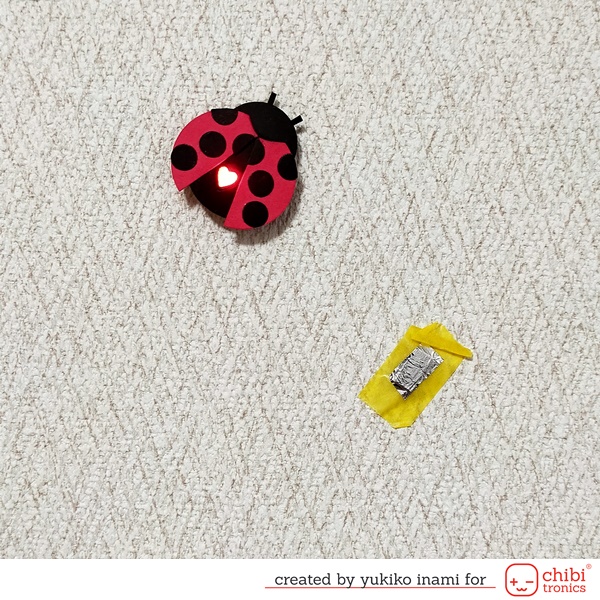
Then I put the ladybug.
The battery and magnet stick to each other. So these make a good combination on the wall decoration.
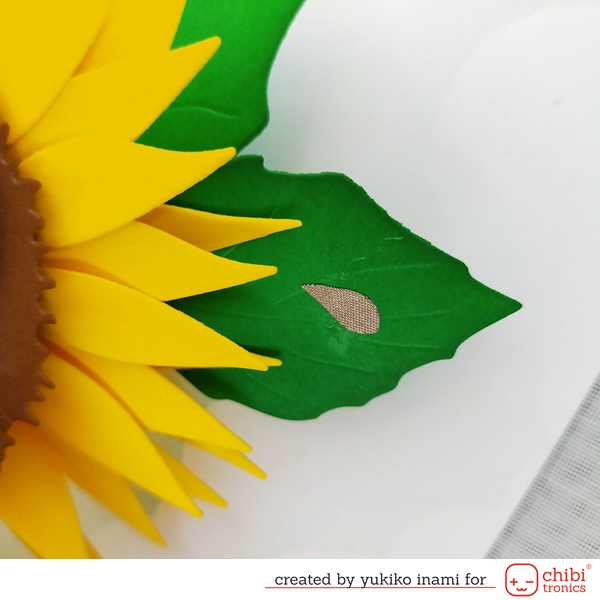
<For the pop-up card>
I put the neodymium magnet on the backside of the leaf. And the conductive fabric patch cut the shape of a water droplet.
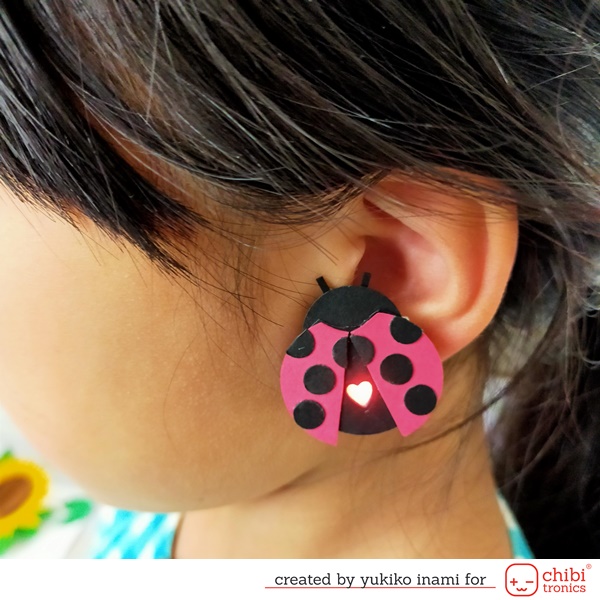
<For the earring> just for adults!
I use two round shape thin neodymium magnets. Two magnets sand the earlobe.
The neodymium magnet is conductive. So it works as the connecter on the switch gap!
***(Caution!!) neodymium magnet is dangerous for the kids. Don’t use it for the kids.
<For the brooch>
Same as the earring, but you can use a bigger magnet for the backside of the cloths because the magnet is invisible hiding in the back.

I can play with this ladybug having a small shining heart in many ways!
If you like it and make something with this light sticker, please share it on your platform with #Chibitronics .
I am so happy to see you and your projects!
Thank you for stopping by!
Have a wonderful weekend!
Nicorin (Yukiko I.)