Hi, crafty friends!
I have happy news today!
Do you know the Chibitronics Design Team is in the new season?
The talented ladies have joined our team this June.
Jessica will tell you more information soon. So I just say we are so excited to have new members with our Design Team!
Watch and wait for their posts!
That’s why I’m so honored to be the first writer of this new term.
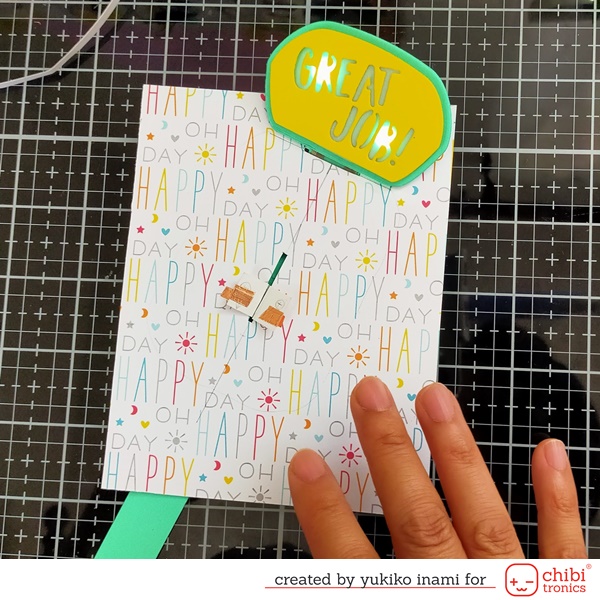
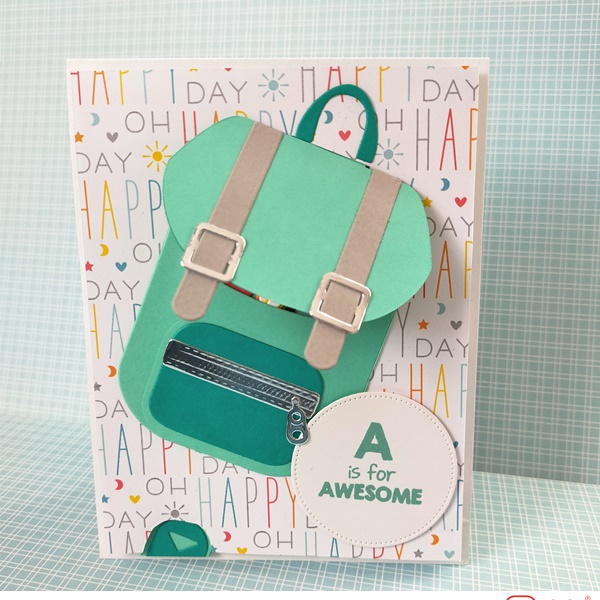
I am sharing this light-up backpack today.
When you pull the tab, the lid of the backpack opens and the sentiment shines!
This school year was a very strange and hard time for all students, teachers, and parents.
Great job, everyone! We’ve made many opportunities and solutions even though this hard situation.
Take a rest and hope you have a great summer vacation.

Take a look how my card moves and works!
1. Supplies
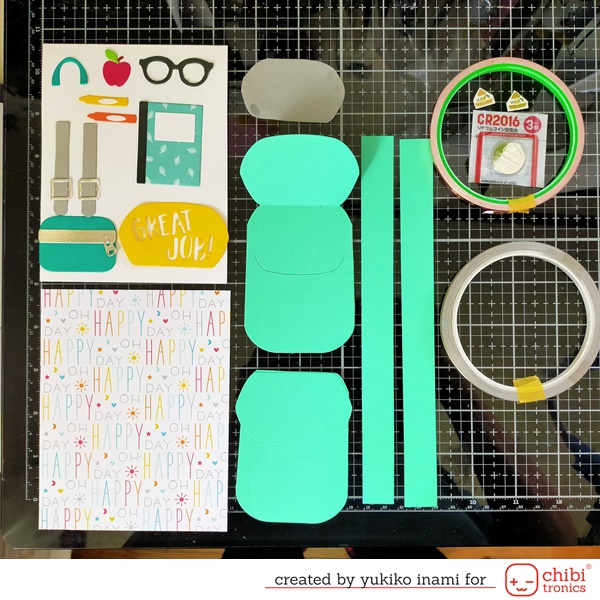
・Cover panel; 4 x 5 1/4 inch
・Card base; 4 1/4 x 11 inch fold in half
・Pull tab ; 3/4 x8 inch ; 2 Sleeve ; 3/4 x 2 inch
・Switch parts; 1 1/2 x 1/2 inches Score 1/4, 1/2, 1, 1 1/4 Fold to mountain, valley, valley, mountain
If you are the bigginer try to this switch, please check the movie showing the end of this post from the “0:15” point.
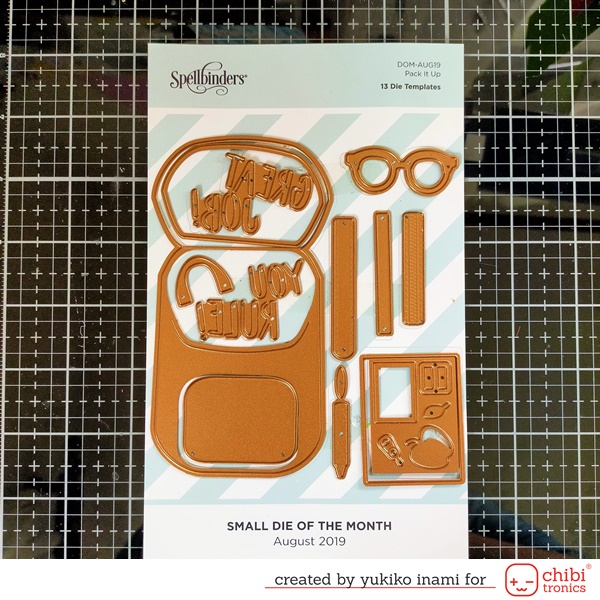
・Backpack basement;2 sets; die cut with the dies; Spellbinders Pack It Up
・Inner of the lid; cut out the color paper with the sentiment “GREAT JOB!” and cut out 1sheet of the vellum
・Belts for the lids;2 Handle, Pocket, Zip, Zip slider, Crayon, Note, Apple, etc… what you want to bring to school.
・Banner of sentiment; I cut the circle shape with the die and stamp the sentiments
・LED stickers; Chibitronics
・Copper tape; Chibitronics
・Conductive Fabric tape; Chibitronics
・Cell battery; CR2016 ( This number means the diameter;20mm, thickness;1.6mm)
・Foam Tape; 3mm thick
2. The Pop Up System- Flap that lift away from the direction of the pull
I use the system of the flap opening with the pull tab.
I love this system because the motion makes me wondering why the flap opens away from the direction of the pull.
I found the great youtube cite “the pop-up channel” And you can see there at around 3’40” how work this system well.
There are many amazing movies about the pop-up.
At the point of the tab slit, the stopper and the folding make the rolling over action. I show the motion below.
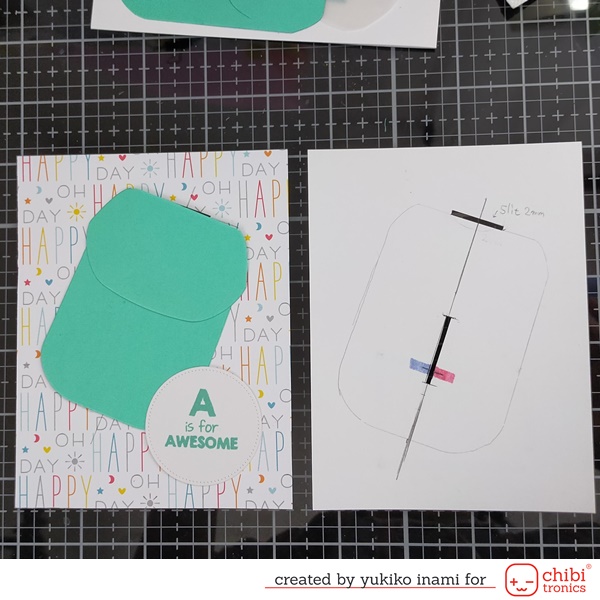
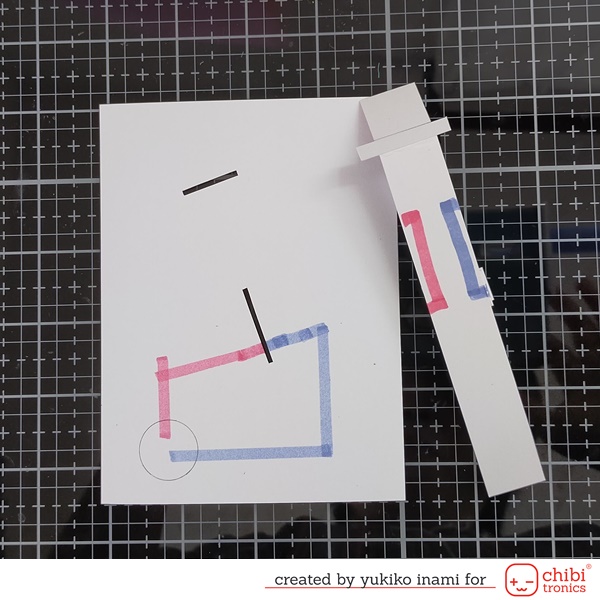
3. The Circuit
At first, I plan the design. Set the place of the backpack and the slit for the switch.
Then I set the place for the battery.
Slit size is set with the width of the switch and motion.
Let’s calculate the slit we need to make.
The pull tab slide “: it is the two times of the stopper width 1/4×2”
The width of the switch is 1/2″
So the slit length for switch is 1/2+ 1/2 = 1″ plus some margin, about 2mm
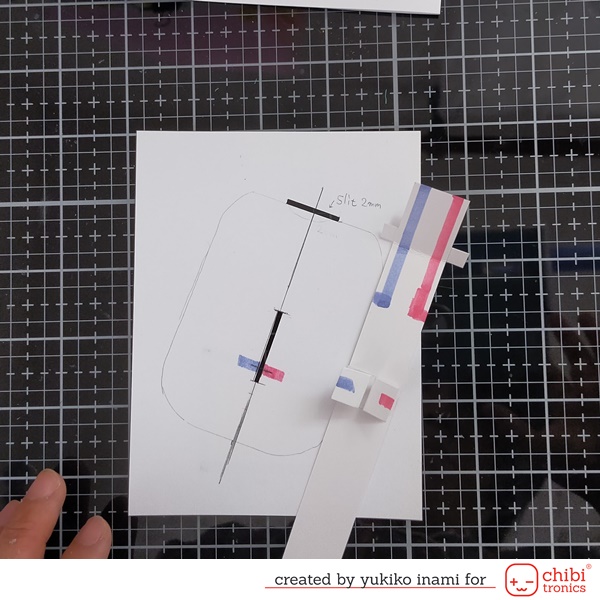
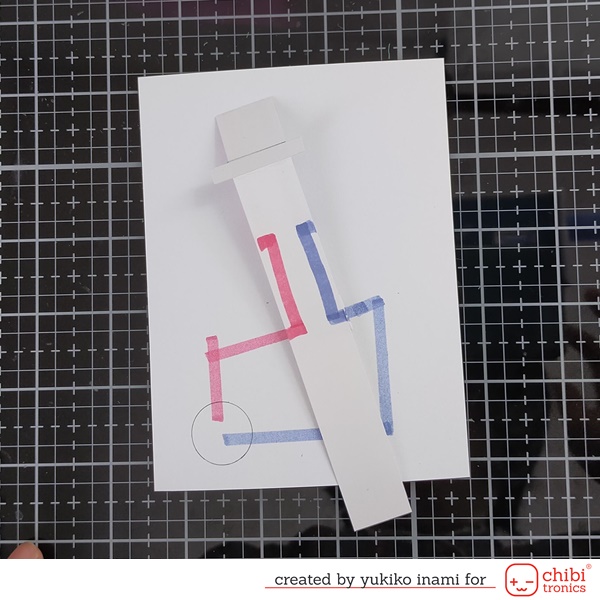
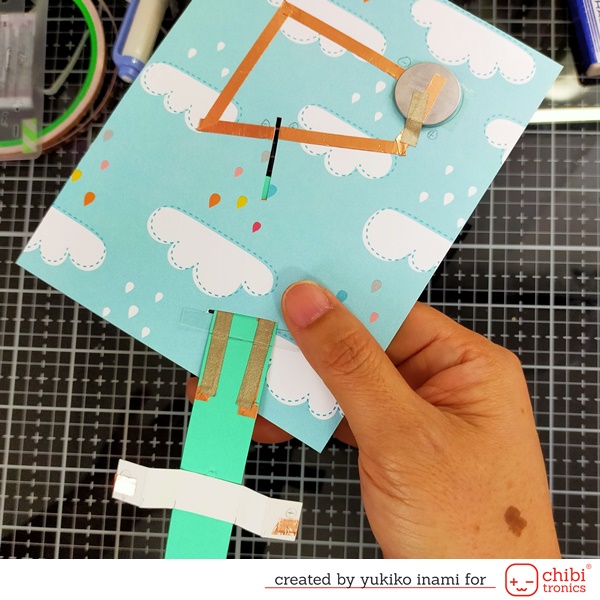
The pull tab has the part of the circuit connecting the battery and light.
The switch part has a positive and a negative path separately on each side.
When the switch slide in the turn-on point. The circuit is completed and the light turns on.
I made the model first for the test.
Then make the card seeing the model.
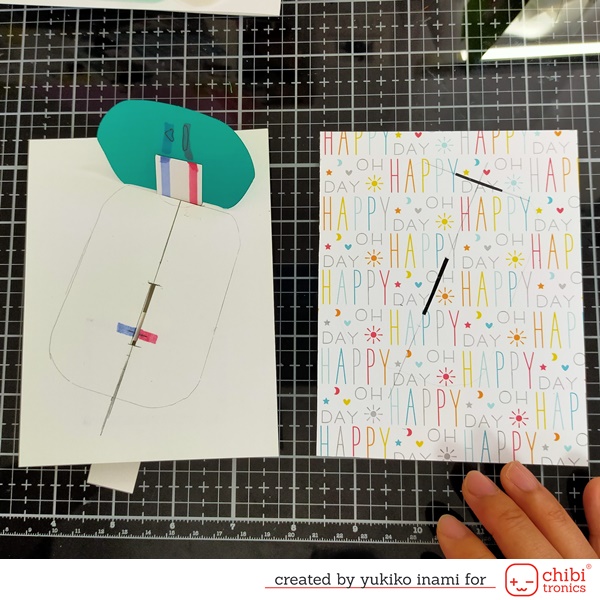
I cover the light with vellum then the light
4. Fabric Tape and Copper Tape
I had the trouble with my card!
The circuit break as showing in the below photo.
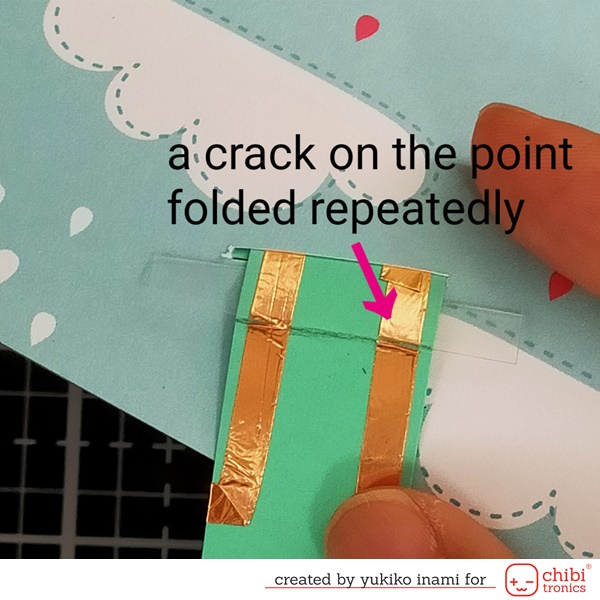
The copper tape will crack if it is folded repeatedly. So it is good to use conductive fabric tape for these points.
The conductive tape is flexible and does not break when folded repeatedly. On the other hand, You need to use scissors to cut.
Chibitronics has some types of conductive tape, Copper Tape, Conductive Fabric tape, and Conductive Fabric Patch.
The site has a good guide comparing these tapes. Check it out here!
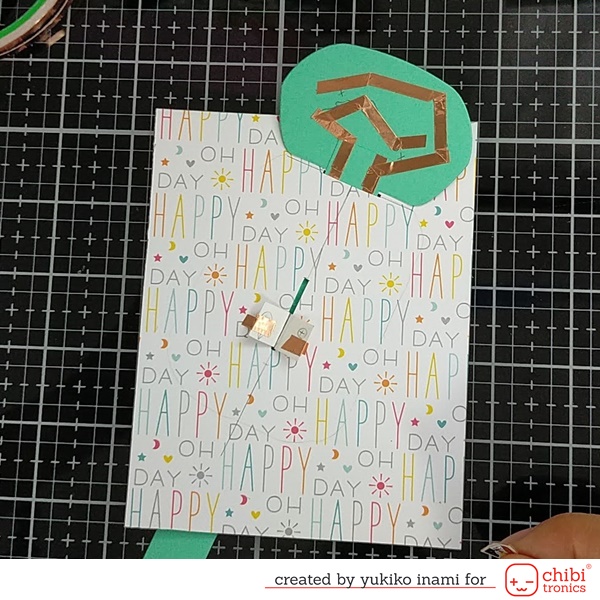
I repair the breaking point with the conductive fabric tape.
It can make a secure connection to the circuit too!
I use it for the place to need a secure connection, for example, the branched circuit.
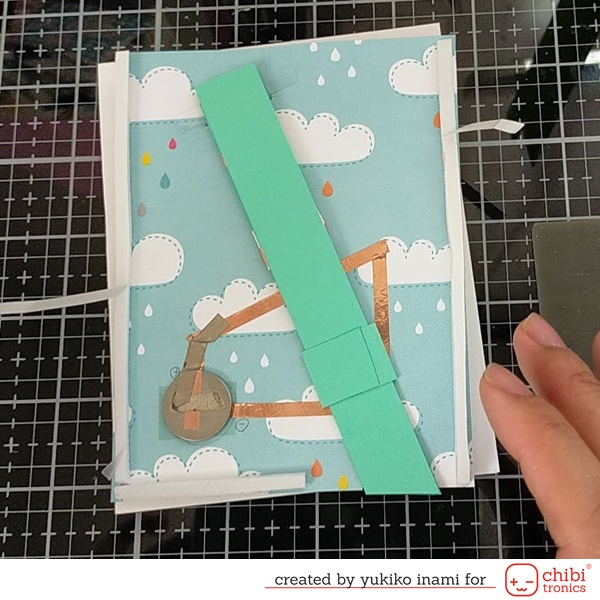
5. Assembly
I stick the sleeve for the pull tab. It makes the pull tab motion stable.
I put the foam strips around the cover panel except for the top edge and the space for the pull tab.
I peeled off the paper of the foam strip.
I set a cover panel on the card base.
6. Make your backpack
It’s a fun time!
I make a backpack design. Put belts of the lid, the handle, and the pocket with zip.
Ahh! Is the metal zip looks so real, isn’t it?
Then put the school supplies in the back pack. Apple is an essential item, I think!
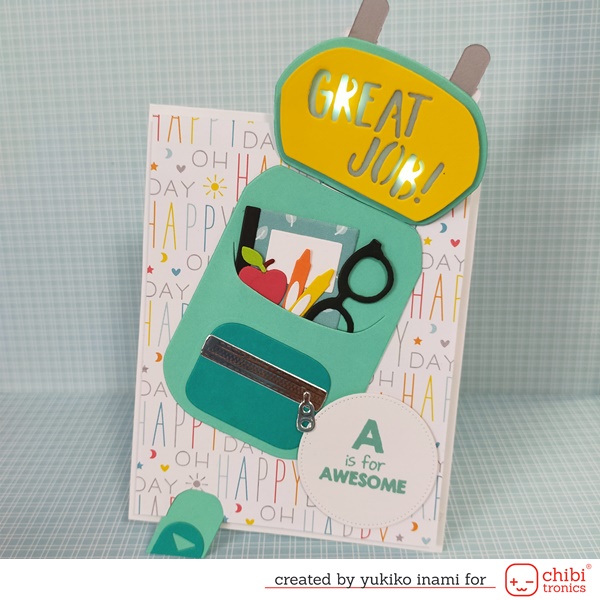
GREAT JOB EVERYONE! You are so AWESOME.
I am sharing the making movie.
In Japan, the school semester starts in April and closes in March.
So this season is not the end of the school year. But the summer vacation is the longest vacation in the year.
The students enjoy it as like the US students.
How about are the students in your country?
Thank you so much for stopping by today!
Have a wonderful day!
Yukiko I. (Nicorin)