Hi friends! Yukiko is here again with a shadow box having light for this month’s project.
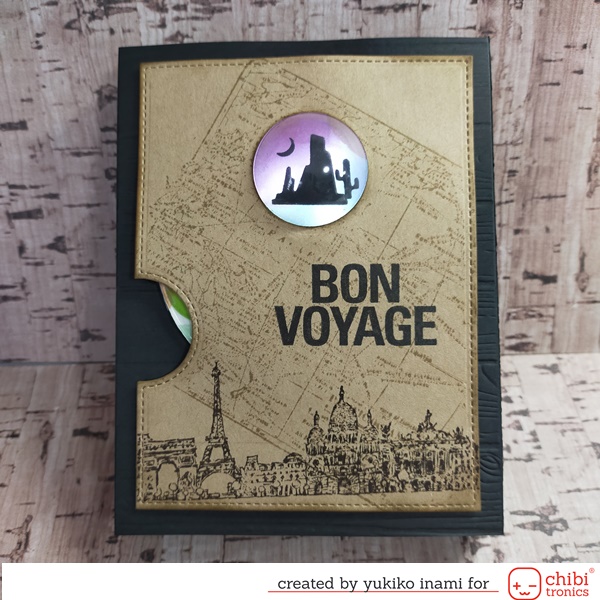
I miss many of my favorite places in this world, especially over the sea.
I tried to enjoy my trip in the shadow picture box.
When you turn the disc, you can see my favorite scenes in the light.
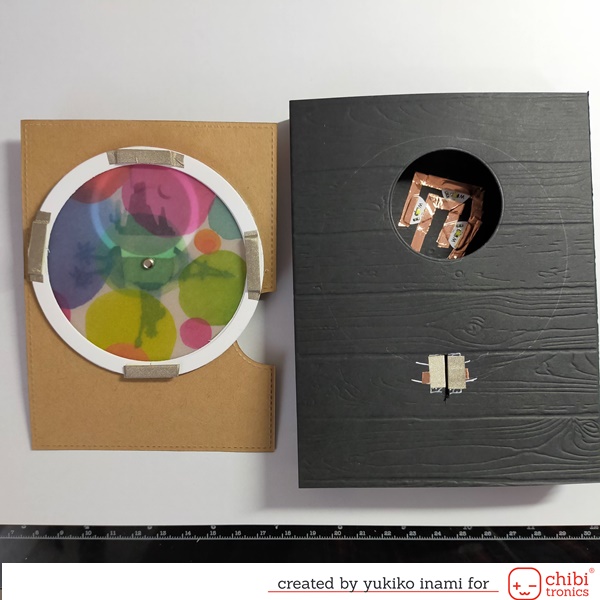
This shadow picture box has a disc with four scenes. The box has lights inside.
There are four switches on the backside of the disc.
When the switch parts touch on the switch point, the light is on and you can see some seen.
1. Supplies
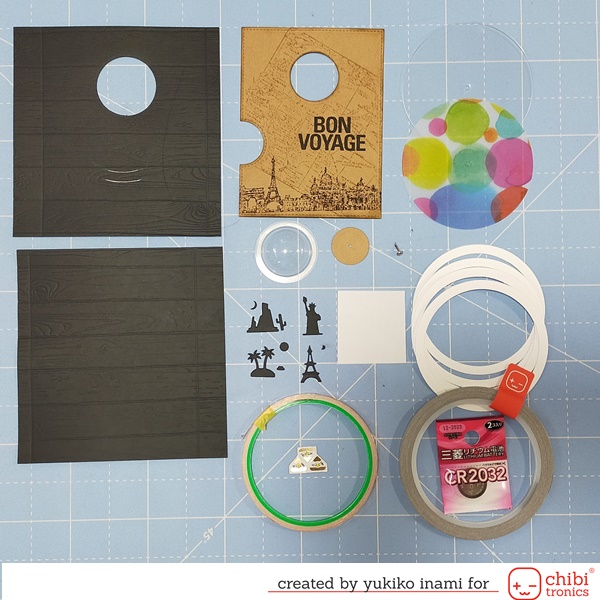
・Parts for the box; 5.5 x5.25 inches; 2 sheets; score 3/4, 5″ I embossed the grain pattern with the embossing folder and cut out a circle window for the screen with the circle die 1.25-inch dia. or the circle die from Tiny Travel Globe.
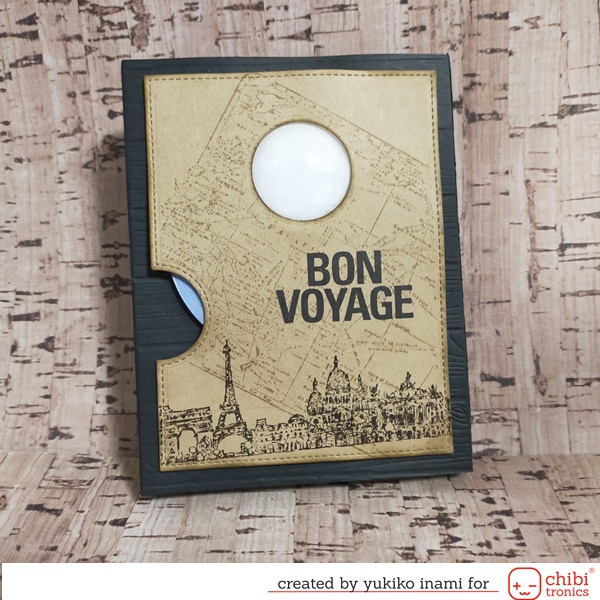
・Cover panel; I made it using the die from the reveal wheel and made a hole for the window 1.5 inches. I stamped the map image with Air Travel, the cityscapes image from Cityscapes, and the sentiment of “Bon Voyage”. I inked on the edge with brown.
・Disc 3.5 inch dia. ; 1 sheet of the acetate, 1 sheet of the color lucent or vellum paper
・Rim for the disc; I made the rim with the circle dies 3.5 and 3-inch dia. I cut four pieces and stack them.
・Disc 1-inch dia. ; I used the circle die from the reveal wheel
・Brads; 1 piece
・Dome for the hole; Dimensional Dome
・Silhouette shapes parts cut out from black paper; Tiny Travel Globe
・White thin paper for the screen 1.75×1.75 inch
・LED stickers; Chibitronics
・Copper tape; Chibitronics
・Conductive Fabric tape; Chibitronics
・Cell battery; CR2016 or CR2032; 3V
・Foam Tape; 2mm thick
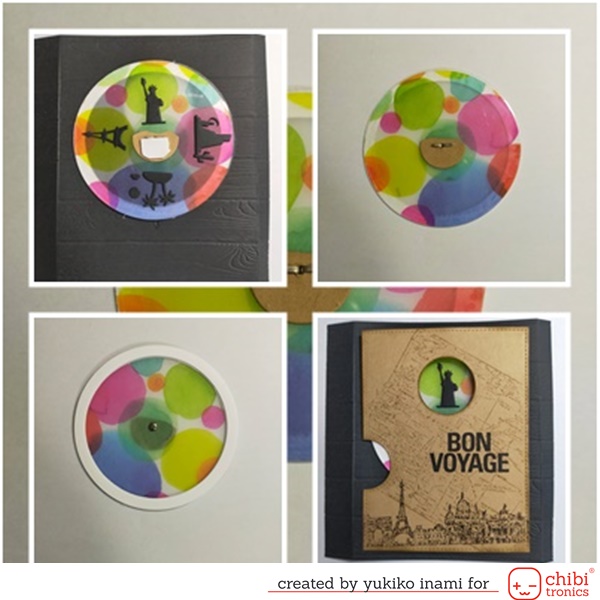
2. Make the parts
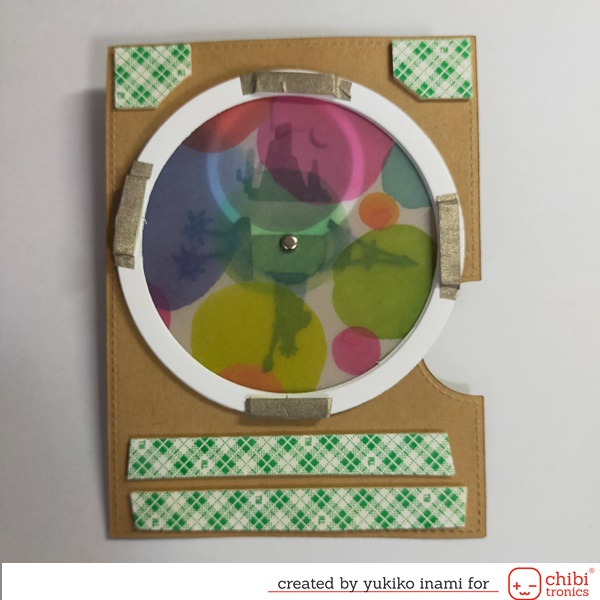
The disc
I used the circle die larger than the original size of the reveal wheel because I’d like to use more wide space for my scene.

I layered the acetate and colored vellum and glued them. This disc became the film projection.
I set the rim on the disc parts.
I assembled the small disc and the big circle with brads. And I set it on the backside of the front panel.
I put the silhouettes parts on the disc at nice places for showing it in the windows.
The box parts
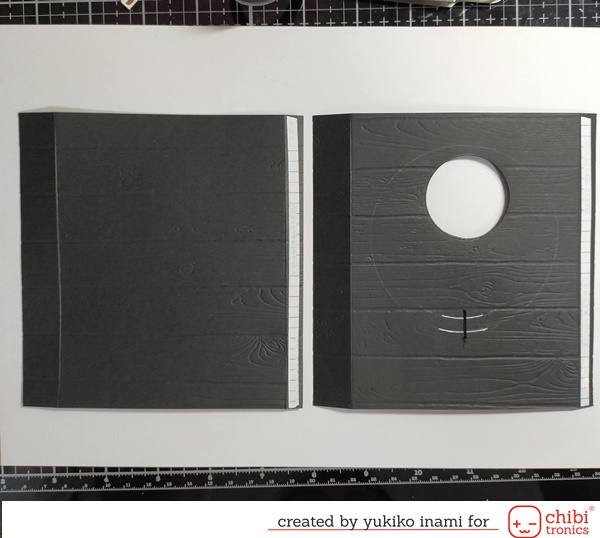
I put the double-side adhesive tape on the tab then stuck the one side.
I cut a slit for the switch below the window.
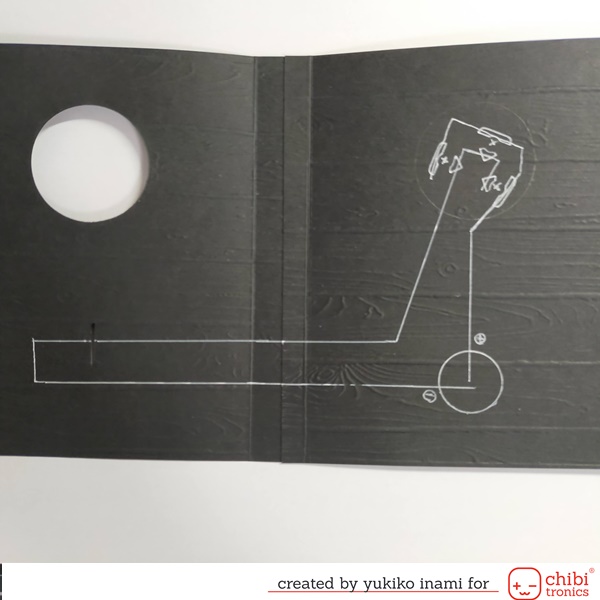
3. The Circuit
I planed to use three lights as the light sources for the projection.
I used the inside surface for the circuit mainly. I set the light positions and the place of the battery.
I set the switch point in the area that layered the disc. I made a slit to cut the circuit.
The path of the circuit goes through this slit to the front side to make the switch point.
I stuck the copper tape on the path. First, I set the double-sided tape on the battery place.
Then I stuck the negative path with the copper tape and made the connection of the battery and path showing the below photo.
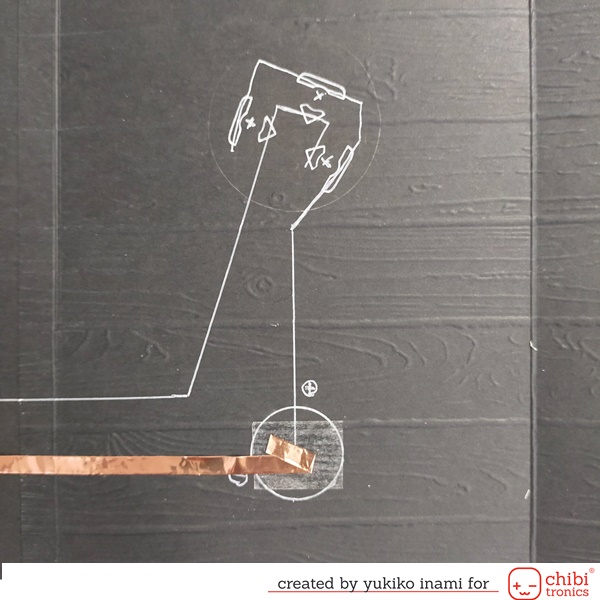
After I stuck the copper tape on all of the paths, I checked the circuit work well or not.
I put a small piece of copper tape on the slit, then the circuit was completed and the lights turned on.
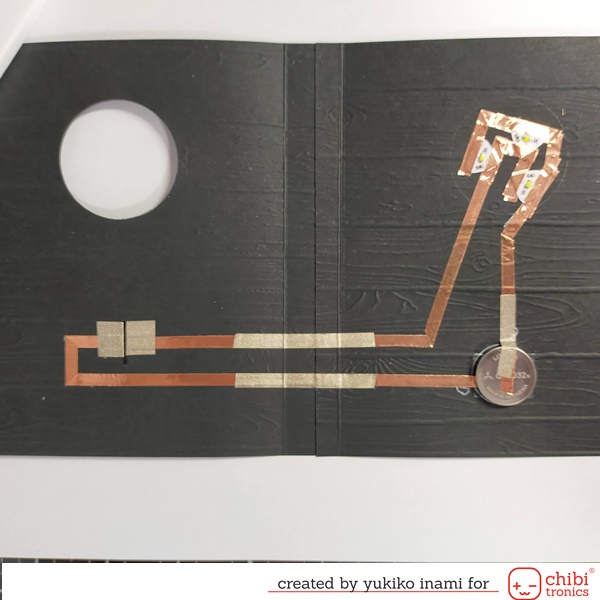
I put the fabric tape on the bending point because the copper tape is easy to get cracking on the bending site.
Then I added the fabric tape on the switch point. This helps the switch worked well. I stuck over the copper tape on the light pads to make secure connections.
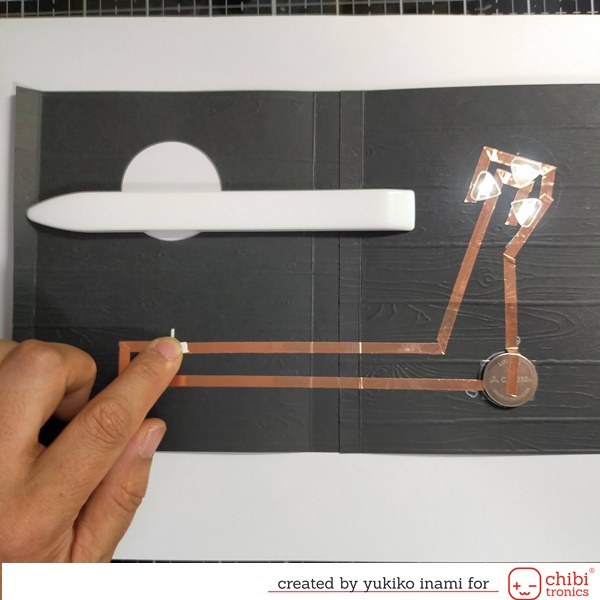
4. Assembly
I stuck the other side edge of the box. It’s a lightbox for the projection.
I made the four switches on the backside of the disc edge. I marked the switch point.
And I put the foam tape strip on the switch points and covered it with the conductive fabric tape.
I set the dimensional dome and the white thin paper on the backside of the circle window.
I stuck the foam tape on the backside of the front panel. The height of the switch parts is higher than the foam tape just a little bit.
So the switch parts could touch the point securely and make the circuit completed!
I put the front panel on the surface of the shadow box confirming the point of the switch.
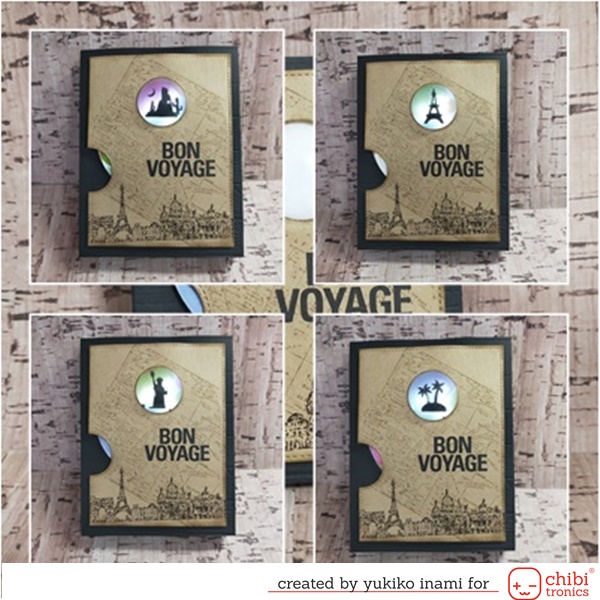
It was challenging to take photos showing you the light effect as I see. I think it needs some professional skills.
I tried my best here. But I couldn’t do enough.
The light effect and the color of the background are so beautiful when the lights turn on.
The dimension of the box makes a beautiful diffusion of the lights.
I tested to get the appropriate distance for the best effect.
The scene projected on the white screen reminds me a kind of a nostalgic feeling.
I thought of my favorite places on our earth during I made this card.
I sincerely hope to enjoy the overseas travels and meet my friends!
Have a good journey in your imagination and stay safe in your precious days!
Yukiko I.