Hi Everyone, Melissa here.
Today I am sharing how I created this simple circuit using a ‘Reed Switch’ and ‘Chibitronic LED Stickers’ to light up the Bees. Let’s get started.
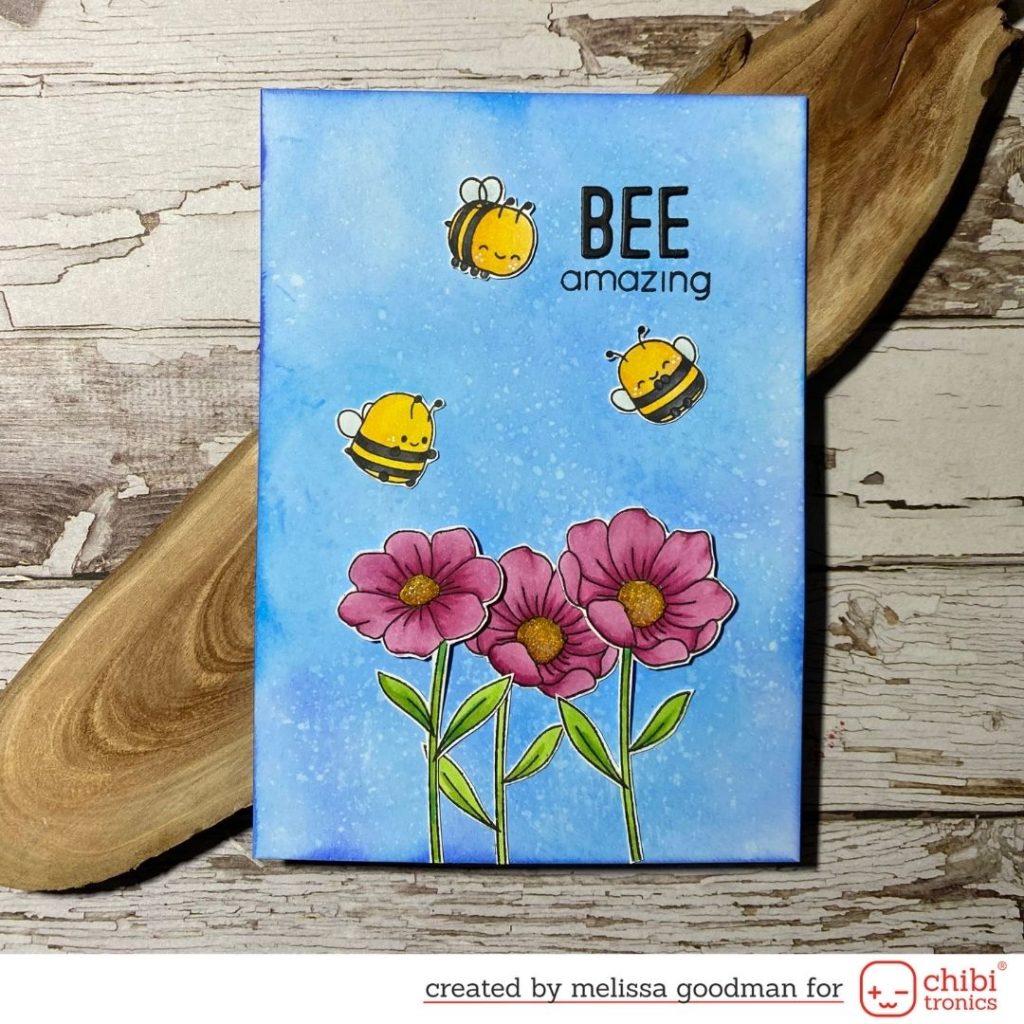
1. Create Card Front
To create this card front, I have coloured the background using Distress Oxide inks (Salty Ocean & Blueprint Sketch).
I have used a stamp set from Paperie Ink called ‘Hap Bee’. The images have been stamped onto X-Press It Blending Card and coloured with Copic Markers. They have been fussy cut leaving a small white border.
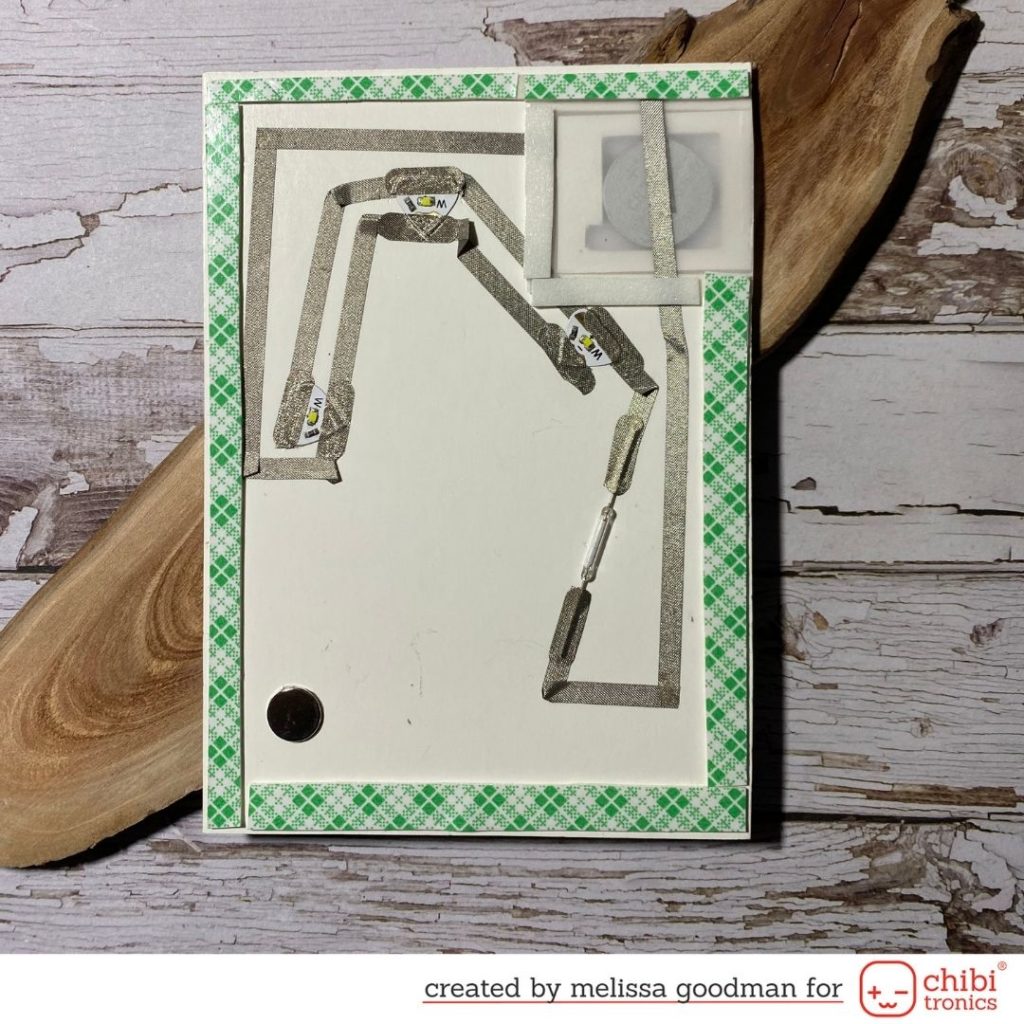
2. Create Base and Circuit
I have created a battery holder so the batter is replaceable. It can’t be seen in these pictures but the battery will slide out so it can be changed.
For this circuit I have used a ‘reed switch’. One of the bees will have a magnet attached behind it and when hovered over the switch, the LED Stickers will light up behind the other bees. I have used the Chibitronics Conductive Fabric tape to create the circuit and Chibitronic LED Stickers to light up the card.
For this card I have used a ‘2025’ battery as it a little thicker and I wanted a permanent connection to the negative and positive terminals of the circuit.
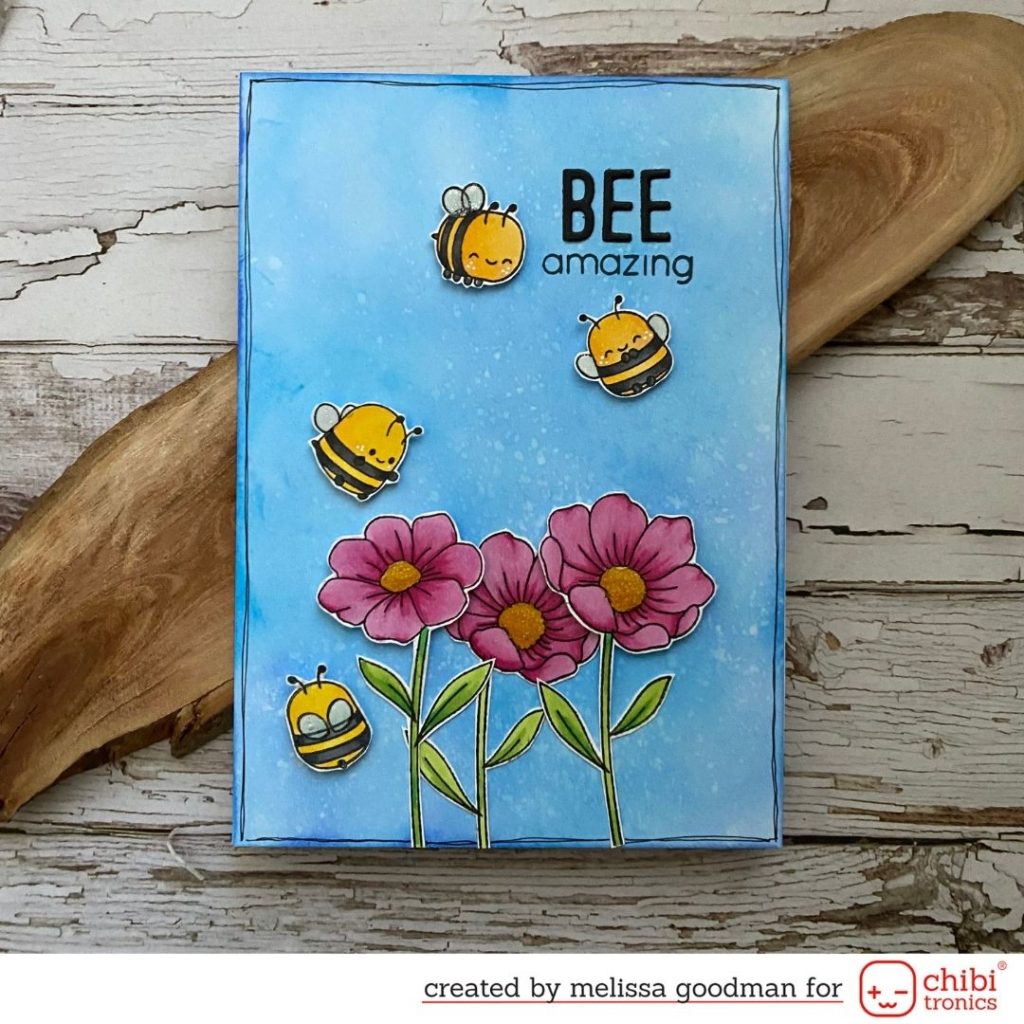
4. Adding the Card Front
I adhered foam tape the the base of the card. This allows the card front to sit flat when attached.
The small magnet on the bottom left hand corner will hold the bee that will be used to light the card up.
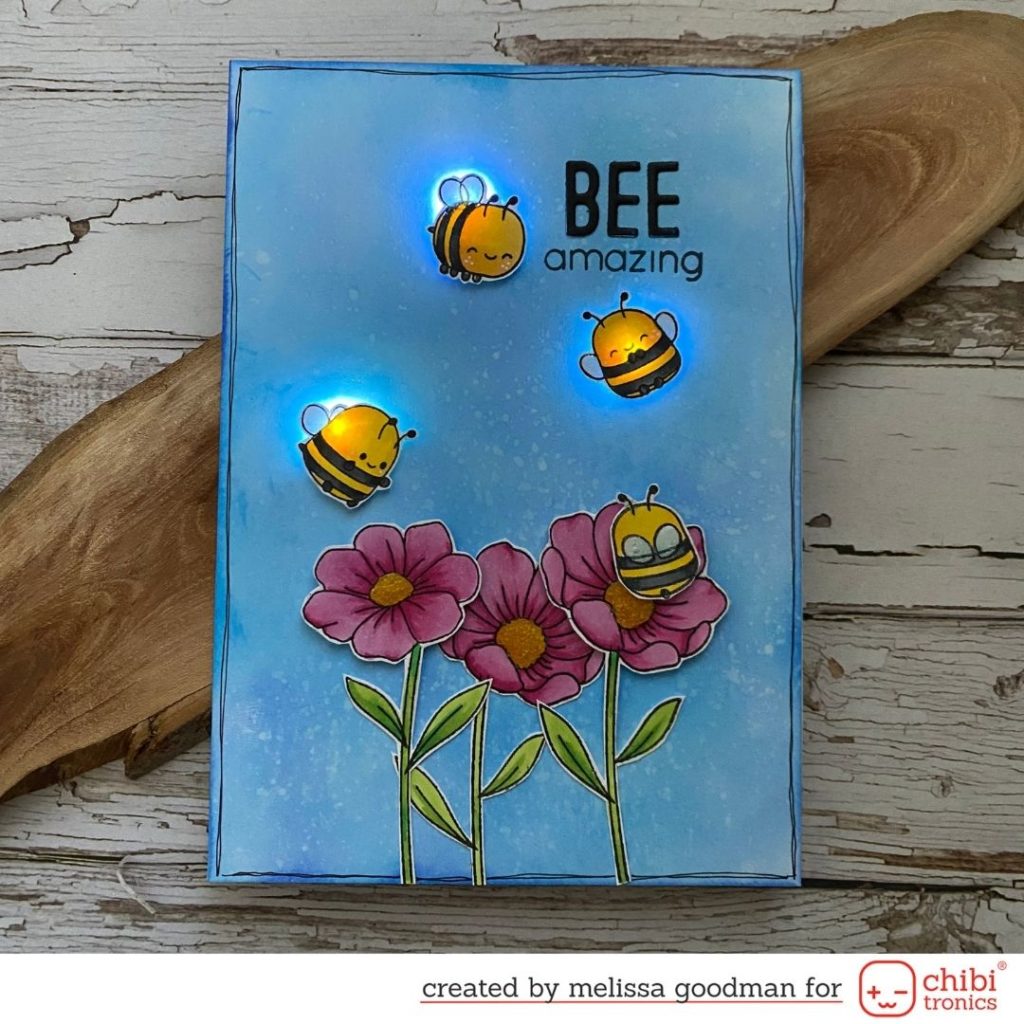
5. Time to light up the card.
To light this card, you move the bee from the bottom left corner over the right hand flower. You can even leave the bee on the flower and the flowers will be permanently lit up until the be is removed.

Supplies
Electronics: Chibitronics: LED Stickers, Chibitronics Conductive Fabric Tape & Reed Switch
Stamp Set: Hap Bee
Medium: Copic Markers
Other: Battery, Foam Tape, Black Ink
I Hope my project inspires you to light something up! Give it a go, it’s fun!
Keep Creating
Melissa xx