Howdy and welcome! I’m Allison Cope and I’m here today to share how to make this super cute birthday card with twinkling candles!
Today we’re going to be using the Circuit Effects Stickers. These 4 stickers allow your LED Sticker Lights to blink, fade, twinkle or even a heartbeat effect to your projects! Also, a fun stencil included so you can plan your designs with our different sticker shapes.
To begin my card, I stamped and layered my delicious cake layers and adhered them to my card panel minus the 5 candle die cuts. I used a tiny circle die to cut out the area where my candle flames were going to be under my die cut candles. This cut out allows more light to transfer to the surface of the card and makes that area of the flame appear brighter. Since my panel was going to be placed on some patterned paper, I cut an area of paper out so my paper wouldn’t block the light of my LED stickers.
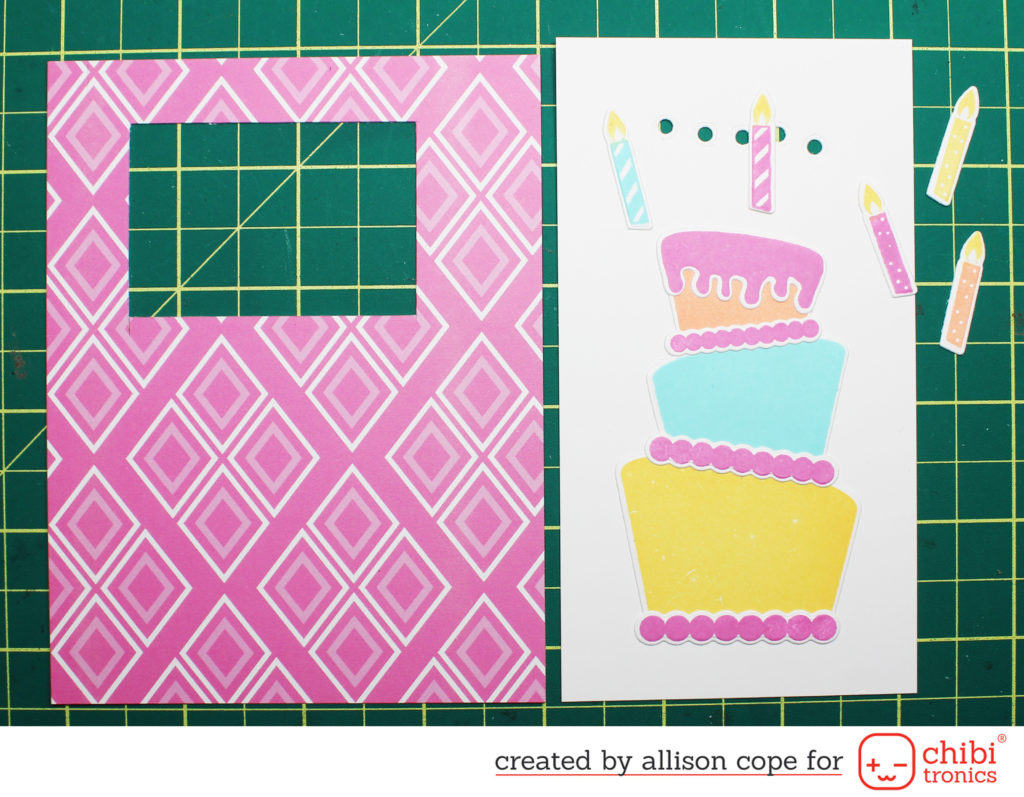
Next, I placed the cake/candle panel over my card base with my patterned paper in place and traced the circles through the front panel so I knew exactly where to place my LED Light Stickers under the flames of the candles.

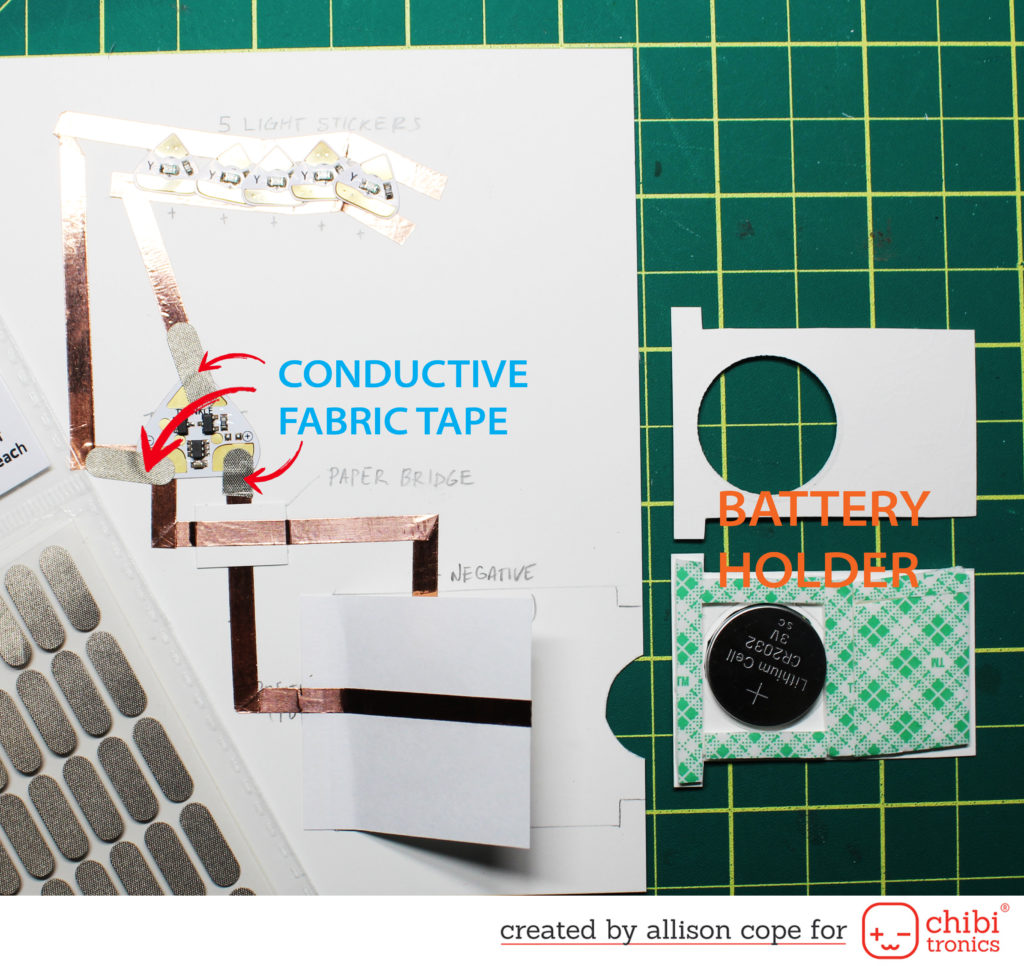
Working on my heavy weight 110# card base, I began mapping out where all of my elements needed to go. I began by figuring out where my switch/battery needed to go first. Then I found the best place for my Twinkle Circuit Effects sticker needed to go. I used the stencil from the Circuit Effects Sticker package and I traced out the area for all my Chibitronic stickers. Then I used a ruler and connected all of the positive parts of the circuit and the negative parts of the circuit.
I carefully placed all the lines of the Copper Tape over top of their corresponding lines, connecting all the positive lines to the positive ends of the sticker areas and connecting all of the the negative corners to the negative sides of the stickers. To create the battery area, I used a light weight piece of copy paper and created a flap. The flap allows me to place the Copper Tape on the top of the battery for a contact point.
I attached all of my LED Light Stickers. For my card, I used the yellow LED stickers from the Red, Yellow Blue MegaPack (30 stickers). I used a few pieces of the Conductive Fabric Tape (also sold in a roll, here) to ensure that my Circuit Effects Sticker had great contact with my Copper Tape. I also assembled my simple battery holder. I created 2 T-shaped pieces of cardstock with holes in them to allow for the battery to contact the Copper Tape on the top and bottom of the battery holder. I used a single layer of foam tape between the 2 layers of cardstock to accommodate the thickness of the battery.
Now that I’ve tested the circuit and it works, I can add the double layer of foam tape to my card base, avoiding the light stickers areas. The doubled up foam tape allows room for the 3-dimensional battery holder which I placed in position before adhering the card front panel. So when the recipient, presses the greeting banner on the card front, it activates the circuit!
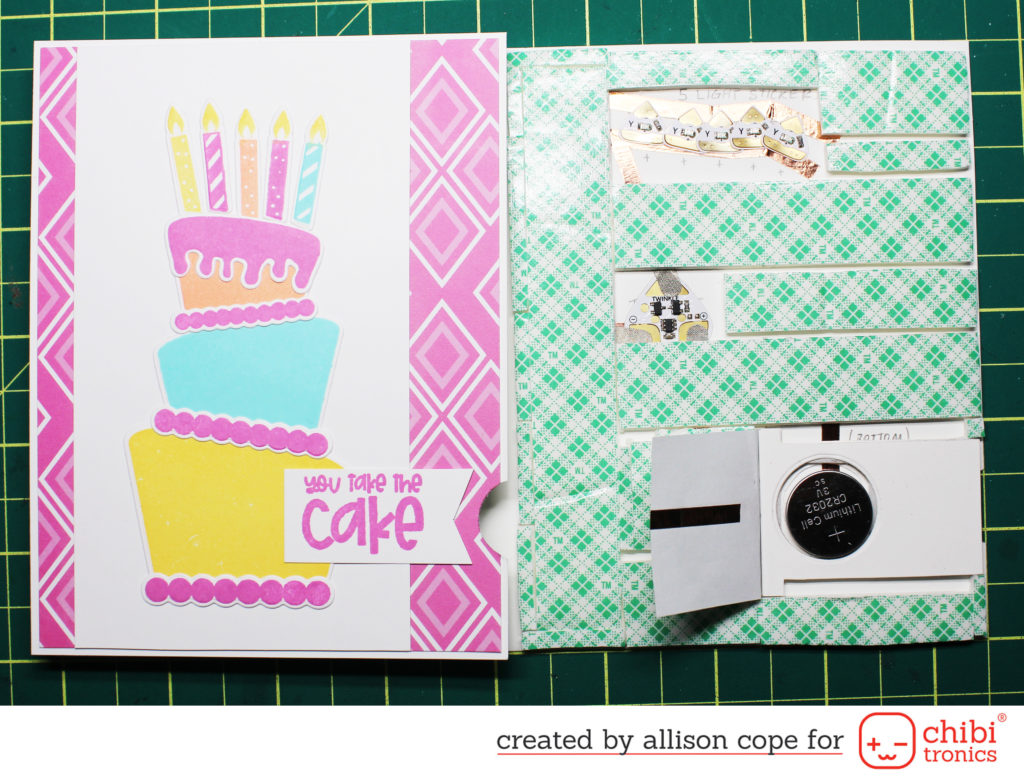
Voila! A light up, twinkling, card was born!

Now, to see this card in action, please visit this very, very short video: TWINKLING CARD IN ACTION.
Thanks for stopping by! I hope my tutorial inspires you to create something light-up fabulous!
~ Allison Cope ~